Author: TonyaW

Why Your Cavalier King Charles Spaniel Might Not Be Food Motivated (Early access for our Patreon community)
How to Motivate and Train a Cavalier King Charles Spaniel

If your Cavalier King Charles Spaniel is not motivated to train, you’re not alone. This is something I hear from Cavalier families all the time: “My Cavalier is not food motivated,” or “My Cavalier just doesn’t care about training.” But in most cases, it’s not that your Cavalier doesn’t want to learn, it’s that something is getting in the way.
Here are a few common reasons your Cavalier might not be interested in training right now and what you can do to help them feel more motivated and ready to learn.
Reasons Your Cavalier Might Seem Unmotivated for Training
They are full
If your Cavalier just finished a meal or had a lot of snacks recently, they may not be interested in working for more food. Training with food rewards works best when your Cavalier is a little bit hungry, not stuffed. Try scheduling your training sessions before meals rather than after, or set aside part of their meal to use as training treats throughout the day.
They are tired
Just like us, Cavaliers have times when they are more alert and times when they just want to rest. If your Cavalier had a big play session, a long walk, or an active outing, they may need some quiet time before they are ready to focus again. Cavalier puppies especially need a lot of sleep, so training when they are rested can make a big difference. Try noticing when your Cavalier naturally seems more alert and ready to engage. That is usually the best time to practice a little training together.
They are not feeling well
If your Cavalier seems unusually uninterested in training or even in their favorite treats, that could be a sign they are not feeling well. Even mild health issues like nausea, pain, or dental discomfort can lower motivation. It is not always obvious at first, but changes in training interest can be an early clue that something is off. If this becomes a pattern, or if anything else seems different, reach out to your Cavalier’s holistic vet to rule out anything medical before moving forward with training.
Your Cavalier is overstimulated
Cavaliers take in a lot of information from their surroundings. If you are training your Cavalier in a busy or unfamiliar location, all those sights, sounds, and smells can be overwhelming. When there is too much going on, your Cavalier might not be able to focus or respond the way they usually do. This is especially common for puppies or sensitive Cavaliers who are still learning how to process the world around them.
If that happens, try moving to a quieter spot. You can even take a little break together for a sniffy walk and then go back to something really simple, like The Name Game or Hand Targeting. These familiar cues can help your Cavalier settle and build confidence again.

Your Cavalier is anxious or unsure
When a Cavalier is feeling unsure, whether it is because of a new environment, a stranger nearby, or something they cannot quite figure out, training can start to feel like too much. It is not about being stubborn or ignoring you. They are just trying to process how they feel before they can focus on learning anything new.
If your Cavalier seems nervous or anxious, the best thing you can do is slow things down. Sit with them quietly, speak gently, and let them look around without pressure. Sometimes just being there together is enough. Once they start to relax, you can offer praise and a treat or a “check it out” cue if they seem ready to explore.
The reward is not meaningful enough
When I hear that a Cavalier is not food motivated, the first thing I look at is the reward. Most of the time, it is not that your Cavalier is not food motivated. It is that the treat just does not matter enough to them at that moment. Dry biscuits or lower value treats usually do not get their attention, especially in busy or distracting places.
Start with real food. I usually go straight to meat. That might be small bits of cooked beef, turkey, or lamb. Freeze dried meat or single ingredient dehydrated treats are also great choices. These are often the best treats for Cavaliers because they are soft, tasty, and easy to eat. Just flip the bag over and check the ingredients. You want something simple that says one thing, like chicken breast or turkey. Avoid fillers or extras that do not need to be there.
You can also use freeze dried raw food, broken into tiny pieces. These are real food options and often made mostly from meat, which makes them a great choice for Cavaliers who need something healthy and high value. Many people use them during training and count them toward their Cavalier’s daily calories. It is an easy way to stay consistent with nutrition while still offering something special and rewarding.
I also avoid using liver or organ meats regularly. A little once in a while is fine, but too much liver can lead to vitamin A concerns. Some organ treats can also be too rich and cause diarrhea.
Use the right reward for the right moment
Once you find something that really works for your Cavalier, think about how and when to use it. The most rewarding treats should be saved for the harder training sessions. That might mean practicing outside, focusing around distractions, or trying something brand new. When the reward truly matters to your Cavalier, motivation naturally improves.
If they get their favorite treats for easy things like sitting in the living room, there is not much reason to work harder when training becomes more challenging. Save the cooked beef, freeze dried meat, or other special rewards for those moments when your Cavalier needs a little extra encouragement. Matching the value of the reward to the difficulty of the task helps keep your Cavalier engaged and willing to try.
Explore other forms of motivation
Not every Cavalier is motivated by food alone. Some respond better to toys, praise, or playful interaction. If your Cavalier enjoys toys, try using a favorite squeaky, a soft tug toy, or a quick game of fetch. Some Cavaliers are especially drawn to textures like fleece or rabbit fur, which can make a toy feel more exciting. Whatever it is, keep it put away when you are not training so it stays special and does not lose its value. Other Cavaliers are more motivated by attention and connection. A cheerful voice, a smile, or light praise can sometimes go further than anything you can hold in your hand. At the end of the day, your Cavalier is the one who decides what feels rewarding. It is not about what we think should work. It is about what actually matters to them.
Your Cavalier can learn with the right support
If your Cavalier is not showing interest in training, it does not mean something is broken. It just means they need a little help feeling ready. That might be adjusting the environment, changing up the reward, or simply giving them time to feel more confident.
This is exactly the kind of thing we work on in my Manners, Life Skills and Foundation Training Course. If you are feeling unsure about how to move forward, I will guide you through simple, kind steps to help your Cavalier feel more focused and connected. You will learn how to use rewards that actually matter to your Cavalier, when to train, and how to build everyday habits that stick. It is self-paced, easy to follow, and I am always there if you need support.
Your Cavalier wants to connect with you. With a little support and the right setup, they will start to feel more engaged and eager to participate. You do not need to rush the process. Keep it light, keep it kind, and celebrate the small wins. They all add up.
|
|

|
|
Popular Blogs

February 26, 2025Cavalier King Charles Spaniel Heart Disease
Mitral Valve Disease (MVD) is something every Cavalier King Charles Spaniel parent should be familiar with. Sadly, this condition is extremely common in the Cavalier breed, but early awareness and proper management can greatly improve a Cavalier’s quality of life. In this blog, we’ll cover what MVD is, why Cavaliers are at risk, how the disease is staged, and which supplements can help support a healthy heart.
A heartfelt thank you to Lisa Davila, BS in Biomedical Science and Hospital Manager at Aggieland Animal Health Center in College Station, Texas, for helping me put together this article. Lisa has not only dedicated her career to animal health but has also been a loving mom to many Cavalier King Charles Spaniels. Her knowledge and experience are truly invaluable!
Understanding Mitral Valve Disease (MVD) in Cavaliers
Mitral Valve Disease (MVD) is a degenerative condition that affects the mitral valve of the heart. The mitral valve is responsible for ensuring blood flows properly between the left atrium and left ventricle. Over time, this valve can weaken and leak, allowing blood to flow backward into the atrium. This puts additional strain on the heart, eventually leading to heart enlargement and, in later stages, congestive heart failure (CHF).
MVD is considered a slow-progressing disease, but it varies from dog to dog. Some Cavaliers may live for years with a mild heart murmur, while others may progress more rapidly. Since MVD is so common in the breed, Cavaliers should be closely examined (cardiac auscultation) annually, to determine if they have a murmur. The presence of a murmur is often the first sign that a dog has degenerative valve disease.
Why Are Cavaliers at Risk of MVD?
Cavalier King Charles Spaniels are unfortunately predisposed to MVD. While any breed can develop valve disease, Cavalier King Charles Spaniels are at the greatest risk for developing degenerative mitral valve disease. Studies have shown that over 50% of Cavaliers develop a heart murmur by the age of 5, and by age 10, that number jumps to nearly 100%.Because MVD has a strong genetic component in Cavaliers, responsible breeding practices are essential. Responsible Cavalier King Charles Spaniel breeders ensure their breeding dogs undergo echocardiograms conducted by board-certified cardiologists. When considering a puppy, both parents should have cardiologist-issued heart clearances and be at least 2.5 years old at the time of breeding. Additionally, all four grandparents should be over the age of 5 and heart-clear. However, even with careful breeding, the risk remains high in the breed.
The Stages of MVD
MVD is typically classified into different stages based on its progression. Early detection and monitoring are crucial to managing the disease effectively.
Stage A – Dogs at risk for MVD but without any current signs (e.g., all Cavaliers are considered Stage A at birth because of their predisposition).
Stage B1 – A veterinarian detects a heart murmur, but there is no evidence of heart enlargement on X-rays or echocardiograms.
Stage B2 – A heart murmur is present, and imaging confirms heart enlargement. At this stage, medication such as Vetmedin (pimobendan) is often started to help delay the onset of congestive heart failure.
Stage C – Congestive heart failure (CHF) is present, meaning the heart can no longer compensate for the disease. Symptoms such as coughing, lethargy, and difficulty breathing may be noticeable. Medications are necessary to help manage the condition.
Stage D – End-stage CHF, where symptoms become harder to control even with medications.
Once a dog reaches Stage B2, most cardiologists recommend starting treatment to slow disease progression. Regular checkups and echocardiograms help ensure the right treatment plan is in place.
The Truth About Grain-Free Diets and Heart Disease in Cavaliers
With all the discussion surrounding Mitral Valve Disease (MVD) in Cavaliers, you may have come across concerns about grain-free diets and their potential link to heart disease. It’s important to separate the headlines from the facts when it comes to feeding our Cavaliers the best diet for heart health.
The debate about grain-free dog food largely stems from concerns about dilated cardiomyopathy (DCM), a condition where the heart muscle weakens, leading to poor function and potential heart failure. While DCM is a serious disease, the concern over grain-free diets has often been misinterpreted. The issue isn’t necessarily the lack of grains but rather the high levels of starchy carbohydrates like peas, lentils, legumes, and potatoes that are often used as substitutes in processed grain-free kibble.
Cavaliers are already predisposed to MVD, not DCM, which is a different heart condition with different causes. However, diet still plays a critical role in supporting heart health. The best way to provide a heart-healthy diet for your Cavalier is to focus on fresh, whole foods rich in high-quality animal proteins rather than relying on highly processed kibble, whether it contains grains or not. Read more about feeding your Cavalier a fresh diet.
Dr. Karen Becker explains it best: “The problem with grain-free formulas isn’t the lack of grains. At a minimum, it’s the high level of starchy carbohydrates coupled with the extreme high-heat processing methods used to produce these diets.”
Rather than worrying about whether a diet is labeled as “grain-free,” focus on feeding a fresh, balanced diet with high-quality proteins, healthy fats, and low-glycemic vegetables. Rotating proteins and using whole-food ingredients can help ensure your Cavalier gets the nutrients they need to support a healthy heart.
If you’re unsure about your dog’s diet, seek guidance from a veterinarian with a strong background in canine nutrition, not just one who sells prescription diets in the clinic. A certified veterinary food therapist (CVFT) can be a great resource when designing a diet that supports heart health while avoiding unnecessary fillers.
A well-balanced, species-appropriate diet can play a key role in keeping your Cavalier’s heart strong and healthy for years to come.
Heart-Healthy Supplements for Cavaliers with MVD
While MVD cannot be cured, a combination of medications, lifestyle management, and supplements can help support heart function and overall well-being. Below are some key supplements that may benefit Cavaliers with or at risk for MVD:
MCT Oil (Medium-Chain Triglycerides) – Provides an alternative energy source for the heart muscle. One recommended brand is Natural Force Organic MCT Oil (1 tsp daily with food). Before giving your Cavalier coconut oil, please read this article on MCAD in the Cavalier.
Amino Acids (Lysine, Methionine, L-Carnitine, Taurine) – Help maintain heart muscle contractility and serve as antioxidants.
Omega-3 Fatty Acids – Reduce inflammation, decrease clot risk, help prevent heart muscle loss, and support healthy blood pressure. Nordic Naturals Omega Pet Liquid is a high-quality option.
Vitamin E – Acts as both an antioxidant and anti-inflammatory.
Magnesium – Plays a crucial role in heart muscle contraction and maintaining a healthy heart rhythm.
Coenzyme Q10 (CoQ10) – A powerful antioxidant that supports heart function. Life Extension 100 mg capsules are a great choice.
Recommended Supplement Blends
If you prefer a multi-ingredient supplement, these options are formulated specifically for heart health:
Rx Vitamins for Pets Formula CV – Includes amino acids, magnesium, Vitamin E, CoQ10, and hawthorn berry extract (safe unless the dog is on Vetmedin).
VetriScience Cardio Strength Capsules – Similar to the Rx Vitamins formula but without hawthorn berry extract, making it safe for all MVD stages and medications.
Recap & Common Questions About MVD in Cavaliers
Mitral Valve Disease (MVD) is a serious but manageable heart condition that affects many Cavalier King Charles Spaniels. Early detection, responsible breeding, proper veterinary care, and supportive supplements can all play a role in keeping your Cavalier’s heart as healthy as possible.
What are the early signs of MVD in Cavaliers?
The first noticeable symptom is often a heart murmur, detected during a cardiologist visit. As the disease progresses, signs can include coughing, fatigue, labored breathing, and reduced exercise tolerance.
How long can a Cavalier live with mitral valve disease?
Many Cavaliers live for years after an MVD diagnosis, especially with early detection and proper management. While every dog is different, with the right veterinary care, medications, and supplements, Cavaliers can still enjoy a good quality of life.
What are the final stages of MVD in dogs?
In the later stages, MVD leads to congestive heart failure (CHF). Symptoms include severe coughing, difficulty breathing, lethargy, fainting, and fluid buildup in the lungs or abdomen. At this stage, medication and veterinary support are essential for comfort.
How do you treat MVD in Cavaliers?
Treatment typically includes veterinary-prescribed medications to support heart function and manage symptoms. Additionally, heart-healthy supplements, such as taurine, CoQ10, and omega-3 fatty acids, can provide extra support. Feeding a fresh, species-appropriate diet may also contribute to overall heart health.
Final Thoughts
A heart-healthy fresh diet, proper weight management, and the right combination of supplements can help support your Cavalier’s heart at any stage of MVD, even before a murmur is detected. Early intervention and regular veterinary care are key to helping our beloved Cavaliers live longer, healthier lives.
A big thank you to Lisa for sharing her knowledge on this topic! If you have any questions, feel free to ask, and don’t forget to check out Lisa and Jiminy on Instagram!
Google Ad Below [...]Read more...
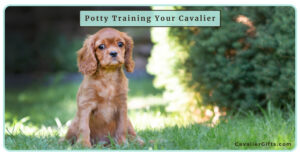
April 15, 2024Cavalier King Charles Spaniel Potty Training
Congratulations on welcoming a Cavalier King Charles Spaniel into your life! They’re such charming and affectionate dogs, full of warmth and love. As a fellow Cavalier mom and positive dog trainer, I’m thrilled to share my experience on the best way to potty train a Cavalier puppy. Let’s jump right in to how to successfully housebreak your Cavalier King Charles Spaniel puppy.
I love puppies! And Cavalier puppies are just some of the cutest little things ever! There’s nothing quite like their sweet kisses, puppy breath, and zest for life! But it’s not all puppy kisses; we also must potty train our Cavaliers. Nobody likes an untrained dog.
One common question I get from Cavalier followers is how to best potty train their puppy. I’ve seen plenty of discussions about potty accidents in Cavalier King Charles Spaniel groups, and I’m here to share some potty training tips with you.
First things first. Let’s start by being realistic. Contrary to what some may suggest, potty training a puppy in a matter of days is not realistic. It’s important to realize that puppies, just like human babies, need time to learn and gain control over their bladders. So, if you’re expecting your Cavalier to hold it for hours after just a few days of training, you are setting your pup and yourself up for failure.
My own Cavalier, Dexter, wasn’t fully potty trained in a mere five days, and I’m perfectly okay with that. I prioritized consistent management and frequent potty breaks, which ultimately led to just a couple of accidents in the house. The key is to prevent accidents by being proactive, not reactive.
What’s the best way to potty train your Cavalier puppy?
It all comes down to three essential things: supervision, frequent potty breaks, and confinement when you can’t actively watch them. The goal is to reduce the chances of accidents happening indoors.
When it comes to supervision, it’s eyeballs on! This means keeping a watchful eye on your puppy at all times, ensuring that you’re there to rush them outside if it looks like they are about ready to go. You can use things like baby gates, leashes, shut doors, or X-pens so that you can keep your eyes on them at all times.
Subscribe to @CavalierTipsandFun on YouTube!
How Often Should You Take Your Puppy Potty?
As for how often to take your puppy potty, it really depends on their age and activity level. Active puppies may need to go out every 15–30 minutes, while older dogs can typically hold it for longer periods. The key is to stay ahead of the game and take your puppy out whenever you notice a change in their behavior or activity. A change in behavior or activity signals that it’s time for a bathroom break. For example, if your puppy just had a bout of puppy zoomies, out to potty we go. Did your puppy wake up from a nap? Out to potty we go. By not waiting for your puppy to ask to go out or have an accident, you are well on your way to a potty-trained dog.
When it comes to crate training, make sure the crate is just the right size to discourage accidents. The crate should be large enough for your pup to stand and lie down comfortably, but not so large that they can use one corner as a bathroom.
Whether you have a fenced yard or not, leash your puppy. This gives you the opportunity to reward your puppy for going potty outside. You will be right there to praise your puppy, give him a snack, and tell him just how smart he is. It also leads to my next potty training tip: teaching your Cavalier to potty on cue!
Teaching your Cavalier to potty on cue is a must in my book. Imagine being able to take your dog outside just before the rainstorm and ask him to pee and poo, and he does! This useful behavior isn’t just fantastic for potty training your dog; it’s incredibly convenient in daily life. The keys to teaching your Cavalier to eliminate on cue are good management, timing, and your reward. By associating a word for peeing with a separate word for defecating, you can start to teach your puppy to do either when requested.
Subscribe to @CavalierTipsandFun
Teaching Your Cavalier to Potty on Cue
Here’s how to get started:
Begin the training process in the morning, when your pup wakes up. Arm yourself with some delicious treats, leash up your Cavalier, and head outside to his favorite potty spot.
Stay close and pay attention to your puppy. Stay about 6’, so it’s not just a sniffing fest; the goal is to get him to eliminate before a big walk, play, or sniff. Pay close attention to your Cavalier’s body language. Watch for subtle cues like sniffing, circling, or squatting, which indicate he’s about to eliminate. As soon as you see a sign, use your potty cue, such as “Go potty,” and wait patiently. When your pup starts to do his business, praise quietly, and after he’s finished, give him big praise and rewards. You want to make sure you don’t interrupt the potty process by rewarding too soon.
If your dog typically follows up with a poop, repeat the process with your poop cue, like “Go poop-poop,” and reward him once he’s finished.
After your Cavalier has finished his business, it’s time for the next reward: fun! Whether it’s a walk, playtime in the yard, or simply enjoying the fresh air, make sure to give your pup some extra time to enjoy himself before heading back indoors. This helps reinforce the idea that going potty leads to enjoyable activities.
Repeat this routine each time you take your Cavalier outside, even if you’re planning on going for a walk. By always pairing potty time with rewards, you’ll motivate your pup to go more quickly.
As your Cavalier starts to make the connection between potty on cue and familiar surroundings, gradually introduce the cue in different environments, such as the park or during walks. This helps your dog understand the cue in any situation, ensuring they respond reliably wherever you are.
With patience, consistency, and plenty of positive reinforcement, you can teach your Cavalier King Charles Spaniel to potty on cue, making potty training easier.
Bell Training Your Cavalier King Charles Spaniel Puppy
While some love doggie doorbell training or puppy pads, I prefer to focus on methods that teach puppies to potty outside, not inside or on “things.” I find these methods tend to confuse puppies. Potty pads or litter boxes are teaching the puppy to potty on things that happen to be indoors. This could be a potty pad, but it also could end up being your favorite blanket.
As far as bell training goes, I’m not a fan of encouraging demanding behavior in dogs. Teaching them to ring bells to go outside may inadvertently lead to them using this to not only tell us they need to potty, but also that they may want to go outside to chase squirrels.
I believe in keeping potty training simple and straightforward, focusing on reinforcing the desired behavior of outdoor elimination. By keeping things simple and staying consistent, we can focus on potty training without having to rely on pee pads or bells.
In the end, potty training your Cavalier King Charles Spaniel is all about patience, consistency, and a whole lot of love. By following these tips and staying diligent, you’ll set your new puppy up for success.
Your comments and questions are always welcome below.
Join our vibrant Cavalier King Charles Spaniel community on Facebook, support our dedication to pet wellness on Patreon, and stay updated with our weekly newsletter for invaluable tips and insights into raising happy, healthy pets. Together, let’s make a difference in our dogs’ lives!
Google Ad Below [...]Read more...
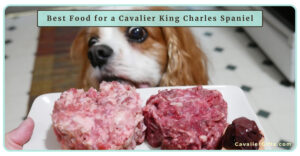
May 29, 2024Natural Diet for Cavalier King Charles Spaniel
Dexter’s Food Journey with Raw and Homemade Food
Dexter, my Cavalier King Charles Spaniel, was a raw-fed puppy. However, because I wasn’t sure how to do it properly, and I was unaware that there were premade raw foods on the market, I fed him kibble with food toppers. After learning about how to balance a fresh dog food diet, I started to home cook for him when he was around two. Then, when he was about four, I transitioned him to a DIY raw diet. Through this journey with Dexter, I’ve learned about creating a nutritious and tailored diet that meets his unique needs. Now, I’m excited to pass along my tips and thoughts on feeding your Cavalier King Charles Spaniel. Let’s dive in!
Natural diet for Cavalier King Charles Spaniels
If you’re anything like me, you’re always on the lookout for the best pet products, natural dog grooming supplies, and the healthiest dog food brands for your Cavalier. One of the most important aspects of your Cavalier’s well-being is their diet. Dogs are natural carnivores, made to thrive on a diet of fresh meat. This means a species-appropriate diet is key to their health and vitality.
Understanding Species-Appropriate Nutrition
Let’s think about our dogs’ ancestors for a moment. They thrived on a diet of raw meat, bones, and organs. Today, we can recreate this natural diet with a raw food approach, using fresh, high-quality ingredients that focus on what dogs are meant to eat. For your Cavalier King Charles Spaniel, in a nutshell, this means focusing on a diet that’s about 90 percent meat, bone, and organ, with the remaining 10 percent coming from fruits and vegetables. This balance provides the essential nutrients and fiber they need to stay healthy. Personally, I feel if you aren’t able to go raw, this diet can also be cooked. You just would need to provide the calcium from the bones in another form, since dogs cannot eat cooked bones.
Don’t forget to subscribe to @CavalierTipsandFun for more!
The Problem with Processed Dry Kibble
Now, dry kibble. It’s processed at high temperatures, which takes away almost all the moisture and nutrients from the ingredients. Often, kibble is made with low-quality ingredients and fillers that don’t give your dog the nutrients they need. The lack of moisture in kibble can also lead to chronic dehydration, affecting everything from kidney function to skin and coat health. Plus, since kibble is made to last a long time, the ingredients can go rancid quicker than you might think, making it even less nutritious for your pup.
The Importance of Moisture in Your Dog’s Diet
Moisture is a crucial part of your dog’s diet. In the wild, dogs get most of their hydration from the food they eat. Fresh, raw diets naturally provide the moisture that kibble just can’t. This is essential for your dog’s digestion, kidney health, and overall well-being. By feeding them fresh, high-quality meat and vegetables, you’re making sure they stay hydrated naturally, without having to depend solely on drinking water.
Google Ad Below
Finding the Best Diet for Your Cavalier King Charles Spaniel
When it comes to our Cavaliers, there’s no one-size-fits-all solution. Every dog is unique, with their own health needs, behaviors, and lifestyle. Personally, I’m a big advocate for variety. This could be in the form of different proteins, suppliers or even a nice pre-made raw or mix. I steer clear of dry pet food altogether unless I’m using freeze dried food for dog training treats. For me, a balanced DIY raw diet for Dexter is the way to go. It’s fresh, it’s healthy, and I can tailor and tweak it to Dexter’s needs.
Why a Raw Food Diet is Ideal for Most Cavalier King Charles Spaniels
A raw food diet is as close to a natural diet as you can get for your Cavalier. It includes raw meat, bones, and organs, providing essential vitamins and minerals often lost in commercial dog foods. This diet can improve your Cavalier’s skin and coat health, immune system, and help maintain a healthy weight. As I mentioned earlier, I think adding an approximately 10 percent mix of fruits and vegetables is a great way to add a nutritional boost to the bowl. By avoiding the fillers and artificial additives found in many commercial foods, we ensure our dogs get the best nutrition possible.
Homemade Raw or Cooked Food: Personalized Nutrition for Your Cavalier
One of the best ways to ensure your Cavalier King Charles Spaniel is eating the healthiest diet is to make their food at home. This way, you control the quality of the ingredients and can tailor the meals to your dog’s specific needs. Homemade meals are especially beneficial if your Cavalier is a picky eater or has food allergies. Just remember to balance their diet properly to include all necessary nutrients. Whether your dog has allergies, digestion issues, or any other specific needs, you can tweak their diet to meet their needs.
Feeding Your Cavalier a Grain-Free Diet
You might have heard that grain-free foods are bad for Cavaliers because they were thought to have caused Dilated Cardiomyopathy (DCM). In 2019, the FDA released a list of grain-free pet foods that had people swearing that grain-free dog food was bad. But, guess what? It’s really not the case. In fact, in 2022 the FDA announced on their website there wasn’t a solid link between grain-free diets and DCM.
Feeding your dog grain-free can actually be a good choice for your Cavalier. But things get tricky if you are looking at a purchased grain-free alternative, particularly a dry kibble. When you’re reading the ingredient panel of a dog food (yes, read those labels), watch out for ones loaded with peas, lentils, legumes, seeds, and/or potatoes. Even if the front of the bag screams “meat-first,” it might sneak in a bunch of carbs and starches that aren’t ideal. According to experts, such as Dr. Karen Becker, it’s not about cutting out grains—it’s about making sure our pets aren’t eating too many starchy fillers. So, bottom line? Go back to that 90 percent meat recommendation.
Feeding Your Cavalier King Charles Spaniel Puppy
When it comes to feeding your Cavalier King Charles Spaniel puppy, it’s essential to consider their unique nutritional needs as they grow. If you’re not quite sure about the specifics of puppy nutrition, it’s perfectly okay to rely on trusted commercial brands known for their expertise in creating a balanced diet for puppies.
A commercial raw puppy food will include the essential proteins, fats, and calcium your puppy needs to develop strong bones. The key is to ensure whatever you choose is well-rounded and provides all the nutrients your Cavalier puppy requires during the puppy life stage.
Maintaining a Healthy Weight
Keeping your Cavalier at his ideal weight is super important. Maintaining a healthy weight isn’t just about good looks, but their health. Extra weight can contribute to health issues like joint problems and heart disease. The breed standard says they should weigh between thirteen and eighteen pounds. But, Cavaliers can vary a lot in size. Take Dexter, for instance. He’s a bit of a big guy, weighing his ideal weight at a healthy twenty-nine pounds. So, how do you know if your Cavalier is at the right weight? It’s all about getting your hands on your dog. Run your fingers lightly over their ribcage; you should be able to feel their ribs without pressing too hard. If they’re too prominent, they might be on the thin side. But if you can’t feel them at all, or if their waistline has disappeared, they might be carrying a few extra pounds. Just keep an eye on their overall body shape, and remember, every Cavalier is unique!
How Often to Feed Your Cavalier King Charles Spaniel
Consistency is key when it comes to feeding your Cavalier. Establishing a regular feeding schedule helps regulate their metabolism and digestion. Typically, feeding your Cavalier twice a day, in the morning and evening, works well. For puppies, more frequent meals might be necessary to meet their higher energy demands. I actually feed Dexter three times a day, mainly due to the fact that he gets so much food, I prefer to space it out.
Adding Supplements and Vitamins
Even with a well-balanced diet, supplements can play an essential role in your Cavalier’s health. Omega-3 fatty acids can enhance skin and coat health, probiotics can aid digestion, and joint supplements can support mobility. Always consult your Cavalier’s vet before adding new supplements to ensure they’re necessary and safe. When possible, opt for real food supplements vs. synthetic.
Food Allergies in Cavalier King Charles Spaniels
If your Cavalier has allergies, a limited-ingredient fresh diet can be incredibly beneficial. Before jumping brands, I would suggest going through a pet food elimination diet to identify triggers. Once you know what your Cavalier is allergic to, you can create a personalized diet just for him. You can read more about how and why a pet food elimination diet is helpful on my other blog, right here.
Safe Fruits and Vegetables to Feed Your Cavalier
Things like carrots, broccoli, and kale can be great sources of extra nutrients and fiber. And don’t forget the powerhouse of antioxidants fruits like blueberries, strawberries, pomegranates, and apples can provide. For best digestion, blitz them up! Introduce all new foods slowly and keep an eye on what works for your dog.
Transitioning to a Raw Food Diet
Transitioning your Cavalier to a raw food diet should be done gradually to avoid digestive upsets. Start by introducing small amounts of raw food while slowly decreasing their current food. A 75 percent and 25 percent switch usually works well. Over a week or two, increase the raw portion until it completely replaces their old diet.
Choosing the Best Raw Food Brands
Selecting high-quality raw food brands for your Cavalier ensures they get balanced and nutritious meals. Personally, I look for brands that offer meats that are antibiotic and hormone free. Ideally, any fruits and vegetables will be organic. Opt for whole foods vs synthetics when possible. But, it will be a balancing act based on what’s available to you and your budget. As I mentioned earlier, shoot for approximately 90 percent meat, bone, and organ. A few raw brand choices to consider include BJ’s Raw, Raw Paws Pet Food, Raw Wild, We Feed Raw, Primal, Vital Essentials, Smallbatch, Raw Bistro and Steve’s Real Food.
A Healthy Diet Can Improve the Immune System, Skin, and Coat Health
By providing your Cavalier with a balanced raw or homemade diet you’re not just filling their bowl, you’re nurturing their well-being from the inside out. Fresh diets, whether raw or homemade, are rich in unprocessed ingredients, offering a higher concentration of vital nutrients compared to heavily processed kibble. Fresh foods do not have the fillers and additives found in kibble, making them easier for dogs to digest and absorb. Because of this, fresh food promotes better immune function, healthier skin, and a shinier coat, making them the ideal choice for your Cavalier.
By focusing on a fresh, natural diet tailored to your Cavalier King Charles Spaniel’s specific needs, you’re setting them up for a long, healthy, and happy life. Remember, my goal is to offer guidance and support to help you navigate the journey of pet nutrition, without any judgment. Let’s work together to ensure the best possible care for you and your Cavalier!
Your comments and questions are always welcome below.
Join our vibrant Cavalier King Charles Spaniel community on Facebook, support our dedication to pet wellness on Patreon, and stay updated with our weekly newsletter for invaluable tips and insights into raising happy, healthy pets. Together, let’s make a difference in our dogs’ lives!
Google Ad Below [...]Read more...
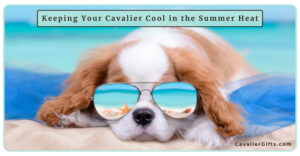
May 14, 2024Hot Weather Tips for Cavalier King Charles Spaniels
People often think of summer as a good time to get out and about with our Cavaliers. As a dog-friendly travel blogger, I’m often pitched ideas and stories about taking Dexter to X outdoors, even in July or August. But, the reality is, that’s usually just too darn hot for my now 14.5 year-old Cavalier King Charles Spaniel, Dexter.
He’s always run a bit hot, but now, as a senior and with MVD, the summer heat is just not ideal for him. But, it’s not just Dexter. Summer heat can pose health issues such as sunburn and heatstroke. Today, I’m going to jump into some ideas on how to keep your Cavalier King Charles Spaniel cool and active during the summer or warm months.
Cavalier King Charles Spaniels and Heat Stroke
Heatstroke is a serious concern for all dog families, particularly for breeds like the Cavalier King Charles Spaniel, which can be more susceptible due to their flat-faced (brachycephalic) nature. Any dog, any breed, and any age can develop heat stroke, even on cool days! The VetCompassTM conducted a study in 2016 regarding the risk factors for heat-related illness (HRI):
Breeds with the highest incidence of HRI included the Chow Chow, Bulldog, French Bulldog, Dogue de Bordeaux, Greyhound, Cavalier King Charles Spaniel, Pug, and the Golden Retriever.
Dogs at or above the mean adult body weight for their breed/sex showed an increased risk of HRI compared to dogs below the mean body weight.
Dogs over 12 years old had the greatest odds of HRI compared to dogs under 2 years old.
Signs of Heatstroke in a Cavalier
Recognizing the signs of heatstroke and taking preventive measures are crucial to keeping your dog safe. Signs such as excessive panting, drooling, rapid pulse, and restlessness indicate your Cavalier may be overheating. If you notice these symptoms, act quickly by providing cool (not cold) water and applying damp towels to areas with good blood flow, such as the head, armpits, and groin. Then take your Cavalier to the vet to prevent things from getting worse.
How Food Affects Your Cavalier’s Ability to Tolerate Heat
Just like for us, our pet’s food does more than just provide them with calories. Food has a big impact on their overall health, affecting everything from their longevity to their behavior and how they handle hot and cold temperatures. According to traditional Chinese medicine (TCM), everything in life has a balance of energy and heat, represented by Yin and Yang. Yin embodies the cool, and yang is the hot. This includes our pets, food, and environment; they all have specific energetics.
Dexter tends to run a little more yang (hot). Therefore, when I’m creating his meals, I aim to have the foods I provide either be energetically cooling or neutral. I avoid energetically warm or hot foods and proteins. For example, common foods that are warming or hot include goat, lamb, venison, chicken, and pheasant. Whereas, cooling proteins include rabbit, duck, beaver, cold water fish, and muskrat.
Applying this feeding concept to our Cavaliers, we can tailor their diets to help regulate their internal temperature. During the warmer months, opting for cooling foods can help maintain balance and comfort for your Cavalier.
Google Ad Below
Summer Fun for You and Your Cavalier King Charles Spaniel
Despite the summer heat, Dexter and I still enjoy our summer adventures. They just need to be modified according to the weather. The first thing I do is check the weather, so I’m not out and about with Dexter and surprised! Walking or strolling Dexter in the morning is by far cooler than in the evening. I know people suggest evening walks, but, honestly, the heat from the pavement and the atmosphere seem hotter to me than in the morning. Your location may be different.
Try walking on grassy areas instead of pavement. Shady parks beat the noon sun. Breezy days while wading in the water are another fun way to help your Cavalier stay cool. However, if it’s still sunny or warm, cool water on their feet and a breeze are unlikely to cut it.
We do a lot of indoor adventures during the summer months. Pet stores, dog friendly stores and attractions are our go-tos. I also do a lot of indoor training sessions and enrichment activities to help keep Dexter engaged. The bottom line is that I don’t want to risk Dexter’s health. And I can say from experience, it’s not a good feeling. Back in 2018, I’m pretty sure Dexter almost had a heat stroke! We were in Florida in the spring, doing touristy things. I thought I was being careful, bringing Dexter inside the stores, indoor attractions, and a covered train tour, but he really wasn’t doing well. He started showing signs of heatstroke. We rushed him to the hotel and cooled him down. I was lucky. And I’m not sure what I would have done if I wasn’t so lucky.
Hot Weather Tips for a Cavalier King Charles Spaniel
Grooming & Trimming: Regularly groom your Cavalier to remove loose fur and prevent overheating. I do give Dexter a puppy cut by trimming his belly, legs, and tail. I started this because of his CM/SM, but it also helps lighten his load and keeps him cooler.
Travel Comfort: Ensure your Cavalier’s comfort during travel with a well-ventilated crate or car harness, and schedule frequent breaks for water and shade. I also use a cooling mat and fan blowing on Dexter.
Sunscreen: Dog friendly sunscreen on your Cavalier’s nose helps protect him from harmful UV rays.
Cooling Products: Invest in cooling accessories like a cooling vest, bandana, or mat to provide relief from the heat during outdoor adventures.
Avoid the Hottest Part of the Day: Schedule outdoor activities during cooler times, such as early morning or late evening.
Mind the Pavement: Hot asphalt can burn your Cavalier’s paw pads. Stick to grassy or shaded areas for walks.
Hydration: Always have fresh water available, and encourage your Cavalier to drink frequently to stay hydrated. I put bone broth cubes in Dexter’s water bottle to encourage him to drink. If not, he will ignore the water.
Indoor Play or Outings: On exceptionally hot days, opt for indoor activities like interactive games or training sessions to keep your Cavalier entertained while staying cool.
Cooling Foods: Opt for cooling or neutral proteins in your Cavalier’s diet.
Remain vigilant, provide ample shade and hydration, and monitor your Cavalier for signs of overheating. Keep your Cavalier King Charles Spaniel’s well-being in mind, and use these practical tips to make sure you and your Cavalier have a safe and enjoyable summer.
Your comments and questions are always welcome below.
Join our vibrant Cavalier King Charles Spaniel community on Facebook, support our dedication to pet wellness on Patreon, and stay updated with our weekly newsletter for invaluable tips and insights into raising happy, healthy pets. Together, let’s make a difference in our dogs’ lives!
Google Ad Below [...]Read more...

June 8, 2024Treatment options for Chiari malformation and Syringomyelia
My best friend, Dexter the Dog, was diagnosed with Chiari malformation and syringomyelia in 2012, just before his third birthday. This diagnosis hit me hard. Over the past twelve years, I’ve shared a lot about Dexter’s diagnosis, care, and treatments on my Raising Your Pets Naturally blog and YouTube channel.
Since I recently started this blog dedicated to Cavalier King Charles Spaniels, I thought it would be a good time to write an update on Dexter’s care and what I’ve learned. I am also happy to say that at almost fifteen, Dexter is doing amazingly well! I hope you find this article on Chiari malformation and syringomyelia in dogs helpful. Please share this information to help others dealing with this heartbreaking diagnosis learn about the many helpful and natural treatments for dogs with Chiari malformation and syringomyelia.
What is Chiari Malformation (CM) and Syringomyelia (SM)
Chiari malformation commonly affects Cavalier King Charles Spaniels, Chihuahuas, Brussels Griffons, Yorkshire Terriers, Maltese, Pomeranians, Toy Poodles, and Shih Tzus. In dogs with CM, the skull is too small to hold their brain properly. This overcrowding forces parts of the brain, specifically the cerebellum and medulla, out of their normal positions. The cerebellum controls movement and balance, while the medulla is connected to breathing and heart rate.
When these brain parts are pushed out of place, they obstruct the normal flow of cerebrospinal fluid (CSF). Cerebrospinal fluid is in the brain and spinal cord and acts as a natural cushion, protecting the brain. When the flow of CSF is blocked, it can lead to a buildup of pressure and result in serious neurological issues and can form syringomyelia (SM), a condition where fluid-filled cavities form within the spinal cord.
In Cavalier King Charles Spaniels, Chiari malformation is a congenital issue, meaning they are born with it. Dr. Clare Rusbridge established a breeding protocol to help reduce CM/SM in puppies. Following the breeding protocol is crucial for reducing the risk of Chiari malformation (CM) and syringomyelia (SM) in Cavalier King Charles Spaniels. If both parents have CM/SM, puppies are 92 percent likely to be affected, while the risk drops to 77 percent if only one parent is affected. If both parents are clear of CM/SM, there is a 70 percent chance their puppies will be clear, rising to 87 percent if the grandparents are also clear. Potential Cavalier families should seek breeders who perform this testing to ensure healthier puppies. The only way to diagnose Chiari malformation and syringomyelia definitively is through an MRI scan.
Recognizing Chiari malformation is vital for Cavalier King Charles Spaniel families because early detection and treatment can greatly improve the quality of life for dogs with this condition. If you notice symptoms like uncoordinated movements, sensitivity around the head and neck, or any other unusual behaviors, it’s important to consult with your veterinarian as soon as possible.
Symptoms of Chiari Malformation and Syringomyelia in Dogs
Symptoms of CM and SM in Cavalier King Charles Spaniels and other breeds can vary. About a year before Dexter’s diagnosis, he began showing some random and unusual behaviors. And they didn’t happen all the time.
Fixating at dust particles in the sunlight.
Fidgeting and biting at his rear end. His vet initially thought it was anal glands, but they really weren’t that full, and he continued to do it.
Acting strangely around flying insects. Whenever a fly was around, he would get strange and start spinning around and growling at his back end.
Then, he had a downright scary episode, where he just was going crazy over his back end, growling, at it, spinning, and I could not gain his attention. I then decided to hit record the next time it happened. After recording the next episode and consulting Dr. Lynette Cole at The Ohio State University, three veterinary neurologists suspected Chiari malformation and syringomyelia. I then made an appointment at the OSU neurology department for an MRI and spinal tap. CM and SM were confirmed.
Dexter’s episode is below.
Don’t forget to subscribe to our @RaisingYourPetsNaturally YouTube channel for more.
Other common symptoms of CM/SM in Cavalier King Charles Spaniels can include:
Air scratching, especially on walks or when excited.
Head scratching or rubbing.
Air snapping or licking.
Random yelps of pain.
Sensitivity to touch and being picked up.
Hind end weakness.
Head or body wobbles, stumbling, or squinting.
Head pressing.
Seeking darkness or solitude.
Inactivity or depression.
Restlessness.
Google Ad Below
Diagnosing Chiari Malformation and Syringomyelia
The only definitive way to diagnose CM/SM is with an MRI. If a dog shows common symptoms and belongs to a breed prone to this disease, like Cavalier King Charles Spaniels, a vet might start treatment without MRI confirmation. For me, knowing exactly what Dexter had was key. Along with an MRI, Dexter also had a spinal tap to ensure we had all the facts.
Treatment Options for Chiari Malformation and Syringomyelia
Surgery for Chiari Malformation in Cavalier King Charles Spaniels
Surgery is performed with the goal of restoring the natural flow of spinal fluid. This involves decompressing the affected area, removing bone fragments, and sometimes adding a shunt. However, the results can differ greatly from one dog to another. Despite surgical intervention, many dogs still require medication to manage their pain effectively.
Medications for Chiari Malformation in Cavalier King Charles Spaniels
The disease is progressive and varies in severity. Treatment prioritizes comfort and alleviates pain. Dr. Clare Rusbridge provides the gold standard in the medication treatment protocol. It’s essential to monitor organ functions regularly when administering long-term medications.
Natural Treatments for Syringomyelia in Dogs
There are many natural treatments to help support a dog with CM/SM. Here are some that have worked for Dexter:
Acupuncture: Restores the normal flow of energy through specific pathways.
Cold Laser Therapy: Reduces inflammation, relieves pain, repairs tissue damage, and increases blood circulation.
PEMF ( Pulsed Electromagnetic Field) Therapy: Reduces inflammation, relieves pain, promotes tissue and cell repair.
Food Therapy: A diet of home-cooked or raw dog food helps reduce inflammation. Ingredients like sardines, shiitake mushrooms, and green-lipped mussels can help.
Conscious Proprioception Exercises: Dexter wore Dr. Buzby’s ToeGrips to stimulate awareness of his feet. I also regularly work with him on footwork exercises to help him be more aware of his feet.
Canine Hydrotherapy: Water treadmill therapy strengthens Dexter’s body with low joint impact.
Core Strength Exercises: Dexter’s rehabilitation focuses on boosting his core and back end strength, crucial for enhancing balance and stability. Through a variety of exercises using different equipment, we target his abdominal, back, and hind leg muscles, ensuring he can confidently navigate any challenges.
Living with a Cavalier King Charles Spaniel with Chiari Malformation
Living with a dog diagnosed with Chiari Malformation and syringomyelia can be challenging. Dexter’s first year after diagnosis was the most challenging. Trying to figure out what worked best for him, what kinds of activities or weather would trigger breakthrough pain, and how best to manage it. His life changed, but, luckily, with a great team of professionals, I was and am able to provide Dexter with a great quality of life that is still full of adventures and enrichment.
Comfort Measures
To help keep Dexter as comfortable, happy, and pain-free as possible, I’ve incorporated a range of products.
Dog Harness: Avoid collars that can be painful due to the disease’s nature.
Dog Strollers: Great for giving Dexter a break while still being part of adventures.
Cooling Mats and Warming Blankets: Depending on Dexter’s temperature needs. I will say, now Dexter is on a cooling mat almost 100 percent of his downtime. He rarely seeks heat.
Snuggle Jackets: Some dogs find comfort in them, while others might not. In the beginning, Dexter wore one almost all the time. But, I think, after we finally found our groove with his care, they were no longer necessary.
Natural Calming Aids: Calming CDs and natural calming sprays help Dexter on rough days.
Support for Dogs with Chiari Malformation and Syringomyelia
Let’s unite in this journey. Dexter’s courage living with Chiari malformation and syringomyelia serves as a light of hope for us all. You aren’t in this alone. Seek the help of a good veterinarian team, join a support group, including ours! Together, we can provide hope and guidance to others on similar paths. Go Team Dexter!
Your comments and questions are always welcome below.
Join our vibrant Cavalier King Charles Spaniel community on Facebook, support our dedication to pet wellness on Patreon, and stay updated with our weekly newsletter for invaluable tips and insights into raising happy, healthy pets. Together, let’s make a difference in our dogs’ lives!
Google Ad Below [...]Read more...
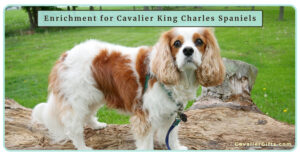
June 26, 2024Cavalier King Charles Spaniel Enrichment Ideas
Ultimate Guide to Canine Enrichment for Cavalier King Charles Spaniels
If you are reading this blog post on ways to keep your Cavalier King Charles Spaniel entertained, you have made me a very happy lady. Mental stimulation for your Cavalier is so important, and sometimes a very overlooked part of a good positive dog training program. I’ve always said, dog training isn’t just about teaching your Cavalier to do something or not do something. Rather, there is a synergy between training your Cavalier and everything else including canine enrichment. I think bonding with your Cavalier King Charles Spaniel is the best medicine for both you and your pup. So much so, I started a Cavalier King Charles Spaniel Facebook group, with a big emphasis on enrichment ideas for Cavaliers. And the photos you are about to see on this Cavalier blog are all from members of our wonderful community! Now, let’s dive into canine enrichment and why it’s so important.
What is Canine Enrichment?
Canine enrichment is about making your dog’s life better by giving them fun activities that keep their mind and body active. I think about canine enrichment as life experiences and engaging our Cavaliers in a variety of fun and interactive activities. It’s more than just a food puzzle toy, although that’s a great introduction to enrichment for your Cavalier.
Enrichment can be interactive play, positive dog training sessions, sensory games, physical activities, food enrichment, and outdoor adventures. The goal is to keep your Cavalier happy, healthy, and mentally sharp. When you do this, it helps prevent boredom, boosts your dog’s mental skills, and strengthens your bond, which also leads to better listening and obedience.
Subscribe to @CavalierTipsandFun for more!
Beyond Food: Enrichment Through Interaction
Many people associate canine enrichment primarily with food-related activities, like filling food toys or using interactive frozen treats. While these activities are great, and I use them daily with Dexter, they are just one piece of the enrichment puzzle. When I think of canine enrichment, I think of activities that involve direct interaction with Dexter. It’s about more than just keeping him occupied with food toys—it’s about creating a connection with him, something we do together.
Incorporating various types of environmental enrichment can greatly benefit your Cavalier King Charles Spaniel, both mentally and physically. Enrichment keeps those unwanted behaviors at bay by preventing boredom. It encourages social interaction, making for a happier and more engaged dog.
Positive Training for Your Cavalier
Training is a wonderful way to enrich your Cavalier’s life. Whether you’re teaching basic obedience, fun tricks, or advanced behaviors, positive dog training sessions offer cognitive stimulation and deepen your bond. Cavaliers are smart and love to please, which makes them quick and eager learners. Remember, when you’re teaching and training your Cavalier, you want the training to be fun for both your dog and you.
Google Ad Below
Outdoor Adventures
Taking your Cavalier to the park or on a walk can be incredibly gratifying. Consider going on a “sniffy walk,” where your pup gets to explore and investigate their surroundings at their own pace. Allowing them to follow their nose is not only fun but also taps into their natural instincts.
Other fun outdoor adventures can be indoors too! Take your Cavalier to a pet store for some shopping or visit a dog-friendly indoor store. Just make sure to call the establishment first to double-check their pet policies. Those training sessions you’ve been working on will ensure your indoor fun is a positive experience and one you can feel proud of.
Fun and Beneficial Canine Fitness Activities
Incorporating canine fitness activities can be both fun and vital for your Cavalier’s health. Stretching, sits to downs to stands, using wobble boards, or even walking over cavaletti poles are a few examples. These activities help keep your Cavalier in good physical shape and engaged. Other fitness ideas include walking on slight outdoor hills, placing two paws on a curb, jumping on a sturdy boulder, and walking across a fallen tree trunk. Always prioritize safety during these exercises.
Sensory Enrichment for Your Cavalier
Sensory enrichment is another great way for keeping your Cavalier King Charles Spaniel active and entertained. This type of enrichment is all about stimulating their senses, sight, smell, hearing, touch, and even taste. Obviously, there is some overlap between enrichment “categories.”
Consider incorporating toys that make different sounds or have different textures to engage their hearing and touch senses. You can even make a scent garden in your yard with dog-friendly plants and herbs. Or, grab some outdoor things such as pine cones, grass, and flowers and place them in scent boxes for your Cavalier to smell or find. Plus, activities such as scent work, where your dog uses their sense of smell to find hidden treats or toys, can provide a great mental and physical workout..
By giving your Cavalier a variety of sensory experiences, you satisfy their natural curiosity and make them happier overall. Giving your Cavalier sensory activities like scent work or creating a scent garden not only keeps them entertained but also deepens your connection as you explore together.
Bonding Activities
Simple activities like grooming, talking to your dog, or giving them a gentle massage are also forms of enrichment. By connecting and touching your dog, you not only are able to do a lump-and-bump check, but you are laying the foundation of trust. Shared Zen moments like listening to music together or just lounging on the couch, can also be incredibly soothing for both you and your dog. Don’t forget snuggle time! Most Cavaliers love to cuddle, and those quiet, close moments can deepen your relationship even more. Did you hear that, Dexter? By incorporating these simple yet meaningful activities into your life, you’ll create a stronger relationship with your dog.
Food Games and Interactive Toys: Enhancing Mealtime for Your Cavalier
Food games like lick mats, interactive food toys, and snuffle mats are a great way to feed your Cavalier. Instead of wasting those valuable calories by tossing them in a bowl, using enrichment toys offers a fantastic activity. Don’t use extras in those food toys; use your Cavalier’s daily food or food calories.
For Cavaliers who are fed fresh food, such as a raw or fresh diet, lick-type toys like lick mats are perfect. These toys allow your Cavalier to eat their food while licking and enjoying their mealtime. Spreading the food out encourages more time eating and offers an easy enrichment activity. It also mimics natural foraging behavior.
Snuffle Mat DIY
If your Cavalier is fed dry kibble or dehydrated food, treat dispensing toys or snuffle mats are excellent choices. These toys make mealtime interactive by challenging your Cavalier to work for their food. They may knock around a toy that dispenses their meal or snuffle around a mat for their nibbles. In order to keep your Cavalier’s calories in check, you can reduce a small portion of their dry food and use fresh foods or toppers or freeze-dried 100 percent meat in these toys to add variety and excitement.
Incorporating food games and interactive toys into your Cavalier’s routine makes mealtime more enjoyable and provides an easy and daily mental enrichment activity. But, don’t just go with one treat puzzle toy. The more variety, the better.
Enriching Your Cavalier’s Life with Every Adventure
Canine enrichment is all about creating a variety of positive and fun experiences that enhance your Cavalier King Charles Spaniel’s life. Food toys are great–it’s the interactive, engaging activities that truly enhance their daily experiences.
By focusing on a variety of enrichment activities, you’ll ensure your Cavalier King Charles Spaniel is happy, content, and well-rounded.
I host a private Facebook group for Cavalier King Charles Spaniels, and we have a big focus on canine enrichment ideas and challenges to keep your Cavalier engaged and thriving!
I’d love to hear about your own enrichment ideas and experiences with your Cavalier! Share your tips and stories in the comments below and let’s keep the conversation going.
Join our vibrant Cavalier King Charles Spaniel community on Facebook, support our dedication to pet wellness on Patreon, and stay updated with our weekly newsletter for invaluable tips and insights into raising happy, healthy pets. Together, let’s make a difference in our dogs’ lives!
Google Ad Below [...]Read more...
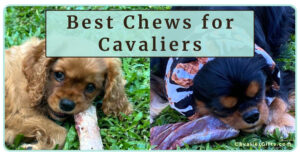
July 24, 2024What Kind of Chew Toys and Bones are Safe for Cavalier King Charles Spaniels?
Most Cavalier King Charles Spaniels love to chew! Chewing is a natural and normal dog behavior that helps fight boredom and can even help keep your Cavalier’s teeth pearly white. But remember, brushing your Cavalier’s teeth daily is still ideal. Puppies and adolescent Cavaliers tend to have a high drive for chewing things. Sometimes, whatever they can sink those teeth into. Hopefully, you are working with a qualified dog trainer to ensure your Cavalier is learning to chew on the right items instead of your furniture, or, even worse, electrical cords or something else that can harm your Cavalier puppy.
So, what makes a chew toy or bone safe for your Cavalier King Charles Spaniel? Over the years, my opinion on this has evolved. I once opted for the harder, the better. But, now, I’m on the other side of the fence, choosing softer items. Hard and tough dog bones can chip teeth and even splinter, which can be very dangerous. Even my sweet, Dexter chipped his tooth on a hard bone….his last hard bone.
I personally do not use or recommend hard bones, antlers, hooves, plastic or nylon bones, rawhides, chews with lots of ingredients, wood bones, or weight-bearing bones. But, I will always say, this is my personal opinion, and they are your Cavaliers. You can do whatever you feel comfortable doing for them, and you will not be judged by me, nor should you be judged by your peers.
Please be aware that not every chew toy or bone will be suitable for every Cavalier. I strongly recommend active supervision when your Cavalier chews, particularly if it’s a new toy or bone or if the chew item is edible. The right size of a bone or toy is also important. You want to make sure the toy or bone is not so small that your Cavalier can place the entire item in their mouth and risk choking. This includes when the chew gets smaller. I tend to toss the end out before Dexter swallows it, with the exception of a chew that is crunchy. Finding the right chew for your Cavalier is sort of like “The Princess and the Pea.” So, let’s jump into my recommendations for safe and healthy chew bones for your Cavalier King Charles Spaniel.
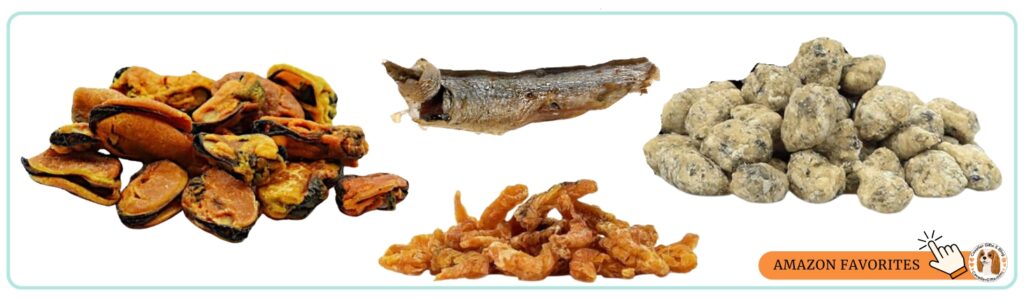
Dehydrated or Freeze-Dried Fish Skins: With a good dehydrated or freeze-dried fish skin dog treat, the treat will be 100 percent fish skin with no artificial colors, preservatives, or flavors. With this list and anything I recommend, the first stop should be to read the actual ingredient panel. What’s inside. Everything. It’s also important to check out the packaging and carefully read the ingredient list and where the fish was caught and processed. Fish skins are great treats for your Cavalier, full of omega-3 fatty acids, typically low in fat, and fully edible. Most dogs love the taste and eagerly chew away. Some fish skins are crunchy, while others are chewy. Chewy ones last longer but need close supervision to make sure your Cavalier chews them up vs. swallowing a large piece. Shop now.
Bully Sticks & Pizzles: Made from the manly part of a bull, many dogs love chewing on these. What I like is that they typically just start to get soft and disappear; I haven’t seen any pieces break off. However, I have seen a stick peel every once in a while, like string cheese. You can also purchase bully stick holders to help hold the stick, which adds a second layer of safety, helping to prevent your dog from swallowing the end. I personally toss that piece into the garbage. Again, sourcing and how they are manufactured is key. Natural does not correlate to not using irradiation (radiation). I contacted my fair share of bully stick brands and asked if they used irradiation, so, make sure you do your homework. Tip: get odor-free or low-odor versions. These can stink like crazy! Shop now.
Raw Bones: Raw bones are another option for your Cavalier to chew on, especially if they are already on a raw diet or natural diet. Because the bones are not cooked, they are soft and unlikely to splinter. Cooked bones easily splinter and are very hard on teeth. The size will depend on the size of the bone and your Cavalier. A few options to consider include necks, wings, feet and tails. Once again, supervise and watch for choking or swallowing. Necks did not work for Dexter, as he thought he should just suck the whole thing down. Chewing Tips: Don’t clean the bones; feed them with some meat on them, as they come. Let your Cavalier pull on the meat and chew and lick the bone. Allow them to have them for an hour, then throw them away. It’s when they sit around the house, get buried, or get dried out that you get bacteria and splintering. They will last in the fridge for three days before feeding. They can also be frozen and thawed. Feed outside or on a towel, and make sure your Cavalier is wearing their snood!. Avoid weight-bearing bones, as dogs can chip or fracture their teeth due to how hard they are. Show now.
Dehydrated Duck/Chicken/Rabbit Feet/Ears: Duck, chicken, and rabbit feet or ears are excellent, crunchy, edible chews for Cavalier King Charles Spaniels. Dehydrated or freeze-dried. Both offer good chewing options. Chicken and duck feet are rich in chondroitin, glucosamine, and collagen, which support joint health, reducing the risk of brittle bones, improving mobility, and maintaining healthy teeth and gums. Rabbit ears and feet are particularly appealing as they are low in fat, high in protein, and help clean your dog’s teeth while reducing plaque buildup. Additionally, the fur on rabbit ears can serve as a natural dewormer. These natural chews are both nutritious and enjoyable, but always supervise your Cavalier to ensure safe chewing. Shop now.
Tripe Sticks: Tripe sticks are a fantastic chew option for Cavalier King Charles Spaniels. Typically made from the stomach lining of cattle, lamb, or goat, these chews are naturally rich in digestive enzymes and nutrients that support gut health. Tripe sticks provide a satisfying, chewy texture that most Cavaliers love, while also helping to clean their teeth and gums. They are full of nutrients that can be a great addition to your dog’s chew rotation. Shop now.
Beef Tails: Beef tails are another excellent choice for your Cavalier. They are durable and provide a long-lasting chewing experience, which helps keep your Cavalier engaged and entertained. Beef tails are also high in protein and can help naturally clean your Cavalier’s teeth. The natural toughness of beef tails makes them a good option for aggressive chewers, but always make sure to choose the appropriate size to prevent any choking hazards. Shop now.
Tendons: Tendons are a great chew for Cavaliers because they are tough yet somewhat flexible, providing a satisfying chew without being too hard on their teeth. They are also rich in collagen, which is beneficial for joint health. Tendons help keep your Cavalier’s teeth clean and their gums healthy. Most Cavaliers find the chewy texture very satisfying. Shop now.
Yak Chews: Yak chews are a fantastic option for Cavalier King Charles Spaniels, but I only recommend them when microwaved to make them poofy. Microwaving them creates a crunchy, airy texture that Cavaliers love, making them a safe and enjoyable option. They are rich in protein and calcium, supporting your dog’s overall health. Made from a mixture of yak and cow milk, these chews are rich in protein and calcium, supporting your dog’s overall health. Again, double check the ingredient label; not all are created equal.
Subscribe to @RaisingYourPetsNaturally’s YouTube channel for more!
Fillable Chew Toys: I am a fan of filling various food toys such as West Paw Tux and Toppl with healthy snacks. The key to getting your Cavalier to chew on a food toy is to stuff it! If your Cavalier is eating the toy instead of the inside food, I do not recommend it. Shop now.
Ingredients matter! If you’re considering chew bones made from various ingredients, it’s crucial to flip over the package and dive deep into the ingredient list. Not all chews are created equal, and some can contain nasty or even toxic substances that could harm your dog. Look for natural, wholesome ingredients and avoid artificial colors, flavors, and preservatives. A little extra time spent reading labels can make a big difference in keeping your Cavalier King Charles Spaniel safe and healthy.
So, there you have it. That is the current list of some healthy and natural chew toys, bones I feel comfortable providing Dexter and recommending to my dog training clients. Always remember to supervise your Cavalier when they are chewing and to choose the right size and type of chew for their needs.
Which of these chews does your Cavalier King Charles Spaniel love the most? Share your favorite chew toys or treats in the comments below!
A big thank you to all the members in our Cavalier Facebook group for your wonderful photos!
Google Ad Below
Join our vibrant Cavalier King Charles Spaniel community on Facebook, support our dedication to pet wellness on Patreon, and stay updated with our weekly newsletter for invaluable tips and insights into raising happy, healthy pets. Together, let’s make a difference in our dogs’ lives!
🐶💙Support our passion for pet wellness and unlock exclusive content, perks and early access by exploring our Patreon tiers.
Sign up for our weekly newsletter!
Join us on Facebook!
[...]Read more...
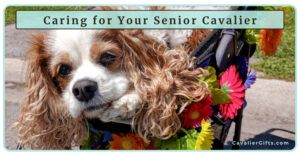
January 23, 2025Supporting Your Senior Cavalier King Charles Spaniel: The Ultimate Guide to Aging Cavaliers
After 15 amazing years with my Cavalier, Dexter it was his time to go to the rainbow bridge. It’s never an easy decision to make and since then, I have been thinking back on our life together. Over the course of his life, I wrote a lot about Dexter on my first blog, Raising Your Pets Naturally. Now, with Stewart, my 7-month-old rescue Cavalier King Charles Spaniel puppy, I’m starting fresh, but with all that I’ve learned from Dexter’s senior years. I thought this would be a good time to explore when a Cavalier King Charles Spaniel is considered a senior, their lifespan, common health concerns, and how we can support our Cavaliers through every stage of life.
At What Age Is a Cavalier King Charles Spaniel Considered a Senior?
If you’re wondering, “When does a Cavalier reach old age?” The answer varies depending on factors like genetics and health. Typically, small breed dogs like Cavaliers are considered seniors between 7 and 10 years old. While this is a general guideline, you may notice your dog showing signs of aging earlier or later.
Some indicators of senior status include:
Decreased Interest in Play: They may be less enthusiastic about toys or games they used to enjoy.
Weight Changes: Unexplained weight gain or loss can be a sign of aging or underlying health issues.
Changes in Vision or Hearing: Difficulty seeing or responding to cues may suggest declining eyesight or hearing.
Increased Time Spent Resting: Senior dogs often nap more during the day and may tire easily after exercise.
Changes in Appetite: They may eat less or show more picky eating habits.
Difficulty Climbing Stairs or Jumping: You might notice hesitancy or struggle with previously easy physical activities.
Behavioral Changes: Increased anxiety, clinginess, or even irritability may indicate aging.
Frequent Bathroom Breaks: Aging can bring bladder control issues or an increased need to urinate.
Dull or Thinning Coat: Their fur might lose its luster or feel thinner in certain areas.
Dental Issues: Bad breath, difficulty chewing, or loss of teeth can become more prominent.
Reduced Tolerance for Cold or Heat: Seniors may seek out warmth or avoid strenuous activity in hot weather.
Increased Vocalization: They may bark or whine more often, potentially due to discomfort, anxiety, or confusion.
Cognitive Changes: Signs of canine cognitive dysfunction (CCD) include disorientation, restlessness, or forgetting familiar routines.
Slower movement or stiffness in the morning: Your Cavalier may take a little longer to get going in the mornings, which can be a sign of joint stiffness or early arthritis.
Graying fur, often around the muzzle: Just like humans, dogs may develop gray hairs as they age, particularly around their face.
But don’t worry, aging doesn’t mean your Cavalier is slowing down in spirit! With the right care and attention, they can still enjoy life to the fullest.
What Is the Life Expectancy of a Cavalier?
You may have heard the question, “How long do Cavaliers live?” The average lifespan of a Cavalier King Charles Spaniel is approximately 10.45 years. This is based on a 2022 UK study of veterinary data. However, some studies suggest a slightly longer lifespan, with a 2024 UK study indicating an average of 11.8 years for the breed. The typical lifespan of a Cavalier King Charles Spaniel is around 9-14 years. That said, some Cavaliers, like Dexter, surpass this average with proper care, while others may face challenges earlier due to health conditions.
Common Health Issues in Cavaliers
Cavaliers are an incredibly loving and joyful breed, but they do have a predisposition to certain health issues. Knowing what to watch for and being proactive in their care can help them live a happy and long life.
Mitral Valve Disease (MVD): Nearly every Cavalier King Charles Spaniel owner will face mitral valve disease at some point if their dog lives long enough. This heart condition affects the valve’s ability to close properly, leading to a heart murmur and, eventually, heart failure if untreated. Yearly heart check-ups with a cardiologist can help monitor and manage this condition.
Chiari-like Malformation (CM): Because of the breed’s unique head shape, it’s estimated that 95 to 99% of Cavaliers will develop a condition called Chiari-like malformation (CM). This happens when the skull is a bit too small for the brain, causing part of the brain to push into the spinal canal. CM can result in pain, weakness, or in severe cases, even paralysis. While there’s no cure, symptoms can often be managed with medications and regular vet check-ups, helping your dog feel more comfortable.
Hip Dysplasia and Patella Luxation: While less common in Cavaliers compared to larger breeds, these conditions can cause joint pain and mobility issues. Patella luxation, which is a dislocation of the kneecap, is more common in Cavaliers and can lead to lameness and discomfort. Keeping your Cavalier at a healthy weight is key to reducing stress on their joints and managing these conditions.
Eye and Ear Problems: Cavaliers are prone to progressive retinal atrophy (PRA), cataracts, and ear infections. Regular grooming and vet visits help catch these issues early.
Intervertebral Disc Disease (IVDD): IVDD is a condition where the discs in your dog’s spine become damaged or degenerate, causing pain, weakness, or even paralysis in severe cases. Cavaliers are particularly vulnerable to this, especially as they age. Be on the lookout for signs of discomfort, difficulty moving, or dragging their back legs.
Myoclonus: Myoclonus refers to muscle twitches or jerks that can occur in Cavalier seniors, especially around the head or neck area. While it’s usually not painful, it’s important to consult with a vet to rule out underlying issues such as neurological problems.
Medium-Chain Acyl-CoA Dehydrogenase (MCAD) Deficiency: This genetic condition affects Cavaliers’ ability to properly metabolize certain fats, which can lead to serious health problems, including low blood sugar, lethargy, and, in severe cases, sudden death. The great thing is that there’s a quick and easy at-home swab test available to check if your Cavalier has MCAD. It’s a simple step that can give you peace of mind and help catch this condition early. It’s a proactive way to care for your Cavalier’s long-term health.
Subscribe to @CavalierTipsandFun for more!
Supporting Your Cavalier Through All Life Stages
Caring for a senior Cavalier means making thoughtful changes to their routine. As our dogs get older, their needs shift in different ways. They may slow down, develop new health concerns, or simply need more comfort. These changes are completely normal, and it’s up to us to help them adjust so they can continue to feel their best. With a little extra care and attention, we can make sure they stay happy, healthy, and comfortable as they age. Whether it’s modifying their diet, adjusting their exercise, or making small changes to your home, these little changes go a long way in supporting their well-being. After all, they’ve given us so many wonderful years of love and companionship, and now it’s our turn to return the favor.
Nutrition for Senior Cavaliers
As your Cavalier enters their senior years, their nutritional needs often shift to support their changing bodies. A balanced diet made with fresh, high-quality ingredients like Omega-3s, antioxidants, glucosamine, and chondroitin can help maintain joint health, cognitive function, and overall vitality. Glucosamine and chondroitin play an essential role in supporting cartilage and joint health and can be included in their diet through natural sources like bone broth, chicken feet, or beef trachea, or through supplements if needed. Adding these fresh foods as part of their meals or even as toppers can provide a natural boost that processed options often lack. Every dog is unique, so working with your vet or a canine nutritionist is key to crafting a plan that meets your Cavalier’s specific needs.
When Dexter was diagnosed with kidney issues in his senior years, I found that his diet needed some adjustments. He had been raw-fed for most of his life, but with the help of his veterinarian, I transitioned him to a customized, home-cooked diet to better support his health. Bones, which are a staple in raw feeding, are high in phosphorus, a mineral I needed to limit. To make up for the lack of bone calcium, I switched to eggshell calcium, which is lower in phosphorus and just as effective.
I also began boiling his meat and discarding the cooking water, which helped reduce the phosphorus content even further. I carefully selected foods that were naturally lower in phosphorus, like certain vegetables and proteins. Dexter was also starting to lose weight, so I added carbs like rice and sweet potatoes to help him maintain his energy and body condition.
These changes made a big difference in his quality of life. While home-cooking may not be for everyone, it’s worth exploring alternatives to prescription diets if your Cavalier develops a medical condition. A good veterinarian or certified dog nutritionist can guide you in creating a plan that meets your dog’s needs without compromising on fresh, wholesome ingredients.
💡 Pro tip: Every Cavalier is unique, and what works for one dog may not work for another. Always partner with your vet or a canine nutritionist to find the best approach for your senior Cavalier. Giving them a fresh diet tailored to their needs is one of the best ways to show your love and care during their golden years.
Exercise and Mental Enrichment
Gentle exercise is important for keeping your senior Cavalier feeling their best, but it’s all about adjusting to their abilities. When Dexter reached his senior years, mosey walks became our go-to. He loved taking his time, sniffing every blade of grass, and enjoying the world at his own pace. When he got tired, I’d pop him into his stroller so we could continue our adventure without overdoing it. That stroller wasn’t just for outdoor strolls either, it was perfect for indoor store adventures, allowing him to stay engaged and part of the action while giving his body the rest it needed.
Mental enrichment was just as important as physical exercise. One of Dexter’s favorite activities was a “find it” game with cardboard boxes. I’d hide a treat in a box, spread them around, and watch his excitement as he used his nose to uncover the prize. It was the perfect mix of mental stimulation and gentle movement. For senior Cavaliers, simple adjustments like these can make a huge difference. Whether it’s a slow walk, a stroller ride, or an engaging puzzle, finding activities that fit their needs helps them stay vibrant and connected to the world around them.
Don’t forget to subscribe to @CavalierTipsandFun for more!
Natural Therapies for Senior Cavaliers
As Cavaliers age, their bodies may need extra support to stay comfortable and mobile. Therapies like at-home laser treatments, physical therapy, and acupuncture made a big difference for Dexter in his senior years. Actually, Dexter had these treatments the majority of his life due to his Chiari malformation. These options can reduce pain, improve mobility, and help manage chronic conditions like arthritis.
Dexter had regular physical therapy visits, where he worked with a canine rehabilitation specialist to keep his joints moving and his muscles strong. I also had simple at-home exercises to follow up with between visits, ensuring he stayed as active as possible without overdoing it. Using a laser therapy device at home helped target areas of stiffness or soreness, and his PEMF (Pulsed Electromagnetic Field) bed became one of his favorite spots to rest. PEMF therapy didn’t just support his comfort but also promoted better circulation and reduced inflammation.
Order a laser for your Cavalier today!
Acupuncture was another natural treatment that worked well for Dexter, offering gentle relief from discomfort and improving his overall quality of life. These treatments, along with his regular routine, were all part of ensuring he was comfortable and able to enjoy his senior years to the fullest.
If you’re considering these therapies for your Cavalier, talk with your Cavalier’s holistic vet or a canine rehabilitation specialist. They can guide you toward the best options for your Cavalier’s individual needs and help create a plan to support their comfort and mobility.
Veterinary Care and Preventative Check-Ups
Regular vet visits are essential, especially as your Cavalier gets older. I recommend scheduling check-ups at least once a year, but if your dog is on medications or managing a condition, like Dexter was, labs every 4 months can give you a better picture of their health. Semi-annual check-ups are also a good idea to catch early signs of issues like MVD, joint problems, or anything else that may need attention. Don’t hesitate to bring up any subtle changes you’ve noticed, whether it’s weight loss, fatigue, or coughing. Early intervention is key, and your vet can provide valuable guidance to help you manage your Cavalier’s health, ensuring they stay happy and comfortable as they age.
Cardiologist Visits
I highly recommend that every Cavalier sees a cardiologist at least once a year. Cardiologists specialize in heart health and truly understand the ins and outs of heart disease, including conditions like MVD, which Cavaliers are prone to. Even if your dog hasn’t been diagnosed with anything serious yet, a cardiologist can spot early signs of issues that might not be apparent to you or your regular vet. If your Cavalier is diagnosed with MVD, your cardiologist may recommend more frequent visits to monitor the progression of the disease and adjust their treatment plan as needed. Having a heart specialist on your team gives you peace of mind and ensures you’re taking proactive steps to care for your dog’s heart health.
Making Your Home Senior-Friendly
As your Cavalier enters their senior years, small changes around the house can make a world of difference in how they move and rest. Senior dogs often experience joint stiffness, and their mobility may not be what it once was, so providing a comfortable and safe environment helps them feel at ease. These adjustments don’t have to be drastic, but they can really support your dog’s needs as they age.
Ramps or Steps: It’s always a good idea to have ramps or steps in place, even if your Cavalier is still young. Jumping down from furniture can put strain on their joints and neck, leading to potential issues down the road. Ramps or steps make it easier for them to get on and off the couch or into the car, preventing unnecessary stress on their bodies. These additions are a simple way to protect your Cavalier from injury and support their mobility throughout all stages of life, ensuring they can continue to join in on the fun without risk.
Orthopedic Beds: Comfort is key when it comes to senior Cavaliers. Cushioned orthopedic beds provide much-needed support for aging joints and pressure points. Dexter was a fan of cooling mats all year, so I made sure to place them throughout the house, including on his beds, to keep him cool. But I always left at least one bed without a cooling mat, in case he wanted to curl up and stay cozy. The goal is to ensure they have a comfortable place to rest, with options that suit their changing needs.
Non-Slip Surfaces: Slippery floors can be a senior dog’s worst enemy. To prevent falls, I recommend adding rugs or carpets to high-traffic areas, especially in places like the kitchen or hallway. You can also try ToeGrips(use promo code: DEXTER for 10% Off Your First Order), which help with traction, so your Cavalier can walk confidently. Making sure they have a stable environment to navigate helps keep them safe, especially when they’re getting around slower than they used to.
How Long Do Cavaliers Live? Cherish Every Moment
If there’s one thing Dexter taught me, it’s to appreciate the little moments, whether it was a slow morning walk, the rare occasion when he’d want to be close and rest in the nook of my legs, or simply watching him nap and snore in the sunshine. Dexter wasn’t much of a cuddler, but when he wanted to be near me, I made sure to savor those times. Our Cavaliers may not live as long as we’d like, but the joy they bring into our lives is something we’ll never forget.
When Stewart reaches his senior years, I know I’ll be ready to give him the care and love he deserves. For now, I’m soaking up every playful, puppy-filled moment.
Google Ad Below [...]Read more...
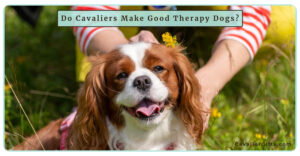
April 28, 2024Are Cavalier King Charles Spaniels Good for Therapy Dog Work?
Today, I want to chat about a topic that is close to my heart: therapy dogs! Have you ever wondered if your Cavalier King Charles Spaniel would make a good therapy dog? It’s a common question and one that has a few caveats. First, it’s not all about the dog! I know, I know, it’s always all about Dexter, but with visiting therapy dogs, it’s about teamwork.
But what is a visiting therapy dog team, and what do they do? A therapy pet team is a person and their pet (sometimes cats, bunnies, etc.) who share their companionship and comfort with those in need, visiting places like hospitals, schools, and nursing homes. These teams engage in either Animal-Assisted Activities (AAA) or Animal-Assisted Therapy (AAT). AAA therapy dog teams engage in sessions without the presence of a medical professional or specific treatment goals, aiming simply to bring joy and comfort. Whereas AAT therapy dog teams work with healthcare providers in goal-oriented sessions aimed at addressing specific issues, with progress carefully measured and tracked throughout the process.
Being a good therapy dog team isn’t just about your Cavalier; it’s also about you. Both you and your CKCS are visiting as a team. You both must have the skills and knowledge required to visit people in a wide range of settings.
Let’s discuss what humans should be bringing to a Cavalier therapy dog team. As a therapy dog handler, it’s important to be comfortable when interacting with both people and your dog. You’ll need to be able to guide your Cavalier through different situations, encouraging them and keeping them safe and happy. Understanding your dog is key to becoming a therapy dog handler. You’ve got to be able to recognize the tiniest changes in behavior and body language, and quickly respond. And at the same time, you will be multitasking by staying engaged with individuals. It’s a balancing act, for sure, especially as you start out your journey as a therapy dog team.
Now, what personality should your Cavalier King Charles Spaniel have in order to make a good therapy dog? When it comes to a well-suited therapy dog, you can look at a few key traits. A good therapy dog should be reliable, predictable, and able to follow your cues with ease. That’s not to say they have to be robots and never get flustered, but as a general rule, you want a dog that is solid in their temperament. Your dog should be friendly with strangers, as your visits will be with strangers. At the same time, they should be poised, not jump on people, and be able to walk nicely on a leash around distractions, including food. It’s not just about loving new people; it’s also about having manners in new and unfamiliar environments.
Getting Started Training Your Cavalier to Become a Visiting Therapy Dog
It’s important that your Cavalier have basic obedience and manners. Walking on a loose leash in crowded places, around dogs, and on slick floors is a must. Leaving food or dropped pills on the ground is incredibly important for your dog’s safety. If your Cavalier knows tricks, that can be a great icebreaker and is also helpful when someone wants to look at your dog but not pet them. Dexter and I were a visiting therapy dog team for many years, and tricks and activities were by far his favorite visits! If your dog needs a refresher, enroll in a positive dog training class.
Subscribe to our @CavalierTipsandFun YouTube channel for more!
Google Ad Below
After your Cavalier has mastered his basic obedience skills in a variety of environments, look for a therapy dog training prep class. This may be a weekend class or one that spans 4–8 weeks. When I taught my therapy dog prep class, each week we covered a new topic to prepare the handlers and dogs for the actual work involved and the test. My students by far enjoyed skit night, where my volunteers and I role-played different scenarios, the teams interacted, and we discussed what was good and how they could improve in that situation. It was a hoot and very eye-opening for the upcoming teams.
When you and your Cavalier are ready to take your therapy dog evaluation, you will need to find an evaluator to assess whether you are ready for therapy work. But there is more than one therapy dog organization out there. Choosing the right organization is crucial. Some facilities have specific requirements, like only accepting teams evaluated by certain organizations. So, if you have your sights set on a specific organization, reach out to them first. If your dog is on a raw food diet or you provide your dog with titers vs. yearly vaccinations, not all therapy dog organizations accept that, but some do.
Speaking of organizations, there are plenty out there, each with its own unique criteria. Some of the most common ones include Alliance of Therapy Dogs, Pet Partners, Love on a Leash, and Therapy Dogs International. Be sure to check out their specific requirements before making your decision.
Subscribe to @DextertheDogandFriends for kid-friendly content!
During the evaluation, the evaluator will test your skills to ensure you’re ready to handle various situations with confidence. Once you’ve got the green light from your evaluator, send in your paperwork and fees. While you are waiting for your official badge, it’s a good time to start reaching out to facilities you’re interested in visiting. It’s best to meet with the director, take a tour, and get a feel for the environment without your dog. When you are ready to visit with your Cavalier, keep those initial visits short and sweet. It’s all about easing them into the new surroundings and ensuring they feel comfortable and confident in their role as a therapy dog.
And remember, if you don’t think therapy work is in the cards for your Cavalier, that’s perfectly fine. There are plenty of other enjoyable activities you and your Cavalier can explore together. But if therapy work is the journey you’ve chosen, then I wish you both the best of luck on this rewarding adventure.
Your comments and questions are always welcome below.
Join our vibrant Cavalier King Charles Spaniel community on Facebook, support our dedication to pet wellness on Patreon, and stay updated with our weekly newsletter for invaluable tips and insights into raising happy, healthy pets. Together, let’s make a difference in our dogs’ lives!
Google Ad Below [...]Read more...
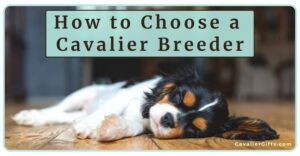
July 10, 2024Choosing a Cavalier King Charles Spaniel Breeder
While I understand the “adopt don’t shop” idea, there are valid reasons to purchase a purebred Cavalier King Charles Spaniel from a responsible Cavalier breeder. I’ve received numerous requests on how to find a good Cavalier King Charles Spaniel puppy breeder, so let’s dive into my personal thoughts and considerations.
Educate Yourself on the Cavalier King Charles Spaniel Breed
First things first, it’s crucial to understand the breed you’re interested in. Cavaliers are charming, affectionate, and beautiful, but they also have specific needs and characteristics. Learning about the typical Cavalier personality and care can help you in deciding if a Cavalier is the right breed for your family.
Dive into the Cavalier King Charles Spaniel Breed Information
The internet has a ton of information about Cavalier King Charles Spaniels. Not all good, so take everything with a grain of salt. I would suggest looking at Cavalier King Charles Spaniel national breed clubs and Cavalier rescues. They tend to have a lot of very helpful information. Spend time reading about Cavaliers to understand their grooming care, behavior traits, size, and medical concerns.
Cavalier King Charles Spaniel Temperament and Personality: Cavaliers are known for their friendly and affectionate nature. They thrive on companionship and are often described as “lap dogs” or “love sponges” because they love to snuggle. But, they aren’t all snuggle bugs, and it’s important to note that they are spaniels, which stem from hunting genes, so they can be very active little dogs. Interestingly, Dexter is now almost fifteen, and, over the years, I have met a lot of Cavalier families who downsized from golden retrievers, I was one of them. I think because they have that same personality of fun and eagerness to be part of the family activities.
When taught properly, they are often good with children and other dogs and adapt well to a variety of living environments. I do say when taught properly, as you can’t assume you can toss any dog into a situation and they will handle it as we had hoped. As a side note, please check out my YouTube channel, Dexter the Dog and Friends, to learn more about raising kids and dogs together.
Dexter’s school assembly!
Cavalier King Charles Spaniel Maintenance and Grooming: Cavaliers require regular grooming due to their silky and long coats. This includes brushing several times a week to prevent mats and tangles. Silky? Well, some Cavaliers have a much thicker coat than others. Take my Dexter, for example. He has very long fur, and it’s silky but also super thick. Daily brushing is even better if you can swing it. It will really help to prevent mats in the first place.
Regular baths are important too. If you are using a truly natural dog shampoo (I use 4-Legger) that does not have any harmful ingredients, you can bathe as needed. When Dexter was a visiting therapy dog, he had to have a scrub-a-dub-dub before his visits, so that was weekly or every two weeks for us. But now, he gets a bath every three to four weeks. Their nails should also be trimmed regularly, and their teeth brushed daily to maintain good dental health.
Grooming Tips. Subscribe to my @RaisingYourPetsNaturally YouTube channel for more.
Trimming Your Cavalier King Charles Spaniel: Talk about a controversy! I am always pro it’s your dog; do what is best for them and you. Dexter has Chiari malformation (more on that below) and because of that, grooming is uncomfortable. Therefore, I have always kept him in a puppy cut. I lighten that thick fur, shorten him up, trim his ears, and keep his slippers short. Slippers, BTW, are the fur around their feet, or Grinch feet. If you want to keep their Grinch feet full, it is important to still trim their foot pads to prevent slipping.
Cavalier King Charles Spaniel Medical Conditions: This is where our beloved breed suffers the most. Cavaliers are prone to several hereditary conditions. It’s essential to be aware of these and ensure your breeder is proactive in health testing because that’s the only way to help our Cavaliers out of their medical mess. Key health concerns include mitral valve disease (MVD), hip dysplasia, Chiari malformation (CM) and syringomyelia (SM), and patellar luxation. Reputable breeders will conduct specific screenings to minimize the risk of these conditions in their puppies.
Understanding Health Testing for Cavaliers
For Cavaliers, it’s crucial that both the breeding dogs and their parents are health tested for hereditary diseases. It’s not just the breeding pair, but the grandparents too! The grandparents have a longer history, testing and health records. A highly regarded breeding Cavalier should be over 2.5 years old, with parents that are MVD heart clear and MRI scanned clear of CM/SM. A reputable breeder will eagerly provide copies of health certificates of each parent and grandparents or links to tests. If not, be sure to ask. If they are hesitant to share, I would be hesitant to move forward.
Mitral Valve Disease (MVD): Every breeding Cavalier King Charles Spaniel should have an annual heart exam by a board-certified veterinary cardiologist. The parents of your prospective puppy should have heart clearances from a cardiologist and be at least 2.5 years old at the time of breeding. All four grandparents should be over the age of 5 and heart clear.
Syringomyelia (SM) and Chiari Malformation (CM): Both parents should have MRI scans showing them clear of CM/SM after reaching 2 years of age. It’s even better if the grandparents have also undergone MRI scans and are clear of CM/SM.
Hips: OFA requires that a Cavalier be a minimum of 2 years old for hips to be certified. It’s recommended for grandparents to have certified hips as well.
Patellas: Testing should be done annually to ensure healthy knees and to prevent luxation in both parents.
Medium-Chain Acyl-CoA Dehydrogenase (MCAD): MCAD is a metabolic disorder that affects how Cavalier King Charles Spaniels process certain fats for energy. It’s caused by a genetic mutation that can lead to metabolic imbalances. DNA testing is essential to identify Cavaliers carrying the mutation and prevent passing it on to their offspring. This is a newer (Summer 2023) DNA test.
Episodic Falling Syndrome (EFS): Is a hereditary neurological disorder affecting Cavaliers. Breeders should ensure all Cavalier breeding dogs undergo DNA testing for EFS before mating.
Dry Eye Curly Coat Syndrome: An inherited disease that affects the eyes, skin, and feet of Cavalier. It can be detected through a DNA test.
Dry Eye: Testing for dry eye in Cavalier King Charles Spaniels involves a DNA health test to identify the presence of the genetic mutation associated with dry eye, curly coat syndrome. Testing ensures early detection and appropriate management of this hereditary condition in breeding dogs.
Don’t forget to subscribe to our @CavalierTipsandFun YouTube channel for more!
The Importance of Puppy Socialization
Puppies develop both physically and mentally right out of the gate, and even during pregnancy! A stressed mom can produce stressed, unhealthy puppies. A responsible breeder not only ensures a Cavalier puppy is medically healthy, but behaviorally as well. Breeders should prioritize the physical and mental well-being of Cavalier puppies by starting basic socialization at home. This includes introducing puppies to children, adults, outdoor environments, handling and grooming, and exposing them to different textures and obstacles.
Finding a Good Cavalier King Charles Spaniel Breeder
Many national breed clubs provide breeder lists, which are a great starting point. Look within a specific mile radius you are willing to drive to meet the breeder and puppies. Breeder websites should have detailed information on health testing and puppy socialization.
When you find a few breeders who look good on paper, contact them via email or phone. Discuss your goals and hopes for your new family member. You are looking for a connection with a breeder just like you are looking for a connection with your puppy.
Visiting the Breeder and Their Cavaliers
I recommend setting up a date and time to meet the breeder in their home and visit with their Cavaliers. Seeing the living situation and behavior of their dogs in person is a great indicator of how the puppies will turn out. Look for happy breeding dogs that are part of the family. Some breeders may be hesitant about home visits, but it’s essential for you to feel comfortable with the environment where your puppy is being raised.
Picking out Dexter! FYI he was 5 weeks here, I would bring him home at 12 weeks.
Choosing Your Cavalier Puppy
This could be an entire article on its own, but here are a few highlights to get you started. TAKE YOUR TIME! This is not a time to make a quick decision or an impulse buy. You are choosing your next family member, a living creature with strong emotions that will hopefully be with you for the next ten to twenty years.
Before meeting the puppies, have an idea about what you want to do with your Cavalier puppy and future dog. Are you looking for a canine athlete? Or maybe a therapy dog to visit children or the elderly? The personality traits of those two puppies can be quite different, so knowing your goals will help in choosing the best Cavalier King Charles Spaniel puppy for you, your family, and your goals.
Bringing Your New Cavalier Puppy Home
Picking up a new Cavalier puppy typically happens when the pup is between 12-15 weeks of age. Prepare your car for your new puppy before arriving at the breeder’s home. Items to have on hand include a travel crate, puppy blankets, healthy treats, water and bowl, and a leash and harness. If your journey includes an overnight stay, pack items for a dog friendly hotel stay.
Air Travel Considerations
I personally would never fly any of my pets in cargo, nor would I have my puppy shipped to me. Meeting the breeder, dogs, and puppies is essential. If you plan on a plane ride home, check with the airlines on what they will need before your departure.
Maintaining Contact with Your Breeder
When breeders are committed to the breed’s well-being, they may ask you to provide specific health tests on your puppy throughout its life. This means the breeder is looking to see how the puppies develop, and if there are any medical concerns over their life, they may not breed that pair again. In my book, this speaks volumes about what a responsible breeder really is.
Now that you have a healthy and behaviorally sound Cavalier puppy, it’s your job to start socialization and training. You and your puppy are ready for a lifetime of fun and joy.
I hope this updated article helps your readers in their quest to find a reputable Cavalier King Charles Spaniel breeder. Good luck at finding your BFF!
Google Ad Below
Join our vibrant Cavalier King Charles Spaniel community on Facebook, support our dedication to pet wellness on Patreon, and stay updated with our weekly newsletter for invaluable tips and insights into raising happy, healthy pets. Together, let’s make a difference in our dogs’ lives!
🐶💙Support our passion for pet wellness and unlock exclusive content, perks and early access by exploring our Patreon tiers.
Sign up for our weekly newsletter!
Join us on Facebook!
[...]Read more...

November 12, 2024Best Treats for a Cavalier King Charles Spaniel
If you’ve found this Cavalier blog by searching for “best treats for Cavalier King Charles Spaniels,” you’re probably wondering what makes a healthy dog treat for this special breed. Whether you’re looking for the best dog-training treats for your Cavalier or just healthy dog treats, it’s essential to choose options that benefit your Cavalier King Charles Spaniel’s health and waistline. Here’s what I consider when picking out healthy treats for Dexter.
Check the Ingredients in Your Cavalier’s Treats
The very first thing I do when choosing treats for Dexter is check the ingredients list. Don’t just rely on the fancy pictures on the front of the bag; the ingredient panel tells you what your Cavalier is actually eating. Even if a treat claims to be “chicken-flavored,” that doesn’t always mean it contains real chicken. Always look for whole, natural ingredients like real meat, vegetables, and fruits.
What to Avoid in Your Cavalier King Charles Spaniel’s Treats
Artificial Flavors: If you see “flavor” in the ingredient list, it’s likely a synthetic that’s meant to mimic real food. Real food ingredients are always better for your Cavalier’s health.
Added Salt: Too much salt can be harmful, especially for dogs with heart issues, like Cavaliers. Stick to treats with no added salt, as too much sodium can lead to health problems.
Preservatives: Treats should be free of artificial preservatives like potassium sorbate, sodium benzoates, BHA and BHT. These chemicals are commonly found in cheaper treats and can be harmful in the long run.
By-Products or Mystery Meat: Avoid any treats that list “meat by-products” or vague “animal fat.” We want to know exactly what’s going into our dog’s body.
Sugar or Sweeteners: Skip the sugary treats! Cavalier King Charles Spaniels can easily gain weight, and too many sugar-filled treats can contribute to obesity, which affects their health.
Grains: Many dogs, including Cavaliers, can be sensitive to corn, wheat, and soy. Grains also pack in a lot of calories. Stick to treats with grain-free ingredients.
Healthy Treats for Cavalier King Charles Spaniels
So, what should you be looking for instead? The best treats for Cavalier King Charles Spaniels are made from whole, natural ingredients. I always opt for treats made with high-quality meats, like rabbit, chicken, beef, or duck, and ingredients that support overall health.
When choosing healthy dog treats, I think about each ingredient and how it affects my dog’s health and diet. I prefer foods that can contribute to Dexter’s overall nutrition, not add-ons. If I think the treat’s ingredients are more like a candy bar, I’ll skip it.
Best Training Treats for Cavaliers
When I’m training Dexter, I want treats that are both nutritious and irresistible. Training treats should be small, easy to chew, and made from single-source protein. Some of my favorites include freeze-dried meat or dehydrated meat. These treats are not only high-value (meaning they’ll grab your Cavalier’s attention), but they’re also healthy and easy to use in training sessions.
I also may grab freeze dried dog food that consists of healthy ingredients and no fillers. They tend to be bite-sized, and I can easily cut down on some of Dexter’s fresh food for the day and replace it with the freeze-dried dog food. No extra calories needed, and he doesn’t lose any of his daily nutritional needs.
Treats for Occasional Snacking
When it’s time for a snack, I’m okay with a treat that’s a bit more substantial, like grain-free biscuits made with sweet potato or pumpkin. These treats are great for occasional use, but they do tend to be higher in calories and more ingredients. I like to keep Dexter’s treats simple and sweet.
My Top Picks for Cavalier King Charles Spaniel Treats
Dehydrated Meat: A simple, natural treat that’s great for training or as an occasional snack. Dehydrating your Cavalier’s meat treats at home is simple and can be done using a dehydrator or your oven. To start, slice the meat (like chicken, beef, or turkey) into thin, even strips, removing any fat. If using a dehydrator, set it to around 160°F and arrange the meat strips on the trays, ensuring they don’t overlap. Dehydrate for 6-12 hours, checking for proper dryness—meat should be firm and break easily. If using an oven, place the meat on a baking rack, set the oven to the lowest possible temperature, and prop the door open slightly to allow moisture to escape. Store a few treats in your Cavalier’s treat jar and the rest in the freezer to stay fresh.
Dehydrated Fruits and Veggies: Dehydrated fruits and vegetables are a great low-calorie treat for Cavalier King Charles Spaniels, providing a crunchy, natural snack without added preservatives or artificial ingredients.
Can Cavaliers have carrots? For me, this is a yes and no. Yes, carrots are perfectly healthy and nutritious for your Cavalier. I know a lot of people recommend feeding large carrots to dogs as a chew, but I do think that may pose a choking risk. You must ensure your Cavalier is safely chewing the carrot and not swallowing big chunks. The same goes for baby carrots. For me, I prefer to feed Dexter carrots as little bits. But, I am definitely a proud helicopter mom. Make sure you read the article on healthy chews for your Cavalier King Charles Spaniel if you are wanting safe-and-natural chews.
Freeze-Dried Healthy Dog Food: Freeze-dried dog food can be an easy swap from their regular diet, making it a convenient and healthy treat option for Cavalier King Charles Spaniels. Plus it’s a great treat for picky eaters.
Freeze-Dried Meat Treats (Single Ingredient): Freeze-dried meat treats are a high-protein, single-ingredient snack for Cavaliers, providing a nutritious option.
Healthy DIY Recipes for Cavaliers. Don’t forget to subscribe to @CavalierTipsandFun for more!
Final Thoughts on Choosing the Best Treat for a Cavalier King Charles Spaniel
When choosing the best treats for your Cavalier King Charles Spaniel, always prioritize natural, healthy ingredients. Look for treats that are high-quality, free of unnecessary fillers, and made with proteins you recognize. And remember, even the healthiest treats should be given in moderation.
What treats does your Cavalier love?
Join our vibrant Cavalier King Charles Spaniel community on Facebook, support our dedication to pet wellness on Patreon, and stay updated with our weekly newsletter for invaluable tips and insights into raising happy, healthy pets. Together, let’s make a difference in our dogs’ lives!
Google Ad Below [...]Read more...
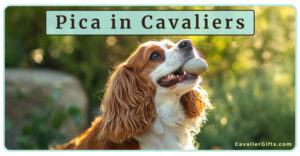
August 20, 2024Why Does My Cavalier King Charles Spaniel Eat Everything?
As a devoted Cavalier King Charles Spaniel family, you may be wondering why your Cavalier seems to eat everything in sight. Leaves, rocks, plants, grass, paper, cardboard, whatever they seem to be able to get their mouth around is fair game. This can be concerning, as it should be. If your Cavalier eats something he shouldn’t, there’s a risk of poisoning or choking. This could be caused by pica, not enough food, other health-related issues, or boredom. Let’s dive in and see if, together, we can figure out why your Cavalier King Charles Spaniel eats non-food items.
What is Pica?
Pica is a condition where dogs eat non-food items. For Cavaliers, this could include chewing on blankets, rocks, dirt or other random items. While it might seem quirky, pica can be a sign of underlying issues. Understanding the root causes can help you address the problem and ensure your Cavalier receives the best care.
The Behavior Behind Pica
Cavaliers, like all dogs, need mental and physical stimulation. Without enough engagement and enrichment, they might resort to chewing on inappropriate items. A 2019 study published in The Journal of Veterinary Medical Science discovered pica is a common behavioral issue. After surveying 2,000 cases, researchers found dogs that lacked regular enrichment, whether due to being crated for too long, being bored, or just not enough physical exercise were more likely to display pica tendencies.
Behavior Issues That Might Be Causing Your Cavalier’s Pica
Boredom and Lack of Stimulation: Cavaliers are playful and intelligent dogs that thrive on activity. If they aren’t entertained, they might turn to chewing on anything they can find. Toys and interactive games are crucial in keeping them busy and satisfied.
Stress and Anxiety: A Cavalier’s anxiety or stress is a major concern when it comes to pica. A change in routine, new family members, or other stressors can cause your Cavalier to engage in pica as a coping response. Providing a safe and secure environment along with calming activities can help reduce anxiety. If you feel your Cavalier has anxiety, it’s important to address that anxiety with a professional.
Attention-Seeking: Sometimes, Cavaliers might eat non-food items to get your attention. I always say, if a dog is asking for attention, they probably aren’t getting the attention they need. Bump up your Cavalier’s training, games, and outings.
Medical Reasons for Pica
While pica can often be a sign of boredom, medical issues can contribute to pica in dogs. This is why it’s always important to speak with your Cavalier’s holistic veterinarian. Here are some common medical issues for pica in dogs.
Nutritional Deficiencies: If your Cavalier’s diet is lacking in essential nutrients, they might chew on non-food items to make up for it. Ensure that their diet is balanced and rich in the nutrients they need.
Gastrointestinal Issues: Sometimes, dogs might eat non-food items to soothe an upset stomach. If your Cavalier seems to be eating odd items frequently, it’s worth checking with your vet to rule out any digestive issues.
Some diagnostic methods your vet might suggest include:
Biopsies: Taking tissue samples from the digestive tract to check for disease.
Therapeutic Trials: Trying a medication or diet change to see if the pica improves.
Blood Work: Checking folate and cobalamin levels, and performing a TLI (Trypsin-Like Immunoreactivity) test to assess pancreatic function.
X-rays: Ruling out gastrointestinal obstructions and other potential causes.
How to Stop Pica in Your Cavalier King Charles Spaniel
The good news is that pica can often be managed with positive training and enrichment techniques. If it’s medical, following your dog’s vet’s protocol will be essential.
Provide Engaging Toys and Enrichment Activities: Offer a variety of toys that challenge your Cavalier’s mind and body, such as puzzle toys, chew toys, and interactive games. Incorporate activities like nose work games, agility courses, or scent trails to provide mental stimulation and prevent them from seeking out inappropriate items. Check out our Cavalier enrichment ideas!
Address Anxiety with a Professional: If anxiety might be contributing to your Cavalier’s pica, consult with a dog behavior consultant. They can help identify the root causes of your dog’s anxiety and develop a tailored plan to address it.
Use Positive Reinforcement: Reward good behavior with praise and treats. When your Cavalier interacts with their toys or engages in positive activities, reinforce this behavior to guide them toward what’s encouraged.
Monitor and Redirect: Keep an eye on your Cavalier’s actions and gently redirect them if they start chewing on non-food items. Providing appropriate toys and praising them when they use them can help steer them away from unwanted behaviors.
Leash Management and OutFox Field Guard: Use a leash to manage your Cavalier and prevent them from accessing non-food items so they can’t sneak off. Consider using an OutFox Field Guard, a type of protective mesh that covers their face that can prevent dogs from eating things they shouldn’t. Unlike a muzzle, which restricts a dog’s ability to open their mouth entirely, a OutFox protects against ingestion while allowing normal breathing and drinking.
Understanding and addressing pica in your Cavalier King Charles Spaniel involves a combination of detective work, positive training, proper enrichment, and, if necessary, medical evaluation. By keeping your Cavalier mentally and physically stimulated, providing a balanced diet, and offering plenty of attention and love, you can help them steer clear of inappropriate chewing and enjoy a happy, healthy life.
Have you noticed any specific triggers for your Cavalier’s pica? Share your experiences and tips in the comments below!
Google Ad Below
Join our vibrant Cavalier King Charles Spaniel community on Facebook, support our dedication to pet wellness on Patreon, and stay updated with our weekly newsletter for invaluable tips and insights into raising happy, healthy pets. Together, let’s make a difference in our dogs’ lives!
🐶💙Support our passion for pet wellness and unlock exclusive content, perks and early access by exploring our Patreon tiers.
Sign up for our weekly newsletter!
Join us on Facebook!
[...]Read more...

March 5, 2025Preparing Your Cavalier King Charles Spaniel for Air Travel
Through Dexter’s 15 years of life, we had countless adventures together, but every single one was by car. At nearly 30 pounds, flying in the cabin wasn’t an option for him, and I would never consider putting a dog in cargo. Now, with Stewart, I have the opportunity to travel by plane since he will be between 16 and 18 pounds as an adult, which is small enough to fit in an airline-approved travel crate under the seat.
I have to admit, I’m a little nervous. It’s been almost 30 years since I last flew, and my experience wasn’t great. But I’m determined to make this a smooth process for both Stewart and myself. In September, we’ll be flying from Detroit to Portland, Maine, and I want to make sure Stewart is as comfortable and confident as possible for his first airplane trip.
Preparing Stewart, My Cavalier King Charles Spaniel for Air Travel
Since Stewart has never flown before, I’m taking a step-by-step approach to help him get used to every part of the travel experience. This isn’t just about the flight itself; it’s about everything leading up to it, from riding in his crate in the car to being in a busy airport environment.
Teaching a Cavalier to Enjoy a Travel Crate
One of the biggest adjustments for a Cavalier is spending time in a small, enclosed space. Since Stewart isn’t crate trained and has some separation anxiety, I’m taking extra care to make his travel crate a safe and positive space. An airline-approved travel crate is a much tighter fit, so here’s how I’ve been getting him used to it:
Introducing the Crate Indoors – I started with short training sessions, luring Stewart into the travel crate with treats and rewarding him for stepping inside. Since it’s a tight fit, I guided him to turn around and reinforced him for doing so. Once he was comfortable moving inside, I worked on having him stay in the crate for a few seconds before rewarding and letting him out, gradually increasing the duration.
Crate Inside a Crate – To help him transition smoothly to riding in the travel crate, I placed it inside his larger crate in the van. Since he was already used to the big crate, this made it feel more familiar. For the first couple of weeks, I left the travel crate unzipped, but zipped up the larger crate.
Zipping Up While Driving – Once he was comfortable, I started zipping up the travel crate while still inside the larger crate. This allowed him to experience confinement in a secure way without making a sudden change.
Removing the Larger Crate – The next step will be taking the travel crate out of the big crate so that he’s riding in just the small one. By gradually adjusting him to this setup, he won’t even notice the change!
Socialization and Confidence Building
Beyond the crate, I want to make sure Stewart is confident in all the different environments he’ll encounter on our trip.
Walking Politely on a Leash – Stewart will need to walk calmly on a leash through the airport. We’ve been practicing polite walking in various places with different surfaces and distractions. I will continue this training with busy locations as we progress through his training.
Exposure to Crowds and Noises – Airports are full of noises; baggage carts, intercom announcements, rolling suitcases. I’m taking Stewart to different places where he can experience a variety of sounds and people in a controlled way.
Getting Used to Security Procedures – At TSA checkpoints, I’ll need to take Stewart out of his crate and carry him through security. To prepare, I’ll work on calmly lifting him out of his crate and holding him in busier environments, helping him get comfortable with the experience before our trip.
Preparing for Time in the Airport
Most airports have designated pet relief areas, but access to them depends on the layout of the airport and TSA procedures. Some airports have relief areas before security, while others have them post-security. Since Stewart will be crated during the drive and throughout check-in and security, I’ll plan ahead to find out if there’s an opportunity for a potty break before we go through security. If not, I’ll make sure he’s had plenty of time to potty before we leave for the airport.
Practicing Extended Crate Time – I’ve been gradually increasing the amount of time Stewart spends zipped up in his crate, so he’s comfortable being inside for longer periods.
Planned Potty Breaks – Since dogs can’t relieve themselves once past security, I’ll make sure to take Stewart to the airport’s designated pet relief area before heading to the gate. This is also why I teach my dogs how to potty on cue; it makes it easier to ensure they go when needed, especially in situations like this where time and access are limited.
The Flight Itself
The actual flight is the final step in our preparation. Since Stewart will be in his crate under the seat for the duration of the flight, I want to make sure he’s as comfortable as possible.
Calm, Positive Associations – I’m making sure that his crate time is always associated with good things; treats, chew items, and a cozy space.
Chews and Enrichment for the Flight –I’ll bring along a few safe chews and likely my slippers to provide comfort for Stewart during the flight.
Staying Calm Myself – Dogs pick up on our emotions, so I’ll be focusing on staying relaxed and making this feel like just another routine adventure for Stewart.
Final Thoughts
Traveling with a Cavalier King Charles Spaniel on a plane takes preparation, but with gradual exposure and a positive approach, it can be a smooth experience. My goal is to make sure Stewart feels safe, confident, and comfortable every step of the way. While I’m still a bit nervous about my first flight in 30 years, I know that by preparing Stewart properly, we’ll both be ready for our adventure to Maine.
A big thank you to all of our Cavalier friends who sent us their travel photos! Don’t forget to follow them on social media.
Have you traveled with your Cavalier on a plane? I’d love to hear about your experiences in the comments!
Google Ad Below [...]Read more...
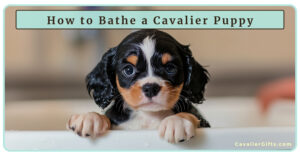
October 30, 2024How to Bathe a Cavalier King Charles Spaniel Puppy
If you are wondering how to bathe a Cavalier King Charles Spaniel puppy at home, I have you covered. As a Cavalier mom and positive dog trainer, I’m ready to help you make bathing your Cavalier puppy not only effective but enjoyable and stress-free for your new Cavalier King Charles Spaniel puppy.
Dexter, who is now fifteen, has had his fair share of dog baths. But, today, I’m going to share how I gave Willow her first bath at home. With the right setup, some tasty treats, taking it slow, and a cozy towel, you can create a zen atmosphere for your Cavalier’s bathtime. So here’s a step-by-step guide to giving your Cavalier King Charles Spaniel puppy their first bath.
Set Up Your Puppy’s Bath Space for Safety and Comfort
First, you want to ensure your puppy’s bathtub or sink is safe and secure. You don’t want your puppy slipping on the surface of a wet tub or sink. First things first-secure the bathtub or sink so your puppy won’t slip. A good rubber mat keeps your Cavalier from slipping, and this alone will help your puppy feel safer in the tub. If your Cavalier is small, like Willow, you can easily bathe them in the sink. But, if they are larger, like Dexter, a tub is a must, or a portable dog bathtub can also work well. I haven’t used one, but I’ve heard from other Cavalier families they are great!
Warm Towel Tip: Before starting your puppy’s bathtime, place a few towels in the dryer. Then, just before you head to the bath, grab the warm towels. Then, after bathtime, your puppy can be wrapped in a warm-and-cozy towel. If you air dry your Cavalier puppy, then add some puppy blankets too, so they can cozy up in the pile of warm blankets.
How to Choose a Puppy Shampoo That is Safe
When choosing a safe puppy shampoo, the first stop is the back of the shampoo bottle to read the entire ingredient panel. Yup, you want to read each ingredient and make sure those ingredients are safe and natural. You may be surprised at the garbage that you find in some puppy shampoos.
Full disclosure, I’ve been working with the 4-Legger brand since 2016 and, in my opinion, they are the best out there. For puppies, I like their hypoallergenic SOOTHE formula. This isn’t a puppy shampoo review, but I do want to share their ingredient panel, so you can get a better idea on what a good puppy shampoo looks like.
4-Legger SOOTHE Ingredients: Organic Aloe Juice, Organic Saponified Oils (Coconut, Shea Butter, Olive, Sunflower, and Jojoba), Organic Vegetable Glycerin, Organic Rosemary Extract Order today with promo code RaiseNaturally20 for 20% off your first order.
Keep Your Cavalier’s Inner Ears Dry
Protecting those little ears is important. You can place a cotton ball gently in each ear to prevent water from sneaking in, but remember to remove them after! Or, you can simply gently press their ear to their head as you use a warm washcloth.
Be Generous with the Tasty Treats or Lick Mats
Treats are key to conditioning your puppy that bathtime is good. Bath=Treats or Bath=Lick Mat Time Giving treats throughout the bath not only keeps it positive but also helps distract them from what is going on. Talk to your Cavalier puppy through the experience. Let your puppy know how much you love them and that this is a safe experience.
If you’re looking for more gentle routines and everyday training ideas like this, my Manners, Life Skills & Foundation Training Course walks you through simple, trust-based lessons you can use at home. It’s all about helping you and your dog feel confident and connected.
Watch Willow’s First Bath and don’t forget to subscribe to @CavalierTipsandFun for more!
Introduce Your Puppy to the Bath Gently
When it’s go-time, place your puppy gently in the sink or tub. Willow was a little unsure at first, so I kept things calm and encouraging. We went slowly, allowing her to get comfortable, and rewarded her bravery with treats. You can always do this in steps over a few days if your puppy is nervous. Teaching your Cavalier puppy to enjoy a bath is going to be so important since this is a breed that can benefit from baths to keep their luxurious coat beautiful. The benefit of puppy bathing is that the process can be much shorter than when your Cavalier has a full coat.
Start the Water Slowly
Once your puppy seems a bit settled, turn on the water. Using a shower sprayer is ideal because it’s easier to manipulate around your Cavalier and get the belly and bum area easier. Always check the temperature; you want it warm, but never hot. If your pup gets nervous, reassure them with gentle touches, talk to them, and provide healthy and tasty treats. We want bathtime to be a good thing, not something to avoid.
Wet Your Puppy and Lather Up
Begin with their back, avoiding their face for now. Once they’re damp, add a little shampoo and lather gently. Go slow and talk to your pup throughout to keep them reassured. Make sure to reach all those little spots like under the belly, armpits, and legs.
When it comes to cleaning your Cavalier’s face, be careful and gentle. Grab a soft washcloth, soak it in warm water, and wring out any excess. Gently wipe around your puppy’s face, especially near the eyes and mouth, to keep things clean without needing shampoo. Cavaliers can be sensitive around their eyes, so keep it soothing and slow, making it a comfortable moment for them. If there’s any tear staining, gently focus on those areas but avoid scrubbing.
Rinse Thoroughly
It’s so important to rinse really well to avoid any leftover shampoo that could irritate their skin. Keep the water warm and gently go over each area until you’re sure they’re squeaky clean.
How to Dry a Cavalier After a Bath
Gently squeeze out as much water as possible from their coat while they’re still in the tub, especially from their ears, legs, and belly. Be careful not to pinch their skin. Then grab a warm towel and start rubbing them down right in the tub. Begin with their back and then work down to their legs, belly, and especially those floppy ears! The towel rubdown helps absorb extra moisture and keeps your puppy from dripping everywhere.
Pro tip: When it looks like your puppy is going to shake their head, try covering their ears lightly with a towel. It can help prevent ear issues and keeps the shake-off water spray to a minimum!
Should You Blow-Dry Your Cavalier King Charles Spaniel Puppy?
For a little more drying, a low heat or cool setting on a blow dryer works great. Keep the dryer moving and avoid getting too close to their skin. And, of course, more treats and sweet talk make this part easier too! I would highly recommend desensitizing your puppy to the hair drier first. You can learn how in the video below. If you are going to allow your Cavalier to air-dry, I would suggest using a dog drying jacket and warm , snuggly blanket.
Learn how to teach your Cavalier to love drying and subscribe to our other YouTube channel @RaisingYourPetsNaturally
And there you have it—bathing your Cavalier King Charles Spaniel puppy at home for the first time! If you’re wondering, when should I bathe my puppy for the first time, or how often should I bathe my puppy, it’s usually safe to start around eight to twelve weeks, assuming you are using a truly safe puppy shampoo. With these tips and a positive approach, you’ll help set up your Cavalier King Charles Spaniel puppy for a lifetime of happy bath times.
What part of your puppy’s first bath are you most nervous about? Let me know in the comments. I’d love to help make it a fun experience for both of you!
Google Ad Below [...]Read more...

October 1, 2024MCAD deficiency in Cavalier King Charles Spaniels
Last year, on my Raising Your Pets Naturally blog, I shared information about a relatively new health condition found in Cavalier King Charles Spaniels: Medium-Chain Acyl-CoA Dehydrogenase (MCAD) deficiency. As many Cavalier families know, this breed is already prone to several health issues, and adding another one to the list is upsetting.
MCAD deficiency is a genetic condition that impacts how the body breaks down certain fats for energy. Recent research has found some Cavaliers who have symptoms such as seizures, lethargy, and other health issues may have MCAD.
The initial study that brought this to the general public’s attention focused on a three-year-old male Cavalier who was experiencing seizures and unusual tiredness. After examining his blood and urine, researchers discovered elevated medium-chain fatty acids, pointing to MCAD deficiency. They then sequenced the dog’s genome and identified a specific change in the ACADM gene, which is associated with this condition.
When the researchers tested this genetic variant in 162 Cavaliers, they found that about 23.5 percent of the dogs carried the mutation. This discovery is important because it suggests that MCAD deficiency might be the reason behind the seizures and other symptoms we sometimes see in Cavaliers.
Here are some symptoms to watch for:
Seizures: Seizures or convulsions can be a key indicator of potential MCAD deficiency.
Lethargy: Unexplained and prolonged tiredness could be a sign of an underlying issue like MCAD deficiency.
Intermittent Health Issues: These episodes might include vomiting, decreased energy, or more severe symptoms like seizures.
Unsteady Gait: Difficulty walking or balance issues could occur during episodes.
Loss of Appetite: A sudden loss of interest in food might indicate a problem.
Low Blood Sugar (Hypoglycemia): This can lead to weakness, shakiness, disorientation, and seizures.
Abnormal Behavior: Changes in behavior, such as irritability or confusion, might be linked to a metabolic disorder.
Respiratory Distress: In severe cases, dogs might experience difficulty breathing during an episode.
Frequent Infections: Some dogs with MCAD deficiency may be more prone to infections.
Neurological Symptoms: Symptoms like circling, head pressing, or lack of coordination could be signs of this condition.
I know, right? A lot of these symptoms are also symptoms of other Cavalier King Charles Spaniel medical issues. While these symptoms can be caused by various factors, it’s important to consider MCAD deficiency, especially if your Cavalier is showing multiple signs.
Consider Getting Your Cavalier Tested for MCAD Deficiency
If you’re concerned about MCAD deficiency and its impact on your Cavalier King Charles Spaniel, getting your dog tested is a straightforward step you can take. The test involves a simple at-home swab, which you can easily order and perform yourself. This can provide valuable insights into whether your Cavalier carries the gene associated with MCAD deficiency.
For those thinking about adding a new Cavalier puppy to their family, it’s encouraging to know that many responsible breeders are proactively testing their breeding pairs and even the grandparents. This testing helps ensure that future puppies are less likely to inherit MCAD deficiency, contributing to healthier generations of Cavaliers.
Testing is a proactive measure that can help you make informed decisions about your dog’s health and well-being. If you’re interested in testing, talk to your veterinarian or reach out to a reputable lab for more information on how to get started.
For Cavaliers at risk of MCAD deficiency, diet plays a crucial role. Since these dogs might struggle to break down medium-chain fatty acids (MCFAs), it’s recommended to be mindful of their diet:
Limit MCTs: Foods high in MCTs, like coconut oil, palm oil, and milk products, including yogurt might need to be limited in dogs with this genetic variant.
Watch High-Fat Diets: A balanced diet, without excessive fats, is key for Cavaliers with potential MCAD deficiency.
Cavaliers that haven’t been tested for MCAD deficiency should avoid foods high in MCTs. Without knowing their genetic status, it’s best to be cautious to prevent potential health issues like seizures or other symptoms associated with the condition. If your Cavalier has had a diet rich in MCTs for a few years without any of the symptoms listed above, you may consider continuing to feed. However, the test is pretty easy and inexpensive, so it might be just easier and safer to test to know for sure.
The research on MCAD deficiency in Cavaliers is ongoing, and it’s vital for more Cavaliers to be tested. A simple swab test can determine whether your Cavalier carries the gene associated with MCAD. This testing is important not just for your Cavalier’s care, but also for responsible breeding practices to reduce the prevalence of this mutation in future generations. If you test, please contact your Cavalier’s breeder with the results.
Testing for MCADD
Canine Genetic Testing
GenSol Animal Diagnostics
Laboklin
As of June, 2024, the latest stats from a Facebook group dedicated to MCAD deficiency in Cavaliers show the following:
Genetically Affected: 49 dogs (9.78%)
Clinically Affected: 6 dogs (1.2%)
Carriers: 238 dogs (47.5%)
Clear: 214 dogs (42.7%)
These numbers highlight the importance of testing and awareness within our Cavalier community. By staying informed and proactive, we can continue to support the health and well-being of our Cavaliers.
Managing MCAD Deficiency: Diet and Care Tips
If your Cavalier King Charles Spaniel has been diagnosed with MCAD deficiency, managing their condition effectively involves careful attention to their diet and feeding schedule. I would suggest a good heart to heart with your dog’s holistic veterinarian. If your Cavalier does have MCAD deficiency you will need to avoid a high-fat diet and avoid foods high in medium-chain triglycerides (MCTs). Don’t forget to read those ingredient panels on all the foods, treats, and chews you feed your Cavalier.
Although MCAD deficiency is serious in Cavaliers, a good food protocol can help ensure your Cavalier still leads a full and enriched life.
Google Ad Below [...]Read more...

September 18, 2024How to Celebrate a Senior Dog’s Birthday and Healthy Dog Cake Recipe
It’s hard to believe that Dexter, my best friend and constant companion, is turning fifteen! I’m over the moon that I am able to celebrate this milestone with him. He may be slowing down a bit, but his spirit and spunk remains as bright as ever. As Dexter has aged, we may have tweaked what we can do, but one thing has stayed the same: we live each day to the fullest, cherishing every moment.
Over the past couple of years, I’ve seen subtle changes in Dexter’s energy and behavior. He doesn’t have the boundless energy of his younger days, and he’s been going through some senior dog anxiety. We’ve learned to adjust our activities together, and I’ve been working on helping him feel more secure as his cognition changes. Our daily enrichment now includes slow, sniffy walks, leisurely poke arounds through the neighborhood followed by a stroll, and indoor adventures. He still enjoys simple training sessions, which keep his mind sharp, and I continue his canine fitness exercises to maintain his mobility and strength.
Earlier this year, Dexter went down in his back end after a reaction to medication. It was a scary time, and I wasn’t sure what his recovery would look like. I was actually wondering if his time was coming to an end. But after three to four months of dedicated rehab, I’m thrilled to share that he’s made a full recovery! Dexter’s resilience has always inspired me, and this experience only deepened my love for him. His ability to bounce back, even at fourteen, is a testament to his incredible spirit.
With Dexter by my side, I’ve been inspired to dive into new creative projects. Over the past year, we launched this blog dedicated to Cavalier King Charles Spaniels. This is actually our second blog! Check out our first blog, Raising Your Pets Naturally. I’ve also created a children’s coloring book, Dexter’s Adventures, bringing his playful and inspiring spirit to life for a younger audience. Which makes this his 3rd children’s book! Everything I do is shaped by Dexter, and I’m so lucky for the joy and inspiration he brings.
Our mantra has always been to live each day to the fullest, and as Dexter turns fifteen, this really hits home. Every day is a gift, and I’m beyond thrilled to have Dexter with me on this journey. Together, we continue to embrace life, even as we both slow down, finding joy in the simple moments we share.
Celebrating Dexter’s birthday is more than just a tradition, it’s a reminder of the love, laughter, and resilience we’ve shared throughout his life. During Dexter’s birthday celebrations, we always make sure to support Cavalier Rescue USA, a cause that’s close to our hearts. If you’re able to donate or volunteer your time, please consider checking them out, and be sure to tell them Dexter sent you!
Here’s to Dexter, my silly monkey, stink pot, my muse, and the one who makes every day brighter with his love.
Don’t forget to subscribe to our @CavalierTipsandFun YouTube channel for more!
Print
Pin
Dog-Friendly Strawberry Birthday Cake
Here's Dexter's 15th birthday cake recipe and photos! To make his special day even more memorable, I whipped up a dog-friendly birthday cake that’s not only tasty but also healthy. This homemade dog birthday cake is packed with ingredients Dexter loves. Whether you're planning a dog birthday celebration or looking for a healthy dog birthday cake recipe, this one is sure to be a hit with your pup.
Course cake Keyword dog friendly cake, dog birthday cake,
Prep Time 1 day day Cook Time 50 minutes minutes
Servings 12 Dogs
Author Tonya Wilhelm
IngredientsOptional Blue Spirulina Gummy Paw Print Decoration6 tbsp Beef Gelatin2 tsp Blue Spirulina2 cups Boiling WaterStrawberry Dog Friendly Cake4 cups Quinoa Flour6 Eggs16 oz Strawberries Stems Removed1/4 cup Olive OilOptional Dog Frosting8 oz Cream Cheese check the ingredients to ensure it’s dog-friendly10 oz Butternut Squash Cooked
InstructionsBlue Spirulina Gummy Paw Print DecorationIn a large mixing cup, combine the gelatin and blue spirulina.Quickly stir in the boiling water until fully dissolved.Pour the mixture into the paw print cutouts in the paw-shaped cake pan. Pour any extra in other fun silicone molds.Refrigerate until set then gently remove the paw gelatin shapes.Place the paw shapes on a cookie sheet and return to the refrigerator while preparing the cake.Dog-Friendly Strawberry CakePreheat the oven to 350°F.Purée the strawberries in a blender until smooth.In a large mixing bowl, combine the quinoa flour, eggs, olive oil, and strawberry purée.Generously grease the paw print cake pan with olive oil.Pour the cake batter into the pan and bake for approximately 50 minutes, or until set.Allow the cake to cool for 15 minutes, then carefully remove it from the pan and place it on a cooling rack to cool completely.Optional Dog FrostingPurée the cooked butternut squash in a blender.Add the cream cheese to the purée and blend until smooth and well combined.Once the cake is completely cool, frost the cake with the butternut squash and cream cheese mixture.Top with the blue spirulina gummy paw print decorations for a fun and colorful touch!
Join our vibrant Cavalier King Charles Spaniel community on Facebook, support our dedication to pet wellness on Patreon, and stay updated with our weekly newsletter for invaluable tips and insights into raising happy, healthy pets. Together, let’s make a difference in our dogs’ lives!
Google Ad Below [...]Read more...
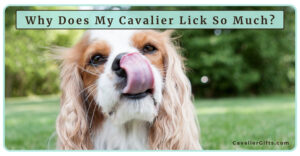
January 8, 2025How to Stop Your Cavalier King Charles Spaniel From Licking Everything
Have you ever wondered why your Cavalier King Charles Spaniel licks you or how to curb excessive licking? If so, you’re not alone. Many Cavalier parents find themselves trying to stop their Cavalier from licking so much. Let’s take a closer look at why Cavaliers lick and what you can do if it becomes too much. Cavaliers lick for various reasons, and understanding the “why” is key to changing and managing the behavior.
Cavaliers May Lick You Because You Taste Great!
One common reason is that you simply taste good. Your Cavalier might be drawn to the salt on your skin, or maybe you’ve just eaten, and they’re picking up on lingering food scents. Even coming inside after an active day outdoors can make you extra appealing to their sensitive noses. Hormones and pheromones also play a role. For example, if you’re feeling stressed or it’s that time of the month, your Cavalier might be more inclined to lick because they’re sensing these subtle changes. Not to mention when we put hand lotion on, oh, yummy!
Cavaliers Lick During Greeting Behaviors
Another reason dogs lick is as part of their greeting ritual. When you come home, they’re excited to see you and may lick as a way of saying, “Hello! I’m so happy you’re here!” It’s a natural expression of affection and enthusiasm. This behavior is especially common in Cavalier King Charles Spaniels, a breed known for their loving and people-oriented nature. Cavaliers thrive on connection and love being close to their families, so licking during greetings is often their way of reinforcing that bond.
Greeting-related licking can also be a way for your dog to gather information about where you’ve been. Dogs rely heavily on their sense of smell and taste to explore their environment, and licking is part of how they “read” the world. If you’ve been around other dogs, eaten something particularly tasty, or even just had a long day out, your Cavalier’s greeting might include licking to learn more about your adventures.
Check out the video. Don’t forget to subscribe to our @RaisingYourPetsNaturally YouTube channel.
Your Cavalier May Be Licking Because He’s Stressed
However, not all licking is tied to happy moments. Sometimes, licking can indicate stress or anxiety. This type of licking is known as a submissive or appeasement gesture. Essentially, your dog is trying to communicate that they mean no harm. You might notice this behavior around guests or strangers, where your dog licks excessively as a way to navigate the interaction. In some cases, they may even start licking their paws or nearby objects if they’re feeling particularly anxious.
How To Stop Your Cavalier King Charles Spaniel From Licking So Much
If your Cavalier’s licking becomes excessive, there are steps you can take to manage it. For instance, if your dog is licking because you taste good or they’re excited to see you, allow a quick lick and then gently redirect them. You can offer a chew toy or a bone to give them something else to focus on. This simple redirection helps channel their energy into a more appropriate activity while still acknowledging their excitement.
When licking is tied to stress, it’s especially important to avoid punishing your Cavalier. Punishment can actually make the behavior worse, as your dog may lick even more in an attempt to appease you. Instead, remain calm and redirect their attention to another behavior, such as sitting or playing with a toy. Addressing the root cause of your Cavalier’s stress and anxiety is key. Building their confidence through positive dog training can make a big difference. As your dog becomes more comfortable in stressful situations, the need for licking as a coping mechanism will naturally decrease.
In some cases, excessive licking may require professional help. If your dog’s licking seems compulsive or tied to high levels of stress, start by consulting your holistic veterinarian. They can check for any medical issues and look at your dog’s behavior history. From there, a dog behavior specialist can help you create a customized dog behavior modification plan to address your Cavalier’s needs, making life easier and more enjoyable for everyone.
If your Cavalier King Charles Spaniel’s licking is becoming a challenge, know that you’re not alone, and there are positive steps you can take to address it. With a little patience and the right approach, you can better understand why your Cavalier licks and guide them toward healthier ways of expressing themselves. If you’re feeling stuck or need personalized guidance, I offer one-on-one phone and Skype sessions to help you and your Cavalier navigate challenges like excessive licking. Together, we can create a plan that works for your unique pup and helps strengthen your bond.
Do you have a licker on your hands?
Google Ad Below [...]Read more...
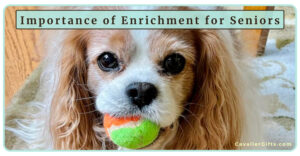
September 3, 2024The Importance of Enrichment for Senior Cavalier King Charles Spaniels
Oh, Dexter. My senior Cavalier King Charles Spaniel, will be fifteen on October 6, 2024! I’m over the moon happy that he has led a long, happy life. He was diagnosed with Chiari malformation and syringomyelia in 2012, and I didn’t think he would have a very long life. Eventually, his MVD diagnosis also rolled in. But, despite his medical conditions, he has been thriving. He’s not just alive, he’s kicking!
I’m not going to lie. He started showing his age and some cognitive decline a few years ago. I have written about his life on my first blog, Raising Your Pets Naturally, so make sure you head over there for even more about Dexter’s life and care. But today, I wanted to discuss some of the things I have done to help keep Dexter as sharp as possible and try to keep canine cognitive dysfunction syndrome (CCDS) at bay. Through my experiences and research, I’ve seen how diet, positive training, and environmental enrichment can make a significant difference in maintaining his quality of life. So, let’s jump in.
What is Canine Cognitive Dysfunction Syndrome
Canine cognitive dysfunction syndrome (CCDS), is similar to dementia in humans and affects many senior dogs. Symptoms can be different from dog to dog, but some common behaviors include: disorientation, disrupted sleep patterns, decreased activity levels, and changed interactions with their environment and people. Research, including a study from the Journal of Veterinary Behavior (2016), shows that cognitive decline in dogs can significantly impact their quality of life. But early intervention and supportive care can improve CCDS symptoms and a dog’s quality of life.
The Importance of Canine Enrichment for Senior Cavaliers
Environmental enrichment is important for helping senior Cavaliers with canine cognitive dysfunction syndrome. Canine enrichment is about engaging your Cavalier’s senses, engaging their minds, and keeping them moving. I always think about “living life to the fullest.” I mean, we brought our Cavaliers into our homes so we can enjoy them and do fun things with them. Although they are beautiful, they deserve more than just a life where they lie around all day and do nothing. Just because they are seniors, doesn’t mean this mentality should change, although their activities will need to be adjusted to meet their individual needs. And it’s not just me; there’s research that backs up this theory.
Mental Stimulation: According to a study published in the Journal of Veterinary Internal Medicine (2016), mental stimulation through enrichment activities helps slow cognitive decline in senior dogs. Puzzle toys, interactive games, and scent-based activities keep the brain engaged, potentially delaying the progression of CCDS symptoms.
Reduces Stress: Canine enrichment is a great way to help reduce anxiety and stress in senior Cavaliers dealing with cognitive decline. Engaging activities and sensory stimulation can make a big difference. By adding enrichment routines to their day, you’re helping your dog feel calmer and more secure, which can ease some of the stress and anxiety that often come with cognitive issues.
Behavioral Improvement: Enrichment activities can make a big difference for senior Cavalier King Charles Spaniels who are restless or pacing. By offering mental and physical stimulation, these activities help reduce repetitive behaviors and keep your dog more relaxed.
Enhanced Quality of Life: Enrichment isn’t just about keeping your Cavalier busy. It’s about improving their overall quality of life. Engaging in enjoyable and stimulating activities brings more enjoyment, engagement, and a sense of purpose to their days, making their lives more fulfilling.
Simple Enrichment Ideas to Boost Your Senior Dog’s Quality of Life
Enrichment doesn’t have to be complicated or time-consuming. It’s all about finding simple, enjoyable activities that stimulate your senior Cavalier’s mind and body. Here are some ideas to get you started. And don’t forget to check out our article on Cavalier Enrichment Ideas.
Interactive Toys: Toys that dispense treats or require problem-solving are fantastic for mental stimulation. Depending on your Cavalier, you can use treat-dispensing toys or lick mats. When Dexter was younger, treat dispensing toys and frozen Tux toys were a hit. Now, he enjoys lick mats and snuffle mats. Food toys engage your dog’s sense of smell and taste.
Scent Games: Speaking of scent games, Dexter has always loved using his nose. Try hiding treats around the house or yard and let your Cavalier find them using his nose. Scent games are a natural way to keep your Cavalier active and provide both mental and physical exercise in a way most dogs love.
Positive Dog Training Sessions: Short, positive dog training sessions with simple cues or tricks are highly rewarding. They keep your Cavalier’s brain sharp and help build a stronger bond through shared activities.
Varied Walks or Strolls: Don’t get into a rut of going on the same walk, to the same park, on the same trail. Changing up your walking routes introduces new sights and smells. This variety provides your Cavalier with cognitive stimulation and keeps your walks fresh and interesting.
Comfortable Environment: Make sure your senior Cavalier’s living space is safe and cozy. Look out for any obstacles, and ensure good footing below. Whether you have carpet, carpet runners, grippy socks, ToeGrips or all of the above, traction is incredibly important for senior Cavaliers. They don’t have the same core strength to hold themselves up, and slick floors can be very scary and even cause injury if they slip or splay out.
Canine Fitness and Strength Building: I highly recommend setting up some sessions with a canine rehabilitation professional. Working with Dr. Sam, Dexter’s strength has been so important in his overall health and wellness. And our at home exercises aren’t just a way to keep him fit. They are also another form of enrichment, since he loves doing them! Engage in simple at-home exercises like sit-to-stand and sit-to-down exercises to help maintain your Cavalier’s muscle strength and joint mobility. Gentle range-of-motion exercises can also support your senior dog’s overall physical health and comfort.
Supporting Cognitive Health with Diet and Nutrition
Diet plays a crucial role in managing cognitive decline in senior dogs. According to research published in the Journal of Veterinary Internal Medicine (2019), a diet rich in specific vitamins and nutrients can significantly support cognitive health. Key vitamins such as vitamin E and vitamin C act as antioxidants, protecting brain cells from oxidative stress and easing cognitive issues. B vitamins, including B6, B12, and folic acid, are essential for maintaining healthy brain function. Omega-3 fatty acids, commonly found in fish and fish oil supplements, also play a vital role in improving cognitive function and managing symptoms of cognitive decline. Including these vitamins and nutrients in your dog’s diet, either through high-quality dog food (preferably fresh) or supplements, can help manage cognitive decline and enhance their overall quality of life.
Dexter, is proof of the benefits of a fresh diet. His meals are carefully prepared with high-quality, fresh ingredients and free from unnecessary chemicals. I’m convinced this fresh, balanced diet, rich in essential nutrients, has played a significant role in keeping his mind sharp and supporting his overall well-being.
How Positive Training Supports Cognitive Health in Senior Cavaliers
Positive training and routine play a vital role in supporting a senior dog’s mental sharpness and managing the effects of cognitive decline. As a positive dog trainer, I’ve taught Dexter plenty of fun and useful tricks, not just for good behavior, but also to keep his mind engaged and sharp. Each training session isn’t just about obedience; it’s about giving Dexter the mental stimulation he needs to stay mentally fit as he ages.
Incorporating regular training sessions into your dog’s routine is a great way to improve their cognition and their body. Focus on simple tricks and behaviors that challenge their mind and body without causing stress. I have noticed Dexter’s abilities change over the years, so it is important to change with them. By tailoring positive dog training sessions to your Cavalier’s needs and incorporating enjoyable activities into their day, you can help your Cavalier maintain their mental clarity and overall well-being.
Follow our YouTube channel for more Cavalier enrichment ideas!
Final Thoughts
Incorporating canine enrichment into Dexter’s daily routine has been essential for maintaining his quality of life. It’s not just about keeping him busy; it’s about enhancing his mental, emotional, and physical well-being. Enrichment is just one piece of the puzzle for Dexter’s health. A fresh, balanced diet and consistent, positive training are also vital for supporting his well-being as a senior dog.
Dexter’s vibrant health is a testament to how a combination of mental stimulation, nutritious food, and engaging routines can make a real difference. I encourage all Cavalier families to integrate these practices into their senior dogs’ lives. By focusing on enrichment, diet, and training, you can significantly improve your dog’s overall well-being and help them enjoy their golden years to the fullest.
I host a private Facebook group for Cavalier King Charles Spaniels, and we have a big focus on canine enrichment ideas and challenges to keep your Cavalier engaged and thriving!
How do you incorporate enrichment, diet, or training into your senior dog’s routine? Share your tips and experiences below!
Enrichment Increases Relaxation
https://www.ncbi.nlm.nih.gov/pmc/articles/PMC8772568/
https://www.sciencedirect.com/science/article/pii/S0168159123002691
Join our vibrant Cavalier King Charles Spaniel community on Facebook, support our dedication to pet wellness on Patreon, and stay updated with our weekly newsletter for invaluable tips and insights into raising happy, healthy pets. Together, let’s make a difference in our dogs’ lives!
Google Ad Below [...]Read more...
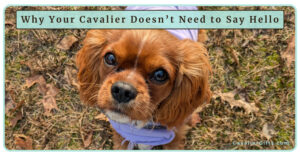
February 5, 2025How to Teach Cavalier King Charles Spaniel to Ignore Distractions
When I’m out with Stewart, my 7-month-old Cavalier, we get stopped a lot. People see his big, sweet eyes, his cute winter coat and wiggly little body and immediately want to say hello. And if this goes for people with or without their dog.
But here’s the thing, not every outing is a social event, and not every person or dog needs to be greeted.
Dog Socializing vs. Everyday Walks
There’s a time and place for socializing, and there’s a time for simply spending quality time with Stewart on our walks and outings. I make sure Stewart has appropriate and positive, structured experiences meeting new people and dogs in a controlled way. This helps him learn confidence, good manners, and appropriate greetings. But, at the same time, I’m teaching him an equally important skill, ignoring distractions such as people and dogs and walking politely with me.
If every walk turns into a meet-and-greet, dogs start to expect it. They pull toward every person or dog, they get frustrated when they don’t get to say hello. That can lead to barking, lunging, or general overexcitement, making walks stressful instead of enjoyable.
Why It’s Important to Teach Your Dog to Ignore Other Dogs and People
Not Every Dog Wants to Say Hello
Some dogs are nervous, in training, or simply not interested. Teaching Stewart to walk past other dogs calmly means he won’t invade another dog’s space or make an already anxious dog uncomfortable.
People Aren’t Always Dog People
Shocking, I know! But not everyone wants a happy little Cavalier bouncing up to them. Some people are afraid of dogs, allergic, or just in a hurry. Stewart is learning to walk past without expecting attention makes life easier for everyone.
Impulse Control is a Life Skill
Dogs who can stay focused, even when exciting things are happening around them, are safer and more enjoyable to live with. If Stewart learns that he doesn’t always get what he wants the moment he wants it, he’ll be better at handling frustration in other areas of life too.
Not Every Walk is About Socializing
Sometimes, I just want to enjoy a peaceful walk with Stewart. He doesn’t need to greet everyone to have a fulfilling experience, sometimes sniffing, walking together, and taking in the world is enough.
Better Walks in Busy Places
By teaching Stewart to walk with me instead of focusing on every dog or person, our walks are smoother and more enjoyable. Crowded sidewalks, busy parks, or narrow trails are much easier to navigate when he stays by my side rather than pulling toward distractions.
Prepping for Travel & Public Outings
I plan on traveling with Stewart, airports, dog-friendly boats, outdoor dining, places where he’ll need to stay close and focused on me. Teaching him now that he doesn’t always get to greet everyone will make these experiences stress-free and enjoyable for both of us.
Don’t forget to subscribe to @CavalierTipsandFun for more videos!
How I’m Teaching Stewart to Walk Past Distractions
Reward Calm Choices
When Stewart notices a dog or person, I reward him. I’m teaching him they=treats. Eventually, he will start to make that connection, see the distraction and look at me for the reward. This is what I’m going for. Over time, he’ll learn that staying focused on me, and it’ll be a non-event for him, he’ll simply walk past without even thinking about stopping to greet.
Use Distance
If Stewart’s too excited or distracted, I create more space between us and the distraction to help him refocus. As he gets better at ignoring, I’ll gradually close that gap, making it easier for him to pass by calmly.
Give Him a Job
I use cues like his name game, watch me, paws up, touch to keep his attention. Engaging his brain with productive tasks means he’s less likely to pull toward distractions.
Set Clear Expectations
I make sure Stewart knows that pulling towards people or dogs does not work. If he starts to pull, I either toss in his name game, stop and wait for him to renege, or add more distance. It truly depends on the situation. I do want him to be successful.
Handling Approaching People
When someone is steadily approaching your Cavalier, how you handle it depends on your goal at that moment. As a positive dog trainer, sometimes I want to explain and educate. If so, then I’ll squat down with Stewart, reward him for staying focused on me, and let the person know we’re training and practicing ignoring distractions. If I choose to say hello, I tell Stewart, “Let’s say hi,” and calmly approach. But sometimes, I just want to keep moving, so I give a quick, upbeat “We’re not saying hello, thank you!” and continue walking, keeping Stewart focused on me. It’s all about setting the tone for the interaction while making sure my dog stays engaged and confident.
Finding the Balance
There’s a time and place for socializing, and there’s also a time to focus on the walk itself. If you do want to stop and say hi, try to stop about 10 feet away from the other person or dog and ask first if it’s okay. Keep in mind that others might be training their dogs or dealing with their own challenges during the walk, so giving them some space is always a good idea. Being considerate makes the experience better for everyone, whether it’s a quick greeting or just calmly walking by each other. I then give Stewart the cue, “Let’s say hi,” so he knows he has permission to greet.
There’s nothing wrong with letting your dog greet others when it’s appropriate, but it’s just as important for them to learn that not every outing is a social event. Teaching Stewart when it’s time to engage and when it’s time to focus on me makes him a better walker and ensures our walks stay enjoyable.
When you’re walking your Cavalier King Charles Spaniel, how do you decide when it’s time to socialize and when it’s time to focus on the walk?
Google Ad Below [...]Read more...
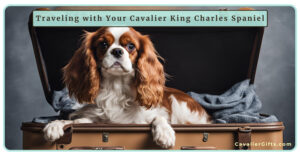
April 21, 2024Tips for traveling with your Cavalier King Charles Spaniel. Dog-friendly vacation ideas.
Follow @CavalierTipsandFun for more videos.
Don’t forget to subscribe to @RaisingYourPetsNaturally for more!
Your comments and questions are always welcome below.
Join our vibrant Cavalier King Charles Spaniel community on Facebook, support our dedication to pet wellness on Patreon, and stay updated with our weekly newsletter for invaluable tips and insights into raising happy, healthy pets. Together, let’s make a difference in our dogs’ lives!
[...]Read more...
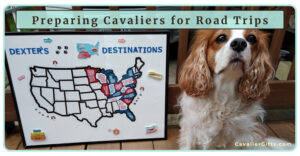
October 15, 2024Cavalier King Charles Spaniel Travel Tips
As a Cavalier mom and positive dog trainer, I know how important it is to help our Cavaliers feel comfortable and safe during car rides. Whether you’re planning a quick trip to the park or a longer dog-friendly road trip, making sure your Cavalier King Charles Spaniel enjoys the car ride is key to a stress-free trip for both you and your dog.
When Dexter and I hit the road, I never have to worry about how he’ll handle the ride. He’s a fantastic travel companion because I spent time training him to feel confident and at ease in the car. Today, I want to share my top tips on how you can prepare your Cavalier for car travel and road trips and turn them into a relaxed, happy traveler too.
1. Start with Short and Positive Rides
Just like with any new experience, easing your Cavalier into car rides instead of popping them into the car for a twelve-hour road trip is super important. Begin by taking short trips to fun, dog-friendly places like the local park or pet store. Keep the first few rides short and sweet, no more than ten-to-fifteen minutes. The goal is to associate the car with positive and fun destinations. A trip to the vet does not count as a fun visit for most dogs.
2. Create a Safe Space in the Car
Safety should always be a priority when traveling with your Cavalier. A secure dog car seat or crash-tested harness designed for small breeds like Cavaliers is a must. I personally recommend looking into the Center for Pet Safety’s approved products, as they conduct independent crash testing for dog travel gear. If a brand states they are crash tested, make sure to watch their crash tested video.
Dexter typically travels in a small crate. Because of his Chiari Malformation and syringomyelia and large size, travel harnesses aren’t the most comfortable for him. However, when we travel in the small car, a crash-tested and passed (yes, make sure they have passed the test) is our go-to. The key is to find a comfortable yet safe setup so your Cavalier feels relaxed without compromising their security.
3. Pack Familiar Comfort Items
Make your Cavalier feel more at home by packing some familiar items for the ride. When Dexter was a puppy, he would cozy up with his baby blanket and soft toy. Now, he has a therapeutic mat inside his crate. He likes to stay cool, so I also have a fan pointing at him. These little comforts can help reduce anxiety and make the ride smoother for dogs who may initially feel unsure about the car.
If your Cavalier is a bit anxious, place something with your scent, like a worn T-shirt next to your Cavalier. Your presence, even in the form of scent, can be calming for your Cavalier, especially if they’re a bit nervous during the first few rides.
4. Plan for Frequent Breaks
When traveling for more than an hour, make sure to schedule frequent potty and stretch breaks. Cavaliers are active little dogs, and, like all of us, they need to stretch their legs and take in their surroundings. I like to plan stops at dog-friendly rest areas or parks where Dexter can explore, do his business, and get a little energy out before continuing the journey.
Remember, each break is an opportunity for positive training. Use it as a chance to reward your dog for good behavior during the ride, and they’ll look forward to the next part of the trip.
5. Help Your Cavalier Relax with Calming Music
One of my favorite dog travel hacks is playing calming music designed for dogs during long car rides. I’ve been a fan of the iCalmDog portable speaker, which plays clinically-tested music that helps keep dogs calm and relaxed. Just be careful not to fall asleep at the wheel yourself!
Check out our all Cavalier calming playlist on YouTube!
6. Monitor Your Cavalier’s Well-Being
Keep an eye on your Cavalier’s behavior throughout the trip. Some Cavaliers may experience motion sickness, especially on longer rides. If your dog starts to drool excessively, whine, or seem uncomfortable, it might be time for a break. You can try natural remedies like ginger treats (with your vet’s approval) or consult your vet for other options.
If your Cavalier seems overly tired or stressed, don’t be afraid to cut the trip short. The goal is for travel to be a positive experience, and pushing them too far can have the opposite effect.
By starting with short, positive experiences and keeping their safety and comfort in mind, you can help your Cavalier King Charles Spaniel become a happy traveler. Dexter loves our road trips, and I’m sure your Cavalier will too!
Do you have any favorite travel tips for Cavaliers? Drop them in the comments!
Follow us on YouTube For fun dog-friendly travel adventures!
Google Ad Below [...]Read more...

December 25, 2024Winter Tips for a Cavalier King Charles Spaniel
Brrrr, it’s cold out there! Winter in Ohio can be tough, and today, it’s a chilly 15 degrees. Thankfully, Stewart and I are bundled up inside, but it’s the perfect time to share some essential winter safety tips for your Cavalier King Charles Spaniel. Whether you’re venturing outdoors or staying warm indoors, these precautions and activities will help keep your pup safe, healthy, and happy all winter long.
Safety First: Protecting Your Cavalier in Winter
Limit Outdoor Time
Our Cavaliers are family members, and they thrive indoors with us. While Stewart loves his outdoor potty breaks and a quick sniff around the yard, I always limit his time outside when temperatures dip. Frostbite and hypothermia are real risks for dogs, especially small breeds like Cavaliers. Keep outings short, and always monitor your pup for signs of discomfort.
Protect Those Paws
A dog’s paw pads aren’t built to handle extreme cold or icy surfaces. For quick potty breaks, toddler socks can be a lifesaver; they’re easy to put on and don’t need to be perfect since they’re just for a short trip. Shoot for dark colors, so that if one falls off, it’s easier to find in the snow. For longer walks or outdoor play, dog boots like Saltsox are fantastic options. If your Cavalier goes outside barefoot, be sure to clean their paws thoroughly with a warm washcloth or natural pet wipes to remove ice, salt, and chemicals that could irritate their skin. I make up a bowl of water with a splash of 4-Legger shampoo and a washcloth to clean paws. I make a new batch each day. (Order 4-Legger today with promo code RaiseNaturally20 for 20% off your first order.)
Scoop the Potty Area
I always scoop a clean, clear area in the yard for potty breaks. Cavaliers, like most dogs, prefer a neat spot for their business. A wide, shoveled path ensures your Cavalier can move around comfortably without getting buried in snow.
Coats and Sweaters for Your Cavalier
Dog coats and sweaters are a must for Cavaliers. Look for a jacket that provides full range of motion and covers your pup’s back and belly. Indoors, a cozy sweater can keep your Cavalier comfortable. If you notice your Cavalier sleeping in a tight ball, or even shivering, a dog sweater is a great idea. Stewart’s favorite sweaters are custom-made by MeekByDesign, but there are plenty of great options online or in pet stores.
Should a Cavalier Wear a Hat in the Winter?
Cavaliers’ long, luxurious ears attract snow and ice like a magnet! A lightweight dog hat or snood can protect your Cavalier’s ears during snowy adventures. Afterward, be sure to dry their ears gently with a soft towel.
Staying Warm and Cozy Indoors
When your Cavalier comes inside from the snow or cold, use a super-absorbent microfiber towel to dry him off thoroughly. For an extra touch of luxury, I like to pop a favorite blanket in the dryer so my dog can snuggle up with something warm. These little comforts make a big difference on chilly days!
Indoors, I keep Stewart active and engaged with puzzle toys, hide-and-seek games, and short training sessions. A mentally stimulated pup is a happy pup, even when it’s too cold for a long walk.
Winter Nutrition for Cavaliers
Did you know that certain foods can help your Cavalier King Charles Spaniel stay warm during the chilly months? According to Traditional Chinese Medicine (TCM), foods have energetic properties that can influence the body’s temperature and overall balance.
In the winter, it’s beneficial to incorporate “warming” proteins into your dog’s diet. Proteins like chicken, lamb, venison, and even goat are considered warming and can help offset the cold temperatures. These proteins are especially good for dogs who seem more sensitive to the cold or have lower energy during the winter.
You can also include warming spices and herbs like ginger or turmeric in small, dog-safe amounts to add a cozy touch to their meals. These not only are warming, but also support joint health during cold weather.
If you’re new to adjusting your dog’s diet seasonally, start slow by adding one or two warming ingredients to their current meals. Always consult with your vet or a canine nutrition expert to ensure your Cavalier’s diet remains balanced and meets their individual needs.
Embrace the Season
Stewart may be new to my home, but we’re already making the most of winter together. From brisk walks in his cozy new jacket to snuggling under a warm blanket on chilly evenings, these little moments remind me of the special bond we share. No matter the season, Cavaliers have a way of bringing warmth and joy to our lives.
How do you keep your Cavalier comfortable and happy during the winter months? Share your tips below, I’d love to hear them!
Google Ad Below [...]Read more...
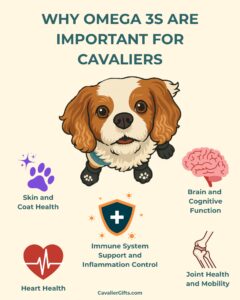
March 30, 2025Health Benefits of Omega-3s for Cavaliers
Omega-3 fatty acids are one of the most important nutrients for Cavaliers, yet they’re often overlooked or misunderstood. These essential fats support heart health, brain function, joint mobility, skin condition, and even immune function. But not all omega-3 sources are created equal. Fresh fish, supplements, and plant-based options vary in effectiveness, and factors like oxidation and sourcing impact their quality. In this guide, I’ll break down the best omega-3 sources, how to choose high-quality options, and what to avoid to ensure your Cavalier King Charles Spaniel gets the maximum health benefits from their Omega-3s.
Skin and Coat Health
Omega-3s help maintain a healthy skin, reducing dryness, flakiness, and itchiness. They also improve coat condition, making your Cavalier’s fur shinier and softer. Cavaliers, like many other breeds, can be prone to allergies and skin sensitivities, and omega-3s can help manage these issues by reducing inflammation in the skin.
Joint Health and Mobility
As Cavaliers age, they can develop arthritis and joint stiffness. Omega-3s have been shown to reduce inflammation in the joints, helping to alleviate pain and improve mobility. Dogs receiving sufficient omega-3s often experience less stiffness and better flexibility, which is particularly important for senior Cavalier King Charles Spaniels.
Brain and Cognitive Function
DHA is a crucial component of brain cell membranes and plays a significant role in cognitive function. In Cavalier puppies, it supports brain development and learning. In senior Cavaliers, it helps prevent cognitive decline and supports memory and problem-solving skills. Studies have shown that dogs supplemented with DHA perform better on cognitive tests than those that do not receive adequate amounts.
Heart Health
Omega-3 fatty acids are essential for supporting cardiovascular function by helping regulate heart rhythm, reduce blood pressure, and improve circulation. For Cavaliers, who are especially prone to mitral valve disease (MVD), a common heart condition in the breed, omega-3s are even more important. Given their susceptibility to MVD, ensuring your Cavalier’s diet is rich in omega-3s can play a crucial role in supporting their heart health and may help slow the progression of the disease.
Immune System Support and Inflammation Control
Chronic inflammation is a factor in many health issues, including autoimmune conditions, allergies, and even cancer. For Cavaliers, who are prone to conditions like Chiari malformation, managing inflammation is especially critical. Omega 3s play an important role in regulating the body’s inflammatory response, helping to balance the immune system and reduce excessive inflammation. By incorporating omega 3s into your Cavalier’s diet, you can help protect against the inflammation that worsens conditions like Chiari malformation and support overall immune health.
Best Omega-3 Sources for Cavaliers
The best omega-3 sources for dogs are those that provide EPA (eicosapentaenoic acid) and DHA (docosahexaenoic acid) in their most bioavailable forms. These two types of omega-3s are the most beneficial for dogs, as they are directly used by the body to support a variety of vital functions, from heart health to joint mobility. The most bioavailable forms of these omega-3s are typically found in marine-based sources, such as oily fish. Fish like salmon, sardines, mackerel, and anchovies are excellent options because they contain high levels of both EPA and DHA, making them ideal for supporting your Cavalier’s health. These fish provide omega-3s in a form that’s easy for the body to absorb, ensuring that your dog gets the maximum benefits.
In addition to fish, fish oil supplements can also be a great source of omega-3s. However, it’s important to choose high-quality, purified fish oils that are free of contaminants like mercury. If your Cavalier is sensitive to fish or you prefer plant-based sources, algae oil is another excellent option, as it provides DHA without the fishy aftertaste or concerns about ocean contaminants. While flaxseed and chia seeds offer plant-based omega-3s, they contain ALA (alpha-linolenic acid), which the body must convert into EPA and DHA, an inefficient process for dogs. This means that marine-based omega-3s are typically the best option for achieving optimal health benefits. By rotating between these high-quality sources, you can help ensure your Cavalier is getting the most effective omega-3s for their needs.
Watch our fresh fish DIY and don’t forget to subscribe to @CavalierTipsandFun for more!
Fresh Fish (Whole Food Source of EPA and DHA)
Feeding fresh, oily fish is one of the most natural ways to provide omega-3s. However, choosing the right type of fish is essential due to concerns about mercury levels, sustainability, and proper sourcing.
Some of the best options for Cavaliers include:
Sardines: Small, low-mercury fish that are naturally high in omega-3s. They are one of the safest whole-food sources.
Anchovies: Similar to sardines, anchovies are rich in DHA and EPA while having minimal contamination risks.
Herring: Often used in high-quality pet foods, herring is another small, oily fish packed with omega-3s.
Atlantic Mackerel: This species is safe, but avoid king mackerel, which is high in mercury.
Wild-Caught Salmon: A great source of omega-3s, but farmed salmon may contain higher levels of contaminants.
When feeding fresh fish, it’s important to either lightly cook the fish or feed it raw if it’s safely sourced. Cooking fish too much can break down some of the omega-3s, while raw fish (from a trusted, safe source) can provide the most nutrients. However, if you choose to feed raw fish, it should be frozen for a week first to reduce the risk of parasites, which can be a concern with certain types of fish.
It’s essential to avoid fish that have been prepared with added salt, spices, or sauces. These seasonings can be harmful to dogs. Also, always avoid feeding cooked bones, as they can splinter and cause serious internal injuries.
Fish Oil Supplements
Many pet parents turn to fish oil supplements to provide omega-3s, but not all fish oil supplements are the same. Choosing the right one for your Cavalier is important to ensure you’re giving them the best quality and the most effective nutrients.
How to Choose a High-Quality Fish Oil
When selecting a fish oil supplement, look for species-specific labeling. Instead of settling for generic “fish oil,” opt for oils like sardine oil, anchovy oil, or krill oil. This ensures transparency in sourcing and gives you a better idea of where the oil is coming from.
When choosing a fish oil supplement, it’s important to look at the levels of EPA and DHA, the two types of omega-3 fatty acids that provide the most health benefits for your dog. The label on the bottle should specify the amount of EPA and DHA in each serving, not just the total amount of fish oil.
For example, a bottle might say it contains 1,000 mg of fish oil per serving. But if the label doesn’t show how much of that is EPA and DHA, it’s hard to know how much of the oil is actually providing the beneficial omega-3s your dog needs.
Some fish oils may have more EPA, which is great for joint and heart health, while others may have more DHA, which supports brain function and reduces inflammation. Knowing exactly how much of each omega-3 is in the oil allows you to be more confident that you’re giving your Cavalier the right amount for their specific health needs. This way, you can make sure you’re getting the full benefits of the omega-3s in the supplement.
Also, choose products that are third-party tested. Reputable brands will test their oils for harmful contaminants like heavy metals, PCBs, and oxidation levels. This helps ensure the oil is safe for your dog and that it hasn’t been compromised during production.
Liquid vs. Capsules
Fish oil comes in two common forms: liquid and capsules. Liquid fish oil (often found in pump bottles) is convenient because it’s easy to dose, but it’s more prone to oxidation once opened. Oxidation occurs when the oil is exposed to light, heat, or air, so it must be stored in the refrigerator and used quickly to maintain its freshness.
On the other hand, capsules are more stable since the oil is protected from air exposure, which reduces the risk of oxidation. However, they can be harder to dose accurately, especially for small dogs.
Oxidation Risks
One of the biggest concerns with fish oil is oxidation. Omega-3s are very sensitive to light, heat, and oxygen, and when the oil oxidizes, it can lose its effectiveness and even become harmful. Signs of rancid fish oil include a strong fishy smell or an unusual taste.
To minimize the risk of oxidation, here are a few tips:
Choose dark glass bottles instead of clear plastic, as glass helps protect the oil from light exposure.
Store the fish oil in the refrigerator after opening to keep it fresh.
Use the oil within 30 to 60 days of opening to ensure you’re getting the best quality.
By taking these steps to choose a high-quality fish oil and storing it properly, you can help ensure your Cavalier gets the full benefits of omega-3s for their heart, joints, and overall health.
Green-Lipped Mussels: A Powerhouse for Joint Support
Green-lipped mussels (Perna canaliculus), native to New Zealand, are one of the most beneficial natural sources of omega-3s for dogs. Unlike traditional fish-based omega-3 supplements that provide primarily EPA and DHA, green-lipped mussels contain a unique omega-3 fatty acid called ETA (Eicosatetraenoic Acid). ETA has been found to have additional anti-inflammatory properties, making it especially helpful for dogs suffering from joint issues like arthritis.
The anti-inflammatory effects of ETA, along with the presence of glucosamine and chondroitin, make green-lipped mussels an excellent option for promoting joint health. These compounds work together to support cartilage repair, reduce inflammation, and enhance mobility in dogs experiencing joint stiffness or discomfort. This combination is particularly beneficial for dog breeds, like Cavaliers, that are prone to developing joint issues as they age.
Comparing Omega-3 Content in Green-Lipped Mussels vs. Fish
In terms of EPA and DHA content, green-lipped mussels may not provide as high a concentration per serving as fatty fish, but their ETA provides an extra layer of anti-inflammatory benefits. This makes green-lipped mussels an excellent addition to a dog’s diet, particularly for those with joint concerns.
How to Feed Green-Lipped Mussels to Your Dog
Green-lipped mussels are often available as freeze-dried powder or in chewable treat forms. Both forms make it easy to incorporate them into your dog’s daily routine, but the powder can be sprinkled over food or mixed into homemade dog meals for ease of use.
As with any supplement, it’s important to start with a small amount to monitor how your dog responds, especially if they are new to green-lipped mussels or have a sensitive digestive system. For the dosing of green-lipped mussels, it’s always best to refer to the product-specific guidelines since the concentration can vary depending on the form (freeze-dried powder, chewables, etc.) and brand. However, a general recommendation often seen in supplements for dogs is:
Start with 1/4 teaspoon per 10 pounds of body weight per day for powder form. This can be adjusted based on the dog’s response and their specific needs.
Plant-Based Omega-3s: Less Effective for Dogs, but Still Valuable
When it comes to omega-3 fatty acids, plant-based options are less efficient for dogs compared to animal sources like fish, as they primarily contain ALA (alpha-linolenic acid). While ALA is an essential omega-3 fatty acid for humans, dogs face challenges in converting ALA to the more bioavailable forms, EPA (eicosapentaenoic acid) and DHA (docosahexaenoic acid), which are the forms most beneficial for their health. This makes plant-based omega-3s less effective for dogs in supporting the same health benefits as those derived from marine sources.
Why ALA Is Less Effective for Dogs
Dogs have a relatively inefficient ability to convert ALA into EPA and DHA. The process of conversion requires specific enzymes, which dogs do not produce in large enough quantities to convert sufficient ALA into the needed forms of omega-3s. As a result, while plant-based omega-3s can still offer some benefits, they are not as effective at delivering the omega-3s that support joint health, cognitive function, and heart health in the same way that fish-derived omega-3s do.
Nevertheless, plant-based sources of omega-3s are still valuable as part of a balanced diet. They can provide supplemental omega-3s and contribute to overall health but should not be relied on as the primary omega-3 source for dogs.
Common Plant-Based Omega-3 Sources
Flaxseeds: Flaxseeds are one of the most popular plant-based sources of ALA omega-3s. They can be ground and added to your dog’s food. However, the conversion rate of ALA to EPA and DHA is low in dogs, so while flaxseeds may offer some benefits, they should not be relied on exclusively for omega-3 needs.
Chia Seeds: Like flaxseeds, chia seeds are rich in ALA. These tiny seeds are highly nutritious and can be added to a dog’s meals. They can absorb water and form a gel, which can be helpful for digestive health. While chia seeds may offer some benefit, they should be seen as supplementary, not primary, sources of omega-3s for dogs.
Hemp Seeds: Hemp seeds contain ALA as well, along with a well-balanced ratio of omega-3 and omega-6 fatty acids. While these can contribute to overall fatty acid intake in dogs, their conversion to EPA and DHA is also limited. Hemp oil, a more concentrated form, may be more effective but still not as efficient as fish oil or algae oil in providing the omega-3s dogs need for optimal health.
Algae Oil: The Better Plant-Based Alternative
While plant-based sources like flaxseeds and chia seeds are valuable in certain aspects, algae oil is usually a better plant-based option for dogs. Algae oil is derived from marine algae, which naturally produce DHA (and sometimes EPA) without requiring the conversion process. Unlike other plant-based sources that contain ALA, algae oil provides a direct source of DHA, the omega-3 that plays a critical role in brain function, heart health, and reducing inflammation.
Algae oil is especially beneficial for pet parents who prefer to avoid fish-based products for ethical, environmental, or allergy reasons. It provides the same essential omega-3 fatty acids found in fish oil, but without the potential risks associated with mercury contamination or fish-based allergens. This makes algae oil a great plant-based alternative for ensuring your dog receives the health benefits of omega-3s.
Algae oil supplements are available in capsules or liquid form and can be incorporated into your dog’s diet just like fish oil. The recommended dosage varies by brand, so it’s important to follow the manufacturer’s guidelines and consult your vet to ensure the right amount for your dog.
While algae oil is a great alternative to fish oil, there are a few differences to consider. One of the main differences is that fish oil generally contains more EPA, an omega-3 that is particularly helpful for reducing inflammation and supporting joint health, while algal oil tends to have more DHA, which is important for brain and eye health. Because of this, if your dog needs more EPA for inflammation or joint issues, fish oil might be a better choice. Additionally, algae oil can be more expensive than fish oil, and it may not be as widely available in stores. Another thing to note is that fish oil is often more bioavailable, meaning it’s easier for dogs to absorb and benefit from. That said, algae oil is still a very good option, especially if you’re looking for a more sustainable, vegetarian, or fish-free supplement. It’s always a good idea to talk to your vet about which type of omega-3 is best for your dog’s specific health needs.
How Much Omega-3 Does Your Cavalier Need?
For general health, the recommended omega-3 dosage, specifically EPA and DHA, is typically between 20 to 55 mg per pound of body weight per day. If your Cavalier has specific health issues, like arthritis or inflammation, the dosage may increase to 50 to 100 mg per pound. If your dog is lacking omega-3s, you might notice signs like dry skin, excessive shedding, joint stiffness, or a dull coat. To ensure you’re giving the right amount, it’s important to consult your vet, who can recommend the proper dosage based on your dog’s size and health concerns.
Final Thoughts
Omega 3s are essential for your Cavalier’s overall health, supporting heart, brain, joint and skin function. By incorporating a variety of high quality omega 3 sources such as fish, green lipped mussels and supplements, you can ensure your Cavalier King Charles Spaniel receives a well rounded intake of these beneficial fatty acids.
Quality matters, so focus on bioavailable forms of EPA and DHA, and always rotate the sources you use to prevent imbalances. Whether you opt for fresh fish, fish oil or green lipped mussels, it’s crucial to store and handle these sources properly to avoid oxidation.
Before making any changes, check with your veterinarian to tailor an omega 3 plan that best suits your Cavalier’s individual health needs. Consistently including omega 3s in their diet will support long term health and vitality, helping your dog thrive at every stage of life.
Do you feed your Cavalier fresh fish?
Google Ad Below [...]Read more...

April 17, 2025Gentle, Safe, and Effective for Our Sensitive Cavaliers
Fleas and ticks. Just hearing those words makes me itch. But as a natural Cavalier Mom, I’ve always been cautious about what I put on or in my dogs, especially with delicate and sensitive breeds like Cavalier King Charles Spaniels. These little sweet hearts often have sensitive skin, luxurious coats, and sometimes underlying conditions like Chiari malformation or syringomyelia, which can make them more vulnerable to adverse reactions.
I’ve been on this natural journey for years, first with Dexter and now with Stewart. Along the way, I’ve learned that staying chemical-free when it comes to flea and tick care is absolutely possible, it just takes a little planning and a lot of label reading.
This is the natural flea and tick routine I’ve found works best for my Cavaliers.
Why I Choose a Natural Approach for My Cavalier King Charles Spaniels
Conventional flea and tick treatments may offer quick results, but they also come with serious risks. Side effects can range from skin irritation, itching, and digestive upset to more concerning issues like tremors, seizures, and in some cases even organ damage. These are not small concerns.
For a breed like the Cavalier King Charles Spaniel, those risks are even more concerning. Cavaliers are already prone to neurological conditions like Chiari malformation, seizures, tremors, and episodic falling syndrome. I’m especially cautious about using anything that lists seizures or neurological side effects as possible outcomes. It just doesn’t make sense to use a treatment that could trigger the very issues this breed is already vulnerable to.
Choosing a natural approach isn’t about trying to be perfect. For me, it’s about reducing chemical exposure wherever I can and building a thoughtful, layered prevention plan that supports overall health instead of relying on a single product to do it all.
My Natural Flea and Tick Prevention Plan for My Cavalier King Charles Spaniel
1. Regular Grooming and Bathing-I bathe Stewart every three to four weeks using a safe, gentle dog shampoo made without synthetic preservatives, artificial fragrances, or harsh surfactants. I’ve been using 4-Legger’s USDA-certified organic formulas for years because I trust their ingredient panel and transparency. They have a variety of formulas that help deter ticks and fleas.
Bathing regularly doesn’t just clean your Cavalier. It helps interrupt the flea life cycle. A good soak and lather can wash away flea eggs, dirt, and debris that might attract pests. When I use a shampoo that includes properly diluted essential oils known to repel fleas and ticks, it gives Stewart an extra layer of protection even after his bath is done.
2. Natural Tick and Flea Sprays for Daily Protection-Before every walk, I spray Stewart with a natural flea and tick repellent. I pay close attention to his legs, chest, tail, and belly, basically anywhere that might brush up against grass, shrubs, or wooded areas. These sprays are one of our most important layers of protection, and I use them daily during warm weather or anytime we’re heading into a high-risk area.
Over the years, I’ve rotated between trusted store-bought options and homemade recipes using properly diluted dog-safe essential oils. I always avoid sprays with synthetic preservatives or ingredients that could irritate a dog’s skin.
When I make my own, I tailor the recipe to the season, the environment, and even the behavior of my dog. Dexter, for example, used to try to catch bees, so I avoided blends with oils like rose geranium that might attract them. The key with any natural tick and flea spray is to apply it each time your Cavalier goes outside. These blends are not designed to last for hours at a time, and a quick re-spritz before each outing is what really makes the difference. I keep a bottle near the door so it becomes part of our daily walking routine.
DIY Natural Flea and Tick Spray for Dogs
This is one of my favorite natural sprays to help keep fleas and ticks at bay, without resorting to harsh chemical treatments. It’s simple to make, and you can use it on both your dog and yourself before heading outside.
What You’ll Need:
3 ounces distilled water
1/4 ounce vodka or grain alcohol (helps disperse oils evenly)
1/4 teaspoon vegetable glycerin (moisturizing and helps blend)
Essential Oils:
4 drops Cedarwood– repels fleas and ticks while being gentle on skin
4 drops Geranium– especially helpful against ticks
3 drops Lavender– calming and gently repels insects
1 drop Citronella– useful for deterring mosquitoes, fleas, and ticks
1 drop Peppermint– offers cooling relief and additional repellent support
How to Make It: Add all the ingredients to a 4-ounce (or larger) amber or cobalt blue glass spray bottle. Shake gently to combine.
How to Use It: Before walks or time outside, shake well and lightly mist your dog’s legs, belly, tail, and along the back. Always avoid spraying near the face and eyes. For areas like the ears, chest, or neck, spray a small amount into your hands first, then gently rub it into your dog’s fur. This helps you apply it more precisely and makes sure it reaches the coat and skin. Always apply when your dog is dry for best results.
Storage Tip: Store your spray in a cool, dark place and an amber or cobalt glass bottle helps protect the essential oils from light exposure, which can cause them to break down over time. Shake before each use to keep the oils properly dispersed.
Simple DIY Natural Flea and Tick Spray for Dogs
When I first started making Dexter’s flea and tick sprays, I kept things really simple. I used just distilled water and a few carefully chosen essential oils. Using just distilled water and essential oils is a great option if you plan to make small batches and use them up fairly quickly. It is easy, gentle, and perfect for Cavalier parents who want something simple. You will still need to shake the bottle well before each use, just like with any natural spray.
If you want your spray to blend a little more evenly and stay fresher a little longer, using the above recipe with the grain alcohol and vegetable glycerin can help. Alcohol acts as a natural preservative and helps the oils disperse a little better through the water. Glycerin can also add some moisture to the coat and skin.
Both options are good, it really depends on what fits best with your dog’s needs and your routine. If you are going through the spray quickly, distilled water and oils work just fine. If you want a little more staying power and an extra moisturizing boost, the version with alcohol and glycerin might be a better fit.
You can also check out four of Dexter’s natural flea and tick spray recipes on my Raising Your Pets Naturally blog.
Watch now and don’t forget to subscribe to @RaisingYourPetsNaturally YouTube for more!
Why Different Natural Tick and Flea Sprays Work for Different Dogs
One thing I learned through experience and from chatting with other natural pet parents is that not every spray works the same way for every dog. Some ticks are more common in certain regions and are repelled by specific essential oils. That’s why I rotate between formulas and stay flexible with what I use. If something stops working, I adjust. It’s not failure, it’s just part of the process.
3. Apple Cider Vinegar for Flea and Tick Support-Raw, unfiltered apple cider vinegar (ACV) is another natural tool I like to keep on hand as part of a layered approach to flea and tick prevention. While it won’t kill fleas or ticks, it can help make your dog less appealing to them.
You can make a simple spray by mixing equal parts raw ACV and distilled water in a spray bottle and lightly misting your dog’s legs and belly. Just be sure to avoid the face, and only use it on healthy, unbroken skin. If your dog has any skin sensitivities or open spots, it’s best to skip ACV topically.
You can also add a small amount of ACV to your Cavalier’s food or water. Not all dogs tolerate vinegar well, especially those with sensitive stomachs or urinary issues. It’s also important if you add it to your Cavalier’s water, they also have non-altered fresh water available.
4. Amber Collars for Natural Flea and Tick Repellent Repellant-Another layer is a raw Baltic amber collar. These collars are made from unpolished amber resin that naturally releases aromatic compounds when warmed by your dog’s body. These compounds can help repel ticks and fleas without adding any scent or chemicals to your dog’s skin.
While I wouldn’t rely on them as the only form of protection, I absolutely feel they can help in the overall care to keep our Cavaliers tick and flea free naturally. They’re lightweight, chemical-free, and easy to clip on. With Cavaliers, just make sure the collar sits comfortably behind their ears and doesn’t tangle with their feathering. If your Cavalier has Chiari malformation, this may not be an option if they can’t wear a collar comfortably.
5. Ultrasonic Tick Tags-Another tool to add to your flea and tick routine is an ultrasonic tick tag. There are various brands that make these small devices that clip onto your dog’s collar or harness. They emit a high-frequency pulse that humans and dogs can’t hear, but it’s designed to interfere with a tick or flea’s ability to orient themselves toward your dog.
These tags are scent-free and totally safe for sensitive dogs like Cavaliers. This type of tag is helpful during hikes, trail walks, or visits to areas known for higher tick populations. It’s a simple, noninvasive step that adds an extra layer of protection.
6. Diatomaceous Earth for Natural Flea and Tick Prevention-Food-grade diatomaceous earth is another natural tool I use as part of our flea and tick routine. It’s a fine powder made from fossilized algae that works by drying out the exoskeletons of pests like fleas and ticks. I don’t use it as a primary prevention method, but it’s a helpful layer, especially after we’ve been somewhere with higher pest exposure.
To apply, I lightly sprinkle a small amount down Stewart’s back and gently brush it into his coat, avoiding his eyes, nose, and mouth. It’s best used when your dog is dry and in a well-ventilated area. You can also use it on bedding or around baseboards during flea season as part of a regular cleaning routine.
Watch how I apply it and don’t forget to subscribe to @CavalierTipsandFun YouTube channel for more!
7. Using Garlic to Support Immune Health and Repel Fleas Naturally-Garlic might be controversial in some circles, but when used responsibly, it’s one of my go-to immune support tools. Garlic often gets a bad reputation because in 2000, they did a study on four dogs and gave them an extreme amount of garlic ( about 25 cloves a day for a 25-pound dog), and they had a bad reaction. That’s not even close to how we’d use garlic in a natural, supportive way. You can read the study here.
I started using fresh garlic years ago with Dexter, and it’s something I continue with Stewart now that he’s old enough for it. Garlic supports the immune system and helps repel fleas and ticks from the inside out. I only use fresh, organic garlic, peeled and minced about ten minutes before mealtime to allow the allicin to activate. Then I mix it into Stewart’s food. I never exceed the recommended amount and only feed garlic for up to three days in a row, followed by five to seven days off.
I never use garlic with puppies, pregnant or nursing dogs, dogs with anemia, or those with upcoming surgeries. It’s not a fit for every dog, so I always recommend checking with a holistic vet first.
Garlic Dose For Dogs: The approximate dose of fresh, organic garlic is 1/8 teaspoon for a 5 pound dog, 1/4 teaspoon for dogs between 6 and 10 pounds, 1/2 teaspoon for 11 to 15 pounds, 3/4 teaspoon for 16 to 20 pounds, and 1 teaspoon for dogs between 21 and 30 pounds. Dogs between 31 and 50 pounds can have 1 1/2 teaspoons, and those over 51 pounds can have up to 2 teaspoons.
8. Spotting and Removing Ticks and Fleas from Your Cavalier King Charles Spaniel-No matter how many prevention tools we use, I always do a hands-on check after walks or outings, especially during peak tick season. I check Stewart’s paws, armpits, ears, groin area, and the base of his tail. These are the spots where ticks love to latch on.
If I do find a tick, I remove it immediately with a tick remover or fine-point tweezers, making sure to grab close to the skin and pull straight out. Afterward, I place it in a bottle with alcohol and wash my hands. I’ve found this routine not only gives me peace of mind but also helps me stay in tune with any changes in Stewart’s skin or coat.
A Quick Note About Dexter’s Experience
As Dexter was in his late senior years and his neurological condition progressed, I started to notice the occasional flea here and there, more than we had seen in the past. His immune system wasn’t as strong, and that likely made him more vulnerable to pests. This isn’t uncommon in aging dogs or those with health challenges. Their bodies just don’t have the same defenses they once did.
I made it a daily routine to sit with Dexter and go over him carefully with a flea comb and a small jar of alcohol to catch any runners before they could become a real problem. I also stayed on top of sweeping and washing his bedding regularly. Thankfully, it never got out of control, just a flea here and there, but it reminded me how important it is to stay consistent.
It also reinforced why I’ve always chosen to avoid harsh flea treatments. With Dexter’s compromised system, exposing him to chemicals could have caused even more serious issues. Supporting his health naturally, with gentle and consistent care, was always the safest choice for him.
Final Thoughts on Natural Flea and Tick Care for Cavaliers
If you’re just starting your natural flea and tick care journey, start small. You don’t have to change everything at once. Pick one new step, try it, and see how it fits your dog’s life. Read labels. Ask questions. And most of all, give yourself grace as you navigate what feels right for you and your Cavalier.
Cavaliers are worth the extra effort, and with how sensitive they can be, choosing gentle, natural care just feels like the right thing to do.
Google Ad Below [...]Read more...
November 27, 2024Does your Cavalier King Charles Spaniel bark for attention? Maybe your Cavalier tosses a toy onto your lap, begging for a game of fetch. Or perhaps your Cavalier King Charles Spaniel barks incessantly to go outside and chase every squirrel in the neighborhood. These are classic examples of attention-seeking behavior and, while they may be funny at times, they can also become exhausting.
In this Cavalier blog, I’ll guide you through training your Cavalier to ask for attention politely or, even better, stop demanding attention altogether. But first, let me be clear. I am all about spending quality time with our dogs. Cavaliers thrive on love, play, and companionship, and I encourage plenty of bonding time. However, constant barking or pushy behaviors for attention are not things I would encourage in a dog. With positive dog training methods, good timing, and a proactive approach, we can change this demanding behavior.
Why Does My Cavalier Bark at Me for Attention?
Cavaliers are a playful breed and incredibly intelligent. They are quick learners and can learn behaviors we don’t even know we are teaching them, like barking for attention. Some Cavaliers may learn to bark for attention, paw, nudge, or give you the “look” for that snack. If they have done one or all of these things, and you gave them what they wanted, they’ve already made the connection: This behavior gets me what I want. For example, if barking speeds up dinner prep or prompts you to throw the ball, your Cavalier has been “trained” by their success.
But, don’t worry. You can change these demanding behaviors to better habits. So, let’s get started at teaching your Cavalier to be calm and quiet for the things they want.
Steps to Stop or at Least Curb Attention-Seeking Behaviors
Increase Quality Time: Cavaliers are highly social and crave interaction. You know that. That’s why they are your breed of choice, right? If your pup is constantly asking for attention, they may feel their current playtime or bonding time isn’t enough. Start by increasing their daily activities by about 50 percent. For example, if you play games with your Cavalier five times a day, bump it up to seven or eight short sessions. The same goes for walks, training, or cuddle sessions. Increase the duration or quantity of their interactive activities. And I do mean interactive vs. just placing a food toy on the floor. Those are all fine and well, but, in most cases, your Cavalier is craving your time. Read more about canine enrichment.
Get Ahead of the Demands: Observe when your Cavalier typically starts seeking attention. If they usually bark for play at 11 a.m., initiate a play session at 10:45 instead. By starting the activity before they ask, you’re rewarding their good and polite behavior rather than their pushiness.
Ignore Pushy Behaviors: This is key. When your Cavalier barks, paws, or demands attention in any way, practice the “invisible dog” technique. Avoid eye contact, verbal responses, or movement. Turn away, walk out of the room, or stay still. Once your Cavalier is quiet, calmly reengage and reward them for being polite. But, this only works if you do #1 and increase that quality time together. If you don’t do that, ignoring won’t work because their needs are not being met.
Pro Tip: Be prepared for an “extinction burst.” Your Cavalier may escalate their behavior temporarily, barking louder or pawing more persistently because the old tactics aren’t working. They are getting frustrated. Stay patient and consistent.
Reward Calm and Quiet: Every time your Cavalier is calm and quiet, offer attention, praise, or even a small treat. Reinforcing this behavior teaches them that being polite is the best way to get what they want. This is also the perfect time to initiate a game or play session with your Cavalier.
Teaching self control is a great way to help curb barking.
Patience Is Key
Changing established habits takes time, so be patient with your Cavalier and yourself. Remember, they’re simply trying to communicate their needs the only way they know how. With consistent positive dog training and a little extra quality time, you’ll soon have a polite pup who doesn’t feel the need to ask for attention because you are providing them all the attention they need and desire.
Real-Life Example: Dexter’s “Talking”
Even my sweet Dexter isn’t perfect. He’s been known to “talk” or snort to get his way, and sometimes it works because I’m not perfect, either. Not to mention, there are two other family members who have been known to reward his ask. And, when it’s rewarded, it persists. If I wanted to fully address this behavior, I’d need to follow the steps above consistently and MAKE SURE the other two members of the family do as well. But, in our home, a little talking is something we tolerate because it doesn’t bother us.
That’s the beauty of training: you get to decide what behaviors matter to you. If something doesn’t bother you, there’s no need to change it, as long as it’s not something that should be addressed like anxiety. Just remember that if you allow certain behaviors, it’s important not to complain about them later.
Check out my playlist on barking!
What You Can Do Next
Now that you have the tools to manage your Cavalier’s attention-seeking behavior, it’s time to put them into action. Start by increasing quality time with your dog, introducing play sessions before they ask for attention, and practicing the “invisible dog” technique when pushy behaviors pop up. Remember, consistency is key, and patience will help you both succeed. With time, you’ll see your Cavalier becoming more polite and less demanding, leading to a stronger bond and fewer unwanted behaviors.
What’s your dog’s favorite way to spend quality time with you?
Join our vibrant Cavalier King Charles Spaniel community on Facebook, support our dedication to pet wellness on Patreon, and stay updated with our weekly newsletter for invaluable tips and insights into raising happy, healthy pets. Together, let’s make a difference in our dogs’ lives!
Google Ad Below [...]Read more...

March 19, 2025How to Teach Your Cavalier King Charles Spaniel to “Leave It” | Positive Training for Cavaliers
Teaching your Cavalier King Charles Spaniel to “leave it” or ignore something on your cue can be lifesaving. Imagine dropping a pill in front of your Cavalier or going for a walk and passing garbage in the street. If your Cavalier King Charles Spaniel has a reliable “leave it” cue, you can easily ask him to leave it as you pick up the pill or walk past the garbage.
When I start the “leave it” training, what I want my dog to learn is that “leave it” doesn’t mean he doesn’t get something, but that I have something better. This helps to build a more reliable behavior, especially off-leash. If you only teach your dog that “leave it” means he doesn’t get something, he might just try to grab the item faster or run off with it. That’s not what we want!
As with all dog training, remember that you need to regularly practice these lessons. Training your Cavalier is not just about doing it once and then only when you need it. Reliable dog training takes time, patience, and consistency. Cavalier King Charles Spaniels, in particular, can be a bit food-driven, so keeping them engaged and excited about the reward is key.
So, be patient, consistent, and most importantly, have fun with your Cavalier while training!
Teaching Your Cavalier to Leave It Level 1
Start with a small, low-value dog treat in your closed hand, and place it about 12 inches to the side of your Cavalier’s face. Make sure your hand is at the right height, not too close to his face, but not too far away either. Let your dog see it there, and wait him out. As soon as he moves his face away or ignores the treat, say, “YES!” and reward him with an amazing treat from your other hand. Not going for the treat is a win, too! So, if you present the leave it treat hand and he doesn’t go for it, “YES!” and treat. Repeat this a few times.
When your Cavalier starts ignoring your treat hand altogether, move to Level 2.
Don’t forget to subscribe to our @CavalierTipsandFun for more!
Teaching a Dog to Leave It Level 2
Start like Level 1, but before you drop your hand, say your “leave it” cue once. Wait him out; as soon as he moves his face away or ignores the treat, say, “YES!” and treat from your other hand. Repeat. When he stops going for your hand after hearing the “leave it” cue, move to Level 3.
Training Your Cavalier to Leave It Level 3
Say your “leave it” cue and drop your hand with the low-value treat to your dog’s side, but leave your hand OPEN. If he goes for the treat, quickly close your hand. When he moves his face away, praise and reward him with a treat from your other hand. Repeat. When your Cavalier is reliably ignoring the treat in your open hand, move to Level 4.
Teaching Your Cavalier to Ignore Items Level 4
At this stage, it’s time to change things up a bit. Up until now, you’ve been using low-value, boring dog treats for the “leave it” item. Once your dog is starting to get the hang of it, it’s time to up the ante. Use tastier treats or toys as the “leave it” item, but remember, his reward needs to be even better.
You can try:
Tastier treats or food
Paper products, tissue, or paper towels
Toys
Subscribe to @RaisingYourPetsNaturally for more!
Here’s how to set it up when using a toy:
Pick a Toy: Choose a toy that your Cavalier likes but isn’t so high-value that your Cavalier would immediately grab it without hesitation. Start with something mildly exciting like a squeaky ball, fleece tuggy toy, or stuffed animal that your dog enjoys.
Set Up the Training Area: Find a quiet spot where you can focus and your dog isn’t too distracted by other things. Make sure it’s a place where you can manage your dog’s movement and reactions.
Start the Cue: Hold the toy in your hand and get your dog’s attention. Don’t get too silly. You just want him to know it’s there, with a bit of excitement.
Use the “Leave It” Cue: Once you’ve gotten his attention, say the “leave it” cue calmly. Hold the toy in front of your dog just out of reach, but don’t place it on the ground yet.
Wait for the Response: Your dog may try to lunge for the toy or show interest in it. The goal here is for him to move away or ignore it, not to grab it. If he goes for it, just swipe the toy up to your chest and ignore him and wait for him to ignore it. Then repeat the process of lowering your hand with the toy. As soon as your dog turns his head or steps away from the toy, immediately say “YES!” and give him a better reward (a tastier treat or something that’s even more valuable than the toy).
Repeat and Increase Difficulty: Repeat the exercise several times, and gradually increase the difficulty. Once your Cavalier reliably ignores the toy when it’s held in your hand, move on to placing the toy on the ground. To set this up, place the toy behind you, out of reach. This way, you can gently body block your dog if he tries to move toward it. When he turns away or ignores the toy, immediately reward him with a better treat or better toy.
Body Blocking: Body blocking involves using your own body to gently guide your dog away from a distraction, like a toy, by positioning yourself between your dog and the item. It’s important to note that body blocking is not about kneeing or being rough with your Cavalier. It’s a gentle, calm way to redirect their attention. However, some dogs may find body blocking intimidating or scary, so if your Cavalier shows signs of stress, it’s best to avoid this method and use alternative techniques for redirection.
Build Duration: As your Cavalier gets more comfortable with the “leave it” cue around toys, try holding the cue for a longer period of time. For example, you can wait for him to sit or stay before rewarding him. This increases his patience and focus during the exercise.
Training Your Cavalier to Leave Something Level 5
Place a low-value treat under your cupped hand, with your dog in front of you. Say your “leave it” cue, and wait for your Cavalier to ignore the treat. If he looks away or shows interest but doesn’t try to grab it, immediately reward him from your other hand with a better treat.
As he gets the hang of this, start showing the “leave it” treat under your cupped hand. If your dog ignores the treat, reward him from your other hand. If he tries to go for the treat, simply cup your hand over the treat again. Repeat this process, gradually raising the criteria by making the treat more tempting and testing his ability to resist.
Teaching Your Cavalier to Leave It Level 6 and Beyond
Now it’s time to make things more challenging. Increase the difficulty by adding distractions, different environments, or a variety of leave-it items. Always be mindful of your Cavalier’s current ability level, and don’t rush the process. If you find your Cavalier is struggling or making mistakes, step back and simplify the task again. You want to build confidence and reliability.
Reminders:
Never allow your Cavalier to get the “leave it” item. If you want your Cavalier to have it, you pick it up and give it to him. The goal is to teach him that ignoring the item leads to something better, not just an empty reward.
If your Cavalier is having trouble with the exercise, step back to easier levels or increase the value of the reward to keep him motivated and engaged. You can also try lowering the difficulty by using a less tempting “leave it” item to help him succeed.
The goal isn’t just for your Cavalier to avoid the item once, but to understand that when you say “leave it,” he has the chance to earn something even better. The more your dog experiences this rewarding outcome, the more reliable the behavior will become.
Pro Tips:
Keep training sessions short, positive, and fun! Don’t let the “leave it” item overwhelm or frustrate your Cavalier. If he’s struggling, simplify the task and increase the reward to keep him interested and motivated.
How Often Should You Practice the Leave It Behavior with Your Cavalier?
It is important to regularly practice “leave it” throughout the day, not just during formal training sessions. You can incorporate it during walks, around the house, or when playing. As you add distractions, make sure to reward your Cavalier for staying focused on you, especially when there are high value items around. Cavaliers are generally quick learners, but they can also get bored easily, so keep your training sessions positive and fun. Consistency and patience will pay off in the long run.
Pro Tip: Practice, practice, practice with various setups. You want your Cavalier to respond reliably to the “leave it” cue in real life situations, whether it is a dropped item, an enticing smell, or something on the floor. By practicing regularly, you ensure they will leave it without hesitation. I still reward those real life “leave its” to keep the behavior strong and consistent!
Conclusion
Practicing “leave it” regularly and in different situations helps ensure your Cavalier responds reliably when it matters most. Keep training sessions fun and rewarding, and don’t forget to reinforce real-life successes. Teaching a solid fetch and “drop it” will also complement “leave it,” giving your Cavalier even more useful skills. With consistency and patience, your Cavalier will continue to improve and make great choices in everyday life.
How is your leave it training going? I’d love to hear about it in the comments!
Google Ad Below [...]Read more...
April 29, 2025Your Cavalier King Charles Spaniel’s Teenage Phase
When you bring home a Cavalier King Charles Spaniel puppy, you are prepared for puppy breath, floppy ears, and all the adorable moments that melt your heart. What nobody talks about enough is what happens when that sweet ball of fluff hits adolescence.
Right now, Stewart, my Cavalier, is about 10 and a half months old and is in full-blown teenager mode. I can tell you firsthand that adolescence is real. Stewart has energy for days, wild bursts of zoomies, and a mischievous sparkle in his eyes that keeps me on my toes. My mom, who adores him, often comments, “He is always getting into trouble!” (Of course, to me, it is not real trouble. It is boredom, enthusiasm, and a young dog who is eager to interact and explore.)
She often compares him to my late Cavalier, Dexter, who lived to be 15 years old. In her memory, Dexter was the perfect, calm little gentleman. And he was, but only after years of growing up. It is easy to forget that Dexter had his own crazy adolescent phase, too. I still remember the day I found myself saying, “You are going to eat, you are going to potty, and you are going to bed!” Sometimes, when puppies get extra wild, it is not even about training. They are simply overtired and need help settling down. Just like toddlers, sometimes they push through their exhaustion and get even more wired.
If you are going through the teenage years with your Cavalier right now, you are not alone. And no, you did not do anything wrong. Adolescence is a natural stage in a dog’s development. In Cavaliers, it usually starts when those puppy teeth begin falling out (around four to six months old) and can last until about eighteen months, give or take depending on the dog.
During this phase, your Cavalier might:
Forget their basic training
Start jumping up more
Become mouthier and more vocal
Seem to ignore you sometimes
Have random bursts of wild energy (we call them “zoomies”)
Get into things they never bothered with before
Show frustration or impatience more easily
Does that sound familiar?
It is important to remember that your Cavalier’s brain is still developing. Just like human teenagers, they are caught between puppyhood and adulthood. Their impulse control is not fully in place yet. The good news? This phase is temporary. And your patience and guidance right now will shape your Cavalier for the rest of their life.
Here is how I am helping Stewart (and helped Dexter before him) navigate this time:
Stay Consistent with Positive Dog Training: Even if your Cavalier seems to have forgotten what “sit” or “stay” means, keep practicing. Short, daily sessions with positive reinforcement go a long way. Stewart and I do a lot of quick “name games,” sits, hand targets, and polite walking games to keep his brain engaged.
Build in Play and Enrichment: A bored adolescent dog is a mischievous dog. I make sure Stewart has plenty of fun activities like sniffy walks, find-it games, fetch sessions, and interactive toys. Play is not just fun, it is a training tool. A dog that plays with you is a dog that trusts you.
Manage the Environment: I always try to be proactive with management first. If I think Stewart might start getting rowdy or restless, I plan ahead. Before I get busy, I will take him for a nice walk, do some training or play a game before I need to settle in. Then, I’ll provide him with something to keep him busy, like a snuffle mat, chew toys or licky mat. That way, he already has something to focus on instead of looking for ways to entertain himself. Managing the environment is not about waiting for problems to pop up. It is about setting your Cavalier up for success before trouble starts.
Provide Enough Rest: After Stewart works on his snuffle mat, chew toy, or licky mat, and has had a little training or a nice walk, he is usually ready to settle. That is when he curls up for a siesta at my feet while I do my work. Remember that story about Dexter? Sometimes the wild behavior we see is not from a lack of exercise. It is from being overtired. Puppies and adolescent Cavaliers still need a lot of sleep throughout the day. Building in scheduled downtime helps them reset and recharge before they get into trouble from being too tired to make good choices.
Focus on Trust and Bonding: During a dog’s adolescence period, it is easy to get caught up in the frustrating moments when your Cavalier is ignoring you, getting too wild, or pushing boundaries. But I always try to remind myself that every interaction with Stewart is an opportunity to build our relationship. Trust and connection are even more important during this teenage stage. Adolescence is a time when Cavaliers are figuring out the world and deciding who and what they can count on. I want Stewart to know that I am always safe, fun, and trustworthy. That way, when things get tricky, like going to the veterinarian or navigating a new place, he will look to me for guidance and reassurance. The stronger the bond we build now, the more confident and connected he will be as an adult.
Keep a Sense of Humor: Adolescent dogs can be frustrating at times, no doubt about it. But it also brings some of the funniest, most joyful memories. Stewart’s goofy antics, the way he proudly carries a pinecone, his dramatic “flops” when he does not get his way, these are the moments I know I will smile about years from now.
If you are raising a Cavalier King Charles Spaniel and feeling overwhelmed by the ups and downs of adolescence, you are not alone. This stage can feel overwhelming on some days, but every patient, playful, and consistent moment you put in now is shaping your Cavalier’s future. All the work you are doing today will help your Cavalier grow into a confident, connected, and loving companion for many years to come.
If you would like more step-by-step help through this stage, I would love for you to join us in our Manners, Life Skills, and Foundation Training course. Inside the course, I walk you through building polite greetings, calm walking, settling skills, and helping your Cavalier stay more focused and connected with you. It is all about giving you the tools to guide your Cavalier through adolescence and beyond with patience, confidence, and fun.
At What Age Do Cavaliers Calm Down?
If you are raising a young Cavalier King Charles Spaniel and wondering when your Cavalier will calm down, it is a common question during the teenage phase. Cavaliers usually start to settle after they move through adolescence, which can last until around eighteen months to two years of age. Some Cavaliers might take a little longer depending on their personality and energy level.
Maturity comes with time, but it also comes with the foundation you build along the way. Positive training, daily routines, enrichment, plenty of rest, and building trust all help your Cavalier develop into a calmer and more confident companion. It is not something that happens overnight, but it does happen.
You have got this! Stay patient, stay positive, and focus on the progress you are making together. It is not about being perfect. It is about showing up, doing the work, and building a strong relationship one day at a time.
What has your Cavalier been doing lately that makes you say, “Yup, we are in the teenage stage”? I would love to hear your stories in the comments!
Google Ad Below [...]Read more...
May 23, 2025What to Do When an Off Leash Dog Approaches or Attacks Your Cavalier
Running into an off leash dog in a public area where leash laws are in place is one of those moments that gets my blood boiling. I’ve heard from too many Cavalier families who have gone through this, and sadly, I know several Cavaliers who were seriously injured. Even a couple that didn’t survive. It’s heartbreaking, it’s preventable, and we need to talk about it.
This post is for those of us doing our best to protect our dogs, especially small, gentle breeds like Cavalier King Charles Spaniels, when others decide the leash rules don’t apply to them. Whether you’re out walking your Cavalier, training, or just enjoying your day, here are real life ways to keep your dog safe and what to do if the worst happens.
Why Letting Your Dog Off Leash Puts Others at Risk
Just because your dog is friendly does not mean they should be off leash in public areas. You never know what someone else’s dog is going through. Some dogs are recovering from surgery or illness and need space. Others are working through fear or reactivity and are not ready for sudden greetings. Some are service dogs who may not be wearing a vest but are doing their job. And many dogs, Cavaliers included, simply do not want strange dogs running up to them.
This is why leash laws exist. They are there to protect everyone. Just because your dog wants to say hi doesn’t mean they should get to.
What to Do When an Off Leash Dog Approaches
There is no perfect solution that works in every situation, especially when an off leash dog charges unexpectedly. But being prepared both mentally and physically can make a real difference. These are practical ideas I have taught, used myself, and seen work in real life. While nothing is guaranteed, having a plan in place can help you stay calm, act quickly, and protect your Cavalier as best you can.
Watch the video demonstrations and don’t forget to subscribe to @RaisingYourPetsNaturally for more tips.
Teach a Sit Stay Behind You
One of the most helpful cues I teach is a sit stay with my dog positioned behind me. I start by practicing in low distraction settings and slowly build it up over time. If a dog approaches, I cue my Cavalier to sit and stay behind me, and I step forward to handle the situation. This helps my dog feel protected and keeps them from reacting or escalating the situation.
Throw Treats at the Approaching Dog
Yes, throw treats right at the dog’s face. It may sound odd, but it works. The goal is to startle the dog and interrupt their focus. Then toss more treats behind them, toward the direction they came from. This often gives you a few seconds to calmly retreat with your Cavalier. I always carry tasty treats for this reason.
Use a Traffic Cop Stance
Turn to face the dog, extend your arm out like a stop sign, and say firmly, “Stop. Go home.” Keep your Cavalier behind you and slowly back away. Some dogs will pause or hesitate if they’re unsure or not aggressive. Keep repeating the phrase and keep your hand out, as you and your Cavalier walk backwards away.
Carry an Air Horn
If your dog is comfortable with noise, an air horn can be a great deterrent. I always condition my dog to hear it at home first and pair it with treats. When needed, a quick blast can interrupt the loose dog’s approach and give you time to move away. It’s one of my go to tools, but only if your dog can handle the sound.
Use an Umbrella as a Visual Block
I train my dogs to be comfortable with umbrellas opening indoors, so they are not startled if I ever need to use one during a walk. If a dog is charging at you, pop open the umbrella toward them. The sudden motion and large shape often causes the dog to pause or back off. If necessary, you can shake it or move it toward the dog as you use a firm, go home, verbal cue.
Carry a Personal Safety Tool
Tools like pepper gel, citronella spray, taser, or even a She’s Birdie alarm can help in urgent moments. Pepper gel has more control than spray, and the alarm can attract attention or startle the other dog. Always practice with these tools and make sure your dog is not afraid of them.
Be Cautious About Picking Up Your Cavalier
It is tempting to scoop up your Cavalier, especially since they are small. But doing so can sometimes make things worse. The approaching dog may jump at you or become more aroused. Only pick up your Cavalier if you feel it will help and if you have a safe place to put them, like a truck bed, behind a fence, or even inside a garbage bin if it means protecting them. Use extreme caution if trying this.
If You’re Walking More Than One Cavalier
This is also one of the reasons I usually prefer walking one dog at a time. It helps me stay more aware, react quickly if something happens, and really connect with the dog I’m with. But I know that’s not always possible, so here’s how to stay prepared when walking more than one.
Walking multiple Cavaliers makes things trickier, especially when a loose dog starts heading your way. It can be harder to control space, stay calm, and manage multiple leashes at once. That’s why I recommend preparing a plan ahead of time if you regularly walk more than one Cavalier.
If possible, practice sit stays with each dog individually first, then gradually build up to group stays. Teach your Cavaliers that standing behind or beside you means safety. If you see a loose dog approaching, calmly guide all your Cavaliers behind you and keep their leashes in one hand while using your other hand to deter the loose dog, whether that’s with a verbal cue, a stop signal, or a safety tool.
This is also where tools like a treat toss or umbrella can really help, because they create distance without needing to physically wrangle multiple Cavaliers. And if things feel too tight, do not hesitate to turn and walk away together. Getting distance is often the safest move when you have more than one dog depending on you.
What to Do If a Dog Attacks Your Cavalier King Charles Spaniel
No one wants to think about this part, and I truly hope you never face it. But if a loose dog attacks your Cavalier, your priority becomes stopping the fight as quickly and safely as possible. This is not about hurting another dog out of anger. It is about protecting your own Cavalier King Charles Spaniel from serious harm or even death.
If you have a tool in hand, such as a stick, an umbrella, or pepper gel, use it to target the attacking dog’s face. Aim for the eyes, nose, or mouth. The goal is to interrupt the attack and create enough of a pause to safely separate the dogs. You may only have a second or two, and you need to respond fast and as hard as you can to protect your Cavalier.
If you are physically trying to break it up without a tool, one method is to grab the attacker’s back legs and swing them away from your dog. This can throw them off balance and give you a chance to create space. Do not reach for collars or faces with your hands. That is the most common way people get bitten during dog fights.
Once the dogs are separated, move your Cavalier to safety right away. If possible, secure the attacking dog so they cannot come back. Then take photos, report the incident, and document everything as soon as you can. Even if your Cavalier seems okay, a vet check is always important. Many bite wounds are deeper than they look.
Helping Your Cavalier Recover Emotionally After an Attack
This is one of the most important parts of the process, and it is often overlooked. A Cavalier who goes through a dog attack may seem fine physically, but emotionally, they can lose trust in the world around them. I have worked with dogs who suddenly freeze on walks, avoid places they once loved, or become uneasy around other dogs even from a distance.
Start by giving your Cavalier time to decompress. Skip your regular walks for a few days and let them rest in the comfort of home. The goal is to help them feel safe again while things settle emotionally and physically. Keep their day simple and supportive.
At home, bring in confidence through simple enrichment. Food puzzles, nose games, and easy trick training can help rebuild a sense of control and engagement. These games in a familiar space can make a big difference.
When you are ready to start walking again, choose quiet places where you are unlikely to run into other dogs. Early mornings, empty parking lots, or quiet nature trails can be good options. Let your Cavalier set the pace. If they want to pause and look around or head back early, that is okay.
Pay attention to the progress. If your Cavalier walks a little farther, seems more confident, or looks at you for guidance, tell them how smart they are. Praise, treat, give a chest scratch. That is how trust returns, little step by little step.
This healing process takes time. That is exactly why I created Supporting Your Sensitive Dog: Gentle Steps Toward Confidence. If your Cavalier is showing signs of fear or hesitation, this course will guide you through gentle, trust based steps to help them feel safe again.
You’re Not Overreacting
Your Cavalier deserves to walk safely. You deserve to walk without fear. And if someone chooses to ignore leash laws, you are completely within your right to protect your Cavalier, using your voice, your body, your training, or any tool you need.
So stay prepared. Be proactive. And most of all, trust your instincts. You’ve got this.
Google Ad Below [...]Read more...
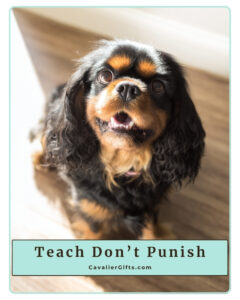
May 14, 2025Kind, Reward-Based Training for Cavalier King Charles Spaniels and All Breeds
When people hear the term positive reinforcement, they sometimes picture a dog who only listens if you have food in your hand. Or they think it means never setting boundaries. I’ve had people say things like, “I don’t want to spoil my dog,” or “I heard that’s just bribing with treats.” But the truth is, positive reinforcement training is science-based, relationship-focused, and one of the most effective ways to help dogs feel confident and understand how to live successfully in our human world.
And it’s not just for Cavaliers. This approach works for every breed, every age, and every behavior challenge.
Let’s break down positive reinforcement dog training in a simple and practical way.
What Positive Reinforcement Dog Training Really Means
Positive reinforcement means adding something your dog enjoys immediately after they do a behavior you want to see again. That reward could be healthy dog treats, a toy, praise, a chance to sniff, or access to something fun. It doesn’t have to be a treat every time, but food is often the easiest and most meaningful place to start. If it’s going to be rewarding for your Cavalier, they decide. I mean, my Mom might think a slice of cherry pie is a good reward, but I don’t even like cherry pie. I’d need a slice of chocolate cake!
This type of training is grounded in how all animals learn, including us. When a behavior is followed by a good outcome, we’re more likely to do it again. Your dog sits, you give them a treat. Your dog walks calmly by your side, you let them go sniff a log. That’s positive reinforcement. You’re not spoiling them. You’re reinforcing behavior you want to see more of, and they get something pleasant in return.
How Dogs Actually Learn
Dogs don’t come into our homes already knowing how to live in them. They don’t know what “sit” means. They don’t know they shouldn’t jump on guests or grab food off the counter. Just like us, they learn by doing, and by figuring out what works.
Dogs learn through repetition. They make connections between what they do and what happens next. If they sit and a treat shows up, they’re more likely to sit again next time. That’s positive reinforcement. We’re showing them that their choices matter and that doing the thing we like leads to something they like.
When we use positive reinforcement, we’re not just trying to get obedience. We’re helping our dogs understand how to live in our world in a way that feels safe and rewarding to them. They’re not learning because they’re afraid of getting it wrong. They’re learning because they feel good getting it right.
And that’s what builds real, long-lasting behavior.
Luring Training Is Teaching—Not Bribing
At the start, we often use a food lure, like holding a treat near your dog’s nose to help them learn how to sit or lie down. We slowly move that treat in a way that encourages the action we want, like guiding their head up and back until their butt hits the ground.
That’s not bribing. It’s teaching. We’re showing them what we’re looking for.
After a few short sessions, we continue practicing the same way. Lure the sit. Reward the sit. Once the dog is starting to understand it, we ask them to follow our empty hand the same way. If they sit, we reward. Now they’re doing the behavior without seeing food first.
Once that’s going smoothly, we add the cue. Say “Sit,” move your empty hand like before, and when their butt hits the ground, reward it.
Over time, we fade the hand movement so that “Sit” becomes all they need to hear. The behavior is now on cue, and your dog learned it in a clear, kind, and effective way.
Dogs Don’t Generalize—They Need Practice in New Places
One of the biggest things people miss is that just because your dog knows how to sit in the living room doesn’t mean they know how to do it in the yard, at the vet’s office, or around a group of children. Dogs need practice in new environments. They need help when distractions are high or when they’re feeling unsure.
That might mean going back to the basics in new places. Using a treat to lure a sit at the park isn’t spoiling your dog. It’s helping them succeed in that moment. You’re helping them learn how to do something they already know, but in a place that’s harder or more distracting.
Why Positive Reinforcement Works for Cavalier King Charles Spaniels and All Breeds of Dogs
Cavaliers are sweet, sensitive, and deeply tuned in to their people. They often respond beautifully to kind guidance and struggle with harsh corrections. A raised voice, leash jerk, or even a stern look can shake their confidence and cause them to shut down.
But this isn’t just about Cavaliers.
Every dog, whether they are a bouncy Labrador, a headstrong terrier, a fearful rescue, or a playful senior, benefits from positive reinforcement dog training. You’re not just teaching skills. You’re building a good relationship. You’re helping your dog feel safe to try new things.
Positive dog training encourages curiosity instead of fear. It helps build lasting behavior in a way that feels good for both you and your dog.
The Risk of Punishment-Based Dog Training
Harsh training methods may seem like they work quickly, but they come with a huge cost. Dogs trained with physical corrections, yelling, or intimidation often show signs of stress, like lip licking, yawning, cowering, or even shutting down completely. They may stop doing the “bad” behavior, but not because they learned something better. They stop because they’re afraid to try.
Studies have shown that punishment-based dog training methods can increase anxiety and reactivity, and even lead to aggressive behavior in some dogs. It doesn’t teach what to do, it just teaches the dog what not to do, without giving them tools to succeed.
I’ve worked with so many families trying to rebuild trust after their dog was trained with punishment. That kind of fallout is hard to undo.
You Don’t Have to Carry Treats Forever
A common concern I hear is, “Will I always need food in my pocket?” The answer is no. As your dog becomes more confident and fluent in a behavior, you’ll reward less often. You’ll also start to mix in other rewards, like praise, sniffy walks, or play.
But here’s the thing, dogs, like us, still appreciate being recognized for a job well done. I still praised Dexter and gave him treats into his senior years. Not because I had to. But because I wanted to reinforce the connection we built over a lifetime of learning together.
You’re not creating a treat-dependent dog. You’re building a dog who trusts that good choices lead to good outcomes.
If you want to teach your dog real life manners in a kind, clear, and effective way, take a look at my Manners, Life Skills, and Foundation Training Course. It’s self paced, easy to follow, and designed to help your dog build everyday skills with confidence. You’ll learn how to prevent common problems before they start, teach polite behavior step by step, and create calm, positive routines that work in daily life. I personally answer questions, give feedback, and support you as you go through the course.
Why Positive Dog Training Works for Behavior Issues Too
Positive reinforcement is not just for basic training or fun dog tricks. It’s also one of the best ways to work through real behavior issues like jumping, barking, reactivity, anxiety, and fear-based behaviors.
A big part of dog behavior modification is emotion. When a dog is barking or lunging, they’re not just being “bad.” They’re usually feeling overwhelmed, scared, frustrated, or unsure. If we only try to stop the behavior without addressing how the dog feels, we’re not really helping them.
Positive reinforcement gives us a way to change those emotions. We teach our dogs that good things happen when they make calm, safe choices. Over time, they start to feel more relaxed in situations that used to be stressful. That change from fear to comfort, from confusion to understanding, is what creates real, lasting change.
Instead of just trying to stop the behavior, we ask, “What is my dog feeling?” Then, “How would I like them to feel instead?” and “What do I want them to do instead?” From there, we adjust the situation so we can meet all those needs and teach the new behavior in a kind, clear way. The more your dog practices that skill in the right setting, the more confident they become. And that’s where things really start to turn around.
What Your Dog Really Needs From You
At the heart of it all, positive reinforcement dog training is about more than treats. It’s about empathy. It’s about understanding how your dog sees the world and helping them learn in a way that clicks.
It’s about setting them up for success and guiding them toward the behaviors you want. Not through fear, but through trust, patience, and connection.
That’s what I want for Stewart. That’s what I wanted for Angel Dexter. And that’s what I want every dog to have, training that feels good, makes sense, and builds a life rooted in partnership, not power.
Keep it positive. Keep it patient. Keep it proactive.
Google Ad Below [...]Read more...
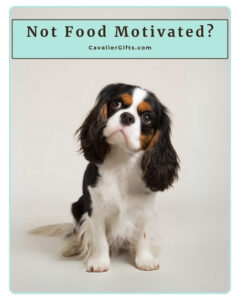
June 5, 2025How to Motivate and Train a Cavalier King Charles Spaniel
If your Cavalier King Charles Spaniel is not motivated to train, you’re not alone. This is something I hear from Cavalier families all the time: “My Cavalier is not food motivated,” or “My Cavalier just doesn’t care about training.” But in most cases, it’s not that your Cavalier doesn’t want to learn, it’s that something is getting in the way.
Here are a few common reasons your Cavalier might not be interested in training right now and what you can do to help them feel more motivated and ready to learn.
Reasons Your Cavalier Might Seem Unmotivated for Training
They are full
If your Cavalier just finished a meal or had a lot of snacks recently, they may not be interested in working for more food. Training with food rewards works best when your Cavalier is a little bit hungry, not stuffed. Try scheduling your training sessions before meals rather than after, or set aside part of their meal to use as training treats throughout the day.
They are tired
Just like us, Cavaliers have times when they are more alert and times when they just want to rest. If your Cavalier had a big play session, a long walk, or an active outing, they may need some quiet time before they are ready to focus again. Cavalier puppies especially need a lot of sleep, so training when they are rested can make a big difference. Try noticing when your Cavalier naturally seems more alert and ready to engage. That is usually the best time to practice a little training together.
They are not feeling well
If your Cavalier seems unusually uninterested in training or even in their favorite treats, that could be a sign they are not feeling well. Even mild health issues like nausea, pain, or dental discomfort can lower motivation. It is not always obvious at first, but changes in training interest can be an early clue that something is off. If this becomes a pattern, or if anything else seems different, reach out to your Cavalier’s holistic vet to rule out anything medical before moving forward with training.
Your Cavalier is overstimulated
Cavaliers take in a lot of information from their surroundings. If you are training your Cavalier in a busy or unfamiliar location, all those sights, sounds, and smells can be overwhelming. When there is too much going on, your Cavalier might not be able to focus or respond the way they usually do. This is especially common for puppies or sensitive Cavaliers who are still learning how to process the world around them.
If that happens, try moving to a quieter spot. You can even take a little break together for a sniffy walk and then go back to something really simple, like The Name Game or Hand Targeting. These familiar cues can help your Cavalier settle and build confidence again.
Your Cavalier is anxious or unsure
When a Cavalier is feeling unsure, whether it is because of a new environment, a stranger nearby, or something they cannot quite figure out, training can start to feel like too much. It is not about being stubborn or ignoring you. They are just trying to process how they feel before they can focus on learning anything new.
If your Cavalier seems nervous or anxious, the best thing you can do is slow things down. Sit with them quietly, speak gently, and let them look around without pressure. Sometimes just being there together is enough. Once they start to relax, you can offer praise and a treat or a “check it out” cue if they seem ready to explore.
The reward is not meaningful enough
When I hear that a Cavalier is not food motivated, the first thing I look at is the reward. Most of the time, it is not that your Cavalier is not food motivated. It is that the treat just does not matter enough to them at that moment. Dry biscuits or lower value treats usually do not get their attention, especially in busy or distracting places.
Start with real food. I usually go straight to meat. That might be small bits of cooked beef, turkey, or lamb. Freeze dried meat or single ingredient dehydrated treats are also great choices. These are often the best treats for Cavaliers because they are soft, tasty, and easy to eat. Just flip the bag over and check the ingredients. You want something simple that says one thing, like chicken breast or turkey. Avoid fillers or extras that do not need to be there.
You can also use freeze dried raw food, broken into tiny pieces. These are real food options and often made mostly from meat, which makes them a great choice for Cavaliers who need something healthy and high value. Many people use them during training and count them toward their Cavalier’s daily calories. It is an easy way to stay consistent with nutrition while still offering something special and rewarding.
I also avoid using liver or organ meats regularly. A little once in a while is fine, but too much liver can lead to vitamin A concerns. Some organ treats can also be too rich and cause diarrhea.
Use the right reward for the right moment
Once you find something that really works for your Cavalier, think about how and when to use it. The most rewarding treats should be saved for the harder training sessions. That might mean practicing outside, focusing around distractions, or trying something brand new. When the reward truly matters to your Cavalier, motivation naturally improves.
If they get their favorite treats for easy things like sitting in the living room, there is not much reason to work harder when training becomes more challenging. Save the cooked beef, freeze dried meat, or other special rewards for those moments when your Cavalier needs a little extra encouragement. Matching the value of the reward to the difficulty of the task helps keep your Cavalier engaged and willing to try.
Explore other forms of motivation
Not every Cavalier is motivated by food alone. Some respond better to toys, praise, or playful interaction. If your Cavalier enjoys toys, try using a favorite squeaky, a soft tug toy, or a quick game of fetch. Some Cavaliers are especially drawn to textures like fleece or rabbit fur, which can make a toy feel more exciting. Whatever it is, keep it put away when you are not training so it stays special and does not lose its value. Other Cavaliers are more motivated by attention and connection. A cheerful voice, a smile, or light praise can sometimes go further than anything you can hold in your hand. At the end of the day, your Cavalier is the one who decides what feels rewarding. It is not about what we think should work. It is about what actually matters to them.
Your Cavalier can learn with the right support
If your Cavalier is not showing interest in training, it does not mean something is broken. It just means they need a little help feeling ready. That might be adjusting the environment, changing up the reward, or simply giving them time to feel more confident.
This is exactly the kind of thing we work on in my Manners, Life Skills and Foundation Training Course. If you are feeling unsure about how to move forward, I will guide you through simple, kind steps to help your Cavalier feel more focused and connected. You will learn how to use rewards that actually matter to your Cavalier, when to train, and how to build everyday habits that stick. It is self-paced, easy to follow, and I am always there if you need support.
Your Cavalier wants to connect with you. With a little support and the right setup, they will start to feel more engaged and eager to participate. You do not need to rush the process. Keep it light, keep it kind, and celebrate the small wins. They all add up.
Google Ad Below [...]Read more...
Google Ad Below
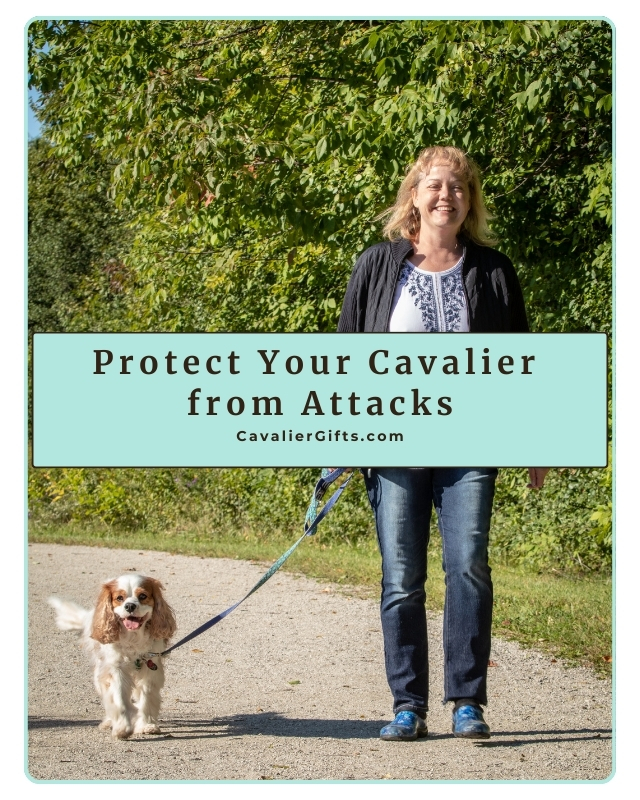
How to Protect Your Cavalier King Charles Spaniel from Off Leash Dogs and Dog Attacks (Early access for our Patreon community)
What to Do When an Off Leash Dog Approaches or Attacks Your Cavalier
Running into an off leash dog in a public area where leash laws are in place is one of those moments that gets my blood boiling. I’ve heard from too many Cavalier families who have gone through this, and sadly, I know several Cavaliers who were seriously injured. Even a couple that didn’t survive. It’s heartbreaking, it’s preventable, and we need to talk about it.
This post is for those of us doing our best to protect our dogs, especially small, gentle breeds like Cavalier King Charles Spaniels, when others decide the leash rules don’t apply to them. Whether you’re out walking your Cavalier, training, or just enjoying your day, here are real life ways to keep your dog safe and what to do if the worst happens.
Why Letting Your Dog Off Leash Puts Others at Risk
Just because your dog is friendly does not mean they should be off leash in public areas. You never know what someone else’s dog is going through. Some dogs are recovering from surgery or illness and need space. Others are working through fear or reactivity and are not ready for sudden greetings. Some are service dogs who may not be wearing a vest but are doing their job. And many dogs, Cavaliers included, simply do not want strange dogs running up to them.
This is why leash laws exist. They are there to protect everyone. Just because your dog wants to say hi doesn’t mean they should get to.
What to Do When an Off Leash Dog Approaches
There is no perfect solution that works in every situation, especially when an off leash dog charges unexpectedly. But being prepared both mentally and physically can make a real difference. These are practical ideas I have taught, used myself, and seen work in real life. While nothing is guaranteed, having a plan in place can help you stay calm, act quickly, and protect your Cavalier as best you can.
Watch the video demonstrations and don’t forget to subscribe to @RaisingYourPetsNaturally for more tips.
Teach a Sit Stay Behind You
One of the most helpful cues I teach is a sit stay with my dog positioned behind me. I start by practicing in low distraction settings and slowly build it up over time. If a dog approaches, I cue my Cavalier to sit and stay behind me, and I step forward to handle the situation. This helps my dog feel protected and keeps them from reacting or escalating the situation.
Throw Treats at the Approaching Dog
Yes, throw treats right at the dog’s face. It may sound odd, but it works. The goal is to startle the dog and interrupt their focus. Then toss more treats behind them, toward the direction they came from. This often gives you a few seconds to calmly retreat with your Cavalier. I always carry tasty treats for this reason.
Use a Traffic Cop Stance
Turn to face the dog, extend your arm out like a stop sign, and say firmly, “Stop. Go home.” Keep your Cavalier behind you and slowly back away. Some dogs will pause or hesitate if they’re unsure or not aggressive. Keep repeating the phrase and keep your hand out, as you and your Cavalier walk backwards away.
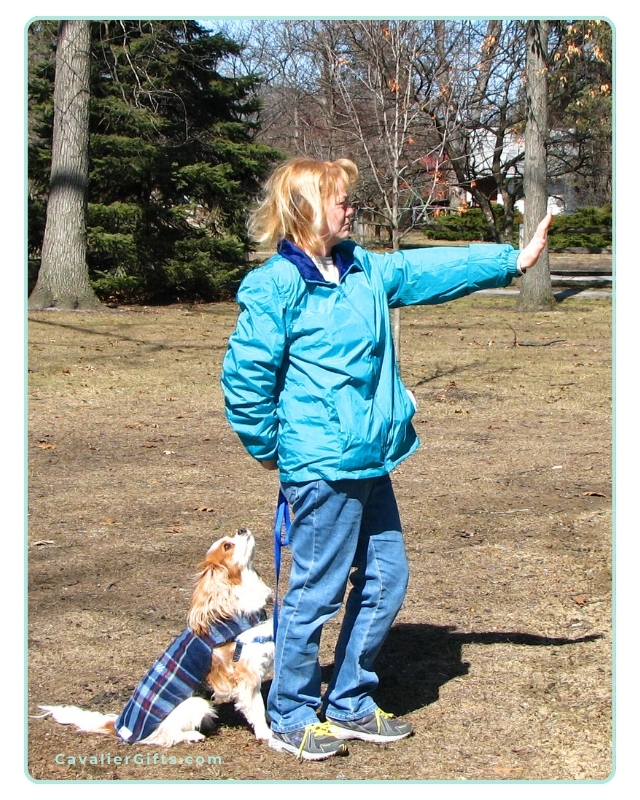
Carry an Air Horn
If your dog is comfortable with noise, an air horn can be a great deterrent. I always condition my dog to hear it at home first and pair it with treats. When needed, a quick blast can interrupt the loose dog’s approach and give you time to move away. It’s one of my go to tools, but only if your dog can handle the sound.
Use an Umbrella as a Visual Block
I train my dogs to be comfortable with umbrellas opening indoors, so they are not startled if I ever need to use one during a walk. If a dog is charging at you, pop open the umbrella toward them. The sudden motion and large shape often causes the dog to pause or back off. If necessary, you can shake it or move it toward the dog as you use a firm, go home, verbal cue.
Carry a Personal Safety Tool
Tools like pepper gel, citronella spray, taser, or even a She’s Birdie alarm can help in urgent moments. Pepper gel has more control than spray, and the alarm can attract attention or startle the other dog. Always practice with these tools and make sure your dog is not afraid of them.
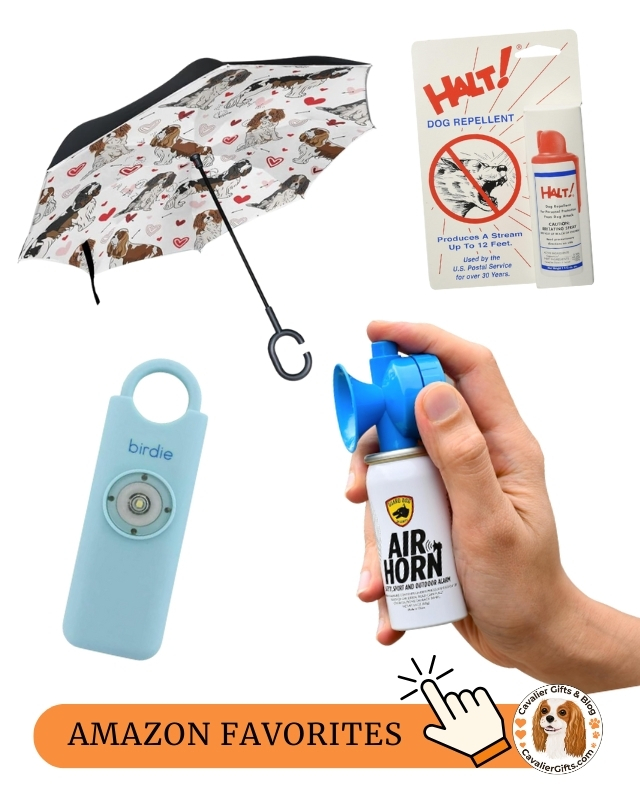
Be Cautious About Picking Up Your Cavalier
It is tempting to scoop up your Cavalier, especially since they are small. But doing so can sometimes make things worse. The approaching dog may jump at you or become more aroused. Only pick up your Cavalier if you feel it will help and if you have a safe place to put them, like a truck bed, behind a fence, or even inside a garbage bin if it means protecting them. Use extreme caution if trying this.
If You’re Walking More Than One Cavalier
This is also one of the reasons I usually prefer walking one dog at a time. It helps me stay more aware, react quickly if something happens, and really connect with the dog I’m with. But I know that’s not always possible, so here’s how to stay prepared when walking more than one.
Walking multiple Cavaliers makes things trickier, especially when a loose dog starts heading your way. It can be harder to control space, stay calm, and manage multiple leashes at once. That’s why I recommend preparing a plan ahead of time if you regularly walk more than one Cavalier.
If possible, practice sit stays with each dog individually first, then gradually build up to group stays. Teach your Cavaliers that standing behind or beside you means safety. If you see a loose dog approaching, calmly guide all your Cavaliers behind you and keep their leashes in one hand while using your other hand to deter the loose dog, whether that’s with a verbal cue, a stop signal, or a safety tool.
This is also where tools like a treat toss or umbrella can really help, because they create distance without needing to physically wrangle multiple Cavaliers. And if things feel too tight, do not hesitate to turn and walk away together. Getting distance is often the safest move when you have more than one dog depending on you.
What to Do If a Dog Attacks Your Cavalier King Charles Spaniel
No one wants to think about this part, and I truly hope you never face it. But if a loose dog attacks your Cavalier, your priority becomes stopping the fight as quickly and safely as possible. This is not about hurting another dog out of anger. It is about protecting your own Cavalier King Charles Spaniel from serious harm or even death.
If you have a tool in hand, such as a stick, an umbrella, or pepper gel, use it to target the attacking dog’s face. Aim for the eyes, nose, or mouth. The goal is to interrupt the attack and create enough of a pause to safely separate the dogs. You may only have a second or two, and you need to respond fast and as hard as you can to protect your Cavalier.
If you are physically trying to break it up without a tool, one method is to grab the attacker’s back legs and swing them away from your dog. This can throw them off balance and give you a chance to create space. Do not reach for collars or faces with your hands. That is the most common way people get bitten during dog fights.
Once the dogs are separated, move your Cavalier to safety right away. If possible, secure the attacking dog so they cannot come back. Then take photos, report the incident, and document everything as soon as you can. Even if your Cavalier seems okay, a vet check is always important. Many bite wounds are deeper than they look.
Helping Your Cavalier Recover Emotionally After an Attack
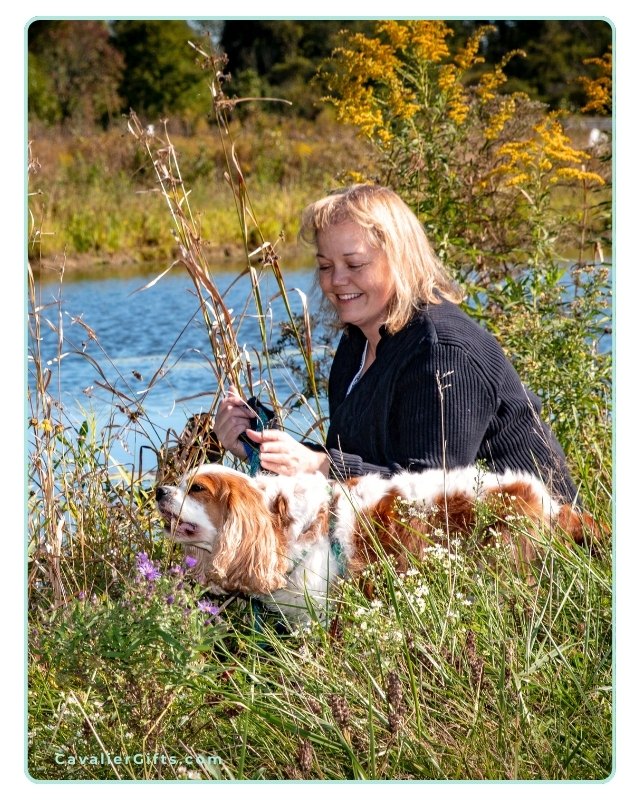
This is one of the most important parts of the process, and it is often overlooked. A Cavalier who goes through a dog attack may seem fine physically, but emotionally, they can lose trust in the world around them. I have worked with dogs who suddenly freeze on walks, avoid places they once loved, or become uneasy around other dogs even from a distance.
Start by giving your Cavalier time to decompress. Skip your regular walks for a few days and let them rest in the comfort of home. The goal is to help them feel safe again while things settle emotionally and physically. Keep their day simple and supportive.
At home, bring in confidence through simple enrichment. Food puzzles, nose games, and easy trick training can help rebuild a sense of control and engagement. These games in a familiar space can make a big difference.
When you are ready to start walking again, choose quiet places where you are unlikely to run into other dogs. Early mornings, empty parking lots, or quiet nature trails can be good options. Let your Cavalier set the pace. If they want to pause and look around or head back early, that is okay.
Pay attention to the progress. If your Cavalier walks a little farther, seems more confident, or looks at you for guidance, tell them how smart they are. Praise, treat, give a chest scratch. That is how trust returns, little step by little step.
This healing process takes time. That is exactly why I created Supporting Your Sensitive Dog: Gentle Steps Toward Confidence. If your Cavalier is showing signs of fear or hesitation, this course will guide you through gentle, trust based steps to help them feel safe again.
You’re Not Overreacting
Your Cavalier deserves to walk safely. You deserve to walk without fear. And if someone chooses to ignore leash laws, you are completely within your right to protect your Cavalier, using your voice, your body, your training, or any tool you need.
So stay prepared. Be proactive. And most of all, trust your instincts. You’ve got this.
|
|
|
|
Popular Blogs
February 26, 2025Cavalier King Charles Spaniel Heart Disease
Mitral Valve Disease (MVD) is something every Cavalier King Charles Spaniel parent should be familiar with. Sadly, this condition is extremely common in the Cavalier breed, but early awareness and proper management can greatly improve a Cavalier’s quality of life. In this blog, we’ll cover what MVD is, why Cavaliers are at risk, how the disease is staged, and which supplements can help support a healthy heart.
A heartfelt thank you to Lisa Davila, BS in Biomedical Science and Hospital Manager at Aggieland Animal Health Center in College Station, Texas, for helping me put together this article. Lisa has not only dedicated her career to animal health but has also been a loving mom to many Cavalier King Charles Spaniels. Her knowledge and experience are truly invaluable!
Understanding Mitral Valve Disease (MVD) in Cavaliers
Mitral Valve Disease (MVD) is a degenerative condition that affects the mitral valve of the heart. The mitral valve is responsible for ensuring blood flows properly between the left atrium and left ventricle. Over time, this valve can weaken and leak, allowing blood to flow backward into the atrium. This puts additional strain on the heart, eventually leading to heart enlargement and, in later stages, congestive heart failure (CHF).
MVD is considered a slow-progressing disease, but it varies from dog to dog. Some Cavaliers may live for years with a mild heart murmur, while others may progress more rapidly. Since MVD is so common in the breed, Cavaliers should be closely examined (cardiac auscultation) annually, to determine if they have a murmur. The presence of a murmur is often the first sign that a dog has degenerative valve disease.
Why Are Cavaliers at Risk of MVD?
Cavalier King Charles Spaniels are unfortunately predisposed to MVD. While any breed can develop valve disease, Cavalier King Charles Spaniels are at the greatest risk for developing degenerative mitral valve disease. Studies have shown that over 50% of Cavaliers develop a heart murmur by the age of 5, and by age 10, that number jumps to nearly 100%.Because MVD has a strong genetic component in Cavaliers, responsible breeding practices are essential. Responsible Cavalier King Charles Spaniel breeders ensure their breeding dogs undergo echocardiograms conducted by board-certified cardiologists. When considering a puppy, both parents should have cardiologist-issued heart clearances and be at least 2.5 years old at the time of breeding. Additionally, all four grandparents should be over the age of 5 and heart-clear. However, even with careful breeding, the risk remains high in the breed.
The Stages of MVD
MVD is typically classified into different stages based on its progression. Early detection and monitoring are crucial to managing the disease effectively.
Stage A – Dogs at risk for MVD but without any current signs (e.g., all Cavaliers are considered Stage A at birth because of their predisposition).
Stage B1 – A veterinarian detects a heart murmur, but there is no evidence of heart enlargement on X-rays or echocardiograms.
Stage B2 – A heart murmur is present, and imaging confirms heart enlargement. At this stage, medication such as Vetmedin (pimobendan) is often started to help delay the onset of congestive heart failure.
Stage C – Congestive heart failure (CHF) is present, meaning the heart can no longer compensate for the disease. Symptoms such as coughing, lethargy, and difficulty breathing may be noticeable. Medications are necessary to help manage the condition.
Stage D – End-stage CHF, where symptoms become harder to control even with medications.
Once a dog reaches Stage B2, most cardiologists recommend starting treatment to slow disease progression. Regular checkups and echocardiograms help ensure the right treatment plan is in place.
The Truth About Grain-Free Diets and Heart Disease in Cavaliers
With all the discussion surrounding Mitral Valve Disease (MVD) in Cavaliers, you may have come across concerns about grain-free diets and their potential link to heart disease. It’s important to separate the headlines from the facts when it comes to feeding our Cavaliers the best diet for heart health.
The debate about grain-free dog food largely stems from concerns about dilated cardiomyopathy (DCM), a condition where the heart muscle weakens, leading to poor function and potential heart failure. While DCM is a serious disease, the concern over grain-free diets has often been misinterpreted. The issue isn’t necessarily the lack of grains but rather the high levels of starchy carbohydrates like peas, lentils, legumes, and potatoes that are often used as substitutes in processed grain-free kibble.
Cavaliers are already predisposed to MVD, not DCM, which is a different heart condition with different causes. However, diet still plays a critical role in supporting heart health. The best way to provide a heart-healthy diet for your Cavalier is to focus on fresh, whole foods rich in high-quality animal proteins rather than relying on highly processed kibble, whether it contains grains or not. Read more about feeding your Cavalier a fresh diet.
Dr. Karen Becker explains it best: “The problem with grain-free formulas isn’t the lack of grains. At a minimum, it’s the high level of starchy carbohydrates coupled with the extreme high-heat processing methods used to produce these diets.”
Rather than worrying about whether a diet is labeled as “grain-free,” focus on feeding a fresh, balanced diet with high-quality proteins, healthy fats, and low-glycemic vegetables. Rotating proteins and using whole-food ingredients can help ensure your Cavalier gets the nutrients they need to support a healthy heart.
If you’re unsure about your dog’s diet, seek guidance from a veterinarian with a strong background in canine nutrition, not just one who sells prescription diets in the clinic. A certified veterinary food therapist (CVFT) can be a great resource when designing a diet that supports heart health while avoiding unnecessary fillers.
A well-balanced, species-appropriate diet can play a key role in keeping your Cavalier’s heart strong and healthy for years to come.
Heart-Healthy Supplements for Cavaliers with MVD
While MVD cannot be cured, a combination of medications, lifestyle management, and supplements can help support heart function and overall well-being. Below are some key supplements that may benefit Cavaliers with or at risk for MVD:
MCT Oil (Medium-Chain Triglycerides) – Provides an alternative energy source for the heart muscle. One recommended brand is Natural Force Organic MCT Oil (1 tsp daily with food). Before giving your Cavalier coconut oil, please read this article on MCAD in the Cavalier.
Amino Acids (Lysine, Methionine, L-Carnitine, Taurine) – Help maintain heart muscle contractility and serve as antioxidants.
Omega-3 Fatty Acids – Reduce inflammation, decrease clot risk, help prevent heart muscle loss, and support healthy blood pressure. Nordic Naturals Omega Pet Liquid is a high-quality option.
Vitamin E – Acts as both an antioxidant and anti-inflammatory.
Magnesium – Plays a crucial role in heart muscle contraction and maintaining a healthy heart rhythm.
Coenzyme Q10 (CoQ10) – A powerful antioxidant that supports heart function. Life Extension 100 mg capsules are a great choice.
Recommended Supplement Blends
If you prefer a multi-ingredient supplement, these options are formulated specifically for heart health:
Rx Vitamins for Pets Formula CV – Includes amino acids, magnesium, Vitamin E, CoQ10, and hawthorn berry extract (safe unless the dog is on Vetmedin).
VetriScience Cardio Strength Capsules – Similar to the Rx Vitamins formula but without hawthorn berry extract, making it safe for all MVD stages and medications.
Recap & Common Questions About MVD in Cavaliers
Mitral Valve Disease (MVD) is a serious but manageable heart condition that affects many Cavalier King Charles Spaniels. Early detection, responsible breeding, proper veterinary care, and supportive supplements can all play a role in keeping your Cavalier’s heart as healthy as possible.
What are the early signs of MVD in Cavaliers?
The first noticeable symptom is often a heart murmur, detected during a cardiologist visit. As the disease progresses, signs can include coughing, fatigue, labored breathing, and reduced exercise tolerance.
How long can a Cavalier live with mitral valve disease?
Many Cavaliers live for years after an MVD diagnosis, especially with early detection and proper management. While every dog is different, with the right veterinary care, medications, and supplements, Cavaliers can still enjoy a good quality of life.
What are the final stages of MVD in dogs?
In the later stages, MVD leads to congestive heart failure (CHF). Symptoms include severe coughing, difficulty breathing, lethargy, fainting, and fluid buildup in the lungs or abdomen. At this stage, medication and veterinary support are essential for comfort.
How do you treat MVD in Cavaliers?
Treatment typically includes veterinary-prescribed medications to support heart function and manage symptoms. Additionally, heart-healthy supplements, such as taurine, CoQ10, and omega-3 fatty acids, can provide extra support. Feeding a fresh, species-appropriate diet may also contribute to overall heart health.
Final Thoughts
A heart-healthy fresh diet, proper weight management, and the right combination of supplements can help support your Cavalier’s heart at any stage of MVD, even before a murmur is detected. Early intervention and regular veterinary care are key to helping our beloved Cavaliers live longer, healthier lives.
A big thank you to Lisa for sharing her knowledge on this topic! If you have any questions, feel free to ask, and don’t forget to check out Lisa and Jiminy on Instagram!
Google Ad Below [...]Read more...
April 15, 2024Cavalier King Charles Spaniel Potty Training
Congratulations on welcoming a Cavalier King Charles Spaniel into your life! They’re such charming and affectionate dogs, full of warmth and love. As a fellow Cavalier mom and positive dog trainer, I’m thrilled to share my experience on the best way to potty train a Cavalier puppy. Let’s jump right in to how to successfully housebreak your Cavalier King Charles Spaniel puppy.
I love puppies! And Cavalier puppies are just some of the cutest little things ever! There’s nothing quite like their sweet kisses, puppy breath, and zest for life! But it’s not all puppy kisses; we also must potty train our Cavaliers. Nobody likes an untrained dog.
One common question I get from Cavalier followers is how to best potty train their puppy. I’ve seen plenty of discussions about potty accidents in Cavalier King Charles Spaniel groups, and I’m here to share some potty training tips with you.
First things first. Let’s start by being realistic. Contrary to what some may suggest, potty training a puppy in a matter of days is not realistic. It’s important to realize that puppies, just like human babies, need time to learn and gain control over their bladders. So, if you’re expecting your Cavalier to hold it for hours after just a few days of training, you are setting your pup and yourself up for failure.
My own Cavalier, Dexter, wasn’t fully potty trained in a mere five days, and I’m perfectly okay with that. I prioritized consistent management and frequent potty breaks, which ultimately led to just a couple of accidents in the house. The key is to prevent accidents by being proactive, not reactive.
What’s the best way to potty train your Cavalier puppy?
It all comes down to three essential things: supervision, frequent potty breaks, and confinement when you can’t actively watch them. The goal is to reduce the chances of accidents happening indoors.
When it comes to supervision, it’s eyeballs on! This means keeping a watchful eye on your puppy at all times, ensuring that you’re there to rush them outside if it looks like they are about ready to go. You can use things like baby gates, leashes, shut doors, or X-pens so that you can keep your eyes on them at all times.
Subscribe to @CavalierTipsandFun on YouTube!
How Often Should You Take Your Puppy Potty?
As for how often to take your puppy potty, it really depends on their age and activity level. Active puppies may need to go out every 15–30 minutes, while older dogs can typically hold it for longer periods. The key is to stay ahead of the game and take your puppy out whenever you notice a change in their behavior or activity. A change in behavior or activity signals that it’s time for a bathroom break. For example, if your puppy just had a bout of puppy zoomies, out to potty we go. Did your puppy wake up from a nap? Out to potty we go. By not waiting for your puppy to ask to go out or have an accident, you are well on your way to a potty-trained dog.
When it comes to crate training, make sure the crate is just the right size to discourage accidents. The crate should be large enough for your pup to stand and lie down comfortably, but not so large that they can use one corner as a bathroom.
Whether you have a fenced yard or not, leash your puppy. This gives you the opportunity to reward your puppy for going potty outside. You will be right there to praise your puppy, give him a snack, and tell him just how smart he is. It also leads to my next potty training tip: teaching your Cavalier to potty on cue!
Teaching your Cavalier to potty on cue is a must in my book. Imagine being able to take your dog outside just before the rainstorm and ask him to pee and poo, and he does! This useful behavior isn’t just fantastic for potty training your dog; it’s incredibly convenient in daily life. The keys to teaching your Cavalier to eliminate on cue are good management, timing, and your reward. By associating a word for peeing with a separate word for defecating, you can start to teach your puppy to do either when requested.
Subscribe to @CavalierTipsandFun
Teaching Your Cavalier to Potty on Cue
Here’s how to get started:
Begin the training process in the morning, when your pup wakes up. Arm yourself with some delicious treats, leash up your Cavalier, and head outside to his favorite potty spot.
Stay close and pay attention to your puppy. Stay about 6’, so it’s not just a sniffing fest; the goal is to get him to eliminate before a big walk, play, or sniff. Pay close attention to your Cavalier’s body language. Watch for subtle cues like sniffing, circling, or squatting, which indicate he’s about to eliminate. As soon as you see a sign, use your potty cue, such as “Go potty,” and wait patiently. When your pup starts to do his business, praise quietly, and after he’s finished, give him big praise and rewards. You want to make sure you don’t interrupt the potty process by rewarding too soon.
If your dog typically follows up with a poop, repeat the process with your poop cue, like “Go poop-poop,” and reward him once he’s finished.
After your Cavalier has finished his business, it’s time for the next reward: fun! Whether it’s a walk, playtime in the yard, or simply enjoying the fresh air, make sure to give your pup some extra time to enjoy himself before heading back indoors. This helps reinforce the idea that going potty leads to enjoyable activities.
Repeat this routine each time you take your Cavalier outside, even if you’re planning on going for a walk. By always pairing potty time with rewards, you’ll motivate your pup to go more quickly.
As your Cavalier starts to make the connection between potty on cue and familiar surroundings, gradually introduce the cue in different environments, such as the park or during walks. This helps your dog understand the cue in any situation, ensuring they respond reliably wherever you are.
With patience, consistency, and plenty of positive reinforcement, you can teach your Cavalier King Charles Spaniel to potty on cue, making potty training easier.
Bell Training Your Cavalier King Charles Spaniel Puppy
While some love doggie doorbell training or puppy pads, I prefer to focus on methods that teach puppies to potty outside, not inside or on “things.” I find these methods tend to confuse puppies. Potty pads or litter boxes are teaching the puppy to potty on things that happen to be indoors. This could be a potty pad, but it also could end up being your favorite blanket.
As far as bell training goes, I’m not a fan of encouraging demanding behavior in dogs. Teaching them to ring bells to go outside may inadvertently lead to them using this to not only tell us they need to potty, but also that they may want to go outside to chase squirrels.
I believe in keeping potty training simple and straightforward, focusing on reinforcing the desired behavior of outdoor elimination. By keeping things simple and staying consistent, we can focus on potty training without having to rely on pee pads or bells.
In the end, potty training your Cavalier King Charles Spaniel is all about patience, consistency, and a whole lot of love. By following these tips and staying diligent, you’ll set your new puppy up for success.
Your comments and questions are always welcome below.
Join our vibrant Cavalier King Charles Spaniel community on Facebook, support our dedication to pet wellness on Patreon, and stay updated with our weekly newsletter for invaluable tips and insights into raising happy, healthy pets. Together, let’s make a difference in our dogs’ lives!
Google Ad Below [...]Read more...
May 29, 2024Natural Diet for Cavalier King Charles Spaniel
Dexter’s Food Journey with Raw and Homemade Food
Dexter, my Cavalier King Charles Spaniel, was a raw-fed puppy. However, because I wasn’t sure how to do it properly, and I was unaware that there were premade raw foods on the market, I fed him kibble with food toppers. After learning about how to balance a fresh dog food diet, I started to home cook for him when he was around two. Then, when he was about four, I transitioned him to a DIY raw diet. Through this journey with Dexter, I’ve learned about creating a nutritious and tailored diet that meets his unique needs. Now, I’m excited to pass along my tips and thoughts on feeding your Cavalier King Charles Spaniel. Let’s dive in!
Natural diet for Cavalier King Charles Spaniels
If you’re anything like me, you’re always on the lookout for the best pet products, natural dog grooming supplies, and the healthiest dog food brands for your Cavalier. One of the most important aspects of your Cavalier’s well-being is their diet. Dogs are natural carnivores, made to thrive on a diet of fresh meat. This means a species-appropriate diet is key to their health and vitality.
Understanding Species-Appropriate Nutrition
Let’s think about our dogs’ ancestors for a moment. They thrived on a diet of raw meat, bones, and organs. Today, we can recreate this natural diet with a raw food approach, using fresh, high-quality ingredients that focus on what dogs are meant to eat. For your Cavalier King Charles Spaniel, in a nutshell, this means focusing on a diet that’s about 90 percent meat, bone, and organ, with the remaining 10 percent coming from fruits and vegetables. This balance provides the essential nutrients and fiber they need to stay healthy. Personally, I feel if you aren’t able to go raw, this diet can also be cooked. You just would need to provide the calcium from the bones in another form, since dogs cannot eat cooked bones.
Don’t forget to subscribe to @CavalierTipsandFun for more!
The Problem with Processed Dry Kibble
Now, dry kibble. It’s processed at high temperatures, which takes away almost all the moisture and nutrients from the ingredients. Often, kibble is made with low-quality ingredients and fillers that don’t give your dog the nutrients they need. The lack of moisture in kibble can also lead to chronic dehydration, affecting everything from kidney function to skin and coat health. Plus, since kibble is made to last a long time, the ingredients can go rancid quicker than you might think, making it even less nutritious for your pup.
The Importance of Moisture in Your Dog’s Diet
Moisture is a crucial part of your dog’s diet. In the wild, dogs get most of their hydration from the food they eat. Fresh, raw diets naturally provide the moisture that kibble just can’t. This is essential for your dog’s digestion, kidney health, and overall well-being. By feeding them fresh, high-quality meat and vegetables, you’re making sure they stay hydrated naturally, without having to depend solely on drinking water.
Google Ad Below
Finding the Best Diet for Your Cavalier King Charles Spaniel
When it comes to our Cavaliers, there’s no one-size-fits-all solution. Every dog is unique, with their own health needs, behaviors, and lifestyle. Personally, I’m a big advocate for variety. This could be in the form of different proteins, suppliers or even a nice pre-made raw or mix. I steer clear of dry pet food altogether unless I’m using freeze dried food for dog training treats. For me, a balanced DIY raw diet for Dexter is the way to go. It’s fresh, it’s healthy, and I can tailor and tweak it to Dexter’s needs.
Why a Raw Food Diet is Ideal for Most Cavalier King Charles Spaniels
A raw food diet is as close to a natural diet as you can get for your Cavalier. It includes raw meat, bones, and organs, providing essential vitamins and minerals often lost in commercial dog foods. This diet can improve your Cavalier’s skin and coat health, immune system, and help maintain a healthy weight. As I mentioned earlier, I think adding an approximately 10 percent mix of fruits and vegetables is a great way to add a nutritional boost to the bowl. By avoiding the fillers and artificial additives found in many commercial foods, we ensure our dogs get the best nutrition possible.
Homemade Raw or Cooked Food: Personalized Nutrition for Your Cavalier
One of the best ways to ensure your Cavalier King Charles Spaniel is eating the healthiest diet is to make their food at home. This way, you control the quality of the ingredients and can tailor the meals to your dog’s specific needs. Homemade meals are especially beneficial if your Cavalier is a picky eater or has food allergies. Just remember to balance their diet properly to include all necessary nutrients. Whether your dog has allergies, digestion issues, or any other specific needs, you can tweak their diet to meet their needs.
Feeding Your Cavalier a Grain-Free Diet
You might have heard that grain-free foods are bad for Cavaliers because they were thought to have caused Dilated Cardiomyopathy (DCM). In 2019, the FDA released a list of grain-free pet foods that had people swearing that grain-free dog food was bad. But, guess what? It’s really not the case. In fact, in 2022 the FDA announced on their website there wasn’t a solid link between grain-free diets and DCM.
Feeding your dog grain-free can actually be a good choice for your Cavalier. But things get tricky if you are looking at a purchased grain-free alternative, particularly a dry kibble. When you’re reading the ingredient panel of a dog food (yes, read those labels), watch out for ones loaded with peas, lentils, legumes, seeds, and/or potatoes. Even if the front of the bag screams “meat-first,” it might sneak in a bunch of carbs and starches that aren’t ideal. According to experts, such as Dr. Karen Becker, it’s not about cutting out grains—it’s about making sure our pets aren’t eating too many starchy fillers. So, bottom line? Go back to that 90 percent meat recommendation.
Feeding Your Cavalier King Charles Spaniel Puppy
When it comes to feeding your Cavalier King Charles Spaniel puppy, it’s essential to consider their unique nutritional needs as they grow. If you’re not quite sure about the specifics of puppy nutrition, it’s perfectly okay to rely on trusted commercial brands known for their expertise in creating a balanced diet for puppies.
A commercial raw puppy food will include the essential proteins, fats, and calcium your puppy needs to develop strong bones. The key is to ensure whatever you choose is well-rounded and provides all the nutrients your Cavalier puppy requires during the puppy life stage.
Maintaining a Healthy Weight
Keeping your Cavalier at his ideal weight is super important. Maintaining a healthy weight isn’t just about good looks, but their health. Extra weight can contribute to health issues like joint problems and heart disease. The breed standard says they should weigh between thirteen and eighteen pounds. But, Cavaliers can vary a lot in size. Take Dexter, for instance. He’s a bit of a big guy, weighing his ideal weight at a healthy twenty-nine pounds. So, how do you know if your Cavalier is at the right weight? It’s all about getting your hands on your dog. Run your fingers lightly over their ribcage; you should be able to feel their ribs without pressing too hard. If they’re too prominent, they might be on the thin side. But if you can’t feel them at all, or if their waistline has disappeared, they might be carrying a few extra pounds. Just keep an eye on their overall body shape, and remember, every Cavalier is unique!
How Often to Feed Your Cavalier King Charles Spaniel
Consistency is key when it comes to feeding your Cavalier. Establishing a regular feeding schedule helps regulate their metabolism and digestion. Typically, feeding your Cavalier twice a day, in the morning and evening, works well. For puppies, more frequent meals might be necessary to meet their higher energy demands. I actually feed Dexter three times a day, mainly due to the fact that he gets so much food, I prefer to space it out.
Adding Supplements and Vitamins
Even with a well-balanced diet, supplements can play an essential role in your Cavalier’s health. Omega-3 fatty acids can enhance skin and coat health, probiotics can aid digestion, and joint supplements can support mobility. Always consult your Cavalier’s vet before adding new supplements to ensure they’re necessary and safe. When possible, opt for real food supplements vs. synthetic.
Food Allergies in Cavalier King Charles Spaniels
If your Cavalier has allergies, a limited-ingredient fresh diet can be incredibly beneficial. Before jumping brands, I would suggest going through a pet food elimination diet to identify triggers. Once you know what your Cavalier is allergic to, you can create a personalized diet just for him. You can read more about how and why a pet food elimination diet is helpful on my other blog, right here.
Safe Fruits and Vegetables to Feed Your Cavalier
Things like carrots, broccoli, and kale can be great sources of extra nutrients and fiber. And don’t forget the powerhouse of antioxidants fruits like blueberries, strawberries, pomegranates, and apples can provide. For best digestion, blitz them up! Introduce all new foods slowly and keep an eye on what works for your dog.
Transitioning to a Raw Food Diet
Transitioning your Cavalier to a raw food diet should be done gradually to avoid digestive upsets. Start by introducing small amounts of raw food while slowly decreasing their current food. A 75 percent and 25 percent switch usually works well. Over a week or two, increase the raw portion until it completely replaces their old diet.
Choosing the Best Raw Food Brands
Selecting high-quality raw food brands for your Cavalier ensures they get balanced and nutritious meals. Personally, I look for brands that offer meats that are antibiotic and hormone free. Ideally, any fruits and vegetables will be organic. Opt for whole foods vs synthetics when possible. But, it will be a balancing act based on what’s available to you and your budget. As I mentioned earlier, shoot for approximately 90 percent meat, bone, and organ. A few raw brand choices to consider include BJ’s Raw, Raw Paws Pet Food, Raw Wild, We Feed Raw, Primal, Vital Essentials, Smallbatch, Raw Bistro and Steve’s Real Food.
A Healthy Diet Can Improve the Immune System, Skin, and Coat Health
By providing your Cavalier with a balanced raw or homemade diet you’re not just filling their bowl, you’re nurturing their well-being from the inside out. Fresh diets, whether raw or homemade, are rich in unprocessed ingredients, offering a higher concentration of vital nutrients compared to heavily processed kibble. Fresh foods do not have the fillers and additives found in kibble, making them easier for dogs to digest and absorb. Because of this, fresh food promotes better immune function, healthier skin, and a shinier coat, making them the ideal choice for your Cavalier.
By focusing on a fresh, natural diet tailored to your Cavalier King Charles Spaniel’s specific needs, you’re setting them up for a long, healthy, and happy life. Remember, my goal is to offer guidance and support to help you navigate the journey of pet nutrition, without any judgment. Let’s work together to ensure the best possible care for you and your Cavalier!
Your comments and questions are always welcome below.
Join our vibrant Cavalier King Charles Spaniel community on Facebook, support our dedication to pet wellness on Patreon, and stay updated with our weekly newsletter for invaluable tips and insights into raising happy, healthy pets. Together, let’s make a difference in our dogs’ lives!
Google Ad Below [...]Read more...
May 14, 2024Hot Weather Tips for Cavalier King Charles Spaniels
People often think of summer as a good time to get out and about with our Cavaliers. As a dog-friendly travel blogger, I’m often pitched ideas and stories about taking Dexter to X outdoors, even in July or August. But, the reality is, that’s usually just too darn hot for my now 14.5 year-old Cavalier King Charles Spaniel, Dexter.
He’s always run a bit hot, but now, as a senior and with MVD, the summer heat is just not ideal for him. But, it’s not just Dexter. Summer heat can pose health issues such as sunburn and heatstroke. Today, I’m going to jump into some ideas on how to keep your Cavalier King Charles Spaniel cool and active during the summer or warm months.
Cavalier King Charles Spaniels and Heat Stroke
Heatstroke is a serious concern for all dog families, particularly for breeds like the Cavalier King Charles Spaniel, which can be more susceptible due to their flat-faced (brachycephalic) nature. Any dog, any breed, and any age can develop heat stroke, even on cool days! The VetCompassTM conducted a study in 2016 regarding the risk factors for heat-related illness (HRI):
Breeds with the highest incidence of HRI included the Chow Chow, Bulldog, French Bulldog, Dogue de Bordeaux, Greyhound, Cavalier King Charles Spaniel, Pug, and the Golden Retriever.
Dogs at or above the mean adult body weight for their breed/sex showed an increased risk of HRI compared to dogs below the mean body weight.
Dogs over 12 years old had the greatest odds of HRI compared to dogs under 2 years old.
Signs of Heatstroke in a Cavalier
Recognizing the signs of heatstroke and taking preventive measures are crucial to keeping your dog safe. Signs such as excessive panting, drooling, rapid pulse, and restlessness indicate your Cavalier may be overheating. If you notice these symptoms, act quickly by providing cool (not cold) water and applying damp towels to areas with good blood flow, such as the head, armpits, and groin. Then take your Cavalier to the vet to prevent things from getting worse.
How Food Affects Your Cavalier’s Ability to Tolerate Heat
Just like for us, our pet’s food does more than just provide them with calories. Food has a big impact on their overall health, affecting everything from their longevity to their behavior and how they handle hot and cold temperatures. According to traditional Chinese medicine (TCM), everything in life has a balance of energy and heat, represented by Yin and Yang. Yin embodies the cool, and yang is the hot. This includes our pets, food, and environment; they all have specific energetics.
Dexter tends to run a little more yang (hot). Therefore, when I’m creating his meals, I aim to have the foods I provide either be energetically cooling or neutral. I avoid energetically warm or hot foods and proteins. For example, common foods that are warming or hot include goat, lamb, venison, chicken, and pheasant. Whereas, cooling proteins include rabbit, duck, beaver, cold water fish, and muskrat.
Applying this feeding concept to our Cavaliers, we can tailor their diets to help regulate their internal temperature. During the warmer months, opting for cooling foods can help maintain balance and comfort for your Cavalier.
Google Ad Below
Summer Fun for You and Your Cavalier King Charles Spaniel
Despite the summer heat, Dexter and I still enjoy our summer adventures. They just need to be modified according to the weather. The first thing I do is check the weather, so I’m not out and about with Dexter and surprised! Walking or strolling Dexter in the morning is by far cooler than in the evening. I know people suggest evening walks, but, honestly, the heat from the pavement and the atmosphere seem hotter to me than in the morning. Your location may be different.
Try walking on grassy areas instead of pavement. Shady parks beat the noon sun. Breezy days while wading in the water are another fun way to help your Cavalier stay cool. However, if it’s still sunny or warm, cool water on their feet and a breeze are unlikely to cut it.
We do a lot of indoor adventures during the summer months. Pet stores, dog friendly stores and attractions are our go-tos. I also do a lot of indoor training sessions and enrichment activities to help keep Dexter engaged. The bottom line is that I don’t want to risk Dexter’s health. And I can say from experience, it’s not a good feeling. Back in 2018, I’m pretty sure Dexter almost had a heat stroke! We were in Florida in the spring, doing touristy things. I thought I was being careful, bringing Dexter inside the stores, indoor attractions, and a covered train tour, but he really wasn’t doing well. He started showing signs of heatstroke. We rushed him to the hotel and cooled him down. I was lucky. And I’m not sure what I would have done if I wasn’t so lucky.
Hot Weather Tips for a Cavalier King Charles Spaniel
Grooming & Trimming: Regularly groom your Cavalier to remove loose fur and prevent overheating. I do give Dexter a puppy cut by trimming his belly, legs, and tail. I started this because of his CM/SM, but it also helps lighten his load and keeps him cooler.
Travel Comfort: Ensure your Cavalier’s comfort during travel with a well-ventilated crate or car harness, and schedule frequent breaks for water and shade. I also use a cooling mat and fan blowing on Dexter.
Sunscreen: Dog friendly sunscreen on your Cavalier’s nose helps protect him from harmful UV rays.
Cooling Products: Invest in cooling accessories like a cooling vest, bandana, or mat to provide relief from the heat during outdoor adventures.
Avoid the Hottest Part of the Day: Schedule outdoor activities during cooler times, such as early morning or late evening.
Mind the Pavement: Hot asphalt can burn your Cavalier’s paw pads. Stick to grassy or shaded areas for walks.
Hydration: Always have fresh water available, and encourage your Cavalier to drink frequently to stay hydrated. I put bone broth cubes in Dexter’s water bottle to encourage him to drink. If not, he will ignore the water.
Indoor Play or Outings: On exceptionally hot days, opt for indoor activities like interactive games or training sessions to keep your Cavalier entertained while staying cool.
Cooling Foods: Opt for cooling or neutral proteins in your Cavalier’s diet.
Remain vigilant, provide ample shade and hydration, and monitor your Cavalier for signs of overheating. Keep your Cavalier King Charles Spaniel’s well-being in mind, and use these practical tips to make sure you and your Cavalier have a safe and enjoyable summer.
Your comments and questions are always welcome below.
Join our vibrant Cavalier King Charles Spaniel community on Facebook, support our dedication to pet wellness on Patreon, and stay updated with our weekly newsletter for invaluable tips and insights into raising happy, healthy pets. Together, let’s make a difference in our dogs’ lives!
Google Ad Below [...]Read more...
June 8, 2024Treatment options for Chiari malformation and Syringomyelia
My best friend, Dexter the Dog, was diagnosed with Chiari malformation and syringomyelia in 2012, just before his third birthday. This diagnosis hit me hard. Over the past twelve years, I’ve shared a lot about Dexter’s diagnosis, care, and treatments on my Raising Your Pets Naturally blog and YouTube channel.
Since I recently started this blog dedicated to Cavalier King Charles Spaniels, I thought it would be a good time to write an update on Dexter’s care and what I’ve learned. I am also happy to say that at almost fifteen, Dexter is doing amazingly well! I hope you find this article on Chiari malformation and syringomyelia in dogs helpful. Please share this information to help others dealing with this heartbreaking diagnosis learn about the many helpful and natural treatments for dogs with Chiari malformation and syringomyelia.
What is Chiari Malformation (CM) and Syringomyelia (SM)
Chiari malformation commonly affects Cavalier King Charles Spaniels, Chihuahuas, Brussels Griffons, Yorkshire Terriers, Maltese, Pomeranians, Toy Poodles, and Shih Tzus. In dogs with CM, the skull is too small to hold their brain properly. This overcrowding forces parts of the brain, specifically the cerebellum and medulla, out of their normal positions. The cerebellum controls movement and balance, while the medulla is connected to breathing and heart rate.
When these brain parts are pushed out of place, they obstruct the normal flow of cerebrospinal fluid (CSF). Cerebrospinal fluid is in the brain and spinal cord and acts as a natural cushion, protecting the brain. When the flow of CSF is blocked, it can lead to a buildup of pressure and result in serious neurological issues and can form syringomyelia (SM), a condition where fluid-filled cavities form within the spinal cord.
In Cavalier King Charles Spaniels, Chiari malformation is a congenital issue, meaning they are born with it. Dr. Clare Rusbridge established a breeding protocol to help reduce CM/SM in puppies. Following the breeding protocol is crucial for reducing the risk of Chiari malformation (CM) and syringomyelia (SM) in Cavalier King Charles Spaniels. If both parents have CM/SM, puppies are 92 percent likely to be affected, while the risk drops to 77 percent if only one parent is affected. If both parents are clear of CM/SM, there is a 70 percent chance their puppies will be clear, rising to 87 percent if the grandparents are also clear. Potential Cavalier families should seek breeders who perform this testing to ensure healthier puppies. The only way to diagnose Chiari malformation and syringomyelia definitively is through an MRI scan.
Recognizing Chiari malformation is vital for Cavalier King Charles Spaniel families because early detection and treatment can greatly improve the quality of life for dogs with this condition. If you notice symptoms like uncoordinated movements, sensitivity around the head and neck, or any other unusual behaviors, it’s important to consult with your veterinarian as soon as possible.
Symptoms of Chiari Malformation and Syringomyelia in Dogs
Symptoms of CM and SM in Cavalier King Charles Spaniels and other breeds can vary. About a year before Dexter’s diagnosis, he began showing some random and unusual behaviors. And they didn’t happen all the time.
Fixating at dust particles in the sunlight.
Fidgeting and biting at his rear end. His vet initially thought it was anal glands, but they really weren’t that full, and he continued to do it.
Acting strangely around flying insects. Whenever a fly was around, he would get strange and start spinning around and growling at his back end.
Then, he had a downright scary episode, where he just was going crazy over his back end, growling, at it, spinning, and I could not gain his attention. I then decided to hit record the next time it happened. After recording the next episode and consulting Dr. Lynette Cole at The Ohio State University, three veterinary neurologists suspected Chiari malformation and syringomyelia. I then made an appointment at the OSU neurology department for an MRI and spinal tap. CM and SM were confirmed.
Dexter’s episode is below.
Don’t forget to subscribe to our @RaisingYourPetsNaturally YouTube channel for more.
Other common symptoms of CM/SM in Cavalier King Charles Spaniels can include:
Air scratching, especially on walks or when excited.
Head scratching or rubbing.
Air snapping or licking.
Random yelps of pain.
Sensitivity to touch and being picked up.
Hind end weakness.
Head or body wobbles, stumbling, or squinting.
Head pressing.
Seeking darkness or solitude.
Inactivity or depression.
Restlessness.
Google Ad Below
Diagnosing Chiari Malformation and Syringomyelia
The only definitive way to diagnose CM/SM is with an MRI. If a dog shows common symptoms and belongs to a breed prone to this disease, like Cavalier King Charles Spaniels, a vet might start treatment without MRI confirmation. For me, knowing exactly what Dexter had was key. Along with an MRI, Dexter also had a spinal tap to ensure we had all the facts.
Treatment Options for Chiari Malformation and Syringomyelia
Surgery for Chiari Malformation in Cavalier King Charles Spaniels
Surgery is performed with the goal of restoring the natural flow of spinal fluid. This involves decompressing the affected area, removing bone fragments, and sometimes adding a shunt. However, the results can differ greatly from one dog to another. Despite surgical intervention, many dogs still require medication to manage their pain effectively.
Medications for Chiari Malformation in Cavalier King Charles Spaniels
The disease is progressive and varies in severity. Treatment prioritizes comfort and alleviates pain. Dr. Clare Rusbridge provides the gold standard in the medication treatment protocol. It’s essential to monitor organ functions regularly when administering long-term medications.
Natural Treatments for Syringomyelia in Dogs
There are many natural treatments to help support a dog with CM/SM. Here are some that have worked for Dexter:
Acupuncture: Restores the normal flow of energy through specific pathways.
Cold Laser Therapy: Reduces inflammation, relieves pain, repairs tissue damage, and increases blood circulation.
PEMF ( Pulsed Electromagnetic Field) Therapy: Reduces inflammation, relieves pain, promotes tissue and cell repair.
Food Therapy: A diet of home-cooked or raw dog food helps reduce inflammation. Ingredients like sardines, shiitake mushrooms, and green-lipped mussels can help.
Conscious Proprioception Exercises: Dexter wore Dr. Buzby’s ToeGrips to stimulate awareness of his feet. I also regularly work with him on footwork exercises to help him be more aware of his feet.
Canine Hydrotherapy: Water treadmill therapy strengthens Dexter’s body with low joint impact.
Core Strength Exercises: Dexter’s rehabilitation focuses on boosting his core and back end strength, crucial for enhancing balance and stability. Through a variety of exercises using different equipment, we target his abdominal, back, and hind leg muscles, ensuring he can confidently navigate any challenges.
Living with a Cavalier King Charles Spaniel with Chiari Malformation
Living with a dog diagnosed with Chiari Malformation and syringomyelia can be challenging. Dexter’s first year after diagnosis was the most challenging. Trying to figure out what worked best for him, what kinds of activities or weather would trigger breakthrough pain, and how best to manage it. His life changed, but, luckily, with a great team of professionals, I was and am able to provide Dexter with a great quality of life that is still full of adventures and enrichment.
Comfort Measures
To help keep Dexter as comfortable, happy, and pain-free as possible, I’ve incorporated a range of products.
Dog Harness: Avoid collars that can be painful due to the disease’s nature.
Dog Strollers: Great for giving Dexter a break while still being part of adventures.
Cooling Mats and Warming Blankets: Depending on Dexter’s temperature needs. I will say, now Dexter is on a cooling mat almost 100 percent of his downtime. He rarely seeks heat.
Snuggle Jackets: Some dogs find comfort in them, while others might not. In the beginning, Dexter wore one almost all the time. But, I think, after we finally found our groove with his care, they were no longer necessary.
Natural Calming Aids: Calming CDs and natural calming sprays help Dexter on rough days.
Support for Dogs with Chiari Malformation and Syringomyelia
Let’s unite in this journey. Dexter’s courage living with Chiari malformation and syringomyelia serves as a light of hope for us all. You aren’t in this alone. Seek the help of a good veterinarian team, join a support group, including ours! Together, we can provide hope and guidance to others on similar paths. Go Team Dexter!
Your comments and questions are always welcome below.
Join our vibrant Cavalier King Charles Spaniel community on Facebook, support our dedication to pet wellness on Patreon, and stay updated with our weekly newsletter for invaluable tips and insights into raising happy, healthy pets. Together, let’s make a difference in our dogs’ lives!
Google Ad Below [...]Read more...
June 26, 2024Cavalier King Charles Spaniel Enrichment Ideas
Ultimate Guide to Canine Enrichment for Cavalier King Charles Spaniels
If you are reading this blog post on ways to keep your Cavalier King Charles Spaniel entertained, you have made me a very happy lady. Mental stimulation for your Cavalier is so important, and sometimes a very overlooked part of a good positive dog training program. I’ve always said, dog training isn’t just about teaching your Cavalier to do something or not do something. Rather, there is a synergy between training your Cavalier and everything else including canine enrichment. I think bonding with your Cavalier King Charles Spaniel is the best medicine for both you and your pup. So much so, I started a Cavalier King Charles Spaniel Facebook group, with a big emphasis on enrichment ideas for Cavaliers. And the photos you are about to see on this Cavalier blog are all from members of our wonderful community! Now, let’s dive into canine enrichment and why it’s so important.
What is Canine Enrichment?
Canine enrichment is about making your dog’s life better by giving them fun activities that keep their mind and body active. I think about canine enrichment as life experiences and engaging our Cavaliers in a variety of fun and interactive activities. It’s more than just a food puzzle toy, although that’s a great introduction to enrichment for your Cavalier.
Enrichment can be interactive play, positive dog training sessions, sensory games, physical activities, food enrichment, and outdoor adventures. The goal is to keep your Cavalier happy, healthy, and mentally sharp. When you do this, it helps prevent boredom, boosts your dog’s mental skills, and strengthens your bond, which also leads to better listening and obedience.
Subscribe to @CavalierTipsandFun for more!
Beyond Food: Enrichment Through Interaction
Many people associate canine enrichment primarily with food-related activities, like filling food toys or using interactive frozen treats. While these activities are great, and I use them daily with Dexter, they are just one piece of the enrichment puzzle. When I think of canine enrichment, I think of activities that involve direct interaction with Dexter. It’s about more than just keeping him occupied with food toys—it’s about creating a connection with him, something we do together.
Incorporating various types of environmental enrichment can greatly benefit your Cavalier King Charles Spaniel, both mentally and physically. Enrichment keeps those unwanted behaviors at bay by preventing boredom. It encourages social interaction, making for a happier and more engaged dog.
Positive Training for Your Cavalier
Training is a wonderful way to enrich your Cavalier’s life. Whether you’re teaching basic obedience, fun tricks, or advanced behaviors, positive dog training sessions offer cognitive stimulation and deepen your bond. Cavaliers are smart and love to please, which makes them quick and eager learners. Remember, when you’re teaching and training your Cavalier, you want the training to be fun for both your dog and you.
Google Ad Below
Outdoor Adventures
Taking your Cavalier to the park or on a walk can be incredibly gratifying. Consider going on a “sniffy walk,” where your pup gets to explore and investigate their surroundings at their own pace. Allowing them to follow their nose is not only fun but also taps into their natural instincts.
Other fun outdoor adventures can be indoors too! Take your Cavalier to a pet store for some shopping or visit a dog-friendly indoor store. Just make sure to call the establishment first to double-check their pet policies. Those training sessions you’ve been working on will ensure your indoor fun is a positive experience and one you can feel proud of.
Fun and Beneficial Canine Fitness Activities
Incorporating canine fitness activities can be both fun and vital for your Cavalier’s health. Stretching, sits to downs to stands, using wobble boards, or even walking over cavaletti poles are a few examples. These activities help keep your Cavalier in good physical shape and engaged. Other fitness ideas include walking on slight outdoor hills, placing two paws on a curb, jumping on a sturdy boulder, and walking across a fallen tree trunk. Always prioritize safety during these exercises.
Sensory Enrichment for Your Cavalier
Sensory enrichment is another great way for keeping your Cavalier King Charles Spaniel active and entertained. This type of enrichment is all about stimulating their senses, sight, smell, hearing, touch, and even taste. Obviously, there is some overlap between enrichment “categories.”
Consider incorporating toys that make different sounds or have different textures to engage their hearing and touch senses. You can even make a scent garden in your yard with dog-friendly plants and herbs. Or, grab some outdoor things such as pine cones, grass, and flowers and place them in scent boxes for your Cavalier to smell or find. Plus, activities such as scent work, where your dog uses their sense of smell to find hidden treats or toys, can provide a great mental and physical workout..
By giving your Cavalier a variety of sensory experiences, you satisfy their natural curiosity and make them happier overall. Giving your Cavalier sensory activities like scent work or creating a scent garden not only keeps them entertained but also deepens your connection as you explore together.
Bonding Activities
Simple activities like grooming, talking to your dog, or giving them a gentle massage are also forms of enrichment. By connecting and touching your dog, you not only are able to do a lump-and-bump check, but you are laying the foundation of trust. Shared Zen moments like listening to music together or just lounging on the couch, can also be incredibly soothing for both you and your dog. Don’t forget snuggle time! Most Cavaliers love to cuddle, and those quiet, close moments can deepen your relationship even more. Did you hear that, Dexter? By incorporating these simple yet meaningful activities into your life, you’ll create a stronger relationship with your dog.
Food Games and Interactive Toys: Enhancing Mealtime for Your Cavalier
Food games like lick mats, interactive food toys, and snuffle mats are a great way to feed your Cavalier. Instead of wasting those valuable calories by tossing them in a bowl, using enrichment toys offers a fantastic activity. Don’t use extras in those food toys; use your Cavalier’s daily food or food calories.
For Cavaliers who are fed fresh food, such as a raw or fresh diet, lick-type toys like lick mats are perfect. These toys allow your Cavalier to eat their food while licking and enjoying their mealtime. Spreading the food out encourages more time eating and offers an easy enrichment activity. It also mimics natural foraging behavior.
Snuffle Mat DIY
If your Cavalier is fed dry kibble or dehydrated food, treat dispensing toys or snuffle mats are excellent choices. These toys make mealtime interactive by challenging your Cavalier to work for their food. They may knock around a toy that dispenses their meal or snuffle around a mat for their nibbles. In order to keep your Cavalier’s calories in check, you can reduce a small portion of their dry food and use fresh foods or toppers or freeze-dried 100 percent meat in these toys to add variety and excitement.
Incorporating food games and interactive toys into your Cavalier’s routine makes mealtime more enjoyable and provides an easy and daily mental enrichment activity. But, don’t just go with one treat puzzle toy. The more variety, the better.
Enriching Your Cavalier’s Life with Every Adventure
Canine enrichment is all about creating a variety of positive and fun experiences that enhance your Cavalier King Charles Spaniel’s life. Food toys are great–it’s the interactive, engaging activities that truly enhance their daily experiences.
By focusing on a variety of enrichment activities, you’ll ensure your Cavalier King Charles Spaniel is happy, content, and well-rounded.
I host a private Facebook group for Cavalier King Charles Spaniels, and we have a big focus on canine enrichment ideas and challenges to keep your Cavalier engaged and thriving!
I’d love to hear about your own enrichment ideas and experiences with your Cavalier! Share your tips and stories in the comments below and let’s keep the conversation going.
Join our vibrant Cavalier King Charles Spaniel community on Facebook, support our dedication to pet wellness on Patreon, and stay updated with our weekly newsletter for invaluable tips and insights into raising happy, healthy pets. Together, let’s make a difference in our dogs’ lives!
Google Ad Below [...]Read more...
July 24, 2024What Kind of Chew Toys and Bones are Safe for Cavalier King Charles Spaniels?
Most Cavalier King Charles Spaniels love to chew! Chewing is a natural and normal dog behavior that helps fight boredom and can even help keep your Cavalier’s teeth pearly white. But remember, brushing your Cavalier’s teeth daily is still ideal. Puppies and adolescent Cavaliers tend to have a high drive for chewing things. Sometimes, whatever they can sink those teeth into. Hopefully, you are working with a qualified dog trainer to ensure your Cavalier is learning to chew on the right items instead of your furniture, or, even worse, electrical cords or something else that can harm your Cavalier puppy.
So, what makes a chew toy or bone safe for your Cavalier King Charles Spaniel? Over the years, my opinion on this has evolved. I once opted for the harder, the better. But, now, I’m on the other side of the fence, choosing softer items. Hard and tough dog bones can chip teeth and even splinter, which can be very dangerous. Even my sweet, Dexter chipped his tooth on a hard bone….his last hard bone.
I personally do not use or recommend hard bones, antlers, hooves, plastic or nylon bones, rawhides, chews with lots of ingredients, wood bones, or weight-bearing bones. But, I will always say, this is my personal opinion, and they are your Cavaliers. You can do whatever you feel comfortable doing for them, and you will not be judged by me, nor should you be judged by your peers.
Please be aware that not every chew toy or bone will be suitable for every Cavalier. I strongly recommend active supervision when your Cavalier chews, particularly if it’s a new toy or bone or if the chew item is edible. The right size of a bone or toy is also important. You want to make sure the toy or bone is not so small that your Cavalier can place the entire item in their mouth and risk choking. This includes when the chew gets smaller. I tend to toss the end out before Dexter swallows it, with the exception of a chew that is crunchy. Finding the right chew for your Cavalier is sort of like “The Princess and the Pea.” So, let’s jump into my recommendations for safe and healthy chew bones for your Cavalier King Charles Spaniel.
Dehydrated or Freeze-Dried Fish Skins: With a good dehydrated or freeze-dried fish skin dog treat, the treat will be 100 percent fish skin with no artificial colors, preservatives, or flavors. With this list and anything I recommend, the first stop should be to read the actual ingredient panel. What’s inside. Everything. It’s also important to check out the packaging and carefully read the ingredient list and where the fish was caught and processed. Fish skins are great treats for your Cavalier, full of omega-3 fatty acids, typically low in fat, and fully edible. Most dogs love the taste and eagerly chew away. Some fish skins are crunchy, while others are chewy. Chewy ones last longer but need close supervision to make sure your Cavalier chews them up vs. swallowing a large piece. Shop now.
Bully Sticks & Pizzles: Made from the manly part of a bull, many dogs love chewing on these. What I like is that they typically just start to get soft and disappear; I haven’t seen any pieces break off. However, I have seen a stick peel every once in a while, like string cheese. You can also purchase bully stick holders to help hold the stick, which adds a second layer of safety, helping to prevent your dog from swallowing the end. I personally toss that piece into the garbage. Again, sourcing and how they are manufactured is key. Natural does not correlate to not using irradiation (radiation). I contacted my fair share of bully stick brands and asked if they used irradiation, so, make sure you do your homework. Tip: get odor-free or low-odor versions. These can stink like crazy! Shop now.
Raw Bones: Raw bones are another option for your Cavalier to chew on, especially if they are already on a raw diet or natural diet. Because the bones are not cooked, they are soft and unlikely to splinter. Cooked bones easily splinter and are very hard on teeth. The size will depend on the size of the bone and your Cavalier. A few options to consider include necks, wings, feet and tails. Once again, supervise and watch for choking or swallowing. Necks did not work for Dexter, as he thought he should just suck the whole thing down. Chewing Tips: Don’t clean the bones; feed them with some meat on them, as they come. Let your Cavalier pull on the meat and chew and lick the bone. Allow them to have them for an hour, then throw them away. It’s when they sit around the house, get buried, or get dried out that you get bacteria and splintering. They will last in the fridge for three days before feeding. They can also be frozen and thawed. Feed outside or on a towel, and make sure your Cavalier is wearing their snood!. Avoid weight-bearing bones, as dogs can chip or fracture their teeth due to how hard they are. Show now.
Dehydrated Duck/Chicken/Rabbit Feet/Ears: Duck, chicken, and rabbit feet or ears are excellent, crunchy, edible chews for Cavalier King Charles Spaniels. Dehydrated or freeze-dried. Both offer good chewing options. Chicken and duck feet are rich in chondroitin, glucosamine, and collagen, which support joint health, reducing the risk of brittle bones, improving mobility, and maintaining healthy teeth and gums. Rabbit ears and feet are particularly appealing as they are low in fat, high in protein, and help clean your dog’s teeth while reducing plaque buildup. Additionally, the fur on rabbit ears can serve as a natural dewormer. These natural chews are both nutritious and enjoyable, but always supervise your Cavalier to ensure safe chewing. Shop now.
Tripe Sticks: Tripe sticks are a fantastic chew option for Cavalier King Charles Spaniels. Typically made from the stomach lining of cattle, lamb, or goat, these chews are naturally rich in digestive enzymes and nutrients that support gut health. Tripe sticks provide a satisfying, chewy texture that most Cavaliers love, while also helping to clean their teeth and gums. They are full of nutrients that can be a great addition to your dog’s chew rotation. Shop now.
Beef Tails: Beef tails are another excellent choice for your Cavalier. They are durable and provide a long-lasting chewing experience, which helps keep your Cavalier engaged and entertained. Beef tails are also high in protein and can help naturally clean your Cavalier’s teeth. The natural toughness of beef tails makes them a good option for aggressive chewers, but always make sure to choose the appropriate size to prevent any choking hazards. Shop now.
Tendons: Tendons are a great chew for Cavaliers because they are tough yet somewhat flexible, providing a satisfying chew without being too hard on their teeth. They are also rich in collagen, which is beneficial for joint health. Tendons help keep your Cavalier’s teeth clean and their gums healthy. Most Cavaliers find the chewy texture very satisfying. Shop now.
Yak Chews: Yak chews are a fantastic option for Cavalier King Charles Spaniels, but I only recommend them when microwaved to make them poofy. Microwaving them creates a crunchy, airy texture that Cavaliers love, making them a safe and enjoyable option. They are rich in protein and calcium, supporting your dog’s overall health. Made from a mixture of yak and cow milk, these chews are rich in protein and calcium, supporting your dog’s overall health. Again, double check the ingredient label; not all are created equal.
Subscribe to @RaisingYourPetsNaturally’s YouTube channel for more!
Fillable Chew Toys: I am a fan of filling various food toys such as West Paw Tux and Toppl with healthy snacks. The key to getting your Cavalier to chew on a food toy is to stuff it! If your Cavalier is eating the toy instead of the inside food, I do not recommend it. Shop now.
Ingredients matter! If you’re considering chew bones made from various ingredients, it’s crucial to flip over the package and dive deep into the ingredient list. Not all chews are created equal, and some can contain nasty or even toxic substances that could harm your dog. Look for natural, wholesome ingredients and avoid artificial colors, flavors, and preservatives. A little extra time spent reading labels can make a big difference in keeping your Cavalier King Charles Spaniel safe and healthy.
So, there you have it. That is the current list of some healthy and natural chew toys, bones I feel comfortable providing Dexter and recommending to my dog training clients. Always remember to supervise your Cavalier when they are chewing and to choose the right size and type of chew for their needs.
Which of these chews does your Cavalier King Charles Spaniel love the most? Share your favorite chew toys or treats in the comments below!
A big thank you to all the members in our Cavalier Facebook group for your wonderful photos!
Google Ad Below
Join our vibrant Cavalier King Charles Spaniel community on Facebook, support our dedication to pet wellness on Patreon, and stay updated with our weekly newsletter for invaluable tips and insights into raising happy, healthy pets. Together, let’s make a difference in our dogs’ lives!
🐶💙Support our passion for pet wellness and unlock exclusive content, perks and early access by exploring our Patreon tiers.
Sign up for our weekly newsletter!
Join us on Facebook!
[...]Read more...
January 23, 2025Supporting Your Senior Cavalier King Charles Spaniel: The Ultimate Guide to Aging Cavaliers
After 15 amazing years with my Cavalier, Dexter it was his time to go to the rainbow bridge. It’s never an easy decision to make and since then, I have been thinking back on our life together. Over the course of his life, I wrote a lot about Dexter on my first blog, Raising Your Pets Naturally. Now, with Stewart, my 7-month-old rescue Cavalier King Charles Spaniel puppy, I’m starting fresh, but with all that I’ve learned from Dexter’s senior years. I thought this would be a good time to explore when a Cavalier King Charles Spaniel is considered a senior, their lifespan, common health concerns, and how we can support our Cavaliers through every stage of life.
At What Age Is a Cavalier King Charles Spaniel Considered a Senior?
If you’re wondering, “When does a Cavalier reach old age?” The answer varies depending on factors like genetics and health. Typically, small breed dogs like Cavaliers are considered seniors between 7 and 10 years old. While this is a general guideline, you may notice your dog showing signs of aging earlier or later.
Some indicators of senior status include:
Decreased Interest in Play: They may be less enthusiastic about toys or games they used to enjoy.
Weight Changes: Unexplained weight gain or loss can be a sign of aging or underlying health issues.
Changes in Vision or Hearing: Difficulty seeing or responding to cues may suggest declining eyesight or hearing.
Increased Time Spent Resting: Senior dogs often nap more during the day and may tire easily after exercise.
Changes in Appetite: They may eat less or show more picky eating habits.
Difficulty Climbing Stairs or Jumping: You might notice hesitancy or struggle with previously easy physical activities.
Behavioral Changes: Increased anxiety, clinginess, or even irritability may indicate aging.
Frequent Bathroom Breaks: Aging can bring bladder control issues or an increased need to urinate.
Dull or Thinning Coat: Their fur might lose its luster or feel thinner in certain areas.
Dental Issues: Bad breath, difficulty chewing, or loss of teeth can become more prominent.
Reduced Tolerance for Cold or Heat: Seniors may seek out warmth or avoid strenuous activity in hot weather.
Increased Vocalization: They may bark or whine more often, potentially due to discomfort, anxiety, or confusion.
Cognitive Changes: Signs of canine cognitive dysfunction (CCD) include disorientation, restlessness, or forgetting familiar routines.
Slower movement or stiffness in the morning: Your Cavalier may take a little longer to get going in the mornings, which can be a sign of joint stiffness or early arthritis.
Graying fur, often around the muzzle: Just like humans, dogs may develop gray hairs as they age, particularly around their face.
But don’t worry, aging doesn’t mean your Cavalier is slowing down in spirit! With the right care and attention, they can still enjoy life to the fullest.
What Is the Life Expectancy of a Cavalier?
You may have heard the question, “How long do Cavaliers live?” The average lifespan of a Cavalier King Charles Spaniel is approximately 10.45 years. This is based on a 2022 UK study of veterinary data. However, some studies suggest a slightly longer lifespan, with a 2024 UK study indicating an average of 11.8 years for the breed. The typical lifespan of a Cavalier King Charles Spaniel is around 9-14 years. That said, some Cavaliers, like Dexter, surpass this average with proper care, while others may face challenges earlier due to health conditions.
Common Health Issues in Cavaliers
Cavaliers are an incredibly loving and joyful breed, but they do have a predisposition to certain health issues. Knowing what to watch for and being proactive in their care can help them live a happy and long life.
Mitral Valve Disease (MVD): Nearly every Cavalier King Charles Spaniel owner will face mitral valve disease at some point if their dog lives long enough. This heart condition affects the valve’s ability to close properly, leading to a heart murmur and, eventually, heart failure if untreated. Yearly heart check-ups with a cardiologist can help monitor and manage this condition.
Chiari-like Malformation (CM): Because of the breed’s unique head shape, it’s estimated that 95 to 99% of Cavaliers will develop a condition called Chiari-like malformation (CM). This happens when the skull is a bit too small for the brain, causing part of the brain to push into the spinal canal. CM can result in pain, weakness, or in severe cases, even paralysis. While there’s no cure, symptoms can often be managed with medications and regular vet check-ups, helping your dog feel more comfortable.
Hip Dysplasia and Patella Luxation: While less common in Cavaliers compared to larger breeds, these conditions can cause joint pain and mobility issues. Patella luxation, which is a dislocation of the kneecap, is more common in Cavaliers and can lead to lameness and discomfort. Keeping your Cavalier at a healthy weight is key to reducing stress on their joints and managing these conditions.
Eye and Ear Problems: Cavaliers are prone to progressive retinal atrophy (PRA), cataracts, and ear infections. Regular grooming and vet visits help catch these issues early.
Intervertebral Disc Disease (IVDD): IVDD is a condition where the discs in your dog’s spine become damaged or degenerate, causing pain, weakness, or even paralysis in severe cases. Cavaliers are particularly vulnerable to this, especially as they age. Be on the lookout for signs of discomfort, difficulty moving, or dragging their back legs.
Myoclonus: Myoclonus refers to muscle twitches or jerks that can occur in Cavalier seniors, especially around the head or neck area. While it’s usually not painful, it’s important to consult with a vet to rule out underlying issues such as neurological problems.
Medium-Chain Acyl-CoA Dehydrogenase (MCAD) Deficiency: This genetic condition affects Cavaliers’ ability to properly metabolize certain fats, which can lead to serious health problems, including low blood sugar, lethargy, and, in severe cases, sudden death. The great thing is that there’s a quick and easy at-home swab test available to check if your Cavalier has MCAD. It’s a simple step that can give you peace of mind and help catch this condition early. It’s a proactive way to care for your Cavalier’s long-term health.
Subscribe to @CavalierTipsandFun for more!
Supporting Your Cavalier Through All Life Stages
Caring for a senior Cavalier means making thoughtful changes to their routine. As our dogs get older, their needs shift in different ways. They may slow down, develop new health concerns, or simply need more comfort. These changes are completely normal, and it’s up to us to help them adjust so they can continue to feel their best. With a little extra care and attention, we can make sure they stay happy, healthy, and comfortable as they age. Whether it’s modifying their diet, adjusting their exercise, or making small changes to your home, these little changes go a long way in supporting their well-being. After all, they’ve given us so many wonderful years of love and companionship, and now it’s our turn to return the favor.
Nutrition for Senior Cavaliers
As your Cavalier enters their senior years, their nutritional needs often shift to support their changing bodies. A balanced diet made with fresh, high-quality ingredients like Omega-3s, antioxidants, glucosamine, and chondroitin can help maintain joint health, cognitive function, and overall vitality. Glucosamine and chondroitin play an essential role in supporting cartilage and joint health and can be included in their diet through natural sources like bone broth, chicken feet, or beef trachea, or through supplements if needed. Adding these fresh foods as part of their meals or even as toppers can provide a natural boost that processed options often lack. Every dog is unique, so working with your vet or a canine nutritionist is key to crafting a plan that meets your Cavalier’s specific needs.
When Dexter was diagnosed with kidney issues in his senior years, I found that his diet needed some adjustments. He had been raw-fed for most of his life, but with the help of his veterinarian, I transitioned him to a customized, home-cooked diet to better support his health. Bones, which are a staple in raw feeding, are high in phosphorus, a mineral I needed to limit. To make up for the lack of bone calcium, I switched to eggshell calcium, which is lower in phosphorus and just as effective.
I also began boiling his meat and discarding the cooking water, which helped reduce the phosphorus content even further. I carefully selected foods that were naturally lower in phosphorus, like certain vegetables and proteins. Dexter was also starting to lose weight, so I added carbs like rice and sweet potatoes to help him maintain his energy and body condition.
These changes made a big difference in his quality of life. While home-cooking may not be for everyone, it’s worth exploring alternatives to prescription diets if your Cavalier develops a medical condition. A good veterinarian or certified dog nutritionist can guide you in creating a plan that meets your dog’s needs without compromising on fresh, wholesome ingredients.
💡 Pro tip: Every Cavalier is unique, and what works for one dog may not work for another. Always partner with your vet or a canine nutritionist to find the best approach for your senior Cavalier. Giving them a fresh diet tailored to their needs is one of the best ways to show your love and care during their golden years.
Exercise and Mental Enrichment
Gentle exercise is important for keeping your senior Cavalier feeling their best, but it’s all about adjusting to their abilities. When Dexter reached his senior years, mosey walks became our go-to. He loved taking his time, sniffing every blade of grass, and enjoying the world at his own pace. When he got tired, I’d pop him into his stroller so we could continue our adventure without overdoing it. That stroller wasn’t just for outdoor strolls either, it was perfect for indoor store adventures, allowing him to stay engaged and part of the action while giving his body the rest it needed.
Mental enrichment was just as important as physical exercise. One of Dexter’s favorite activities was a “find it” game with cardboard boxes. I’d hide a treat in a box, spread them around, and watch his excitement as he used his nose to uncover the prize. It was the perfect mix of mental stimulation and gentle movement. For senior Cavaliers, simple adjustments like these can make a huge difference. Whether it’s a slow walk, a stroller ride, or an engaging puzzle, finding activities that fit their needs helps them stay vibrant and connected to the world around them.
Don’t forget to subscribe to @CavalierTipsandFun for more!
Natural Therapies for Senior Cavaliers
As Cavaliers age, their bodies may need extra support to stay comfortable and mobile. Therapies like at-home laser treatments, physical therapy, and acupuncture made a big difference for Dexter in his senior years. Actually, Dexter had these treatments the majority of his life due to his Chiari malformation. These options can reduce pain, improve mobility, and help manage chronic conditions like arthritis.
Dexter had regular physical therapy visits, where he worked with a canine rehabilitation specialist to keep his joints moving and his muscles strong. I also had simple at-home exercises to follow up with between visits, ensuring he stayed as active as possible without overdoing it. Using a laser therapy device at home helped target areas of stiffness or soreness, and his PEMF (Pulsed Electromagnetic Field) bed became one of his favorite spots to rest. PEMF therapy didn’t just support his comfort but also promoted better circulation and reduced inflammation.
Order a laser for your Cavalier today!
Acupuncture was another natural treatment that worked well for Dexter, offering gentle relief from discomfort and improving his overall quality of life. These treatments, along with his regular routine, were all part of ensuring he was comfortable and able to enjoy his senior years to the fullest.
If you’re considering these therapies for your Cavalier, talk with your Cavalier’s holistic vet or a canine rehabilitation specialist. They can guide you toward the best options for your Cavalier’s individual needs and help create a plan to support their comfort and mobility.
Veterinary Care and Preventative Check-Ups
Regular vet visits are essential, especially as your Cavalier gets older. I recommend scheduling check-ups at least once a year, but if your dog is on medications or managing a condition, like Dexter was, labs every 4 months can give you a better picture of their health. Semi-annual check-ups are also a good idea to catch early signs of issues like MVD, joint problems, or anything else that may need attention. Don’t hesitate to bring up any subtle changes you’ve noticed, whether it’s weight loss, fatigue, or coughing. Early intervention is key, and your vet can provide valuable guidance to help you manage your Cavalier’s health, ensuring they stay happy and comfortable as they age.
Cardiologist Visits
I highly recommend that every Cavalier sees a cardiologist at least once a year. Cardiologists specialize in heart health and truly understand the ins and outs of heart disease, including conditions like MVD, which Cavaliers are prone to. Even if your dog hasn’t been diagnosed with anything serious yet, a cardiologist can spot early signs of issues that might not be apparent to you or your regular vet. If your Cavalier is diagnosed with MVD, your cardiologist may recommend more frequent visits to monitor the progression of the disease and adjust their treatment plan as needed. Having a heart specialist on your team gives you peace of mind and ensures you’re taking proactive steps to care for your dog’s heart health.
Making Your Home Senior-Friendly
As your Cavalier enters their senior years, small changes around the house can make a world of difference in how they move and rest. Senior dogs often experience joint stiffness, and their mobility may not be what it once was, so providing a comfortable and safe environment helps them feel at ease. These adjustments don’t have to be drastic, but they can really support your dog’s needs as they age.
Ramps or Steps: It’s always a good idea to have ramps or steps in place, even if your Cavalier is still young. Jumping down from furniture can put strain on their joints and neck, leading to potential issues down the road. Ramps or steps make it easier for them to get on and off the couch or into the car, preventing unnecessary stress on their bodies. These additions are a simple way to protect your Cavalier from injury and support their mobility throughout all stages of life, ensuring they can continue to join in on the fun without risk.
Orthopedic Beds: Comfort is key when it comes to senior Cavaliers. Cushioned orthopedic beds provide much-needed support for aging joints and pressure points. Dexter was a fan of cooling mats all year, so I made sure to place them throughout the house, including on his beds, to keep him cool. But I always left at least one bed without a cooling mat, in case he wanted to curl up and stay cozy. The goal is to ensure they have a comfortable place to rest, with options that suit their changing needs.
Non-Slip Surfaces: Slippery floors can be a senior dog’s worst enemy. To prevent falls, I recommend adding rugs or carpets to high-traffic areas, especially in places like the kitchen or hallway. You can also try ToeGrips(use promo code: DEXTER for 10% Off Your First Order), which help with traction, so your Cavalier can walk confidently. Making sure they have a stable environment to navigate helps keep them safe, especially when they’re getting around slower than they used to.
How Long Do Cavaliers Live? Cherish Every Moment
If there’s one thing Dexter taught me, it’s to appreciate the little moments, whether it was a slow morning walk, the rare occasion when he’d want to be close and rest in the nook of my legs, or simply watching him nap and snore in the sunshine. Dexter wasn’t much of a cuddler, but when he wanted to be near me, I made sure to savor those times. Our Cavaliers may not live as long as we’d like, but the joy they bring into our lives is something we’ll never forget.
When Stewart reaches his senior years, I know I’ll be ready to give him the care and love he deserves. For now, I’m soaking up every playful, puppy-filled moment.
Google Ad Below [...]Read more...
April 28, 2024Are Cavalier King Charles Spaniels Good for Therapy Dog Work?
Today, I want to chat about a topic that is close to my heart: therapy dogs! Have you ever wondered if your Cavalier King Charles Spaniel would make a good therapy dog? It’s a common question and one that has a few caveats. First, it’s not all about the dog! I know, I know, it’s always all about Dexter, but with visiting therapy dogs, it’s about teamwork.
But what is a visiting therapy dog team, and what do they do? A therapy pet team is a person and their pet (sometimes cats, bunnies, etc.) who share their companionship and comfort with those in need, visiting places like hospitals, schools, and nursing homes. These teams engage in either Animal-Assisted Activities (AAA) or Animal-Assisted Therapy (AAT). AAA therapy dog teams engage in sessions without the presence of a medical professional or specific treatment goals, aiming simply to bring joy and comfort. Whereas AAT therapy dog teams work with healthcare providers in goal-oriented sessions aimed at addressing specific issues, with progress carefully measured and tracked throughout the process.
Being a good therapy dog team isn’t just about your Cavalier; it’s also about you. Both you and your CKCS are visiting as a team. You both must have the skills and knowledge required to visit people in a wide range of settings.
Let’s discuss what humans should be bringing to a Cavalier therapy dog team. As a therapy dog handler, it’s important to be comfortable when interacting with both people and your dog. You’ll need to be able to guide your Cavalier through different situations, encouraging them and keeping them safe and happy. Understanding your dog is key to becoming a therapy dog handler. You’ve got to be able to recognize the tiniest changes in behavior and body language, and quickly respond. And at the same time, you will be multitasking by staying engaged with individuals. It’s a balancing act, for sure, especially as you start out your journey as a therapy dog team.
Now, what personality should your Cavalier King Charles Spaniel have in order to make a good therapy dog? When it comes to a well-suited therapy dog, you can look at a few key traits. A good therapy dog should be reliable, predictable, and able to follow your cues with ease. That’s not to say they have to be robots and never get flustered, but as a general rule, you want a dog that is solid in their temperament. Your dog should be friendly with strangers, as your visits will be with strangers. At the same time, they should be poised, not jump on people, and be able to walk nicely on a leash around distractions, including food. It’s not just about loving new people; it’s also about having manners in new and unfamiliar environments.
Getting Started Training Your Cavalier to Become a Visiting Therapy Dog
It’s important that your Cavalier have basic obedience and manners. Walking on a loose leash in crowded places, around dogs, and on slick floors is a must. Leaving food or dropped pills on the ground is incredibly important for your dog’s safety. If your Cavalier knows tricks, that can be a great icebreaker and is also helpful when someone wants to look at your dog but not pet them. Dexter and I were a visiting therapy dog team for many years, and tricks and activities were by far his favorite visits! If your dog needs a refresher, enroll in a positive dog training class.
Subscribe to our @CavalierTipsandFun YouTube channel for more!
Google Ad Below
After your Cavalier has mastered his basic obedience skills in a variety of environments, look for a therapy dog training prep class. This may be a weekend class or one that spans 4–8 weeks. When I taught my therapy dog prep class, each week we covered a new topic to prepare the handlers and dogs for the actual work involved and the test. My students by far enjoyed skit night, where my volunteers and I role-played different scenarios, the teams interacted, and we discussed what was good and how they could improve in that situation. It was a hoot and very eye-opening for the upcoming teams.
When you and your Cavalier are ready to take your therapy dog evaluation, you will need to find an evaluator to assess whether you are ready for therapy work. But there is more than one therapy dog organization out there. Choosing the right organization is crucial. Some facilities have specific requirements, like only accepting teams evaluated by certain organizations. So, if you have your sights set on a specific organization, reach out to them first. If your dog is on a raw food diet or you provide your dog with titers vs. yearly vaccinations, not all therapy dog organizations accept that, but some do.
Speaking of organizations, there are plenty out there, each with its own unique criteria. Some of the most common ones include Alliance of Therapy Dogs, Pet Partners, Love on a Leash, and Therapy Dogs International. Be sure to check out their specific requirements before making your decision.
Subscribe to @DextertheDogandFriends for kid-friendly content!
During the evaluation, the evaluator will test your skills to ensure you’re ready to handle various situations with confidence. Once you’ve got the green light from your evaluator, send in your paperwork and fees. While you are waiting for your official badge, it’s a good time to start reaching out to facilities you’re interested in visiting. It’s best to meet with the director, take a tour, and get a feel for the environment without your dog. When you are ready to visit with your Cavalier, keep those initial visits short and sweet. It’s all about easing them into the new surroundings and ensuring they feel comfortable and confident in their role as a therapy dog.
And remember, if you don’t think therapy work is in the cards for your Cavalier, that’s perfectly fine. There are plenty of other enjoyable activities you and your Cavalier can explore together. But if therapy work is the journey you’ve chosen, then I wish you both the best of luck on this rewarding adventure.
Your comments and questions are always welcome below.
Join our vibrant Cavalier King Charles Spaniel community on Facebook, support our dedication to pet wellness on Patreon, and stay updated with our weekly newsletter for invaluable tips and insights into raising happy, healthy pets. Together, let’s make a difference in our dogs’ lives!
Google Ad Below [...]Read more...
July 10, 2024Choosing a Cavalier King Charles Spaniel Breeder
While I understand the “adopt don’t shop” idea, there are valid reasons to purchase a purebred Cavalier King Charles Spaniel from a responsible Cavalier breeder. I’ve received numerous requests on how to find a good Cavalier King Charles Spaniel puppy breeder, so let’s dive into my personal thoughts and considerations.
Educate Yourself on the Cavalier King Charles Spaniel Breed
First things first, it’s crucial to understand the breed you’re interested in. Cavaliers are charming, affectionate, and beautiful, but they also have specific needs and characteristics. Learning about the typical Cavalier personality and care can help you in deciding if a Cavalier is the right breed for your family.
Dive into the Cavalier King Charles Spaniel Breed Information
The internet has a ton of information about Cavalier King Charles Spaniels. Not all good, so take everything with a grain of salt. I would suggest looking at Cavalier King Charles Spaniel national breed clubs and Cavalier rescues. They tend to have a lot of very helpful information. Spend time reading about Cavaliers to understand their grooming care, behavior traits, size, and medical concerns.
Cavalier King Charles Spaniel Temperament and Personality: Cavaliers are known for their friendly and affectionate nature. They thrive on companionship and are often described as “lap dogs” or “love sponges” because they love to snuggle. But, they aren’t all snuggle bugs, and it’s important to note that they are spaniels, which stem from hunting genes, so they can be very active little dogs. Interestingly, Dexter is now almost fifteen, and, over the years, I have met a lot of Cavalier families who downsized from golden retrievers, I was one of them. I think because they have that same personality of fun and eagerness to be part of the family activities.
When taught properly, they are often good with children and other dogs and adapt well to a variety of living environments. I do say when taught properly, as you can’t assume you can toss any dog into a situation and they will handle it as we had hoped. As a side note, please check out my YouTube channel, Dexter the Dog and Friends, to learn more about raising kids and dogs together.
Dexter’s school assembly!
Cavalier King Charles Spaniel Maintenance and Grooming: Cavaliers require regular grooming due to their silky and long coats. This includes brushing several times a week to prevent mats and tangles. Silky? Well, some Cavaliers have a much thicker coat than others. Take my Dexter, for example. He has very long fur, and it’s silky but also super thick. Daily brushing is even better if you can swing it. It will really help to prevent mats in the first place.
Regular baths are important too. If you are using a truly natural dog shampoo (I use 4-Legger) that does not have any harmful ingredients, you can bathe as needed. When Dexter was a visiting therapy dog, he had to have a scrub-a-dub-dub before his visits, so that was weekly or every two weeks for us. But now, he gets a bath every three to four weeks. Their nails should also be trimmed regularly, and their teeth brushed daily to maintain good dental health.
Grooming Tips. Subscribe to my @RaisingYourPetsNaturally YouTube channel for more.
Trimming Your Cavalier King Charles Spaniel: Talk about a controversy! I am always pro it’s your dog; do what is best for them and you. Dexter has Chiari malformation (more on that below) and because of that, grooming is uncomfortable. Therefore, I have always kept him in a puppy cut. I lighten that thick fur, shorten him up, trim his ears, and keep his slippers short. Slippers, BTW, are the fur around their feet, or Grinch feet. If you want to keep their Grinch feet full, it is important to still trim their foot pads to prevent slipping.
Cavalier King Charles Spaniel Medical Conditions: This is where our beloved breed suffers the most. Cavaliers are prone to several hereditary conditions. It’s essential to be aware of these and ensure your breeder is proactive in health testing because that’s the only way to help our Cavaliers out of their medical mess. Key health concerns include mitral valve disease (MVD), hip dysplasia, Chiari malformation (CM) and syringomyelia (SM), and patellar luxation. Reputable breeders will conduct specific screenings to minimize the risk of these conditions in their puppies.
Understanding Health Testing for Cavaliers
For Cavaliers, it’s crucial that both the breeding dogs and their parents are health tested for hereditary diseases. It’s not just the breeding pair, but the grandparents too! The grandparents have a longer history, testing and health records. A highly regarded breeding Cavalier should be over 2.5 years old, with parents that are MVD heart clear and MRI scanned clear of CM/SM. A reputable breeder will eagerly provide copies of health certificates of each parent and grandparents or links to tests. If not, be sure to ask. If they are hesitant to share, I would be hesitant to move forward.
Mitral Valve Disease (MVD): Every breeding Cavalier King Charles Spaniel should have an annual heart exam by a board-certified veterinary cardiologist. The parents of your prospective puppy should have heart clearances from a cardiologist and be at least 2.5 years old at the time of breeding. All four grandparents should be over the age of 5 and heart clear.
Syringomyelia (SM) and Chiari Malformation (CM): Both parents should have MRI scans showing them clear of CM/SM after reaching 2 years of age. It’s even better if the grandparents have also undergone MRI scans and are clear of CM/SM.
Hips: OFA requires that a Cavalier be a minimum of 2 years old for hips to be certified. It’s recommended for grandparents to have certified hips as well.
Patellas: Testing should be done annually to ensure healthy knees and to prevent luxation in both parents.
Medium-Chain Acyl-CoA Dehydrogenase (MCAD): MCAD is a metabolic disorder that affects how Cavalier King Charles Spaniels process certain fats for energy. It’s caused by a genetic mutation that can lead to metabolic imbalances. DNA testing is essential to identify Cavaliers carrying the mutation and prevent passing it on to their offspring. This is a newer (Summer 2023) DNA test.
Episodic Falling Syndrome (EFS): Is a hereditary neurological disorder affecting Cavaliers. Breeders should ensure all Cavalier breeding dogs undergo DNA testing for EFS before mating.
Dry Eye Curly Coat Syndrome: An inherited disease that affects the eyes, skin, and feet of Cavalier. It can be detected through a DNA test.
Dry Eye: Testing for dry eye in Cavalier King Charles Spaniels involves a DNA health test to identify the presence of the genetic mutation associated with dry eye, curly coat syndrome. Testing ensures early detection and appropriate management of this hereditary condition in breeding dogs.
Don’t forget to subscribe to our @CavalierTipsandFun YouTube channel for more!
The Importance of Puppy Socialization
Puppies develop both physically and mentally right out of the gate, and even during pregnancy! A stressed mom can produce stressed, unhealthy puppies. A responsible breeder not only ensures a Cavalier puppy is medically healthy, but behaviorally as well. Breeders should prioritize the physical and mental well-being of Cavalier puppies by starting basic socialization at home. This includes introducing puppies to children, adults, outdoor environments, handling and grooming, and exposing them to different textures and obstacles.
Finding a Good Cavalier King Charles Spaniel Breeder
Many national breed clubs provide breeder lists, which are a great starting point. Look within a specific mile radius you are willing to drive to meet the breeder and puppies. Breeder websites should have detailed information on health testing and puppy socialization.
When you find a few breeders who look good on paper, contact them via email or phone. Discuss your goals and hopes for your new family member. You are looking for a connection with a breeder just like you are looking for a connection with your puppy.
Visiting the Breeder and Their Cavaliers
I recommend setting up a date and time to meet the breeder in their home and visit with their Cavaliers. Seeing the living situation and behavior of their dogs in person is a great indicator of how the puppies will turn out. Look for happy breeding dogs that are part of the family. Some breeders may be hesitant about home visits, but it’s essential for you to feel comfortable with the environment where your puppy is being raised.
Picking out Dexter! FYI he was 5 weeks here, I would bring him home at 12 weeks.
Choosing Your Cavalier Puppy
This could be an entire article on its own, but here are a few highlights to get you started. TAKE YOUR TIME! This is not a time to make a quick decision or an impulse buy. You are choosing your next family member, a living creature with strong emotions that will hopefully be with you for the next ten to twenty years.
Before meeting the puppies, have an idea about what you want to do with your Cavalier puppy and future dog. Are you looking for a canine athlete? Or maybe a therapy dog to visit children or the elderly? The personality traits of those two puppies can be quite different, so knowing your goals will help in choosing the best Cavalier King Charles Spaniel puppy for you, your family, and your goals.
Bringing Your New Cavalier Puppy Home
Picking up a new Cavalier puppy typically happens when the pup is between 12-15 weeks of age. Prepare your car for your new puppy before arriving at the breeder’s home. Items to have on hand include a travel crate, puppy blankets, healthy treats, water and bowl, and a leash and harness. If your journey includes an overnight stay, pack items for a dog friendly hotel stay.
Air Travel Considerations
I personally would never fly any of my pets in cargo, nor would I have my puppy shipped to me. Meeting the breeder, dogs, and puppies is essential. If you plan on a plane ride home, check with the airlines on what they will need before your departure.
Maintaining Contact with Your Breeder
When breeders are committed to the breed’s well-being, they may ask you to provide specific health tests on your puppy throughout its life. This means the breeder is looking to see how the puppies develop, and if there are any medical concerns over their life, they may not breed that pair again. In my book, this speaks volumes about what a responsible breeder really is.
Now that you have a healthy and behaviorally sound Cavalier puppy, it’s your job to start socialization and training. You and your puppy are ready for a lifetime of fun and joy.
I hope this updated article helps your readers in their quest to find a reputable Cavalier King Charles Spaniel breeder. Good luck at finding your BFF!
Google Ad Below
Join our vibrant Cavalier King Charles Spaniel community on Facebook, support our dedication to pet wellness on Patreon, and stay updated with our weekly newsletter for invaluable tips and insights into raising happy, healthy pets. Together, let’s make a difference in our dogs’ lives!
🐶💙Support our passion for pet wellness and unlock exclusive content, perks and early access by exploring our Patreon tiers.
Sign up for our weekly newsletter!
Join us on Facebook!
[...]Read more...
November 12, 2024Best Treats for a Cavalier King Charles Spaniel
If you’ve found this Cavalier blog by searching for “best treats for Cavalier King Charles Spaniels,” you’re probably wondering what makes a healthy dog treat for this special breed. Whether you’re looking for the best dog-training treats for your Cavalier or just healthy dog treats, it’s essential to choose options that benefit your Cavalier King Charles Spaniel’s health and waistline. Here’s what I consider when picking out healthy treats for Dexter.
Check the Ingredients in Your Cavalier’s Treats
The very first thing I do when choosing treats for Dexter is check the ingredients list. Don’t just rely on the fancy pictures on the front of the bag; the ingredient panel tells you what your Cavalier is actually eating. Even if a treat claims to be “chicken-flavored,” that doesn’t always mean it contains real chicken. Always look for whole, natural ingredients like real meat, vegetables, and fruits.
What to Avoid in Your Cavalier King Charles Spaniel’s Treats
Artificial Flavors: If you see “flavor” in the ingredient list, it’s likely a synthetic that’s meant to mimic real food. Real food ingredients are always better for your Cavalier’s health.
Added Salt: Too much salt can be harmful, especially for dogs with heart issues, like Cavaliers. Stick to treats with no added salt, as too much sodium can lead to health problems.
Preservatives: Treats should be free of artificial preservatives like potassium sorbate, sodium benzoates, BHA and BHT. These chemicals are commonly found in cheaper treats and can be harmful in the long run.
By-Products or Mystery Meat: Avoid any treats that list “meat by-products” or vague “animal fat.” We want to know exactly what’s going into our dog’s body.
Sugar or Sweeteners: Skip the sugary treats! Cavalier King Charles Spaniels can easily gain weight, and too many sugar-filled treats can contribute to obesity, which affects their health.
Grains: Many dogs, including Cavaliers, can be sensitive to corn, wheat, and soy. Grains also pack in a lot of calories. Stick to treats with grain-free ingredients.
Healthy Treats for Cavalier King Charles Spaniels
So, what should you be looking for instead? The best treats for Cavalier King Charles Spaniels are made from whole, natural ingredients. I always opt for treats made with high-quality meats, like rabbit, chicken, beef, or duck, and ingredients that support overall health.
When choosing healthy dog treats, I think about each ingredient and how it affects my dog’s health and diet. I prefer foods that can contribute to Dexter’s overall nutrition, not add-ons. If I think the treat’s ingredients are more like a candy bar, I’ll skip it.
Best Training Treats for Cavaliers
When I’m training Dexter, I want treats that are both nutritious and irresistible. Training treats should be small, easy to chew, and made from single-source protein. Some of my favorites include freeze-dried meat or dehydrated meat. These treats are not only high-value (meaning they’ll grab your Cavalier’s attention), but they’re also healthy and easy to use in training sessions.
I also may grab freeze dried dog food that consists of healthy ingredients and no fillers. They tend to be bite-sized, and I can easily cut down on some of Dexter’s fresh food for the day and replace it with the freeze-dried dog food. No extra calories needed, and he doesn’t lose any of his daily nutritional needs.
Treats for Occasional Snacking
When it’s time for a snack, I’m okay with a treat that’s a bit more substantial, like grain-free biscuits made with sweet potato or pumpkin. These treats are great for occasional use, but they do tend to be higher in calories and more ingredients. I like to keep Dexter’s treats simple and sweet.
My Top Picks for Cavalier King Charles Spaniel Treats
Dehydrated Meat: A simple, natural treat that’s great for training or as an occasional snack. Dehydrating your Cavalier’s meat treats at home is simple and can be done using a dehydrator or your oven. To start, slice the meat (like chicken, beef, or turkey) into thin, even strips, removing any fat. If using a dehydrator, set it to around 160°F and arrange the meat strips on the trays, ensuring they don’t overlap. Dehydrate for 6-12 hours, checking for proper dryness—meat should be firm and break easily. If using an oven, place the meat on a baking rack, set the oven to the lowest possible temperature, and prop the door open slightly to allow moisture to escape. Store a few treats in your Cavalier’s treat jar and the rest in the freezer to stay fresh.
Dehydrated Fruits and Veggies: Dehydrated fruits and vegetables are a great low-calorie treat for Cavalier King Charles Spaniels, providing a crunchy, natural snack without added preservatives or artificial ingredients.
Can Cavaliers have carrots? For me, this is a yes and no. Yes, carrots are perfectly healthy and nutritious for your Cavalier. I know a lot of people recommend feeding large carrots to dogs as a chew, but I do think that may pose a choking risk. You must ensure your Cavalier is safely chewing the carrot and not swallowing big chunks. The same goes for baby carrots. For me, I prefer to feed Dexter carrots as little bits. But, I am definitely a proud helicopter mom. Make sure you read the article on healthy chews for your Cavalier King Charles Spaniel if you are wanting safe-and-natural chews.
Freeze-Dried Healthy Dog Food: Freeze-dried dog food can be an easy swap from their regular diet, making it a convenient and healthy treat option for Cavalier King Charles Spaniels. Plus it’s a great treat for picky eaters.
Freeze-Dried Meat Treats (Single Ingredient): Freeze-dried meat treats are a high-protein, single-ingredient snack for Cavaliers, providing a nutritious option.
Healthy DIY Recipes for Cavaliers. Don’t forget to subscribe to @CavalierTipsandFun for more!
Final Thoughts on Choosing the Best Treat for a Cavalier King Charles Spaniel
When choosing the best treats for your Cavalier King Charles Spaniel, always prioritize natural, healthy ingredients. Look for treats that are high-quality, free of unnecessary fillers, and made with proteins you recognize. And remember, even the healthiest treats should be given in moderation.
What treats does your Cavalier love?
Join our vibrant Cavalier King Charles Spaniel community on Facebook, support our dedication to pet wellness on Patreon, and stay updated with our weekly newsletter for invaluable tips and insights into raising happy, healthy pets. Together, let’s make a difference in our dogs’ lives!
Google Ad Below [...]Read more...
August 20, 2024Why Does My Cavalier King Charles Spaniel Eat Everything?
As a devoted Cavalier King Charles Spaniel family, you may be wondering why your Cavalier seems to eat everything in sight. Leaves, rocks, plants, grass, paper, cardboard, whatever they seem to be able to get their mouth around is fair game. This can be concerning, as it should be. If your Cavalier eats something he shouldn’t, there’s a risk of poisoning or choking. This could be caused by pica, not enough food, other health-related issues, or boredom. Let’s dive in and see if, together, we can figure out why your Cavalier King Charles Spaniel eats non-food items.
What is Pica?
Pica is a condition where dogs eat non-food items. For Cavaliers, this could include chewing on blankets, rocks, dirt or other random items. While it might seem quirky, pica can be a sign of underlying issues. Understanding the root causes can help you address the problem and ensure your Cavalier receives the best care.
The Behavior Behind Pica
Cavaliers, like all dogs, need mental and physical stimulation. Without enough engagement and enrichment, they might resort to chewing on inappropriate items. A 2019 study published in The Journal of Veterinary Medical Science discovered pica is a common behavioral issue. After surveying 2,000 cases, researchers found dogs that lacked regular enrichment, whether due to being crated for too long, being bored, or just not enough physical exercise were more likely to display pica tendencies.
Behavior Issues That Might Be Causing Your Cavalier’s Pica
Boredom and Lack of Stimulation: Cavaliers are playful and intelligent dogs that thrive on activity. If they aren’t entertained, they might turn to chewing on anything they can find. Toys and interactive games are crucial in keeping them busy and satisfied.
Stress and Anxiety: A Cavalier’s anxiety or stress is a major concern when it comes to pica. A change in routine, new family members, or other stressors can cause your Cavalier to engage in pica as a coping response. Providing a safe and secure environment along with calming activities can help reduce anxiety. If you feel your Cavalier has anxiety, it’s important to address that anxiety with a professional.
Attention-Seeking: Sometimes, Cavaliers might eat non-food items to get your attention. I always say, if a dog is asking for attention, they probably aren’t getting the attention they need. Bump up your Cavalier’s training, games, and outings.
Medical Reasons for Pica
While pica can often be a sign of boredom, medical issues can contribute to pica in dogs. This is why it’s always important to speak with your Cavalier’s holistic veterinarian. Here are some common medical issues for pica in dogs.
Nutritional Deficiencies: If your Cavalier’s diet is lacking in essential nutrients, they might chew on non-food items to make up for it. Ensure that their diet is balanced and rich in the nutrients they need.
Gastrointestinal Issues: Sometimes, dogs might eat non-food items to soothe an upset stomach. If your Cavalier seems to be eating odd items frequently, it’s worth checking with your vet to rule out any digestive issues.
Some diagnostic methods your vet might suggest include:
Biopsies: Taking tissue samples from the digestive tract to check for disease.
Therapeutic Trials: Trying a medication or diet change to see if the pica improves.
Blood Work: Checking folate and cobalamin levels, and performing a TLI (Trypsin-Like Immunoreactivity) test to assess pancreatic function.
X-rays: Ruling out gastrointestinal obstructions and other potential causes.
How to Stop Pica in Your Cavalier King Charles Spaniel
The good news is that pica can often be managed with positive training and enrichment techniques. If it’s medical, following your dog’s vet’s protocol will be essential.
Provide Engaging Toys and Enrichment Activities: Offer a variety of toys that challenge your Cavalier’s mind and body, such as puzzle toys, chew toys, and interactive games. Incorporate activities like nose work games, agility courses, or scent trails to provide mental stimulation and prevent them from seeking out inappropriate items. Check out our Cavalier enrichment ideas!
Address Anxiety with a Professional: If anxiety might be contributing to your Cavalier’s pica, consult with a dog behavior consultant. They can help identify the root causes of your dog’s anxiety and develop a tailored plan to address it.
Use Positive Reinforcement: Reward good behavior with praise and treats. When your Cavalier interacts with their toys or engages in positive activities, reinforce this behavior to guide them toward what’s encouraged.
Monitor and Redirect: Keep an eye on your Cavalier’s actions and gently redirect them if they start chewing on non-food items. Providing appropriate toys and praising them when they use them can help steer them away from unwanted behaviors.
Leash Management and OutFox Field Guard: Use a leash to manage your Cavalier and prevent them from accessing non-food items so they can’t sneak off. Consider using an OutFox Field Guard, a type of protective mesh that covers their face that can prevent dogs from eating things they shouldn’t. Unlike a muzzle, which restricts a dog’s ability to open their mouth entirely, a OutFox protects against ingestion while allowing normal breathing and drinking.
Understanding and addressing pica in your Cavalier King Charles Spaniel involves a combination of detective work, positive training, proper enrichment, and, if necessary, medical evaluation. By keeping your Cavalier mentally and physically stimulated, providing a balanced diet, and offering plenty of attention and love, you can help them steer clear of inappropriate chewing and enjoy a happy, healthy life.
Have you noticed any specific triggers for your Cavalier’s pica? Share your experiences and tips in the comments below!
Google Ad Below
Join our vibrant Cavalier King Charles Spaniel community on Facebook, support our dedication to pet wellness on Patreon, and stay updated with our weekly newsletter for invaluable tips and insights into raising happy, healthy pets. Together, let’s make a difference in our dogs’ lives!
🐶💙Support our passion for pet wellness and unlock exclusive content, perks and early access by exploring our Patreon tiers.
Sign up for our weekly newsletter!
Join us on Facebook!
[...]Read more...
March 5, 2025Preparing Your Cavalier King Charles Spaniel for Air Travel
Through Dexter’s 15 years of life, we had countless adventures together, but every single one was by car. At nearly 30 pounds, flying in the cabin wasn’t an option for him, and I would never consider putting a dog in cargo. Now, with Stewart, I have the opportunity to travel by plane since he will be between 16 and 18 pounds as an adult, which is small enough to fit in an airline-approved travel crate under the seat.
I have to admit, I’m a little nervous. It’s been almost 30 years since I last flew, and my experience wasn’t great. But I’m determined to make this a smooth process for both Stewart and myself. In September, we’ll be flying from Detroit to Portland, Maine, and I want to make sure Stewart is as comfortable and confident as possible for his first airplane trip.
Preparing Stewart, My Cavalier King Charles Spaniel for Air Travel
Since Stewart has never flown before, I’m taking a step-by-step approach to help him get used to every part of the travel experience. This isn’t just about the flight itself; it’s about everything leading up to it, from riding in his crate in the car to being in a busy airport environment.
Teaching a Cavalier to Enjoy a Travel Crate
One of the biggest adjustments for a Cavalier is spending time in a small, enclosed space. Since Stewart isn’t crate trained and has some separation anxiety, I’m taking extra care to make his travel crate a safe and positive space. An airline-approved travel crate is a much tighter fit, so here’s how I’ve been getting him used to it:
Introducing the Crate Indoors – I started with short training sessions, luring Stewart into the travel crate with treats and rewarding him for stepping inside. Since it’s a tight fit, I guided him to turn around and reinforced him for doing so. Once he was comfortable moving inside, I worked on having him stay in the crate for a few seconds before rewarding and letting him out, gradually increasing the duration.
Crate Inside a Crate – To help him transition smoothly to riding in the travel crate, I placed it inside his larger crate in the van. Since he was already used to the big crate, this made it feel more familiar. For the first couple of weeks, I left the travel crate unzipped, but zipped up the larger crate.
Zipping Up While Driving – Once he was comfortable, I started zipping up the travel crate while still inside the larger crate. This allowed him to experience confinement in a secure way without making a sudden change.
Removing the Larger Crate – The next step will be taking the travel crate out of the big crate so that he’s riding in just the small one. By gradually adjusting him to this setup, he won’t even notice the change!
Socialization and Confidence Building
Beyond the crate, I want to make sure Stewart is confident in all the different environments he’ll encounter on our trip.
Walking Politely on a Leash – Stewart will need to walk calmly on a leash through the airport. We’ve been practicing polite walking in various places with different surfaces and distractions. I will continue this training with busy locations as we progress through his training.
Exposure to Crowds and Noises – Airports are full of noises; baggage carts, intercom announcements, rolling suitcases. I’m taking Stewart to different places where he can experience a variety of sounds and people in a controlled way.
Getting Used to Security Procedures – At TSA checkpoints, I’ll need to take Stewart out of his crate and carry him through security. To prepare, I’ll work on calmly lifting him out of his crate and holding him in busier environments, helping him get comfortable with the experience before our trip.
Preparing for Time in the Airport
Most airports have designated pet relief areas, but access to them depends on the layout of the airport and TSA procedures. Some airports have relief areas before security, while others have them post-security. Since Stewart will be crated during the drive and throughout check-in and security, I’ll plan ahead to find out if there’s an opportunity for a potty break before we go through security. If not, I’ll make sure he’s had plenty of time to potty before we leave for the airport.
Practicing Extended Crate Time – I’ve been gradually increasing the amount of time Stewart spends zipped up in his crate, so he’s comfortable being inside for longer periods.
Planned Potty Breaks – Since dogs can’t relieve themselves once past security, I’ll make sure to take Stewart to the airport’s designated pet relief area before heading to the gate. This is also why I teach my dogs how to potty on cue; it makes it easier to ensure they go when needed, especially in situations like this where time and access are limited.
The Flight Itself
The actual flight is the final step in our preparation. Since Stewart will be in his crate under the seat for the duration of the flight, I want to make sure he’s as comfortable as possible.
Calm, Positive Associations – I’m making sure that his crate time is always associated with good things; treats, chew items, and a cozy space.
Chews and Enrichment for the Flight –I’ll bring along a few safe chews and likely my slippers to provide comfort for Stewart during the flight.
Staying Calm Myself – Dogs pick up on our emotions, so I’ll be focusing on staying relaxed and making this feel like just another routine adventure for Stewart.
Final Thoughts
Traveling with a Cavalier King Charles Spaniel on a plane takes preparation, but with gradual exposure and a positive approach, it can be a smooth experience. My goal is to make sure Stewart feels safe, confident, and comfortable every step of the way. While I’m still a bit nervous about my first flight in 30 years, I know that by preparing Stewart properly, we’ll both be ready for our adventure to Maine.
A big thank you to all of our Cavalier friends who sent us their travel photos! Don’t forget to follow them on social media.
Have you traveled with your Cavalier on a plane? I’d love to hear about your experiences in the comments!
Google Ad Below [...]Read more...
October 30, 2024How to Bathe a Cavalier King Charles Spaniel Puppy
If you are wondering how to bathe a Cavalier King Charles Spaniel puppy at home, I have you covered. As a Cavalier mom and positive dog trainer, I’m ready to help you make bathing your Cavalier puppy not only effective but enjoyable and stress-free for your new Cavalier King Charles Spaniel puppy.
Dexter, who is now fifteen, has had his fair share of dog baths. But, today, I’m going to share how I gave Willow her first bath at home. With the right setup, some tasty treats, taking it slow, and a cozy towel, you can create a zen atmosphere for your Cavalier’s bathtime. So here’s a step-by-step guide to giving your Cavalier King Charles Spaniel puppy their first bath.
Set Up Your Puppy’s Bath Space for Safety and Comfort
First, you want to ensure your puppy’s bathtub or sink is safe and secure. You don’t want your puppy slipping on the surface of a wet tub or sink. First things first-secure the bathtub or sink so your puppy won’t slip. A good rubber mat keeps your Cavalier from slipping, and this alone will help your puppy feel safer in the tub. If your Cavalier is small, like Willow, you can easily bathe them in the sink. But, if they are larger, like Dexter, a tub is a must, or a portable dog bathtub can also work well. I haven’t used one, but I’ve heard from other Cavalier families they are great!
Warm Towel Tip: Before starting your puppy’s bathtime, place a few towels in the dryer. Then, just before you head to the bath, grab the warm towels. Then, after bathtime, your puppy can be wrapped in a warm-and-cozy towel. If you air dry your Cavalier puppy, then add some puppy blankets too, so they can cozy up in the pile of warm blankets.
How to Choose a Puppy Shampoo That is Safe
When choosing a safe puppy shampoo, the first stop is the back of the shampoo bottle to read the entire ingredient panel. Yup, you want to read each ingredient and make sure those ingredients are safe and natural. You may be surprised at the garbage that you find in some puppy shampoos.
Full disclosure, I’ve been working with the 4-Legger brand since 2016 and, in my opinion, they are the best out there. For puppies, I like their hypoallergenic SOOTHE formula. This isn’t a puppy shampoo review, but I do want to share their ingredient panel, so you can get a better idea on what a good puppy shampoo looks like.
4-Legger SOOTHE Ingredients: Organic Aloe Juice, Organic Saponified Oils (Coconut, Shea Butter, Olive, Sunflower, and Jojoba), Organic Vegetable Glycerin, Organic Rosemary Extract Order today with promo code RaiseNaturally20 for 20% off your first order.
Keep Your Cavalier’s Inner Ears Dry
Protecting those little ears is important. You can place a cotton ball gently in each ear to prevent water from sneaking in, but remember to remove them after! Or, you can simply gently press their ear to their head as you use a warm washcloth.
Be Generous with the Tasty Treats or Lick Mats
Treats are key to conditioning your puppy that bathtime is good. Bath=Treats or Bath=Lick Mat Time Giving treats throughout the bath not only keeps it positive but also helps distract them from what is going on. Talk to your Cavalier puppy through the experience. Let your puppy know how much you love them and that this is a safe experience.
If you’re looking for more gentle routines and everyday training ideas like this, my Manners, Life Skills & Foundation Training Course walks you through simple, trust-based lessons you can use at home. It’s all about helping you and your dog feel confident and connected.
Watch Willow’s First Bath and don’t forget to subscribe to @CavalierTipsandFun for more!
Introduce Your Puppy to the Bath Gently
When it’s go-time, place your puppy gently in the sink or tub. Willow was a little unsure at first, so I kept things calm and encouraging. We went slowly, allowing her to get comfortable, and rewarded her bravery with treats. You can always do this in steps over a few days if your puppy is nervous. Teaching your Cavalier puppy to enjoy a bath is going to be so important since this is a breed that can benefit from baths to keep their luxurious coat beautiful. The benefit of puppy bathing is that the process can be much shorter than when your Cavalier has a full coat.
Start the Water Slowly
Once your puppy seems a bit settled, turn on the water. Using a shower sprayer is ideal because it’s easier to manipulate around your Cavalier and get the belly and bum area easier. Always check the temperature; you want it warm, but never hot. If your pup gets nervous, reassure them with gentle touches, talk to them, and provide healthy and tasty treats. We want bathtime to be a good thing, not something to avoid.
Wet Your Puppy and Lather Up
Begin with their back, avoiding their face for now. Once they’re damp, add a little shampoo and lather gently. Go slow and talk to your pup throughout to keep them reassured. Make sure to reach all those little spots like under the belly, armpits, and legs.
When it comes to cleaning your Cavalier’s face, be careful and gentle. Grab a soft washcloth, soak it in warm water, and wring out any excess. Gently wipe around your puppy’s face, especially near the eyes and mouth, to keep things clean without needing shampoo. Cavaliers can be sensitive around their eyes, so keep it soothing and slow, making it a comfortable moment for them. If there’s any tear staining, gently focus on those areas but avoid scrubbing.
Rinse Thoroughly
It’s so important to rinse really well to avoid any leftover shampoo that could irritate their skin. Keep the water warm and gently go over each area until you’re sure they’re squeaky clean.
How to Dry a Cavalier After a Bath
Gently squeeze out as much water as possible from their coat while they’re still in the tub, especially from their ears, legs, and belly. Be careful not to pinch their skin. Then grab a warm towel and start rubbing them down right in the tub. Begin with their back and then work down to their legs, belly, and especially those floppy ears! The towel rubdown helps absorb extra moisture and keeps your puppy from dripping everywhere.
Pro tip: When it looks like your puppy is going to shake their head, try covering their ears lightly with a towel. It can help prevent ear issues and keeps the shake-off water spray to a minimum!
Should You Blow-Dry Your Cavalier King Charles Spaniel Puppy?
For a little more drying, a low heat or cool setting on a blow dryer works great. Keep the dryer moving and avoid getting too close to their skin. And, of course, more treats and sweet talk make this part easier too! I would highly recommend desensitizing your puppy to the hair drier first. You can learn how in the video below. If you are going to allow your Cavalier to air-dry, I would suggest using a dog drying jacket and warm , snuggly blanket.
Learn how to teach your Cavalier to love drying and subscribe to our other YouTube channel @RaisingYourPetsNaturally
And there you have it—bathing your Cavalier King Charles Spaniel puppy at home for the first time! If you’re wondering, when should I bathe my puppy for the first time, or how often should I bathe my puppy, it’s usually safe to start around eight to twelve weeks, assuming you are using a truly safe puppy shampoo. With these tips and a positive approach, you’ll help set up your Cavalier King Charles Spaniel puppy for a lifetime of happy bath times.
What part of your puppy’s first bath are you most nervous about? Let me know in the comments. I’d love to help make it a fun experience for both of you!
Google Ad Below [...]Read more...
October 1, 2024MCAD deficiency in Cavalier King Charles Spaniels
Last year, on my Raising Your Pets Naturally blog, I shared information about a relatively new health condition found in Cavalier King Charles Spaniels: Medium-Chain Acyl-CoA Dehydrogenase (MCAD) deficiency. As many Cavalier families know, this breed is already prone to several health issues, and adding another one to the list is upsetting.
MCAD deficiency is a genetic condition that impacts how the body breaks down certain fats for energy. Recent research has found some Cavaliers who have symptoms such as seizures, lethargy, and other health issues may have MCAD.
The initial study that brought this to the general public’s attention focused on a three-year-old male Cavalier who was experiencing seizures and unusual tiredness. After examining his blood and urine, researchers discovered elevated medium-chain fatty acids, pointing to MCAD deficiency. They then sequenced the dog’s genome and identified a specific change in the ACADM gene, which is associated with this condition.
When the researchers tested this genetic variant in 162 Cavaliers, they found that about 23.5 percent of the dogs carried the mutation. This discovery is important because it suggests that MCAD deficiency might be the reason behind the seizures and other symptoms we sometimes see in Cavaliers.
Here are some symptoms to watch for:
Seizures: Seizures or convulsions can be a key indicator of potential MCAD deficiency.
Lethargy: Unexplained and prolonged tiredness could be a sign of an underlying issue like MCAD deficiency.
Intermittent Health Issues: These episodes might include vomiting, decreased energy, or more severe symptoms like seizures.
Unsteady Gait: Difficulty walking or balance issues could occur during episodes.
Loss of Appetite: A sudden loss of interest in food might indicate a problem.
Low Blood Sugar (Hypoglycemia): This can lead to weakness, shakiness, disorientation, and seizures.
Abnormal Behavior: Changes in behavior, such as irritability or confusion, might be linked to a metabolic disorder.
Respiratory Distress: In severe cases, dogs might experience difficulty breathing during an episode.
Frequent Infections: Some dogs with MCAD deficiency may be more prone to infections.
Neurological Symptoms: Symptoms like circling, head pressing, or lack of coordination could be signs of this condition.
I know, right? A lot of these symptoms are also symptoms of other Cavalier King Charles Spaniel medical issues. While these symptoms can be caused by various factors, it’s important to consider MCAD deficiency, especially if your Cavalier is showing multiple signs.
Consider Getting Your Cavalier Tested for MCAD Deficiency
If you’re concerned about MCAD deficiency and its impact on your Cavalier King Charles Spaniel, getting your dog tested is a straightforward step you can take. The test involves a simple at-home swab, which you can easily order and perform yourself. This can provide valuable insights into whether your Cavalier carries the gene associated with MCAD deficiency.
For those thinking about adding a new Cavalier puppy to their family, it’s encouraging to know that many responsible breeders are proactively testing their breeding pairs and even the grandparents. This testing helps ensure that future puppies are less likely to inherit MCAD deficiency, contributing to healthier generations of Cavaliers.
Testing is a proactive measure that can help you make informed decisions about your dog’s health and well-being. If you’re interested in testing, talk to your veterinarian or reach out to a reputable lab for more information on how to get started.
For Cavaliers at risk of MCAD deficiency, diet plays a crucial role. Since these dogs might struggle to break down medium-chain fatty acids (MCFAs), it’s recommended to be mindful of their diet:
Limit MCTs: Foods high in MCTs, like coconut oil, palm oil, and milk products, including yogurt might need to be limited in dogs with this genetic variant.
Watch High-Fat Diets: A balanced diet, without excessive fats, is key for Cavaliers with potential MCAD deficiency.
Cavaliers that haven’t been tested for MCAD deficiency should avoid foods high in MCTs. Without knowing their genetic status, it’s best to be cautious to prevent potential health issues like seizures or other symptoms associated with the condition. If your Cavalier has had a diet rich in MCTs for a few years without any of the symptoms listed above, you may consider continuing to feed. However, the test is pretty easy and inexpensive, so it might be just easier and safer to test to know for sure.
The research on MCAD deficiency in Cavaliers is ongoing, and it’s vital for more Cavaliers to be tested. A simple swab test can determine whether your Cavalier carries the gene associated with MCAD. This testing is important not just for your Cavalier’s care, but also for responsible breeding practices to reduce the prevalence of this mutation in future generations. If you test, please contact your Cavalier’s breeder with the results.
Testing for MCADD
Canine Genetic Testing
GenSol Animal Diagnostics
Laboklin
As of June, 2024, the latest stats from a Facebook group dedicated to MCAD deficiency in Cavaliers show the following:
Genetically Affected: 49 dogs (9.78%)
Clinically Affected: 6 dogs (1.2%)
Carriers: 238 dogs (47.5%)
Clear: 214 dogs (42.7%)
These numbers highlight the importance of testing and awareness within our Cavalier community. By staying informed and proactive, we can continue to support the health and well-being of our Cavaliers.
Managing MCAD Deficiency: Diet and Care Tips
If your Cavalier King Charles Spaniel has been diagnosed with MCAD deficiency, managing their condition effectively involves careful attention to their diet and feeding schedule. I would suggest a good heart to heart with your dog’s holistic veterinarian. If your Cavalier does have MCAD deficiency you will need to avoid a high-fat diet and avoid foods high in medium-chain triglycerides (MCTs). Don’t forget to read those ingredient panels on all the foods, treats, and chews you feed your Cavalier.
Although MCAD deficiency is serious in Cavaliers, a good food protocol can help ensure your Cavalier still leads a full and enriched life.
Google Ad Below [...]Read more...
September 18, 2024How to Celebrate a Senior Dog’s Birthday and Healthy Dog Cake Recipe
It’s hard to believe that Dexter, my best friend and constant companion, is turning fifteen! I’m over the moon that I am able to celebrate this milestone with him. He may be slowing down a bit, but his spirit and spunk remains as bright as ever. As Dexter has aged, we may have tweaked what we can do, but one thing has stayed the same: we live each day to the fullest, cherishing every moment.
Over the past couple of years, I’ve seen subtle changes in Dexter’s energy and behavior. He doesn’t have the boundless energy of his younger days, and he’s been going through some senior dog anxiety. We’ve learned to adjust our activities together, and I’ve been working on helping him feel more secure as his cognition changes. Our daily enrichment now includes slow, sniffy walks, leisurely poke arounds through the neighborhood followed by a stroll, and indoor adventures. He still enjoys simple training sessions, which keep his mind sharp, and I continue his canine fitness exercises to maintain his mobility and strength.
Earlier this year, Dexter went down in his back end after a reaction to medication. It was a scary time, and I wasn’t sure what his recovery would look like. I was actually wondering if his time was coming to an end. But after three to four months of dedicated rehab, I’m thrilled to share that he’s made a full recovery! Dexter’s resilience has always inspired me, and this experience only deepened my love for him. His ability to bounce back, even at fourteen, is a testament to his incredible spirit.
With Dexter by my side, I’ve been inspired to dive into new creative projects. Over the past year, we launched this blog dedicated to Cavalier King Charles Spaniels. This is actually our second blog! Check out our first blog, Raising Your Pets Naturally. I’ve also created a children’s coloring book, Dexter’s Adventures, bringing his playful and inspiring spirit to life for a younger audience. Which makes this his 3rd children’s book! Everything I do is shaped by Dexter, and I’m so lucky for the joy and inspiration he brings.
Our mantra has always been to live each day to the fullest, and as Dexter turns fifteen, this really hits home. Every day is a gift, and I’m beyond thrilled to have Dexter with me on this journey. Together, we continue to embrace life, even as we both slow down, finding joy in the simple moments we share.
Celebrating Dexter’s birthday is more than just a tradition, it’s a reminder of the love, laughter, and resilience we’ve shared throughout his life. During Dexter’s birthday celebrations, we always make sure to support Cavalier Rescue USA, a cause that’s close to our hearts. If you’re able to donate or volunteer your time, please consider checking them out, and be sure to tell them Dexter sent you!
Here’s to Dexter, my silly monkey, stink pot, my muse, and the one who makes every day brighter with his love.
Don’t forget to subscribe to our @CavalierTipsandFun YouTube channel for more!
Print
Pin
Dog-Friendly Strawberry Birthday Cake
Here's Dexter's 15th birthday cake recipe and photos! To make his special day even more memorable, I whipped up a dog-friendly birthday cake that’s not only tasty but also healthy. This homemade dog birthday cake is packed with ingredients Dexter loves. Whether you're planning a dog birthday celebration or looking for a healthy dog birthday cake recipe, this one is sure to be a hit with your pup.
Course cake Keyword dog friendly cake, dog birthday cake,
Prep Time 1 day day Cook Time 50 minutes minutes
Servings 12 Dogs
Author Tonya Wilhelm
IngredientsOptional Blue Spirulina Gummy Paw Print Decoration6 tbsp Beef Gelatin2 tsp Blue Spirulina2 cups Boiling WaterStrawberry Dog Friendly Cake4 cups Quinoa Flour6 Eggs16 oz Strawberries Stems Removed1/4 cup Olive OilOptional Dog Frosting8 oz Cream Cheese check the ingredients to ensure it’s dog-friendly10 oz Butternut Squash Cooked
InstructionsBlue Spirulina Gummy Paw Print DecorationIn a large mixing cup, combine the gelatin and blue spirulina.Quickly stir in the boiling water until fully dissolved.Pour the mixture into the paw print cutouts in the paw-shaped cake pan. Pour any extra in other fun silicone molds.Refrigerate until set then gently remove the paw gelatin shapes.Place the paw shapes on a cookie sheet and return to the refrigerator while preparing the cake.Dog-Friendly Strawberry CakePreheat the oven to 350°F.Purée the strawberries in a blender until smooth.In a large mixing bowl, combine the quinoa flour, eggs, olive oil, and strawberry purée.Generously grease the paw print cake pan with olive oil.Pour the cake batter into the pan and bake for approximately 50 minutes, or until set.Allow the cake to cool for 15 minutes, then carefully remove it from the pan and place it on a cooling rack to cool completely.Optional Dog FrostingPurée the cooked butternut squash in a blender.Add the cream cheese to the purée and blend until smooth and well combined.Once the cake is completely cool, frost the cake with the butternut squash and cream cheese mixture.Top with the blue spirulina gummy paw print decorations for a fun and colorful touch!
Join our vibrant Cavalier King Charles Spaniel community on Facebook, support our dedication to pet wellness on Patreon, and stay updated with our weekly newsletter for invaluable tips and insights into raising happy, healthy pets. Together, let’s make a difference in our dogs’ lives!
Google Ad Below [...]Read more...
January 8, 2025How to Stop Your Cavalier King Charles Spaniel From Licking Everything
Have you ever wondered why your Cavalier King Charles Spaniel licks you or how to curb excessive licking? If so, you’re not alone. Many Cavalier parents find themselves trying to stop their Cavalier from licking so much. Let’s take a closer look at why Cavaliers lick and what you can do if it becomes too much. Cavaliers lick for various reasons, and understanding the “why” is key to changing and managing the behavior.
Cavaliers May Lick You Because You Taste Great!
One common reason is that you simply taste good. Your Cavalier might be drawn to the salt on your skin, or maybe you’ve just eaten, and they’re picking up on lingering food scents. Even coming inside after an active day outdoors can make you extra appealing to their sensitive noses. Hormones and pheromones also play a role. For example, if you’re feeling stressed or it’s that time of the month, your Cavalier might be more inclined to lick because they’re sensing these subtle changes. Not to mention when we put hand lotion on, oh, yummy!
Cavaliers Lick During Greeting Behaviors
Another reason dogs lick is as part of their greeting ritual. When you come home, they’re excited to see you and may lick as a way of saying, “Hello! I’m so happy you’re here!” It’s a natural expression of affection and enthusiasm. This behavior is especially common in Cavalier King Charles Spaniels, a breed known for their loving and people-oriented nature. Cavaliers thrive on connection and love being close to their families, so licking during greetings is often their way of reinforcing that bond.
Greeting-related licking can also be a way for your dog to gather information about where you’ve been. Dogs rely heavily on their sense of smell and taste to explore their environment, and licking is part of how they “read” the world. If you’ve been around other dogs, eaten something particularly tasty, or even just had a long day out, your Cavalier’s greeting might include licking to learn more about your adventures.
Check out the video. Don’t forget to subscribe to our @RaisingYourPetsNaturally YouTube channel.
Your Cavalier May Be Licking Because He’s Stressed
However, not all licking is tied to happy moments. Sometimes, licking can indicate stress or anxiety. This type of licking is known as a submissive or appeasement gesture. Essentially, your dog is trying to communicate that they mean no harm. You might notice this behavior around guests or strangers, where your dog licks excessively as a way to navigate the interaction. In some cases, they may even start licking their paws or nearby objects if they’re feeling particularly anxious.
How To Stop Your Cavalier King Charles Spaniel From Licking So Much
If your Cavalier’s licking becomes excessive, there are steps you can take to manage it. For instance, if your dog is licking because you taste good or they’re excited to see you, allow a quick lick and then gently redirect them. You can offer a chew toy or a bone to give them something else to focus on. This simple redirection helps channel their energy into a more appropriate activity while still acknowledging their excitement.
When licking is tied to stress, it’s especially important to avoid punishing your Cavalier. Punishment can actually make the behavior worse, as your dog may lick even more in an attempt to appease you. Instead, remain calm and redirect their attention to another behavior, such as sitting or playing with a toy. Addressing the root cause of your Cavalier’s stress and anxiety is key. Building their confidence through positive dog training can make a big difference. As your dog becomes more comfortable in stressful situations, the need for licking as a coping mechanism will naturally decrease.
In some cases, excessive licking may require professional help. If your dog’s licking seems compulsive or tied to high levels of stress, start by consulting your holistic veterinarian. They can check for any medical issues and look at your dog’s behavior history. From there, a dog behavior specialist can help you create a customized dog behavior modification plan to address your Cavalier’s needs, making life easier and more enjoyable for everyone.
If your Cavalier King Charles Spaniel’s licking is becoming a challenge, know that you’re not alone, and there are positive steps you can take to address it. With a little patience and the right approach, you can better understand why your Cavalier licks and guide them toward healthier ways of expressing themselves. If you’re feeling stuck or need personalized guidance, I offer one-on-one phone and Skype sessions to help you and your Cavalier navigate challenges like excessive licking. Together, we can create a plan that works for your unique pup and helps strengthen your bond.
Do you have a licker on your hands?
Google Ad Below [...]Read more...
September 3, 2024The Importance of Enrichment for Senior Cavalier King Charles Spaniels
Oh, Dexter. My senior Cavalier King Charles Spaniel, will be fifteen on October 6, 2024! I’m over the moon happy that he has led a long, happy life. He was diagnosed with Chiari malformation and syringomyelia in 2012, and I didn’t think he would have a very long life. Eventually, his MVD diagnosis also rolled in. But, despite his medical conditions, he has been thriving. He’s not just alive, he’s kicking!
I’m not going to lie. He started showing his age and some cognitive decline a few years ago. I have written about his life on my first blog, Raising Your Pets Naturally, so make sure you head over there for even more about Dexter’s life and care. But today, I wanted to discuss some of the things I have done to help keep Dexter as sharp as possible and try to keep canine cognitive dysfunction syndrome (CCDS) at bay. Through my experiences and research, I’ve seen how diet, positive training, and environmental enrichment can make a significant difference in maintaining his quality of life. So, let’s jump in.
What is Canine Cognitive Dysfunction Syndrome
Canine cognitive dysfunction syndrome (CCDS), is similar to dementia in humans and affects many senior dogs. Symptoms can be different from dog to dog, but some common behaviors include: disorientation, disrupted sleep patterns, decreased activity levels, and changed interactions with their environment and people. Research, including a study from the Journal of Veterinary Behavior (2016), shows that cognitive decline in dogs can significantly impact their quality of life. But early intervention and supportive care can improve CCDS symptoms and a dog’s quality of life.
The Importance of Canine Enrichment for Senior Cavaliers
Environmental enrichment is important for helping senior Cavaliers with canine cognitive dysfunction syndrome. Canine enrichment is about engaging your Cavalier’s senses, engaging their minds, and keeping them moving. I always think about “living life to the fullest.” I mean, we brought our Cavaliers into our homes so we can enjoy them and do fun things with them. Although they are beautiful, they deserve more than just a life where they lie around all day and do nothing. Just because they are seniors, doesn’t mean this mentality should change, although their activities will need to be adjusted to meet their individual needs. And it’s not just me; there’s research that backs up this theory.
Mental Stimulation: According to a study published in the Journal of Veterinary Internal Medicine (2016), mental stimulation through enrichment activities helps slow cognitive decline in senior dogs. Puzzle toys, interactive games, and scent-based activities keep the brain engaged, potentially delaying the progression of CCDS symptoms.
Reduces Stress: Canine enrichment is a great way to help reduce anxiety and stress in senior Cavaliers dealing with cognitive decline. Engaging activities and sensory stimulation can make a big difference. By adding enrichment routines to their day, you’re helping your dog feel calmer and more secure, which can ease some of the stress and anxiety that often come with cognitive issues.
Behavioral Improvement: Enrichment activities can make a big difference for senior Cavalier King Charles Spaniels who are restless or pacing. By offering mental and physical stimulation, these activities help reduce repetitive behaviors and keep your dog more relaxed.
Enhanced Quality of Life: Enrichment isn’t just about keeping your Cavalier busy. It’s about improving their overall quality of life. Engaging in enjoyable and stimulating activities brings more enjoyment, engagement, and a sense of purpose to their days, making their lives more fulfilling.
Simple Enrichment Ideas to Boost Your Senior Dog’s Quality of Life
Enrichment doesn’t have to be complicated or time-consuming. It’s all about finding simple, enjoyable activities that stimulate your senior Cavalier’s mind and body. Here are some ideas to get you started. And don’t forget to check out our article on Cavalier Enrichment Ideas.
Interactive Toys: Toys that dispense treats or require problem-solving are fantastic for mental stimulation. Depending on your Cavalier, you can use treat-dispensing toys or lick mats. When Dexter was younger, treat dispensing toys and frozen Tux toys were a hit. Now, he enjoys lick mats and snuffle mats. Food toys engage your dog’s sense of smell and taste.
Scent Games: Speaking of scent games, Dexter has always loved using his nose. Try hiding treats around the house or yard and let your Cavalier find them using his nose. Scent games are a natural way to keep your Cavalier active and provide both mental and physical exercise in a way most dogs love.
Positive Dog Training Sessions: Short, positive dog training sessions with simple cues or tricks are highly rewarding. They keep your Cavalier’s brain sharp and help build a stronger bond through shared activities.
Varied Walks or Strolls: Don’t get into a rut of going on the same walk, to the same park, on the same trail. Changing up your walking routes introduces new sights and smells. This variety provides your Cavalier with cognitive stimulation and keeps your walks fresh and interesting.
Comfortable Environment: Make sure your senior Cavalier’s living space is safe and cozy. Look out for any obstacles, and ensure good footing below. Whether you have carpet, carpet runners, grippy socks, ToeGrips or all of the above, traction is incredibly important for senior Cavaliers. They don’t have the same core strength to hold themselves up, and slick floors can be very scary and even cause injury if they slip or splay out.
Canine Fitness and Strength Building: I highly recommend setting up some sessions with a canine rehabilitation professional. Working with Dr. Sam, Dexter’s strength has been so important in his overall health and wellness. And our at home exercises aren’t just a way to keep him fit. They are also another form of enrichment, since he loves doing them! Engage in simple at-home exercises like sit-to-stand and sit-to-down exercises to help maintain your Cavalier’s muscle strength and joint mobility. Gentle range-of-motion exercises can also support your senior dog’s overall physical health and comfort.
Supporting Cognitive Health with Diet and Nutrition
Diet plays a crucial role in managing cognitive decline in senior dogs. According to research published in the Journal of Veterinary Internal Medicine (2019), a diet rich in specific vitamins and nutrients can significantly support cognitive health. Key vitamins such as vitamin E and vitamin C act as antioxidants, protecting brain cells from oxidative stress and easing cognitive issues. B vitamins, including B6, B12, and folic acid, are essential for maintaining healthy brain function. Omega-3 fatty acids, commonly found in fish and fish oil supplements, also play a vital role in improving cognitive function and managing symptoms of cognitive decline. Including these vitamins and nutrients in your dog’s diet, either through high-quality dog food (preferably fresh) or supplements, can help manage cognitive decline and enhance their overall quality of life.
Dexter, is proof of the benefits of a fresh diet. His meals are carefully prepared with high-quality, fresh ingredients and free from unnecessary chemicals. I’m convinced this fresh, balanced diet, rich in essential nutrients, has played a significant role in keeping his mind sharp and supporting his overall well-being.
How Positive Training Supports Cognitive Health in Senior Cavaliers
Positive training and routine play a vital role in supporting a senior dog’s mental sharpness and managing the effects of cognitive decline. As a positive dog trainer, I’ve taught Dexter plenty of fun and useful tricks, not just for good behavior, but also to keep his mind engaged and sharp. Each training session isn’t just about obedience; it’s about giving Dexter the mental stimulation he needs to stay mentally fit as he ages.
Incorporating regular training sessions into your dog’s routine is a great way to improve their cognition and their body. Focus on simple tricks and behaviors that challenge their mind and body without causing stress. I have noticed Dexter’s abilities change over the years, so it is important to change with them. By tailoring positive dog training sessions to your Cavalier’s needs and incorporating enjoyable activities into their day, you can help your Cavalier maintain their mental clarity and overall well-being.
Follow our YouTube channel for more Cavalier enrichment ideas!
Final Thoughts
Incorporating canine enrichment into Dexter’s daily routine has been essential for maintaining his quality of life. It’s not just about keeping him busy; it’s about enhancing his mental, emotional, and physical well-being. Enrichment is just one piece of the puzzle for Dexter’s health. A fresh, balanced diet and consistent, positive training are also vital for supporting his well-being as a senior dog.
Dexter’s vibrant health is a testament to how a combination of mental stimulation, nutritious food, and engaging routines can make a real difference. I encourage all Cavalier families to integrate these practices into their senior dogs’ lives. By focusing on enrichment, diet, and training, you can significantly improve your dog’s overall well-being and help them enjoy their golden years to the fullest.
I host a private Facebook group for Cavalier King Charles Spaniels, and we have a big focus on canine enrichment ideas and challenges to keep your Cavalier engaged and thriving!
How do you incorporate enrichment, diet, or training into your senior dog’s routine? Share your tips and experiences below!
Enrichment Increases Relaxation
https://www.ncbi.nlm.nih.gov/pmc/articles/PMC8772568/
https://www.sciencedirect.com/science/article/pii/S0168159123002691
Join our vibrant Cavalier King Charles Spaniel community on Facebook, support our dedication to pet wellness on Patreon, and stay updated with our weekly newsletter for invaluable tips and insights into raising happy, healthy pets. Together, let’s make a difference in our dogs’ lives!
Google Ad Below [...]Read more...
February 5, 2025How to Teach Cavalier King Charles Spaniel to Ignore Distractions
When I’m out with Stewart, my 7-month-old Cavalier, we get stopped a lot. People see his big, sweet eyes, his cute winter coat and wiggly little body and immediately want to say hello. And if this goes for people with or without their dog.
But here’s the thing, not every outing is a social event, and not every person or dog needs to be greeted.
Dog Socializing vs. Everyday Walks
There’s a time and place for socializing, and there’s a time for simply spending quality time with Stewart on our walks and outings. I make sure Stewart has appropriate and positive, structured experiences meeting new people and dogs in a controlled way. This helps him learn confidence, good manners, and appropriate greetings. But, at the same time, I’m teaching him an equally important skill, ignoring distractions such as people and dogs and walking politely with me.
If every walk turns into a meet-and-greet, dogs start to expect it. They pull toward every person or dog, they get frustrated when they don’t get to say hello. That can lead to barking, lunging, or general overexcitement, making walks stressful instead of enjoyable.
Why It’s Important to Teach Your Dog to Ignore Other Dogs and People
Not Every Dog Wants to Say Hello
Some dogs are nervous, in training, or simply not interested. Teaching Stewart to walk past other dogs calmly means he won’t invade another dog’s space or make an already anxious dog uncomfortable.
People Aren’t Always Dog People
Shocking, I know! But not everyone wants a happy little Cavalier bouncing up to them. Some people are afraid of dogs, allergic, or just in a hurry. Stewart is learning to walk past without expecting attention makes life easier for everyone.
Impulse Control is a Life Skill
Dogs who can stay focused, even when exciting things are happening around them, are safer and more enjoyable to live with. If Stewart learns that he doesn’t always get what he wants the moment he wants it, he’ll be better at handling frustration in other areas of life too.
Not Every Walk is About Socializing
Sometimes, I just want to enjoy a peaceful walk with Stewart. He doesn’t need to greet everyone to have a fulfilling experience, sometimes sniffing, walking together, and taking in the world is enough.
Better Walks in Busy Places
By teaching Stewart to walk with me instead of focusing on every dog or person, our walks are smoother and more enjoyable. Crowded sidewalks, busy parks, or narrow trails are much easier to navigate when he stays by my side rather than pulling toward distractions.
Prepping for Travel & Public Outings
I plan on traveling with Stewart, airports, dog-friendly boats, outdoor dining, places where he’ll need to stay close and focused on me. Teaching him now that he doesn’t always get to greet everyone will make these experiences stress-free and enjoyable for both of us.
Don’t forget to subscribe to @CavalierTipsandFun for more videos!
How I’m Teaching Stewart to Walk Past Distractions
Reward Calm Choices
When Stewart notices a dog or person, I reward him. I’m teaching him they=treats. Eventually, he will start to make that connection, see the distraction and look at me for the reward. This is what I’m going for. Over time, he’ll learn that staying focused on me, and it’ll be a non-event for him, he’ll simply walk past without even thinking about stopping to greet.
Use Distance
If Stewart’s too excited or distracted, I create more space between us and the distraction to help him refocus. As he gets better at ignoring, I’ll gradually close that gap, making it easier for him to pass by calmly.
Give Him a Job
I use cues like his name game, watch me, paws up, touch to keep his attention. Engaging his brain with productive tasks means he’s less likely to pull toward distractions.
Set Clear Expectations
I make sure Stewart knows that pulling towards people or dogs does not work. If he starts to pull, I either toss in his name game, stop and wait for him to renege, or add more distance. It truly depends on the situation. I do want him to be successful.
Handling Approaching People
When someone is steadily approaching your Cavalier, how you handle it depends on your goal at that moment. As a positive dog trainer, sometimes I want to explain and educate. If so, then I’ll squat down with Stewart, reward him for staying focused on me, and let the person know we’re training and practicing ignoring distractions. If I choose to say hello, I tell Stewart, “Let’s say hi,” and calmly approach. But sometimes, I just want to keep moving, so I give a quick, upbeat “We’re not saying hello, thank you!” and continue walking, keeping Stewart focused on me. It’s all about setting the tone for the interaction while making sure my dog stays engaged and confident.
Finding the Balance
There’s a time and place for socializing, and there’s also a time to focus on the walk itself. If you do want to stop and say hi, try to stop about 10 feet away from the other person or dog and ask first if it’s okay. Keep in mind that others might be training their dogs or dealing with their own challenges during the walk, so giving them some space is always a good idea. Being considerate makes the experience better for everyone, whether it’s a quick greeting or just calmly walking by each other. I then give Stewart the cue, “Let’s say hi,” so he knows he has permission to greet.
There’s nothing wrong with letting your dog greet others when it’s appropriate, but it’s just as important for them to learn that not every outing is a social event. Teaching Stewart when it’s time to engage and when it’s time to focus on me makes him a better walker and ensures our walks stay enjoyable.
When you’re walking your Cavalier King Charles Spaniel, how do you decide when it’s time to socialize and when it’s time to focus on the walk?
Google Ad Below [...]Read more...
April 21, 2024Tips for traveling with your Cavalier King Charles Spaniel. Dog-friendly vacation ideas.
Follow @CavalierTipsandFun for more videos.
Don’t forget to subscribe to @RaisingYourPetsNaturally for more!
Your comments and questions are always welcome below.
Join our vibrant Cavalier King Charles Spaniel community on Facebook, support our dedication to pet wellness on Patreon, and stay updated with our weekly newsletter for invaluable tips and insights into raising happy, healthy pets. Together, let’s make a difference in our dogs’ lives!
[...]Read more...
October 15, 2024Cavalier King Charles Spaniel Travel Tips
As a Cavalier mom and positive dog trainer, I know how important it is to help our Cavaliers feel comfortable and safe during car rides. Whether you’re planning a quick trip to the park or a longer dog-friendly road trip, making sure your Cavalier King Charles Spaniel enjoys the car ride is key to a stress-free trip for both you and your dog.
When Dexter and I hit the road, I never have to worry about how he’ll handle the ride. He’s a fantastic travel companion because I spent time training him to feel confident and at ease in the car. Today, I want to share my top tips on how you can prepare your Cavalier for car travel and road trips and turn them into a relaxed, happy traveler too.
1. Start with Short and Positive Rides
Just like with any new experience, easing your Cavalier into car rides instead of popping them into the car for a twelve-hour road trip is super important. Begin by taking short trips to fun, dog-friendly places like the local park or pet store. Keep the first few rides short and sweet, no more than ten-to-fifteen minutes. The goal is to associate the car with positive and fun destinations. A trip to the vet does not count as a fun visit for most dogs.
2. Create a Safe Space in the Car
Safety should always be a priority when traveling with your Cavalier. A secure dog car seat or crash-tested harness designed for small breeds like Cavaliers is a must. I personally recommend looking into the Center for Pet Safety’s approved products, as they conduct independent crash testing for dog travel gear. If a brand states they are crash tested, make sure to watch their crash tested video.
Dexter typically travels in a small crate. Because of his Chiari Malformation and syringomyelia and large size, travel harnesses aren’t the most comfortable for him. However, when we travel in the small car, a crash-tested and passed (yes, make sure they have passed the test) is our go-to. The key is to find a comfortable yet safe setup so your Cavalier feels relaxed without compromising their security.
3. Pack Familiar Comfort Items
Make your Cavalier feel more at home by packing some familiar items for the ride. When Dexter was a puppy, he would cozy up with his baby blanket and soft toy. Now, he has a therapeutic mat inside his crate. He likes to stay cool, so I also have a fan pointing at him. These little comforts can help reduce anxiety and make the ride smoother for dogs who may initially feel unsure about the car.
If your Cavalier is a bit anxious, place something with your scent, like a worn T-shirt next to your Cavalier. Your presence, even in the form of scent, can be calming for your Cavalier, especially if they’re a bit nervous during the first few rides.
4. Plan for Frequent Breaks
When traveling for more than an hour, make sure to schedule frequent potty and stretch breaks. Cavaliers are active little dogs, and, like all of us, they need to stretch their legs and take in their surroundings. I like to plan stops at dog-friendly rest areas or parks where Dexter can explore, do his business, and get a little energy out before continuing the journey.
Remember, each break is an opportunity for positive training. Use it as a chance to reward your dog for good behavior during the ride, and they’ll look forward to the next part of the trip.
5. Help Your Cavalier Relax with Calming Music
One of my favorite dog travel hacks is playing calming music designed for dogs during long car rides. I’ve been a fan of the iCalmDog portable speaker, which plays clinically-tested music that helps keep dogs calm and relaxed. Just be careful not to fall asleep at the wheel yourself!
Check out our all Cavalier calming playlist on YouTube!
6. Monitor Your Cavalier’s Well-Being
Keep an eye on your Cavalier’s behavior throughout the trip. Some Cavaliers may experience motion sickness, especially on longer rides. If your dog starts to drool excessively, whine, or seem uncomfortable, it might be time for a break. You can try natural remedies like ginger treats (with your vet’s approval) or consult your vet for other options.
If your Cavalier seems overly tired or stressed, don’t be afraid to cut the trip short. The goal is for travel to be a positive experience, and pushing them too far can have the opposite effect.
By starting with short, positive experiences and keeping their safety and comfort in mind, you can help your Cavalier King Charles Spaniel become a happy traveler. Dexter loves our road trips, and I’m sure your Cavalier will too!
Do you have any favorite travel tips for Cavaliers? Drop them in the comments!
Follow us on YouTube For fun dog-friendly travel adventures!
Google Ad Below [...]Read more...
December 25, 2024Winter Tips for a Cavalier King Charles Spaniel
Brrrr, it’s cold out there! Winter in Ohio can be tough, and today, it’s a chilly 15 degrees. Thankfully, Stewart and I are bundled up inside, but it’s the perfect time to share some essential winter safety tips for your Cavalier King Charles Spaniel. Whether you’re venturing outdoors or staying warm indoors, these precautions and activities will help keep your pup safe, healthy, and happy all winter long.
Safety First: Protecting Your Cavalier in Winter
Limit Outdoor Time
Our Cavaliers are family members, and they thrive indoors with us. While Stewart loves his outdoor potty breaks and a quick sniff around the yard, I always limit his time outside when temperatures dip. Frostbite and hypothermia are real risks for dogs, especially small breeds like Cavaliers. Keep outings short, and always monitor your pup for signs of discomfort.
Protect Those Paws
A dog’s paw pads aren’t built to handle extreme cold or icy surfaces. For quick potty breaks, toddler socks can be a lifesaver; they’re easy to put on and don’t need to be perfect since they’re just for a short trip. Shoot for dark colors, so that if one falls off, it’s easier to find in the snow. For longer walks or outdoor play, dog boots like Saltsox are fantastic options. If your Cavalier goes outside barefoot, be sure to clean their paws thoroughly with a warm washcloth or natural pet wipes to remove ice, salt, and chemicals that could irritate their skin. I make up a bowl of water with a splash of 4-Legger shampoo and a washcloth to clean paws. I make a new batch each day. (Order 4-Legger today with promo code RaiseNaturally20 for 20% off your first order.)
Scoop the Potty Area
I always scoop a clean, clear area in the yard for potty breaks. Cavaliers, like most dogs, prefer a neat spot for their business. A wide, shoveled path ensures your Cavalier can move around comfortably without getting buried in snow.
Coats and Sweaters for Your Cavalier
Dog coats and sweaters are a must for Cavaliers. Look for a jacket that provides full range of motion and covers your pup’s back and belly. Indoors, a cozy sweater can keep your Cavalier comfortable. If you notice your Cavalier sleeping in a tight ball, or even shivering, a dog sweater is a great idea. Stewart’s favorite sweaters are custom-made by MeekByDesign, but there are plenty of great options online or in pet stores.
Should a Cavalier Wear a Hat in the Winter?
Cavaliers’ long, luxurious ears attract snow and ice like a magnet! A lightweight dog hat or snood can protect your Cavalier’s ears during snowy adventures. Afterward, be sure to dry their ears gently with a soft towel.
Staying Warm and Cozy Indoors
When your Cavalier comes inside from the snow or cold, use a super-absorbent microfiber towel to dry him off thoroughly. For an extra touch of luxury, I like to pop a favorite blanket in the dryer so my dog can snuggle up with something warm. These little comforts make a big difference on chilly days!
Indoors, I keep Stewart active and engaged with puzzle toys, hide-and-seek games, and short training sessions. A mentally stimulated pup is a happy pup, even when it’s too cold for a long walk.
Winter Nutrition for Cavaliers
Did you know that certain foods can help your Cavalier King Charles Spaniel stay warm during the chilly months? According to Traditional Chinese Medicine (TCM), foods have energetic properties that can influence the body’s temperature and overall balance.
In the winter, it’s beneficial to incorporate “warming” proteins into your dog’s diet. Proteins like chicken, lamb, venison, and even goat are considered warming and can help offset the cold temperatures. These proteins are especially good for dogs who seem more sensitive to the cold or have lower energy during the winter.
You can also include warming spices and herbs like ginger or turmeric in small, dog-safe amounts to add a cozy touch to their meals. These not only are warming, but also support joint health during cold weather.
If you’re new to adjusting your dog’s diet seasonally, start slow by adding one or two warming ingredients to their current meals. Always consult with your vet or a canine nutrition expert to ensure your Cavalier’s diet remains balanced and meets their individual needs.
Embrace the Season
Stewart may be new to my home, but we’re already making the most of winter together. From brisk walks in his cozy new jacket to snuggling under a warm blanket on chilly evenings, these little moments remind me of the special bond we share. No matter the season, Cavaliers have a way of bringing warmth and joy to our lives.
How do you keep your Cavalier comfortable and happy during the winter months? Share your tips below, I’d love to hear them!
Google Ad Below [...]Read more...
March 30, 2025Health Benefits of Omega-3s for Cavaliers
Omega-3 fatty acids are one of the most important nutrients for Cavaliers, yet they’re often overlooked or misunderstood. These essential fats support heart health, brain function, joint mobility, skin condition, and even immune function. But not all omega-3 sources are created equal. Fresh fish, supplements, and plant-based options vary in effectiveness, and factors like oxidation and sourcing impact their quality. In this guide, I’ll break down the best omega-3 sources, how to choose high-quality options, and what to avoid to ensure your Cavalier King Charles Spaniel gets the maximum health benefits from their Omega-3s.
Skin and Coat Health
Omega-3s help maintain a healthy skin, reducing dryness, flakiness, and itchiness. They also improve coat condition, making your Cavalier’s fur shinier and softer. Cavaliers, like many other breeds, can be prone to allergies and skin sensitivities, and omega-3s can help manage these issues by reducing inflammation in the skin.
Joint Health and Mobility
As Cavaliers age, they can develop arthritis and joint stiffness. Omega-3s have been shown to reduce inflammation in the joints, helping to alleviate pain and improve mobility. Dogs receiving sufficient omega-3s often experience less stiffness and better flexibility, which is particularly important for senior Cavalier King Charles Spaniels.
Brain and Cognitive Function
DHA is a crucial component of brain cell membranes and plays a significant role in cognitive function. In Cavalier puppies, it supports brain development and learning. In senior Cavaliers, it helps prevent cognitive decline and supports memory and problem-solving skills. Studies have shown that dogs supplemented with DHA perform better on cognitive tests than those that do not receive adequate amounts.
Heart Health
Omega-3 fatty acids are essential for supporting cardiovascular function by helping regulate heart rhythm, reduce blood pressure, and improve circulation. For Cavaliers, who are especially prone to mitral valve disease (MVD), a common heart condition in the breed, omega-3s are even more important. Given their susceptibility to MVD, ensuring your Cavalier’s diet is rich in omega-3s can play a crucial role in supporting their heart health and may help slow the progression of the disease.
Immune System Support and Inflammation Control
Chronic inflammation is a factor in many health issues, including autoimmune conditions, allergies, and even cancer. For Cavaliers, who are prone to conditions like Chiari malformation, managing inflammation is especially critical. Omega 3s play an important role in regulating the body’s inflammatory response, helping to balance the immune system and reduce excessive inflammation. By incorporating omega 3s into your Cavalier’s diet, you can help protect against the inflammation that worsens conditions like Chiari malformation and support overall immune health.
Best Omega-3 Sources for Cavaliers
The best omega-3 sources for dogs are those that provide EPA (eicosapentaenoic acid) and DHA (docosahexaenoic acid) in their most bioavailable forms. These two types of omega-3s are the most beneficial for dogs, as they are directly used by the body to support a variety of vital functions, from heart health to joint mobility. The most bioavailable forms of these omega-3s are typically found in marine-based sources, such as oily fish. Fish like salmon, sardines, mackerel, and anchovies are excellent options because they contain high levels of both EPA and DHA, making them ideal for supporting your Cavalier’s health. These fish provide omega-3s in a form that’s easy for the body to absorb, ensuring that your dog gets the maximum benefits.
In addition to fish, fish oil supplements can also be a great source of omega-3s. However, it’s important to choose high-quality, purified fish oils that are free of contaminants like mercury. If your Cavalier is sensitive to fish or you prefer plant-based sources, algae oil is another excellent option, as it provides DHA without the fishy aftertaste or concerns about ocean contaminants. While flaxseed and chia seeds offer plant-based omega-3s, they contain ALA (alpha-linolenic acid), which the body must convert into EPA and DHA, an inefficient process for dogs. This means that marine-based omega-3s are typically the best option for achieving optimal health benefits. By rotating between these high-quality sources, you can help ensure your Cavalier is getting the most effective omega-3s for their needs.
Watch our fresh fish DIY and don’t forget to subscribe to @CavalierTipsandFun for more!
Fresh Fish (Whole Food Source of EPA and DHA)
Feeding fresh, oily fish is one of the most natural ways to provide omega-3s. However, choosing the right type of fish is essential due to concerns about mercury levels, sustainability, and proper sourcing.
Some of the best options for Cavaliers include:
Sardines: Small, low-mercury fish that are naturally high in omega-3s. They are one of the safest whole-food sources.
Anchovies: Similar to sardines, anchovies are rich in DHA and EPA while having minimal contamination risks.
Herring: Often used in high-quality pet foods, herring is another small, oily fish packed with omega-3s.
Atlantic Mackerel: This species is safe, but avoid king mackerel, which is high in mercury.
Wild-Caught Salmon: A great source of omega-3s, but farmed salmon may contain higher levels of contaminants.
When feeding fresh fish, it’s important to either lightly cook the fish or feed it raw if it’s safely sourced. Cooking fish too much can break down some of the omega-3s, while raw fish (from a trusted, safe source) can provide the most nutrients. However, if you choose to feed raw fish, it should be frozen for a week first to reduce the risk of parasites, which can be a concern with certain types of fish.
It’s essential to avoid fish that have been prepared with added salt, spices, or sauces. These seasonings can be harmful to dogs. Also, always avoid feeding cooked bones, as they can splinter and cause serious internal injuries.
Fish Oil Supplements
Many pet parents turn to fish oil supplements to provide omega-3s, but not all fish oil supplements are the same. Choosing the right one for your Cavalier is important to ensure you’re giving them the best quality and the most effective nutrients.
How to Choose a High-Quality Fish Oil
When selecting a fish oil supplement, look for species-specific labeling. Instead of settling for generic “fish oil,” opt for oils like sardine oil, anchovy oil, or krill oil. This ensures transparency in sourcing and gives you a better idea of where the oil is coming from.
When choosing a fish oil supplement, it’s important to look at the levels of EPA and DHA, the two types of omega-3 fatty acids that provide the most health benefits for your dog. The label on the bottle should specify the amount of EPA and DHA in each serving, not just the total amount of fish oil.
For example, a bottle might say it contains 1,000 mg of fish oil per serving. But if the label doesn’t show how much of that is EPA and DHA, it’s hard to know how much of the oil is actually providing the beneficial omega-3s your dog needs.
Some fish oils may have more EPA, which is great for joint and heart health, while others may have more DHA, which supports brain function and reduces inflammation. Knowing exactly how much of each omega-3 is in the oil allows you to be more confident that you’re giving your Cavalier the right amount for their specific health needs. This way, you can make sure you’re getting the full benefits of the omega-3s in the supplement.
Also, choose products that are third-party tested. Reputable brands will test their oils for harmful contaminants like heavy metals, PCBs, and oxidation levels. This helps ensure the oil is safe for your dog and that it hasn’t been compromised during production.
Liquid vs. Capsules
Fish oil comes in two common forms: liquid and capsules. Liquid fish oil (often found in pump bottles) is convenient because it’s easy to dose, but it’s more prone to oxidation once opened. Oxidation occurs when the oil is exposed to light, heat, or air, so it must be stored in the refrigerator and used quickly to maintain its freshness.
On the other hand, capsules are more stable since the oil is protected from air exposure, which reduces the risk of oxidation. However, they can be harder to dose accurately, especially for small dogs.
Oxidation Risks
One of the biggest concerns with fish oil is oxidation. Omega-3s are very sensitive to light, heat, and oxygen, and when the oil oxidizes, it can lose its effectiveness and even become harmful. Signs of rancid fish oil include a strong fishy smell or an unusual taste.
To minimize the risk of oxidation, here are a few tips:
Choose dark glass bottles instead of clear plastic, as glass helps protect the oil from light exposure.
Store the fish oil in the refrigerator after opening to keep it fresh.
Use the oil within 30 to 60 days of opening to ensure you’re getting the best quality.
By taking these steps to choose a high-quality fish oil and storing it properly, you can help ensure your Cavalier gets the full benefits of omega-3s for their heart, joints, and overall health.
Green-Lipped Mussels: A Powerhouse for Joint Support
Green-lipped mussels (Perna canaliculus), native to New Zealand, are one of the most beneficial natural sources of omega-3s for dogs. Unlike traditional fish-based omega-3 supplements that provide primarily EPA and DHA, green-lipped mussels contain a unique omega-3 fatty acid called ETA (Eicosatetraenoic Acid). ETA has been found to have additional anti-inflammatory properties, making it especially helpful for dogs suffering from joint issues like arthritis.
The anti-inflammatory effects of ETA, along with the presence of glucosamine and chondroitin, make green-lipped mussels an excellent option for promoting joint health. These compounds work together to support cartilage repair, reduce inflammation, and enhance mobility in dogs experiencing joint stiffness or discomfort. This combination is particularly beneficial for dog breeds, like Cavaliers, that are prone to developing joint issues as they age.
Comparing Omega-3 Content in Green-Lipped Mussels vs. Fish
In terms of EPA and DHA content, green-lipped mussels may not provide as high a concentration per serving as fatty fish, but their ETA provides an extra layer of anti-inflammatory benefits. This makes green-lipped mussels an excellent addition to a dog’s diet, particularly for those with joint concerns.
How to Feed Green-Lipped Mussels to Your Dog
Green-lipped mussels are often available as freeze-dried powder or in chewable treat forms. Both forms make it easy to incorporate them into your dog’s daily routine, but the powder can be sprinkled over food or mixed into homemade dog meals for ease of use.
As with any supplement, it’s important to start with a small amount to monitor how your dog responds, especially if they are new to green-lipped mussels or have a sensitive digestive system. For the dosing of green-lipped mussels, it’s always best to refer to the product-specific guidelines since the concentration can vary depending on the form (freeze-dried powder, chewables, etc.) and brand. However, a general recommendation often seen in supplements for dogs is:
Start with 1/4 teaspoon per 10 pounds of body weight per day for powder form. This can be adjusted based on the dog’s response and their specific needs.
Plant-Based Omega-3s: Less Effective for Dogs, but Still Valuable
When it comes to omega-3 fatty acids, plant-based options are less efficient for dogs compared to animal sources like fish, as they primarily contain ALA (alpha-linolenic acid). While ALA is an essential omega-3 fatty acid for humans, dogs face challenges in converting ALA to the more bioavailable forms, EPA (eicosapentaenoic acid) and DHA (docosahexaenoic acid), which are the forms most beneficial for their health. This makes plant-based omega-3s less effective for dogs in supporting the same health benefits as those derived from marine sources.
Why ALA Is Less Effective for Dogs
Dogs have a relatively inefficient ability to convert ALA into EPA and DHA. The process of conversion requires specific enzymes, which dogs do not produce in large enough quantities to convert sufficient ALA into the needed forms of omega-3s. As a result, while plant-based omega-3s can still offer some benefits, they are not as effective at delivering the omega-3s that support joint health, cognitive function, and heart health in the same way that fish-derived omega-3s do.
Nevertheless, plant-based sources of omega-3s are still valuable as part of a balanced diet. They can provide supplemental omega-3s and contribute to overall health but should not be relied on as the primary omega-3 source for dogs.
Common Plant-Based Omega-3 Sources
Flaxseeds: Flaxseeds are one of the most popular plant-based sources of ALA omega-3s. They can be ground and added to your dog’s food. However, the conversion rate of ALA to EPA and DHA is low in dogs, so while flaxseeds may offer some benefits, they should not be relied on exclusively for omega-3 needs.
Chia Seeds: Like flaxseeds, chia seeds are rich in ALA. These tiny seeds are highly nutritious and can be added to a dog’s meals. They can absorb water and form a gel, which can be helpful for digestive health. While chia seeds may offer some benefit, they should be seen as supplementary, not primary, sources of omega-3s for dogs.
Hemp Seeds: Hemp seeds contain ALA as well, along with a well-balanced ratio of omega-3 and omega-6 fatty acids. While these can contribute to overall fatty acid intake in dogs, their conversion to EPA and DHA is also limited. Hemp oil, a more concentrated form, may be more effective but still not as efficient as fish oil or algae oil in providing the omega-3s dogs need for optimal health.
Algae Oil: The Better Plant-Based Alternative
While plant-based sources like flaxseeds and chia seeds are valuable in certain aspects, algae oil is usually a better plant-based option for dogs. Algae oil is derived from marine algae, which naturally produce DHA (and sometimes EPA) without requiring the conversion process. Unlike other plant-based sources that contain ALA, algae oil provides a direct source of DHA, the omega-3 that plays a critical role in brain function, heart health, and reducing inflammation.
Algae oil is especially beneficial for pet parents who prefer to avoid fish-based products for ethical, environmental, or allergy reasons. It provides the same essential omega-3 fatty acids found in fish oil, but without the potential risks associated with mercury contamination or fish-based allergens. This makes algae oil a great plant-based alternative for ensuring your dog receives the health benefits of omega-3s.
Algae oil supplements are available in capsules or liquid form and can be incorporated into your dog’s diet just like fish oil. The recommended dosage varies by brand, so it’s important to follow the manufacturer’s guidelines and consult your vet to ensure the right amount for your dog.
While algae oil is a great alternative to fish oil, there are a few differences to consider. One of the main differences is that fish oil generally contains more EPA, an omega-3 that is particularly helpful for reducing inflammation and supporting joint health, while algal oil tends to have more DHA, which is important for brain and eye health. Because of this, if your dog needs more EPA for inflammation or joint issues, fish oil might be a better choice. Additionally, algae oil can be more expensive than fish oil, and it may not be as widely available in stores. Another thing to note is that fish oil is often more bioavailable, meaning it’s easier for dogs to absorb and benefit from. That said, algae oil is still a very good option, especially if you’re looking for a more sustainable, vegetarian, or fish-free supplement. It’s always a good idea to talk to your vet about which type of omega-3 is best for your dog’s specific health needs.
How Much Omega-3 Does Your Cavalier Need?
For general health, the recommended omega-3 dosage, specifically EPA and DHA, is typically between 20 to 55 mg per pound of body weight per day. If your Cavalier has specific health issues, like arthritis or inflammation, the dosage may increase to 50 to 100 mg per pound. If your dog is lacking omega-3s, you might notice signs like dry skin, excessive shedding, joint stiffness, or a dull coat. To ensure you’re giving the right amount, it’s important to consult your vet, who can recommend the proper dosage based on your dog’s size and health concerns.
Final Thoughts
Omega 3s are essential for your Cavalier’s overall health, supporting heart, brain, joint and skin function. By incorporating a variety of high quality omega 3 sources such as fish, green lipped mussels and supplements, you can ensure your Cavalier King Charles Spaniel receives a well rounded intake of these beneficial fatty acids.
Quality matters, so focus on bioavailable forms of EPA and DHA, and always rotate the sources you use to prevent imbalances. Whether you opt for fresh fish, fish oil or green lipped mussels, it’s crucial to store and handle these sources properly to avoid oxidation.
Before making any changes, check with your veterinarian to tailor an omega 3 plan that best suits your Cavalier’s individual health needs. Consistently including omega 3s in their diet will support long term health and vitality, helping your dog thrive at every stage of life.
Do you feed your Cavalier fresh fish?
Google Ad Below [...]Read more...
April 17, 2025Gentle, Safe, and Effective for Our Sensitive Cavaliers
Fleas and ticks. Just hearing those words makes me itch. But as a natural Cavalier Mom, I’ve always been cautious about what I put on or in my dogs, especially with delicate and sensitive breeds like Cavalier King Charles Spaniels. These little sweet hearts often have sensitive skin, luxurious coats, and sometimes underlying conditions like Chiari malformation or syringomyelia, which can make them more vulnerable to adverse reactions.
I’ve been on this natural journey for years, first with Dexter and now with Stewart. Along the way, I’ve learned that staying chemical-free when it comes to flea and tick care is absolutely possible, it just takes a little planning and a lot of label reading.
This is the natural flea and tick routine I’ve found works best for my Cavaliers.
Why I Choose a Natural Approach for My Cavalier King Charles Spaniels
Conventional flea and tick treatments may offer quick results, but they also come with serious risks. Side effects can range from skin irritation, itching, and digestive upset to more concerning issues like tremors, seizures, and in some cases even organ damage. These are not small concerns.
For a breed like the Cavalier King Charles Spaniel, those risks are even more concerning. Cavaliers are already prone to neurological conditions like Chiari malformation, seizures, tremors, and episodic falling syndrome. I’m especially cautious about using anything that lists seizures or neurological side effects as possible outcomes. It just doesn’t make sense to use a treatment that could trigger the very issues this breed is already vulnerable to.
Choosing a natural approach isn’t about trying to be perfect. For me, it’s about reducing chemical exposure wherever I can and building a thoughtful, layered prevention plan that supports overall health instead of relying on a single product to do it all.
My Natural Flea and Tick Prevention Plan for My Cavalier King Charles Spaniel
1. Regular Grooming and Bathing-I bathe Stewart every three to four weeks using a safe, gentle dog shampoo made without synthetic preservatives, artificial fragrances, or harsh surfactants. I’ve been using 4-Legger’s USDA-certified organic formulas for years because I trust their ingredient panel and transparency. They have a variety of formulas that help deter ticks and fleas.
Bathing regularly doesn’t just clean your Cavalier. It helps interrupt the flea life cycle. A good soak and lather can wash away flea eggs, dirt, and debris that might attract pests. When I use a shampoo that includes properly diluted essential oils known to repel fleas and ticks, it gives Stewart an extra layer of protection even after his bath is done.
2. Natural Tick and Flea Sprays for Daily Protection-Before every walk, I spray Stewart with a natural flea and tick repellent. I pay close attention to his legs, chest, tail, and belly, basically anywhere that might brush up against grass, shrubs, or wooded areas. These sprays are one of our most important layers of protection, and I use them daily during warm weather or anytime we’re heading into a high-risk area.
Over the years, I’ve rotated between trusted store-bought options and homemade recipes using properly diluted dog-safe essential oils. I always avoid sprays with synthetic preservatives or ingredients that could irritate a dog’s skin.
When I make my own, I tailor the recipe to the season, the environment, and even the behavior of my dog. Dexter, for example, used to try to catch bees, so I avoided blends with oils like rose geranium that might attract them. The key with any natural tick and flea spray is to apply it each time your Cavalier goes outside. These blends are not designed to last for hours at a time, and a quick re-spritz before each outing is what really makes the difference. I keep a bottle near the door so it becomes part of our daily walking routine.
DIY Natural Flea and Tick Spray for Dogs
This is one of my favorite natural sprays to help keep fleas and ticks at bay, without resorting to harsh chemical treatments. It’s simple to make, and you can use it on both your dog and yourself before heading outside.
What You’ll Need:
3 ounces distilled water
1/4 ounce vodka or grain alcohol (helps disperse oils evenly)
1/4 teaspoon vegetable glycerin (moisturizing and helps blend)
Essential Oils:
4 drops Cedarwood– repels fleas and ticks while being gentle on skin
4 drops Geranium– especially helpful against ticks
3 drops Lavender– calming and gently repels insects
1 drop Citronella– useful for deterring mosquitoes, fleas, and ticks
1 drop Peppermint– offers cooling relief and additional repellent support
How to Make It: Add all the ingredients to a 4-ounce (or larger) amber or cobalt blue glass spray bottle. Shake gently to combine.
How to Use It: Before walks or time outside, shake well and lightly mist your dog’s legs, belly, tail, and along the back. Always avoid spraying near the face and eyes. For areas like the ears, chest, or neck, spray a small amount into your hands first, then gently rub it into your dog’s fur. This helps you apply it more precisely and makes sure it reaches the coat and skin. Always apply when your dog is dry for best results.
Storage Tip: Store your spray in a cool, dark place and an amber or cobalt glass bottle helps protect the essential oils from light exposure, which can cause them to break down over time. Shake before each use to keep the oils properly dispersed.
Simple DIY Natural Flea and Tick Spray for Dogs
When I first started making Dexter’s flea and tick sprays, I kept things really simple. I used just distilled water and a few carefully chosen essential oils. Using just distilled water and essential oils is a great option if you plan to make small batches and use them up fairly quickly. It is easy, gentle, and perfect for Cavalier parents who want something simple. You will still need to shake the bottle well before each use, just like with any natural spray.
If you want your spray to blend a little more evenly and stay fresher a little longer, using the above recipe with the grain alcohol and vegetable glycerin can help. Alcohol acts as a natural preservative and helps the oils disperse a little better through the water. Glycerin can also add some moisture to the coat and skin.
Both options are good, it really depends on what fits best with your dog’s needs and your routine. If you are going through the spray quickly, distilled water and oils work just fine. If you want a little more staying power and an extra moisturizing boost, the version with alcohol and glycerin might be a better fit.
You can also check out four of Dexter’s natural flea and tick spray recipes on my Raising Your Pets Naturally blog.
Watch now and don’t forget to subscribe to @RaisingYourPetsNaturally YouTube for more!
Why Different Natural Tick and Flea Sprays Work for Different Dogs
One thing I learned through experience and from chatting with other natural pet parents is that not every spray works the same way for every dog. Some ticks are more common in certain regions and are repelled by specific essential oils. That’s why I rotate between formulas and stay flexible with what I use. If something stops working, I adjust. It’s not failure, it’s just part of the process.
3. Apple Cider Vinegar for Flea and Tick Support-Raw, unfiltered apple cider vinegar (ACV) is another natural tool I like to keep on hand as part of a layered approach to flea and tick prevention. While it won’t kill fleas or ticks, it can help make your dog less appealing to them.
You can make a simple spray by mixing equal parts raw ACV and distilled water in a spray bottle and lightly misting your dog’s legs and belly. Just be sure to avoid the face, and only use it on healthy, unbroken skin. If your dog has any skin sensitivities or open spots, it’s best to skip ACV topically.
You can also add a small amount of ACV to your Cavalier’s food or water. Not all dogs tolerate vinegar well, especially those with sensitive stomachs or urinary issues. It’s also important if you add it to your Cavalier’s water, they also have non-altered fresh water available.
4. Amber Collars for Natural Flea and Tick Repellent Repellant-Another layer is a raw Baltic amber collar. These collars are made from unpolished amber resin that naturally releases aromatic compounds when warmed by your dog’s body. These compounds can help repel ticks and fleas without adding any scent or chemicals to your dog’s skin.
While I wouldn’t rely on them as the only form of protection, I absolutely feel they can help in the overall care to keep our Cavaliers tick and flea free naturally. They’re lightweight, chemical-free, and easy to clip on. With Cavaliers, just make sure the collar sits comfortably behind their ears and doesn’t tangle with their feathering. If your Cavalier has Chiari malformation, this may not be an option if they can’t wear a collar comfortably.
5. Ultrasonic Tick Tags-Another tool to add to your flea and tick routine is an ultrasonic tick tag. There are various brands that make these small devices that clip onto your dog’s collar or harness. They emit a high-frequency pulse that humans and dogs can’t hear, but it’s designed to interfere with a tick or flea’s ability to orient themselves toward your dog.
These tags are scent-free and totally safe for sensitive dogs like Cavaliers. This type of tag is helpful during hikes, trail walks, or visits to areas known for higher tick populations. It’s a simple, noninvasive step that adds an extra layer of protection.
6. Diatomaceous Earth for Natural Flea and Tick Prevention-Food-grade diatomaceous earth is another natural tool I use as part of our flea and tick routine. It’s a fine powder made from fossilized algae that works by drying out the exoskeletons of pests like fleas and ticks. I don’t use it as a primary prevention method, but it’s a helpful layer, especially after we’ve been somewhere with higher pest exposure.
To apply, I lightly sprinkle a small amount down Stewart’s back and gently brush it into his coat, avoiding his eyes, nose, and mouth. It’s best used when your dog is dry and in a well-ventilated area. You can also use it on bedding or around baseboards during flea season as part of a regular cleaning routine.
Watch how I apply it and don’t forget to subscribe to @CavalierTipsandFun YouTube channel for more!
7. Using Garlic to Support Immune Health and Repel Fleas Naturally-Garlic might be controversial in some circles, but when used responsibly, it’s one of my go-to immune support tools. Garlic often gets a bad reputation because in 2000, they did a study on four dogs and gave them an extreme amount of garlic ( about 25 cloves a day for a 25-pound dog), and they had a bad reaction. That’s not even close to how we’d use garlic in a natural, supportive way. You can read the study here.
I started using fresh garlic years ago with Dexter, and it’s something I continue with Stewart now that he’s old enough for it. Garlic supports the immune system and helps repel fleas and ticks from the inside out. I only use fresh, organic garlic, peeled and minced about ten minutes before mealtime to allow the allicin to activate. Then I mix it into Stewart’s food. I never exceed the recommended amount and only feed garlic for up to three days in a row, followed by five to seven days off.
I never use garlic with puppies, pregnant or nursing dogs, dogs with anemia, or those with upcoming surgeries. It’s not a fit for every dog, so I always recommend checking with a holistic vet first.
Garlic Dose For Dogs: The approximate dose of fresh, organic garlic is 1/8 teaspoon for a 5 pound dog, 1/4 teaspoon for dogs between 6 and 10 pounds, 1/2 teaspoon for 11 to 15 pounds, 3/4 teaspoon for 16 to 20 pounds, and 1 teaspoon for dogs between 21 and 30 pounds. Dogs between 31 and 50 pounds can have 1 1/2 teaspoons, and those over 51 pounds can have up to 2 teaspoons.
8. Spotting and Removing Ticks and Fleas from Your Cavalier King Charles Spaniel-No matter how many prevention tools we use, I always do a hands-on check after walks or outings, especially during peak tick season. I check Stewart’s paws, armpits, ears, groin area, and the base of his tail. These are the spots where ticks love to latch on.
If I do find a tick, I remove it immediately with a tick remover or fine-point tweezers, making sure to grab close to the skin and pull straight out. Afterward, I place it in a bottle with alcohol and wash my hands. I’ve found this routine not only gives me peace of mind but also helps me stay in tune with any changes in Stewart’s skin or coat.
A Quick Note About Dexter’s Experience
As Dexter was in his late senior years and his neurological condition progressed, I started to notice the occasional flea here and there, more than we had seen in the past. His immune system wasn’t as strong, and that likely made him more vulnerable to pests. This isn’t uncommon in aging dogs or those with health challenges. Their bodies just don’t have the same defenses they once did.
I made it a daily routine to sit with Dexter and go over him carefully with a flea comb and a small jar of alcohol to catch any runners before they could become a real problem. I also stayed on top of sweeping and washing his bedding regularly. Thankfully, it never got out of control, just a flea here and there, but it reminded me how important it is to stay consistent.
It also reinforced why I’ve always chosen to avoid harsh flea treatments. With Dexter’s compromised system, exposing him to chemicals could have caused even more serious issues. Supporting his health naturally, with gentle and consistent care, was always the safest choice for him.
Final Thoughts on Natural Flea and Tick Care for Cavaliers
If you’re just starting your natural flea and tick care journey, start small. You don’t have to change everything at once. Pick one new step, try it, and see how it fits your dog’s life. Read labels. Ask questions. And most of all, give yourself grace as you navigate what feels right for you and your Cavalier.
Cavaliers are worth the extra effort, and with how sensitive they can be, choosing gentle, natural care just feels like the right thing to do.
Google Ad Below [...]Read more...
November 27, 2024Does your Cavalier King Charles Spaniel bark for attention? Maybe your Cavalier tosses a toy onto your lap, begging for a game of fetch. Or perhaps your Cavalier King Charles Spaniel barks incessantly to go outside and chase every squirrel in the neighborhood. These are classic examples of attention-seeking behavior and, while they may be funny at times, they can also become exhausting.
In this Cavalier blog, I’ll guide you through training your Cavalier to ask for attention politely or, even better, stop demanding attention altogether. But first, let me be clear. I am all about spending quality time with our dogs. Cavaliers thrive on love, play, and companionship, and I encourage plenty of bonding time. However, constant barking or pushy behaviors for attention are not things I would encourage in a dog. With positive dog training methods, good timing, and a proactive approach, we can change this demanding behavior.
Why Does My Cavalier Bark at Me for Attention?
Cavaliers are a playful breed and incredibly intelligent. They are quick learners and can learn behaviors we don’t even know we are teaching them, like barking for attention. Some Cavaliers may learn to bark for attention, paw, nudge, or give you the “look” for that snack. If they have done one or all of these things, and you gave them what they wanted, they’ve already made the connection: This behavior gets me what I want. For example, if barking speeds up dinner prep or prompts you to throw the ball, your Cavalier has been “trained” by their success.
But, don’t worry. You can change these demanding behaviors to better habits. So, let’s get started at teaching your Cavalier to be calm and quiet for the things they want.
Steps to Stop or at Least Curb Attention-Seeking Behaviors
Increase Quality Time: Cavaliers are highly social and crave interaction. You know that. That’s why they are your breed of choice, right? If your pup is constantly asking for attention, they may feel their current playtime or bonding time isn’t enough. Start by increasing their daily activities by about 50 percent. For example, if you play games with your Cavalier five times a day, bump it up to seven or eight short sessions. The same goes for walks, training, or cuddle sessions. Increase the duration or quantity of their interactive activities. And I do mean interactive vs. just placing a food toy on the floor. Those are all fine and well, but, in most cases, your Cavalier is craving your time. Read more about canine enrichment.
Get Ahead of the Demands: Observe when your Cavalier typically starts seeking attention. If they usually bark for play at 11 a.m., initiate a play session at 10:45 instead. By starting the activity before they ask, you’re rewarding their good and polite behavior rather than their pushiness.
Ignore Pushy Behaviors: This is key. When your Cavalier barks, paws, or demands attention in any way, practice the “invisible dog” technique. Avoid eye contact, verbal responses, or movement. Turn away, walk out of the room, or stay still. Once your Cavalier is quiet, calmly reengage and reward them for being polite. But, this only works if you do #1 and increase that quality time together. If you don’t do that, ignoring won’t work because their needs are not being met.
Pro Tip: Be prepared for an “extinction burst.” Your Cavalier may escalate their behavior temporarily, barking louder or pawing more persistently because the old tactics aren’t working. They are getting frustrated. Stay patient and consistent.
Reward Calm and Quiet: Every time your Cavalier is calm and quiet, offer attention, praise, or even a small treat. Reinforcing this behavior teaches them that being polite is the best way to get what they want. This is also the perfect time to initiate a game or play session with your Cavalier.
Teaching self control is a great way to help curb barking.
Patience Is Key
Changing established habits takes time, so be patient with your Cavalier and yourself. Remember, they’re simply trying to communicate their needs the only way they know how. With consistent positive dog training and a little extra quality time, you’ll soon have a polite pup who doesn’t feel the need to ask for attention because you are providing them all the attention they need and desire.
Real-Life Example: Dexter’s “Talking”
Even my sweet Dexter isn’t perfect. He’s been known to “talk” or snort to get his way, and sometimes it works because I’m not perfect, either. Not to mention, there are two other family members who have been known to reward his ask. And, when it’s rewarded, it persists. If I wanted to fully address this behavior, I’d need to follow the steps above consistently and MAKE SURE the other two members of the family do as well. But, in our home, a little talking is something we tolerate because it doesn’t bother us.
That’s the beauty of training: you get to decide what behaviors matter to you. If something doesn’t bother you, there’s no need to change it, as long as it’s not something that should be addressed like anxiety. Just remember that if you allow certain behaviors, it’s important not to complain about them later.
Check out my playlist on barking!
What You Can Do Next
Now that you have the tools to manage your Cavalier’s attention-seeking behavior, it’s time to put them into action. Start by increasing quality time with your dog, introducing play sessions before they ask for attention, and practicing the “invisible dog” technique when pushy behaviors pop up. Remember, consistency is key, and patience will help you both succeed. With time, you’ll see your Cavalier becoming more polite and less demanding, leading to a stronger bond and fewer unwanted behaviors.
What’s your dog’s favorite way to spend quality time with you?
Join our vibrant Cavalier King Charles Spaniel community on Facebook, support our dedication to pet wellness on Patreon, and stay updated with our weekly newsletter for invaluable tips and insights into raising happy, healthy pets. Together, let’s make a difference in our dogs’ lives!
Google Ad Below [...]Read more...
March 19, 2025How to Teach Your Cavalier King Charles Spaniel to “Leave It” | Positive Training for Cavaliers
Teaching your Cavalier King Charles Spaniel to “leave it” or ignore something on your cue can be lifesaving. Imagine dropping a pill in front of your Cavalier or going for a walk and passing garbage in the street. If your Cavalier King Charles Spaniel has a reliable “leave it” cue, you can easily ask him to leave it as you pick up the pill or walk past the garbage.
When I start the “leave it” training, what I want my dog to learn is that “leave it” doesn’t mean he doesn’t get something, but that I have something better. This helps to build a more reliable behavior, especially off-leash. If you only teach your dog that “leave it” means he doesn’t get something, he might just try to grab the item faster or run off with it. That’s not what we want!
As with all dog training, remember that you need to regularly practice these lessons. Training your Cavalier is not just about doing it once and then only when you need it. Reliable dog training takes time, patience, and consistency. Cavalier King Charles Spaniels, in particular, can be a bit food-driven, so keeping them engaged and excited about the reward is key.
So, be patient, consistent, and most importantly, have fun with your Cavalier while training!
Teaching Your Cavalier to Leave It Level 1
Start with a small, low-value dog treat in your closed hand, and place it about 12 inches to the side of your Cavalier’s face. Make sure your hand is at the right height, not too close to his face, but not too far away either. Let your dog see it there, and wait him out. As soon as he moves his face away or ignores the treat, say, “YES!” and reward him with an amazing treat from your other hand. Not going for the treat is a win, too! So, if you present the leave it treat hand and he doesn’t go for it, “YES!” and treat. Repeat this a few times.
When your Cavalier starts ignoring your treat hand altogether, move to Level 2.
Don’t forget to subscribe to our @CavalierTipsandFun for more!
Teaching a Dog to Leave It Level 2
Start like Level 1, but before you drop your hand, say your “leave it” cue once. Wait him out; as soon as he moves his face away or ignores the treat, say, “YES!” and treat from your other hand. Repeat. When he stops going for your hand after hearing the “leave it” cue, move to Level 3.
Training Your Cavalier to Leave It Level 3
Say your “leave it” cue and drop your hand with the low-value treat to your dog’s side, but leave your hand OPEN. If he goes for the treat, quickly close your hand. When he moves his face away, praise and reward him with a treat from your other hand. Repeat. When your Cavalier is reliably ignoring the treat in your open hand, move to Level 4.
Teaching Your Cavalier to Ignore Items Level 4
At this stage, it’s time to change things up a bit. Up until now, you’ve been using low-value, boring dog treats for the “leave it” item. Once your dog is starting to get the hang of it, it’s time to up the ante. Use tastier treats or toys as the “leave it” item, but remember, his reward needs to be even better.
You can try:
Tastier treats or food
Paper products, tissue, or paper towels
Toys
Subscribe to @RaisingYourPetsNaturally for more!
Here’s how to set it up when using a toy:
Pick a Toy: Choose a toy that your Cavalier likes but isn’t so high-value that your Cavalier would immediately grab it without hesitation. Start with something mildly exciting like a squeaky ball, fleece tuggy toy, or stuffed animal that your dog enjoys.
Set Up the Training Area: Find a quiet spot where you can focus and your dog isn’t too distracted by other things. Make sure it’s a place where you can manage your dog’s movement and reactions.
Start the Cue: Hold the toy in your hand and get your dog’s attention. Don’t get too silly. You just want him to know it’s there, with a bit of excitement.
Use the “Leave It” Cue: Once you’ve gotten his attention, say the “leave it” cue calmly. Hold the toy in front of your dog just out of reach, but don’t place it on the ground yet.
Wait for the Response: Your dog may try to lunge for the toy or show interest in it. The goal here is for him to move away or ignore it, not to grab it. If he goes for it, just swipe the toy up to your chest and ignore him and wait for him to ignore it. Then repeat the process of lowering your hand with the toy. As soon as your dog turns his head or steps away from the toy, immediately say “YES!” and give him a better reward (a tastier treat or something that’s even more valuable than the toy).
Repeat and Increase Difficulty: Repeat the exercise several times, and gradually increase the difficulty. Once your Cavalier reliably ignores the toy when it’s held in your hand, move on to placing the toy on the ground. To set this up, place the toy behind you, out of reach. This way, you can gently body block your dog if he tries to move toward it. When he turns away or ignores the toy, immediately reward him with a better treat or better toy.
Body Blocking: Body blocking involves using your own body to gently guide your dog away from a distraction, like a toy, by positioning yourself between your dog and the item. It’s important to note that body blocking is not about kneeing or being rough with your Cavalier. It’s a gentle, calm way to redirect their attention. However, some dogs may find body blocking intimidating or scary, so if your Cavalier shows signs of stress, it’s best to avoid this method and use alternative techniques for redirection.
Build Duration: As your Cavalier gets more comfortable with the “leave it” cue around toys, try holding the cue for a longer period of time. For example, you can wait for him to sit or stay before rewarding him. This increases his patience and focus during the exercise.
Training Your Cavalier to Leave Something Level 5
Place a low-value treat under your cupped hand, with your dog in front of you. Say your “leave it” cue, and wait for your Cavalier to ignore the treat. If he looks away or shows interest but doesn’t try to grab it, immediately reward him from your other hand with a better treat.
As he gets the hang of this, start showing the “leave it” treat under your cupped hand. If your dog ignores the treat, reward him from your other hand. If he tries to go for the treat, simply cup your hand over the treat again. Repeat this process, gradually raising the criteria by making the treat more tempting and testing his ability to resist.
Teaching Your Cavalier to Leave It Level 6 and Beyond
Now it’s time to make things more challenging. Increase the difficulty by adding distractions, different environments, or a variety of leave-it items. Always be mindful of your Cavalier’s current ability level, and don’t rush the process. If you find your Cavalier is struggling or making mistakes, step back and simplify the task again. You want to build confidence and reliability.
Reminders:
Never allow your Cavalier to get the “leave it” item. If you want your Cavalier to have it, you pick it up and give it to him. The goal is to teach him that ignoring the item leads to something better, not just an empty reward.
If your Cavalier is having trouble with the exercise, step back to easier levels or increase the value of the reward to keep him motivated and engaged. You can also try lowering the difficulty by using a less tempting “leave it” item to help him succeed.
The goal isn’t just for your Cavalier to avoid the item once, but to understand that when you say “leave it,” he has the chance to earn something even better. The more your dog experiences this rewarding outcome, the more reliable the behavior will become.
Pro Tips:
Keep training sessions short, positive, and fun! Don’t let the “leave it” item overwhelm or frustrate your Cavalier. If he’s struggling, simplify the task and increase the reward to keep him interested and motivated.
How Often Should You Practice the Leave It Behavior with Your Cavalier?
It is important to regularly practice “leave it” throughout the day, not just during formal training sessions. You can incorporate it during walks, around the house, or when playing. As you add distractions, make sure to reward your Cavalier for staying focused on you, especially when there are high value items around. Cavaliers are generally quick learners, but they can also get bored easily, so keep your training sessions positive and fun. Consistency and patience will pay off in the long run.
Pro Tip: Practice, practice, practice with various setups. You want your Cavalier to respond reliably to the “leave it” cue in real life situations, whether it is a dropped item, an enticing smell, or something on the floor. By practicing regularly, you ensure they will leave it without hesitation. I still reward those real life “leave its” to keep the behavior strong and consistent!
Conclusion
Practicing “leave it” regularly and in different situations helps ensure your Cavalier responds reliably when it matters most. Keep training sessions fun and rewarding, and don’t forget to reinforce real-life successes. Teaching a solid fetch and “drop it” will also complement “leave it,” giving your Cavalier even more useful skills. With consistency and patience, your Cavalier will continue to improve and make great choices in everyday life.
How is your leave it training going? I’d love to hear about it in the comments!
Google Ad Below [...]Read more...
April 29, 2025Your Cavalier King Charles Spaniel’s Teenage Phase
When you bring home a Cavalier King Charles Spaniel puppy, you are prepared for puppy breath, floppy ears, and all the adorable moments that melt your heart. What nobody talks about enough is what happens when that sweet ball of fluff hits adolescence.
Right now, Stewart, my Cavalier, is about 10 and a half months old and is in full-blown teenager mode. I can tell you firsthand that adolescence is real. Stewart has energy for days, wild bursts of zoomies, and a mischievous sparkle in his eyes that keeps me on my toes. My mom, who adores him, often comments, “He is always getting into trouble!” (Of course, to me, it is not real trouble. It is boredom, enthusiasm, and a young dog who is eager to interact and explore.)
She often compares him to my late Cavalier, Dexter, who lived to be 15 years old. In her memory, Dexter was the perfect, calm little gentleman. And he was, but only after years of growing up. It is easy to forget that Dexter had his own crazy adolescent phase, too. I still remember the day I found myself saying, “You are going to eat, you are going to potty, and you are going to bed!” Sometimes, when puppies get extra wild, it is not even about training. They are simply overtired and need help settling down. Just like toddlers, sometimes they push through their exhaustion and get even more wired.
If you are going through the teenage years with your Cavalier right now, you are not alone. And no, you did not do anything wrong. Adolescence is a natural stage in a dog’s development. In Cavaliers, it usually starts when those puppy teeth begin falling out (around four to six months old) and can last until about eighteen months, give or take depending on the dog.
During this phase, your Cavalier might:
Forget their basic training
Start jumping up more
Become mouthier and more vocal
Seem to ignore you sometimes
Have random bursts of wild energy (we call them “zoomies”)
Get into things they never bothered with before
Show frustration or impatience more easily
Does that sound familiar?
It is important to remember that your Cavalier’s brain is still developing. Just like human teenagers, they are caught between puppyhood and adulthood. Their impulse control is not fully in place yet. The good news? This phase is temporary. And your patience and guidance right now will shape your Cavalier for the rest of their life.
Here is how I am helping Stewart (and helped Dexter before him) navigate this time:
Stay Consistent with Positive Dog Training: Even if your Cavalier seems to have forgotten what “sit” or “stay” means, keep practicing. Short, daily sessions with positive reinforcement go a long way. Stewart and I do a lot of quick “name games,” sits, hand targets, and polite walking games to keep his brain engaged.
Build in Play and Enrichment: A bored adolescent dog is a mischievous dog. I make sure Stewart has plenty of fun activities like sniffy walks, find-it games, fetch sessions, and interactive toys. Play is not just fun, it is a training tool. A dog that plays with you is a dog that trusts you.
Manage the Environment: I always try to be proactive with management first. If I think Stewart might start getting rowdy or restless, I plan ahead. Before I get busy, I will take him for a nice walk, do some training or play a game before I need to settle in. Then, I’ll provide him with something to keep him busy, like a snuffle mat, chew toys or licky mat. That way, he already has something to focus on instead of looking for ways to entertain himself. Managing the environment is not about waiting for problems to pop up. It is about setting your Cavalier up for success before trouble starts.
Provide Enough Rest: After Stewart works on his snuffle mat, chew toy, or licky mat, and has had a little training or a nice walk, he is usually ready to settle. That is when he curls up for a siesta at my feet while I do my work. Remember that story about Dexter? Sometimes the wild behavior we see is not from a lack of exercise. It is from being overtired. Puppies and adolescent Cavaliers still need a lot of sleep throughout the day. Building in scheduled downtime helps them reset and recharge before they get into trouble from being too tired to make good choices.
Focus on Trust and Bonding: During a dog’s adolescence period, it is easy to get caught up in the frustrating moments when your Cavalier is ignoring you, getting too wild, or pushing boundaries. But I always try to remind myself that every interaction with Stewart is an opportunity to build our relationship. Trust and connection are even more important during this teenage stage. Adolescence is a time when Cavaliers are figuring out the world and deciding who and what they can count on. I want Stewart to know that I am always safe, fun, and trustworthy. That way, when things get tricky, like going to the veterinarian or navigating a new place, he will look to me for guidance and reassurance. The stronger the bond we build now, the more confident and connected he will be as an adult.
Keep a Sense of Humor: Adolescent dogs can be frustrating at times, no doubt about it. But it also brings some of the funniest, most joyful memories. Stewart’s goofy antics, the way he proudly carries a pinecone, his dramatic “flops” when he does not get his way, these are the moments I know I will smile about years from now.
If you are raising a Cavalier King Charles Spaniel and feeling overwhelmed by the ups and downs of adolescence, you are not alone. This stage can feel overwhelming on some days, but every patient, playful, and consistent moment you put in now is shaping your Cavalier’s future. All the work you are doing today will help your Cavalier grow into a confident, connected, and loving companion for many years to come.
If you would like more step-by-step help through this stage, I would love for you to join us in our Manners, Life Skills, and Foundation Training course. Inside the course, I walk you through building polite greetings, calm walking, settling skills, and helping your Cavalier stay more focused and connected with you. It is all about giving you the tools to guide your Cavalier through adolescence and beyond with patience, confidence, and fun.
At What Age Do Cavaliers Calm Down?
If you are raising a young Cavalier King Charles Spaniel and wondering when your Cavalier will calm down, it is a common question during the teenage phase. Cavaliers usually start to settle after they move through adolescence, which can last until around eighteen months to two years of age. Some Cavaliers might take a little longer depending on their personality and energy level.
Maturity comes with time, but it also comes with the foundation you build along the way. Positive training, daily routines, enrichment, plenty of rest, and building trust all help your Cavalier develop into a calmer and more confident companion. It is not something that happens overnight, but it does happen.
You have got this! Stay patient, stay positive, and focus on the progress you are making together. It is not about being perfect. It is about showing up, doing the work, and building a strong relationship one day at a time.
What has your Cavalier been doing lately that makes you say, “Yup, we are in the teenage stage”? I would love to hear your stories in the comments!
Google Ad Below [...]Read more...
May 23, 2025What to Do When an Off Leash Dog Approaches or Attacks Your Cavalier
Running into an off leash dog in a public area where leash laws are in place is one of those moments that gets my blood boiling. I’ve heard from too many Cavalier families who have gone through this, and sadly, I know several Cavaliers who were seriously injured. Even a couple that didn’t survive. It’s heartbreaking, it’s preventable, and we need to talk about it.
This post is for those of us doing our best to protect our dogs, especially small, gentle breeds like Cavalier King Charles Spaniels, when others decide the leash rules don’t apply to them. Whether you’re out walking your Cavalier, training, or just enjoying your day, here are real life ways to keep your dog safe and what to do if the worst happens.
Why Letting Your Dog Off Leash Puts Others at Risk
Just because your dog is friendly does not mean they should be off leash in public areas. You never know what someone else’s dog is going through. Some dogs are recovering from surgery or illness and need space. Others are working through fear or reactivity and are not ready for sudden greetings. Some are service dogs who may not be wearing a vest but are doing their job. And many dogs, Cavaliers included, simply do not want strange dogs running up to them.
This is why leash laws exist. They are there to protect everyone. Just because your dog wants to say hi doesn’t mean they should get to.
What to Do When an Off Leash Dog Approaches
There is no perfect solution that works in every situation, especially when an off leash dog charges unexpectedly. But being prepared both mentally and physically can make a real difference. These are practical ideas I have taught, used myself, and seen work in real life. While nothing is guaranteed, having a plan in place can help you stay calm, act quickly, and protect your Cavalier as best you can.
Watch the video demonstrations and don’t forget to subscribe to @RaisingYourPetsNaturally for more tips.
Teach a Sit Stay Behind You
One of the most helpful cues I teach is a sit stay with my dog positioned behind me. I start by practicing in low distraction settings and slowly build it up over time. If a dog approaches, I cue my Cavalier to sit and stay behind me, and I step forward to handle the situation. This helps my dog feel protected and keeps them from reacting or escalating the situation.
Throw Treats at the Approaching Dog
Yes, throw treats right at the dog’s face. It may sound odd, but it works. The goal is to startle the dog and interrupt their focus. Then toss more treats behind them, toward the direction they came from. This often gives you a few seconds to calmly retreat with your Cavalier. I always carry tasty treats for this reason.
Use a Traffic Cop Stance
Turn to face the dog, extend your arm out like a stop sign, and say firmly, “Stop. Go home.” Keep your Cavalier behind you and slowly back away. Some dogs will pause or hesitate if they’re unsure or not aggressive. Keep repeating the phrase and keep your hand out, as you and your Cavalier walk backwards away.
Carry an Air Horn
If your dog is comfortable with noise, an air horn can be a great deterrent. I always condition my dog to hear it at home first and pair it with treats. When needed, a quick blast can interrupt the loose dog’s approach and give you time to move away. It’s one of my go to tools, but only if your dog can handle the sound.
Use an Umbrella as a Visual Block
I train my dogs to be comfortable with umbrellas opening indoors, so they are not startled if I ever need to use one during a walk. If a dog is charging at you, pop open the umbrella toward them. The sudden motion and large shape often causes the dog to pause or back off. If necessary, you can shake it or move it toward the dog as you use a firm, go home, verbal cue.
Carry a Personal Safety Tool
Tools like pepper gel, citronella spray, taser, or even a She’s Birdie alarm can help in urgent moments. Pepper gel has more control than spray, and the alarm can attract attention or startle the other dog. Always practice with these tools and make sure your dog is not afraid of them.
Be Cautious About Picking Up Your Cavalier
It is tempting to scoop up your Cavalier, especially since they are small. But doing so can sometimes make things worse. The approaching dog may jump at you or become more aroused. Only pick up your Cavalier if you feel it will help and if you have a safe place to put them, like a truck bed, behind a fence, or even inside a garbage bin if it means protecting them. Use extreme caution if trying this.
If You’re Walking More Than One Cavalier
This is also one of the reasons I usually prefer walking one dog at a time. It helps me stay more aware, react quickly if something happens, and really connect with the dog I’m with. But I know that’s not always possible, so here’s how to stay prepared when walking more than one.
Walking multiple Cavaliers makes things trickier, especially when a loose dog starts heading your way. It can be harder to control space, stay calm, and manage multiple leashes at once. That’s why I recommend preparing a plan ahead of time if you regularly walk more than one Cavalier.
If possible, practice sit stays with each dog individually first, then gradually build up to group stays. Teach your Cavaliers that standing behind or beside you means safety. If you see a loose dog approaching, calmly guide all your Cavaliers behind you and keep their leashes in one hand while using your other hand to deter the loose dog, whether that’s with a verbal cue, a stop signal, or a safety tool.
This is also where tools like a treat toss or umbrella can really help, because they create distance without needing to physically wrangle multiple Cavaliers. And if things feel too tight, do not hesitate to turn and walk away together. Getting distance is often the safest move when you have more than one dog depending on you.
What to Do If a Dog Attacks Your Cavalier King Charles Spaniel
No one wants to think about this part, and I truly hope you never face it. But if a loose dog attacks your Cavalier, your priority becomes stopping the fight as quickly and safely as possible. This is not about hurting another dog out of anger. It is about protecting your own Cavalier King Charles Spaniel from serious harm or even death.
If you have a tool in hand, such as a stick, an umbrella, or pepper gel, use it to target the attacking dog’s face. Aim for the eyes, nose, or mouth. The goal is to interrupt the attack and create enough of a pause to safely separate the dogs. You may only have a second or two, and you need to respond fast and as hard as you can to protect your Cavalier.
If you are physically trying to break it up without a tool, one method is to grab the attacker’s back legs and swing them away from your dog. This can throw them off balance and give you a chance to create space. Do not reach for collars or faces with your hands. That is the most common way people get bitten during dog fights.
Once the dogs are separated, move your Cavalier to safety right away. If possible, secure the attacking dog so they cannot come back. Then take photos, report the incident, and document everything as soon as you can. Even if your Cavalier seems okay, a vet check is always important. Many bite wounds are deeper than they look.
Helping Your Cavalier Recover Emotionally After an Attack
This is one of the most important parts of the process, and it is often overlooked. A Cavalier who goes through a dog attack may seem fine physically, but emotionally, they can lose trust in the world around them. I have worked with dogs who suddenly freeze on walks, avoid places they once loved, or become uneasy around other dogs even from a distance.
Start by giving your Cavalier time to decompress. Skip your regular walks for a few days and let them rest in the comfort of home. The goal is to help them feel safe again while things settle emotionally and physically. Keep their day simple and supportive.
At home, bring in confidence through simple enrichment. Food puzzles, nose games, and easy trick training can help rebuild a sense of control and engagement. These games in a familiar space can make a big difference.
When you are ready to start walking again, choose quiet places where you are unlikely to run into other dogs. Early mornings, empty parking lots, or quiet nature trails can be good options. Let your Cavalier set the pace. If they want to pause and look around or head back early, that is okay.
Pay attention to the progress. If your Cavalier walks a little farther, seems more confident, or looks at you for guidance, tell them how smart they are. Praise, treat, give a chest scratch. That is how trust returns, little step by little step.
This healing process takes time. That is exactly why I created Supporting Your Sensitive Dog: Gentle Steps Toward Confidence. If your Cavalier is showing signs of fear or hesitation, this course will guide you through gentle, trust based steps to help them feel safe again.
You’re Not Overreacting
Your Cavalier deserves to walk safely. You deserve to walk without fear. And if someone chooses to ignore leash laws, you are completely within your right to protect your Cavalier, using your voice, your body, your training, or any tool you need.
So stay prepared. Be proactive. And most of all, trust your instincts. You’ve got this.
Google Ad Below [...]Read more...
May 14, 2025Kind, Reward-Based Training for Cavalier King Charles Spaniels and All Breeds
When people hear the term positive reinforcement, they sometimes picture a dog who only listens if you have food in your hand. Or they think it means never setting boundaries. I’ve had people say things like, “I don’t want to spoil my dog,” or “I heard that’s just bribing with treats.” But the truth is, positive reinforcement training is science-based, relationship-focused, and one of the most effective ways to help dogs feel confident and understand how to live successfully in our human world.
And it’s not just for Cavaliers. This approach works for every breed, every age, and every behavior challenge.
Let’s break down positive reinforcement dog training in a simple and practical way.
What Positive Reinforcement Dog Training Really Means
Positive reinforcement means adding something your dog enjoys immediately after they do a behavior you want to see again. That reward could be healthy dog treats, a toy, praise, a chance to sniff, or access to something fun. It doesn’t have to be a treat every time, but food is often the easiest and most meaningful place to start. If it’s going to be rewarding for your Cavalier, they decide. I mean, my Mom might think a slice of cherry pie is a good reward, but I don’t even like cherry pie. I’d need a slice of chocolate cake!
This type of training is grounded in how all animals learn, including us. When a behavior is followed by a good outcome, we’re more likely to do it again. Your dog sits, you give them a treat. Your dog walks calmly by your side, you let them go sniff a log. That’s positive reinforcement. You’re not spoiling them. You’re reinforcing behavior you want to see more of, and they get something pleasant in return.
How Dogs Actually Learn
Dogs don’t come into our homes already knowing how to live in them. They don’t know what “sit” means. They don’t know they shouldn’t jump on guests or grab food off the counter. Just like us, they learn by doing, and by figuring out what works.
Dogs learn through repetition. They make connections between what they do and what happens next. If they sit and a treat shows up, they’re more likely to sit again next time. That’s positive reinforcement. We’re showing them that their choices matter and that doing the thing we like leads to something they like.
When we use positive reinforcement, we’re not just trying to get obedience. We’re helping our dogs understand how to live in our world in a way that feels safe and rewarding to them. They’re not learning because they’re afraid of getting it wrong. They’re learning because they feel good getting it right.
And that’s what builds real, long-lasting behavior.
Luring Training Is Teaching—Not Bribing
At the start, we often use a food lure, like holding a treat near your dog’s nose to help them learn how to sit or lie down. We slowly move that treat in a way that encourages the action we want, like guiding their head up and back until their butt hits the ground.
That’s not bribing. It’s teaching. We’re showing them what we’re looking for.
After a few short sessions, we continue practicing the same way. Lure the sit. Reward the sit. Once the dog is starting to understand it, we ask them to follow our empty hand the same way. If they sit, we reward. Now they’re doing the behavior without seeing food first.
Once that’s going smoothly, we add the cue. Say “Sit,” move your empty hand like before, and when their butt hits the ground, reward it.
Over time, we fade the hand movement so that “Sit” becomes all they need to hear. The behavior is now on cue, and your dog learned it in a clear, kind, and effective way.
Dogs Don’t Generalize—They Need Practice in New Places
One of the biggest things people miss is that just because your dog knows how to sit in the living room doesn’t mean they know how to do it in the yard, at the vet’s office, or around a group of children. Dogs need practice in new environments. They need help when distractions are high or when they’re feeling unsure.
That might mean going back to the basics in new places. Using a treat to lure a sit at the park isn’t spoiling your dog. It’s helping them succeed in that moment. You’re helping them learn how to do something they already know, but in a place that’s harder or more distracting.
Why Positive Reinforcement Works for Cavalier King Charles Spaniels and All Breeds of Dogs
Cavaliers are sweet, sensitive, and deeply tuned in to their people. They often respond beautifully to kind guidance and struggle with harsh corrections. A raised voice, leash jerk, or even a stern look can shake their confidence and cause them to shut down.
But this isn’t just about Cavaliers.
Every dog, whether they are a bouncy Labrador, a headstrong terrier, a fearful rescue, or a playful senior, benefits from positive reinforcement dog training. You’re not just teaching skills. You’re building a good relationship. You’re helping your dog feel safe to try new things.
Positive dog training encourages curiosity instead of fear. It helps build lasting behavior in a way that feels good for both you and your dog.
The Risk of Punishment-Based Dog Training
Harsh training methods may seem like they work quickly, but they come with a huge cost. Dogs trained with physical corrections, yelling, or intimidation often show signs of stress, like lip licking, yawning, cowering, or even shutting down completely. They may stop doing the “bad” behavior, but not because they learned something better. They stop because they’re afraid to try.
Studies have shown that punishment-based dog training methods can increase anxiety and reactivity, and even lead to aggressive behavior in some dogs. It doesn’t teach what to do, it just teaches the dog what not to do, without giving them tools to succeed.
I’ve worked with so many families trying to rebuild trust after their dog was trained with punishment. That kind of fallout is hard to undo.
You Don’t Have to Carry Treats Forever
A common concern I hear is, “Will I always need food in my pocket?” The answer is no. As your dog becomes more confident and fluent in a behavior, you’ll reward less often. You’ll also start to mix in other rewards, like praise, sniffy walks, or play.
But here’s the thing, dogs, like us, still appreciate being recognized for a job well done. I still praised Dexter and gave him treats into his senior years. Not because I had to. But because I wanted to reinforce the connection we built over a lifetime of learning together.
You’re not creating a treat-dependent dog. You’re building a dog who trusts that good choices lead to good outcomes.
If you want to teach your dog real life manners in a kind, clear, and effective way, take a look at my Manners, Life Skills, and Foundation Training Course. It’s self paced, easy to follow, and designed to help your dog build everyday skills with confidence. You’ll learn how to prevent common problems before they start, teach polite behavior step by step, and create calm, positive routines that work in daily life. I personally answer questions, give feedback, and support you as you go through the course.
Why Positive Dog Training Works for Behavior Issues Too
Positive reinforcement is not just for basic training or fun dog tricks. It’s also one of the best ways to work through real behavior issues like jumping, barking, reactivity, anxiety, and fear-based behaviors.
A big part of dog behavior modification is emotion. When a dog is barking or lunging, they’re not just being “bad.” They’re usually feeling overwhelmed, scared, frustrated, or unsure. If we only try to stop the behavior without addressing how the dog feels, we’re not really helping them.
Positive reinforcement gives us a way to change those emotions. We teach our dogs that good things happen when they make calm, safe choices. Over time, they start to feel more relaxed in situations that used to be stressful. That change from fear to comfort, from confusion to understanding, is what creates real, lasting change.
Instead of just trying to stop the behavior, we ask, “What is my dog feeling?” Then, “How would I like them to feel instead?” and “What do I want them to do instead?” From there, we adjust the situation so we can meet all those needs and teach the new behavior in a kind, clear way. The more your dog practices that skill in the right setting, the more confident they become. And that’s where things really start to turn around.
What Your Dog Really Needs From You
At the heart of it all, positive reinforcement dog training is about more than treats. It’s about empathy. It’s about understanding how your dog sees the world and helping them learn in a way that clicks.
It’s about setting them up for success and guiding them toward the behaviors you want. Not through fear, but through trust, patience, and connection.
That’s what I want for Stewart. That’s what I wanted for Angel Dexter. And that’s what I want every dog to have, training that feels good, makes sense, and builds a life rooted in partnership, not power.
Keep it positive. Keep it patient. Keep it proactive.
Google Ad Below [...]Read more...
June 5, 2025How to Motivate and Train a Cavalier King Charles Spaniel
If your Cavalier King Charles Spaniel is not motivated to train, you’re not alone. This is something I hear from Cavalier families all the time: “My Cavalier is not food motivated,” or “My Cavalier just doesn’t care about training.” But in most cases, it’s not that your Cavalier doesn’t want to learn, it’s that something is getting in the way.
Here are a few common reasons your Cavalier might not be interested in training right now and what you can do to help them feel more motivated and ready to learn.
Reasons Your Cavalier Might Seem Unmotivated for Training
They are full
If your Cavalier just finished a meal or had a lot of snacks recently, they may not be interested in working for more food. Training with food rewards works best when your Cavalier is a little bit hungry, not stuffed. Try scheduling your training sessions before meals rather than after, or set aside part of their meal to use as training treats throughout the day.
They are tired
Just like us, Cavaliers have times when they are more alert and times when they just want to rest. If your Cavalier had a big play session, a long walk, or an active outing, they may need some quiet time before they are ready to focus again. Cavalier puppies especially need a lot of sleep, so training when they are rested can make a big difference. Try noticing when your Cavalier naturally seems more alert and ready to engage. That is usually the best time to practice a little training together.
They are not feeling well
If your Cavalier seems unusually uninterested in training or even in their favorite treats, that could be a sign they are not feeling well. Even mild health issues like nausea, pain, or dental discomfort can lower motivation. It is not always obvious at first, but changes in training interest can be an early clue that something is off. If this becomes a pattern, or if anything else seems different, reach out to your Cavalier’s holistic vet to rule out anything medical before moving forward with training.
Your Cavalier is overstimulated
Cavaliers take in a lot of information from their surroundings. If you are training your Cavalier in a busy or unfamiliar location, all those sights, sounds, and smells can be overwhelming. When there is too much going on, your Cavalier might not be able to focus or respond the way they usually do. This is especially common for puppies or sensitive Cavaliers who are still learning how to process the world around them.
If that happens, try moving to a quieter spot. You can even take a little break together for a sniffy walk and then go back to something really simple, like The Name Game or Hand Targeting. These familiar cues can help your Cavalier settle and build confidence again.
Your Cavalier is anxious or unsure
When a Cavalier is feeling unsure, whether it is because of a new environment, a stranger nearby, or something they cannot quite figure out, training can start to feel like too much. It is not about being stubborn or ignoring you. They are just trying to process how they feel before they can focus on learning anything new.
If your Cavalier seems nervous or anxious, the best thing you can do is slow things down. Sit with them quietly, speak gently, and let them look around without pressure. Sometimes just being there together is enough. Once they start to relax, you can offer praise and a treat or a “check it out” cue if they seem ready to explore.
The reward is not meaningful enough
When I hear that a Cavalier is not food motivated, the first thing I look at is the reward. Most of the time, it is not that your Cavalier is not food motivated. It is that the treat just does not matter enough to them at that moment. Dry biscuits or lower value treats usually do not get their attention, especially in busy or distracting places.
Start with real food. I usually go straight to meat. That might be small bits of cooked beef, turkey, or lamb. Freeze dried meat or single ingredient dehydrated treats are also great choices. These are often the best treats for Cavaliers because they are soft, tasty, and easy to eat. Just flip the bag over and check the ingredients. You want something simple that says one thing, like chicken breast or turkey. Avoid fillers or extras that do not need to be there.
You can also use freeze dried raw food, broken into tiny pieces. These are real food options and often made mostly from meat, which makes them a great choice for Cavaliers who need something healthy and high value. Many people use them during training and count them toward their Cavalier’s daily calories. It is an easy way to stay consistent with nutrition while still offering something special and rewarding.
I also avoid using liver or organ meats regularly. A little once in a while is fine, but too much liver can lead to vitamin A concerns. Some organ treats can also be too rich and cause diarrhea.
Use the right reward for the right moment
Once you find something that really works for your Cavalier, think about how and when to use it. The most rewarding treats should be saved for the harder training sessions. That might mean practicing outside, focusing around distractions, or trying something brand new. When the reward truly matters to your Cavalier, motivation naturally improves.
If they get their favorite treats for easy things like sitting in the living room, there is not much reason to work harder when training becomes more challenging. Save the cooked beef, freeze dried meat, or other special rewards for those moments when your Cavalier needs a little extra encouragement. Matching the value of the reward to the difficulty of the task helps keep your Cavalier engaged and willing to try.
Explore other forms of motivation
Not every Cavalier is motivated by food alone. Some respond better to toys, praise, or playful interaction. If your Cavalier enjoys toys, try using a favorite squeaky, a soft tug toy, or a quick game of fetch. Some Cavaliers are especially drawn to textures like fleece or rabbit fur, which can make a toy feel more exciting. Whatever it is, keep it put away when you are not training so it stays special and does not lose its value. Other Cavaliers are more motivated by attention and connection. A cheerful voice, a smile, or light praise can sometimes go further than anything you can hold in your hand. At the end of the day, your Cavalier is the one who decides what feels rewarding. It is not about what we think should work. It is about what actually matters to them.
Your Cavalier can learn with the right support
If your Cavalier is not showing interest in training, it does not mean something is broken. It just means they need a little help feeling ready. That might be adjusting the environment, changing up the reward, or simply giving them time to feel more confident.
This is exactly the kind of thing we work on in my Manners, Life Skills and Foundation Training Course. If you are feeling unsure about how to move forward, I will guide you through simple, kind steps to help your Cavalier feel more focused and connected. You will learn how to use rewards that actually matter to your Cavalier, when to train, and how to build everyday habits that stick. It is self-paced, easy to follow, and I am always there if you need support.
Your Cavalier wants to connect with you. With a little support and the right setup, they will start to feel more engaged and eager to participate. You do not need to rush the process. Keep it light, keep it kind, and celebrate the small wins. They all add up.
Google Ad Below [...]Read more...
Google Ad Below

What Is Positive Reinforcement Dog Training? Why It Works for Cavalier King Charles Spaniels and All Breeds (Early access for our Patreon community)
Kind, Reward-Based Training for Cavalier King Charles Spaniels and All Breeds
When people hear the term positive reinforcement, they sometimes picture a dog who only listens if you have food in your hand. Or they think it means never setting boundaries. I’ve had people say things like, “I don’t want to spoil my dog,” or “I heard that’s just bribing with treats.” But the truth is, positive reinforcement training is science-based, relationship-focused, and one of the most effective ways to help dogs feel confident and understand how to live successfully in our human world.
And it’s not just for Cavaliers. This approach works for every breed, every age, and every behavior challenge.
Let’s break down positive reinforcement dog training in a simple and practical way.
What Positive Reinforcement Dog Training Really Means
Positive reinforcement means adding something your dog enjoys immediately after they do a behavior you want to see again. That reward could be healthy dog treats, a toy, praise, a chance to sniff, or access to something fun. It doesn’t have to be a treat every time, but food is often the easiest and most meaningful place to start. If it’s going to be rewarding for your Cavalier, they decide. I mean, my Mom might think a slice of cherry pie is a good reward, but I don’t even like cherry pie. I’d need a slice of chocolate cake!
This type of training is grounded in how all animals learn, including us. When a behavior is followed by a good outcome, we’re more likely to do it again. Your dog sits, you give them a treat. Your dog walks calmly by your side, you let them go sniff a log. That’s positive reinforcement. You’re not spoiling them. You’re reinforcing behavior you want to see more of, and they get something pleasant in return.
How Dogs Actually Learn
Dogs don’t come into our homes already knowing how to live in them. They don’t know what “sit” means. They don’t know they shouldn’t jump on guests or grab food off the counter. Just like us, they learn by doing, and by figuring out what works.
Dogs learn through repetition. They make connections between what they do and what happens next. If they sit and a treat shows up, they’re more likely to sit again next time. That’s positive reinforcement. We’re showing them that their choices matter and that doing the thing we like leads to something they like.
When we use positive reinforcement, we’re not just trying to get obedience. We’re helping our dogs understand how to live in our world in a way that feels safe and rewarding to them. They’re not learning because they’re afraid of getting it wrong. They’re learning because they feel good getting it right.
And that’s what builds real, long-lasting behavior.
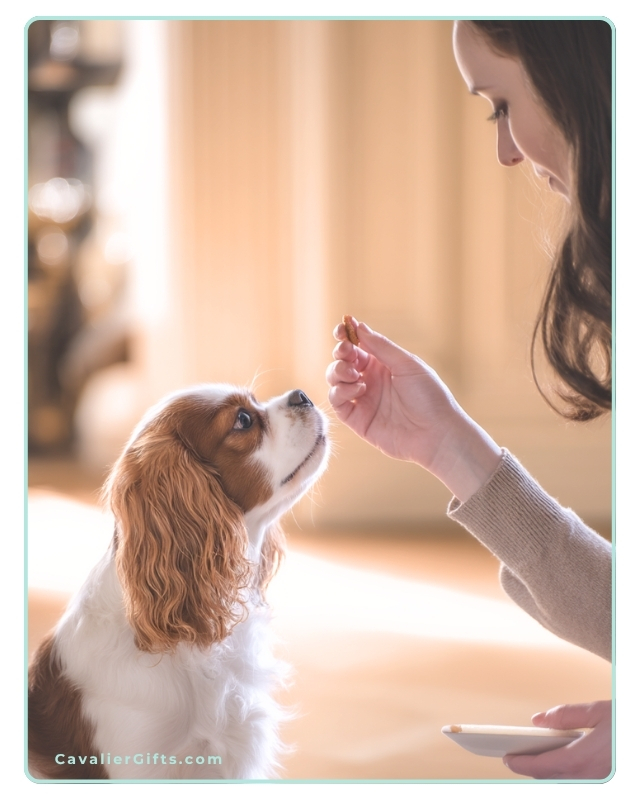
Luring Training Is Teaching—Not Bribing
At the start, we often use a food lure, like holding a treat near your dog’s nose to help them learn how to sit or lie down. We slowly move that treat in a way that encourages the action we want, like guiding their head up and back until their butt hits the ground.
That’s not bribing. It’s teaching. We’re showing them what we’re looking for.
After a few short sessions, we continue practicing the same way. Lure the sit. Reward the sit. Once the dog is starting to understand it, we ask them to follow our empty hand the same way. If they sit, we reward. Now they’re doing the behavior without seeing food first.
Once that’s going smoothly, we add the cue. Say “Sit,” move your empty hand like before, and when their butt hits the ground, reward it.
Over time, we fade the hand movement so that “Sit” becomes all they need to hear. The behavior is now on cue, and your dog learned it in a clear, kind, and effective way.
Dogs Don’t Generalize—They Need Practice in New Places
One of the biggest things people miss is that just because your dog knows how to sit in the living room doesn’t mean they know how to do it in the yard, at the vet’s office, or around a group of children. Dogs need practice in new environments. They need help when distractions are high or when they’re feeling unsure.
That might mean going back to the basics in new places. Using a treat to lure a sit at the park isn’t spoiling your dog. It’s helping them succeed in that moment. You’re helping them learn how to do something they already know, but in a place that’s harder or more distracting.
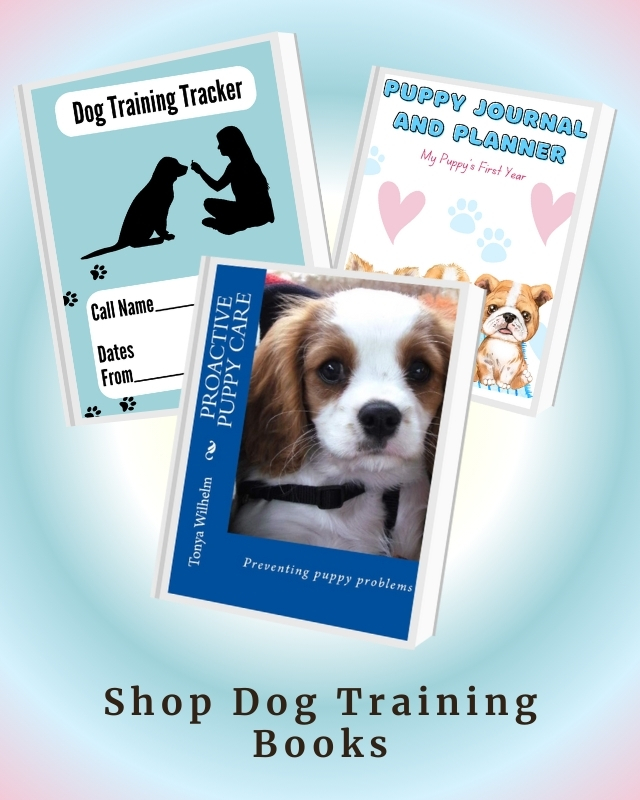
Why Positive Reinforcement Works for Cavalier King Charles Spaniels and All Breeds of Dogs
Cavaliers are sweet, sensitive, and deeply tuned in to their people. They often respond beautifully to kind guidance and struggle with harsh corrections. A raised voice, leash jerk, or even a stern look can shake their confidence and cause them to shut down.
But this isn’t just about Cavaliers.
Every dog, whether they are a bouncy Labrador, a headstrong terrier, a fearful rescue, or a playful senior, benefits from positive reinforcement dog training. You’re not just teaching skills. You’re building a good relationship. You’re helping your dog feel safe to try new things.
Positive dog training encourages curiosity instead of fear. It helps build lasting behavior in a way that feels good for both you and your dog.
The Risk of Punishment-Based Dog Training
Harsh training methods may seem like they work quickly, but they come with a huge cost. Dogs trained with physical corrections, yelling, or intimidation often show signs of stress, like lip licking, yawning, cowering, or even shutting down completely. They may stop doing the “bad” behavior, but not because they learned something better. They stop because they’re afraid to try.
Studies have shown that punishment-based dog training methods can increase anxiety and reactivity, and even lead to aggressive behavior in some dogs. It doesn’t teach what to do, it just teaches the dog what not to do, without giving them tools to succeed.
I’ve worked with so many families trying to rebuild trust after their dog was trained with punishment. That kind of fallout is hard to undo.
You Don’t Have to Carry Treats Forever
A common concern I hear is, “Will I always need food in my pocket?” The answer is no. As your dog becomes more confident and fluent in a behavior, you’ll reward less often. You’ll also start to mix in other rewards, like praise, sniffy walks, or play.
But here’s the thing, dogs, like us, still appreciate being recognized for a job well done. I still praised Dexter and gave him treats into his senior years. Not because I had to. But because I wanted to reinforce the connection we built over a lifetime of learning together.
You’re not creating a treat-dependent dog. You’re building a dog who trusts that good choices lead to good outcomes.
If you want to teach your dog real life manners in a kind, clear, and effective way, take a look at my Manners, Life Skills, and Foundation Training Course. It’s self paced, easy to follow, and designed to help your dog build everyday skills with confidence. You’ll learn how to prevent common problems before they start, teach polite behavior step by step, and create calm, positive routines that work in daily life. I personally answer questions, give feedback, and support you as you go through the course.
Why Positive Dog Training Works for Behavior Issues Too
Positive reinforcement is not just for basic training or fun dog tricks. It’s also one of the best ways to work through real behavior issues like jumping, barking, reactivity, anxiety, and fear-based behaviors.
A big part of dog behavior modification is emotion. When a dog is barking or lunging, they’re not just being “bad.” They’re usually feeling overwhelmed, scared, frustrated, or unsure. If we only try to stop the behavior without addressing how the dog feels, we’re not really helping them.
Positive reinforcement gives us a way to change those emotions. We teach our dogs that good things happen when they make calm, safe choices. Over time, they start to feel more relaxed in situations that used to be stressful. That change from fear to comfort, from confusion to understanding, is what creates real, lasting change.
Instead of just trying to stop the behavior, we ask, “What is my dog feeling?” Then, “How would I like them to feel instead?” and “What do I want them to do instead?” From there, we adjust the situation so we can meet all those needs and teach the new behavior in a kind, clear way. The more your dog practices that skill in the right setting, the more confident they become. And that’s where things really start to turn around.
What Your Dog Really Needs From You
At the heart of it all, positive reinforcement dog training is about more than treats. It’s about empathy. It’s about understanding how your dog sees the world and helping them learn in a way that clicks.
It’s about setting them up for success and guiding them toward the behaviors you want. Not through fear, but through trust, patience, and connection.
That’s what I want for Stewart. That’s what I wanted for Angel Dexter. And that’s what I want every dog to have, training that feels good, makes sense, and builds a life rooted in partnership, not power.
Keep it positive. Keep it patient. Keep it proactive.
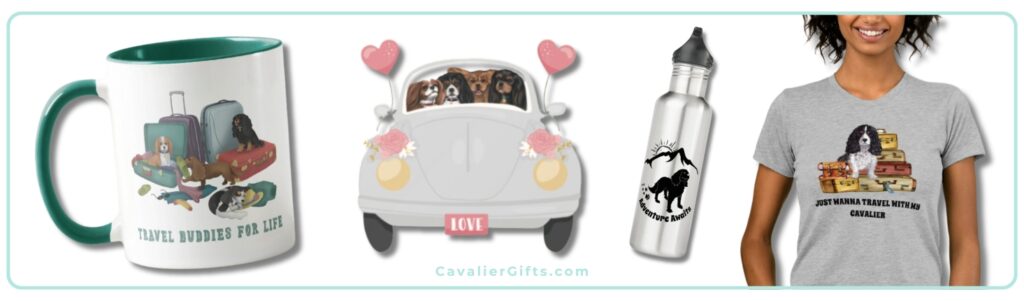
|
|
|
|
Popular Blogs
February 26, 2025Cavalier King Charles Spaniel Heart Disease
Mitral Valve Disease (MVD) is something every Cavalier King Charles Spaniel parent should be familiar with. Sadly, this condition is extremely common in the Cavalier breed, but early awareness and proper management can greatly improve a Cavalier’s quality of life. In this blog, we’ll cover what MVD is, why Cavaliers are at risk, how the disease is staged, and which supplements can help support a healthy heart.
A heartfelt thank you to Lisa Davila, BS in Biomedical Science and Hospital Manager at Aggieland Animal Health Center in College Station, Texas, for helping me put together this article. Lisa has not only dedicated her career to animal health but has also been a loving mom to many Cavalier King Charles Spaniels. Her knowledge and experience are truly invaluable!
Understanding Mitral Valve Disease (MVD) in Cavaliers
Mitral Valve Disease (MVD) is a degenerative condition that affects the mitral valve of the heart. The mitral valve is responsible for ensuring blood flows properly between the left atrium and left ventricle. Over time, this valve can weaken and leak, allowing blood to flow backward into the atrium. This puts additional strain on the heart, eventually leading to heart enlargement and, in later stages, congestive heart failure (CHF).
MVD is considered a slow-progressing disease, but it varies from dog to dog. Some Cavaliers may live for years with a mild heart murmur, while others may progress more rapidly. Since MVD is so common in the breed, Cavaliers should be closely examined (cardiac auscultation) annually, to determine if they have a murmur. The presence of a murmur is often the first sign that a dog has degenerative valve disease.
Why Are Cavaliers at Risk of MVD?
Cavalier King Charles Spaniels are unfortunately predisposed to MVD. While any breed can develop valve disease, Cavalier King Charles Spaniels are at the greatest risk for developing degenerative mitral valve disease. Studies have shown that over 50% of Cavaliers develop a heart murmur by the age of 5, and by age 10, that number jumps to nearly 100%.Because MVD has a strong genetic component in Cavaliers, responsible breeding practices are essential. Responsible Cavalier King Charles Spaniel breeders ensure their breeding dogs undergo echocardiograms conducted by board-certified cardiologists. When considering a puppy, both parents should have cardiologist-issued heart clearances and be at least 2.5 years old at the time of breeding. Additionally, all four grandparents should be over the age of 5 and heart-clear. However, even with careful breeding, the risk remains high in the breed.
The Stages of MVD
MVD is typically classified into different stages based on its progression. Early detection and monitoring are crucial to managing the disease effectively.
Stage A – Dogs at risk for MVD but without any current signs (e.g., all Cavaliers are considered Stage A at birth because of their predisposition).
Stage B1 – A veterinarian detects a heart murmur, but there is no evidence of heart enlargement on X-rays or echocardiograms.
Stage B2 – A heart murmur is present, and imaging confirms heart enlargement. At this stage, medication such as Vetmedin (pimobendan) is often started to help delay the onset of congestive heart failure.
Stage C – Congestive heart failure (CHF) is present, meaning the heart can no longer compensate for the disease. Symptoms such as coughing, lethargy, and difficulty breathing may be noticeable. Medications are necessary to help manage the condition.
Stage D – End-stage CHF, where symptoms become harder to control even with medications.
Once a dog reaches Stage B2, most cardiologists recommend starting treatment to slow disease progression. Regular checkups and echocardiograms help ensure the right treatment plan is in place.
The Truth About Grain-Free Diets and Heart Disease in Cavaliers
With all the discussion surrounding Mitral Valve Disease (MVD) in Cavaliers, you may have come across concerns about grain-free diets and their potential link to heart disease. It’s important to separate the headlines from the facts when it comes to feeding our Cavaliers the best diet for heart health.
The debate about grain-free dog food largely stems from concerns about dilated cardiomyopathy (DCM), a condition where the heart muscle weakens, leading to poor function and potential heart failure. While DCM is a serious disease, the concern over grain-free diets has often been misinterpreted. The issue isn’t necessarily the lack of grains but rather the high levels of starchy carbohydrates like peas, lentils, legumes, and potatoes that are often used as substitutes in processed grain-free kibble.
Cavaliers are already predisposed to MVD, not DCM, which is a different heart condition with different causes. However, diet still plays a critical role in supporting heart health. The best way to provide a heart-healthy diet for your Cavalier is to focus on fresh, whole foods rich in high-quality animal proteins rather than relying on highly processed kibble, whether it contains grains or not. Read more about feeding your Cavalier a fresh diet.
Dr. Karen Becker explains it best: “The problem with grain-free formulas isn’t the lack of grains. At a minimum, it’s the high level of starchy carbohydrates coupled with the extreme high-heat processing methods used to produce these diets.”
Rather than worrying about whether a diet is labeled as “grain-free,” focus on feeding a fresh, balanced diet with high-quality proteins, healthy fats, and low-glycemic vegetables. Rotating proteins and using whole-food ingredients can help ensure your Cavalier gets the nutrients they need to support a healthy heart.
If you’re unsure about your dog’s diet, seek guidance from a veterinarian with a strong background in canine nutrition, not just one who sells prescription diets in the clinic. A certified veterinary food therapist (CVFT) can be a great resource when designing a diet that supports heart health while avoiding unnecessary fillers.
A well-balanced, species-appropriate diet can play a key role in keeping your Cavalier’s heart strong and healthy for years to come.
Heart-Healthy Supplements for Cavaliers with MVD
While MVD cannot be cured, a combination of medications, lifestyle management, and supplements can help support heart function and overall well-being. Below are some key supplements that may benefit Cavaliers with or at risk for MVD:
MCT Oil (Medium-Chain Triglycerides) – Provides an alternative energy source for the heart muscle. One recommended brand is Natural Force Organic MCT Oil (1 tsp daily with food). Before giving your Cavalier coconut oil, please read this article on MCAD in the Cavalier.
Amino Acids (Lysine, Methionine, L-Carnitine, Taurine) – Help maintain heart muscle contractility and serve as antioxidants.
Omega-3 Fatty Acids – Reduce inflammation, decrease clot risk, help prevent heart muscle loss, and support healthy blood pressure. Nordic Naturals Omega Pet Liquid is a high-quality option.
Vitamin E – Acts as both an antioxidant and anti-inflammatory.
Magnesium – Plays a crucial role in heart muscle contraction and maintaining a healthy heart rhythm.
Coenzyme Q10 (CoQ10) – A powerful antioxidant that supports heart function. Life Extension 100 mg capsules are a great choice.
Recommended Supplement Blends
If you prefer a multi-ingredient supplement, these options are formulated specifically for heart health:
Rx Vitamins for Pets Formula CV – Includes amino acids, magnesium, Vitamin E, CoQ10, and hawthorn berry extract (safe unless the dog is on Vetmedin).
VetriScience Cardio Strength Capsules – Similar to the Rx Vitamins formula but without hawthorn berry extract, making it safe for all MVD stages and medications.
Recap & Common Questions About MVD in Cavaliers
Mitral Valve Disease (MVD) is a serious but manageable heart condition that affects many Cavalier King Charles Spaniels. Early detection, responsible breeding, proper veterinary care, and supportive supplements can all play a role in keeping your Cavalier’s heart as healthy as possible.
What are the early signs of MVD in Cavaliers?
The first noticeable symptom is often a heart murmur, detected during a cardiologist visit. As the disease progresses, signs can include coughing, fatigue, labored breathing, and reduced exercise tolerance.
How long can a Cavalier live with mitral valve disease?
Many Cavaliers live for years after an MVD diagnosis, especially with early detection and proper management. While every dog is different, with the right veterinary care, medications, and supplements, Cavaliers can still enjoy a good quality of life.
What are the final stages of MVD in dogs?
In the later stages, MVD leads to congestive heart failure (CHF). Symptoms include severe coughing, difficulty breathing, lethargy, fainting, and fluid buildup in the lungs or abdomen. At this stage, medication and veterinary support are essential for comfort.
How do you treat MVD in Cavaliers?
Treatment typically includes veterinary-prescribed medications to support heart function and manage symptoms. Additionally, heart-healthy supplements, such as taurine, CoQ10, and omega-3 fatty acids, can provide extra support. Feeding a fresh, species-appropriate diet may also contribute to overall heart health.
Final Thoughts
A heart-healthy fresh diet, proper weight management, and the right combination of supplements can help support your Cavalier’s heart at any stage of MVD, even before a murmur is detected. Early intervention and regular veterinary care are key to helping our beloved Cavaliers live longer, healthier lives.
A big thank you to Lisa for sharing her knowledge on this topic! If you have any questions, feel free to ask, and don’t forget to check out Lisa and Jiminy on Instagram!
Google Ad Below [...]Read more...
April 15, 2024Cavalier King Charles Spaniel Potty Training
Congratulations on welcoming a Cavalier King Charles Spaniel into your life! They’re such charming and affectionate dogs, full of warmth and love. As a fellow Cavalier mom and positive dog trainer, I’m thrilled to share my experience on the best way to potty train a Cavalier puppy. Let’s jump right in to how to successfully housebreak your Cavalier King Charles Spaniel puppy.
I love puppies! And Cavalier puppies are just some of the cutest little things ever! There’s nothing quite like their sweet kisses, puppy breath, and zest for life! But it’s not all puppy kisses; we also must potty train our Cavaliers. Nobody likes an untrained dog.
One common question I get from Cavalier followers is how to best potty train their puppy. I’ve seen plenty of discussions about potty accidents in Cavalier King Charles Spaniel groups, and I’m here to share some potty training tips with you.
First things first. Let’s start by being realistic. Contrary to what some may suggest, potty training a puppy in a matter of days is not realistic. It’s important to realize that puppies, just like human babies, need time to learn and gain control over their bladders. So, if you’re expecting your Cavalier to hold it for hours after just a few days of training, you are setting your pup and yourself up for failure.
My own Cavalier, Dexter, wasn’t fully potty trained in a mere five days, and I’m perfectly okay with that. I prioritized consistent management and frequent potty breaks, which ultimately led to just a couple of accidents in the house. The key is to prevent accidents by being proactive, not reactive.
What’s the best way to potty train your Cavalier puppy?
It all comes down to three essential things: supervision, frequent potty breaks, and confinement when you can’t actively watch them. The goal is to reduce the chances of accidents happening indoors.
When it comes to supervision, it’s eyeballs on! This means keeping a watchful eye on your puppy at all times, ensuring that you’re there to rush them outside if it looks like they are about ready to go. You can use things like baby gates, leashes, shut doors, or X-pens so that you can keep your eyes on them at all times.
Subscribe to @CavalierTipsandFun on YouTube!
How Often Should You Take Your Puppy Potty?
As for how often to take your puppy potty, it really depends on their age and activity level. Active puppies may need to go out every 15–30 minutes, while older dogs can typically hold it for longer periods. The key is to stay ahead of the game and take your puppy out whenever you notice a change in their behavior or activity. A change in behavior or activity signals that it’s time for a bathroom break. For example, if your puppy just had a bout of puppy zoomies, out to potty we go. Did your puppy wake up from a nap? Out to potty we go. By not waiting for your puppy to ask to go out or have an accident, you are well on your way to a potty-trained dog.
When it comes to crate training, make sure the crate is just the right size to discourage accidents. The crate should be large enough for your pup to stand and lie down comfortably, but not so large that they can use one corner as a bathroom.
Whether you have a fenced yard or not, leash your puppy. This gives you the opportunity to reward your puppy for going potty outside. You will be right there to praise your puppy, give him a snack, and tell him just how smart he is. It also leads to my next potty training tip: teaching your Cavalier to potty on cue!
Teaching your Cavalier to potty on cue is a must in my book. Imagine being able to take your dog outside just before the rainstorm and ask him to pee and poo, and he does! This useful behavior isn’t just fantastic for potty training your dog; it’s incredibly convenient in daily life. The keys to teaching your Cavalier to eliminate on cue are good management, timing, and your reward. By associating a word for peeing with a separate word for defecating, you can start to teach your puppy to do either when requested.
Subscribe to @CavalierTipsandFun
Teaching Your Cavalier to Potty on Cue
Here’s how to get started:
Begin the training process in the morning, when your pup wakes up. Arm yourself with some delicious treats, leash up your Cavalier, and head outside to his favorite potty spot.
Stay close and pay attention to your puppy. Stay about 6’, so it’s not just a sniffing fest; the goal is to get him to eliminate before a big walk, play, or sniff. Pay close attention to your Cavalier’s body language. Watch for subtle cues like sniffing, circling, or squatting, which indicate he’s about to eliminate. As soon as you see a sign, use your potty cue, such as “Go potty,” and wait patiently. When your pup starts to do his business, praise quietly, and after he’s finished, give him big praise and rewards. You want to make sure you don’t interrupt the potty process by rewarding too soon.
If your dog typically follows up with a poop, repeat the process with your poop cue, like “Go poop-poop,” and reward him once he’s finished.
After your Cavalier has finished his business, it’s time for the next reward: fun! Whether it’s a walk, playtime in the yard, or simply enjoying the fresh air, make sure to give your pup some extra time to enjoy himself before heading back indoors. This helps reinforce the idea that going potty leads to enjoyable activities.
Repeat this routine each time you take your Cavalier outside, even if you’re planning on going for a walk. By always pairing potty time with rewards, you’ll motivate your pup to go more quickly.
As your Cavalier starts to make the connection between potty on cue and familiar surroundings, gradually introduce the cue in different environments, such as the park or during walks. This helps your dog understand the cue in any situation, ensuring they respond reliably wherever you are.
With patience, consistency, and plenty of positive reinforcement, you can teach your Cavalier King Charles Spaniel to potty on cue, making potty training easier.
Bell Training Your Cavalier King Charles Spaniel Puppy
While some love doggie doorbell training or puppy pads, I prefer to focus on methods that teach puppies to potty outside, not inside or on “things.” I find these methods tend to confuse puppies. Potty pads or litter boxes are teaching the puppy to potty on things that happen to be indoors. This could be a potty pad, but it also could end up being your favorite blanket.
As far as bell training goes, I’m not a fan of encouraging demanding behavior in dogs. Teaching them to ring bells to go outside may inadvertently lead to them using this to not only tell us they need to potty, but also that they may want to go outside to chase squirrels.
I believe in keeping potty training simple and straightforward, focusing on reinforcing the desired behavior of outdoor elimination. By keeping things simple and staying consistent, we can focus on potty training without having to rely on pee pads or bells.
In the end, potty training your Cavalier King Charles Spaniel is all about patience, consistency, and a whole lot of love. By following these tips and staying diligent, you’ll set your new puppy up for success.
Your comments and questions are always welcome below.
Join our vibrant Cavalier King Charles Spaniel community on Facebook, support our dedication to pet wellness on Patreon, and stay updated with our weekly newsletter for invaluable tips and insights into raising happy, healthy pets. Together, let’s make a difference in our dogs’ lives!
Google Ad Below [...]Read more...
May 29, 2024Natural Diet for Cavalier King Charles Spaniel
Dexter’s Food Journey with Raw and Homemade Food
Dexter, my Cavalier King Charles Spaniel, was a raw-fed puppy. However, because I wasn’t sure how to do it properly, and I was unaware that there were premade raw foods on the market, I fed him kibble with food toppers. After learning about how to balance a fresh dog food diet, I started to home cook for him when he was around two. Then, when he was about four, I transitioned him to a DIY raw diet. Through this journey with Dexter, I’ve learned about creating a nutritious and tailored diet that meets his unique needs. Now, I’m excited to pass along my tips and thoughts on feeding your Cavalier King Charles Spaniel. Let’s dive in!
Natural diet for Cavalier King Charles Spaniels
If you’re anything like me, you’re always on the lookout for the best pet products, natural dog grooming supplies, and the healthiest dog food brands for your Cavalier. One of the most important aspects of your Cavalier’s well-being is their diet. Dogs are natural carnivores, made to thrive on a diet of fresh meat. This means a species-appropriate diet is key to their health and vitality.
Understanding Species-Appropriate Nutrition
Let’s think about our dogs’ ancestors for a moment. They thrived on a diet of raw meat, bones, and organs. Today, we can recreate this natural diet with a raw food approach, using fresh, high-quality ingredients that focus on what dogs are meant to eat. For your Cavalier King Charles Spaniel, in a nutshell, this means focusing on a diet that’s about 90 percent meat, bone, and organ, with the remaining 10 percent coming from fruits and vegetables. This balance provides the essential nutrients and fiber they need to stay healthy. Personally, I feel if you aren’t able to go raw, this diet can also be cooked. You just would need to provide the calcium from the bones in another form, since dogs cannot eat cooked bones.
Don’t forget to subscribe to @CavalierTipsandFun for more!
The Problem with Processed Dry Kibble
Now, dry kibble. It’s processed at high temperatures, which takes away almost all the moisture and nutrients from the ingredients. Often, kibble is made with low-quality ingredients and fillers that don’t give your dog the nutrients they need. The lack of moisture in kibble can also lead to chronic dehydration, affecting everything from kidney function to skin and coat health. Plus, since kibble is made to last a long time, the ingredients can go rancid quicker than you might think, making it even less nutritious for your pup.
The Importance of Moisture in Your Dog’s Diet
Moisture is a crucial part of your dog’s diet. In the wild, dogs get most of their hydration from the food they eat. Fresh, raw diets naturally provide the moisture that kibble just can’t. This is essential for your dog’s digestion, kidney health, and overall well-being. By feeding them fresh, high-quality meat and vegetables, you’re making sure they stay hydrated naturally, without having to depend solely on drinking water.
Google Ad Below
Finding the Best Diet for Your Cavalier King Charles Spaniel
When it comes to our Cavaliers, there’s no one-size-fits-all solution. Every dog is unique, with their own health needs, behaviors, and lifestyle. Personally, I’m a big advocate for variety. This could be in the form of different proteins, suppliers or even a nice pre-made raw or mix. I steer clear of dry pet food altogether unless I’m using freeze dried food for dog training treats. For me, a balanced DIY raw diet for Dexter is the way to go. It’s fresh, it’s healthy, and I can tailor and tweak it to Dexter’s needs.
Why a Raw Food Diet is Ideal for Most Cavalier King Charles Spaniels
A raw food diet is as close to a natural diet as you can get for your Cavalier. It includes raw meat, bones, and organs, providing essential vitamins and minerals often lost in commercial dog foods. This diet can improve your Cavalier’s skin and coat health, immune system, and help maintain a healthy weight. As I mentioned earlier, I think adding an approximately 10 percent mix of fruits and vegetables is a great way to add a nutritional boost to the bowl. By avoiding the fillers and artificial additives found in many commercial foods, we ensure our dogs get the best nutrition possible.
Homemade Raw or Cooked Food: Personalized Nutrition for Your Cavalier
One of the best ways to ensure your Cavalier King Charles Spaniel is eating the healthiest diet is to make their food at home. This way, you control the quality of the ingredients and can tailor the meals to your dog’s specific needs. Homemade meals are especially beneficial if your Cavalier is a picky eater or has food allergies. Just remember to balance their diet properly to include all necessary nutrients. Whether your dog has allergies, digestion issues, or any other specific needs, you can tweak their diet to meet their needs.
Feeding Your Cavalier a Grain-Free Diet
You might have heard that grain-free foods are bad for Cavaliers because they were thought to have caused Dilated Cardiomyopathy (DCM). In 2019, the FDA released a list of grain-free pet foods that had people swearing that grain-free dog food was bad. But, guess what? It’s really not the case. In fact, in 2022 the FDA announced on their website there wasn’t a solid link between grain-free diets and DCM.
Feeding your dog grain-free can actually be a good choice for your Cavalier. But things get tricky if you are looking at a purchased grain-free alternative, particularly a dry kibble. When you’re reading the ingredient panel of a dog food (yes, read those labels), watch out for ones loaded with peas, lentils, legumes, seeds, and/or potatoes. Even if the front of the bag screams “meat-first,” it might sneak in a bunch of carbs and starches that aren’t ideal. According to experts, such as Dr. Karen Becker, it’s not about cutting out grains—it’s about making sure our pets aren’t eating too many starchy fillers. So, bottom line? Go back to that 90 percent meat recommendation.
Feeding Your Cavalier King Charles Spaniel Puppy
When it comes to feeding your Cavalier King Charles Spaniel puppy, it’s essential to consider their unique nutritional needs as they grow. If you’re not quite sure about the specifics of puppy nutrition, it’s perfectly okay to rely on trusted commercial brands known for their expertise in creating a balanced diet for puppies.
A commercial raw puppy food will include the essential proteins, fats, and calcium your puppy needs to develop strong bones. The key is to ensure whatever you choose is well-rounded and provides all the nutrients your Cavalier puppy requires during the puppy life stage.
Maintaining a Healthy Weight
Keeping your Cavalier at his ideal weight is super important. Maintaining a healthy weight isn’t just about good looks, but their health. Extra weight can contribute to health issues like joint problems and heart disease. The breed standard says they should weigh between thirteen and eighteen pounds. But, Cavaliers can vary a lot in size. Take Dexter, for instance. He’s a bit of a big guy, weighing his ideal weight at a healthy twenty-nine pounds. So, how do you know if your Cavalier is at the right weight? It’s all about getting your hands on your dog. Run your fingers lightly over their ribcage; you should be able to feel their ribs without pressing too hard. If they’re too prominent, they might be on the thin side. But if you can’t feel them at all, or if their waistline has disappeared, they might be carrying a few extra pounds. Just keep an eye on their overall body shape, and remember, every Cavalier is unique!
How Often to Feed Your Cavalier King Charles Spaniel
Consistency is key when it comes to feeding your Cavalier. Establishing a regular feeding schedule helps regulate their metabolism and digestion. Typically, feeding your Cavalier twice a day, in the morning and evening, works well. For puppies, more frequent meals might be necessary to meet their higher energy demands. I actually feed Dexter three times a day, mainly due to the fact that he gets so much food, I prefer to space it out.
Adding Supplements and Vitamins
Even with a well-balanced diet, supplements can play an essential role in your Cavalier’s health. Omega-3 fatty acids can enhance skin and coat health, probiotics can aid digestion, and joint supplements can support mobility. Always consult your Cavalier’s vet before adding new supplements to ensure they’re necessary and safe. When possible, opt for real food supplements vs. synthetic.
Food Allergies in Cavalier King Charles Spaniels
If your Cavalier has allergies, a limited-ingredient fresh diet can be incredibly beneficial. Before jumping brands, I would suggest going through a pet food elimination diet to identify triggers. Once you know what your Cavalier is allergic to, you can create a personalized diet just for him. You can read more about how and why a pet food elimination diet is helpful on my other blog, right here.
Safe Fruits and Vegetables to Feed Your Cavalier
Things like carrots, broccoli, and kale can be great sources of extra nutrients and fiber. And don’t forget the powerhouse of antioxidants fruits like blueberries, strawberries, pomegranates, and apples can provide. For best digestion, blitz them up! Introduce all new foods slowly and keep an eye on what works for your dog.
Transitioning to a Raw Food Diet
Transitioning your Cavalier to a raw food diet should be done gradually to avoid digestive upsets. Start by introducing small amounts of raw food while slowly decreasing their current food. A 75 percent and 25 percent switch usually works well. Over a week or two, increase the raw portion until it completely replaces their old diet.
Choosing the Best Raw Food Brands
Selecting high-quality raw food brands for your Cavalier ensures they get balanced and nutritious meals. Personally, I look for brands that offer meats that are antibiotic and hormone free. Ideally, any fruits and vegetables will be organic. Opt for whole foods vs synthetics when possible. But, it will be a balancing act based on what’s available to you and your budget. As I mentioned earlier, shoot for approximately 90 percent meat, bone, and organ. A few raw brand choices to consider include BJ’s Raw, Raw Paws Pet Food, Raw Wild, We Feed Raw, Primal, Vital Essentials, Smallbatch, Raw Bistro and Steve’s Real Food.
A Healthy Diet Can Improve the Immune System, Skin, and Coat Health
By providing your Cavalier with a balanced raw or homemade diet you’re not just filling their bowl, you’re nurturing their well-being from the inside out. Fresh diets, whether raw or homemade, are rich in unprocessed ingredients, offering a higher concentration of vital nutrients compared to heavily processed kibble. Fresh foods do not have the fillers and additives found in kibble, making them easier for dogs to digest and absorb. Because of this, fresh food promotes better immune function, healthier skin, and a shinier coat, making them the ideal choice for your Cavalier.
By focusing on a fresh, natural diet tailored to your Cavalier King Charles Spaniel’s specific needs, you’re setting them up for a long, healthy, and happy life. Remember, my goal is to offer guidance and support to help you navigate the journey of pet nutrition, without any judgment. Let’s work together to ensure the best possible care for you and your Cavalier!
Your comments and questions are always welcome below.
Join our vibrant Cavalier King Charles Spaniel community on Facebook, support our dedication to pet wellness on Patreon, and stay updated with our weekly newsletter for invaluable tips and insights into raising happy, healthy pets. Together, let’s make a difference in our dogs’ lives!
Google Ad Below [...]Read more...
May 14, 2024Hot Weather Tips for Cavalier King Charles Spaniels
People often think of summer as a good time to get out and about with our Cavaliers. As a dog-friendly travel blogger, I’m often pitched ideas and stories about taking Dexter to X outdoors, even in July or August. But, the reality is, that’s usually just too darn hot for my now 14.5 year-old Cavalier King Charles Spaniel, Dexter.
He’s always run a bit hot, but now, as a senior and with MVD, the summer heat is just not ideal for him. But, it’s not just Dexter. Summer heat can pose health issues such as sunburn and heatstroke. Today, I’m going to jump into some ideas on how to keep your Cavalier King Charles Spaniel cool and active during the summer or warm months.
Cavalier King Charles Spaniels and Heat Stroke
Heatstroke is a serious concern for all dog families, particularly for breeds like the Cavalier King Charles Spaniel, which can be more susceptible due to their flat-faced (brachycephalic) nature. Any dog, any breed, and any age can develop heat stroke, even on cool days! The VetCompassTM conducted a study in 2016 regarding the risk factors for heat-related illness (HRI):
Breeds with the highest incidence of HRI included the Chow Chow, Bulldog, French Bulldog, Dogue de Bordeaux, Greyhound, Cavalier King Charles Spaniel, Pug, and the Golden Retriever.
Dogs at or above the mean adult body weight for their breed/sex showed an increased risk of HRI compared to dogs below the mean body weight.
Dogs over 12 years old had the greatest odds of HRI compared to dogs under 2 years old.
Signs of Heatstroke in a Cavalier
Recognizing the signs of heatstroke and taking preventive measures are crucial to keeping your dog safe. Signs such as excessive panting, drooling, rapid pulse, and restlessness indicate your Cavalier may be overheating. If you notice these symptoms, act quickly by providing cool (not cold) water and applying damp towels to areas with good blood flow, such as the head, armpits, and groin. Then take your Cavalier to the vet to prevent things from getting worse.
How Food Affects Your Cavalier’s Ability to Tolerate Heat
Just like for us, our pet’s food does more than just provide them with calories. Food has a big impact on their overall health, affecting everything from their longevity to their behavior and how they handle hot and cold temperatures. According to traditional Chinese medicine (TCM), everything in life has a balance of energy and heat, represented by Yin and Yang. Yin embodies the cool, and yang is the hot. This includes our pets, food, and environment; they all have specific energetics.
Dexter tends to run a little more yang (hot). Therefore, when I’m creating his meals, I aim to have the foods I provide either be energetically cooling or neutral. I avoid energetically warm or hot foods and proteins. For example, common foods that are warming or hot include goat, lamb, venison, chicken, and pheasant. Whereas, cooling proteins include rabbit, duck, beaver, cold water fish, and muskrat.
Applying this feeding concept to our Cavaliers, we can tailor their diets to help regulate their internal temperature. During the warmer months, opting for cooling foods can help maintain balance and comfort for your Cavalier.
Google Ad Below
Summer Fun for You and Your Cavalier King Charles Spaniel
Despite the summer heat, Dexter and I still enjoy our summer adventures. They just need to be modified according to the weather. The first thing I do is check the weather, so I’m not out and about with Dexter and surprised! Walking or strolling Dexter in the morning is by far cooler than in the evening. I know people suggest evening walks, but, honestly, the heat from the pavement and the atmosphere seem hotter to me than in the morning. Your location may be different.
Try walking on grassy areas instead of pavement. Shady parks beat the noon sun. Breezy days while wading in the water are another fun way to help your Cavalier stay cool. However, if it’s still sunny or warm, cool water on their feet and a breeze are unlikely to cut it.
We do a lot of indoor adventures during the summer months. Pet stores, dog friendly stores and attractions are our go-tos. I also do a lot of indoor training sessions and enrichment activities to help keep Dexter engaged. The bottom line is that I don’t want to risk Dexter’s health. And I can say from experience, it’s not a good feeling. Back in 2018, I’m pretty sure Dexter almost had a heat stroke! We were in Florida in the spring, doing touristy things. I thought I was being careful, bringing Dexter inside the stores, indoor attractions, and a covered train tour, but he really wasn’t doing well. He started showing signs of heatstroke. We rushed him to the hotel and cooled him down. I was lucky. And I’m not sure what I would have done if I wasn’t so lucky.
Hot Weather Tips for a Cavalier King Charles Spaniel
Grooming & Trimming: Regularly groom your Cavalier to remove loose fur and prevent overheating. I do give Dexter a puppy cut by trimming his belly, legs, and tail. I started this because of his CM/SM, but it also helps lighten his load and keeps him cooler.
Travel Comfort: Ensure your Cavalier’s comfort during travel with a well-ventilated crate or car harness, and schedule frequent breaks for water and shade. I also use a cooling mat and fan blowing on Dexter.
Sunscreen: Dog friendly sunscreen on your Cavalier’s nose helps protect him from harmful UV rays.
Cooling Products: Invest in cooling accessories like a cooling vest, bandana, or mat to provide relief from the heat during outdoor adventures.
Avoid the Hottest Part of the Day: Schedule outdoor activities during cooler times, such as early morning or late evening.
Mind the Pavement: Hot asphalt can burn your Cavalier’s paw pads. Stick to grassy or shaded areas for walks.
Hydration: Always have fresh water available, and encourage your Cavalier to drink frequently to stay hydrated. I put bone broth cubes in Dexter’s water bottle to encourage him to drink. If not, he will ignore the water.
Indoor Play or Outings: On exceptionally hot days, opt for indoor activities like interactive games or training sessions to keep your Cavalier entertained while staying cool.
Cooling Foods: Opt for cooling or neutral proteins in your Cavalier’s diet.
Remain vigilant, provide ample shade and hydration, and monitor your Cavalier for signs of overheating. Keep your Cavalier King Charles Spaniel’s well-being in mind, and use these practical tips to make sure you and your Cavalier have a safe and enjoyable summer.
Your comments and questions are always welcome below.
Join our vibrant Cavalier King Charles Spaniel community on Facebook, support our dedication to pet wellness on Patreon, and stay updated with our weekly newsletter for invaluable tips and insights into raising happy, healthy pets. Together, let’s make a difference in our dogs’ lives!
Google Ad Below [...]Read more...
June 8, 2024Treatment options for Chiari malformation and Syringomyelia
My best friend, Dexter the Dog, was diagnosed with Chiari malformation and syringomyelia in 2012, just before his third birthday. This diagnosis hit me hard. Over the past twelve years, I’ve shared a lot about Dexter’s diagnosis, care, and treatments on my Raising Your Pets Naturally blog and YouTube channel.
Since I recently started this blog dedicated to Cavalier King Charles Spaniels, I thought it would be a good time to write an update on Dexter’s care and what I’ve learned. I am also happy to say that at almost fifteen, Dexter is doing amazingly well! I hope you find this article on Chiari malformation and syringomyelia in dogs helpful. Please share this information to help others dealing with this heartbreaking diagnosis learn about the many helpful and natural treatments for dogs with Chiari malformation and syringomyelia.
What is Chiari Malformation (CM) and Syringomyelia (SM)
Chiari malformation commonly affects Cavalier King Charles Spaniels, Chihuahuas, Brussels Griffons, Yorkshire Terriers, Maltese, Pomeranians, Toy Poodles, and Shih Tzus. In dogs with CM, the skull is too small to hold their brain properly. This overcrowding forces parts of the brain, specifically the cerebellum and medulla, out of their normal positions. The cerebellum controls movement and balance, while the medulla is connected to breathing and heart rate.
When these brain parts are pushed out of place, they obstruct the normal flow of cerebrospinal fluid (CSF). Cerebrospinal fluid is in the brain and spinal cord and acts as a natural cushion, protecting the brain. When the flow of CSF is blocked, it can lead to a buildup of pressure and result in serious neurological issues and can form syringomyelia (SM), a condition where fluid-filled cavities form within the spinal cord.
In Cavalier King Charles Spaniels, Chiari malformation is a congenital issue, meaning they are born with it. Dr. Clare Rusbridge established a breeding protocol to help reduce CM/SM in puppies. Following the breeding protocol is crucial for reducing the risk of Chiari malformation (CM) and syringomyelia (SM) in Cavalier King Charles Spaniels. If both parents have CM/SM, puppies are 92 percent likely to be affected, while the risk drops to 77 percent if only one parent is affected. If both parents are clear of CM/SM, there is a 70 percent chance their puppies will be clear, rising to 87 percent if the grandparents are also clear. Potential Cavalier families should seek breeders who perform this testing to ensure healthier puppies. The only way to diagnose Chiari malformation and syringomyelia definitively is through an MRI scan.
Recognizing Chiari malformation is vital for Cavalier King Charles Spaniel families because early detection and treatment can greatly improve the quality of life for dogs with this condition. If you notice symptoms like uncoordinated movements, sensitivity around the head and neck, or any other unusual behaviors, it’s important to consult with your veterinarian as soon as possible.
Symptoms of Chiari Malformation and Syringomyelia in Dogs
Symptoms of CM and SM in Cavalier King Charles Spaniels and other breeds can vary. About a year before Dexter’s diagnosis, he began showing some random and unusual behaviors. And they didn’t happen all the time.
Fixating at dust particles in the sunlight.
Fidgeting and biting at his rear end. His vet initially thought it was anal glands, but they really weren’t that full, and he continued to do it.
Acting strangely around flying insects. Whenever a fly was around, he would get strange and start spinning around and growling at his back end.
Then, he had a downright scary episode, where he just was going crazy over his back end, growling, at it, spinning, and I could not gain his attention. I then decided to hit record the next time it happened. After recording the next episode and consulting Dr. Lynette Cole at The Ohio State University, three veterinary neurologists suspected Chiari malformation and syringomyelia. I then made an appointment at the OSU neurology department for an MRI and spinal tap. CM and SM were confirmed.
Dexter’s episode is below.
Don’t forget to subscribe to our @RaisingYourPetsNaturally YouTube channel for more.
Other common symptoms of CM/SM in Cavalier King Charles Spaniels can include:
Air scratching, especially on walks or when excited.
Head scratching or rubbing.
Air snapping or licking.
Random yelps of pain.
Sensitivity to touch and being picked up.
Hind end weakness.
Head or body wobbles, stumbling, or squinting.
Head pressing.
Seeking darkness or solitude.
Inactivity or depression.
Restlessness.
Google Ad Below
Diagnosing Chiari Malformation and Syringomyelia
The only definitive way to diagnose CM/SM is with an MRI. If a dog shows common symptoms and belongs to a breed prone to this disease, like Cavalier King Charles Spaniels, a vet might start treatment without MRI confirmation. For me, knowing exactly what Dexter had was key. Along with an MRI, Dexter also had a spinal tap to ensure we had all the facts.
Treatment Options for Chiari Malformation and Syringomyelia
Surgery for Chiari Malformation in Cavalier King Charles Spaniels
Surgery is performed with the goal of restoring the natural flow of spinal fluid. This involves decompressing the affected area, removing bone fragments, and sometimes adding a shunt. However, the results can differ greatly from one dog to another. Despite surgical intervention, many dogs still require medication to manage their pain effectively.
Medications for Chiari Malformation in Cavalier King Charles Spaniels
The disease is progressive and varies in severity. Treatment prioritizes comfort and alleviates pain. Dr. Clare Rusbridge provides the gold standard in the medication treatment protocol. It’s essential to monitor organ functions regularly when administering long-term medications.
Natural Treatments for Syringomyelia in Dogs
There are many natural treatments to help support a dog with CM/SM. Here are some that have worked for Dexter:
Acupuncture: Restores the normal flow of energy through specific pathways.
Cold Laser Therapy: Reduces inflammation, relieves pain, repairs tissue damage, and increases blood circulation.
PEMF ( Pulsed Electromagnetic Field) Therapy: Reduces inflammation, relieves pain, promotes tissue and cell repair.
Food Therapy: A diet of home-cooked or raw dog food helps reduce inflammation. Ingredients like sardines, shiitake mushrooms, and green-lipped mussels can help.
Conscious Proprioception Exercises: Dexter wore Dr. Buzby’s ToeGrips to stimulate awareness of his feet. I also regularly work with him on footwork exercises to help him be more aware of his feet.
Canine Hydrotherapy: Water treadmill therapy strengthens Dexter’s body with low joint impact.
Core Strength Exercises: Dexter’s rehabilitation focuses on boosting his core and back end strength, crucial for enhancing balance and stability. Through a variety of exercises using different equipment, we target his abdominal, back, and hind leg muscles, ensuring he can confidently navigate any challenges.
Living with a Cavalier King Charles Spaniel with Chiari Malformation
Living with a dog diagnosed with Chiari Malformation and syringomyelia can be challenging. Dexter’s first year after diagnosis was the most challenging. Trying to figure out what worked best for him, what kinds of activities or weather would trigger breakthrough pain, and how best to manage it. His life changed, but, luckily, with a great team of professionals, I was and am able to provide Dexter with a great quality of life that is still full of adventures and enrichment.
Comfort Measures
To help keep Dexter as comfortable, happy, and pain-free as possible, I’ve incorporated a range of products.
Dog Harness: Avoid collars that can be painful due to the disease’s nature.
Dog Strollers: Great for giving Dexter a break while still being part of adventures.
Cooling Mats and Warming Blankets: Depending on Dexter’s temperature needs. I will say, now Dexter is on a cooling mat almost 100 percent of his downtime. He rarely seeks heat.
Snuggle Jackets: Some dogs find comfort in them, while others might not. In the beginning, Dexter wore one almost all the time. But, I think, after we finally found our groove with his care, they were no longer necessary.
Natural Calming Aids: Calming CDs and natural calming sprays help Dexter on rough days.
Support for Dogs with Chiari Malformation and Syringomyelia
Let’s unite in this journey. Dexter’s courage living with Chiari malformation and syringomyelia serves as a light of hope for us all. You aren’t in this alone. Seek the help of a good veterinarian team, join a support group, including ours! Together, we can provide hope and guidance to others on similar paths. Go Team Dexter!
Your comments and questions are always welcome below.
Join our vibrant Cavalier King Charles Spaniel community on Facebook, support our dedication to pet wellness on Patreon, and stay updated with our weekly newsletter for invaluable tips and insights into raising happy, healthy pets. Together, let’s make a difference in our dogs’ lives!
Google Ad Below [...]Read more...
June 26, 2024Cavalier King Charles Spaniel Enrichment Ideas
Ultimate Guide to Canine Enrichment for Cavalier King Charles Spaniels
If you are reading this blog post on ways to keep your Cavalier King Charles Spaniel entertained, you have made me a very happy lady. Mental stimulation for your Cavalier is so important, and sometimes a very overlooked part of a good positive dog training program. I’ve always said, dog training isn’t just about teaching your Cavalier to do something or not do something. Rather, there is a synergy between training your Cavalier and everything else including canine enrichment. I think bonding with your Cavalier King Charles Spaniel is the best medicine for both you and your pup. So much so, I started a Cavalier King Charles Spaniel Facebook group, with a big emphasis on enrichment ideas for Cavaliers. And the photos you are about to see on this Cavalier blog are all from members of our wonderful community! Now, let’s dive into canine enrichment and why it’s so important.
What is Canine Enrichment?
Canine enrichment is about making your dog’s life better by giving them fun activities that keep their mind and body active. I think about canine enrichment as life experiences and engaging our Cavaliers in a variety of fun and interactive activities. It’s more than just a food puzzle toy, although that’s a great introduction to enrichment for your Cavalier.
Enrichment can be interactive play, positive dog training sessions, sensory games, physical activities, food enrichment, and outdoor adventures. The goal is to keep your Cavalier happy, healthy, and mentally sharp. When you do this, it helps prevent boredom, boosts your dog’s mental skills, and strengthens your bond, which also leads to better listening and obedience.
Subscribe to @CavalierTipsandFun for more!
Beyond Food: Enrichment Through Interaction
Many people associate canine enrichment primarily with food-related activities, like filling food toys or using interactive frozen treats. While these activities are great, and I use them daily with Dexter, they are just one piece of the enrichment puzzle. When I think of canine enrichment, I think of activities that involve direct interaction with Dexter. It’s about more than just keeping him occupied with food toys—it’s about creating a connection with him, something we do together.
Incorporating various types of environmental enrichment can greatly benefit your Cavalier King Charles Spaniel, both mentally and physically. Enrichment keeps those unwanted behaviors at bay by preventing boredom. It encourages social interaction, making for a happier and more engaged dog.
Positive Training for Your Cavalier
Training is a wonderful way to enrich your Cavalier’s life. Whether you’re teaching basic obedience, fun tricks, or advanced behaviors, positive dog training sessions offer cognitive stimulation and deepen your bond. Cavaliers are smart and love to please, which makes them quick and eager learners. Remember, when you’re teaching and training your Cavalier, you want the training to be fun for both your dog and you.
Google Ad Below
Outdoor Adventures
Taking your Cavalier to the park or on a walk can be incredibly gratifying. Consider going on a “sniffy walk,” where your pup gets to explore and investigate their surroundings at their own pace. Allowing them to follow their nose is not only fun but also taps into their natural instincts.
Other fun outdoor adventures can be indoors too! Take your Cavalier to a pet store for some shopping or visit a dog-friendly indoor store. Just make sure to call the establishment first to double-check their pet policies. Those training sessions you’ve been working on will ensure your indoor fun is a positive experience and one you can feel proud of.
Fun and Beneficial Canine Fitness Activities
Incorporating canine fitness activities can be both fun and vital for your Cavalier’s health. Stretching, sits to downs to stands, using wobble boards, or even walking over cavaletti poles are a few examples. These activities help keep your Cavalier in good physical shape and engaged. Other fitness ideas include walking on slight outdoor hills, placing two paws on a curb, jumping on a sturdy boulder, and walking across a fallen tree trunk. Always prioritize safety during these exercises.
Sensory Enrichment for Your Cavalier
Sensory enrichment is another great way for keeping your Cavalier King Charles Spaniel active and entertained. This type of enrichment is all about stimulating their senses, sight, smell, hearing, touch, and even taste. Obviously, there is some overlap between enrichment “categories.”
Consider incorporating toys that make different sounds or have different textures to engage their hearing and touch senses. You can even make a scent garden in your yard with dog-friendly plants and herbs. Or, grab some outdoor things such as pine cones, grass, and flowers and place them in scent boxes for your Cavalier to smell or find. Plus, activities such as scent work, where your dog uses their sense of smell to find hidden treats or toys, can provide a great mental and physical workout..
By giving your Cavalier a variety of sensory experiences, you satisfy their natural curiosity and make them happier overall. Giving your Cavalier sensory activities like scent work or creating a scent garden not only keeps them entertained but also deepens your connection as you explore together.
Bonding Activities
Simple activities like grooming, talking to your dog, or giving them a gentle massage are also forms of enrichment. By connecting and touching your dog, you not only are able to do a lump-and-bump check, but you are laying the foundation of trust. Shared Zen moments like listening to music together or just lounging on the couch, can also be incredibly soothing for both you and your dog. Don’t forget snuggle time! Most Cavaliers love to cuddle, and those quiet, close moments can deepen your relationship even more. Did you hear that, Dexter? By incorporating these simple yet meaningful activities into your life, you’ll create a stronger relationship with your dog.
Food Games and Interactive Toys: Enhancing Mealtime for Your Cavalier
Food games like lick mats, interactive food toys, and snuffle mats are a great way to feed your Cavalier. Instead of wasting those valuable calories by tossing them in a bowl, using enrichment toys offers a fantastic activity. Don’t use extras in those food toys; use your Cavalier’s daily food or food calories.
For Cavaliers who are fed fresh food, such as a raw or fresh diet, lick-type toys like lick mats are perfect. These toys allow your Cavalier to eat their food while licking and enjoying their mealtime. Spreading the food out encourages more time eating and offers an easy enrichment activity. It also mimics natural foraging behavior.
Snuffle Mat DIY
If your Cavalier is fed dry kibble or dehydrated food, treat dispensing toys or snuffle mats are excellent choices. These toys make mealtime interactive by challenging your Cavalier to work for their food. They may knock around a toy that dispenses their meal or snuffle around a mat for their nibbles. In order to keep your Cavalier’s calories in check, you can reduce a small portion of their dry food and use fresh foods or toppers or freeze-dried 100 percent meat in these toys to add variety and excitement.
Incorporating food games and interactive toys into your Cavalier’s routine makes mealtime more enjoyable and provides an easy and daily mental enrichment activity. But, don’t just go with one treat puzzle toy. The more variety, the better.
Enriching Your Cavalier’s Life with Every Adventure
Canine enrichment is all about creating a variety of positive and fun experiences that enhance your Cavalier King Charles Spaniel’s life. Food toys are great–it’s the interactive, engaging activities that truly enhance their daily experiences.
By focusing on a variety of enrichment activities, you’ll ensure your Cavalier King Charles Spaniel is happy, content, and well-rounded.
I host a private Facebook group for Cavalier King Charles Spaniels, and we have a big focus on canine enrichment ideas and challenges to keep your Cavalier engaged and thriving!
I’d love to hear about your own enrichment ideas and experiences with your Cavalier! Share your tips and stories in the comments below and let’s keep the conversation going.
Join our vibrant Cavalier King Charles Spaniel community on Facebook, support our dedication to pet wellness on Patreon, and stay updated with our weekly newsletter for invaluable tips and insights into raising happy, healthy pets. Together, let’s make a difference in our dogs’ lives!
Google Ad Below [...]Read more...
July 24, 2024What Kind of Chew Toys and Bones are Safe for Cavalier King Charles Spaniels?
Most Cavalier King Charles Spaniels love to chew! Chewing is a natural and normal dog behavior that helps fight boredom and can even help keep your Cavalier’s teeth pearly white. But remember, brushing your Cavalier’s teeth daily is still ideal. Puppies and adolescent Cavaliers tend to have a high drive for chewing things. Sometimes, whatever they can sink those teeth into. Hopefully, you are working with a qualified dog trainer to ensure your Cavalier is learning to chew on the right items instead of your furniture, or, even worse, electrical cords or something else that can harm your Cavalier puppy.
So, what makes a chew toy or bone safe for your Cavalier King Charles Spaniel? Over the years, my opinion on this has evolved. I once opted for the harder, the better. But, now, I’m on the other side of the fence, choosing softer items. Hard and tough dog bones can chip teeth and even splinter, which can be very dangerous. Even my sweet, Dexter chipped his tooth on a hard bone….his last hard bone.
I personally do not use or recommend hard bones, antlers, hooves, plastic or nylon bones, rawhides, chews with lots of ingredients, wood bones, or weight-bearing bones. But, I will always say, this is my personal opinion, and they are your Cavaliers. You can do whatever you feel comfortable doing for them, and you will not be judged by me, nor should you be judged by your peers.
Please be aware that not every chew toy or bone will be suitable for every Cavalier. I strongly recommend active supervision when your Cavalier chews, particularly if it’s a new toy or bone or if the chew item is edible. The right size of a bone or toy is also important. You want to make sure the toy or bone is not so small that your Cavalier can place the entire item in their mouth and risk choking. This includes when the chew gets smaller. I tend to toss the end out before Dexter swallows it, with the exception of a chew that is crunchy. Finding the right chew for your Cavalier is sort of like “The Princess and the Pea.” So, let’s jump into my recommendations for safe and healthy chew bones for your Cavalier King Charles Spaniel.
Dehydrated or Freeze-Dried Fish Skins: With a good dehydrated or freeze-dried fish skin dog treat, the treat will be 100 percent fish skin with no artificial colors, preservatives, or flavors. With this list and anything I recommend, the first stop should be to read the actual ingredient panel. What’s inside. Everything. It’s also important to check out the packaging and carefully read the ingredient list and where the fish was caught and processed. Fish skins are great treats for your Cavalier, full of omega-3 fatty acids, typically low in fat, and fully edible. Most dogs love the taste and eagerly chew away. Some fish skins are crunchy, while others are chewy. Chewy ones last longer but need close supervision to make sure your Cavalier chews them up vs. swallowing a large piece. Shop now.
Bully Sticks & Pizzles: Made from the manly part of a bull, many dogs love chewing on these. What I like is that they typically just start to get soft and disappear; I haven’t seen any pieces break off. However, I have seen a stick peel every once in a while, like string cheese. You can also purchase bully stick holders to help hold the stick, which adds a second layer of safety, helping to prevent your dog from swallowing the end. I personally toss that piece into the garbage. Again, sourcing and how they are manufactured is key. Natural does not correlate to not using irradiation (radiation). I contacted my fair share of bully stick brands and asked if they used irradiation, so, make sure you do your homework. Tip: get odor-free or low-odor versions. These can stink like crazy! Shop now.
Raw Bones: Raw bones are another option for your Cavalier to chew on, especially if they are already on a raw diet or natural diet. Because the bones are not cooked, they are soft and unlikely to splinter. Cooked bones easily splinter and are very hard on teeth. The size will depend on the size of the bone and your Cavalier. A few options to consider include necks, wings, feet and tails. Once again, supervise and watch for choking or swallowing. Necks did not work for Dexter, as he thought he should just suck the whole thing down. Chewing Tips: Don’t clean the bones; feed them with some meat on them, as they come. Let your Cavalier pull on the meat and chew and lick the bone. Allow them to have them for an hour, then throw them away. It’s when they sit around the house, get buried, or get dried out that you get bacteria and splintering. They will last in the fridge for three days before feeding. They can also be frozen and thawed. Feed outside or on a towel, and make sure your Cavalier is wearing their snood!. Avoid weight-bearing bones, as dogs can chip or fracture their teeth due to how hard they are. Show now.
Dehydrated Duck/Chicken/Rabbit Feet/Ears: Duck, chicken, and rabbit feet or ears are excellent, crunchy, edible chews for Cavalier King Charles Spaniels. Dehydrated or freeze-dried. Both offer good chewing options. Chicken and duck feet are rich in chondroitin, glucosamine, and collagen, which support joint health, reducing the risk of brittle bones, improving mobility, and maintaining healthy teeth and gums. Rabbit ears and feet are particularly appealing as they are low in fat, high in protein, and help clean your dog’s teeth while reducing plaque buildup. Additionally, the fur on rabbit ears can serve as a natural dewormer. These natural chews are both nutritious and enjoyable, but always supervise your Cavalier to ensure safe chewing. Shop now.
Tripe Sticks: Tripe sticks are a fantastic chew option for Cavalier King Charles Spaniels. Typically made from the stomach lining of cattle, lamb, or goat, these chews are naturally rich in digestive enzymes and nutrients that support gut health. Tripe sticks provide a satisfying, chewy texture that most Cavaliers love, while also helping to clean their teeth and gums. They are full of nutrients that can be a great addition to your dog’s chew rotation. Shop now.
Beef Tails: Beef tails are another excellent choice for your Cavalier. They are durable and provide a long-lasting chewing experience, which helps keep your Cavalier engaged and entertained. Beef tails are also high in protein and can help naturally clean your Cavalier’s teeth. The natural toughness of beef tails makes them a good option for aggressive chewers, but always make sure to choose the appropriate size to prevent any choking hazards. Shop now.
Tendons: Tendons are a great chew for Cavaliers because they are tough yet somewhat flexible, providing a satisfying chew without being too hard on their teeth. They are also rich in collagen, which is beneficial for joint health. Tendons help keep your Cavalier’s teeth clean and their gums healthy. Most Cavaliers find the chewy texture very satisfying. Shop now.
Yak Chews: Yak chews are a fantastic option for Cavalier King Charles Spaniels, but I only recommend them when microwaved to make them poofy. Microwaving them creates a crunchy, airy texture that Cavaliers love, making them a safe and enjoyable option. They are rich in protein and calcium, supporting your dog’s overall health. Made from a mixture of yak and cow milk, these chews are rich in protein and calcium, supporting your dog’s overall health. Again, double check the ingredient label; not all are created equal.
Subscribe to @RaisingYourPetsNaturally’s YouTube channel for more!
Fillable Chew Toys: I am a fan of filling various food toys such as West Paw Tux and Toppl with healthy snacks. The key to getting your Cavalier to chew on a food toy is to stuff it! If your Cavalier is eating the toy instead of the inside food, I do not recommend it. Shop now.
Ingredients matter! If you’re considering chew bones made from various ingredients, it’s crucial to flip over the package and dive deep into the ingredient list. Not all chews are created equal, and some can contain nasty or even toxic substances that could harm your dog. Look for natural, wholesome ingredients and avoid artificial colors, flavors, and preservatives. A little extra time spent reading labels can make a big difference in keeping your Cavalier King Charles Spaniel safe and healthy.
So, there you have it. That is the current list of some healthy and natural chew toys, bones I feel comfortable providing Dexter and recommending to my dog training clients. Always remember to supervise your Cavalier when they are chewing and to choose the right size and type of chew for their needs.
Which of these chews does your Cavalier King Charles Spaniel love the most? Share your favorite chew toys or treats in the comments below!
A big thank you to all the members in our Cavalier Facebook group for your wonderful photos!
Google Ad Below
Join our vibrant Cavalier King Charles Spaniel community on Facebook, support our dedication to pet wellness on Patreon, and stay updated with our weekly newsletter for invaluable tips and insights into raising happy, healthy pets. Together, let’s make a difference in our dogs’ lives!
🐶💙Support our passion for pet wellness and unlock exclusive content, perks and early access by exploring our Patreon tiers.
Sign up for our weekly newsletter!
Join us on Facebook!
[...]Read more...
January 23, 2025Supporting Your Senior Cavalier King Charles Spaniel: The Ultimate Guide to Aging Cavaliers
After 15 amazing years with my Cavalier, Dexter it was his time to go to the rainbow bridge. It’s never an easy decision to make and since then, I have been thinking back on our life together. Over the course of his life, I wrote a lot about Dexter on my first blog, Raising Your Pets Naturally. Now, with Stewart, my 7-month-old rescue Cavalier King Charles Spaniel puppy, I’m starting fresh, but with all that I’ve learned from Dexter’s senior years. I thought this would be a good time to explore when a Cavalier King Charles Spaniel is considered a senior, their lifespan, common health concerns, and how we can support our Cavaliers through every stage of life.
At What Age Is a Cavalier King Charles Spaniel Considered a Senior?
If you’re wondering, “When does a Cavalier reach old age?” The answer varies depending on factors like genetics and health. Typically, small breed dogs like Cavaliers are considered seniors between 7 and 10 years old. While this is a general guideline, you may notice your dog showing signs of aging earlier or later.
Some indicators of senior status include:
Decreased Interest in Play: They may be less enthusiastic about toys or games they used to enjoy.
Weight Changes: Unexplained weight gain or loss can be a sign of aging or underlying health issues.
Changes in Vision or Hearing: Difficulty seeing or responding to cues may suggest declining eyesight or hearing.
Increased Time Spent Resting: Senior dogs often nap more during the day and may tire easily after exercise.
Changes in Appetite: They may eat less or show more picky eating habits.
Difficulty Climbing Stairs or Jumping: You might notice hesitancy or struggle with previously easy physical activities.
Behavioral Changes: Increased anxiety, clinginess, or even irritability may indicate aging.
Frequent Bathroom Breaks: Aging can bring bladder control issues or an increased need to urinate.
Dull or Thinning Coat: Their fur might lose its luster or feel thinner in certain areas.
Dental Issues: Bad breath, difficulty chewing, or loss of teeth can become more prominent.
Reduced Tolerance for Cold or Heat: Seniors may seek out warmth or avoid strenuous activity in hot weather.
Increased Vocalization: They may bark or whine more often, potentially due to discomfort, anxiety, or confusion.
Cognitive Changes: Signs of canine cognitive dysfunction (CCD) include disorientation, restlessness, or forgetting familiar routines.
Slower movement or stiffness in the morning: Your Cavalier may take a little longer to get going in the mornings, which can be a sign of joint stiffness or early arthritis.
Graying fur, often around the muzzle: Just like humans, dogs may develop gray hairs as they age, particularly around their face.
But don’t worry, aging doesn’t mean your Cavalier is slowing down in spirit! With the right care and attention, they can still enjoy life to the fullest.
What Is the Life Expectancy of a Cavalier?
You may have heard the question, “How long do Cavaliers live?” The average lifespan of a Cavalier King Charles Spaniel is approximately 10.45 years. This is based on a 2022 UK study of veterinary data. However, some studies suggest a slightly longer lifespan, with a 2024 UK study indicating an average of 11.8 years for the breed. The typical lifespan of a Cavalier King Charles Spaniel is around 9-14 years. That said, some Cavaliers, like Dexter, surpass this average with proper care, while others may face challenges earlier due to health conditions.
Common Health Issues in Cavaliers
Cavaliers are an incredibly loving and joyful breed, but they do have a predisposition to certain health issues. Knowing what to watch for and being proactive in their care can help them live a happy and long life.
Mitral Valve Disease (MVD): Nearly every Cavalier King Charles Spaniel owner will face mitral valve disease at some point if their dog lives long enough. This heart condition affects the valve’s ability to close properly, leading to a heart murmur and, eventually, heart failure if untreated. Yearly heart check-ups with a cardiologist can help monitor and manage this condition.
Chiari-like Malformation (CM): Because of the breed’s unique head shape, it’s estimated that 95 to 99% of Cavaliers will develop a condition called Chiari-like malformation (CM). This happens when the skull is a bit too small for the brain, causing part of the brain to push into the spinal canal. CM can result in pain, weakness, or in severe cases, even paralysis. While there’s no cure, symptoms can often be managed with medications and regular vet check-ups, helping your dog feel more comfortable.
Hip Dysplasia and Patella Luxation: While less common in Cavaliers compared to larger breeds, these conditions can cause joint pain and mobility issues. Patella luxation, which is a dislocation of the kneecap, is more common in Cavaliers and can lead to lameness and discomfort. Keeping your Cavalier at a healthy weight is key to reducing stress on their joints and managing these conditions.
Eye and Ear Problems: Cavaliers are prone to progressive retinal atrophy (PRA), cataracts, and ear infections. Regular grooming and vet visits help catch these issues early.
Intervertebral Disc Disease (IVDD): IVDD is a condition where the discs in your dog’s spine become damaged or degenerate, causing pain, weakness, or even paralysis in severe cases. Cavaliers are particularly vulnerable to this, especially as they age. Be on the lookout for signs of discomfort, difficulty moving, or dragging their back legs.
Myoclonus: Myoclonus refers to muscle twitches or jerks that can occur in Cavalier seniors, especially around the head or neck area. While it’s usually not painful, it’s important to consult with a vet to rule out underlying issues such as neurological problems.
Medium-Chain Acyl-CoA Dehydrogenase (MCAD) Deficiency: This genetic condition affects Cavaliers’ ability to properly metabolize certain fats, which can lead to serious health problems, including low blood sugar, lethargy, and, in severe cases, sudden death. The great thing is that there’s a quick and easy at-home swab test available to check if your Cavalier has MCAD. It’s a simple step that can give you peace of mind and help catch this condition early. It’s a proactive way to care for your Cavalier’s long-term health.
Subscribe to @CavalierTipsandFun for more!
Supporting Your Cavalier Through All Life Stages
Caring for a senior Cavalier means making thoughtful changes to their routine. As our dogs get older, their needs shift in different ways. They may slow down, develop new health concerns, or simply need more comfort. These changes are completely normal, and it’s up to us to help them adjust so they can continue to feel their best. With a little extra care and attention, we can make sure they stay happy, healthy, and comfortable as they age. Whether it’s modifying their diet, adjusting their exercise, or making small changes to your home, these little changes go a long way in supporting their well-being. After all, they’ve given us so many wonderful years of love and companionship, and now it’s our turn to return the favor.
Nutrition for Senior Cavaliers
As your Cavalier enters their senior years, their nutritional needs often shift to support their changing bodies. A balanced diet made with fresh, high-quality ingredients like Omega-3s, antioxidants, glucosamine, and chondroitin can help maintain joint health, cognitive function, and overall vitality. Glucosamine and chondroitin play an essential role in supporting cartilage and joint health and can be included in their diet through natural sources like bone broth, chicken feet, or beef trachea, or through supplements if needed. Adding these fresh foods as part of their meals or even as toppers can provide a natural boost that processed options often lack. Every dog is unique, so working with your vet or a canine nutritionist is key to crafting a plan that meets your Cavalier’s specific needs.
When Dexter was diagnosed with kidney issues in his senior years, I found that his diet needed some adjustments. He had been raw-fed for most of his life, but with the help of his veterinarian, I transitioned him to a customized, home-cooked diet to better support his health. Bones, which are a staple in raw feeding, are high in phosphorus, a mineral I needed to limit. To make up for the lack of bone calcium, I switched to eggshell calcium, which is lower in phosphorus and just as effective.
I also began boiling his meat and discarding the cooking water, which helped reduce the phosphorus content even further. I carefully selected foods that were naturally lower in phosphorus, like certain vegetables and proteins. Dexter was also starting to lose weight, so I added carbs like rice and sweet potatoes to help him maintain his energy and body condition.
These changes made a big difference in his quality of life. While home-cooking may not be for everyone, it’s worth exploring alternatives to prescription diets if your Cavalier develops a medical condition. A good veterinarian or certified dog nutritionist can guide you in creating a plan that meets your dog’s needs without compromising on fresh, wholesome ingredients.
💡 Pro tip: Every Cavalier is unique, and what works for one dog may not work for another. Always partner with your vet or a canine nutritionist to find the best approach for your senior Cavalier. Giving them a fresh diet tailored to their needs is one of the best ways to show your love and care during their golden years.
Exercise and Mental Enrichment
Gentle exercise is important for keeping your senior Cavalier feeling their best, but it’s all about adjusting to their abilities. When Dexter reached his senior years, mosey walks became our go-to. He loved taking his time, sniffing every blade of grass, and enjoying the world at his own pace. When he got tired, I’d pop him into his stroller so we could continue our adventure without overdoing it. That stroller wasn’t just for outdoor strolls either, it was perfect for indoor store adventures, allowing him to stay engaged and part of the action while giving his body the rest it needed.
Mental enrichment was just as important as physical exercise. One of Dexter’s favorite activities was a “find it” game with cardboard boxes. I’d hide a treat in a box, spread them around, and watch his excitement as he used his nose to uncover the prize. It was the perfect mix of mental stimulation and gentle movement. For senior Cavaliers, simple adjustments like these can make a huge difference. Whether it’s a slow walk, a stroller ride, or an engaging puzzle, finding activities that fit their needs helps them stay vibrant and connected to the world around them.
Don’t forget to subscribe to @CavalierTipsandFun for more!
Natural Therapies for Senior Cavaliers
As Cavaliers age, their bodies may need extra support to stay comfortable and mobile. Therapies like at-home laser treatments, physical therapy, and acupuncture made a big difference for Dexter in his senior years. Actually, Dexter had these treatments the majority of his life due to his Chiari malformation. These options can reduce pain, improve mobility, and help manage chronic conditions like arthritis.
Dexter had regular physical therapy visits, where he worked with a canine rehabilitation specialist to keep his joints moving and his muscles strong. I also had simple at-home exercises to follow up with between visits, ensuring he stayed as active as possible without overdoing it. Using a laser therapy device at home helped target areas of stiffness or soreness, and his PEMF (Pulsed Electromagnetic Field) bed became one of his favorite spots to rest. PEMF therapy didn’t just support his comfort but also promoted better circulation and reduced inflammation.
Order a laser for your Cavalier today!
Acupuncture was another natural treatment that worked well for Dexter, offering gentle relief from discomfort and improving his overall quality of life. These treatments, along with his regular routine, were all part of ensuring he was comfortable and able to enjoy his senior years to the fullest.
If you’re considering these therapies for your Cavalier, talk with your Cavalier’s holistic vet or a canine rehabilitation specialist. They can guide you toward the best options for your Cavalier’s individual needs and help create a plan to support their comfort and mobility.
Veterinary Care and Preventative Check-Ups
Regular vet visits are essential, especially as your Cavalier gets older. I recommend scheduling check-ups at least once a year, but if your dog is on medications or managing a condition, like Dexter was, labs every 4 months can give you a better picture of their health. Semi-annual check-ups are also a good idea to catch early signs of issues like MVD, joint problems, or anything else that may need attention. Don’t hesitate to bring up any subtle changes you’ve noticed, whether it’s weight loss, fatigue, or coughing. Early intervention is key, and your vet can provide valuable guidance to help you manage your Cavalier’s health, ensuring they stay happy and comfortable as they age.
Cardiologist Visits
I highly recommend that every Cavalier sees a cardiologist at least once a year. Cardiologists specialize in heart health and truly understand the ins and outs of heart disease, including conditions like MVD, which Cavaliers are prone to. Even if your dog hasn’t been diagnosed with anything serious yet, a cardiologist can spot early signs of issues that might not be apparent to you or your regular vet. If your Cavalier is diagnosed with MVD, your cardiologist may recommend more frequent visits to monitor the progression of the disease and adjust their treatment plan as needed. Having a heart specialist on your team gives you peace of mind and ensures you’re taking proactive steps to care for your dog’s heart health.
Making Your Home Senior-Friendly
As your Cavalier enters their senior years, small changes around the house can make a world of difference in how they move and rest. Senior dogs often experience joint stiffness, and their mobility may not be what it once was, so providing a comfortable and safe environment helps them feel at ease. These adjustments don’t have to be drastic, but they can really support your dog’s needs as they age.
Ramps or Steps: It’s always a good idea to have ramps or steps in place, even if your Cavalier is still young. Jumping down from furniture can put strain on their joints and neck, leading to potential issues down the road. Ramps or steps make it easier for them to get on and off the couch or into the car, preventing unnecessary stress on their bodies. These additions are a simple way to protect your Cavalier from injury and support their mobility throughout all stages of life, ensuring they can continue to join in on the fun without risk.
Orthopedic Beds: Comfort is key when it comes to senior Cavaliers. Cushioned orthopedic beds provide much-needed support for aging joints and pressure points. Dexter was a fan of cooling mats all year, so I made sure to place them throughout the house, including on his beds, to keep him cool. But I always left at least one bed without a cooling mat, in case he wanted to curl up and stay cozy. The goal is to ensure they have a comfortable place to rest, with options that suit their changing needs.
Non-Slip Surfaces: Slippery floors can be a senior dog’s worst enemy. To prevent falls, I recommend adding rugs or carpets to high-traffic areas, especially in places like the kitchen or hallway. You can also try ToeGrips(use promo code: DEXTER for 10% Off Your First Order), which help with traction, so your Cavalier can walk confidently. Making sure they have a stable environment to navigate helps keep them safe, especially when they’re getting around slower than they used to.
How Long Do Cavaliers Live? Cherish Every Moment
If there’s one thing Dexter taught me, it’s to appreciate the little moments, whether it was a slow morning walk, the rare occasion when he’d want to be close and rest in the nook of my legs, or simply watching him nap and snore in the sunshine. Dexter wasn’t much of a cuddler, but when he wanted to be near me, I made sure to savor those times. Our Cavaliers may not live as long as we’d like, but the joy they bring into our lives is something we’ll never forget.
When Stewart reaches his senior years, I know I’ll be ready to give him the care and love he deserves. For now, I’m soaking up every playful, puppy-filled moment.
Google Ad Below [...]Read more...
April 28, 2024Are Cavalier King Charles Spaniels Good for Therapy Dog Work?
Today, I want to chat about a topic that is close to my heart: therapy dogs! Have you ever wondered if your Cavalier King Charles Spaniel would make a good therapy dog? It’s a common question and one that has a few caveats. First, it’s not all about the dog! I know, I know, it’s always all about Dexter, but with visiting therapy dogs, it’s about teamwork.
But what is a visiting therapy dog team, and what do they do? A therapy pet team is a person and their pet (sometimes cats, bunnies, etc.) who share their companionship and comfort with those in need, visiting places like hospitals, schools, and nursing homes. These teams engage in either Animal-Assisted Activities (AAA) or Animal-Assisted Therapy (AAT). AAA therapy dog teams engage in sessions without the presence of a medical professional or specific treatment goals, aiming simply to bring joy and comfort. Whereas AAT therapy dog teams work with healthcare providers in goal-oriented sessions aimed at addressing specific issues, with progress carefully measured and tracked throughout the process.
Being a good therapy dog team isn’t just about your Cavalier; it’s also about you. Both you and your CKCS are visiting as a team. You both must have the skills and knowledge required to visit people in a wide range of settings.
Let’s discuss what humans should be bringing to a Cavalier therapy dog team. As a therapy dog handler, it’s important to be comfortable when interacting with both people and your dog. You’ll need to be able to guide your Cavalier through different situations, encouraging them and keeping them safe and happy. Understanding your dog is key to becoming a therapy dog handler. You’ve got to be able to recognize the tiniest changes in behavior and body language, and quickly respond. And at the same time, you will be multitasking by staying engaged with individuals. It’s a balancing act, for sure, especially as you start out your journey as a therapy dog team.
Now, what personality should your Cavalier King Charles Spaniel have in order to make a good therapy dog? When it comes to a well-suited therapy dog, you can look at a few key traits. A good therapy dog should be reliable, predictable, and able to follow your cues with ease. That’s not to say they have to be robots and never get flustered, but as a general rule, you want a dog that is solid in their temperament. Your dog should be friendly with strangers, as your visits will be with strangers. At the same time, they should be poised, not jump on people, and be able to walk nicely on a leash around distractions, including food. It’s not just about loving new people; it’s also about having manners in new and unfamiliar environments.
Getting Started Training Your Cavalier to Become a Visiting Therapy Dog
It’s important that your Cavalier have basic obedience and manners. Walking on a loose leash in crowded places, around dogs, and on slick floors is a must. Leaving food or dropped pills on the ground is incredibly important for your dog’s safety. If your Cavalier knows tricks, that can be a great icebreaker and is also helpful when someone wants to look at your dog but not pet them. Dexter and I were a visiting therapy dog team for many years, and tricks and activities were by far his favorite visits! If your dog needs a refresher, enroll in a positive dog training class.
Subscribe to our @CavalierTipsandFun YouTube channel for more!
Google Ad Below
After your Cavalier has mastered his basic obedience skills in a variety of environments, look for a therapy dog training prep class. This may be a weekend class or one that spans 4–8 weeks. When I taught my therapy dog prep class, each week we covered a new topic to prepare the handlers and dogs for the actual work involved and the test. My students by far enjoyed skit night, where my volunteers and I role-played different scenarios, the teams interacted, and we discussed what was good and how they could improve in that situation. It was a hoot and very eye-opening for the upcoming teams.
When you and your Cavalier are ready to take your therapy dog evaluation, you will need to find an evaluator to assess whether you are ready for therapy work. But there is more than one therapy dog organization out there. Choosing the right organization is crucial. Some facilities have specific requirements, like only accepting teams evaluated by certain organizations. So, if you have your sights set on a specific organization, reach out to them first. If your dog is on a raw food diet or you provide your dog with titers vs. yearly vaccinations, not all therapy dog organizations accept that, but some do.
Speaking of organizations, there are plenty out there, each with its own unique criteria. Some of the most common ones include Alliance of Therapy Dogs, Pet Partners, Love on a Leash, and Therapy Dogs International. Be sure to check out their specific requirements before making your decision.
Subscribe to @DextertheDogandFriends for kid-friendly content!
During the evaluation, the evaluator will test your skills to ensure you’re ready to handle various situations with confidence. Once you’ve got the green light from your evaluator, send in your paperwork and fees. While you are waiting for your official badge, it’s a good time to start reaching out to facilities you’re interested in visiting. It’s best to meet with the director, take a tour, and get a feel for the environment without your dog. When you are ready to visit with your Cavalier, keep those initial visits short and sweet. It’s all about easing them into the new surroundings and ensuring they feel comfortable and confident in their role as a therapy dog.
And remember, if you don’t think therapy work is in the cards for your Cavalier, that’s perfectly fine. There are plenty of other enjoyable activities you and your Cavalier can explore together. But if therapy work is the journey you’ve chosen, then I wish you both the best of luck on this rewarding adventure.
Your comments and questions are always welcome below.
Join our vibrant Cavalier King Charles Spaniel community on Facebook, support our dedication to pet wellness on Patreon, and stay updated with our weekly newsletter for invaluable tips and insights into raising happy, healthy pets. Together, let’s make a difference in our dogs’ lives!
Google Ad Below [...]Read more...
July 10, 2024Choosing a Cavalier King Charles Spaniel Breeder
While I understand the “adopt don’t shop” idea, there are valid reasons to purchase a purebred Cavalier King Charles Spaniel from a responsible Cavalier breeder. I’ve received numerous requests on how to find a good Cavalier King Charles Spaniel puppy breeder, so let’s dive into my personal thoughts and considerations.
Educate Yourself on the Cavalier King Charles Spaniel Breed
First things first, it’s crucial to understand the breed you’re interested in. Cavaliers are charming, affectionate, and beautiful, but they also have specific needs and characteristics. Learning about the typical Cavalier personality and care can help you in deciding if a Cavalier is the right breed for your family.
Dive into the Cavalier King Charles Spaniel Breed Information
The internet has a ton of information about Cavalier King Charles Spaniels. Not all good, so take everything with a grain of salt. I would suggest looking at Cavalier King Charles Spaniel national breed clubs and Cavalier rescues. They tend to have a lot of very helpful information. Spend time reading about Cavaliers to understand their grooming care, behavior traits, size, and medical concerns.
Cavalier King Charles Spaniel Temperament and Personality: Cavaliers are known for their friendly and affectionate nature. They thrive on companionship and are often described as “lap dogs” or “love sponges” because they love to snuggle. But, they aren’t all snuggle bugs, and it’s important to note that they are spaniels, which stem from hunting genes, so they can be very active little dogs. Interestingly, Dexter is now almost fifteen, and, over the years, I have met a lot of Cavalier families who downsized from golden retrievers, I was one of them. I think because they have that same personality of fun and eagerness to be part of the family activities.
When taught properly, they are often good with children and other dogs and adapt well to a variety of living environments. I do say when taught properly, as you can’t assume you can toss any dog into a situation and they will handle it as we had hoped. As a side note, please check out my YouTube channel, Dexter the Dog and Friends, to learn more about raising kids and dogs together.
Dexter’s school assembly!
Cavalier King Charles Spaniel Maintenance and Grooming: Cavaliers require regular grooming due to their silky and long coats. This includes brushing several times a week to prevent mats and tangles. Silky? Well, some Cavaliers have a much thicker coat than others. Take my Dexter, for example. He has very long fur, and it’s silky but also super thick. Daily brushing is even better if you can swing it. It will really help to prevent mats in the first place.
Regular baths are important too. If you are using a truly natural dog shampoo (I use 4-Legger) that does not have any harmful ingredients, you can bathe as needed. When Dexter was a visiting therapy dog, he had to have a scrub-a-dub-dub before his visits, so that was weekly or every two weeks for us. But now, he gets a bath every three to four weeks. Their nails should also be trimmed regularly, and their teeth brushed daily to maintain good dental health.
Grooming Tips. Subscribe to my @RaisingYourPetsNaturally YouTube channel for more.
Trimming Your Cavalier King Charles Spaniel: Talk about a controversy! I am always pro it’s your dog; do what is best for them and you. Dexter has Chiari malformation (more on that below) and because of that, grooming is uncomfortable. Therefore, I have always kept him in a puppy cut. I lighten that thick fur, shorten him up, trim his ears, and keep his slippers short. Slippers, BTW, are the fur around their feet, or Grinch feet. If you want to keep their Grinch feet full, it is important to still trim their foot pads to prevent slipping.
Cavalier King Charles Spaniel Medical Conditions: This is where our beloved breed suffers the most. Cavaliers are prone to several hereditary conditions. It’s essential to be aware of these and ensure your breeder is proactive in health testing because that’s the only way to help our Cavaliers out of their medical mess. Key health concerns include mitral valve disease (MVD), hip dysplasia, Chiari malformation (CM) and syringomyelia (SM), and patellar luxation. Reputable breeders will conduct specific screenings to minimize the risk of these conditions in their puppies.
Understanding Health Testing for Cavaliers
For Cavaliers, it’s crucial that both the breeding dogs and their parents are health tested for hereditary diseases. It’s not just the breeding pair, but the grandparents too! The grandparents have a longer history, testing and health records. A highly regarded breeding Cavalier should be over 2.5 years old, with parents that are MVD heart clear and MRI scanned clear of CM/SM. A reputable breeder will eagerly provide copies of health certificates of each parent and grandparents or links to tests. If not, be sure to ask. If they are hesitant to share, I would be hesitant to move forward.
Mitral Valve Disease (MVD): Every breeding Cavalier King Charles Spaniel should have an annual heart exam by a board-certified veterinary cardiologist. The parents of your prospective puppy should have heart clearances from a cardiologist and be at least 2.5 years old at the time of breeding. All four grandparents should be over the age of 5 and heart clear.
Syringomyelia (SM) and Chiari Malformation (CM): Both parents should have MRI scans showing them clear of CM/SM after reaching 2 years of age. It’s even better if the grandparents have also undergone MRI scans and are clear of CM/SM.
Hips: OFA requires that a Cavalier be a minimum of 2 years old for hips to be certified. It’s recommended for grandparents to have certified hips as well.
Patellas: Testing should be done annually to ensure healthy knees and to prevent luxation in both parents.
Medium-Chain Acyl-CoA Dehydrogenase (MCAD): MCAD is a metabolic disorder that affects how Cavalier King Charles Spaniels process certain fats for energy. It’s caused by a genetic mutation that can lead to metabolic imbalances. DNA testing is essential to identify Cavaliers carrying the mutation and prevent passing it on to their offspring. This is a newer (Summer 2023) DNA test.
Episodic Falling Syndrome (EFS): Is a hereditary neurological disorder affecting Cavaliers. Breeders should ensure all Cavalier breeding dogs undergo DNA testing for EFS before mating.
Dry Eye Curly Coat Syndrome: An inherited disease that affects the eyes, skin, and feet of Cavalier. It can be detected through a DNA test.
Dry Eye: Testing for dry eye in Cavalier King Charles Spaniels involves a DNA health test to identify the presence of the genetic mutation associated with dry eye, curly coat syndrome. Testing ensures early detection and appropriate management of this hereditary condition in breeding dogs.
Don’t forget to subscribe to our @CavalierTipsandFun YouTube channel for more!
The Importance of Puppy Socialization
Puppies develop both physically and mentally right out of the gate, and even during pregnancy! A stressed mom can produce stressed, unhealthy puppies. A responsible breeder not only ensures a Cavalier puppy is medically healthy, but behaviorally as well. Breeders should prioritize the physical and mental well-being of Cavalier puppies by starting basic socialization at home. This includes introducing puppies to children, adults, outdoor environments, handling and grooming, and exposing them to different textures and obstacles.
Finding a Good Cavalier King Charles Spaniel Breeder
Many national breed clubs provide breeder lists, which are a great starting point. Look within a specific mile radius you are willing to drive to meet the breeder and puppies. Breeder websites should have detailed information on health testing and puppy socialization.
When you find a few breeders who look good on paper, contact them via email or phone. Discuss your goals and hopes for your new family member. You are looking for a connection with a breeder just like you are looking for a connection with your puppy.
Visiting the Breeder and Their Cavaliers
I recommend setting up a date and time to meet the breeder in their home and visit with their Cavaliers. Seeing the living situation and behavior of their dogs in person is a great indicator of how the puppies will turn out. Look for happy breeding dogs that are part of the family. Some breeders may be hesitant about home visits, but it’s essential for you to feel comfortable with the environment where your puppy is being raised.
Picking out Dexter! FYI he was 5 weeks here, I would bring him home at 12 weeks.
Choosing Your Cavalier Puppy
This could be an entire article on its own, but here are a few highlights to get you started. TAKE YOUR TIME! This is not a time to make a quick decision or an impulse buy. You are choosing your next family member, a living creature with strong emotions that will hopefully be with you for the next ten to twenty years.
Before meeting the puppies, have an idea about what you want to do with your Cavalier puppy and future dog. Are you looking for a canine athlete? Or maybe a therapy dog to visit children or the elderly? The personality traits of those two puppies can be quite different, so knowing your goals will help in choosing the best Cavalier King Charles Spaniel puppy for you, your family, and your goals.
Bringing Your New Cavalier Puppy Home
Picking up a new Cavalier puppy typically happens when the pup is between 12-15 weeks of age. Prepare your car for your new puppy before arriving at the breeder’s home. Items to have on hand include a travel crate, puppy blankets, healthy treats, water and bowl, and a leash and harness. If your journey includes an overnight stay, pack items for a dog friendly hotel stay.
Air Travel Considerations
I personally would never fly any of my pets in cargo, nor would I have my puppy shipped to me. Meeting the breeder, dogs, and puppies is essential. If you plan on a plane ride home, check with the airlines on what they will need before your departure.
Maintaining Contact with Your Breeder
When breeders are committed to the breed’s well-being, they may ask you to provide specific health tests on your puppy throughout its life. This means the breeder is looking to see how the puppies develop, and if there are any medical concerns over their life, they may not breed that pair again. In my book, this speaks volumes about what a responsible breeder really is.
Now that you have a healthy and behaviorally sound Cavalier puppy, it’s your job to start socialization and training. You and your puppy are ready for a lifetime of fun and joy.
I hope this updated article helps your readers in their quest to find a reputable Cavalier King Charles Spaniel breeder. Good luck at finding your BFF!
Google Ad Below
Join our vibrant Cavalier King Charles Spaniel community on Facebook, support our dedication to pet wellness on Patreon, and stay updated with our weekly newsletter for invaluable tips and insights into raising happy, healthy pets. Together, let’s make a difference in our dogs’ lives!
🐶💙Support our passion for pet wellness and unlock exclusive content, perks and early access by exploring our Patreon tiers.
Sign up for our weekly newsletter!
Join us on Facebook!
[...]Read more...
November 12, 2024Best Treats for a Cavalier King Charles Spaniel
If you’ve found this Cavalier blog by searching for “best treats for Cavalier King Charles Spaniels,” you’re probably wondering what makes a healthy dog treat for this special breed. Whether you’re looking for the best dog-training treats for your Cavalier or just healthy dog treats, it’s essential to choose options that benefit your Cavalier King Charles Spaniel’s health and waistline. Here’s what I consider when picking out healthy treats for Dexter.
Check the Ingredients in Your Cavalier’s Treats
The very first thing I do when choosing treats for Dexter is check the ingredients list. Don’t just rely on the fancy pictures on the front of the bag; the ingredient panel tells you what your Cavalier is actually eating. Even if a treat claims to be “chicken-flavored,” that doesn’t always mean it contains real chicken. Always look for whole, natural ingredients like real meat, vegetables, and fruits.
What to Avoid in Your Cavalier King Charles Spaniel’s Treats
Artificial Flavors: If you see “flavor” in the ingredient list, it’s likely a synthetic that’s meant to mimic real food. Real food ingredients are always better for your Cavalier’s health.
Added Salt: Too much salt can be harmful, especially for dogs with heart issues, like Cavaliers. Stick to treats with no added salt, as too much sodium can lead to health problems.
Preservatives: Treats should be free of artificial preservatives like potassium sorbate, sodium benzoates, BHA and BHT. These chemicals are commonly found in cheaper treats and can be harmful in the long run.
By-Products or Mystery Meat: Avoid any treats that list “meat by-products” or vague “animal fat.” We want to know exactly what’s going into our dog’s body.
Sugar or Sweeteners: Skip the sugary treats! Cavalier King Charles Spaniels can easily gain weight, and too many sugar-filled treats can contribute to obesity, which affects their health.
Grains: Many dogs, including Cavaliers, can be sensitive to corn, wheat, and soy. Grains also pack in a lot of calories. Stick to treats with grain-free ingredients.
Healthy Treats for Cavalier King Charles Spaniels
So, what should you be looking for instead? The best treats for Cavalier King Charles Spaniels are made from whole, natural ingredients. I always opt for treats made with high-quality meats, like rabbit, chicken, beef, or duck, and ingredients that support overall health.
When choosing healthy dog treats, I think about each ingredient and how it affects my dog’s health and diet. I prefer foods that can contribute to Dexter’s overall nutrition, not add-ons. If I think the treat’s ingredients are more like a candy bar, I’ll skip it.
Best Training Treats for Cavaliers
When I’m training Dexter, I want treats that are both nutritious and irresistible. Training treats should be small, easy to chew, and made from single-source protein. Some of my favorites include freeze-dried meat or dehydrated meat. These treats are not only high-value (meaning they’ll grab your Cavalier’s attention), but they’re also healthy and easy to use in training sessions.
I also may grab freeze dried dog food that consists of healthy ingredients and no fillers. They tend to be bite-sized, and I can easily cut down on some of Dexter’s fresh food for the day and replace it with the freeze-dried dog food. No extra calories needed, and he doesn’t lose any of his daily nutritional needs.
Treats for Occasional Snacking
When it’s time for a snack, I’m okay with a treat that’s a bit more substantial, like grain-free biscuits made with sweet potato or pumpkin. These treats are great for occasional use, but they do tend to be higher in calories and more ingredients. I like to keep Dexter’s treats simple and sweet.
My Top Picks for Cavalier King Charles Spaniel Treats
Dehydrated Meat: A simple, natural treat that’s great for training or as an occasional snack. Dehydrating your Cavalier’s meat treats at home is simple and can be done using a dehydrator or your oven. To start, slice the meat (like chicken, beef, or turkey) into thin, even strips, removing any fat. If using a dehydrator, set it to around 160°F and arrange the meat strips on the trays, ensuring they don’t overlap. Dehydrate for 6-12 hours, checking for proper dryness—meat should be firm and break easily. If using an oven, place the meat on a baking rack, set the oven to the lowest possible temperature, and prop the door open slightly to allow moisture to escape. Store a few treats in your Cavalier’s treat jar and the rest in the freezer to stay fresh.
Dehydrated Fruits and Veggies: Dehydrated fruits and vegetables are a great low-calorie treat for Cavalier King Charles Spaniels, providing a crunchy, natural snack without added preservatives or artificial ingredients.
Can Cavaliers have carrots? For me, this is a yes and no. Yes, carrots are perfectly healthy and nutritious for your Cavalier. I know a lot of people recommend feeding large carrots to dogs as a chew, but I do think that may pose a choking risk. You must ensure your Cavalier is safely chewing the carrot and not swallowing big chunks. The same goes for baby carrots. For me, I prefer to feed Dexter carrots as little bits. But, I am definitely a proud helicopter mom. Make sure you read the article on healthy chews for your Cavalier King Charles Spaniel if you are wanting safe-and-natural chews.
Freeze-Dried Healthy Dog Food: Freeze-dried dog food can be an easy swap from their regular diet, making it a convenient and healthy treat option for Cavalier King Charles Spaniels. Plus it’s a great treat for picky eaters.
Freeze-Dried Meat Treats (Single Ingredient): Freeze-dried meat treats are a high-protein, single-ingredient snack for Cavaliers, providing a nutritious option.
Healthy DIY Recipes for Cavaliers. Don’t forget to subscribe to @CavalierTipsandFun for more!
Final Thoughts on Choosing the Best Treat for a Cavalier King Charles Spaniel
When choosing the best treats for your Cavalier King Charles Spaniel, always prioritize natural, healthy ingredients. Look for treats that are high-quality, free of unnecessary fillers, and made with proteins you recognize. And remember, even the healthiest treats should be given in moderation.
What treats does your Cavalier love?
Join our vibrant Cavalier King Charles Spaniel community on Facebook, support our dedication to pet wellness on Patreon, and stay updated with our weekly newsletter for invaluable tips and insights into raising happy, healthy pets. Together, let’s make a difference in our dogs’ lives!
Google Ad Below [...]Read more...
August 20, 2024Why Does My Cavalier King Charles Spaniel Eat Everything?
As a devoted Cavalier King Charles Spaniel family, you may be wondering why your Cavalier seems to eat everything in sight. Leaves, rocks, plants, grass, paper, cardboard, whatever they seem to be able to get their mouth around is fair game. This can be concerning, as it should be. If your Cavalier eats something he shouldn’t, there’s a risk of poisoning or choking. This could be caused by pica, not enough food, other health-related issues, or boredom. Let’s dive in and see if, together, we can figure out why your Cavalier King Charles Spaniel eats non-food items.
What is Pica?
Pica is a condition where dogs eat non-food items. For Cavaliers, this could include chewing on blankets, rocks, dirt or other random items. While it might seem quirky, pica can be a sign of underlying issues. Understanding the root causes can help you address the problem and ensure your Cavalier receives the best care.
The Behavior Behind Pica
Cavaliers, like all dogs, need mental and physical stimulation. Without enough engagement and enrichment, they might resort to chewing on inappropriate items. A 2019 study published in The Journal of Veterinary Medical Science discovered pica is a common behavioral issue. After surveying 2,000 cases, researchers found dogs that lacked regular enrichment, whether due to being crated for too long, being bored, or just not enough physical exercise were more likely to display pica tendencies.
Behavior Issues That Might Be Causing Your Cavalier’s Pica
Boredom and Lack of Stimulation: Cavaliers are playful and intelligent dogs that thrive on activity. If they aren’t entertained, they might turn to chewing on anything they can find. Toys and interactive games are crucial in keeping them busy and satisfied.
Stress and Anxiety: A Cavalier’s anxiety or stress is a major concern when it comes to pica. A change in routine, new family members, or other stressors can cause your Cavalier to engage in pica as a coping response. Providing a safe and secure environment along with calming activities can help reduce anxiety. If you feel your Cavalier has anxiety, it’s important to address that anxiety with a professional.
Attention-Seeking: Sometimes, Cavaliers might eat non-food items to get your attention. I always say, if a dog is asking for attention, they probably aren’t getting the attention they need. Bump up your Cavalier’s training, games, and outings.
Medical Reasons for Pica
While pica can often be a sign of boredom, medical issues can contribute to pica in dogs. This is why it’s always important to speak with your Cavalier’s holistic veterinarian. Here are some common medical issues for pica in dogs.
Nutritional Deficiencies: If your Cavalier’s diet is lacking in essential nutrients, they might chew on non-food items to make up for it. Ensure that their diet is balanced and rich in the nutrients they need.
Gastrointestinal Issues: Sometimes, dogs might eat non-food items to soothe an upset stomach. If your Cavalier seems to be eating odd items frequently, it’s worth checking with your vet to rule out any digestive issues.
Some diagnostic methods your vet might suggest include:
Biopsies: Taking tissue samples from the digestive tract to check for disease.
Therapeutic Trials: Trying a medication or diet change to see if the pica improves.
Blood Work: Checking folate and cobalamin levels, and performing a TLI (Trypsin-Like Immunoreactivity) test to assess pancreatic function.
X-rays: Ruling out gastrointestinal obstructions and other potential causes.
How to Stop Pica in Your Cavalier King Charles Spaniel
The good news is that pica can often be managed with positive training and enrichment techniques. If it’s medical, following your dog’s vet’s protocol will be essential.
Provide Engaging Toys and Enrichment Activities: Offer a variety of toys that challenge your Cavalier’s mind and body, such as puzzle toys, chew toys, and interactive games. Incorporate activities like nose work games, agility courses, or scent trails to provide mental stimulation and prevent them from seeking out inappropriate items. Check out our Cavalier enrichment ideas!
Address Anxiety with a Professional: If anxiety might be contributing to your Cavalier’s pica, consult with a dog behavior consultant. They can help identify the root causes of your dog’s anxiety and develop a tailored plan to address it.
Use Positive Reinforcement: Reward good behavior with praise and treats. When your Cavalier interacts with their toys or engages in positive activities, reinforce this behavior to guide them toward what’s encouraged.
Monitor and Redirect: Keep an eye on your Cavalier’s actions and gently redirect them if they start chewing on non-food items. Providing appropriate toys and praising them when they use them can help steer them away from unwanted behaviors.
Leash Management and OutFox Field Guard: Use a leash to manage your Cavalier and prevent them from accessing non-food items so they can’t sneak off. Consider using an OutFox Field Guard, a type of protective mesh that covers their face that can prevent dogs from eating things they shouldn’t. Unlike a muzzle, which restricts a dog’s ability to open their mouth entirely, a OutFox protects against ingestion while allowing normal breathing and drinking.
Understanding and addressing pica in your Cavalier King Charles Spaniel involves a combination of detective work, positive training, proper enrichment, and, if necessary, medical evaluation. By keeping your Cavalier mentally and physically stimulated, providing a balanced diet, and offering plenty of attention and love, you can help them steer clear of inappropriate chewing and enjoy a happy, healthy life.
Have you noticed any specific triggers for your Cavalier’s pica? Share your experiences and tips in the comments below!
Google Ad Below
Join our vibrant Cavalier King Charles Spaniel community on Facebook, support our dedication to pet wellness on Patreon, and stay updated with our weekly newsletter for invaluable tips and insights into raising happy, healthy pets. Together, let’s make a difference in our dogs’ lives!
🐶💙Support our passion for pet wellness and unlock exclusive content, perks and early access by exploring our Patreon tiers.
Sign up for our weekly newsletter!
Join us on Facebook!
[...]Read more...
March 5, 2025Preparing Your Cavalier King Charles Spaniel for Air Travel
Through Dexter’s 15 years of life, we had countless adventures together, but every single one was by car. At nearly 30 pounds, flying in the cabin wasn’t an option for him, and I would never consider putting a dog in cargo. Now, with Stewart, I have the opportunity to travel by plane since he will be between 16 and 18 pounds as an adult, which is small enough to fit in an airline-approved travel crate under the seat.
I have to admit, I’m a little nervous. It’s been almost 30 years since I last flew, and my experience wasn’t great. But I’m determined to make this a smooth process for both Stewart and myself. In September, we’ll be flying from Detroit to Portland, Maine, and I want to make sure Stewart is as comfortable and confident as possible for his first airplane trip.
Preparing Stewart, My Cavalier King Charles Spaniel for Air Travel
Since Stewart has never flown before, I’m taking a step-by-step approach to help him get used to every part of the travel experience. This isn’t just about the flight itself; it’s about everything leading up to it, from riding in his crate in the car to being in a busy airport environment.
Teaching a Cavalier to Enjoy a Travel Crate
One of the biggest adjustments for a Cavalier is spending time in a small, enclosed space. Since Stewart isn’t crate trained and has some separation anxiety, I’m taking extra care to make his travel crate a safe and positive space. An airline-approved travel crate is a much tighter fit, so here’s how I’ve been getting him used to it:
Introducing the Crate Indoors – I started with short training sessions, luring Stewart into the travel crate with treats and rewarding him for stepping inside. Since it’s a tight fit, I guided him to turn around and reinforced him for doing so. Once he was comfortable moving inside, I worked on having him stay in the crate for a few seconds before rewarding and letting him out, gradually increasing the duration.
Crate Inside a Crate – To help him transition smoothly to riding in the travel crate, I placed it inside his larger crate in the van. Since he was already used to the big crate, this made it feel more familiar. For the first couple of weeks, I left the travel crate unzipped, but zipped up the larger crate.
Zipping Up While Driving – Once he was comfortable, I started zipping up the travel crate while still inside the larger crate. This allowed him to experience confinement in a secure way without making a sudden change.
Removing the Larger Crate – The next step will be taking the travel crate out of the big crate so that he’s riding in just the small one. By gradually adjusting him to this setup, he won’t even notice the change!
Socialization and Confidence Building
Beyond the crate, I want to make sure Stewart is confident in all the different environments he’ll encounter on our trip.
Walking Politely on a Leash – Stewart will need to walk calmly on a leash through the airport. We’ve been practicing polite walking in various places with different surfaces and distractions. I will continue this training with busy locations as we progress through his training.
Exposure to Crowds and Noises – Airports are full of noises; baggage carts, intercom announcements, rolling suitcases. I’m taking Stewart to different places where he can experience a variety of sounds and people in a controlled way.
Getting Used to Security Procedures – At TSA checkpoints, I’ll need to take Stewart out of his crate and carry him through security. To prepare, I’ll work on calmly lifting him out of his crate and holding him in busier environments, helping him get comfortable with the experience before our trip.
Preparing for Time in the Airport
Most airports have designated pet relief areas, but access to them depends on the layout of the airport and TSA procedures. Some airports have relief areas before security, while others have them post-security. Since Stewart will be crated during the drive and throughout check-in and security, I’ll plan ahead to find out if there’s an opportunity for a potty break before we go through security. If not, I’ll make sure he’s had plenty of time to potty before we leave for the airport.
Practicing Extended Crate Time – I’ve been gradually increasing the amount of time Stewart spends zipped up in his crate, so he’s comfortable being inside for longer periods.
Planned Potty Breaks – Since dogs can’t relieve themselves once past security, I’ll make sure to take Stewart to the airport’s designated pet relief area before heading to the gate. This is also why I teach my dogs how to potty on cue; it makes it easier to ensure they go when needed, especially in situations like this where time and access are limited.
The Flight Itself
The actual flight is the final step in our preparation. Since Stewart will be in his crate under the seat for the duration of the flight, I want to make sure he’s as comfortable as possible.
Calm, Positive Associations – I’m making sure that his crate time is always associated with good things; treats, chew items, and a cozy space.
Chews and Enrichment for the Flight –I’ll bring along a few safe chews and likely my slippers to provide comfort for Stewart during the flight.
Staying Calm Myself – Dogs pick up on our emotions, so I’ll be focusing on staying relaxed and making this feel like just another routine adventure for Stewart.
Final Thoughts
Traveling with a Cavalier King Charles Spaniel on a plane takes preparation, but with gradual exposure and a positive approach, it can be a smooth experience. My goal is to make sure Stewart feels safe, confident, and comfortable every step of the way. While I’m still a bit nervous about my first flight in 30 years, I know that by preparing Stewart properly, we’ll both be ready for our adventure to Maine.
A big thank you to all of our Cavalier friends who sent us their travel photos! Don’t forget to follow them on social media.
Have you traveled with your Cavalier on a plane? I’d love to hear about your experiences in the comments!
Google Ad Below [...]Read more...
October 30, 2024How to Bathe a Cavalier King Charles Spaniel Puppy
If you are wondering how to bathe a Cavalier King Charles Spaniel puppy at home, I have you covered. As a Cavalier mom and positive dog trainer, I’m ready to help you make bathing your Cavalier puppy not only effective but enjoyable and stress-free for your new Cavalier King Charles Spaniel puppy.
Dexter, who is now fifteen, has had his fair share of dog baths. But, today, I’m going to share how I gave Willow her first bath at home. With the right setup, some tasty treats, taking it slow, and a cozy towel, you can create a zen atmosphere for your Cavalier’s bathtime. So here’s a step-by-step guide to giving your Cavalier King Charles Spaniel puppy their first bath.
Set Up Your Puppy’s Bath Space for Safety and Comfort
First, you want to ensure your puppy’s bathtub or sink is safe and secure. You don’t want your puppy slipping on the surface of a wet tub or sink. First things first-secure the bathtub or sink so your puppy won’t slip. A good rubber mat keeps your Cavalier from slipping, and this alone will help your puppy feel safer in the tub. If your Cavalier is small, like Willow, you can easily bathe them in the sink. But, if they are larger, like Dexter, a tub is a must, or a portable dog bathtub can also work well. I haven’t used one, but I’ve heard from other Cavalier families they are great!
Warm Towel Tip: Before starting your puppy’s bathtime, place a few towels in the dryer. Then, just before you head to the bath, grab the warm towels. Then, after bathtime, your puppy can be wrapped in a warm-and-cozy towel. If you air dry your Cavalier puppy, then add some puppy blankets too, so they can cozy up in the pile of warm blankets.
How to Choose a Puppy Shampoo That is Safe
When choosing a safe puppy shampoo, the first stop is the back of the shampoo bottle to read the entire ingredient panel. Yup, you want to read each ingredient and make sure those ingredients are safe and natural. You may be surprised at the garbage that you find in some puppy shampoos.
Full disclosure, I’ve been working with the 4-Legger brand since 2016 and, in my opinion, they are the best out there. For puppies, I like their hypoallergenic SOOTHE formula. This isn’t a puppy shampoo review, but I do want to share their ingredient panel, so you can get a better idea on what a good puppy shampoo looks like.
4-Legger SOOTHE Ingredients: Organic Aloe Juice, Organic Saponified Oils (Coconut, Shea Butter, Olive, Sunflower, and Jojoba), Organic Vegetable Glycerin, Organic Rosemary Extract Order today with promo code RaiseNaturally20 for 20% off your first order.
Keep Your Cavalier’s Inner Ears Dry
Protecting those little ears is important. You can place a cotton ball gently in each ear to prevent water from sneaking in, but remember to remove them after! Or, you can simply gently press their ear to their head as you use a warm washcloth.
Be Generous with the Tasty Treats or Lick Mats
Treats are key to conditioning your puppy that bathtime is good. Bath=Treats or Bath=Lick Mat Time Giving treats throughout the bath not only keeps it positive but also helps distract them from what is going on. Talk to your Cavalier puppy through the experience. Let your puppy know how much you love them and that this is a safe experience.
If you’re looking for more gentle routines and everyday training ideas like this, my Manners, Life Skills & Foundation Training Course walks you through simple, trust-based lessons you can use at home. It’s all about helping you and your dog feel confident and connected.
Watch Willow’s First Bath and don’t forget to subscribe to @CavalierTipsandFun for more!
Introduce Your Puppy to the Bath Gently
When it’s go-time, place your puppy gently in the sink or tub. Willow was a little unsure at first, so I kept things calm and encouraging. We went slowly, allowing her to get comfortable, and rewarded her bravery with treats. You can always do this in steps over a few days if your puppy is nervous. Teaching your Cavalier puppy to enjoy a bath is going to be so important since this is a breed that can benefit from baths to keep their luxurious coat beautiful. The benefit of puppy bathing is that the process can be much shorter than when your Cavalier has a full coat.
Start the Water Slowly
Once your puppy seems a bit settled, turn on the water. Using a shower sprayer is ideal because it’s easier to manipulate around your Cavalier and get the belly and bum area easier. Always check the temperature; you want it warm, but never hot. If your pup gets nervous, reassure them with gentle touches, talk to them, and provide healthy and tasty treats. We want bathtime to be a good thing, not something to avoid.
Wet Your Puppy and Lather Up
Begin with their back, avoiding their face for now. Once they’re damp, add a little shampoo and lather gently. Go slow and talk to your pup throughout to keep them reassured. Make sure to reach all those little spots like under the belly, armpits, and legs.
When it comes to cleaning your Cavalier’s face, be careful and gentle. Grab a soft washcloth, soak it in warm water, and wring out any excess. Gently wipe around your puppy’s face, especially near the eyes and mouth, to keep things clean without needing shampoo. Cavaliers can be sensitive around their eyes, so keep it soothing and slow, making it a comfortable moment for them. If there’s any tear staining, gently focus on those areas but avoid scrubbing.
Rinse Thoroughly
It’s so important to rinse really well to avoid any leftover shampoo that could irritate their skin. Keep the water warm and gently go over each area until you’re sure they’re squeaky clean.
How to Dry a Cavalier After a Bath
Gently squeeze out as much water as possible from their coat while they’re still in the tub, especially from their ears, legs, and belly. Be careful not to pinch their skin. Then grab a warm towel and start rubbing them down right in the tub. Begin with their back and then work down to their legs, belly, and especially those floppy ears! The towel rubdown helps absorb extra moisture and keeps your puppy from dripping everywhere.
Pro tip: When it looks like your puppy is going to shake their head, try covering their ears lightly with a towel. It can help prevent ear issues and keeps the shake-off water spray to a minimum!
Should You Blow-Dry Your Cavalier King Charles Spaniel Puppy?
For a little more drying, a low heat or cool setting on a blow dryer works great. Keep the dryer moving and avoid getting too close to their skin. And, of course, more treats and sweet talk make this part easier too! I would highly recommend desensitizing your puppy to the hair drier first. You can learn how in the video below. If you are going to allow your Cavalier to air-dry, I would suggest using a dog drying jacket and warm , snuggly blanket.
Learn how to teach your Cavalier to love drying and subscribe to our other YouTube channel @RaisingYourPetsNaturally
And there you have it—bathing your Cavalier King Charles Spaniel puppy at home for the first time! If you’re wondering, when should I bathe my puppy for the first time, or how often should I bathe my puppy, it’s usually safe to start around eight to twelve weeks, assuming you are using a truly safe puppy shampoo. With these tips and a positive approach, you’ll help set up your Cavalier King Charles Spaniel puppy for a lifetime of happy bath times.
What part of your puppy’s first bath are you most nervous about? Let me know in the comments. I’d love to help make it a fun experience for both of you!
Google Ad Below [...]Read more...
October 1, 2024MCAD deficiency in Cavalier King Charles Spaniels
Last year, on my Raising Your Pets Naturally blog, I shared information about a relatively new health condition found in Cavalier King Charles Spaniels: Medium-Chain Acyl-CoA Dehydrogenase (MCAD) deficiency. As many Cavalier families know, this breed is already prone to several health issues, and adding another one to the list is upsetting.
MCAD deficiency is a genetic condition that impacts how the body breaks down certain fats for energy. Recent research has found some Cavaliers who have symptoms such as seizures, lethargy, and other health issues may have MCAD.
The initial study that brought this to the general public’s attention focused on a three-year-old male Cavalier who was experiencing seizures and unusual tiredness. After examining his blood and urine, researchers discovered elevated medium-chain fatty acids, pointing to MCAD deficiency. They then sequenced the dog’s genome and identified a specific change in the ACADM gene, which is associated with this condition.
When the researchers tested this genetic variant in 162 Cavaliers, they found that about 23.5 percent of the dogs carried the mutation. This discovery is important because it suggests that MCAD deficiency might be the reason behind the seizures and other symptoms we sometimes see in Cavaliers.
Here are some symptoms to watch for:
Seizures: Seizures or convulsions can be a key indicator of potential MCAD deficiency.
Lethargy: Unexplained and prolonged tiredness could be a sign of an underlying issue like MCAD deficiency.
Intermittent Health Issues: These episodes might include vomiting, decreased energy, or more severe symptoms like seizures.
Unsteady Gait: Difficulty walking or balance issues could occur during episodes.
Loss of Appetite: A sudden loss of interest in food might indicate a problem.
Low Blood Sugar (Hypoglycemia): This can lead to weakness, shakiness, disorientation, and seizures.
Abnormal Behavior: Changes in behavior, such as irritability or confusion, might be linked to a metabolic disorder.
Respiratory Distress: In severe cases, dogs might experience difficulty breathing during an episode.
Frequent Infections: Some dogs with MCAD deficiency may be more prone to infections.
Neurological Symptoms: Symptoms like circling, head pressing, or lack of coordination could be signs of this condition.
I know, right? A lot of these symptoms are also symptoms of other Cavalier King Charles Spaniel medical issues. While these symptoms can be caused by various factors, it’s important to consider MCAD deficiency, especially if your Cavalier is showing multiple signs.
Consider Getting Your Cavalier Tested for MCAD Deficiency
If you’re concerned about MCAD deficiency and its impact on your Cavalier King Charles Spaniel, getting your dog tested is a straightforward step you can take. The test involves a simple at-home swab, which you can easily order and perform yourself. This can provide valuable insights into whether your Cavalier carries the gene associated with MCAD deficiency.
For those thinking about adding a new Cavalier puppy to their family, it’s encouraging to know that many responsible breeders are proactively testing their breeding pairs and even the grandparents. This testing helps ensure that future puppies are less likely to inherit MCAD deficiency, contributing to healthier generations of Cavaliers.
Testing is a proactive measure that can help you make informed decisions about your dog’s health and well-being. If you’re interested in testing, talk to your veterinarian or reach out to a reputable lab for more information on how to get started.
For Cavaliers at risk of MCAD deficiency, diet plays a crucial role. Since these dogs might struggle to break down medium-chain fatty acids (MCFAs), it’s recommended to be mindful of their diet:
Limit MCTs: Foods high in MCTs, like coconut oil, palm oil, and milk products, including yogurt might need to be limited in dogs with this genetic variant.
Watch High-Fat Diets: A balanced diet, without excessive fats, is key for Cavaliers with potential MCAD deficiency.
Cavaliers that haven’t been tested for MCAD deficiency should avoid foods high in MCTs. Without knowing their genetic status, it’s best to be cautious to prevent potential health issues like seizures or other symptoms associated with the condition. If your Cavalier has had a diet rich in MCTs for a few years without any of the symptoms listed above, you may consider continuing to feed. However, the test is pretty easy and inexpensive, so it might be just easier and safer to test to know for sure.
The research on MCAD deficiency in Cavaliers is ongoing, and it’s vital for more Cavaliers to be tested. A simple swab test can determine whether your Cavalier carries the gene associated with MCAD. This testing is important not just for your Cavalier’s care, but also for responsible breeding practices to reduce the prevalence of this mutation in future generations. If you test, please contact your Cavalier’s breeder with the results.
Testing for MCADD
Canine Genetic Testing
GenSol Animal Diagnostics
Laboklin
As of June, 2024, the latest stats from a Facebook group dedicated to MCAD deficiency in Cavaliers show the following:
Genetically Affected: 49 dogs (9.78%)
Clinically Affected: 6 dogs (1.2%)
Carriers: 238 dogs (47.5%)
Clear: 214 dogs (42.7%)
These numbers highlight the importance of testing and awareness within our Cavalier community. By staying informed and proactive, we can continue to support the health and well-being of our Cavaliers.
Managing MCAD Deficiency: Diet and Care Tips
If your Cavalier King Charles Spaniel has been diagnosed with MCAD deficiency, managing their condition effectively involves careful attention to their diet and feeding schedule. I would suggest a good heart to heart with your dog’s holistic veterinarian. If your Cavalier does have MCAD deficiency you will need to avoid a high-fat diet and avoid foods high in medium-chain triglycerides (MCTs). Don’t forget to read those ingredient panels on all the foods, treats, and chews you feed your Cavalier.
Although MCAD deficiency is serious in Cavaliers, a good food protocol can help ensure your Cavalier still leads a full and enriched life.
Google Ad Below [...]Read more...
September 18, 2024How to Celebrate a Senior Dog’s Birthday and Healthy Dog Cake Recipe
It’s hard to believe that Dexter, my best friend and constant companion, is turning fifteen! I’m over the moon that I am able to celebrate this milestone with him. He may be slowing down a bit, but his spirit and spunk remains as bright as ever. As Dexter has aged, we may have tweaked what we can do, but one thing has stayed the same: we live each day to the fullest, cherishing every moment.
Over the past couple of years, I’ve seen subtle changes in Dexter’s energy and behavior. He doesn’t have the boundless energy of his younger days, and he’s been going through some senior dog anxiety. We’ve learned to adjust our activities together, and I’ve been working on helping him feel more secure as his cognition changes. Our daily enrichment now includes slow, sniffy walks, leisurely poke arounds through the neighborhood followed by a stroll, and indoor adventures. He still enjoys simple training sessions, which keep his mind sharp, and I continue his canine fitness exercises to maintain his mobility and strength.
Earlier this year, Dexter went down in his back end after a reaction to medication. It was a scary time, and I wasn’t sure what his recovery would look like. I was actually wondering if his time was coming to an end. But after three to four months of dedicated rehab, I’m thrilled to share that he’s made a full recovery! Dexter’s resilience has always inspired me, and this experience only deepened my love for him. His ability to bounce back, even at fourteen, is a testament to his incredible spirit.
With Dexter by my side, I’ve been inspired to dive into new creative projects. Over the past year, we launched this blog dedicated to Cavalier King Charles Spaniels. This is actually our second blog! Check out our first blog, Raising Your Pets Naturally. I’ve also created a children’s coloring book, Dexter’s Adventures, bringing his playful and inspiring spirit to life for a younger audience. Which makes this his 3rd children’s book! Everything I do is shaped by Dexter, and I’m so lucky for the joy and inspiration he brings.
Our mantra has always been to live each day to the fullest, and as Dexter turns fifteen, this really hits home. Every day is a gift, and I’m beyond thrilled to have Dexter with me on this journey. Together, we continue to embrace life, even as we both slow down, finding joy in the simple moments we share.
Celebrating Dexter’s birthday is more than just a tradition, it’s a reminder of the love, laughter, and resilience we’ve shared throughout his life. During Dexter’s birthday celebrations, we always make sure to support Cavalier Rescue USA, a cause that’s close to our hearts. If you’re able to donate or volunteer your time, please consider checking them out, and be sure to tell them Dexter sent you!
Here’s to Dexter, my silly monkey, stink pot, my muse, and the one who makes every day brighter with his love.
Don’t forget to subscribe to our @CavalierTipsandFun YouTube channel for more!
Print
Pin
Dog-Friendly Strawberry Birthday Cake
Here's Dexter's 15th birthday cake recipe and photos! To make his special day even more memorable, I whipped up a dog-friendly birthday cake that’s not only tasty but also healthy. This homemade dog birthday cake is packed with ingredients Dexter loves. Whether you're planning a dog birthday celebration or looking for a healthy dog birthday cake recipe, this one is sure to be a hit with your pup.
Course cake Keyword dog friendly cake, dog birthday cake,
Prep Time 1 day day Cook Time 50 minutes minutes
Servings 12 Dogs
Author Tonya Wilhelm
IngredientsOptional Blue Spirulina Gummy Paw Print Decoration6 tbsp Beef Gelatin2 tsp Blue Spirulina2 cups Boiling WaterStrawberry Dog Friendly Cake4 cups Quinoa Flour6 Eggs16 oz Strawberries Stems Removed1/4 cup Olive OilOptional Dog Frosting8 oz Cream Cheese check the ingredients to ensure it’s dog-friendly10 oz Butternut Squash Cooked
InstructionsBlue Spirulina Gummy Paw Print DecorationIn a large mixing cup, combine the gelatin and blue spirulina.Quickly stir in the boiling water until fully dissolved.Pour the mixture into the paw print cutouts in the paw-shaped cake pan. Pour any extra in other fun silicone molds.Refrigerate until set then gently remove the paw gelatin shapes.Place the paw shapes on a cookie sheet and return to the refrigerator while preparing the cake.Dog-Friendly Strawberry CakePreheat the oven to 350°F.Purée the strawberries in a blender until smooth.In a large mixing bowl, combine the quinoa flour, eggs, olive oil, and strawberry purée.Generously grease the paw print cake pan with olive oil.Pour the cake batter into the pan and bake for approximately 50 minutes, or until set.Allow the cake to cool for 15 minutes, then carefully remove it from the pan and place it on a cooling rack to cool completely.Optional Dog FrostingPurée the cooked butternut squash in a blender.Add the cream cheese to the purée and blend until smooth and well combined.Once the cake is completely cool, frost the cake with the butternut squash and cream cheese mixture.Top with the blue spirulina gummy paw print decorations for a fun and colorful touch!
Join our vibrant Cavalier King Charles Spaniel community on Facebook, support our dedication to pet wellness on Patreon, and stay updated with our weekly newsletter for invaluable tips and insights into raising happy, healthy pets. Together, let’s make a difference in our dogs’ lives!
Google Ad Below [...]Read more...
January 8, 2025How to Stop Your Cavalier King Charles Spaniel From Licking Everything
Have you ever wondered why your Cavalier King Charles Spaniel licks you or how to curb excessive licking? If so, you’re not alone. Many Cavalier parents find themselves trying to stop their Cavalier from licking so much. Let’s take a closer look at why Cavaliers lick and what you can do if it becomes too much. Cavaliers lick for various reasons, and understanding the “why” is key to changing and managing the behavior.
Cavaliers May Lick You Because You Taste Great!
One common reason is that you simply taste good. Your Cavalier might be drawn to the salt on your skin, or maybe you’ve just eaten, and they’re picking up on lingering food scents. Even coming inside after an active day outdoors can make you extra appealing to their sensitive noses. Hormones and pheromones also play a role. For example, if you’re feeling stressed or it’s that time of the month, your Cavalier might be more inclined to lick because they’re sensing these subtle changes. Not to mention when we put hand lotion on, oh, yummy!
Cavaliers Lick During Greeting Behaviors
Another reason dogs lick is as part of their greeting ritual. When you come home, they’re excited to see you and may lick as a way of saying, “Hello! I’m so happy you’re here!” It’s a natural expression of affection and enthusiasm. This behavior is especially common in Cavalier King Charles Spaniels, a breed known for their loving and people-oriented nature. Cavaliers thrive on connection and love being close to their families, so licking during greetings is often their way of reinforcing that bond.
Greeting-related licking can also be a way for your dog to gather information about where you’ve been. Dogs rely heavily on their sense of smell and taste to explore their environment, and licking is part of how they “read” the world. If you’ve been around other dogs, eaten something particularly tasty, or even just had a long day out, your Cavalier’s greeting might include licking to learn more about your adventures.
Check out the video. Don’t forget to subscribe to our @RaisingYourPetsNaturally YouTube channel.
Your Cavalier May Be Licking Because He’s Stressed
However, not all licking is tied to happy moments. Sometimes, licking can indicate stress or anxiety. This type of licking is known as a submissive or appeasement gesture. Essentially, your dog is trying to communicate that they mean no harm. You might notice this behavior around guests or strangers, where your dog licks excessively as a way to navigate the interaction. In some cases, they may even start licking their paws or nearby objects if they’re feeling particularly anxious.
How To Stop Your Cavalier King Charles Spaniel From Licking So Much
If your Cavalier’s licking becomes excessive, there are steps you can take to manage it. For instance, if your dog is licking because you taste good or they’re excited to see you, allow a quick lick and then gently redirect them. You can offer a chew toy or a bone to give them something else to focus on. This simple redirection helps channel their energy into a more appropriate activity while still acknowledging their excitement.
When licking is tied to stress, it’s especially important to avoid punishing your Cavalier. Punishment can actually make the behavior worse, as your dog may lick even more in an attempt to appease you. Instead, remain calm and redirect their attention to another behavior, such as sitting or playing with a toy. Addressing the root cause of your Cavalier’s stress and anxiety is key. Building their confidence through positive dog training can make a big difference. As your dog becomes more comfortable in stressful situations, the need for licking as a coping mechanism will naturally decrease.
In some cases, excessive licking may require professional help. If your dog’s licking seems compulsive or tied to high levels of stress, start by consulting your holistic veterinarian. They can check for any medical issues and look at your dog’s behavior history. From there, a dog behavior specialist can help you create a customized dog behavior modification plan to address your Cavalier’s needs, making life easier and more enjoyable for everyone.
If your Cavalier King Charles Spaniel’s licking is becoming a challenge, know that you’re not alone, and there are positive steps you can take to address it. With a little patience and the right approach, you can better understand why your Cavalier licks and guide them toward healthier ways of expressing themselves. If you’re feeling stuck or need personalized guidance, I offer one-on-one phone and Skype sessions to help you and your Cavalier navigate challenges like excessive licking. Together, we can create a plan that works for your unique pup and helps strengthen your bond.
Do you have a licker on your hands?
Google Ad Below [...]Read more...
September 3, 2024The Importance of Enrichment for Senior Cavalier King Charles Spaniels
Oh, Dexter. My senior Cavalier King Charles Spaniel, will be fifteen on October 6, 2024! I’m over the moon happy that he has led a long, happy life. He was diagnosed with Chiari malformation and syringomyelia in 2012, and I didn’t think he would have a very long life. Eventually, his MVD diagnosis also rolled in. But, despite his medical conditions, he has been thriving. He’s not just alive, he’s kicking!
I’m not going to lie. He started showing his age and some cognitive decline a few years ago. I have written about his life on my first blog, Raising Your Pets Naturally, so make sure you head over there for even more about Dexter’s life and care. But today, I wanted to discuss some of the things I have done to help keep Dexter as sharp as possible and try to keep canine cognitive dysfunction syndrome (CCDS) at bay. Through my experiences and research, I’ve seen how diet, positive training, and environmental enrichment can make a significant difference in maintaining his quality of life. So, let’s jump in.
What is Canine Cognitive Dysfunction Syndrome
Canine cognitive dysfunction syndrome (CCDS), is similar to dementia in humans and affects many senior dogs. Symptoms can be different from dog to dog, but some common behaviors include: disorientation, disrupted sleep patterns, decreased activity levels, and changed interactions with their environment and people. Research, including a study from the Journal of Veterinary Behavior (2016), shows that cognitive decline in dogs can significantly impact their quality of life. But early intervention and supportive care can improve CCDS symptoms and a dog’s quality of life.
The Importance of Canine Enrichment for Senior Cavaliers
Environmental enrichment is important for helping senior Cavaliers with canine cognitive dysfunction syndrome. Canine enrichment is about engaging your Cavalier’s senses, engaging their minds, and keeping them moving. I always think about “living life to the fullest.” I mean, we brought our Cavaliers into our homes so we can enjoy them and do fun things with them. Although they are beautiful, they deserve more than just a life where they lie around all day and do nothing. Just because they are seniors, doesn’t mean this mentality should change, although their activities will need to be adjusted to meet their individual needs. And it’s not just me; there’s research that backs up this theory.
Mental Stimulation: According to a study published in the Journal of Veterinary Internal Medicine (2016), mental stimulation through enrichment activities helps slow cognitive decline in senior dogs. Puzzle toys, interactive games, and scent-based activities keep the brain engaged, potentially delaying the progression of CCDS symptoms.
Reduces Stress: Canine enrichment is a great way to help reduce anxiety and stress in senior Cavaliers dealing with cognitive decline. Engaging activities and sensory stimulation can make a big difference. By adding enrichment routines to their day, you’re helping your dog feel calmer and more secure, which can ease some of the stress and anxiety that often come with cognitive issues.
Behavioral Improvement: Enrichment activities can make a big difference for senior Cavalier King Charles Spaniels who are restless or pacing. By offering mental and physical stimulation, these activities help reduce repetitive behaviors and keep your dog more relaxed.
Enhanced Quality of Life: Enrichment isn’t just about keeping your Cavalier busy. It’s about improving their overall quality of life. Engaging in enjoyable and stimulating activities brings more enjoyment, engagement, and a sense of purpose to their days, making their lives more fulfilling.
Simple Enrichment Ideas to Boost Your Senior Dog’s Quality of Life
Enrichment doesn’t have to be complicated or time-consuming. It’s all about finding simple, enjoyable activities that stimulate your senior Cavalier’s mind and body. Here are some ideas to get you started. And don’t forget to check out our article on Cavalier Enrichment Ideas.
Interactive Toys: Toys that dispense treats or require problem-solving are fantastic for mental stimulation. Depending on your Cavalier, you can use treat-dispensing toys or lick mats. When Dexter was younger, treat dispensing toys and frozen Tux toys were a hit. Now, he enjoys lick mats and snuffle mats. Food toys engage your dog’s sense of smell and taste.
Scent Games: Speaking of scent games, Dexter has always loved using his nose. Try hiding treats around the house or yard and let your Cavalier find them using his nose. Scent games are a natural way to keep your Cavalier active and provide both mental and physical exercise in a way most dogs love.
Positive Dog Training Sessions: Short, positive dog training sessions with simple cues or tricks are highly rewarding. They keep your Cavalier’s brain sharp and help build a stronger bond through shared activities.
Varied Walks or Strolls: Don’t get into a rut of going on the same walk, to the same park, on the same trail. Changing up your walking routes introduces new sights and smells. This variety provides your Cavalier with cognitive stimulation and keeps your walks fresh and interesting.
Comfortable Environment: Make sure your senior Cavalier’s living space is safe and cozy. Look out for any obstacles, and ensure good footing below. Whether you have carpet, carpet runners, grippy socks, ToeGrips or all of the above, traction is incredibly important for senior Cavaliers. They don’t have the same core strength to hold themselves up, and slick floors can be very scary and even cause injury if they slip or splay out.
Canine Fitness and Strength Building: I highly recommend setting up some sessions with a canine rehabilitation professional. Working with Dr. Sam, Dexter’s strength has been so important in his overall health and wellness. And our at home exercises aren’t just a way to keep him fit. They are also another form of enrichment, since he loves doing them! Engage in simple at-home exercises like sit-to-stand and sit-to-down exercises to help maintain your Cavalier’s muscle strength and joint mobility. Gentle range-of-motion exercises can also support your senior dog’s overall physical health and comfort.
Supporting Cognitive Health with Diet and Nutrition
Diet plays a crucial role in managing cognitive decline in senior dogs. According to research published in the Journal of Veterinary Internal Medicine (2019), a diet rich in specific vitamins and nutrients can significantly support cognitive health. Key vitamins such as vitamin E and vitamin C act as antioxidants, protecting brain cells from oxidative stress and easing cognitive issues. B vitamins, including B6, B12, and folic acid, are essential for maintaining healthy brain function. Omega-3 fatty acids, commonly found in fish and fish oil supplements, also play a vital role in improving cognitive function and managing symptoms of cognitive decline. Including these vitamins and nutrients in your dog’s diet, either through high-quality dog food (preferably fresh) or supplements, can help manage cognitive decline and enhance their overall quality of life.
Dexter, is proof of the benefits of a fresh diet. His meals are carefully prepared with high-quality, fresh ingredients and free from unnecessary chemicals. I’m convinced this fresh, balanced diet, rich in essential nutrients, has played a significant role in keeping his mind sharp and supporting his overall well-being.
How Positive Training Supports Cognitive Health in Senior Cavaliers
Positive training and routine play a vital role in supporting a senior dog’s mental sharpness and managing the effects of cognitive decline. As a positive dog trainer, I’ve taught Dexter plenty of fun and useful tricks, not just for good behavior, but also to keep his mind engaged and sharp. Each training session isn’t just about obedience; it’s about giving Dexter the mental stimulation he needs to stay mentally fit as he ages.
Incorporating regular training sessions into your dog’s routine is a great way to improve their cognition and their body. Focus on simple tricks and behaviors that challenge their mind and body without causing stress. I have noticed Dexter’s abilities change over the years, so it is important to change with them. By tailoring positive dog training sessions to your Cavalier’s needs and incorporating enjoyable activities into their day, you can help your Cavalier maintain their mental clarity and overall well-being.
Follow our YouTube channel for more Cavalier enrichment ideas!
Final Thoughts
Incorporating canine enrichment into Dexter’s daily routine has been essential for maintaining his quality of life. It’s not just about keeping him busy; it’s about enhancing his mental, emotional, and physical well-being. Enrichment is just one piece of the puzzle for Dexter’s health. A fresh, balanced diet and consistent, positive training are also vital for supporting his well-being as a senior dog.
Dexter’s vibrant health is a testament to how a combination of mental stimulation, nutritious food, and engaging routines can make a real difference. I encourage all Cavalier families to integrate these practices into their senior dogs’ lives. By focusing on enrichment, diet, and training, you can significantly improve your dog’s overall well-being and help them enjoy their golden years to the fullest.
I host a private Facebook group for Cavalier King Charles Spaniels, and we have a big focus on canine enrichment ideas and challenges to keep your Cavalier engaged and thriving!
How do you incorporate enrichment, diet, or training into your senior dog’s routine? Share your tips and experiences below!
Enrichment Increases Relaxation
https://www.ncbi.nlm.nih.gov/pmc/articles/PMC8772568/
https://www.sciencedirect.com/science/article/pii/S0168159123002691
Join our vibrant Cavalier King Charles Spaniel community on Facebook, support our dedication to pet wellness on Patreon, and stay updated with our weekly newsletter for invaluable tips and insights into raising happy, healthy pets. Together, let’s make a difference in our dogs’ lives!
Google Ad Below [...]Read more...
February 5, 2025How to Teach Cavalier King Charles Spaniel to Ignore Distractions
When I’m out with Stewart, my 7-month-old Cavalier, we get stopped a lot. People see his big, sweet eyes, his cute winter coat and wiggly little body and immediately want to say hello. And if this goes for people with or without their dog.
But here’s the thing, not every outing is a social event, and not every person or dog needs to be greeted.
Dog Socializing vs. Everyday Walks
There’s a time and place for socializing, and there’s a time for simply spending quality time with Stewart on our walks and outings. I make sure Stewart has appropriate and positive, structured experiences meeting new people and dogs in a controlled way. This helps him learn confidence, good manners, and appropriate greetings. But, at the same time, I’m teaching him an equally important skill, ignoring distractions such as people and dogs and walking politely with me.
If every walk turns into a meet-and-greet, dogs start to expect it. They pull toward every person or dog, they get frustrated when they don’t get to say hello. That can lead to barking, lunging, or general overexcitement, making walks stressful instead of enjoyable.
Why It’s Important to Teach Your Dog to Ignore Other Dogs and People
Not Every Dog Wants to Say Hello
Some dogs are nervous, in training, or simply not interested. Teaching Stewart to walk past other dogs calmly means he won’t invade another dog’s space or make an already anxious dog uncomfortable.
People Aren’t Always Dog People
Shocking, I know! But not everyone wants a happy little Cavalier bouncing up to them. Some people are afraid of dogs, allergic, or just in a hurry. Stewart is learning to walk past without expecting attention makes life easier for everyone.
Impulse Control is a Life Skill
Dogs who can stay focused, even when exciting things are happening around them, are safer and more enjoyable to live with. If Stewart learns that he doesn’t always get what he wants the moment he wants it, he’ll be better at handling frustration in other areas of life too.
Not Every Walk is About Socializing
Sometimes, I just want to enjoy a peaceful walk with Stewart. He doesn’t need to greet everyone to have a fulfilling experience, sometimes sniffing, walking together, and taking in the world is enough.
Better Walks in Busy Places
By teaching Stewart to walk with me instead of focusing on every dog or person, our walks are smoother and more enjoyable. Crowded sidewalks, busy parks, or narrow trails are much easier to navigate when he stays by my side rather than pulling toward distractions.
Prepping for Travel & Public Outings
I plan on traveling with Stewart, airports, dog-friendly boats, outdoor dining, places where he’ll need to stay close and focused on me. Teaching him now that he doesn’t always get to greet everyone will make these experiences stress-free and enjoyable for both of us.
Don’t forget to subscribe to @CavalierTipsandFun for more videos!
How I’m Teaching Stewart to Walk Past Distractions
Reward Calm Choices
When Stewart notices a dog or person, I reward him. I’m teaching him they=treats. Eventually, he will start to make that connection, see the distraction and look at me for the reward. This is what I’m going for. Over time, he’ll learn that staying focused on me, and it’ll be a non-event for him, he’ll simply walk past without even thinking about stopping to greet.
Use Distance
If Stewart’s too excited or distracted, I create more space between us and the distraction to help him refocus. As he gets better at ignoring, I’ll gradually close that gap, making it easier for him to pass by calmly.
Give Him a Job
I use cues like his name game, watch me, paws up, touch to keep his attention. Engaging his brain with productive tasks means he’s less likely to pull toward distractions.
Set Clear Expectations
I make sure Stewart knows that pulling towards people or dogs does not work. If he starts to pull, I either toss in his name game, stop and wait for him to renege, or add more distance. It truly depends on the situation. I do want him to be successful.
Handling Approaching People
When someone is steadily approaching your Cavalier, how you handle it depends on your goal at that moment. As a positive dog trainer, sometimes I want to explain and educate. If so, then I’ll squat down with Stewart, reward him for staying focused on me, and let the person know we’re training and practicing ignoring distractions. If I choose to say hello, I tell Stewart, “Let’s say hi,” and calmly approach. But sometimes, I just want to keep moving, so I give a quick, upbeat “We’re not saying hello, thank you!” and continue walking, keeping Stewart focused on me. It’s all about setting the tone for the interaction while making sure my dog stays engaged and confident.
Finding the Balance
There’s a time and place for socializing, and there’s also a time to focus on the walk itself. If you do want to stop and say hi, try to stop about 10 feet away from the other person or dog and ask first if it’s okay. Keep in mind that others might be training their dogs or dealing with their own challenges during the walk, so giving them some space is always a good idea. Being considerate makes the experience better for everyone, whether it’s a quick greeting or just calmly walking by each other. I then give Stewart the cue, “Let’s say hi,” so he knows he has permission to greet.
There’s nothing wrong with letting your dog greet others when it’s appropriate, but it’s just as important for them to learn that not every outing is a social event. Teaching Stewart when it’s time to engage and when it’s time to focus on me makes him a better walker and ensures our walks stay enjoyable.
When you’re walking your Cavalier King Charles Spaniel, how do you decide when it’s time to socialize and when it’s time to focus on the walk?
Google Ad Below [...]Read more...
April 21, 2024Tips for traveling with your Cavalier King Charles Spaniel. Dog-friendly vacation ideas.
Follow @CavalierTipsandFun for more videos.
Don’t forget to subscribe to @RaisingYourPetsNaturally for more!
Your comments and questions are always welcome below.
Join our vibrant Cavalier King Charles Spaniel community on Facebook, support our dedication to pet wellness on Patreon, and stay updated with our weekly newsletter for invaluable tips and insights into raising happy, healthy pets. Together, let’s make a difference in our dogs’ lives!
[...]Read more...
October 15, 2024Cavalier King Charles Spaniel Travel Tips
As a Cavalier mom and positive dog trainer, I know how important it is to help our Cavaliers feel comfortable and safe during car rides. Whether you’re planning a quick trip to the park or a longer dog-friendly road trip, making sure your Cavalier King Charles Spaniel enjoys the car ride is key to a stress-free trip for both you and your dog.
When Dexter and I hit the road, I never have to worry about how he’ll handle the ride. He’s a fantastic travel companion because I spent time training him to feel confident and at ease in the car. Today, I want to share my top tips on how you can prepare your Cavalier for car travel and road trips and turn them into a relaxed, happy traveler too.
1. Start with Short and Positive Rides
Just like with any new experience, easing your Cavalier into car rides instead of popping them into the car for a twelve-hour road trip is super important. Begin by taking short trips to fun, dog-friendly places like the local park or pet store. Keep the first few rides short and sweet, no more than ten-to-fifteen minutes. The goal is to associate the car with positive and fun destinations. A trip to the vet does not count as a fun visit for most dogs.
2. Create a Safe Space in the Car
Safety should always be a priority when traveling with your Cavalier. A secure dog car seat or crash-tested harness designed for small breeds like Cavaliers is a must. I personally recommend looking into the Center for Pet Safety’s approved products, as they conduct independent crash testing for dog travel gear. If a brand states they are crash tested, make sure to watch their crash tested video.
Dexter typically travels in a small crate. Because of his Chiari Malformation and syringomyelia and large size, travel harnesses aren’t the most comfortable for him. However, when we travel in the small car, a crash-tested and passed (yes, make sure they have passed the test) is our go-to. The key is to find a comfortable yet safe setup so your Cavalier feels relaxed without compromising their security.
3. Pack Familiar Comfort Items
Make your Cavalier feel more at home by packing some familiar items for the ride. When Dexter was a puppy, he would cozy up with his baby blanket and soft toy. Now, he has a therapeutic mat inside his crate. He likes to stay cool, so I also have a fan pointing at him. These little comforts can help reduce anxiety and make the ride smoother for dogs who may initially feel unsure about the car.
If your Cavalier is a bit anxious, place something with your scent, like a worn T-shirt next to your Cavalier. Your presence, even in the form of scent, can be calming for your Cavalier, especially if they’re a bit nervous during the first few rides.
4. Plan for Frequent Breaks
When traveling for more than an hour, make sure to schedule frequent potty and stretch breaks. Cavaliers are active little dogs, and, like all of us, they need to stretch their legs and take in their surroundings. I like to plan stops at dog-friendly rest areas or parks where Dexter can explore, do his business, and get a little energy out before continuing the journey.
Remember, each break is an opportunity for positive training. Use it as a chance to reward your dog for good behavior during the ride, and they’ll look forward to the next part of the trip.
5. Help Your Cavalier Relax with Calming Music
One of my favorite dog travel hacks is playing calming music designed for dogs during long car rides. I’ve been a fan of the iCalmDog portable speaker, which plays clinically-tested music that helps keep dogs calm and relaxed. Just be careful not to fall asleep at the wheel yourself!
Check out our all Cavalier calming playlist on YouTube!
6. Monitor Your Cavalier’s Well-Being
Keep an eye on your Cavalier’s behavior throughout the trip. Some Cavaliers may experience motion sickness, especially on longer rides. If your dog starts to drool excessively, whine, or seem uncomfortable, it might be time for a break. You can try natural remedies like ginger treats (with your vet’s approval) or consult your vet for other options.
If your Cavalier seems overly tired or stressed, don’t be afraid to cut the trip short. The goal is for travel to be a positive experience, and pushing them too far can have the opposite effect.
By starting with short, positive experiences and keeping their safety and comfort in mind, you can help your Cavalier King Charles Spaniel become a happy traveler. Dexter loves our road trips, and I’m sure your Cavalier will too!
Do you have any favorite travel tips for Cavaliers? Drop them in the comments!
Follow us on YouTube For fun dog-friendly travel adventures!
Google Ad Below [...]Read more...
December 25, 2024Winter Tips for a Cavalier King Charles Spaniel
Brrrr, it’s cold out there! Winter in Ohio can be tough, and today, it’s a chilly 15 degrees. Thankfully, Stewart and I are bundled up inside, but it’s the perfect time to share some essential winter safety tips for your Cavalier King Charles Spaniel. Whether you’re venturing outdoors or staying warm indoors, these precautions and activities will help keep your pup safe, healthy, and happy all winter long.
Safety First: Protecting Your Cavalier in Winter
Limit Outdoor Time
Our Cavaliers are family members, and they thrive indoors with us. While Stewart loves his outdoor potty breaks and a quick sniff around the yard, I always limit his time outside when temperatures dip. Frostbite and hypothermia are real risks for dogs, especially small breeds like Cavaliers. Keep outings short, and always monitor your pup for signs of discomfort.
Protect Those Paws
A dog’s paw pads aren’t built to handle extreme cold or icy surfaces. For quick potty breaks, toddler socks can be a lifesaver; they’re easy to put on and don’t need to be perfect since they’re just for a short trip. Shoot for dark colors, so that if one falls off, it’s easier to find in the snow. For longer walks or outdoor play, dog boots like Saltsox are fantastic options. If your Cavalier goes outside barefoot, be sure to clean their paws thoroughly with a warm washcloth or natural pet wipes to remove ice, salt, and chemicals that could irritate their skin. I make up a bowl of water with a splash of 4-Legger shampoo and a washcloth to clean paws. I make a new batch each day. (Order 4-Legger today with promo code RaiseNaturally20 for 20% off your first order.)
Scoop the Potty Area
I always scoop a clean, clear area in the yard for potty breaks. Cavaliers, like most dogs, prefer a neat spot for their business. A wide, shoveled path ensures your Cavalier can move around comfortably without getting buried in snow.
Coats and Sweaters for Your Cavalier
Dog coats and sweaters are a must for Cavaliers. Look for a jacket that provides full range of motion and covers your pup’s back and belly. Indoors, a cozy sweater can keep your Cavalier comfortable. If you notice your Cavalier sleeping in a tight ball, or even shivering, a dog sweater is a great idea. Stewart’s favorite sweaters are custom-made by MeekByDesign, but there are plenty of great options online or in pet stores.
Should a Cavalier Wear a Hat in the Winter?
Cavaliers’ long, luxurious ears attract snow and ice like a magnet! A lightweight dog hat or snood can protect your Cavalier’s ears during snowy adventures. Afterward, be sure to dry their ears gently with a soft towel.
Staying Warm and Cozy Indoors
When your Cavalier comes inside from the snow or cold, use a super-absorbent microfiber towel to dry him off thoroughly. For an extra touch of luxury, I like to pop a favorite blanket in the dryer so my dog can snuggle up with something warm. These little comforts make a big difference on chilly days!
Indoors, I keep Stewart active and engaged with puzzle toys, hide-and-seek games, and short training sessions. A mentally stimulated pup is a happy pup, even when it’s too cold for a long walk.
Winter Nutrition for Cavaliers
Did you know that certain foods can help your Cavalier King Charles Spaniel stay warm during the chilly months? According to Traditional Chinese Medicine (TCM), foods have energetic properties that can influence the body’s temperature and overall balance.
In the winter, it’s beneficial to incorporate “warming” proteins into your dog’s diet. Proteins like chicken, lamb, venison, and even goat are considered warming and can help offset the cold temperatures. These proteins are especially good for dogs who seem more sensitive to the cold or have lower energy during the winter.
You can also include warming spices and herbs like ginger or turmeric in small, dog-safe amounts to add a cozy touch to their meals. These not only are warming, but also support joint health during cold weather.
If you’re new to adjusting your dog’s diet seasonally, start slow by adding one or two warming ingredients to their current meals. Always consult with your vet or a canine nutrition expert to ensure your Cavalier’s diet remains balanced and meets their individual needs.
Embrace the Season
Stewart may be new to my home, but we’re already making the most of winter together. From brisk walks in his cozy new jacket to snuggling under a warm blanket on chilly evenings, these little moments remind me of the special bond we share. No matter the season, Cavaliers have a way of bringing warmth and joy to our lives.
How do you keep your Cavalier comfortable and happy during the winter months? Share your tips below, I’d love to hear them!
Google Ad Below [...]Read more...
March 30, 2025Health Benefits of Omega-3s for Cavaliers
Omega-3 fatty acids are one of the most important nutrients for Cavaliers, yet they’re often overlooked or misunderstood. These essential fats support heart health, brain function, joint mobility, skin condition, and even immune function. But not all omega-3 sources are created equal. Fresh fish, supplements, and plant-based options vary in effectiveness, and factors like oxidation and sourcing impact their quality. In this guide, I’ll break down the best omega-3 sources, how to choose high-quality options, and what to avoid to ensure your Cavalier King Charles Spaniel gets the maximum health benefits from their Omega-3s.
Skin and Coat Health
Omega-3s help maintain a healthy skin, reducing dryness, flakiness, and itchiness. They also improve coat condition, making your Cavalier’s fur shinier and softer. Cavaliers, like many other breeds, can be prone to allergies and skin sensitivities, and omega-3s can help manage these issues by reducing inflammation in the skin.
Joint Health and Mobility
As Cavaliers age, they can develop arthritis and joint stiffness. Omega-3s have been shown to reduce inflammation in the joints, helping to alleviate pain and improve mobility. Dogs receiving sufficient omega-3s often experience less stiffness and better flexibility, which is particularly important for senior Cavalier King Charles Spaniels.
Brain and Cognitive Function
DHA is a crucial component of brain cell membranes and plays a significant role in cognitive function. In Cavalier puppies, it supports brain development and learning. In senior Cavaliers, it helps prevent cognitive decline and supports memory and problem-solving skills. Studies have shown that dogs supplemented with DHA perform better on cognitive tests than those that do not receive adequate amounts.
Heart Health
Omega-3 fatty acids are essential for supporting cardiovascular function by helping regulate heart rhythm, reduce blood pressure, and improve circulation. For Cavaliers, who are especially prone to mitral valve disease (MVD), a common heart condition in the breed, omega-3s are even more important. Given their susceptibility to MVD, ensuring your Cavalier’s diet is rich in omega-3s can play a crucial role in supporting their heart health and may help slow the progression of the disease.
Immune System Support and Inflammation Control
Chronic inflammation is a factor in many health issues, including autoimmune conditions, allergies, and even cancer. For Cavaliers, who are prone to conditions like Chiari malformation, managing inflammation is especially critical. Omega 3s play an important role in regulating the body’s inflammatory response, helping to balance the immune system and reduce excessive inflammation. By incorporating omega 3s into your Cavalier’s diet, you can help protect against the inflammation that worsens conditions like Chiari malformation and support overall immune health.
Best Omega-3 Sources for Cavaliers
The best omega-3 sources for dogs are those that provide EPA (eicosapentaenoic acid) and DHA (docosahexaenoic acid) in their most bioavailable forms. These two types of omega-3s are the most beneficial for dogs, as they are directly used by the body to support a variety of vital functions, from heart health to joint mobility. The most bioavailable forms of these omega-3s are typically found in marine-based sources, such as oily fish. Fish like salmon, sardines, mackerel, and anchovies are excellent options because they contain high levels of both EPA and DHA, making them ideal for supporting your Cavalier’s health. These fish provide omega-3s in a form that’s easy for the body to absorb, ensuring that your dog gets the maximum benefits.
In addition to fish, fish oil supplements can also be a great source of omega-3s. However, it’s important to choose high-quality, purified fish oils that are free of contaminants like mercury. If your Cavalier is sensitive to fish or you prefer plant-based sources, algae oil is another excellent option, as it provides DHA without the fishy aftertaste or concerns about ocean contaminants. While flaxseed and chia seeds offer plant-based omega-3s, they contain ALA (alpha-linolenic acid), which the body must convert into EPA and DHA, an inefficient process for dogs. This means that marine-based omega-3s are typically the best option for achieving optimal health benefits. By rotating between these high-quality sources, you can help ensure your Cavalier is getting the most effective omega-3s for their needs.
Watch our fresh fish DIY and don’t forget to subscribe to @CavalierTipsandFun for more!
Fresh Fish (Whole Food Source of EPA and DHA)
Feeding fresh, oily fish is one of the most natural ways to provide omega-3s. However, choosing the right type of fish is essential due to concerns about mercury levels, sustainability, and proper sourcing.
Some of the best options for Cavaliers include:
Sardines: Small, low-mercury fish that are naturally high in omega-3s. They are one of the safest whole-food sources.
Anchovies: Similar to sardines, anchovies are rich in DHA and EPA while having minimal contamination risks.
Herring: Often used in high-quality pet foods, herring is another small, oily fish packed with omega-3s.
Atlantic Mackerel: This species is safe, but avoid king mackerel, which is high in mercury.
Wild-Caught Salmon: A great source of omega-3s, but farmed salmon may contain higher levels of contaminants.
When feeding fresh fish, it’s important to either lightly cook the fish or feed it raw if it’s safely sourced. Cooking fish too much can break down some of the omega-3s, while raw fish (from a trusted, safe source) can provide the most nutrients. However, if you choose to feed raw fish, it should be frozen for a week first to reduce the risk of parasites, which can be a concern with certain types of fish.
It’s essential to avoid fish that have been prepared with added salt, spices, or sauces. These seasonings can be harmful to dogs. Also, always avoid feeding cooked bones, as they can splinter and cause serious internal injuries.
Fish Oil Supplements
Many pet parents turn to fish oil supplements to provide omega-3s, but not all fish oil supplements are the same. Choosing the right one for your Cavalier is important to ensure you’re giving them the best quality and the most effective nutrients.
How to Choose a High-Quality Fish Oil
When selecting a fish oil supplement, look for species-specific labeling. Instead of settling for generic “fish oil,” opt for oils like sardine oil, anchovy oil, or krill oil. This ensures transparency in sourcing and gives you a better idea of where the oil is coming from.
When choosing a fish oil supplement, it’s important to look at the levels of EPA and DHA, the two types of omega-3 fatty acids that provide the most health benefits for your dog. The label on the bottle should specify the amount of EPA and DHA in each serving, not just the total amount of fish oil.
For example, a bottle might say it contains 1,000 mg of fish oil per serving. But if the label doesn’t show how much of that is EPA and DHA, it’s hard to know how much of the oil is actually providing the beneficial omega-3s your dog needs.
Some fish oils may have more EPA, which is great for joint and heart health, while others may have more DHA, which supports brain function and reduces inflammation. Knowing exactly how much of each omega-3 is in the oil allows you to be more confident that you’re giving your Cavalier the right amount for their specific health needs. This way, you can make sure you’re getting the full benefits of the omega-3s in the supplement.
Also, choose products that are third-party tested. Reputable brands will test their oils for harmful contaminants like heavy metals, PCBs, and oxidation levels. This helps ensure the oil is safe for your dog and that it hasn’t been compromised during production.
Liquid vs. Capsules
Fish oil comes in two common forms: liquid and capsules. Liquid fish oil (often found in pump bottles) is convenient because it’s easy to dose, but it’s more prone to oxidation once opened. Oxidation occurs when the oil is exposed to light, heat, or air, so it must be stored in the refrigerator and used quickly to maintain its freshness.
On the other hand, capsules are more stable since the oil is protected from air exposure, which reduces the risk of oxidation. However, they can be harder to dose accurately, especially for small dogs.
Oxidation Risks
One of the biggest concerns with fish oil is oxidation. Omega-3s are very sensitive to light, heat, and oxygen, and when the oil oxidizes, it can lose its effectiveness and even become harmful. Signs of rancid fish oil include a strong fishy smell or an unusual taste.
To minimize the risk of oxidation, here are a few tips:
Choose dark glass bottles instead of clear plastic, as glass helps protect the oil from light exposure.
Store the fish oil in the refrigerator after opening to keep it fresh.
Use the oil within 30 to 60 days of opening to ensure you’re getting the best quality.
By taking these steps to choose a high-quality fish oil and storing it properly, you can help ensure your Cavalier gets the full benefits of omega-3s for their heart, joints, and overall health.
Green-Lipped Mussels: A Powerhouse for Joint Support
Green-lipped mussels (Perna canaliculus), native to New Zealand, are one of the most beneficial natural sources of omega-3s for dogs. Unlike traditional fish-based omega-3 supplements that provide primarily EPA and DHA, green-lipped mussels contain a unique omega-3 fatty acid called ETA (Eicosatetraenoic Acid). ETA has been found to have additional anti-inflammatory properties, making it especially helpful for dogs suffering from joint issues like arthritis.
The anti-inflammatory effects of ETA, along with the presence of glucosamine and chondroitin, make green-lipped mussels an excellent option for promoting joint health. These compounds work together to support cartilage repair, reduce inflammation, and enhance mobility in dogs experiencing joint stiffness or discomfort. This combination is particularly beneficial for dog breeds, like Cavaliers, that are prone to developing joint issues as they age.
Comparing Omega-3 Content in Green-Lipped Mussels vs. Fish
In terms of EPA and DHA content, green-lipped mussels may not provide as high a concentration per serving as fatty fish, but their ETA provides an extra layer of anti-inflammatory benefits. This makes green-lipped mussels an excellent addition to a dog’s diet, particularly for those with joint concerns.
How to Feed Green-Lipped Mussels to Your Dog
Green-lipped mussels are often available as freeze-dried powder or in chewable treat forms. Both forms make it easy to incorporate them into your dog’s daily routine, but the powder can be sprinkled over food or mixed into homemade dog meals for ease of use.
As with any supplement, it’s important to start with a small amount to monitor how your dog responds, especially if they are new to green-lipped mussels or have a sensitive digestive system. For the dosing of green-lipped mussels, it’s always best to refer to the product-specific guidelines since the concentration can vary depending on the form (freeze-dried powder, chewables, etc.) and brand. However, a general recommendation often seen in supplements for dogs is:
Start with 1/4 teaspoon per 10 pounds of body weight per day for powder form. This can be adjusted based on the dog’s response and their specific needs.
Plant-Based Omega-3s: Less Effective for Dogs, but Still Valuable
When it comes to omega-3 fatty acids, plant-based options are less efficient for dogs compared to animal sources like fish, as they primarily contain ALA (alpha-linolenic acid). While ALA is an essential omega-3 fatty acid for humans, dogs face challenges in converting ALA to the more bioavailable forms, EPA (eicosapentaenoic acid) and DHA (docosahexaenoic acid), which are the forms most beneficial for their health. This makes plant-based omega-3s less effective for dogs in supporting the same health benefits as those derived from marine sources.
Why ALA Is Less Effective for Dogs
Dogs have a relatively inefficient ability to convert ALA into EPA and DHA. The process of conversion requires specific enzymes, which dogs do not produce in large enough quantities to convert sufficient ALA into the needed forms of omega-3s. As a result, while plant-based omega-3s can still offer some benefits, they are not as effective at delivering the omega-3s that support joint health, cognitive function, and heart health in the same way that fish-derived omega-3s do.
Nevertheless, plant-based sources of omega-3s are still valuable as part of a balanced diet. They can provide supplemental omega-3s and contribute to overall health but should not be relied on as the primary omega-3 source for dogs.
Common Plant-Based Omega-3 Sources
Flaxseeds: Flaxseeds are one of the most popular plant-based sources of ALA omega-3s. They can be ground and added to your dog’s food. However, the conversion rate of ALA to EPA and DHA is low in dogs, so while flaxseeds may offer some benefits, they should not be relied on exclusively for omega-3 needs.
Chia Seeds: Like flaxseeds, chia seeds are rich in ALA. These tiny seeds are highly nutritious and can be added to a dog’s meals. They can absorb water and form a gel, which can be helpful for digestive health. While chia seeds may offer some benefit, they should be seen as supplementary, not primary, sources of omega-3s for dogs.
Hemp Seeds: Hemp seeds contain ALA as well, along with a well-balanced ratio of omega-3 and omega-6 fatty acids. While these can contribute to overall fatty acid intake in dogs, their conversion to EPA and DHA is also limited. Hemp oil, a more concentrated form, may be more effective but still not as efficient as fish oil or algae oil in providing the omega-3s dogs need for optimal health.
Algae Oil: The Better Plant-Based Alternative
While plant-based sources like flaxseeds and chia seeds are valuable in certain aspects, algae oil is usually a better plant-based option for dogs. Algae oil is derived from marine algae, which naturally produce DHA (and sometimes EPA) without requiring the conversion process. Unlike other plant-based sources that contain ALA, algae oil provides a direct source of DHA, the omega-3 that plays a critical role in brain function, heart health, and reducing inflammation.
Algae oil is especially beneficial for pet parents who prefer to avoid fish-based products for ethical, environmental, or allergy reasons. It provides the same essential omega-3 fatty acids found in fish oil, but without the potential risks associated with mercury contamination or fish-based allergens. This makes algae oil a great plant-based alternative for ensuring your dog receives the health benefits of omega-3s.
Algae oil supplements are available in capsules or liquid form and can be incorporated into your dog’s diet just like fish oil. The recommended dosage varies by brand, so it’s important to follow the manufacturer’s guidelines and consult your vet to ensure the right amount for your dog.
While algae oil is a great alternative to fish oil, there are a few differences to consider. One of the main differences is that fish oil generally contains more EPA, an omega-3 that is particularly helpful for reducing inflammation and supporting joint health, while algal oil tends to have more DHA, which is important for brain and eye health. Because of this, if your dog needs more EPA for inflammation or joint issues, fish oil might be a better choice. Additionally, algae oil can be more expensive than fish oil, and it may not be as widely available in stores. Another thing to note is that fish oil is often more bioavailable, meaning it’s easier for dogs to absorb and benefit from. That said, algae oil is still a very good option, especially if you’re looking for a more sustainable, vegetarian, or fish-free supplement. It’s always a good idea to talk to your vet about which type of omega-3 is best for your dog’s specific health needs.
How Much Omega-3 Does Your Cavalier Need?
For general health, the recommended omega-3 dosage, specifically EPA and DHA, is typically between 20 to 55 mg per pound of body weight per day. If your Cavalier has specific health issues, like arthritis or inflammation, the dosage may increase to 50 to 100 mg per pound. If your dog is lacking omega-3s, you might notice signs like dry skin, excessive shedding, joint stiffness, or a dull coat. To ensure you’re giving the right amount, it’s important to consult your vet, who can recommend the proper dosage based on your dog’s size and health concerns.
Final Thoughts
Omega 3s are essential for your Cavalier’s overall health, supporting heart, brain, joint and skin function. By incorporating a variety of high quality omega 3 sources such as fish, green lipped mussels and supplements, you can ensure your Cavalier King Charles Spaniel receives a well rounded intake of these beneficial fatty acids.
Quality matters, so focus on bioavailable forms of EPA and DHA, and always rotate the sources you use to prevent imbalances. Whether you opt for fresh fish, fish oil or green lipped mussels, it’s crucial to store and handle these sources properly to avoid oxidation.
Before making any changes, check with your veterinarian to tailor an omega 3 plan that best suits your Cavalier’s individual health needs. Consistently including omega 3s in their diet will support long term health and vitality, helping your dog thrive at every stage of life.
Do you feed your Cavalier fresh fish?
Google Ad Below [...]Read more...
April 17, 2025Gentle, Safe, and Effective for Our Sensitive Cavaliers
Fleas and ticks. Just hearing those words makes me itch. But as a natural Cavalier Mom, I’ve always been cautious about what I put on or in my dogs, especially with delicate and sensitive breeds like Cavalier King Charles Spaniels. These little sweet hearts often have sensitive skin, luxurious coats, and sometimes underlying conditions like Chiari malformation or syringomyelia, which can make them more vulnerable to adverse reactions.
I’ve been on this natural journey for years, first with Dexter and now with Stewart. Along the way, I’ve learned that staying chemical-free when it comes to flea and tick care is absolutely possible, it just takes a little planning and a lot of label reading.
This is the natural flea and tick routine I’ve found works best for my Cavaliers.
Why I Choose a Natural Approach for My Cavalier King Charles Spaniels
Conventional flea and tick treatments may offer quick results, but they also come with serious risks. Side effects can range from skin irritation, itching, and digestive upset to more concerning issues like tremors, seizures, and in some cases even organ damage. These are not small concerns.
For a breed like the Cavalier King Charles Spaniel, those risks are even more concerning. Cavaliers are already prone to neurological conditions like Chiari malformation, seizures, tremors, and episodic falling syndrome. I’m especially cautious about using anything that lists seizures or neurological side effects as possible outcomes. It just doesn’t make sense to use a treatment that could trigger the very issues this breed is already vulnerable to.
Choosing a natural approach isn’t about trying to be perfect. For me, it’s about reducing chemical exposure wherever I can and building a thoughtful, layered prevention plan that supports overall health instead of relying on a single product to do it all.
My Natural Flea and Tick Prevention Plan for My Cavalier King Charles Spaniel
1. Regular Grooming and Bathing-I bathe Stewart every three to four weeks using a safe, gentle dog shampoo made without synthetic preservatives, artificial fragrances, or harsh surfactants. I’ve been using 4-Legger’s USDA-certified organic formulas for years because I trust their ingredient panel and transparency. They have a variety of formulas that help deter ticks and fleas.
Bathing regularly doesn’t just clean your Cavalier. It helps interrupt the flea life cycle. A good soak and lather can wash away flea eggs, dirt, and debris that might attract pests. When I use a shampoo that includes properly diluted essential oils known to repel fleas and ticks, it gives Stewart an extra layer of protection even after his bath is done.
2. Natural Tick and Flea Sprays for Daily Protection-Before every walk, I spray Stewart with a natural flea and tick repellent. I pay close attention to his legs, chest, tail, and belly, basically anywhere that might brush up against grass, shrubs, or wooded areas. These sprays are one of our most important layers of protection, and I use them daily during warm weather or anytime we’re heading into a high-risk area.
Over the years, I’ve rotated between trusted store-bought options and homemade recipes using properly diluted dog-safe essential oils. I always avoid sprays with synthetic preservatives or ingredients that could irritate a dog’s skin.
When I make my own, I tailor the recipe to the season, the environment, and even the behavior of my dog. Dexter, for example, used to try to catch bees, so I avoided blends with oils like rose geranium that might attract them. The key with any natural tick and flea spray is to apply it each time your Cavalier goes outside. These blends are not designed to last for hours at a time, and a quick re-spritz before each outing is what really makes the difference. I keep a bottle near the door so it becomes part of our daily walking routine.
DIY Natural Flea and Tick Spray for Dogs
This is one of my favorite natural sprays to help keep fleas and ticks at bay, without resorting to harsh chemical treatments. It’s simple to make, and you can use it on both your dog and yourself before heading outside.
What You’ll Need:
3 ounces distilled water
1/4 ounce vodka or grain alcohol (helps disperse oils evenly)
1/4 teaspoon vegetable glycerin (moisturizing and helps blend)
Essential Oils:
4 drops Cedarwood– repels fleas and ticks while being gentle on skin
4 drops Geranium– especially helpful against ticks
3 drops Lavender– calming and gently repels insects
1 drop Citronella– useful for deterring mosquitoes, fleas, and ticks
1 drop Peppermint– offers cooling relief and additional repellent support
How to Make It: Add all the ingredients to a 4-ounce (or larger) amber or cobalt blue glass spray bottle. Shake gently to combine.
How to Use It: Before walks or time outside, shake well and lightly mist your dog’s legs, belly, tail, and along the back. Always avoid spraying near the face and eyes. For areas like the ears, chest, or neck, spray a small amount into your hands first, then gently rub it into your dog’s fur. This helps you apply it more precisely and makes sure it reaches the coat and skin. Always apply when your dog is dry for best results.
Storage Tip: Store your spray in a cool, dark place and an amber or cobalt glass bottle helps protect the essential oils from light exposure, which can cause them to break down over time. Shake before each use to keep the oils properly dispersed.
Simple DIY Natural Flea and Tick Spray for Dogs
When I first started making Dexter’s flea and tick sprays, I kept things really simple. I used just distilled water and a few carefully chosen essential oils. Using just distilled water and essential oils is a great option if you plan to make small batches and use them up fairly quickly. It is easy, gentle, and perfect for Cavalier parents who want something simple. You will still need to shake the bottle well before each use, just like with any natural spray.
If you want your spray to blend a little more evenly and stay fresher a little longer, using the above recipe with the grain alcohol and vegetable glycerin can help. Alcohol acts as a natural preservative and helps the oils disperse a little better through the water. Glycerin can also add some moisture to the coat and skin.
Both options are good, it really depends on what fits best with your dog’s needs and your routine. If you are going through the spray quickly, distilled water and oils work just fine. If you want a little more staying power and an extra moisturizing boost, the version with alcohol and glycerin might be a better fit.
You can also check out four of Dexter’s natural flea and tick spray recipes on my Raising Your Pets Naturally blog.
Watch now and don’t forget to subscribe to @RaisingYourPetsNaturally YouTube for more!
Why Different Natural Tick and Flea Sprays Work for Different Dogs
One thing I learned through experience and from chatting with other natural pet parents is that not every spray works the same way for every dog. Some ticks are more common in certain regions and are repelled by specific essential oils. That’s why I rotate between formulas and stay flexible with what I use. If something stops working, I adjust. It’s not failure, it’s just part of the process.
3. Apple Cider Vinegar for Flea and Tick Support-Raw, unfiltered apple cider vinegar (ACV) is another natural tool I like to keep on hand as part of a layered approach to flea and tick prevention. While it won’t kill fleas or ticks, it can help make your dog less appealing to them.
You can make a simple spray by mixing equal parts raw ACV and distilled water in a spray bottle and lightly misting your dog’s legs and belly. Just be sure to avoid the face, and only use it on healthy, unbroken skin. If your dog has any skin sensitivities or open spots, it’s best to skip ACV topically.
You can also add a small amount of ACV to your Cavalier’s food or water. Not all dogs tolerate vinegar well, especially those with sensitive stomachs or urinary issues. It’s also important if you add it to your Cavalier’s water, they also have non-altered fresh water available.
4. Amber Collars for Natural Flea and Tick Repellent Repellant-Another layer is a raw Baltic amber collar. These collars are made from unpolished amber resin that naturally releases aromatic compounds when warmed by your dog’s body. These compounds can help repel ticks and fleas without adding any scent or chemicals to your dog’s skin.
While I wouldn’t rely on them as the only form of protection, I absolutely feel they can help in the overall care to keep our Cavaliers tick and flea free naturally. They’re lightweight, chemical-free, and easy to clip on. With Cavaliers, just make sure the collar sits comfortably behind their ears and doesn’t tangle with their feathering. If your Cavalier has Chiari malformation, this may not be an option if they can’t wear a collar comfortably.
5. Ultrasonic Tick Tags-Another tool to add to your flea and tick routine is an ultrasonic tick tag. There are various brands that make these small devices that clip onto your dog’s collar or harness. They emit a high-frequency pulse that humans and dogs can’t hear, but it’s designed to interfere with a tick or flea’s ability to orient themselves toward your dog.
These tags are scent-free and totally safe for sensitive dogs like Cavaliers. This type of tag is helpful during hikes, trail walks, or visits to areas known for higher tick populations. It’s a simple, noninvasive step that adds an extra layer of protection.
6. Diatomaceous Earth for Natural Flea and Tick Prevention-Food-grade diatomaceous earth is another natural tool I use as part of our flea and tick routine. It’s a fine powder made from fossilized algae that works by drying out the exoskeletons of pests like fleas and ticks. I don’t use it as a primary prevention method, but it’s a helpful layer, especially after we’ve been somewhere with higher pest exposure.
To apply, I lightly sprinkle a small amount down Stewart’s back and gently brush it into his coat, avoiding his eyes, nose, and mouth. It’s best used when your dog is dry and in a well-ventilated area. You can also use it on bedding or around baseboards during flea season as part of a regular cleaning routine.
Watch how I apply it and don’t forget to subscribe to @CavalierTipsandFun YouTube channel for more!
7. Using Garlic to Support Immune Health and Repel Fleas Naturally-Garlic might be controversial in some circles, but when used responsibly, it’s one of my go-to immune support tools. Garlic often gets a bad reputation because in 2000, they did a study on four dogs and gave them an extreme amount of garlic ( about 25 cloves a day for a 25-pound dog), and they had a bad reaction. That’s not even close to how we’d use garlic in a natural, supportive way. You can read the study here.
I started using fresh garlic years ago with Dexter, and it’s something I continue with Stewart now that he’s old enough for it. Garlic supports the immune system and helps repel fleas and ticks from the inside out. I only use fresh, organic garlic, peeled and minced about ten minutes before mealtime to allow the allicin to activate. Then I mix it into Stewart’s food. I never exceed the recommended amount and only feed garlic for up to three days in a row, followed by five to seven days off.
I never use garlic with puppies, pregnant or nursing dogs, dogs with anemia, or those with upcoming surgeries. It’s not a fit for every dog, so I always recommend checking with a holistic vet first.
Garlic Dose For Dogs: The approximate dose of fresh, organic garlic is 1/8 teaspoon for a 5 pound dog, 1/4 teaspoon for dogs between 6 and 10 pounds, 1/2 teaspoon for 11 to 15 pounds, 3/4 teaspoon for 16 to 20 pounds, and 1 teaspoon for dogs between 21 and 30 pounds. Dogs between 31 and 50 pounds can have 1 1/2 teaspoons, and those over 51 pounds can have up to 2 teaspoons.
8. Spotting and Removing Ticks and Fleas from Your Cavalier King Charles Spaniel-No matter how many prevention tools we use, I always do a hands-on check after walks or outings, especially during peak tick season. I check Stewart’s paws, armpits, ears, groin area, and the base of his tail. These are the spots where ticks love to latch on.
If I do find a tick, I remove it immediately with a tick remover or fine-point tweezers, making sure to grab close to the skin and pull straight out. Afterward, I place it in a bottle with alcohol and wash my hands. I’ve found this routine not only gives me peace of mind but also helps me stay in tune with any changes in Stewart’s skin or coat.
A Quick Note About Dexter’s Experience
As Dexter was in his late senior years and his neurological condition progressed, I started to notice the occasional flea here and there, more than we had seen in the past. His immune system wasn’t as strong, and that likely made him more vulnerable to pests. This isn’t uncommon in aging dogs or those with health challenges. Their bodies just don’t have the same defenses they once did.
I made it a daily routine to sit with Dexter and go over him carefully with a flea comb and a small jar of alcohol to catch any runners before they could become a real problem. I also stayed on top of sweeping and washing his bedding regularly. Thankfully, it never got out of control, just a flea here and there, but it reminded me how important it is to stay consistent.
It also reinforced why I’ve always chosen to avoid harsh flea treatments. With Dexter’s compromised system, exposing him to chemicals could have caused even more serious issues. Supporting his health naturally, with gentle and consistent care, was always the safest choice for him.
Final Thoughts on Natural Flea and Tick Care for Cavaliers
If you’re just starting your natural flea and tick care journey, start small. You don’t have to change everything at once. Pick one new step, try it, and see how it fits your dog’s life. Read labels. Ask questions. And most of all, give yourself grace as you navigate what feels right for you and your Cavalier.
Cavaliers are worth the extra effort, and with how sensitive they can be, choosing gentle, natural care just feels like the right thing to do.
Google Ad Below [...]Read more...
November 27, 2024Does your Cavalier King Charles Spaniel bark for attention? Maybe your Cavalier tosses a toy onto your lap, begging for a game of fetch. Or perhaps your Cavalier King Charles Spaniel barks incessantly to go outside and chase every squirrel in the neighborhood. These are classic examples of attention-seeking behavior and, while they may be funny at times, they can also become exhausting.
In this Cavalier blog, I’ll guide you through training your Cavalier to ask for attention politely or, even better, stop demanding attention altogether. But first, let me be clear. I am all about spending quality time with our dogs. Cavaliers thrive on love, play, and companionship, and I encourage plenty of bonding time. However, constant barking or pushy behaviors for attention are not things I would encourage in a dog. With positive dog training methods, good timing, and a proactive approach, we can change this demanding behavior.
Why Does My Cavalier Bark at Me for Attention?
Cavaliers are a playful breed and incredibly intelligent. They are quick learners and can learn behaviors we don’t even know we are teaching them, like barking for attention. Some Cavaliers may learn to bark for attention, paw, nudge, or give you the “look” for that snack. If they have done one or all of these things, and you gave them what they wanted, they’ve already made the connection: This behavior gets me what I want. For example, if barking speeds up dinner prep or prompts you to throw the ball, your Cavalier has been “trained” by their success.
But, don’t worry. You can change these demanding behaviors to better habits. So, let’s get started at teaching your Cavalier to be calm and quiet for the things they want.
Steps to Stop or at Least Curb Attention-Seeking Behaviors
Increase Quality Time: Cavaliers are highly social and crave interaction. You know that. That’s why they are your breed of choice, right? If your pup is constantly asking for attention, they may feel their current playtime or bonding time isn’t enough. Start by increasing their daily activities by about 50 percent. For example, if you play games with your Cavalier five times a day, bump it up to seven or eight short sessions. The same goes for walks, training, or cuddle sessions. Increase the duration or quantity of their interactive activities. And I do mean interactive vs. just placing a food toy on the floor. Those are all fine and well, but, in most cases, your Cavalier is craving your time. Read more about canine enrichment.
Get Ahead of the Demands: Observe when your Cavalier typically starts seeking attention. If they usually bark for play at 11 a.m., initiate a play session at 10:45 instead. By starting the activity before they ask, you’re rewarding their good and polite behavior rather than their pushiness.
Ignore Pushy Behaviors: This is key. When your Cavalier barks, paws, or demands attention in any way, practice the “invisible dog” technique. Avoid eye contact, verbal responses, or movement. Turn away, walk out of the room, or stay still. Once your Cavalier is quiet, calmly reengage and reward them for being polite. But, this only works if you do #1 and increase that quality time together. If you don’t do that, ignoring won’t work because their needs are not being met.
Pro Tip: Be prepared for an “extinction burst.” Your Cavalier may escalate their behavior temporarily, barking louder or pawing more persistently because the old tactics aren’t working. They are getting frustrated. Stay patient and consistent.
Reward Calm and Quiet: Every time your Cavalier is calm and quiet, offer attention, praise, or even a small treat. Reinforcing this behavior teaches them that being polite is the best way to get what they want. This is also the perfect time to initiate a game or play session with your Cavalier.
Teaching self control is a great way to help curb barking.
Patience Is Key
Changing established habits takes time, so be patient with your Cavalier and yourself. Remember, they’re simply trying to communicate their needs the only way they know how. With consistent positive dog training and a little extra quality time, you’ll soon have a polite pup who doesn’t feel the need to ask for attention because you are providing them all the attention they need and desire.
Real-Life Example: Dexter’s “Talking”
Even my sweet Dexter isn’t perfect. He’s been known to “talk” or snort to get his way, and sometimes it works because I’m not perfect, either. Not to mention, there are two other family members who have been known to reward his ask. And, when it’s rewarded, it persists. If I wanted to fully address this behavior, I’d need to follow the steps above consistently and MAKE SURE the other two members of the family do as well. But, in our home, a little talking is something we tolerate because it doesn’t bother us.
That’s the beauty of training: you get to decide what behaviors matter to you. If something doesn’t bother you, there’s no need to change it, as long as it’s not something that should be addressed like anxiety. Just remember that if you allow certain behaviors, it’s important not to complain about them later.
Check out my playlist on barking!
What You Can Do Next
Now that you have the tools to manage your Cavalier’s attention-seeking behavior, it’s time to put them into action. Start by increasing quality time with your dog, introducing play sessions before they ask for attention, and practicing the “invisible dog” technique when pushy behaviors pop up. Remember, consistency is key, and patience will help you both succeed. With time, you’ll see your Cavalier becoming more polite and less demanding, leading to a stronger bond and fewer unwanted behaviors.
What’s your dog’s favorite way to spend quality time with you?
Join our vibrant Cavalier King Charles Spaniel community on Facebook, support our dedication to pet wellness on Patreon, and stay updated with our weekly newsletter for invaluable tips and insights into raising happy, healthy pets. Together, let’s make a difference in our dogs’ lives!
Google Ad Below [...]Read more...
March 19, 2025How to Teach Your Cavalier King Charles Spaniel to “Leave It” | Positive Training for Cavaliers
Teaching your Cavalier King Charles Spaniel to “leave it” or ignore something on your cue can be lifesaving. Imagine dropping a pill in front of your Cavalier or going for a walk and passing garbage in the street. If your Cavalier King Charles Spaniel has a reliable “leave it” cue, you can easily ask him to leave it as you pick up the pill or walk past the garbage.
When I start the “leave it” training, what I want my dog to learn is that “leave it” doesn’t mean he doesn’t get something, but that I have something better. This helps to build a more reliable behavior, especially off-leash. If you only teach your dog that “leave it” means he doesn’t get something, he might just try to grab the item faster or run off with it. That’s not what we want!
As with all dog training, remember that you need to regularly practice these lessons. Training your Cavalier is not just about doing it once and then only when you need it. Reliable dog training takes time, patience, and consistency. Cavalier King Charles Spaniels, in particular, can be a bit food-driven, so keeping them engaged and excited about the reward is key.
So, be patient, consistent, and most importantly, have fun with your Cavalier while training!
Teaching Your Cavalier to Leave It Level 1
Start with a small, low-value dog treat in your closed hand, and place it about 12 inches to the side of your Cavalier’s face. Make sure your hand is at the right height, not too close to his face, but not too far away either. Let your dog see it there, and wait him out. As soon as he moves his face away or ignores the treat, say, “YES!” and reward him with an amazing treat from your other hand. Not going for the treat is a win, too! So, if you present the leave it treat hand and he doesn’t go for it, “YES!” and treat. Repeat this a few times.
When your Cavalier starts ignoring your treat hand altogether, move to Level 2.
Don’t forget to subscribe to our @CavalierTipsandFun for more!
Teaching a Dog to Leave It Level 2
Start like Level 1, but before you drop your hand, say your “leave it” cue once. Wait him out; as soon as he moves his face away or ignores the treat, say, “YES!” and treat from your other hand. Repeat. When he stops going for your hand after hearing the “leave it” cue, move to Level 3.
Training Your Cavalier to Leave It Level 3
Say your “leave it” cue and drop your hand with the low-value treat to your dog’s side, but leave your hand OPEN. If he goes for the treat, quickly close your hand. When he moves his face away, praise and reward him with a treat from your other hand. Repeat. When your Cavalier is reliably ignoring the treat in your open hand, move to Level 4.
Teaching Your Cavalier to Ignore Items Level 4
At this stage, it’s time to change things up a bit. Up until now, you’ve been using low-value, boring dog treats for the “leave it” item. Once your dog is starting to get the hang of it, it’s time to up the ante. Use tastier treats or toys as the “leave it” item, but remember, his reward needs to be even better.
You can try:
Tastier treats or food
Paper products, tissue, or paper towels
Toys
Subscribe to @RaisingYourPetsNaturally for more!
Here’s how to set it up when using a toy:
Pick a Toy: Choose a toy that your Cavalier likes but isn’t so high-value that your Cavalier would immediately grab it without hesitation. Start with something mildly exciting like a squeaky ball, fleece tuggy toy, or stuffed animal that your dog enjoys.
Set Up the Training Area: Find a quiet spot where you can focus and your dog isn’t too distracted by other things. Make sure it’s a place where you can manage your dog’s movement and reactions.
Start the Cue: Hold the toy in your hand and get your dog’s attention. Don’t get too silly. You just want him to know it’s there, with a bit of excitement.
Use the “Leave It” Cue: Once you’ve gotten his attention, say the “leave it” cue calmly. Hold the toy in front of your dog just out of reach, but don’t place it on the ground yet.
Wait for the Response: Your dog may try to lunge for the toy or show interest in it. The goal here is for him to move away or ignore it, not to grab it. If he goes for it, just swipe the toy up to your chest and ignore him and wait for him to ignore it. Then repeat the process of lowering your hand with the toy. As soon as your dog turns his head or steps away from the toy, immediately say “YES!” and give him a better reward (a tastier treat or something that’s even more valuable than the toy).
Repeat and Increase Difficulty: Repeat the exercise several times, and gradually increase the difficulty. Once your Cavalier reliably ignores the toy when it’s held in your hand, move on to placing the toy on the ground. To set this up, place the toy behind you, out of reach. This way, you can gently body block your dog if he tries to move toward it. When he turns away or ignores the toy, immediately reward him with a better treat or better toy.
Body Blocking: Body blocking involves using your own body to gently guide your dog away from a distraction, like a toy, by positioning yourself between your dog and the item. It’s important to note that body blocking is not about kneeing or being rough with your Cavalier. It’s a gentle, calm way to redirect their attention. However, some dogs may find body blocking intimidating or scary, so if your Cavalier shows signs of stress, it’s best to avoid this method and use alternative techniques for redirection.
Build Duration: As your Cavalier gets more comfortable with the “leave it” cue around toys, try holding the cue for a longer period of time. For example, you can wait for him to sit or stay before rewarding him. This increases his patience and focus during the exercise.
Training Your Cavalier to Leave Something Level 5
Place a low-value treat under your cupped hand, with your dog in front of you. Say your “leave it” cue, and wait for your Cavalier to ignore the treat. If he looks away or shows interest but doesn’t try to grab it, immediately reward him from your other hand with a better treat.
As he gets the hang of this, start showing the “leave it” treat under your cupped hand. If your dog ignores the treat, reward him from your other hand. If he tries to go for the treat, simply cup your hand over the treat again. Repeat this process, gradually raising the criteria by making the treat more tempting and testing his ability to resist.
Teaching Your Cavalier to Leave It Level 6 and Beyond
Now it’s time to make things more challenging. Increase the difficulty by adding distractions, different environments, or a variety of leave-it items. Always be mindful of your Cavalier’s current ability level, and don’t rush the process. If you find your Cavalier is struggling or making mistakes, step back and simplify the task again. You want to build confidence and reliability.
Reminders:
Never allow your Cavalier to get the “leave it” item. If you want your Cavalier to have it, you pick it up and give it to him. The goal is to teach him that ignoring the item leads to something better, not just an empty reward.
If your Cavalier is having trouble with the exercise, step back to easier levels or increase the value of the reward to keep him motivated and engaged. You can also try lowering the difficulty by using a less tempting “leave it” item to help him succeed.
The goal isn’t just for your Cavalier to avoid the item once, but to understand that when you say “leave it,” he has the chance to earn something even better. The more your dog experiences this rewarding outcome, the more reliable the behavior will become.
Pro Tips:
Keep training sessions short, positive, and fun! Don’t let the “leave it” item overwhelm or frustrate your Cavalier. If he’s struggling, simplify the task and increase the reward to keep him interested and motivated.
How Often Should You Practice the Leave It Behavior with Your Cavalier?
It is important to regularly practice “leave it” throughout the day, not just during formal training sessions. You can incorporate it during walks, around the house, or when playing. As you add distractions, make sure to reward your Cavalier for staying focused on you, especially when there are high value items around. Cavaliers are generally quick learners, but they can also get bored easily, so keep your training sessions positive and fun. Consistency and patience will pay off in the long run.
Pro Tip: Practice, practice, practice with various setups. You want your Cavalier to respond reliably to the “leave it” cue in real life situations, whether it is a dropped item, an enticing smell, or something on the floor. By practicing regularly, you ensure they will leave it without hesitation. I still reward those real life “leave its” to keep the behavior strong and consistent!
Conclusion
Practicing “leave it” regularly and in different situations helps ensure your Cavalier responds reliably when it matters most. Keep training sessions fun and rewarding, and don’t forget to reinforce real-life successes. Teaching a solid fetch and “drop it” will also complement “leave it,” giving your Cavalier even more useful skills. With consistency and patience, your Cavalier will continue to improve and make great choices in everyday life.
How is your leave it training going? I’d love to hear about it in the comments!
Google Ad Below [...]Read more...
April 29, 2025Your Cavalier King Charles Spaniel’s Teenage Phase
When you bring home a Cavalier King Charles Spaniel puppy, you are prepared for puppy breath, floppy ears, and all the adorable moments that melt your heart. What nobody talks about enough is what happens when that sweet ball of fluff hits adolescence.
Right now, Stewart, my Cavalier, is about 10 and a half months old and is in full-blown teenager mode. I can tell you firsthand that adolescence is real. Stewart has energy for days, wild bursts of zoomies, and a mischievous sparkle in his eyes that keeps me on my toes. My mom, who adores him, often comments, “He is always getting into trouble!” (Of course, to me, it is not real trouble. It is boredom, enthusiasm, and a young dog who is eager to interact and explore.)
She often compares him to my late Cavalier, Dexter, who lived to be 15 years old. In her memory, Dexter was the perfect, calm little gentleman. And he was, but only after years of growing up. It is easy to forget that Dexter had his own crazy adolescent phase, too. I still remember the day I found myself saying, “You are going to eat, you are going to potty, and you are going to bed!” Sometimes, when puppies get extra wild, it is not even about training. They are simply overtired and need help settling down. Just like toddlers, sometimes they push through their exhaustion and get even more wired.
If you are going through the teenage years with your Cavalier right now, you are not alone. And no, you did not do anything wrong. Adolescence is a natural stage in a dog’s development. In Cavaliers, it usually starts when those puppy teeth begin falling out (around four to six months old) and can last until about eighteen months, give or take depending on the dog.
During this phase, your Cavalier might:
Forget their basic training
Start jumping up more
Become mouthier and more vocal
Seem to ignore you sometimes
Have random bursts of wild energy (we call them “zoomies”)
Get into things they never bothered with before
Show frustration or impatience more easily
Does that sound familiar?
It is important to remember that your Cavalier’s brain is still developing. Just like human teenagers, they are caught between puppyhood and adulthood. Their impulse control is not fully in place yet. The good news? This phase is temporary. And your patience and guidance right now will shape your Cavalier for the rest of their life.
Here is how I am helping Stewart (and helped Dexter before him) navigate this time:
Stay Consistent with Positive Dog Training: Even if your Cavalier seems to have forgotten what “sit” or “stay” means, keep practicing. Short, daily sessions with positive reinforcement go a long way. Stewart and I do a lot of quick “name games,” sits, hand targets, and polite walking games to keep his brain engaged.
Build in Play and Enrichment: A bored adolescent dog is a mischievous dog. I make sure Stewart has plenty of fun activities like sniffy walks, find-it games, fetch sessions, and interactive toys. Play is not just fun, it is a training tool. A dog that plays with you is a dog that trusts you.
Manage the Environment: I always try to be proactive with management first. If I think Stewart might start getting rowdy or restless, I plan ahead. Before I get busy, I will take him for a nice walk, do some training or play a game before I need to settle in. Then, I’ll provide him with something to keep him busy, like a snuffle mat, chew toys or licky mat. That way, he already has something to focus on instead of looking for ways to entertain himself. Managing the environment is not about waiting for problems to pop up. It is about setting your Cavalier up for success before trouble starts.
Provide Enough Rest: After Stewart works on his snuffle mat, chew toy, or licky mat, and has had a little training or a nice walk, he is usually ready to settle. That is when he curls up for a siesta at my feet while I do my work. Remember that story about Dexter? Sometimes the wild behavior we see is not from a lack of exercise. It is from being overtired. Puppies and adolescent Cavaliers still need a lot of sleep throughout the day. Building in scheduled downtime helps them reset and recharge before they get into trouble from being too tired to make good choices.
Focus on Trust and Bonding: During a dog’s adolescence period, it is easy to get caught up in the frustrating moments when your Cavalier is ignoring you, getting too wild, or pushing boundaries. But I always try to remind myself that every interaction with Stewart is an opportunity to build our relationship. Trust and connection are even more important during this teenage stage. Adolescence is a time when Cavaliers are figuring out the world and deciding who and what they can count on. I want Stewart to know that I am always safe, fun, and trustworthy. That way, when things get tricky, like going to the veterinarian or navigating a new place, he will look to me for guidance and reassurance. The stronger the bond we build now, the more confident and connected he will be as an adult.
Keep a Sense of Humor: Adolescent dogs can be frustrating at times, no doubt about it. But it also brings some of the funniest, most joyful memories. Stewart’s goofy antics, the way he proudly carries a pinecone, his dramatic “flops” when he does not get his way, these are the moments I know I will smile about years from now.
If you are raising a Cavalier King Charles Spaniel and feeling overwhelmed by the ups and downs of adolescence, you are not alone. This stage can feel overwhelming on some days, but every patient, playful, and consistent moment you put in now is shaping your Cavalier’s future. All the work you are doing today will help your Cavalier grow into a confident, connected, and loving companion for many years to come.
If you would like more step-by-step help through this stage, I would love for you to join us in our Manners, Life Skills, and Foundation Training course. Inside the course, I walk you through building polite greetings, calm walking, settling skills, and helping your Cavalier stay more focused and connected with you. It is all about giving you the tools to guide your Cavalier through adolescence and beyond with patience, confidence, and fun.
At What Age Do Cavaliers Calm Down?
If you are raising a young Cavalier King Charles Spaniel and wondering when your Cavalier will calm down, it is a common question during the teenage phase. Cavaliers usually start to settle after they move through adolescence, which can last until around eighteen months to two years of age. Some Cavaliers might take a little longer depending on their personality and energy level.
Maturity comes with time, but it also comes with the foundation you build along the way. Positive training, daily routines, enrichment, plenty of rest, and building trust all help your Cavalier develop into a calmer and more confident companion. It is not something that happens overnight, but it does happen.
You have got this! Stay patient, stay positive, and focus on the progress you are making together. It is not about being perfect. It is about showing up, doing the work, and building a strong relationship one day at a time.
What has your Cavalier been doing lately that makes you say, “Yup, we are in the teenage stage”? I would love to hear your stories in the comments!
Google Ad Below [...]Read more...
May 23, 2025What to Do When an Off Leash Dog Approaches or Attacks Your Cavalier
Running into an off leash dog in a public area where leash laws are in place is one of those moments that gets my blood boiling. I’ve heard from too many Cavalier families who have gone through this, and sadly, I know several Cavaliers who were seriously injured. Even a couple that didn’t survive. It’s heartbreaking, it’s preventable, and we need to talk about it.
This post is for those of us doing our best to protect our dogs, especially small, gentle breeds like Cavalier King Charles Spaniels, when others decide the leash rules don’t apply to them. Whether you’re out walking your Cavalier, training, or just enjoying your day, here are real life ways to keep your dog safe and what to do if the worst happens.
Why Letting Your Dog Off Leash Puts Others at Risk
Just because your dog is friendly does not mean they should be off leash in public areas. You never know what someone else’s dog is going through. Some dogs are recovering from surgery or illness and need space. Others are working through fear or reactivity and are not ready for sudden greetings. Some are service dogs who may not be wearing a vest but are doing their job. And many dogs, Cavaliers included, simply do not want strange dogs running up to them.
This is why leash laws exist. They are there to protect everyone. Just because your dog wants to say hi doesn’t mean they should get to.
What to Do When an Off Leash Dog Approaches
There is no perfect solution that works in every situation, especially when an off leash dog charges unexpectedly. But being prepared both mentally and physically can make a real difference. These are practical ideas I have taught, used myself, and seen work in real life. While nothing is guaranteed, having a plan in place can help you stay calm, act quickly, and protect your Cavalier as best you can.
Watch the video demonstrations and don’t forget to subscribe to @RaisingYourPetsNaturally for more tips.
Teach a Sit Stay Behind You
One of the most helpful cues I teach is a sit stay with my dog positioned behind me. I start by practicing in low distraction settings and slowly build it up over time. If a dog approaches, I cue my Cavalier to sit and stay behind me, and I step forward to handle the situation. This helps my dog feel protected and keeps them from reacting or escalating the situation.
Throw Treats at the Approaching Dog
Yes, throw treats right at the dog’s face. It may sound odd, but it works. The goal is to startle the dog and interrupt their focus. Then toss more treats behind them, toward the direction they came from. This often gives you a few seconds to calmly retreat with your Cavalier. I always carry tasty treats for this reason.
Use a Traffic Cop Stance
Turn to face the dog, extend your arm out like a stop sign, and say firmly, “Stop. Go home.” Keep your Cavalier behind you and slowly back away. Some dogs will pause or hesitate if they’re unsure or not aggressive. Keep repeating the phrase and keep your hand out, as you and your Cavalier walk backwards away.
Carry an Air Horn
If your dog is comfortable with noise, an air horn can be a great deterrent. I always condition my dog to hear it at home first and pair it with treats. When needed, a quick blast can interrupt the loose dog’s approach and give you time to move away. It’s one of my go to tools, but only if your dog can handle the sound.
Use an Umbrella as a Visual Block
I train my dogs to be comfortable with umbrellas opening indoors, so they are not startled if I ever need to use one during a walk. If a dog is charging at you, pop open the umbrella toward them. The sudden motion and large shape often causes the dog to pause or back off. If necessary, you can shake it or move it toward the dog as you use a firm, go home, verbal cue.
Carry a Personal Safety Tool
Tools like pepper gel, citronella spray, taser, or even a She’s Birdie alarm can help in urgent moments. Pepper gel has more control than spray, and the alarm can attract attention or startle the other dog. Always practice with these tools and make sure your dog is not afraid of them.
Be Cautious About Picking Up Your Cavalier
It is tempting to scoop up your Cavalier, especially since they are small. But doing so can sometimes make things worse. The approaching dog may jump at you or become more aroused. Only pick up your Cavalier if you feel it will help and if you have a safe place to put them, like a truck bed, behind a fence, or even inside a garbage bin if it means protecting them. Use extreme caution if trying this.
If You’re Walking More Than One Cavalier
This is also one of the reasons I usually prefer walking one dog at a time. It helps me stay more aware, react quickly if something happens, and really connect with the dog I’m with. But I know that’s not always possible, so here’s how to stay prepared when walking more than one.
Walking multiple Cavaliers makes things trickier, especially when a loose dog starts heading your way. It can be harder to control space, stay calm, and manage multiple leashes at once. That’s why I recommend preparing a plan ahead of time if you regularly walk more than one Cavalier.
If possible, practice sit stays with each dog individually first, then gradually build up to group stays. Teach your Cavaliers that standing behind or beside you means safety. If you see a loose dog approaching, calmly guide all your Cavaliers behind you and keep their leashes in one hand while using your other hand to deter the loose dog, whether that’s with a verbal cue, a stop signal, or a safety tool.
This is also where tools like a treat toss or umbrella can really help, because they create distance without needing to physically wrangle multiple Cavaliers. And if things feel too tight, do not hesitate to turn and walk away together. Getting distance is often the safest move when you have more than one dog depending on you.
What to Do If a Dog Attacks Your Cavalier King Charles Spaniel
No one wants to think about this part, and I truly hope you never face it. But if a loose dog attacks your Cavalier, your priority becomes stopping the fight as quickly and safely as possible. This is not about hurting another dog out of anger. It is about protecting your own Cavalier King Charles Spaniel from serious harm or even death.
If you have a tool in hand, such as a stick, an umbrella, or pepper gel, use it to target the attacking dog’s face. Aim for the eyes, nose, or mouth. The goal is to interrupt the attack and create enough of a pause to safely separate the dogs. You may only have a second or two, and you need to respond fast and as hard as you can to protect your Cavalier.
If you are physically trying to break it up without a tool, one method is to grab the attacker’s back legs and swing them away from your dog. This can throw them off balance and give you a chance to create space. Do not reach for collars or faces with your hands. That is the most common way people get bitten during dog fights.
Once the dogs are separated, move your Cavalier to safety right away. If possible, secure the attacking dog so they cannot come back. Then take photos, report the incident, and document everything as soon as you can. Even if your Cavalier seems okay, a vet check is always important. Many bite wounds are deeper than they look.
Helping Your Cavalier Recover Emotionally After an Attack
This is one of the most important parts of the process, and it is often overlooked. A Cavalier who goes through a dog attack may seem fine physically, but emotionally, they can lose trust in the world around them. I have worked with dogs who suddenly freeze on walks, avoid places they once loved, or become uneasy around other dogs even from a distance.
Start by giving your Cavalier time to decompress. Skip your regular walks for a few days and let them rest in the comfort of home. The goal is to help them feel safe again while things settle emotionally and physically. Keep their day simple and supportive.
At home, bring in confidence through simple enrichment. Food puzzles, nose games, and easy trick training can help rebuild a sense of control and engagement. These games in a familiar space can make a big difference.
When you are ready to start walking again, choose quiet places where you are unlikely to run into other dogs. Early mornings, empty parking lots, or quiet nature trails can be good options. Let your Cavalier set the pace. If they want to pause and look around or head back early, that is okay.
Pay attention to the progress. If your Cavalier walks a little farther, seems more confident, or looks at you for guidance, tell them how smart they are. Praise, treat, give a chest scratch. That is how trust returns, little step by little step.
This healing process takes time. That is exactly why I created Supporting Your Sensitive Dog: Gentle Steps Toward Confidence. If your Cavalier is showing signs of fear or hesitation, this course will guide you through gentle, trust based steps to help them feel safe again.
You’re Not Overreacting
Your Cavalier deserves to walk safely. You deserve to walk without fear. And if someone chooses to ignore leash laws, you are completely within your right to protect your Cavalier, using your voice, your body, your training, or any tool you need.
So stay prepared. Be proactive. And most of all, trust your instincts. You’ve got this.
Google Ad Below [...]Read more...
May 14, 2025Kind, Reward-Based Training for Cavalier King Charles Spaniels and All Breeds
When people hear the term positive reinforcement, they sometimes picture a dog who only listens if you have food in your hand. Or they think it means never setting boundaries. I’ve had people say things like, “I don’t want to spoil my dog,” or “I heard that’s just bribing with treats.” But the truth is, positive reinforcement training is science-based, relationship-focused, and one of the most effective ways to help dogs feel confident and understand how to live successfully in our human world.
And it’s not just for Cavaliers. This approach works for every breed, every age, and every behavior challenge.
Let’s break down positive reinforcement dog training in a simple and practical way.
What Positive Reinforcement Dog Training Really Means
Positive reinforcement means adding something your dog enjoys immediately after they do a behavior you want to see again. That reward could be healthy dog treats, a toy, praise, a chance to sniff, or access to something fun. It doesn’t have to be a treat every time, but food is often the easiest and most meaningful place to start. If it’s going to be rewarding for your Cavalier, they decide. I mean, my Mom might think a slice of cherry pie is a good reward, but I don’t even like cherry pie. I’d need a slice of chocolate cake!
This type of training is grounded in how all animals learn, including us. When a behavior is followed by a good outcome, we’re more likely to do it again. Your dog sits, you give them a treat. Your dog walks calmly by your side, you let them go sniff a log. That’s positive reinforcement. You’re not spoiling them. You’re reinforcing behavior you want to see more of, and they get something pleasant in return.
How Dogs Actually Learn
Dogs don’t come into our homes already knowing how to live in them. They don’t know what “sit” means. They don’t know they shouldn’t jump on guests or grab food off the counter. Just like us, they learn by doing, and by figuring out what works.
Dogs learn through repetition. They make connections between what they do and what happens next. If they sit and a treat shows up, they’re more likely to sit again next time. That’s positive reinforcement. We’re showing them that their choices matter and that doing the thing we like leads to something they like.
When we use positive reinforcement, we’re not just trying to get obedience. We’re helping our dogs understand how to live in our world in a way that feels safe and rewarding to them. They’re not learning because they’re afraid of getting it wrong. They’re learning because they feel good getting it right.
And that’s what builds real, long-lasting behavior.
Luring Training Is Teaching—Not Bribing
At the start, we often use a food lure, like holding a treat near your dog’s nose to help them learn how to sit or lie down. We slowly move that treat in a way that encourages the action we want, like guiding their head up and back until their butt hits the ground.
That’s not bribing. It’s teaching. We’re showing them what we’re looking for.
After a few short sessions, we continue practicing the same way. Lure the sit. Reward the sit. Once the dog is starting to understand it, we ask them to follow our empty hand the same way. If they sit, we reward. Now they’re doing the behavior without seeing food first.
Once that’s going smoothly, we add the cue. Say “Sit,” move your empty hand like before, and when their butt hits the ground, reward it.
Over time, we fade the hand movement so that “Sit” becomes all they need to hear. The behavior is now on cue, and your dog learned it in a clear, kind, and effective way.
Dogs Don’t Generalize—They Need Practice in New Places
One of the biggest things people miss is that just because your dog knows how to sit in the living room doesn’t mean they know how to do it in the yard, at the vet’s office, or around a group of children. Dogs need practice in new environments. They need help when distractions are high or when they’re feeling unsure.
That might mean going back to the basics in new places. Using a treat to lure a sit at the park isn’t spoiling your dog. It’s helping them succeed in that moment. You’re helping them learn how to do something they already know, but in a place that’s harder or more distracting.
Why Positive Reinforcement Works for Cavalier King Charles Spaniels and All Breeds of Dogs
Cavaliers are sweet, sensitive, and deeply tuned in to their people. They often respond beautifully to kind guidance and struggle with harsh corrections. A raised voice, leash jerk, or even a stern look can shake their confidence and cause them to shut down.
But this isn’t just about Cavaliers.
Every dog, whether they are a bouncy Labrador, a headstrong terrier, a fearful rescue, or a playful senior, benefits from positive reinforcement dog training. You’re not just teaching skills. You’re building a good relationship. You’re helping your dog feel safe to try new things.
Positive dog training encourages curiosity instead of fear. It helps build lasting behavior in a way that feels good for both you and your dog.
The Risk of Punishment-Based Dog Training
Harsh training methods may seem like they work quickly, but they come with a huge cost. Dogs trained with physical corrections, yelling, or intimidation often show signs of stress, like lip licking, yawning, cowering, or even shutting down completely. They may stop doing the “bad” behavior, but not because they learned something better. They stop because they’re afraid to try.
Studies have shown that punishment-based dog training methods can increase anxiety and reactivity, and even lead to aggressive behavior in some dogs. It doesn’t teach what to do, it just teaches the dog what not to do, without giving them tools to succeed.
I’ve worked with so many families trying to rebuild trust after their dog was trained with punishment. That kind of fallout is hard to undo.
You Don’t Have to Carry Treats Forever
A common concern I hear is, “Will I always need food in my pocket?” The answer is no. As your dog becomes more confident and fluent in a behavior, you’ll reward less often. You’ll also start to mix in other rewards, like praise, sniffy walks, or play.
But here’s the thing, dogs, like us, still appreciate being recognized for a job well done. I still praised Dexter and gave him treats into his senior years. Not because I had to. But because I wanted to reinforce the connection we built over a lifetime of learning together.
You’re not creating a treat-dependent dog. You’re building a dog who trusts that good choices lead to good outcomes.
If you want to teach your dog real life manners in a kind, clear, and effective way, take a look at my Manners, Life Skills, and Foundation Training Course. It’s self paced, easy to follow, and designed to help your dog build everyday skills with confidence. You’ll learn how to prevent common problems before they start, teach polite behavior step by step, and create calm, positive routines that work in daily life. I personally answer questions, give feedback, and support you as you go through the course.
Why Positive Dog Training Works for Behavior Issues Too
Positive reinforcement is not just for basic training or fun dog tricks. It’s also one of the best ways to work through real behavior issues like jumping, barking, reactivity, anxiety, and fear-based behaviors.
A big part of dog behavior modification is emotion. When a dog is barking or lunging, they’re not just being “bad.” They’re usually feeling overwhelmed, scared, frustrated, or unsure. If we only try to stop the behavior without addressing how the dog feels, we’re not really helping them.
Positive reinforcement gives us a way to change those emotions. We teach our dogs that good things happen when they make calm, safe choices. Over time, they start to feel more relaxed in situations that used to be stressful. That change from fear to comfort, from confusion to understanding, is what creates real, lasting change.
Instead of just trying to stop the behavior, we ask, “What is my dog feeling?” Then, “How would I like them to feel instead?” and “What do I want them to do instead?” From there, we adjust the situation so we can meet all those needs and teach the new behavior in a kind, clear way. The more your dog practices that skill in the right setting, the more confident they become. And that’s where things really start to turn around.
What Your Dog Really Needs From You
At the heart of it all, positive reinforcement dog training is about more than treats. It’s about empathy. It’s about understanding how your dog sees the world and helping them learn in a way that clicks.
It’s about setting them up for success and guiding them toward the behaviors you want. Not through fear, but through trust, patience, and connection.
That’s what I want for Stewart. That’s what I wanted for Angel Dexter. And that’s what I want every dog to have, training that feels good, makes sense, and builds a life rooted in partnership, not power.
Keep it positive. Keep it patient. Keep it proactive.
Google Ad Below [...]Read more...
June 5, 2025How to Motivate and Train a Cavalier King Charles Spaniel
If your Cavalier King Charles Spaniel is not motivated to train, you’re not alone. This is something I hear from Cavalier families all the time: “My Cavalier is not food motivated,” or “My Cavalier just doesn’t care about training.” But in most cases, it’s not that your Cavalier doesn’t want to learn, it’s that something is getting in the way.
Here are a few common reasons your Cavalier might not be interested in training right now and what you can do to help them feel more motivated and ready to learn.
Reasons Your Cavalier Might Seem Unmotivated for Training
They are full
If your Cavalier just finished a meal or had a lot of snacks recently, they may not be interested in working for more food. Training with food rewards works best when your Cavalier is a little bit hungry, not stuffed. Try scheduling your training sessions before meals rather than after, or set aside part of their meal to use as training treats throughout the day.
They are tired
Just like us, Cavaliers have times when they are more alert and times when they just want to rest. If your Cavalier had a big play session, a long walk, or an active outing, they may need some quiet time before they are ready to focus again. Cavalier puppies especially need a lot of sleep, so training when they are rested can make a big difference. Try noticing when your Cavalier naturally seems more alert and ready to engage. That is usually the best time to practice a little training together.
They are not feeling well
If your Cavalier seems unusually uninterested in training or even in their favorite treats, that could be a sign they are not feeling well. Even mild health issues like nausea, pain, or dental discomfort can lower motivation. It is not always obvious at first, but changes in training interest can be an early clue that something is off. If this becomes a pattern, or if anything else seems different, reach out to your Cavalier’s holistic vet to rule out anything medical before moving forward with training.
Your Cavalier is overstimulated
Cavaliers take in a lot of information from their surroundings. If you are training your Cavalier in a busy or unfamiliar location, all those sights, sounds, and smells can be overwhelming. When there is too much going on, your Cavalier might not be able to focus or respond the way they usually do. This is especially common for puppies or sensitive Cavaliers who are still learning how to process the world around them.
If that happens, try moving to a quieter spot. You can even take a little break together for a sniffy walk and then go back to something really simple, like The Name Game or Hand Targeting. These familiar cues can help your Cavalier settle and build confidence again.
Your Cavalier is anxious or unsure
When a Cavalier is feeling unsure, whether it is because of a new environment, a stranger nearby, or something they cannot quite figure out, training can start to feel like too much. It is not about being stubborn or ignoring you. They are just trying to process how they feel before they can focus on learning anything new.
If your Cavalier seems nervous or anxious, the best thing you can do is slow things down. Sit with them quietly, speak gently, and let them look around without pressure. Sometimes just being there together is enough. Once they start to relax, you can offer praise and a treat or a “check it out” cue if they seem ready to explore.
The reward is not meaningful enough
When I hear that a Cavalier is not food motivated, the first thing I look at is the reward. Most of the time, it is not that your Cavalier is not food motivated. It is that the treat just does not matter enough to them at that moment. Dry biscuits or lower value treats usually do not get their attention, especially in busy or distracting places.
Start with real food. I usually go straight to meat. That might be small bits of cooked beef, turkey, or lamb. Freeze dried meat or single ingredient dehydrated treats are also great choices. These are often the best treats for Cavaliers because they are soft, tasty, and easy to eat. Just flip the bag over and check the ingredients. You want something simple that says one thing, like chicken breast or turkey. Avoid fillers or extras that do not need to be there.
You can also use freeze dried raw food, broken into tiny pieces. These are real food options and often made mostly from meat, which makes them a great choice for Cavaliers who need something healthy and high value. Many people use them during training and count them toward their Cavalier’s daily calories. It is an easy way to stay consistent with nutrition while still offering something special and rewarding.
I also avoid using liver or organ meats regularly. A little once in a while is fine, but too much liver can lead to vitamin A concerns. Some organ treats can also be too rich and cause diarrhea.
Use the right reward for the right moment
Once you find something that really works for your Cavalier, think about how and when to use it. The most rewarding treats should be saved for the harder training sessions. That might mean practicing outside, focusing around distractions, or trying something brand new. When the reward truly matters to your Cavalier, motivation naturally improves.
If they get their favorite treats for easy things like sitting in the living room, there is not much reason to work harder when training becomes more challenging. Save the cooked beef, freeze dried meat, or other special rewards for those moments when your Cavalier needs a little extra encouragement. Matching the value of the reward to the difficulty of the task helps keep your Cavalier engaged and willing to try.
Explore other forms of motivation
Not every Cavalier is motivated by food alone. Some respond better to toys, praise, or playful interaction. If your Cavalier enjoys toys, try using a favorite squeaky, a soft tug toy, or a quick game of fetch. Some Cavaliers are especially drawn to textures like fleece or rabbit fur, which can make a toy feel more exciting. Whatever it is, keep it put away when you are not training so it stays special and does not lose its value. Other Cavaliers are more motivated by attention and connection. A cheerful voice, a smile, or light praise can sometimes go further than anything you can hold in your hand. At the end of the day, your Cavalier is the one who decides what feels rewarding. It is not about what we think should work. It is about what actually matters to them.
Your Cavalier can learn with the right support
If your Cavalier is not showing interest in training, it does not mean something is broken. It just means they need a little help feeling ready. That might be adjusting the environment, changing up the reward, or simply giving them time to feel more confident.
This is exactly the kind of thing we work on in my Manners, Life Skills and Foundation Training Course. If you are feeling unsure about how to move forward, I will guide you through simple, kind steps to help your Cavalier feel more focused and connected. You will learn how to use rewards that actually matter to your Cavalier, when to train, and how to build everyday habits that stick. It is self-paced, easy to follow, and I am always there if you need support.
Your Cavalier wants to connect with you. With a little support and the right setup, they will start to feel more engaged and eager to participate. You do not need to rush the process. Keep it light, keep it kind, and celebrate the small wins. They all add up.
Google Ad Below [...]Read more...
Google Ad Below

Surviving Your Cavalier King Charles Spaniel’s Adolescence | At What Age Do Cavaliers Calm Down? (Early access for our Patreon community)
Your Cavalier King Charles Spaniel’s Teenage Phase

When you bring home a Cavalier King Charles Spaniel puppy, you are prepared for puppy breath, floppy ears, and all the adorable moments that melt your heart. What nobody talks about enough is what happens when that sweet ball of fluff hits adolescence.
Right now, Stewart, my Cavalier, is about 10 and a half months old and is in full-blown teenager mode. I can tell you firsthand that adolescence is real. Stewart has energy for days, wild bursts of zoomies, and a mischievous sparkle in his eyes that keeps me on my toes. My mom, who adores him, often comments, “He is always getting into trouble!” (Of course, to me, it is not real trouble. It is boredom, enthusiasm, and a young dog who is eager to interact and explore.)
She often compares him to my late Cavalier, Dexter, who lived to be 15 years old. In her memory, Dexter was the perfect, calm little gentleman. And he was, but only after years of growing up. It is easy to forget that Dexter had his own crazy adolescent phase, too. I still remember the day I found myself saying, “You are going to eat, you are going to potty, and you are going to bed!” Sometimes, when puppies get extra wild, it is not even about training. They are simply overtired and need help settling down. Just like toddlers, sometimes they push through their exhaustion and get even more wired.
If you are going through the teenage years with your Cavalier right now, you are not alone. And no, you did not do anything wrong. Adolescence is a natural stage in a dog’s development. In Cavaliers, it usually starts when those puppy teeth begin falling out (around four to six months old) and can last until about eighteen months, give or take depending on the dog.
During this phase, your Cavalier might:
- Forget their basic training
- Start jumping up more
- Become mouthier and more vocal
- Seem to ignore you sometimes
- Have random bursts of wild energy (we call them “zoomies”)
- Get into things they never bothered with before
- Show frustration or impatience more easily
Does that sound familiar?
It is important to remember that your Cavalier’s brain is still developing. Just like human teenagers, they are caught between puppyhood and adulthood. Their impulse control is not fully in place yet. The good news? This phase is temporary. And your patience and guidance right now will shape your Cavalier for the rest of their life.
Here is how I am helping Stewart (and helped Dexter before him) navigate this time:
- Stay Consistent with Positive Dog Training: Even if your Cavalier seems to have forgotten what “sit” or “stay” means, keep practicing. Short, daily sessions with positive reinforcement go a long way. Stewart and I do a lot of quick “name games,” sits, hand targets, and polite walking games to keep his brain engaged.
- Build in Play and Enrichment: A bored adolescent dog is a mischievous dog. I make sure Stewart has plenty of fun activities like sniffy walks, find-it games, fetch sessions, and interactive toys. Play is not just fun, it is a training tool. A dog that plays with you is a dog that trusts you.
- Manage the Environment: I always try to be proactive with management first. If I think Stewart might start getting rowdy or restless, I plan ahead. Before I get busy, I will take him for a nice walk, do some training or play a game before I need to settle in. Then, I’ll provide him with something to keep him busy, like a snuffle mat, chew toys or licky mat. That way, he already has something to focus on instead of looking for ways to entertain himself. Managing the environment is not about waiting for problems to pop up. It is about setting your Cavalier up for success before trouble starts.

Are you looking for simple, positive ways to guide your Cavalier through training and daily life? 📘 These are some of the books I created for real pet parents who want to stay organized, consistent, and connected. Available now in Amazon. - Provide Enough Rest: After Stewart works on his snuffle mat, chew toy, or licky mat, and has had a little training or a nice walk, he is usually ready to settle. That is when he curls up for a siesta at my feet while I do my work. Remember that story about Dexter? Sometimes the wild behavior we see is not from a lack of exercise. It is from being overtired. Puppies and adolescent Cavaliers still need a lot of sleep throughout the day. Building in scheduled downtime helps them reset and recharge before they get into trouble from being too tired to make good choices.
- Focus on Trust and Bonding: During a dog’s adolescence period, it is easy to get caught up in the frustrating moments when your Cavalier is ignoring you, getting too wild, or pushing boundaries. But I always try to remind myself that every interaction with Stewart is an opportunity to build our relationship. Trust and connection are even more important during this teenage stage. Adolescence is a time when Cavaliers are figuring out the world and deciding who and what they can count on. I want Stewart to know that I am always safe, fun, and trustworthy. That way, when things get tricky, like going to the veterinarian or navigating a new place, he will look to me for guidance and reassurance. The stronger the bond we build now, the more confident and connected he will be as an adult.
- Keep a Sense of Humor: Adolescent dogs can be frustrating at times, no doubt about it. But it also brings some of the funniest, most joyful memories. Stewart’s goofy antics, the way he proudly carries a pinecone, his dramatic “flops” when he does not get his way, these are the moments I know I will smile about years from now.
If you are raising a Cavalier King Charles Spaniel and feeling overwhelmed by the ups and downs of adolescence, you are not alone. This stage can feel overwhelming on some days, but every patient, playful, and consistent moment you put in now is shaping your Cavalier’s future. All the work you are doing today will help your Cavalier grow into a confident, connected, and loving companion for many years to come.
If you would like more step-by-step help through this stage, I would love for you to join us in our Manners, Life Skills, and Foundation Training course. Inside the course, I walk you through building polite greetings, calm walking, settling skills, and helping your Cavalier stay more focused and connected with you. It is all about giving you the tools to guide your Cavalier through adolescence and beyond with patience, confidence, and fun.
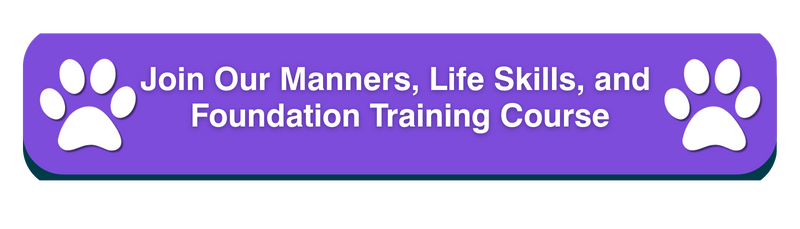
At What Age Do Cavaliers Calm Down?
If you are raising a young Cavalier King Charles Spaniel and wondering when your Cavalier will calm down, it is a common question during the teenage phase. Cavaliers usually start to settle after they move through adolescence, which can last until around eighteen months to two years of age. Some Cavaliers might take a little longer depending on their personality and energy level.
Maturity comes with time, but it also comes with the foundation you build along the way. Positive training, daily routines, enrichment, plenty of rest, and building trust all help your Cavalier develop into a calmer and more confident companion. It is not something that happens overnight, but it does happen.
You have got this! Stay patient, stay positive, and focus on the progress you are making together. It is not about being perfect. It is about showing up, doing the work, and building a strong relationship one day at a time.
What has your Cavalier been doing lately that makes you say, “Yup, we are in the teenage stage”? I would love to hear your stories in the comments!
|
|
|
|
Popular Blogs
February 26, 2025Cavalier King Charles Spaniel Heart Disease
Mitral Valve Disease (MVD) is something every Cavalier King Charles Spaniel parent should be familiar with. Sadly, this condition is extremely common in the Cavalier breed, but early awareness and proper management can greatly improve a Cavalier’s quality of life. In this blog, we’ll cover what MVD is, why Cavaliers are at risk, how the disease is staged, and which supplements can help support a healthy heart.
A heartfelt thank you to Lisa Davila, BS in Biomedical Science and Hospital Manager at Aggieland Animal Health Center in College Station, Texas, for helping me put together this article. Lisa has not only dedicated her career to animal health but has also been a loving mom to many Cavalier King Charles Spaniels. Her knowledge and experience are truly invaluable!
Understanding Mitral Valve Disease (MVD) in Cavaliers
Mitral Valve Disease (MVD) is a degenerative condition that affects the mitral valve of the heart. The mitral valve is responsible for ensuring blood flows properly between the left atrium and left ventricle. Over time, this valve can weaken and leak, allowing blood to flow backward into the atrium. This puts additional strain on the heart, eventually leading to heart enlargement and, in later stages, congestive heart failure (CHF).
MVD is considered a slow-progressing disease, but it varies from dog to dog. Some Cavaliers may live for years with a mild heart murmur, while others may progress more rapidly. Since MVD is so common in the breed, Cavaliers should be closely examined (cardiac auscultation) annually, to determine if they have a murmur. The presence of a murmur is often the first sign that a dog has degenerative valve disease.
Why Are Cavaliers at Risk of MVD?
Cavalier King Charles Spaniels are unfortunately predisposed to MVD. While any breed can develop valve disease, Cavalier King Charles Spaniels are at the greatest risk for developing degenerative mitral valve disease. Studies have shown that over 50% of Cavaliers develop a heart murmur by the age of 5, and by age 10, that number jumps to nearly 100%.Because MVD has a strong genetic component in Cavaliers, responsible breeding practices are essential. Responsible Cavalier King Charles Spaniel breeders ensure their breeding dogs undergo echocardiograms conducted by board-certified cardiologists. When considering a puppy, both parents should have cardiologist-issued heart clearances and be at least 2.5 years old at the time of breeding. Additionally, all four grandparents should be over the age of 5 and heart-clear. However, even with careful breeding, the risk remains high in the breed.
The Stages of MVD
MVD is typically classified into different stages based on its progression. Early detection and monitoring are crucial to managing the disease effectively.
Stage A – Dogs at risk for MVD but without any current signs (e.g., all Cavaliers are considered Stage A at birth because of their predisposition).
Stage B1 – A veterinarian detects a heart murmur, but there is no evidence of heart enlargement on X-rays or echocardiograms.
Stage B2 – A heart murmur is present, and imaging confirms heart enlargement. At this stage, medication such as Vetmedin (pimobendan) is often started to help delay the onset of congestive heart failure.
Stage C – Congestive heart failure (CHF) is present, meaning the heart can no longer compensate for the disease. Symptoms such as coughing, lethargy, and difficulty breathing may be noticeable. Medications are necessary to help manage the condition.
Stage D – End-stage CHF, where symptoms become harder to control even with medications.
Once a dog reaches Stage B2, most cardiologists recommend starting treatment to slow disease progression. Regular checkups and echocardiograms help ensure the right treatment plan is in place.
The Truth About Grain-Free Diets and Heart Disease in Cavaliers
With all the discussion surrounding Mitral Valve Disease (MVD) in Cavaliers, you may have come across concerns about grain-free diets and their potential link to heart disease. It’s important to separate the headlines from the facts when it comes to feeding our Cavaliers the best diet for heart health.
The debate about grain-free dog food largely stems from concerns about dilated cardiomyopathy (DCM), a condition where the heart muscle weakens, leading to poor function and potential heart failure. While DCM is a serious disease, the concern over grain-free diets has often been misinterpreted. The issue isn’t necessarily the lack of grains but rather the high levels of starchy carbohydrates like peas, lentils, legumes, and potatoes that are often used as substitutes in processed grain-free kibble.
Cavaliers are already predisposed to MVD, not DCM, which is a different heart condition with different causes. However, diet still plays a critical role in supporting heart health. The best way to provide a heart-healthy diet for your Cavalier is to focus on fresh, whole foods rich in high-quality animal proteins rather than relying on highly processed kibble, whether it contains grains or not. Read more about feeding your Cavalier a fresh diet.
Dr. Karen Becker explains it best: “The problem with grain-free formulas isn’t the lack of grains. At a minimum, it’s the high level of starchy carbohydrates coupled with the extreme high-heat processing methods used to produce these diets.”
Rather than worrying about whether a diet is labeled as “grain-free,” focus on feeding a fresh, balanced diet with high-quality proteins, healthy fats, and low-glycemic vegetables. Rotating proteins and using whole-food ingredients can help ensure your Cavalier gets the nutrients they need to support a healthy heart.
If you’re unsure about your dog’s diet, seek guidance from a veterinarian with a strong background in canine nutrition, not just one who sells prescription diets in the clinic. A certified veterinary food therapist (CVFT) can be a great resource when designing a diet that supports heart health while avoiding unnecessary fillers.
A well-balanced, species-appropriate diet can play a key role in keeping your Cavalier’s heart strong and healthy for years to come.
Heart-Healthy Supplements for Cavaliers with MVD
While MVD cannot be cured, a combination of medications, lifestyle management, and supplements can help support heart function and overall well-being. Below are some key supplements that may benefit Cavaliers with or at risk for MVD:
MCT Oil (Medium-Chain Triglycerides) – Provides an alternative energy source for the heart muscle. One recommended brand is Natural Force Organic MCT Oil (1 tsp daily with food). Before giving your Cavalier coconut oil, please read this article on MCAD in the Cavalier.
Amino Acids (Lysine, Methionine, L-Carnitine, Taurine) – Help maintain heart muscle contractility and serve as antioxidants.
Omega-3 Fatty Acids – Reduce inflammation, decrease clot risk, help prevent heart muscle loss, and support healthy blood pressure. Nordic Naturals Omega Pet Liquid is a high-quality option.
Vitamin E – Acts as both an antioxidant and anti-inflammatory.
Magnesium – Plays a crucial role in heart muscle contraction and maintaining a healthy heart rhythm.
Coenzyme Q10 (CoQ10) – A powerful antioxidant that supports heart function. Life Extension 100 mg capsules are a great choice.
Recommended Supplement Blends
If you prefer a multi-ingredient supplement, these options are formulated specifically for heart health:
Rx Vitamins for Pets Formula CV – Includes amino acids, magnesium, Vitamin E, CoQ10, and hawthorn berry extract (safe unless the dog is on Vetmedin).
VetriScience Cardio Strength Capsules – Similar to the Rx Vitamins formula but without hawthorn berry extract, making it safe for all MVD stages and medications.
Recap & Common Questions About MVD in Cavaliers
Mitral Valve Disease (MVD) is a serious but manageable heart condition that affects many Cavalier King Charles Spaniels. Early detection, responsible breeding, proper veterinary care, and supportive supplements can all play a role in keeping your Cavalier’s heart as healthy as possible.
What are the early signs of MVD in Cavaliers?
The first noticeable symptom is often a heart murmur, detected during a cardiologist visit. As the disease progresses, signs can include coughing, fatigue, labored breathing, and reduced exercise tolerance.
How long can a Cavalier live with mitral valve disease?
Many Cavaliers live for years after an MVD diagnosis, especially with early detection and proper management. While every dog is different, with the right veterinary care, medications, and supplements, Cavaliers can still enjoy a good quality of life.
What are the final stages of MVD in dogs?
In the later stages, MVD leads to congestive heart failure (CHF). Symptoms include severe coughing, difficulty breathing, lethargy, fainting, and fluid buildup in the lungs or abdomen. At this stage, medication and veterinary support are essential for comfort.
How do you treat MVD in Cavaliers?
Treatment typically includes veterinary-prescribed medications to support heart function and manage symptoms. Additionally, heart-healthy supplements, such as taurine, CoQ10, and omega-3 fatty acids, can provide extra support. Feeding a fresh, species-appropriate diet may also contribute to overall heart health.
Final Thoughts
A heart-healthy fresh diet, proper weight management, and the right combination of supplements can help support your Cavalier’s heart at any stage of MVD, even before a murmur is detected. Early intervention and regular veterinary care are key to helping our beloved Cavaliers live longer, healthier lives.
A big thank you to Lisa for sharing her knowledge on this topic! If you have any questions, feel free to ask, and don’t forget to check out Lisa and Jiminy on Instagram!
Google Ad Below [...]Read more...
April 15, 2024Cavalier King Charles Spaniel Potty Training
Congratulations on welcoming a Cavalier King Charles Spaniel into your life! They’re such charming and affectionate dogs, full of warmth and love. As a fellow Cavalier mom and positive dog trainer, I’m thrilled to share my experience on the best way to potty train a Cavalier puppy. Let’s jump right in to how to successfully housebreak your Cavalier King Charles Spaniel puppy.
I love puppies! And Cavalier puppies are just some of the cutest little things ever! There’s nothing quite like their sweet kisses, puppy breath, and zest for life! But it’s not all puppy kisses; we also must potty train our Cavaliers. Nobody likes an untrained dog.
One common question I get from Cavalier followers is how to best potty train their puppy. I’ve seen plenty of discussions about potty accidents in Cavalier King Charles Spaniel groups, and I’m here to share some potty training tips with you.
First things first. Let’s start by being realistic. Contrary to what some may suggest, potty training a puppy in a matter of days is not realistic. It’s important to realize that puppies, just like human babies, need time to learn and gain control over their bladders. So, if you’re expecting your Cavalier to hold it for hours after just a few days of training, you are setting your pup and yourself up for failure.
My own Cavalier, Dexter, wasn’t fully potty trained in a mere five days, and I’m perfectly okay with that. I prioritized consistent management and frequent potty breaks, which ultimately led to just a couple of accidents in the house. The key is to prevent accidents by being proactive, not reactive.
What’s the best way to potty train your Cavalier puppy?
It all comes down to three essential things: supervision, frequent potty breaks, and confinement when you can’t actively watch them. The goal is to reduce the chances of accidents happening indoors.
When it comes to supervision, it’s eyeballs on! This means keeping a watchful eye on your puppy at all times, ensuring that you’re there to rush them outside if it looks like they are about ready to go. You can use things like baby gates, leashes, shut doors, or X-pens so that you can keep your eyes on them at all times.
Subscribe to @CavalierTipsandFun on YouTube!
How Often Should You Take Your Puppy Potty?
As for how often to take your puppy potty, it really depends on their age and activity level. Active puppies may need to go out every 15–30 minutes, while older dogs can typically hold it for longer periods. The key is to stay ahead of the game and take your puppy out whenever you notice a change in their behavior or activity. A change in behavior or activity signals that it’s time for a bathroom break. For example, if your puppy just had a bout of puppy zoomies, out to potty we go. Did your puppy wake up from a nap? Out to potty we go. By not waiting for your puppy to ask to go out or have an accident, you are well on your way to a potty-trained dog.
When it comes to crate training, make sure the crate is just the right size to discourage accidents. The crate should be large enough for your pup to stand and lie down comfortably, but not so large that they can use one corner as a bathroom.
Whether you have a fenced yard or not, leash your puppy. This gives you the opportunity to reward your puppy for going potty outside. You will be right there to praise your puppy, give him a snack, and tell him just how smart he is. It also leads to my next potty training tip: teaching your Cavalier to potty on cue!
Teaching your Cavalier to potty on cue is a must in my book. Imagine being able to take your dog outside just before the rainstorm and ask him to pee and poo, and he does! This useful behavior isn’t just fantastic for potty training your dog; it’s incredibly convenient in daily life. The keys to teaching your Cavalier to eliminate on cue are good management, timing, and your reward. By associating a word for peeing with a separate word for defecating, you can start to teach your puppy to do either when requested.
Subscribe to @CavalierTipsandFun
Teaching Your Cavalier to Potty on Cue
Here’s how to get started:
Begin the training process in the morning, when your pup wakes up. Arm yourself with some delicious treats, leash up your Cavalier, and head outside to his favorite potty spot.
Stay close and pay attention to your puppy. Stay about 6’, so it’s not just a sniffing fest; the goal is to get him to eliminate before a big walk, play, or sniff. Pay close attention to your Cavalier’s body language. Watch for subtle cues like sniffing, circling, or squatting, which indicate he’s about to eliminate. As soon as you see a sign, use your potty cue, such as “Go potty,” and wait patiently. When your pup starts to do his business, praise quietly, and after he’s finished, give him big praise and rewards. You want to make sure you don’t interrupt the potty process by rewarding too soon.
If your dog typically follows up with a poop, repeat the process with your poop cue, like “Go poop-poop,” and reward him once he’s finished.
After your Cavalier has finished his business, it’s time for the next reward: fun! Whether it’s a walk, playtime in the yard, or simply enjoying the fresh air, make sure to give your pup some extra time to enjoy himself before heading back indoors. This helps reinforce the idea that going potty leads to enjoyable activities.
Repeat this routine each time you take your Cavalier outside, even if you’re planning on going for a walk. By always pairing potty time with rewards, you’ll motivate your pup to go more quickly.
As your Cavalier starts to make the connection between potty on cue and familiar surroundings, gradually introduce the cue in different environments, such as the park or during walks. This helps your dog understand the cue in any situation, ensuring they respond reliably wherever you are.
With patience, consistency, and plenty of positive reinforcement, you can teach your Cavalier King Charles Spaniel to potty on cue, making potty training easier.
Bell Training Your Cavalier King Charles Spaniel Puppy
While some love doggie doorbell training or puppy pads, I prefer to focus on methods that teach puppies to potty outside, not inside or on “things.” I find these methods tend to confuse puppies. Potty pads or litter boxes are teaching the puppy to potty on things that happen to be indoors. This could be a potty pad, but it also could end up being your favorite blanket.
As far as bell training goes, I’m not a fan of encouraging demanding behavior in dogs. Teaching them to ring bells to go outside may inadvertently lead to them using this to not only tell us they need to potty, but also that they may want to go outside to chase squirrels.
I believe in keeping potty training simple and straightforward, focusing on reinforcing the desired behavior of outdoor elimination. By keeping things simple and staying consistent, we can focus on potty training without having to rely on pee pads or bells.
In the end, potty training your Cavalier King Charles Spaniel is all about patience, consistency, and a whole lot of love. By following these tips and staying diligent, you’ll set your new puppy up for success.
Your comments and questions are always welcome below.
Join our vibrant Cavalier King Charles Spaniel community on Facebook, support our dedication to pet wellness on Patreon, and stay updated with our weekly newsletter for invaluable tips and insights into raising happy, healthy pets. Together, let’s make a difference in our dogs’ lives!
Google Ad Below [...]Read more...
May 29, 2024Natural Diet for Cavalier King Charles Spaniel
Dexter’s Food Journey with Raw and Homemade Food
Dexter, my Cavalier King Charles Spaniel, was a raw-fed puppy. However, because I wasn’t sure how to do it properly, and I was unaware that there were premade raw foods on the market, I fed him kibble with food toppers. After learning about how to balance a fresh dog food diet, I started to home cook for him when he was around two. Then, when he was about four, I transitioned him to a DIY raw diet. Through this journey with Dexter, I’ve learned about creating a nutritious and tailored diet that meets his unique needs. Now, I’m excited to pass along my tips and thoughts on feeding your Cavalier King Charles Spaniel. Let’s dive in!
Natural diet for Cavalier King Charles Spaniels
If you’re anything like me, you’re always on the lookout for the best pet products, natural dog grooming supplies, and the healthiest dog food brands for your Cavalier. One of the most important aspects of your Cavalier’s well-being is their diet. Dogs are natural carnivores, made to thrive on a diet of fresh meat. This means a species-appropriate diet is key to their health and vitality.
Understanding Species-Appropriate Nutrition
Let’s think about our dogs’ ancestors for a moment. They thrived on a diet of raw meat, bones, and organs. Today, we can recreate this natural diet with a raw food approach, using fresh, high-quality ingredients that focus on what dogs are meant to eat. For your Cavalier King Charles Spaniel, in a nutshell, this means focusing on a diet that’s about 90 percent meat, bone, and organ, with the remaining 10 percent coming from fruits and vegetables. This balance provides the essential nutrients and fiber they need to stay healthy. Personally, I feel if you aren’t able to go raw, this diet can also be cooked. You just would need to provide the calcium from the bones in another form, since dogs cannot eat cooked bones.
Don’t forget to subscribe to @CavalierTipsandFun for more!
The Problem with Processed Dry Kibble
Now, dry kibble. It’s processed at high temperatures, which takes away almost all the moisture and nutrients from the ingredients. Often, kibble is made with low-quality ingredients and fillers that don’t give your dog the nutrients they need. The lack of moisture in kibble can also lead to chronic dehydration, affecting everything from kidney function to skin and coat health. Plus, since kibble is made to last a long time, the ingredients can go rancid quicker than you might think, making it even less nutritious for your pup.
The Importance of Moisture in Your Dog’s Diet
Moisture is a crucial part of your dog’s diet. In the wild, dogs get most of their hydration from the food they eat. Fresh, raw diets naturally provide the moisture that kibble just can’t. This is essential for your dog’s digestion, kidney health, and overall well-being. By feeding them fresh, high-quality meat and vegetables, you’re making sure they stay hydrated naturally, without having to depend solely on drinking water.
Google Ad Below
Finding the Best Diet for Your Cavalier King Charles Spaniel
When it comes to our Cavaliers, there’s no one-size-fits-all solution. Every dog is unique, with their own health needs, behaviors, and lifestyle. Personally, I’m a big advocate for variety. This could be in the form of different proteins, suppliers or even a nice pre-made raw or mix. I steer clear of dry pet food altogether unless I’m using freeze dried food for dog training treats. For me, a balanced DIY raw diet for Dexter is the way to go. It’s fresh, it’s healthy, and I can tailor and tweak it to Dexter’s needs.
Why a Raw Food Diet is Ideal for Most Cavalier King Charles Spaniels
A raw food diet is as close to a natural diet as you can get for your Cavalier. It includes raw meat, bones, and organs, providing essential vitamins and minerals often lost in commercial dog foods. This diet can improve your Cavalier’s skin and coat health, immune system, and help maintain a healthy weight. As I mentioned earlier, I think adding an approximately 10 percent mix of fruits and vegetables is a great way to add a nutritional boost to the bowl. By avoiding the fillers and artificial additives found in many commercial foods, we ensure our dogs get the best nutrition possible.
Homemade Raw or Cooked Food: Personalized Nutrition for Your Cavalier
One of the best ways to ensure your Cavalier King Charles Spaniel is eating the healthiest diet is to make their food at home. This way, you control the quality of the ingredients and can tailor the meals to your dog’s specific needs. Homemade meals are especially beneficial if your Cavalier is a picky eater or has food allergies. Just remember to balance their diet properly to include all necessary nutrients. Whether your dog has allergies, digestion issues, or any other specific needs, you can tweak their diet to meet their needs.
Feeding Your Cavalier a Grain-Free Diet
You might have heard that grain-free foods are bad for Cavaliers because they were thought to have caused Dilated Cardiomyopathy (DCM). In 2019, the FDA released a list of grain-free pet foods that had people swearing that grain-free dog food was bad. But, guess what? It’s really not the case. In fact, in 2022 the FDA announced on their website there wasn’t a solid link between grain-free diets and DCM.
Feeding your dog grain-free can actually be a good choice for your Cavalier. But things get tricky if you are looking at a purchased grain-free alternative, particularly a dry kibble. When you’re reading the ingredient panel of a dog food (yes, read those labels), watch out for ones loaded with peas, lentils, legumes, seeds, and/or potatoes. Even if the front of the bag screams “meat-first,” it might sneak in a bunch of carbs and starches that aren’t ideal. According to experts, such as Dr. Karen Becker, it’s not about cutting out grains—it’s about making sure our pets aren’t eating too many starchy fillers. So, bottom line? Go back to that 90 percent meat recommendation.
Feeding Your Cavalier King Charles Spaniel Puppy
When it comes to feeding your Cavalier King Charles Spaniel puppy, it’s essential to consider their unique nutritional needs as they grow. If you’re not quite sure about the specifics of puppy nutrition, it’s perfectly okay to rely on trusted commercial brands known for their expertise in creating a balanced diet for puppies.
A commercial raw puppy food will include the essential proteins, fats, and calcium your puppy needs to develop strong bones. The key is to ensure whatever you choose is well-rounded and provides all the nutrients your Cavalier puppy requires during the puppy life stage.
Maintaining a Healthy Weight
Keeping your Cavalier at his ideal weight is super important. Maintaining a healthy weight isn’t just about good looks, but their health. Extra weight can contribute to health issues like joint problems and heart disease. The breed standard says they should weigh between thirteen and eighteen pounds. But, Cavaliers can vary a lot in size. Take Dexter, for instance. He’s a bit of a big guy, weighing his ideal weight at a healthy twenty-nine pounds. So, how do you know if your Cavalier is at the right weight? It’s all about getting your hands on your dog. Run your fingers lightly over their ribcage; you should be able to feel their ribs without pressing too hard. If they’re too prominent, they might be on the thin side. But if you can’t feel them at all, or if their waistline has disappeared, they might be carrying a few extra pounds. Just keep an eye on their overall body shape, and remember, every Cavalier is unique!
How Often to Feed Your Cavalier King Charles Spaniel
Consistency is key when it comes to feeding your Cavalier. Establishing a regular feeding schedule helps regulate their metabolism and digestion. Typically, feeding your Cavalier twice a day, in the morning and evening, works well. For puppies, more frequent meals might be necessary to meet their higher energy demands. I actually feed Dexter three times a day, mainly due to the fact that he gets so much food, I prefer to space it out.
Adding Supplements and Vitamins
Even with a well-balanced diet, supplements can play an essential role in your Cavalier’s health. Omega-3 fatty acids can enhance skin and coat health, probiotics can aid digestion, and joint supplements can support mobility. Always consult your Cavalier’s vet before adding new supplements to ensure they’re necessary and safe. When possible, opt for real food supplements vs. synthetic.
Food Allergies in Cavalier King Charles Spaniels
If your Cavalier has allergies, a limited-ingredient fresh diet can be incredibly beneficial. Before jumping brands, I would suggest going through a pet food elimination diet to identify triggers. Once you know what your Cavalier is allergic to, you can create a personalized diet just for him. You can read more about how and why a pet food elimination diet is helpful on my other blog, right here.
Safe Fruits and Vegetables to Feed Your Cavalier
Things like carrots, broccoli, and kale can be great sources of extra nutrients and fiber. And don’t forget the powerhouse of antioxidants fruits like blueberries, strawberries, pomegranates, and apples can provide. For best digestion, blitz them up! Introduce all new foods slowly and keep an eye on what works for your dog.
Transitioning to a Raw Food Diet
Transitioning your Cavalier to a raw food diet should be done gradually to avoid digestive upsets. Start by introducing small amounts of raw food while slowly decreasing their current food. A 75 percent and 25 percent switch usually works well. Over a week or two, increase the raw portion until it completely replaces their old diet.
Choosing the Best Raw Food Brands
Selecting high-quality raw food brands for your Cavalier ensures they get balanced and nutritious meals. Personally, I look for brands that offer meats that are antibiotic and hormone free. Ideally, any fruits and vegetables will be organic. Opt for whole foods vs synthetics when possible. But, it will be a balancing act based on what’s available to you and your budget. As I mentioned earlier, shoot for approximately 90 percent meat, bone, and organ. A few raw brand choices to consider include BJ’s Raw, Raw Paws Pet Food, Raw Wild, We Feed Raw, Primal, Vital Essentials, Smallbatch, Raw Bistro and Steve’s Real Food.
A Healthy Diet Can Improve the Immune System, Skin, and Coat Health
By providing your Cavalier with a balanced raw or homemade diet you’re not just filling their bowl, you’re nurturing their well-being from the inside out. Fresh diets, whether raw or homemade, are rich in unprocessed ingredients, offering a higher concentration of vital nutrients compared to heavily processed kibble. Fresh foods do not have the fillers and additives found in kibble, making them easier for dogs to digest and absorb. Because of this, fresh food promotes better immune function, healthier skin, and a shinier coat, making them the ideal choice for your Cavalier.
By focusing on a fresh, natural diet tailored to your Cavalier King Charles Spaniel’s specific needs, you’re setting them up for a long, healthy, and happy life. Remember, my goal is to offer guidance and support to help you navigate the journey of pet nutrition, without any judgment. Let’s work together to ensure the best possible care for you and your Cavalier!
Your comments and questions are always welcome below.
Join our vibrant Cavalier King Charles Spaniel community on Facebook, support our dedication to pet wellness on Patreon, and stay updated with our weekly newsletter for invaluable tips and insights into raising happy, healthy pets. Together, let’s make a difference in our dogs’ lives!
Google Ad Below [...]Read more...
May 14, 2024Hot Weather Tips for Cavalier King Charles Spaniels
People often think of summer as a good time to get out and about with our Cavaliers. As a dog-friendly travel blogger, I’m often pitched ideas and stories about taking Dexter to X outdoors, even in July or August. But, the reality is, that’s usually just too darn hot for my now 14.5 year-old Cavalier King Charles Spaniel, Dexter.
He’s always run a bit hot, but now, as a senior and with MVD, the summer heat is just not ideal for him. But, it’s not just Dexter. Summer heat can pose health issues such as sunburn and heatstroke. Today, I’m going to jump into some ideas on how to keep your Cavalier King Charles Spaniel cool and active during the summer or warm months.
Cavalier King Charles Spaniels and Heat Stroke
Heatstroke is a serious concern for all dog families, particularly for breeds like the Cavalier King Charles Spaniel, which can be more susceptible due to their flat-faced (brachycephalic) nature. Any dog, any breed, and any age can develop heat stroke, even on cool days! The VetCompassTM conducted a study in 2016 regarding the risk factors for heat-related illness (HRI):
Breeds with the highest incidence of HRI included the Chow Chow, Bulldog, French Bulldog, Dogue de Bordeaux, Greyhound, Cavalier King Charles Spaniel, Pug, and the Golden Retriever.
Dogs at or above the mean adult body weight for their breed/sex showed an increased risk of HRI compared to dogs below the mean body weight.
Dogs over 12 years old had the greatest odds of HRI compared to dogs under 2 years old.
Signs of Heatstroke in a Cavalier
Recognizing the signs of heatstroke and taking preventive measures are crucial to keeping your dog safe. Signs such as excessive panting, drooling, rapid pulse, and restlessness indicate your Cavalier may be overheating. If you notice these symptoms, act quickly by providing cool (not cold) water and applying damp towels to areas with good blood flow, such as the head, armpits, and groin. Then take your Cavalier to the vet to prevent things from getting worse.
How Food Affects Your Cavalier’s Ability to Tolerate Heat
Just like for us, our pet’s food does more than just provide them with calories. Food has a big impact on their overall health, affecting everything from their longevity to their behavior and how they handle hot and cold temperatures. According to traditional Chinese medicine (TCM), everything in life has a balance of energy and heat, represented by Yin and Yang. Yin embodies the cool, and yang is the hot. This includes our pets, food, and environment; they all have specific energetics.
Dexter tends to run a little more yang (hot). Therefore, when I’m creating his meals, I aim to have the foods I provide either be energetically cooling or neutral. I avoid energetically warm or hot foods and proteins. For example, common foods that are warming or hot include goat, lamb, venison, chicken, and pheasant. Whereas, cooling proteins include rabbit, duck, beaver, cold water fish, and muskrat.
Applying this feeding concept to our Cavaliers, we can tailor their diets to help regulate their internal temperature. During the warmer months, opting for cooling foods can help maintain balance and comfort for your Cavalier.
Google Ad Below
Summer Fun for You and Your Cavalier King Charles Spaniel
Despite the summer heat, Dexter and I still enjoy our summer adventures. They just need to be modified according to the weather. The first thing I do is check the weather, so I’m not out and about with Dexter and surprised! Walking or strolling Dexter in the morning is by far cooler than in the evening. I know people suggest evening walks, but, honestly, the heat from the pavement and the atmosphere seem hotter to me than in the morning. Your location may be different.
Try walking on grassy areas instead of pavement. Shady parks beat the noon sun. Breezy days while wading in the water are another fun way to help your Cavalier stay cool. However, if it’s still sunny or warm, cool water on their feet and a breeze are unlikely to cut it.
We do a lot of indoor adventures during the summer months. Pet stores, dog friendly stores and attractions are our go-tos. I also do a lot of indoor training sessions and enrichment activities to help keep Dexter engaged. The bottom line is that I don’t want to risk Dexter’s health. And I can say from experience, it’s not a good feeling. Back in 2018, I’m pretty sure Dexter almost had a heat stroke! We were in Florida in the spring, doing touristy things. I thought I was being careful, bringing Dexter inside the stores, indoor attractions, and a covered train tour, but he really wasn’t doing well. He started showing signs of heatstroke. We rushed him to the hotel and cooled him down. I was lucky. And I’m not sure what I would have done if I wasn’t so lucky.
Hot Weather Tips for a Cavalier King Charles Spaniel
Grooming & Trimming: Regularly groom your Cavalier to remove loose fur and prevent overheating. I do give Dexter a puppy cut by trimming his belly, legs, and tail. I started this because of his CM/SM, but it also helps lighten his load and keeps him cooler.
Travel Comfort: Ensure your Cavalier’s comfort during travel with a well-ventilated crate or car harness, and schedule frequent breaks for water and shade. I also use a cooling mat and fan blowing on Dexter.
Sunscreen: Dog friendly sunscreen on your Cavalier’s nose helps protect him from harmful UV rays.
Cooling Products: Invest in cooling accessories like a cooling vest, bandana, or mat to provide relief from the heat during outdoor adventures.
Avoid the Hottest Part of the Day: Schedule outdoor activities during cooler times, such as early morning or late evening.
Mind the Pavement: Hot asphalt can burn your Cavalier’s paw pads. Stick to grassy or shaded areas for walks.
Hydration: Always have fresh water available, and encourage your Cavalier to drink frequently to stay hydrated. I put bone broth cubes in Dexter’s water bottle to encourage him to drink. If not, he will ignore the water.
Indoor Play or Outings: On exceptionally hot days, opt for indoor activities like interactive games or training sessions to keep your Cavalier entertained while staying cool.
Cooling Foods: Opt for cooling or neutral proteins in your Cavalier’s diet.
Remain vigilant, provide ample shade and hydration, and monitor your Cavalier for signs of overheating. Keep your Cavalier King Charles Spaniel’s well-being in mind, and use these practical tips to make sure you and your Cavalier have a safe and enjoyable summer.
Your comments and questions are always welcome below.
Join our vibrant Cavalier King Charles Spaniel community on Facebook, support our dedication to pet wellness on Patreon, and stay updated with our weekly newsletter for invaluable tips and insights into raising happy, healthy pets. Together, let’s make a difference in our dogs’ lives!
Google Ad Below [...]Read more...
June 8, 2024Treatment options for Chiari malformation and Syringomyelia
My best friend, Dexter the Dog, was diagnosed with Chiari malformation and syringomyelia in 2012, just before his third birthday. This diagnosis hit me hard. Over the past twelve years, I’ve shared a lot about Dexter’s diagnosis, care, and treatments on my Raising Your Pets Naturally blog and YouTube channel.
Since I recently started this blog dedicated to Cavalier King Charles Spaniels, I thought it would be a good time to write an update on Dexter’s care and what I’ve learned. I am also happy to say that at almost fifteen, Dexter is doing amazingly well! I hope you find this article on Chiari malformation and syringomyelia in dogs helpful. Please share this information to help others dealing with this heartbreaking diagnosis learn about the many helpful and natural treatments for dogs with Chiari malformation and syringomyelia.
What is Chiari Malformation (CM) and Syringomyelia (SM)
Chiari malformation commonly affects Cavalier King Charles Spaniels, Chihuahuas, Brussels Griffons, Yorkshire Terriers, Maltese, Pomeranians, Toy Poodles, and Shih Tzus. In dogs with CM, the skull is too small to hold their brain properly. This overcrowding forces parts of the brain, specifically the cerebellum and medulla, out of their normal positions. The cerebellum controls movement and balance, while the medulla is connected to breathing and heart rate.
When these brain parts are pushed out of place, they obstruct the normal flow of cerebrospinal fluid (CSF). Cerebrospinal fluid is in the brain and spinal cord and acts as a natural cushion, protecting the brain. When the flow of CSF is blocked, it can lead to a buildup of pressure and result in serious neurological issues and can form syringomyelia (SM), a condition where fluid-filled cavities form within the spinal cord.
In Cavalier King Charles Spaniels, Chiari malformation is a congenital issue, meaning they are born with it. Dr. Clare Rusbridge established a breeding protocol to help reduce CM/SM in puppies. Following the breeding protocol is crucial for reducing the risk of Chiari malformation (CM) and syringomyelia (SM) in Cavalier King Charles Spaniels. If both parents have CM/SM, puppies are 92 percent likely to be affected, while the risk drops to 77 percent if only one parent is affected. If both parents are clear of CM/SM, there is a 70 percent chance their puppies will be clear, rising to 87 percent if the grandparents are also clear. Potential Cavalier families should seek breeders who perform this testing to ensure healthier puppies. The only way to diagnose Chiari malformation and syringomyelia definitively is through an MRI scan.
Recognizing Chiari malformation is vital for Cavalier King Charles Spaniel families because early detection and treatment can greatly improve the quality of life for dogs with this condition. If you notice symptoms like uncoordinated movements, sensitivity around the head and neck, or any other unusual behaviors, it’s important to consult with your veterinarian as soon as possible.
Symptoms of Chiari Malformation and Syringomyelia in Dogs
Symptoms of CM and SM in Cavalier King Charles Spaniels and other breeds can vary. About a year before Dexter’s diagnosis, he began showing some random and unusual behaviors. And they didn’t happen all the time.
Fixating at dust particles in the sunlight.
Fidgeting and biting at his rear end. His vet initially thought it was anal glands, but they really weren’t that full, and he continued to do it.
Acting strangely around flying insects. Whenever a fly was around, he would get strange and start spinning around and growling at his back end.
Then, he had a downright scary episode, where he just was going crazy over his back end, growling, at it, spinning, and I could not gain his attention. I then decided to hit record the next time it happened. After recording the next episode and consulting Dr. Lynette Cole at The Ohio State University, three veterinary neurologists suspected Chiari malformation and syringomyelia. I then made an appointment at the OSU neurology department for an MRI and spinal tap. CM and SM were confirmed.
Dexter’s episode is below.
Don’t forget to subscribe to our @RaisingYourPetsNaturally YouTube channel for more.
Other common symptoms of CM/SM in Cavalier King Charles Spaniels can include:
Air scratching, especially on walks or when excited.
Head scratching or rubbing.
Air snapping or licking.
Random yelps of pain.
Sensitivity to touch and being picked up.
Hind end weakness.
Head or body wobbles, stumbling, or squinting.
Head pressing.
Seeking darkness or solitude.
Inactivity or depression.
Restlessness.
Google Ad Below
Diagnosing Chiari Malformation and Syringomyelia
The only definitive way to diagnose CM/SM is with an MRI. If a dog shows common symptoms and belongs to a breed prone to this disease, like Cavalier King Charles Spaniels, a vet might start treatment without MRI confirmation. For me, knowing exactly what Dexter had was key. Along with an MRI, Dexter also had a spinal tap to ensure we had all the facts.
Treatment Options for Chiari Malformation and Syringomyelia
Surgery for Chiari Malformation in Cavalier King Charles Spaniels
Surgery is performed with the goal of restoring the natural flow of spinal fluid. This involves decompressing the affected area, removing bone fragments, and sometimes adding a shunt. However, the results can differ greatly from one dog to another. Despite surgical intervention, many dogs still require medication to manage their pain effectively.
Medications for Chiari Malformation in Cavalier King Charles Spaniels
The disease is progressive and varies in severity. Treatment prioritizes comfort and alleviates pain. Dr. Clare Rusbridge provides the gold standard in the medication treatment protocol. It’s essential to monitor organ functions regularly when administering long-term medications.
Natural Treatments for Syringomyelia in Dogs
There are many natural treatments to help support a dog with CM/SM. Here are some that have worked for Dexter:
Acupuncture: Restores the normal flow of energy through specific pathways.
Cold Laser Therapy: Reduces inflammation, relieves pain, repairs tissue damage, and increases blood circulation.
PEMF ( Pulsed Electromagnetic Field) Therapy: Reduces inflammation, relieves pain, promotes tissue and cell repair.
Food Therapy: A diet of home-cooked or raw dog food helps reduce inflammation. Ingredients like sardines, shiitake mushrooms, and green-lipped mussels can help.
Conscious Proprioception Exercises: Dexter wore Dr. Buzby’s ToeGrips to stimulate awareness of his feet. I also regularly work with him on footwork exercises to help him be more aware of his feet.
Canine Hydrotherapy: Water treadmill therapy strengthens Dexter’s body with low joint impact.
Core Strength Exercises: Dexter’s rehabilitation focuses on boosting his core and back end strength, crucial for enhancing balance and stability. Through a variety of exercises using different equipment, we target his abdominal, back, and hind leg muscles, ensuring he can confidently navigate any challenges.
Living with a Cavalier King Charles Spaniel with Chiari Malformation
Living with a dog diagnosed with Chiari Malformation and syringomyelia can be challenging. Dexter’s first year after diagnosis was the most challenging. Trying to figure out what worked best for him, what kinds of activities or weather would trigger breakthrough pain, and how best to manage it. His life changed, but, luckily, with a great team of professionals, I was and am able to provide Dexter with a great quality of life that is still full of adventures and enrichment.
Comfort Measures
To help keep Dexter as comfortable, happy, and pain-free as possible, I’ve incorporated a range of products.
Dog Harness: Avoid collars that can be painful due to the disease’s nature.
Dog Strollers: Great for giving Dexter a break while still being part of adventures.
Cooling Mats and Warming Blankets: Depending on Dexter’s temperature needs. I will say, now Dexter is on a cooling mat almost 100 percent of his downtime. He rarely seeks heat.
Snuggle Jackets: Some dogs find comfort in them, while others might not. In the beginning, Dexter wore one almost all the time. But, I think, after we finally found our groove with his care, they were no longer necessary.
Natural Calming Aids: Calming CDs and natural calming sprays help Dexter on rough days.
Support for Dogs with Chiari Malformation and Syringomyelia
Let’s unite in this journey. Dexter’s courage living with Chiari malformation and syringomyelia serves as a light of hope for us all. You aren’t in this alone. Seek the help of a good veterinarian team, join a support group, including ours! Together, we can provide hope and guidance to others on similar paths. Go Team Dexter!
Your comments and questions are always welcome below.
Join our vibrant Cavalier King Charles Spaniel community on Facebook, support our dedication to pet wellness on Patreon, and stay updated with our weekly newsletter for invaluable tips and insights into raising happy, healthy pets. Together, let’s make a difference in our dogs’ lives!
Google Ad Below [...]Read more...
June 26, 2024Cavalier King Charles Spaniel Enrichment Ideas
Ultimate Guide to Canine Enrichment for Cavalier King Charles Spaniels
If you are reading this blog post on ways to keep your Cavalier King Charles Spaniel entertained, you have made me a very happy lady. Mental stimulation for your Cavalier is so important, and sometimes a very overlooked part of a good positive dog training program. I’ve always said, dog training isn’t just about teaching your Cavalier to do something or not do something. Rather, there is a synergy between training your Cavalier and everything else including canine enrichment. I think bonding with your Cavalier King Charles Spaniel is the best medicine for both you and your pup. So much so, I started a Cavalier King Charles Spaniel Facebook group, with a big emphasis on enrichment ideas for Cavaliers. And the photos you are about to see on this Cavalier blog are all from members of our wonderful community! Now, let’s dive into canine enrichment and why it’s so important.
What is Canine Enrichment?
Canine enrichment is about making your dog’s life better by giving them fun activities that keep their mind and body active. I think about canine enrichment as life experiences and engaging our Cavaliers in a variety of fun and interactive activities. It’s more than just a food puzzle toy, although that’s a great introduction to enrichment for your Cavalier.
Enrichment can be interactive play, positive dog training sessions, sensory games, physical activities, food enrichment, and outdoor adventures. The goal is to keep your Cavalier happy, healthy, and mentally sharp. When you do this, it helps prevent boredom, boosts your dog’s mental skills, and strengthens your bond, which also leads to better listening and obedience.
Subscribe to @CavalierTipsandFun for more!
Beyond Food: Enrichment Through Interaction
Many people associate canine enrichment primarily with food-related activities, like filling food toys or using interactive frozen treats. While these activities are great, and I use them daily with Dexter, they are just one piece of the enrichment puzzle. When I think of canine enrichment, I think of activities that involve direct interaction with Dexter. It’s about more than just keeping him occupied with food toys—it’s about creating a connection with him, something we do together.
Incorporating various types of environmental enrichment can greatly benefit your Cavalier King Charles Spaniel, both mentally and physically. Enrichment keeps those unwanted behaviors at bay by preventing boredom. It encourages social interaction, making for a happier and more engaged dog.
Positive Training for Your Cavalier
Training is a wonderful way to enrich your Cavalier’s life. Whether you’re teaching basic obedience, fun tricks, or advanced behaviors, positive dog training sessions offer cognitive stimulation and deepen your bond. Cavaliers are smart and love to please, which makes them quick and eager learners. Remember, when you’re teaching and training your Cavalier, you want the training to be fun for both your dog and you.
Google Ad Below
Outdoor Adventures
Taking your Cavalier to the park or on a walk can be incredibly gratifying. Consider going on a “sniffy walk,” where your pup gets to explore and investigate their surroundings at their own pace. Allowing them to follow their nose is not only fun but also taps into their natural instincts.
Other fun outdoor adventures can be indoors too! Take your Cavalier to a pet store for some shopping or visit a dog-friendly indoor store. Just make sure to call the establishment first to double-check their pet policies. Those training sessions you’ve been working on will ensure your indoor fun is a positive experience and one you can feel proud of.
Fun and Beneficial Canine Fitness Activities
Incorporating canine fitness activities can be both fun and vital for your Cavalier’s health. Stretching, sits to downs to stands, using wobble boards, or even walking over cavaletti poles are a few examples. These activities help keep your Cavalier in good physical shape and engaged. Other fitness ideas include walking on slight outdoor hills, placing two paws on a curb, jumping on a sturdy boulder, and walking across a fallen tree trunk. Always prioritize safety during these exercises.
Sensory Enrichment for Your Cavalier
Sensory enrichment is another great way for keeping your Cavalier King Charles Spaniel active and entertained. This type of enrichment is all about stimulating their senses, sight, smell, hearing, touch, and even taste. Obviously, there is some overlap between enrichment “categories.”
Consider incorporating toys that make different sounds or have different textures to engage their hearing and touch senses. You can even make a scent garden in your yard with dog-friendly plants and herbs. Or, grab some outdoor things such as pine cones, grass, and flowers and place them in scent boxes for your Cavalier to smell or find. Plus, activities such as scent work, where your dog uses their sense of smell to find hidden treats or toys, can provide a great mental and physical workout..
By giving your Cavalier a variety of sensory experiences, you satisfy their natural curiosity and make them happier overall. Giving your Cavalier sensory activities like scent work or creating a scent garden not only keeps them entertained but also deepens your connection as you explore together.
Bonding Activities
Simple activities like grooming, talking to your dog, or giving them a gentle massage are also forms of enrichment. By connecting and touching your dog, you not only are able to do a lump-and-bump check, but you are laying the foundation of trust. Shared Zen moments like listening to music together or just lounging on the couch, can also be incredibly soothing for both you and your dog. Don’t forget snuggle time! Most Cavaliers love to cuddle, and those quiet, close moments can deepen your relationship even more. Did you hear that, Dexter? By incorporating these simple yet meaningful activities into your life, you’ll create a stronger relationship with your dog.
Food Games and Interactive Toys: Enhancing Mealtime for Your Cavalier
Food games like lick mats, interactive food toys, and snuffle mats are a great way to feed your Cavalier. Instead of wasting those valuable calories by tossing them in a bowl, using enrichment toys offers a fantastic activity. Don’t use extras in those food toys; use your Cavalier’s daily food or food calories.
For Cavaliers who are fed fresh food, such as a raw or fresh diet, lick-type toys like lick mats are perfect. These toys allow your Cavalier to eat their food while licking and enjoying their mealtime. Spreading the food out encourages more time eating and offers an easy enrichment activity. It also mimics natural foraging behavior.
Snuffle Mat DIY
If your Cavalier is fed dry kibble or dehydrated food, treat dispensing toys or snuffle mats are excellent choices. These toys make mealtime interactive by challenging your Cavalier to work for their food. They may knock around a toy that dispenses their meal or snuffle around a mat for their nibbles. In order to keep your Cavalier’s calories in check, you can reduce a small portion of their dry food and use fresh foods or toppers or freeze-dried 100 percent meat in these toys to add variety and excitement.
Incorporating food games and interactive toys into your Cavalier’s routine makes mealtime more enjoyable and provides an easy and daily mental enrichment activity. But, don’t just go with one treat puzzle toy. The more variety, the better.
Enriching Your Cavalier’s Life with Every Adventure
Canine enrichment is all about creating a variety of positive and fun experiences that enhance your Cavalier King Charles Spaniel’s life. Food toys are great–it’s the interactive, engaging activities that truly enhance their daily experiences.
By focusing on a variety of enrichment activities, you’ll ensure your Cavalier King Charles Spaniel is happy, content, and well-rounded.
I host a private Facebook group for Cavalier King Charles Spaniels, and we have a big focus on canine enrichment ideas and challenges to keep your Cavalier engaged and thriving!
I’d love to hear about your own enrichment ideas and experiences with your Cavalier! Share your tips and stories in the comments below and let’s keep the conversation going.
Join our vibrant Cavalier King Charles Spaniel community on Facebook, support our dedication to pet wellness on Patreon, and stay updated with our weekly newsletter for invaluable tips and insights into raising happy, healthy pets. Together, let’s make a difference in our dogs’ lives!
Google Ad Below [...]Read more...
July 24, 2024What Kind of Chew Toys and Bones are Safe for Cavalier King Charles Spaniels?
Most Cavalier King Charles Spaniels love to chew! Chewing is a natural and normal dog behavior that helps fight boredom and can even help keep your Cavalier’s teeth pearly white. But remember, brushing your Cavalier’s teeth daily is still ideal. Puppies and adolescent Cavaliers tend to have a high drive for chewing things. Sometimes, whatever they can sink those teeth into. Hopefully, you are working with a qualified dog trainer to ensure your Cavalier is learning to chew on the right items instead of your furniture, or, even worse, electrical cords or something else that can harm your Cavalier puppy.
So, what makes a chew toy or bone safe for your Cavalier King Charles Spaniel? Over the years, my opinion on this has evolved. I once opted for the harder, the better. But, now, I’m on the other side of the fence, choosing softer items. Hard and tough dog bones can chip teeth and even splinter, which can be very dangerous. Even my sweet, Dexter chipped his tooth on a hard bone….his last hard bone.
I personally do not use or recommend hard bones, antlers, hooves, plastic or nylon bones, rawhides, chews with lots of ingredients, wood bones, or weight-bearing bones. But, I will always say, this is my personal opinion, and they are your Cavaliers. You can do whatever you feel comfortable doing for them, and you will not be judged by me, nor should you be judged by your peers.
Please be aware that not every chew toy or bone will be suitable for every Cavalier. I strongly recommend active supervision when your Cavalier chews, particularly if it’s a new toy or bone or if the chew item is edible. The right size of a bone or toy is also important. You want to make sure the toy or bone is not so small that your Cavalier can place the entire item in their mouth and risk choking. This includes when the chew gets smaller. I tend to toss the end out before Dexter swallows it, with the exception of a chew that is crunchy. Finding the right chew for your Cavalier is sort of like “The Princess and the Pea.” So, let’s jump into my recommendations for safe and healthy chew bones for your Cavalier King Charles Spaniel.
Dehydrated or Freeze-Dried Fish Skins: With a good dehydrated or freeze-dried fish skin dog treat, the treat will be 100 percent fish skin with no artificial colors, preservatives, or flavors. With this list and anything I recommend, the first stop should be to read the actual ingredient panel. What’s inside. Everything. It’s also important to check out the packaging and carefully read the ingredient list and where the fish was caught and processed. Fish skins are great treats for your Cavalier, full of omega-3 fatty acids, typically low in fat, and fully edible. Most dogs love the taste and eagerly chew away. Some fish skins are crunchy, while others are chewy. Chewy ones last longer but need close supervision to make sure your Cavalier chews them up vs. swallowing a large piece. Shop now.
Bully Sticks & Pizzles: Made from the manly part of a bull, many dogs love chewing on these. What I like is that they typically just start to get soft and disappear; I haven’t seen any pieces break off. However, I have seen a stick peel every once in a while, like string cheese. You can also purchase bully stick holders to help hold the stick, which adds a second layer of safety, helping to prevent your dog from swallowing the end. I personally toss that piece into the garbage. Again, sourcing and how they are manufactured is key. Natural does not correlate to not using irradiation (radiation). I contacted my fair share of bully stick brands and asked if they used irradiation, so, make sure you do your homework. Tip: get odor-free or low-odor versions. These can stink like crazy! Shop now.
Raw Bones: Raw bones are another option for your Cavalier to chew on, especially if they are already on a raw diet or natural diet. Because the bones are not cooked, they are soft and unlikely to splinter. Cooked bones easily splinter and are very hard on teeth. The size will depend on the size of the bone and your Cavalier. A few options to consider include necks, wings, feet and tails. Once again, supervise and watch for choking or swallowing. Necks did not work for Dexter, as he thought he should just suck the whole thing down. Chewing Tips: Don’t clean the bones; feed them with some meat on them, as they come. Let your Cavalier pull on the meat and chew and lick the bone. Allow them to have them for an hour, then throw them away. It’s when they sit around the house, get buried, or get dried out that you get bacteria and splintering. They will last in the fridge for three days before feeding. They can also be frozen and thawed. Feed outside or on a towel, and make sure your Cavalier is wearing their snood!. Avoid weight-bearing bones, as dogs can chip or fracture their teeth due to how hard they are. Show now.
Dehydrated Duck/Chicken/Rabbit Feet/Ears: Duck, chicken, and rabbit feet or ears are excellent, crunchy, edible chews for Cavalier King Charles Spaniels. Dehydrated or freeze-dried. Both offer good chewing options. Chicken and duck feet are rich in chondroitin, glucosamine, and collagen, which support joint health, reducing the risk of brittle bones, improving mobility, and maintaining healthy teeth and gums. Rabbit ears and feet are particularly appealing as they are low in fat, high in protein, and help clean your dog’s teeth while reducing plaque buildup. Additionally, the fur on rabbit ears can serve as a natural dewormer. These natural chews are both nutritious and enjoyable, but always supervise your Cavalier to ensure safe chewing. Shop now.
Tripe Sticks: Tripe sticks are a fantastic chew option for Cavalier King Charles Spaniels. Typically made from the stomach lining of cattle, lamb, or goat, these chews are naturally rich in digestive enzymes and nutrients that support gut health. Tripe sticks provide a satisfying, chewy texture that most Cavaliers love, while also helping to clean their teeth and gums. They are full of nutrients that can be a great addition to your dog’s chew rotation. Shop now.
Beef Tails: Beef tails are another excellent choice for your Cavalier. They are durable and provide a long-lasting chewing experience, which helps keep your Cavalier engaged and entertained. Beef tails are also high in protein and can help naturally clean your Cavalier’s teeth. The natural toughness of beef tails makes them a good option for aggressive chewers, but always make sure to choose the appropriate size to prevent any choking hazards. Shop now.
Tendons: Tendons are a great chew for Cavaliers because they are tough yet somewhat flexible, providing a satisfying chew without being too hard on their teeth. They are also rich in collagen, which is beneficial for joint health. Tendons help keep your Cavalier’s teeth clean and their gums healthy. Most Cavaliers find the chewy texture very satisfying. Shop now.
Yak Chews: Yak chews are a fantastic option for Cavalier King Charles Spaniels, but I only recommend them when microwaved to make them poofy. Microwaving them creates a crunchy, airy texture that Cavaliers love, making them a safe and enjoyable option. They are rich in protein and calcium, supporting your dog’s overall health. Made from a mixture of yak and cow milk, these chews are rich in protein and calcium, supporting your dog’s overall health. Again, double check the ingredient label; not all are created equal.
Subscribe to @RaisingYourPetsNaturally’s YouTube channel for more!
Fillable Chew Toys: I am a fan of filling various food toys such as West Paw Tux and Toppl with healthy snacks. The key to getting your Cavalier to chew on a food toy is to stuff it! If your Cavalier is eating the toy instead of the inside food, I do not recommend it. Shop now.
Ingredients matter! If you’re considering chew bones made from various ingredients, it’s crucial to flip over the package and dive deep into the ingredient list. Not all chews are created equal, and some can contain nasty or even toxic substances that could harm your dog. Look for natural, wholesome ingredients and avoid artificial colors, flavors, and preservatives. A little extra time spent reading labels can make a big difference in keeping your Cavalier King Charles Spaniel safe and healthy.
So, there you have it. That is the current list of some healthy and natural chew toys, bones I feel comfortable providing Dexter and recommending to my dog training clients. Always remember to supervise your Cavalier when they are chewing and to choose the right size and type of chew for their needs.
Which of these chews does your Cavalier King Charles Spaniel love the most? Share your favorite chew toys or treats in the comments below!
A big thank you to all the members in our Cavalier Facebook group for your wonderful photos!
Google Ad Below
Join our vibrant Cavalier King Charles Spaniel community on Facebook, support our dedication to pet wellness on Patreon, and stay updated with our weekly newsletter for invaluable tips and insights into raising happy, healthy pets. Together, let’s make a difference in our dogs’ lives!
🐶💙Support our passion for pet wellness and unlock exclusive content, perks and early access by exploring our Patreon tiers.
Sign up for our weekly newsletter!
Join us on Facebook!
[...]Read more...
January 23, 2025Supporting Your Senior Cavalier King Charles Spaniel: The Ultimate Guide to Aging Cavaliers
After 15 amazing years with my Cavalier, Dexter it was his time to go to the rainbow bridge. It’s never an easy decision to make and since then, I have been thinking back on our life together. Over the course of his life, I wrote a lot about Dexter on my first blog, Raising Your Pets Naturally. Now, with Stewart, my 7-month-old rescue Cavalier King Charles Spaniel puppy, I’m starting fresh, but with all that I’ve learned from Dexter’s senior years. I thought this would be a good time to explore when a Cavalier King Charles Spaniel is considered a senior, their lifespan, common health concerns, and how we can support our Cavaliers through every stage of life.
At What Age Is a Cavalier King Charles Spaniel Considered a Senior?
If you’re wondering, “When does a Cavalier reach old age?” The answer varies depending on factors like genetics and health. Typically, small breed dogs like Cavaliers are considered seniors between 7 and 10 years old. While this is a general guideline, you may notice your dog showing signs of aging earlier or later.
Some indicators of senior status include:
Decreased Interest in Play: They may be less enthusiastic about toys or games they used to enjoy.
Weight Changes: Unexplained weight gain or loss can be a sign of aging or underlying health issues.
Changes in Vision or Hearing: Difficulty seeing or responding to cues may suggest declining eyesight or hearing.
Increased Time Spent Resting: Senior dogs often nap more during the day and may tire easily after exercise.
Changes in Appetite: They may eat less or show more picky eating habits.
Difficulty Climbing Stairs or Jumping: You might notice hesitancy or struggle with previously easy physical activities.
Behavioral Changes: Increased anxiety, clinginess, or even irritability may indicate aging.
Frequent Bathroom Breaks: Aging can bring bladder control issues or an increased need to urinate.
Dull or Thinning Coat: Their fur might lose its luster or feel thinner in certain areas.
Dental Issues: Bad breath, difficulty chewing, or loss of teeth can become more prominent.
Reduced Tolerance for Cold or Heat: Seniors may seek out warmth or avoid strenuous activity in hot weather.
Increased Vocalization: They may bark or whine more often, potentially due to discomfort, anxiety, or confusion.
Cognitive Changes: Signs of canine cognitive dysfunction (CCD) include disorientation, restlessness, or forgetting familiar routines.
Slower movement or stiffness in the morning: Your Cavalier may take a little longer to get going in the mornings, which can be a sign of joint stiffness or early arthritis.
Graying fur, often around the muzzle: Just like humans, dogs may develop gray hairs as they age, particularly around their face.
But don’t worry, aging doesn’t mean your Cavalier is slowing down in spirit! With the right care and attention, they can still enjoy life to the fullest.
What Is the Life Expectancy of a Cavalier?
You may have heard the question, “How long do Cavaliers live?” The average lifespan of a Cavalier King Charles Spaniel is approximately 10.45 years. This is based on a 2022 UK study of veterinary data. However, some studies suggest a slightly longer lifespan, with a 2024 UK study indicating an average of 11.8 years for the breed. The typical lifespan of a Cavalier King Charles Spaniel is around 9-14 years. That said, some Cavaliers, like Dexter, surpass this average with proper care, while others may face challenges earlier due to health conditions.
Common Health Issues in Cavaliers
Cavaliers are an incredibly loving and joyful breed, but they do have a predisposition to certain health issues. Knowing what to watch for and being proactive in their care can help them live a happy and long life.
Mitral Valve Disease (MVD): Nearly every Cavalier King Charles Spaniel owner will face mitral valve disease at some point if their dog lives long enough. This heart condition affects the valve’s ability to close properly, leading to a heart murmur and, eventually, heart failure if untreated. Yearly heart check-ups with a cardiologist can help monitor and manage this condition.
Chiari-like Malformation (CM): Because of the breed’s unique head shape, it’s estimated that 95 to 99% of Cavaliers will develop a condition called Chiari-like malformation (CM). This happens when the skull is a bit too small for the brain, causing part of the brain to push into the spinal canal. CM can result in pain, weakness, or in severe cases, even paralysis. While there’s no cure, symptoms can often be managed with medications and regular vet check-ups, helping your dog feel more comfortable.
Hip Dysplasia and Patella Luxation: While less common in Cavaliers compared to larger breeds, these conditions can cause joint pain and mobility issues. Patella luxation, which is a dislocation of the kneecap, is more common in Cavaliers and can lead to lameness and discomfort. Keeping your Cavalier at a healthy weight is key to reducing stress on their joints and managing these conditions.
Eye and Ear Problems: Cavaliers are prone to progressive retinal atrophy (PRA), cataracts, and ear infections. Regular grooming and vet visits help catch these issues early.
Intervertebral Disc Disease (IVDD): IVDD is a condition where the discs in your dog’s spine become damaged or degenerate, causing pain, weakness, or even paralysis in severe cases. Cavaliers are particularly vulnerable to this, especially as they age. Be on the lookout for signs of discomfort, difficulty moving, or dragging their back legs.
Myoclonus: Myoclonus refers to muscle twitches or jerks that can occur in Cavalier seniors, especially around the head or neck area. While it’s usually not painful, it’s important to consult with a vet to rule out underlying issues such as neurological problems.
Medium-Chain Acyl-CoA Dehydrogenase (MCAD) Deficiency: This genetic condition affects Cavaliers’ ability to properly metabolize certain fats, which can lead to serious health problems, including low blood sugar, lethargy, and, in severe cases, sudden death. The great thing is that there’s a quick and easy at-home swab test available to check if your Cavalier has MCAD. It’s a simple step that can give you peace of mind and help catch this condition early. It’s a proactive way to care for your Cavalier’s long-term health.
Subscribe to @CavalierTipsandFun for more!
Supporting Your Cavalier Through All Life Stages
Caring for a senior Cavalier means making thoughtful changes to their routine. As our dogs get older, their needs shift in different ways. They may slow down, develop new health concerns, or simply need more comfort. These changes are completely normal, and it’s up to us to help them adjust so they can continue to feel their best. With a little extra care and attention, we can make sure they stay happy, healthy, and comfortable as they age. Whether it’s modifying their diet, adjusting their exercise, or making small changes to your home, these little changes go a long way in supporting their well-being. After all, they’ve given us so many wonderful years of love and companionship, and now it’s our turn to return the favor.
Nutrition for Senior Cavaliers
As your Cavalier enters their senior years, their nutritional needs often shift to support their changing bodies. A balanced diet made with fresh, high-quality ingredients like Omega-3s, antioxidants, glucosamine, and chondroitin can help maintain joint health, cognitive function, and overall vitality. Glucosamine and chondroitin play an essential role in supporting cartilage and joint health and can be included in their diet through natural sources like bone broth, chicken feet, or beef trachea, or through supplements if needed. Adding these fresh foods as part of their meals or even as toppers can provide a natural boost that processed options often lack. Every dog is unique, so working with your vet or a canine nutritionist is key to crafting a plan that meets your Cavalier’s specific needs.
When Dexter was diagnosed with kidney issues in his senior years, I found that his diet needed some adjustments. He had been raw-fed for most of his life, but with the help of his veterinarian, I transitioned him to a customized, home-cooked diet to better support his health. Bones, which are a staple in raw feeding, are high in phosphorus, a mineral I needed to limit. To make up for the lack of bone calcium, I switched to eggshell calcium, which is lower in phosphorus and just as effective.
I also began boiling his meat and discarding the cooking water, which helped reduce the phosphorus content even further. I carefully selected foods that were naturally lower in phosphorus, like certain vegetables and proteins. Dexter was also starting to lose weight, so I added carbs like rice and sweet potatoes to help him maintain his energy and body condition.
These changes made a big difference in his quality of life. While home-cooking may not be for everyone, it’s worth exploring alternatives to prescription diets if your Cavalier develops a medical condition. A good veterinarian or certified dog nutritionist can guide you in creating a plan that meets your dog’s needs without compromising on fresh, wholesome ingredients.
💡 Pro tip: Every Cavalier is unique, and what works for one dog may not work for another. Always partner with your vet or a canine nutritionist to find the best approach for your senior Cavalier. Giving them a fresh diet tailored to their needs is one of the best ways to show your love and care during their golden years.
Exercise and Mental Enrichment
Gentle exercise is important for keeping your senior Cavalier feeling their best, but it’s all about adjusting to their abilities. When Dexter reached his senior years, mosey walks became our go-to. He loved taking his time, sniffing every blade of grass, and enjoying the world at his own pace. When he got tired, I’d pop him into his stroller so we could continue our adventure without overdoing it. That stroller wasn’t just for outdoor strolls either, it was perfect for indoor store adventures, allowing him to stay engaged and part of the action while giving his body the rest it needed.
Mental enrichment was just as important as physical exercise. One of Dexter’s favorite activities was a “find it” game with cardboard boxes. I’d hide a treat in a box, spread them around, and watch his excitement as he used his nose to uncover the prize. It was the perfect mix of mental stimulation and gentle movement. For senior Cavaliers, simple adjustments like these can make a huge difference. Whether it’s a slow walk, a stroller ride, or an engaging puzzle, finding activities that fit their needs helps them stay vibrant and connected to the world around them.
Don’t forget to subscribe to @CavalierTipsandFun for more!
Natural Therapies for Senior Cavaliers
As Cavaliers age, their bodies may need extra support to stay comfortable and mobile. Therapies like at-home laser treatments, physical therapy, and acupuncture made a big difference for Dexter in his senior years. Actually, Dexter had these treatments the majority of his life due to his Chiari malformation. These options can reduce pain, improve mobility, and help manage chronic conditions like arthritis.
Dexter had regular physical therapy visits, where he worked with a canine rehabilitation specialist to keep his joints moving and his muscles strong. I also had simple at-home exercises to follow up with between visits, ensuring he stayed as active as possible without overdoing it. Using a laser therapy device at home helped target areas of stiffness or soreness, and his PEMF (Pulsed Electromagnetic Field) bed became one of his favorite spots to rest. PEMF therapy didn’t just support his comfort but also promoted better circulation and reduced inflammation.
Order a laser for your Cavalier today!
Acupuncture was another natural treatment that worked well for Dexter, offering gentle relief from discomfort and improving his overall quality of life. These treatments, along with his regular routine, were all part of ensuring he was comfortable and able to enjoy his senior years to the fullest.
If you’re considering these therapies for your Cavalier, talk with your Cavalier’s holistic vet or a canine rehabilitation specialist. They can guide you toward the best options for your Cavalier’s individual needs and help create a plan to support their comfort and mobility.
Veterinary Care and Preventative Check-Ups
Regular vet visits are essential, especially as your Cavalier gets older. I recommend scheduling check-ups at least once a year, but if your dog is on medications or managing a condition, like Dexter was, labs every 4 months can give you a better picture of their health. Semi-annual check-ups are also a good idea to catch early signs of issues like MVD, joint problems, or anything else that may need attention. Don’t hesitate to bring up any subtle changes you’ve noticed, whether it’s weight loss, fatigue, or coughing. Early intervention is key, and your vet can provide valuable guidance to help you manage your Cavalier’s health, ensuring they stay happy and comfortable as they age.
Cardiologist Visits
I highly recommend that every Cavalier sees a cardiologist at least once a year. Cardiologists specialize in heart health and truly understand the ins and outs of heart disease, including conditions like MVD, which Cavaliers are prone to. Even if your dog hasn’t been diagnosed with anything serious yet, a cardiologist can spot early signs of issues that might not be apparent to you or your regular vet. If your Cavalier is diagnosed with MVD, your cardiologist may recommend more frequent visits to monitor the progression of the disease and adjust their treatment plan as needed. Having a heart specialist on your team gives you peace of mind and ensures you’re taking proactive steps to care for your dog’s heart health.
Making Your Home Senior-Friendly
As your Cavalier enters their senior years, small changes around the house can make a world of difference in how they move and rest. Senior dogs often experience joint stiffness, and their mobility may not be what it once was, so providing a comfortable and safe environment helps them feel at ease. These adjustments don’t have to be drastic, but they can really support your dog’s needs as they age.
Ramps or Steps: It’s always a good idea to have ramps or steps in place, even if your Cavalier is still young. Jumping down from furniture can put strain on their joints and neck, leading to potential issues down the road. Ramps or steps make it easier for them to get on and off the couch or into the car, preventing unnecessary stress on their bodies. These additions are a simple way to protect your Cavalier from injury and support their mobility throughout all stages of life, ensuring they can continue to join in on the fun without risk.
Orthopedic Beds: Comfort is key when it comes to senior Cavaliers. Cushioned orthopedic beds provide much-needed support for aging joints and pressure points. Dexter was a fan of cooling mats all year, so I made sure to place them throughout the house, including on his beds, to keep him cool. But I always left at least one bed without a cooling mat, in case he wanted to curl up and stay cozy. The goal is to ensure they have a comfortable place to rest, with options that suit their changing needs.
Non-Slip Surfaces: Slippery floors can be a senior dog’s worst enemy. To prevent falls, I recommend adding rugs or carpets to high-traffic areas, especially in places like the kitchen or hallway. You can also try ToeGrips(use promo code: DEXTER for 10% Off Your First Order), which help with traction, so your Cavalier can walk confidently. Making sure they have a stable environment to navigate helps keep them safe, especially when they’re getting around slower than they used to.
How Long Do Cavaliers Live? Cherish Every Moment
If there’s one thing Dexter taught me, it’s to appreciate the little moments, whether it was a slow morning walk, the rare occasion when he’d want to be close and rest in the nook of my legs, or simply watching him nap and snore in the sunshine. Dexter wasn’t much of a cuddler, but when he wanted to be near me, I made sure to savor those times. Our Cavaliers may not live as long as we’d like, but the joy they bring into our lives is something we’ll never forget.
When Stewart reaches his senior years, I know I’ll be ready to give him the care and love he deserves. For now, I’m soaking up every playful, puppy-filled moment.
Google Ad Below [...]Read more...
April 28, 2024Are Cavalier King Charles Spaniels Good for Therapy Dog Work?
Today, I want to chat about a topic that is close to my heart: therapy dogs! Have you ever wondered if your Cavalier King Charles Spaniel would make a good therapy dog? It’s a common question and one that has a few caveats. First, it’s not all about the dog! I know, I know, it’s always all about Dexter, but with visiting therapy dogs, it’s about teamwork.
But what is a visiting therapy dog team, and what do they do? A therapy pet team is a person and their pet (sometimes cats, bunnies, etc.) who share their companionship and comfort with those in need, visiting places like hospitals, schools, and nursing homes. These teams engage in either Animal-Assisted Activities (AAA) or Animal-Assisted Therapy (AAT). AAA therapy dog teams engage in sessions without the presence of a medical professional or specific treatment goals, aiming simply to bring joy and comfort. Whereas AAT therapy dog teams work with healthcare providers in goal-oriented sessions aimed at addressing specific issues, with progress carefully measured and tracked throughout the process.
Being a good therapy dog team isn’t just about your Cavalier; it’s also about you. Both you and your CKCS are visiting as a team. You both must have the skills and knowledge required to visit people in a wide range of settings.
Let’s discuss what humans should be bringing to a Cavalier therapy dog team. As a therapy dog handler, it’s important to be comfortable when interacting with both people and your dog. You’ll need to be able to guide your Cavalier through different situations, encouraging them and keeping them safe and happy. Understanding your dog is key to becoming a therapy dog handler. You’ve got to be able to recognize the tiniest changes in behavior and body language, and quickly respond. And at the same time, you will be multitasking by staying engaged with individuals. It’s a balancing act, for sure, especially as you start out your journey as a therapy dog team.
Now, what personality should your Cavalier King Charles Spaniel have in order to make a good therapy dog? When it comes to a well-suited therapy dog, you can look at a few key traits. A good therapy dog should be reliable, predictable, and able to follow your cues with ease. That’s not to say they have to be robots and never get flustered, but as a general rule, you want a dog that is solid in their temperament. Your dog should be friendly with strangers, as your visits will be with strangers. At the same time, they should be poised, not jump on people, and be able to walk nicely on a leash around distractions, including food. It’s not just about loving new people; it’s also about having manners in new and unfamiliar environments.
Getting Started Training Your Cavalier to Become a Visiting Therapy Dog
It’s important that your Cavalier have basic obedience and manners. Walking on a loose leash in crowded places, around dogs, and on slick floors is a must. Leaving food or dropped pills on the ground is incredibly important for your dog’s safety. If your Cavalier knows tricks, that can be a great icebreaker and is also helpful when someone wants to look at your dog but not pet them. Dexter and I were a visiting therapy dog team for many years, and tricks and activities were by far his favorite visits! If your dog needs a refresher, enroll in a positive dog training class.
Subscribe to our @CavalierTipsandFun YouTube channel for more!
Google Ad Below
After your Cavalier has mastered his basic obedience skills in a variety of environments, look for a therapy dog training prep class. This may be a weekend class or one that spans 4–8 weeks. When I taught my therapy dog prep class, each week we covered a new topic to prepare the handlers and dogs for the actual work involved and the test. My students by far enjoyed skit night, where my volunteers and I role-played different scenarios, the teams interacted, and we discussed what was good and how they could improve in that situation. It was a hoot and very eye-opening for the upcoming teams.
When you and your Cavalier are ready to take your therapy dog evaluation, you will need to find an evaluator to assess whether you are ready for therapy work. But there is more than one therapy dog organization out there. Choosing the right organization is crucial. Some facilities have specific requirements, like only accepting teams evaluated by certain organizations. So, if you have your sights set on a specific organization, reach out to them first. If your dog is on a raw food diet or you provide your dog with titers vs. yearly vaccinations, not all therapy dog organizations accept that, but some do.
Speaking of organizations, there are plenty out there, each with its own unique criteria. Some of the most common ones include Alliance of Therapy Dogs, Pet Partners, Love on a Leash, and Therapy Dogs International. Be sure to check out their specific requirements before making your decision.
Subscribe to @DextertheDogandFriends for kid-friendly content!
During the evaluation, the evaluator will test your skills to ensure you’re ready to handle various situations with confidence. Once you’ve got the green light from your evaluator, send in your paperwork and fees. While you are waiting for your official badge, it’s a good time to start reaching out to facilities you’re interested in visiting. It’s best to meet with the director, take a tour, and get a feel for the environment without your dog. When you are ready to visit with your Cavalier, keep those initial visits short and sweet. It’s all about easing them into the new surroundings and ensuring they feel comfortable and confident in their role as a therapy dog.
And remember, if you don’t think therapy work is in the cards for your Cavalier, that’s perfectly fine. There are plenty of other enjoyable activities you and your Cavalier can explore together. But if therapy work is the journey you’ve chosen, then I wish you both the best of luck on this rewarding adventure.
Your comments and questions are always welcome below.
Join our vibrant Cavalier King Charles Spaniel community on Facebook, support our dedication to pet wellness on Patreon, and stay updated with our weekly newsletter for invaluable tips and insights into raising happy, healthy pets. Together, let’s make a difference in our dogs’ lives!
Google Ad Below [...]Read more...
July 10, 2024Choosing a Cavalier King Charles Spaniel Breeder
While I understand the “adopt don’t shop” idea, there are valid reasons to purchase a purebred Cavalier King Charles Spaniel from a responsible Cavalier breeder. I’ve received numerous requests on how to find a good Cavalier King Charles Spaniel puppy breeder, so let’s dive into my personal thoughts and considerations.
Educate Yourself on the Cavalier King Charles Spaniel Breed
First things first, it’s crucial to understand the breed you’re interested in. Cavaliers are charming, affectionate, and beautiful, but they also have specific needs and characteristics. Learning about the typical Cavalier personality and care can help you in deciding if a Cavalier is the right breed for your family.
Dive into the Cavalier King Charles Spaniel Breed Information
The internet has a ton of information about Cavalier King Charles Spaniels. Not all good, so take everything with a grain of salt. I would suggest looking at Cavalier King Charles Spaniel national breed clubs and Cavalier rescues. They tend to have a lot of very helpful information. Spend time reading about Cavaliers to understand their grooming care, behavior traits, size, and medical concerns.
Cavalier King Charles Spaniel Temperament and Personality: Cavaliers are known for their friendly and affectionate nature. They thrive on companionship and are often described as “lap dogs” or “love sponges” because they love to snuggle. But, they aren’t all snuggle bugs, and it’s important to note that they are spaniels, which stem from hunting genes, so they can be very active little dogs. Interestingly, Dexter is now almost fifteen, and, over the years, I have met a lot of Cavalier families who downsized from golden retrievers, I was one of them. I think because they have that same personality of fun and eagerness to be part of the family activities.
When taught properly, they are often good with children and other dogs and adapt well to a variety of living environments. I do say when taught properly, as you can’t assume you can toss any dog into a situation and they will handle it as we had hoped. As a side note, please check out my YouTube channel, Dexter the Dog and Friends, to learn more about raising kids and dogs together.
Dexter’s school assembly!
Cavalier King Charles Spaniel Maintenance and Grooming: Cavaliers require regular grooming due to their silky and long coats. This includes brushing several times a week to prevent mats and tangles. Silky? Well, some Cavaliers have a much thicker coat than others. Take my Dexter, for example. He has very long fur, and it’s silky but also super thick. Daily brushing is even better if you can swing it. It will really help to prevent mats in the first place.
Regular baths are important too. If you are using a truly natural dog shampoo (I use 4-Legger) that does not have any harmful ingredients, you can bathe as needed. When Dexter was a visiting therapy dog, he had to have a scrub-a-dub-dub before his visits, so that was weekly or every two weeks for us. But now, he gets a bath every three to four weeks. Their nails should also be trimmed regularly, and their teeth brushed daily to maintain good dental health.
Grooming Tips. Subscribe to my @RaisingYourPetsNaturally YouTube channel for more.
Trimming Your Cavalier King Charles Spaniel: Talk about a controversy! I am always pro it’s your dog; do what is best for them and you. Dexter has Chiari malformation (more on that below) and because of that, grooming is uncomfortable. Therefore, I have always kept him in a puppy cut. I lighten that thick fur, shorten him up, trim his ears, and keep his slippers short. Slippers, BTW, are the fur around their feet, or Grinch feet. If you want to keep their Grinch feet full, it is important to still trim their foot pads to prevent slipping.
Cavalier King Charles Spaniel Medical Conditions: This is where our beloved breed suffers the most. Cavaliers are prone to several hereditary conditions. It’s essential to be aware of these and ensure your breeder is proactive in health testing because that’s the only way to help our Cavaliers out of their medical mess. Key health concerns include mitral valve disease (MVD), hip dysplasia, Chiari malformation (CM) and syringomyelia (SM), and patellar luxation. Reputable breeders will conduct specific screenings to minimize the risk of these conditions in their puppies.
Understanding Health Testing for Cavaliers
For Cavaliers, it’s crucial that both the breeding dogs and their parents are health tested for hereditary diseases. It’s not just the breeding pair, but the grandparents too! The grandparents have a longer history, testing and health records. A highly regarded breeding Cavalier should be over 2.5 years old, with parents that are MVD heart clear and MRI scanned clear of CM/SM. A reputable breeder will eagerly provide copies of health certificates of each parent and grandparents or links to tests. If not, be sure to ask. If they are hesitant to share, I would be hesitant to move forward.
Mitral Valve Disease (MVD): Every breeding Cavalier King Charles Spaniel should have an annual heart exam by a board-certified veterinary cardiologist. The parents of your prospective puppy should have heart clearances from a cardiologist and be at least 2.5 years old at the time of breeding. All four grandparents should be over the age of 5 and heart clear.
Syringomyelia (SM) and Chiari Malformation (CM): Both parents should have MRI scans showing them clear of CM/SM after reaching 2 years of age. It’s even better if the grandparents have also undergone MRI scans and are clear of CM/SM.
Hips: OFA requires that a Cavalier be a minimum of 2 years old for hips to be certified. It’s recommended for grandparents to have certified hips as well.
Patellas: Testing should be done annually to ensure healthy knees and to prevent luxation in both parents.
Medium-Chain Acyl-CoA Dehydrogenase (MCAD): MCAD is a metabolic disorder that affects how Cavalier King Charles Spaniels process certain fats for energy. It’s caused by a genetic mutation that can lead to metabolic imbalances. DNA testing is essential to identify Cavaliers carrying the mutation and prevent passing it on to their offspring. This is a newer (Summer 2023) DNA test.
Episodic Falling Syndrome (EFS): Is a hereditary neurological disorder affecting Cavaliers. Breeders should ensure all Cavalier breeding dogs undergo DNA testing for EFS before mating.
Dry Eye Curly Coat Syndrome: An inherited disease that affects the eyes, skin, and feet of Cavalier. It can be detected through a DNA test.
Dry Eye: Testing for dry eye in Cavalier King Charles Spaniels involves a DNA health test to identify the presence of the genetic mutation associated with dry eye, curly coat syndrome. Testing ensures early detection and appropriate management of this hereditary condition in breeding dogs.
Don’t forget to subscribe to our @CavalierTipsandFun YouTube channel for more!
The Importance of Puppy Socialization
Puppies develop both physically and mentally right out of the gate, and even during pregnancy! A stressed mom can produce stressed, unhealthy puppies. A responsible breeder not only ensures a Cavalier puppy is medically healthy, but behaviorally as well. Breeders should prioritize the physical and mental well-being of Cavalier puppies by starting basic socialization at home. This includes introducing puppies to children, adults, outdoor environments, handling and grooming, and exposing them to different textures and obstacles.
Finding a Good Cavalier King Charles Spaniel Breeder
Many national breed clubs provide breeder lists, which are a great starting point. Look within a specific mile radius you are willing to drive to meet the breeder and puppies. Breeder websites should have detailed information on health testing and puppy socialization.
When you find a few breeders who look good on paper, contact them via email or phone. Discuss your goals and hopes for your new family member. You are looking for a connection with a breeder just like you are looking for a connection with your puppy.
Visiting the Breeder and Their Cavaliers
I recommend setting up a date and time to meet the breeder in their home and visit with their Cavaliers. Seeing the living situation and behavior of their dogs in person is a great indicator of how the puppies will turn out. Look for happy breeding dogs that are part of the family. Some breeders may be hesitant about home visits, but it’s essential for you to feel comfortable with the environment where your puppy is being raised.
Picking out Dexter! FYI he was 5 weeks here, I would bring him home at 12 weeks.
Choosing Your Cavalier Puppy
This could be an entire article on its own, but here are a few highlights to get you started. TAKE YOUR TIME! This is not a time to make a quick decision or an impulse buy. You are choosing your next family member, a living creature with strong emotions that will hopefully be with you for the next ten to twenty years.
Before meeting the puppies, have an idea about what you want to do with your Cavalier puppy and future dog. Are you looking for a canine athlete? Or maybe a therapy dog to visit children or the elderly? The personality traits of those two puppies can be quite different, so knowing your goals will help in choosing the best Cavalier King Charles Spaniel puppy for you, your family, and your goals.
Bringing Your New Cavalier Puppy Home
Picking up a new Cavalier puppy typically happens when the pup is between 12-15 weeks of age. Prepare your car for your new puppy before arriving at the breeder’s home. Items to have on hand include a travel crate, puppy blankets, healthy treats, water and bowl, and a leash and harness. If your journey includes an overnight stay, pack items for a dog friendly hotel stay.
Air Travel Considerations
I personally would never fly any of my pets in cargo, nor would I have my puppy shipped to me. Meeting the breeder, dogs, and puppies is essential. If you plan on a plane ride home, check with the airlines on what they will need before your departure.
Maintaining Contact with Your Breeder
When breeders are committed to the breed’s well-being, they may ask you to provide specific health tests on your puppy throughout its life. This means the breeder is looking to see how the puppies develop, and if there are any medical concerns over their life, they may not breed that pair again. In my book, this speaks volumes about what a responsible breeder really is.
Now that you have a healthy and behaviorally sound Cavalier puppy, it’s your job to start socialization and training. You and your puppy are ready for a lifetime of fun and joy.
I hope this updated article helps your readers in their quest to find a reputable Cavalier King Charles Spaniel breeder. Good luck at finding your BFF!
Google Ad Below
Join our vibrant Cavalier King Charles Spaniel community on Facebook, support our dedication to pet wellness on Patreon, and stay updated with our weekly newsletter for invaluable tips and insights into raising happy, healthy pets. Together, let’s make a difference in our dogs’ lives!
🐶💙Support our passion for pet wellness and unlock exclusive content, perks and early access by exploring our Patreon tiers.
Sign up for our weekly newsletter!
Join us on Facebook!
[...]Read more...
November 12, 2024Best Treats for a Cavalier King Charles Spaniel
If you’ve found this Cavalier blog by searching for “best treats for Cavalier King Charles Spaniels,” you’re probably wondering what makes a healthy dog treat for this special breed. Whether you’re looking for the best dog-training treats for your Cavalier or just healthy dog treats, it’s essential to choose options that benefit your Cavalier King Charles Spaniel’s health and waistline. Here’s what I consider when picking out healthy treats for Dexter.
Check the Ingredients in Your Cavalier’s Treats
The very first thing I do when choosing treats for Dexter is check the ingredients list. Don’t just rely on the fancy pictures on the front of the bag; the ingredient panel tells you what your Cavalier is actually eating. Even if a treat claims to be “chicken-flavored,” that doesn’t always mean it contains real chicken. Always look for whole, natural ingredients like real meat, vegetables, and fruits.
What to Avoid in Your Cavalier King Charles Spaniel’s Treats
Artificial Flavors: If you see “flavor” in the ingredient list, it’s likely a synthetic that’s meant to mimic real food. Real food ingredients are always better for your Cavalier’s health.
Added Salt: Too much salt can be harmful, especially for dogs with heart issues, like Cavaliers. Stick to treats with no added salt, as too much sodium can lead to health problems.
Preservatives: Treats should be free of artificial preservatives like potassium sorbate, sodium benzoates, BHA and BHT. These chemicals are commonly found in cheaper treats and can be harmful in the long run.
By-Products or Mystery Meat: Avoid any treats that list “meat by-products” or vague “animal fat.” We want to know exactly what’s going into our dog’s body.
Sugar or Sweeteners: Skip the sugary treats! Cavalier King Charles Spaniels can easily gain weight, and too many sugar-filled treats can contribute to obesity, which affects their health.
Grains: Many dogs, including Cavaliers, can be sensitive to corn, wheat, and soy. Grains also pack in a lot of calories. Stick to treats with grain-free ingredients.
Healthy Treats for Cavalier King Charles Spaniels
So, what should you be looking for instead? The best treats for Cavalier King Charles Spaniels are made from whole, natural ingredients. I always opt for treats made with high-quality meats, like rabbit, chicken, beef, or duck, and ingredients that support overall health.
When choosing healthy dog treats, I think about each ingredient and how it affects my dog’s health and diet. I prefer foods that can contribute to Dexter’s overall nutrition, not add-ons. If I think the treat’s ingredients are more like a candy bar, I’ll skip it.
Best Training Treats for Cavaliers
When I’m training Dexter, I want treats that are both nutritious and irresistible. Training treats should be small, easy to chew, and made from single-source protein. Some of my favorites include freeze-dried meat or dehydrated meat. These treats are not only high-value (meaning they’ll grab your Cavalier’s attention), but they’re also healthy and easy to use in training sessions.
I also may grab freeze dried dog food that consists of healthy ingredients and no fillers. They tend to be bite-sized, and I can easily cut down on some of Dexter’s fresh food for the day and replace it with the freeze-dried dog food. No extra calories needed, and he doesn’t lose any of his daily nutritional needs.
Treats for Occasional Snacking
When it’s time for a snack, I’m okay with a treat that’s a bit more substantial, like grain-free biscuits made with sweet potato or pumpkin. These treats are great for occasional use, but they do tend to be higher in calories and more ingredients. I like to keep Dexter’s treats simple and sweet.
My Top Picks for Cavalier King Charles Spaniel Treats
Dehydrated Meat: A simple, natural treat that’s great for training or as an occasional snack. Dehydrating your Cavalier’s meat treats at home is simple and can be done using a dehydrator or your oven. To start, slice the meat (like chicken, beef, or turkey) into thin, even strips, removing any fat. If using a dehydrator, set it to around 160°F and arrange the meat strips on the trays, ensuring they don’t overlap. Dehydrate for 6-12 hours, checking for proper dryness—meat should be firm and break easily. If using an oven, place the meat on a baking rack, set the oven to the lowest possible temperature, and prop the door open slightly to allow moisture to escape. Store a few treats in your Cavalier’s treat jar and the rest in the freezer to stay fresh.
Dehydrated Fruits and Veggies: Dehydrated fruits and vegetables are a great low-calorie treat for Cavalier King Charles Spaniels, providing a crunchy, natural snack without added preservatives or artificial ingredients.
Can Cavaliers have carrots? For me, this is a yes and no. Yes, carrots are perfectly healthy and nutritious for your Cavalier. I know a lot of people recommend feeding large carrots to dogs as a chew, but I do think that may pose a choking risk. You must ensure your Cavalier is safely chewing the carrot and not swallowing big chunks. The same goes for baby carrots. For me, I prefer to feed Dexter carrots as little bits. But, I am definitely a proud helicopter mom. Make sure you read the article on healthy chews for your Cavalier King Charles Spaniel if you are wanting safe-and-natural chews.
Freeze-Dried Healthy Dog Food: Freeze-dried dog food can be an easy swap from their regular diet, making it a convenient and healthy treat option for Cavalier King Charles Spaniels. Plus it’s a great treat for picky eaters.
Freeze-Dried Meat Treats (Single Ingredient): Freeze-dried meat treats are a high-protein, single-ingredient snack for Cavaliers, providing a nutritious option.
Healthy DIY Recipes for Cavaliers. Don’t forget to subscribe to @CavalierTipsandFun for more!
Final Thoughts on Choosing the Best Treat for a Cavalier King Charles Spaniel
When choosing the best treats for your Cavalier King Charles Spaniel, always prioritize natural, healthy ingredients. Look for treats that are high-quality, free of unnecessary fillers, and made with proteins you recognize. And remember, even the healthiest treats should be given in moderation.
What treats does your Cavalier love?
Join our vibrant Cavalier King Charles Spaniel community on Facebook, support our dedication to pet wellness on Patreon, and stay updated with our weekly newsletter for invaluable tips and insights into raising happy, healthy pets. Together, let’s make a difference in our dogs’ lives!
Google Ad Below [...]Read more...
August 20, 2024Why Does My Cavalier King Charles Spaniel Eat Everything?
As a devoted Cavalier King Charles Spaniel family, you may be wondering why your Cavalier seems to eat everything in sight. Leaves, rocks, plants, grass, paper, cardboard, whatever they seem to be able to get their mouth around is fair game. This can be concerning, as it should be. If your Cavalier eats something he shouldn’t, there’s a risk of poisoning or choking. This could be caused by pica, not enough food, other health-related issues, or boredom. Let’s dive in and see if, together, we can figure out why your Cavalier King Charles Spaniel eats non-food items.
What is Pica?
Pica is a condition where dogs eat non-food items. For Cavaliers, this could include chewing on blankets, rocks, dirt or other random items. While it might seem quirky, pica can be a sign of underlying issues. Understanding the root causes can help you address the problem and ensure your Cavalier receives the best care.
The Behavior Behind Pica
Cavaliers, like all dogs, need mental and physical stimulation. Without enough engagement and enrichment, they might resort to chewing on inappropriate items. A 2019 study published in The Journal of Veterinary Medical Science discovered pica is a common behavioral issue. After surveying 2,000 cases, researchers found dogs that lacked regular enrichment, whether due to being crated for too long, being bored, or just not enough physical exercise were more likely to display pica tendencies.
Behavior Issues That Might Be Causing Your Cavalier’s Pica
Boredom and Lack of Stimulation: Cavaliers are playful and intelligent dogs that thrive on activity. If they aren’t entertained, they might turn to chewing on anything they can find. Toys and interactive games are crucial in keeping them busy and satisfied.
Stress and Anxiety: A Cavalier’s anxiety or stress is a major concern when it comes to pica. A change in routine, new family members, or other stressors can cause your Cavalier to engage in pica as a coping response. Providing a safe and secure environment along with calming activities can help reduce anxiety. If you feel your Cavalier has anxiety, it’s important to address that anxiety with a professional.
Attention-Seeking: Sometimes, Cavaliers might eat non-food items to get your attention. I always say, if a dog is asking for attention, they probably aren’t getting the attention they need. Bump up your Cavalier’s training, games, and outings.
Medical Reasons for Pica
While pica can often be a sign of boredom, medical issues can contribute to pica in dogs. This is why it’s always important to speak with your Cavalier’s holistic veterinarian. Here are some common medical issues for pica in dogs.
Nutritional Deficiencies: If your Cavalier’s diet is lacking in essential nutrients, they might chew on non-food items to make up for it. Ensure that their diet is balanced and rich in the nutrients they need.
Gastrointestinal Issues: Sometimes, dogs might eat non-food items to soothe an upset stomach. If your Cavalier seems to be eating odd items frequently, it’s worth checking with your vet to rule out any digestive issues.
Some diagnostic methods your vet might suggest include:
Biopsies: Taking tissue samples from the digestive tract to check for disease.
Therapeutic Trials: Trying a medication or diet change to see if the pica improves.
Blood Work: Checking folate and cobalamin levels, and performing a TLI (Trypsin-Like Immunoreactivity) test to assess pancreatic function.
X-rays: Ruling out gastrointestinal obstructions and other potential causes.
How to Stop Pica in Your Cavalier King Charles Spaniel
The good news is that pica can often be managed with positive training and enrichment techniques. If it’s medical, following your dog’s vet’s protocol will be essential.
Provide Engaging Toys and Enrichment Activities: Offer a variety of toys that challenge your Cavalier’s mind and body, such as puzzle toys, chew toys, and interactive games. Incorporate activities like nose work games, agility courses, or scent trails to provide mental stimulation and prevent them from seeking out inappropriate items. Check out our Cavalier enrichment ideas!
Address Anxiety with a Professional: If anxiety might be contributing to your Cavalier’s pica, consult with a dog behavior consultant. They can help identify the root causes of your dog’s anxiety and develop a tailored plan to address it.
Use Positive Reinforcement: Reward good behavior with praise and treats. When your Cavalier interacts with their toys or engages in positive activities, reinforce this behavior to guide them toward what’s encouraged.
Monitor and Redirect: Keep an eye on your Cavalier’s actions and gently redirect them if they start chewing on non-food items. Providing appropriate toys and praising them when they use them can help steer them away from unwanted behaviors.
Leash Management and OutFox Field Guard: Use a leash to manage your Cavalier and prevent them from accessing non-food items so they can’t sneak off. Consider using an OutFox Field Guard, a type of protective mesh that covers their face that can prevent dogs from eating things they shouldn’t. Unlike a muzzle, which restricts a dog’s ability to open their mouth entirely, a OutFox protects against ingestion while allowing normal breathing and drinking.
Understanding and addressing pica in your Cavalier King Charles Spaniel involves a combination of detective work, positive training, proper enrichment, and, if necessary, medical evaluation. By keeping your Cavalier mentally and physically stimulated, providing a balanced diet, and offering plenty of attention and love, you can help them steer clear of inappropriate chewing and enjoy a happy, healthy life.
Have you noticed any specific triggers for your Cavalier’s pica? Share your experiences and tips in the comments below!
Google Ad Below
Join our vibrant Cavalier King Charles Spaniel community on Facebook, support our dedication to pet wellness on Patreon, and stay updated with our weekly newsletter for invaluable tips and insights into raising happy, healthy pets. Together, let’s make a difference in our dogs’ lives!
🐶💙Support our passion for pet wellness and unlock exclusive content, perks and early access by exploring our Patreon tiers.
Sign up for our weekly newsletter!
Join us on Facebook!
[...]Read more...
March 5, 2025Preparing Your Cavalier King Charles Spaniel for Air Travel
Through Dexter’s 15 years of life, we had countless adventures together, but every single one was by car. At nearly 30 pounds, flying in the cabin wasn’t an option for him, and I would never consider putting a dog in cargo. Now, with Stewart, I have the opportunity to travel by plane since he will be between 16 and 18 pounds as an adult, which is small enough to fit in an airline-approved travel crate under the seat.
I have to admit, I’m a little nervous. It’s been almost 30 years since I last flew, and my experience wasn’t great. But I’m determined to make this a smooth process for both Stewart and myself. In September, we’ll be flying from Detroit to Portland, Maine, and I want to make sure Stewart is as comfortable and confident as possible for his first airplane trip.
Preparing Stewart, My Cavalier King Charles Spaniel for Air Travel
Since Stewart has never flown before, I’m taking a step-by-step approach to help him get used to every part of the travel experience. This isn’t just about the flight itself; it’s about everything leading up to it, from riding in his crate in the car to being in a busy airport environment.
Teaching a Cavalier to Enjoy a Travel Crate
One of the biggest adjustments for a Cavalier is spending time in a small, enclosed space. Since Stewart isn’t crate trained and has some separation anxiety, I’m taking extra care to make his travel crate a safe and positive space. An airline-approved travel crate is a much tighter fit, so here’s how I’ve been getting him used to it:
Introducing the Crate Indoors – I started with short training sessions, luring Stewart into the travel crate with treats and rewarding him for stepping inside. Since it’s a tight fit, I guided him to turn around and reinforced him for doing so. Once he was comfortable moving inside, I worked on having him stay in the crate for a few seconds before rewarding and letting him out, gradually increasing the duration.
Crate Inside a Crate – To help him transition smoothly to riding in the travel crate, I placed it inside his larger crate in the van. Since he was already used to the big crate, this made it feel more familiar. For the first couple of weeks, I left the travel crate unzipped, but zipped up the larger crate.
Zipping Up While Driving – Once he was comfortable, I started zipping up the travel crate while still inside the larger crate. This allowed him to experience confinement in a secure way without making a sudden change.
Removing the Larger Crate – The next step will be taking the travel crate out of the big crate so that he’s riding in just the small one. By gradually adjusting him to this setup, he won’t even notice the change!
Socialization and Confidence Building
Beyond the crate, I want to make sure Stewart is confident in all the different environments he’ll encounter on our trip.
Walking Politely on a Leash – Stewart will need to walk calmly on a leash through the airport. We’ve been practicing polite walking in various places with different surfaces and distractions. I will continue this training with busy locations as we progress through his training.
Exposure to Crowds and Noises – Airports are full of noises; baggage carts, intercom announcements, rolling suitcases. I’m taking Stewart to different places where he can experience a variety of sounds and people in a controlled way.
Getting Used to Security Procedures – At TSA checkpoints, I’ll need to take Stewart out of his crate and carry him through security. To prepare, I’ll work on calmly lifting him out of his crate and holding him in busier environments, helping him get comfortable with the experience before our trip.
Preparing for Time in the Airport
Most airports have designated pet relief areas, but access to them depends on the layout of the airport and TSA procedures. Some airports have relief areas before security, while others have them post-security. Since Stewart will be crated during the drive and throughout check-in and security, I’ll plan ahead to find out if there’s an opportunity for a potty break before we go through security. If not, I’ll make sure he’s had plenty of time to potty before we leave for the airport.
Practicing Extended Crate Time – I’ve been gradually increasing the amount of time Stewart spends zipped up in his crate, so he’s comfortable being inside for longer periods.
Planned Potty Breaks – Since dogs can’t relieve themselves once past security, I’ll make sure to take Stewart to the airport’s designated pet relief area before heading to the gate. This is also why I teach my dogs how to potty on cue; it makes it easier to ensure they go when needed, especially in situations like this where time and access are limited.
The Flight Itself
The actual flight is the final step in our preparation. Since Stewart will be in his crate under the seat for the duration of the flight, I want to make sure he’s as comfortable as possible.
Calm, Positive Associations – I’m making sure that his crate time is always associated with good things; treats, chew items, and a cozy space.
Chews and Enrichment for the Flight –I’ll bring along a few safe chews and likely my slippers to provide comfort for Stewart during the flight.
Staying Calm Myself – Dogs pick up on our emotions, so I’ll be focusing on staying relaxed and making this feel like just another routine adventure for Stewart.
Final Thoughts
Traveling with a Cavalier King Charles Spaniel on a plane takes preparation, but with gradual exposure and a positive approach, it can be a smooth experience. My goal is to make sure Stewart feels safe, confident, and comfortable every step of the way. While I’m still a bit nervous about my first flight in 30 years, I know that by preparing Stewart properly, we’ll both be ready for our adventure to Maine.
A big thank you to all of our Cavalier friends who sent us their travel photos! Don’t forget to follow them on social media.
Have you traveled with your Cavalier on a plane? I’d love to hear about your experiences in the comments!
Google Ad Below [...]Read more...
October 30, 2024How to Bathe a Cavalier King Charles Spaniel Puppy
If you are wondering how to bathe a Cavalier King Charles Spaniel puppy at home, I have you covered. As a Cavalier mom and positive dog trainer, I’m ready to help you make bathing your Cavalier puppy not only effective but enjoyable and stress-free for your new Cavalier King Charles Spaniel puppy.
Dexter, who is now fifteen, has had his fair share of dog baths. But, today, I’m going to share how I gave Willow her first bath at home. With the right setup, some tasty treats, taking it slow, and a cozy towel, you can create a zen atmosphere for your Cavalier’s bathtime. So here’s a step-by-step guide to giving your Cavalier King Charles Spaniel puppy their first bath.
Set Up Your Puppy’s Bath Space for Safety and Comfort
First, you want to ensure your puppy’s bathtub or sink is safe and secure. You don’t want your puppy slipping on the surface of a wet tub or sink. First things first-secure the bathtub or sink so your puppy won’t slip. A good rubber mat keeps your Cavalier from slipping, and this alone will help your puppy feel safer in the tub. If your Cavalier is small, like Willow, you can easily bathe them in the sink. But, if they are larger, like Dexter, a tub is a must, or a portable dog bathtub can also work well. I haven’t used one, but I’ve heard from other Cavalier families they are great!
Warm Towel Tip: Before starting your puppy’s bathtime, place a few towels in the dryer. Then, just before you head to the bath, grab the warm towels. Then, after bathtime, your puppy can be wrapped in a warm-and-cozy towel. If you air dry your Cavalier puppy, then add some puppy blankets too, so they can cozy up in the pile of warm blankets.
How to Choose a Puppy Shampoo That is Safe
When choosing a safe puppy shampoo, the first stop is the back of the shampoo bottle to read the entire ingredient panel. Yup, you want to read each ingredient and make sure those ingredients are safe and natural. You may be surprised at the garbage that you find in some puppy shampoos.
Full disclosure, I’ve been working with the 4-Legger brand since 2016 and, in my opinion, they are the best out there. For puppies, I like their hypoallergenic SOOTHE formula. This isn’t a puppy shampoo review, but I do want to share their ingredient panel, so you can get a better idea on what a good puppy shampoo looks like.
4-Legger SOOTHE Ingredients: Organic Aloe Juice, Organic Saponified Oils (Coconut, Shea Butter, Olive, Sunflower, and Jojoba), Organic Vegetable Glycerin, Organic Rosemary Extract Order today with promo code RaiseNaturally20 for 20% off your first order.
Keep Your Cavalier’s Inner Ears Dry
Protecting those little ears is important. You can place a cotton ball gently in each ear to prevent water from sneaking in, but remember to remove them after! Or, you can simply gently press their ear to their head as you use a warm washcloth.
Be Generous with the Tasty Treats or Lick Mats
Treats are key to conditioning your puppy that bathtime is good. Bath=Treats or Bath=Lick Mat Time Giving treats throughout the bath not only keeps it positive but also helps distract them from what is going on. Talk to your Cavalier puppy through the experience. Let your puppy know how much you love them and that this is a safe experience.
If you’re looking for more gentle routines and everyday training ideas like this, my Manners, Life Skills & Foundation Training Course walks you through simple, trust-based lessons you can use at home. It’s all about helping you and your dog feel confident and connected.
Watch Willow’s First Bath and don’t forget to subscribe to @CavalierTipsandFun for more!
Introduce Your Puppy to the Bath Gently
When it’s go-time, place your puppy gently in the sink or tub. Willow was a little unsure at first, so I kept things calm and encouraging. We went slowly, allowing her to get comfortable, and rewarded her bravery with treats. You can always do this in steps over a few days if your puppy is nervous. Teaching your Cavalier puppy to enjoy a bath is going to be so important since this is a breed that can benefit from baths to keep their luxurious coat beautiful. The benefit of puppy bathing is that the process can be much shorter than when your Cavalier has a full coat.
Start the Water Slowly
Once your puppy seems a bit settled, turn on the water. Using a shower sprayer is ideal because it’s easier to manipulate around your Cavalier and get the belly and bum area easier. Always check the temperature; you want it warm, but never hot. If your pup gets nervous, reassure them with gentle touches, talk to them, and provide healthy and tasty treats. We want bathtime to be a good thing, not something to avoid.
Wet Your Puppy and Lather Up
Begin with their back, avoiding their face for now. Once they’re damp, add a little shampoo and lather gently. Go slow and talk to your pup throughout to keep them reassured. Make sure to reach all those little spots like under the belly, armpits, and legs.
When it comes to cleaning your Cavalier’s face, be careful and gentle. Grab a soft washcloth, soak it in warm water, and wring out any excess. Gently wipe around your puppy’s face, especially near the eyes and mouth, to keep things clean without needing shampoo. Cavaliers can be sensitive around their eyes, so keep it soothing and slow, making it a comfortable moment for them. If there’s any tear staining, gently focus on those areas but avoid scrubbing.
Rinse Thoroughly
It’s so important to rinse really well to avoid any leftover shampoo that could irritate their skin. Keep the water warm and gently go over each area until you’re sure they’re squeaky clean.
How to Dry a Cavalier After a Bath
Gently squeeze out as much water as possible from their coat while they’re still in the tub, especially from their ears, legs, and belly. Be careful not to pinch their skin. Then grab a warm towel and start rubbing them down right in the tub. Begin with their back and then work down to their legs, belly, and especially those floppy ears! The towel rubdown helps absorb extra moisture and keeps your puppy from dripping everywhere.
Pro tip: When it looks like your puppy is going to shake their head, try covering their ears lightly with a towel. It can help prevent ear issues and keeps the shake-off water spray to a minimum!
Should You Blow-Dry Your Cavalier King Charles Spaniel Puppy?
For a little more drying, a low heat or cool setting on a blow dryer works great. Keep the dryer moving and avoid getting too close to their skin. And, of course, more treats and sweet talk make this part easier too! I would highly recommend desensitizing your puppy to the hair drier first. You can learn how in the video below. If you are going to allow your Cavalier to air-dry, I would suggest using a dog drying jacket and warm , snuggly blanket.
Learn how to teach your Cavalier to love drying and subscribe to our other YouTube channel @RaisingYourPetsNaturally
And there you have it—bathing your Cavalier King Charles Spaniel puppy at home for the first time! If you’re wondering, when should I bathe my puppy for the first time, or how often should I bathe my puppy, it’s usually safe to start around eight to twelve weeks, assuming you are using a truly safe puppy shampoo. With these tips and a positive approach, you’ll help set up your Cavalier King Charles Spaniel puppy for a lifetime of happy bath times.
What part of your puppy’s first bath are you most nervous about? Let me know in the comments. I’d love to help make it a fun experience for both of you!
Google Ad Below [...]Read more...
October 1, 2024MCAD deficiency in Cavalier King Charles Spaniels
Last year, on my Raising Your Pets Naturally blog, I shared information about a relatively new health condition found in Cavalier King Charles Spaniels: Medium-Chain Acyl-CoA Dehydrogenase (MCAD) deficiency. As many Cavalier families know, this breed is already prone to several health issues, and adding another one to the list is upsetting.
MCAD deficiency is a genetic condition that impacts how the body breaks down certain fats for energy. Recent research has found some Cavaliers who have symptoms such as seizures, lethargy, and other health issues may have MCAD.
The initial study that brought this to the general public’s attention focused on a three-year-old male Cavalier who was experiencing seizures and unusual tiredness. After examining his blood and urine, researchers discovered elevated medium-chain fatty acids, pointing to MCAD deficiency. They then sequenced the dog’s genome and identified a specific change in the ACADM gene, which is associated with this condition.
When the researchers tested this genetic variant in 162 Cavaliers, they found that about 23.5 percent of the dogs carried the mutation. This discovery is important because it suggests that MCAD deficiency might be the reason behind the seizures and other symptoms we sometimes see in Cavaliers.
Here are some symptoms to watch for:
Seizures: Seizures or convulsions can be a key indicator of potential MCAD deficiency.
Lethargy: Unexplained and prolonged tiredness could be a sign of an underlying issue like MCAD deficiency.
Intermittent Health Issues: These episodes might include vomiting, decreased energy, or more severe symptoms like seizures.
Unsteady Gait: Difficulty walking or balance issues could occur during episodes.
Loss of Appetite: A sudden loss of interest in food might indicate a problem.
Low Blood Sugar (Hypoglycemia): This can lead to weakness, shakiness, disorientation, and seizures.
Abnormal Behavior: Changes in behavior, such as irritability or confusion, might be linked to a metabolic disorder.
Respiratory Distress: In severe cases, dogs might experience difficulty breathing during an episode.
Frequent Infections: Some dogs with MCAD deficiency may be more prone to infections.
Neurological Symptoms: Symptoms like circling, head pressing, or lack of coordination could be signs of this condition.
I know, right? A lot of these symptoms are also symptoms of other Cavalier King Charles Spaniel medical issues. While these symptoms can be caused by various factors, it’s important to consider MCAD deficiency, especially if your Cavalier is showing multiple signs.
Consider Getting Your Cavalier Tested for MCAD Deficiency
If you’re concerned about MCAD deficiency and its impact on your Cavalier King Charles Spaniel, getting your dog tested is a straightforward step you can take. The test involves a simple at-home swab, which you can easily order and perform yourself. This can provide valuable insights into whether your Cavalier carries the gene associated with MCAD deficiency.
For those thinking about adding a new Cavalier puppy to their family, it’s encouraging to know that many responsible breeders are proactively testing their breeding pairs and even the grandparents. This testing helps ensure that future puppies are less likely to inherit MCAD deficiency, contributing to healthier generations of Cavaliers.
Testing is a proactive measure that can help you make informed decisions about your dog’s health and well-being. If you’re interested in testing, talk to your veterinarian or reach out to a reputable lab for more information on how to get started.
For Cavaliers at risk of MCAD deficiency, diet plays a crucial role. Since these dogs might struggle to break down medium-chain fatty acids (MCFAs), it’s recommended to be mindful of their diet:
Limit MCTs: Foods high in MCTs, like coconut oil, palm oil, and milk products, including yogurt might need to be limited in dogs with this genetic variant.
Watch High-Fat Diets: A balanced diet, without excessive fats, is key for Cavaliers with potential MCAD deficiency.
Cavaliers that haven’t been tested for MCAD deficiency should avoid foods high in MCTs. Without knowing their genetic status, it’s best to be cautious to prevent potential health issues like seizures or other symptoms associated with the condition. If your Cavalier has had a diet rich in MCTs for a few years without any of the symptoms listed above, you may consider continuing to feed. However, the test is pretty easy and inexpensive, so it might be just easier and safer to test to know for sure.
The research on MCAD deficiency in Cavaliers is ongoing, and it’s vital for more Cavaliers to be tested. A simple swab test can determine whether your Cavalier carries the gene associated with MCAD. This testing is important not just for your Cavalier’s care, but also for responsible breeding practices to reduce the prevalence of this mutation in future generations. If you test, please contact your Cavalier’s breeder with the results.
Testing for MCADD
Canine Genetic Testing
GenSol Animal Diagnostics
Laboklin
As of June, 2024, the latest stats from a Facebook group dedicated to MCAD deficiency in Cavaliers show the following:
Genetically Affected: 49 dogs (9.78%)
Clinically Affected: 6 dogs (1.2%)
Carriers: 238 dogs (47.5%)
Clear: 214 dogs (42.7%)
These numbers highlight the importance of testing and awareness within our Cavalier community. By staying informed and proactive, we can continue to support the health and well-being of our Cavaliers.
Managing MCAD Deficiency: Diet and Care Tips
If your Cavalier King Charles Spaniel has been diagnosed with MCAD deficiency, managing their condition effectively involves careful attention to their diet and feeding schedule. I would suggest a good heart to heart with your dog’s holistic veterinarian. If your Cavalier does have MCAD deficiency you will need to avoid a high-fat diet and avoid foods high in medium-chain triglycerides (MCTs). Don’t forget to read those ingredient panels on all the foods, treats, and chews you feed your Cavalier.
Although MCAD deficiency is serious in Cavaliers, a good food protocol can help ensure your Cavalier still leads a full and enriched life.
Google Ad Below [...]Read more...
September 18, 2024How to Celebrate a Senior Dog’s Birthday and Healthy Dog Cake Recipe
It’s hard to believe that Dexter, my best friend and constant companion, is turning fifteen! I’m over the moon that I am able to celebrate this milestone with him. He may be slowing down a bit, but his spirit and spunk remains as bright as ever. As Dexter has aged, we may have tweaked what we can do, but one thing has stayed the same: we live each day to the fullest, cherishing every moment.
Over the past couple of years, I’ve seen subtle changes in Dexter’s energy and behavior. He doesn’t have the boundless energy of his younger days, and he’s been going through some senior dog anxiety. We’ve learned to adjust our activities together, and I’ve been working on helping him feel more secure as his cognition changes. Our daily enrichment now includes slow, sniffy walks, leisurely poke arounds through the neighborhood followed by a stroll, and indoor adventures. He still enjoys simple training sessions, which keep his mind sharp, and I continue his canine fitness exercises to maintain his mobility and strength.
Earlier this year, Dexter went down in his back end after a reaction to medication. It was a scary time, and I wasn’t sure what his recovery would look like. I was actually wondering if his time was coming to an end. But after three to four months of dedicated rehab, I’m thrilled to share that he’s made a full recovery! Dexter’s resilience has always inspired me, and this experience only deepened my love for him. His ability to bounce back, even at fourteen, is a testament to his incredible spirit.
With Dexter by my side, I’ve been inspired to dive into new creative projects. Over the past year, we launched this blog dedicated to Cavalier King Charles Spaniels. This is actually our second blog! Check out our first blog, Raising Your Pets Naturally. I’ve also created a children’s coloring book, Dexter’s Adventures, bringing his playful and inspiring spirit to life for a younger audience. Which makes this his 3rd children’s book! Everything I do is shaped by Dexter, and I’m so lucky for the joy and inspiration he brings.
Our mantra has always been to live each day to the fullest, and as Dexter turns fifteen, this really hits home. Every day is a gift, and I’m beyond thrilled to have Dexter with me on this journey. Together, we continue to embrace life, even as we both slow down, finding joy in the simple moments we share.
Celebrating Dexter’s birthday is more than just a tradition, it’s a reminder of the love, laughter, and resilience we’ve shared throughout his life. During Dexter’s birthday celebrations, we always make sure to support Cavalier Rescue USA, a cause that’s close to our hearts. If you’re able to donate or volunteer your time, please consider checking them out, and be sure to tell them Dexter sent you!
Here’s to Dexter, my silly monkey, stink pot, my muse, and the one who makes every day brighter with his love.
Don’t forget to subscribe to our @CavalierTipsandFun YouTube channel for more!
Print
Pin
Dog-Friendly Strawberry Birthday Cake
Here's Dexter's 15th birthday cake recipe and photos! To make his special day even more memorable, I whipped up a dog-friendly birthday cake that’s not only tasty but also healthy. This homemade dog birthday cake is packed with ingredients Dexter loves. Whether you're planning a dog birthday celebration or looking for a healthy dog birthday cake recipe, this one is sure to be a hit with your pup.
Course cake Keyword dog friendly cake, dog birthday cake,
Prep Time 1 day day Cook Time 50 minutes minutes
Servings 12 Dogs
Author Tonya Wilhelm
IngredientsOptional Blue Spirulina Gummy Paw Print Decoration6 tbsp Beef Gelatin2 tsp Blue Spirulina2 cups Boiling WaterStrawberry Dog Friendly Cake4 cups Quinoa Flour6 Eggs16 oz Strawberries Stems Removed1/4 cup Olive OilOptional Dog Frosting8 oz Cream Cheese check the ingredients to ensure it’s dog-friendly10 oz Butternut Squash Cooked
InstructionsBlue Spirulina Gummy Paw Print DecorationIn a large mixing cup, combine the gelatin and blue spirulina.Quickly stir in the boiling water until fully dissolved.Pour the mixture into the paw print cutouts in the paw-shaped cake pan. Pour any extra in other fun silicone molds.Refrigerate until set then gently remove the paw gelatin shapes.Place the paw shapes on a cookie sheet and return to the refrigerator while preparing the cake.Dog-Friendly Strawberry CakePreheat the oven to 350°F.Purée the strawberries in a blender until smooth.In a large mixing bowl, combine the quinoa flour, eggs, olive oil, and strawberry purée.Generously grease the paw print cake pan with olive oil.Pour the cake batter into the pan and bake for approximately 50 minutes, or until set.Allow the cake to cool for 15 minutes, then carefully remove it from the pan and place it on a cooling rack to cool completely.Optional Dog FrostingPurée the cooked butternut squash in a blender.Add the cream cheese to the purée and blend until smooth and well combined.Once the cake is completely cool, frost the cake with the butternut squash and cream cheese mixture.Top with the blue spirulina gummy paw print decorations for a fun and colorful touch!
Join our vibrant Cavalier King Charles Spaniel community on Facebook, support our dedication to pet wellness on Patreon, and stay updated with our weekly newsletter for invaluable tips and insights into raising happy, healthy pets. Together, let’s make a difference in our dogs’ lives!
Google Ad Below [...]Read more...
January 8, 2025How to Stop Your Cavalier King Charles Spaniel From Licking Everything
Have you ever wondered why your Cavalier King Charles Spaniel licks you or how to curb excessive licking? If so, you’re not alone. Many Cavalier parents find themselves trying to stop their Cavalier from licking so much. Let’s take a closer look at why Cavaliers lick and what you can do if it becomes too much. Cavaliers lick for various reasons, and understanding the “why” is key to changing and managing the behavior.
Cavaliers May Lick You Because You Taste Great!
One common reason is that you simply taste good. Your Cavalier might be drawn to the salt on your skin, or maybe you’ve just eaten, and they’re picking up on lingering food scents. Even coming inside after an active day outdoors can make you extra appealing to their sensitive noses. Hormones and pheromones also play a role. For example, if you’re feeling stressed or it’s that time of the month, your Cavalier might be more inclined to lick because they’re sensing these subtle changes. Not to mention when we put hand lotion on, oh, yummy!
Cavaliers Lick During Greeting Behaviors
Another reason dogs lick is as part of their greeting ritual. When you come home, they’re excited to see you and may lick as a way of saying, “Hello! I’m so happy you’re here!” It’s a natural expression of affection and enthusiasm. This behavior is especially common in Cavalier King Charles Spaniels, a breed known for their loving and people-oriented nature. Cavaliers thrive on connection and love being close to their families, so licking during greetings is often their way of reinforcing that bond.
Greeting-related licking can also be a way for your dog to gather information about where you’ve been. Dogs rely heavily on their sense of smell and taste to explore their environment, and licking is part of how they “read” the world. If you’ve been around other dogs, eaten something particularly tasty, or even just had a long day out, your Cavalier’s greeting might include licking to learn more about your adventures.
Check out the video. Don’t forget to subscribe to our @RaisingYourPetsNaturally YouTube channel.
Your Cavalier May Be Licking Because He’s Stressed
However, not all licking is tied to happy moments. Sometimes, licking can indicate stress or anxiety. This type of licking is known as a submissive or appeasement gesture. Essentially, your dog is trying to communicate that they mean no harm. You might notice this behavior around guests or strangers, where your dog licks excessively as a way to navigate the interaction. In some cases, they may even start licking their paws or nearby objects if they’re feeling particularly anxious.
How To Stop Your Cavalier King Charles Spaniel From Licking So Much
If your Cavalier’s licking becomes excessive, there are steps you can take to manage it. For instance, if your dog is licking because you taste good or they’re excited to see you, allow a quick lick and then gently redirect them. You can offer a chew toy or a bone to give them something else to focus on. This simple redirection helps channel their energy into a more appropriate activity while still acknowledging their excitement.
When licking is tied to stress, it’s especially important to avoid punishing your Cavalier. Punishment can actually make the behavior worse, as your dog may lick even more in an attempt to appease you. Instead, remain calm and redirect their attention to another behavior, such as sitting or playing with a toy. Addressing the root cause of your Cavalier’s stress and anxiety is key. Building their confidence through positive dog training can make a big difference. As your dog becomes more comfortable in stressful situations, the need for licking as a coping mechanism will naturally decrease.
In some cases, excessive licking may require professional help. If your dog’s licking seems compulsive or tied to high levels of stress, start by consulting your holistic veterinarian. They can check for any medical issues and look at your dog’s behavior history. From there, a dog behavior specialist can help you create a customized dog behavior modification plan to address your Cavalier’s needs, making life easier and more enjoyable for everyone.
If your Cavalier King Charles Spaniel’s licking is becoming a challenge, know that you’re not alone, and there are positive steps you can take to address it. With a little patience and the right approach, you can better understand why your Cavalier licks and guide them toward healthier ways of expressing themselves. If you’re feeling stuck or need personalized guidance, I offer one-on-one phone and Skype sessions to help you and your Cavalier navigate challenges like excessive licking. Together, we can create a plan that works for your unique pup and helps strengthen your bond.
Do you have a licker on your hands?
Google Ad Below [...]Read more...
September 3, 2024The Importance of Enrichment for Senior Cavalier King Charles Spaniels
Oh, Dexter. My senior Cavalier King Charles Spaniel, will be fifteen on October 6, 2024! I’m over the moon happy that he has led a long, happy life. He was diagnosed with Chiari malformation and syringomyelia in 2012, and I didn’t think he would have a very long life. Eventually, his MVD diagnosis also rolled in. But, despite his medical conditions, he has been thriving. He’s not just alive, he’s kicking!
I’m not going to lie. He started showing his age and some cognitive decline a few years ago. I have written about his life on my first blog, Raising Your Pets Naturally, so make sure you head over there for even more about Dexter’s life and care. But today, I wanted to discuss some of the things I have done to help keep Dexter as sharp as possible and try to keep canine cognitive dysfunction syndrome (CCDS) at bay. Through my experiences and research, I’ve seen how diet, positive training, and environmental enrichment can make a significant difference in maintaining his quality of life. So, let’s jump in.
What is Canine Cognitive Dysfunction Syndrome
Canine cognitive dysfunction syndrome (CCDS), is similar to dementia in humans and affects many senior dogs. Symptoms can be different from dog to dog, but some common behaviors include: disorientation, disrupted sleep patterns, decreased activity levels, and changed interactions with their environment and people. Research, including a study from the Journal of Veterinary Behavior (2016), shows that cognitive decline in dogs can significantly impact their quality of life. But early intervention and supportive care can improve CCDS symptoms and a dog’s quality of life.
The Importance of Canine Enrichment for Senior Cavaliers
Environmental enrichment is important for helping senior Cavaliers with canine cognitive dysfunction syndrome. Canine enrichment is about engaging your Cavalier’s senses, engaging their minds, and keeping them moving. I always think about “living life to the fullest.” I mean, we brought our Cavaliers into our homes so we can enjoy them and do fun things with them. Although they are beautiful, they deserve more than just a life where they lie around all day and do nothing. Just because they are seniors, doesn’t mean this mentality should change, although their activities will need to be adjusted to meet their individual needs. And it’s not just me; there’s research that backs up this theory.
Mental Stimulation: According to a study published in the Journal of Veterinary Internal Medicine (2016), mental stimulation through enrichment activities helps slow cognitive decline in senior dogs. Puzzle toys, interactive games, and scent-based activities keep the brain engaged, potentially delaying the progression of CCDS symptoms.
Reduces Stress: Canine enrichment is a great way to help reduce anxiety and stress in senior Cavaliers dealing with cognitive decline. Engaging activities and sensory stimulation can make a big difference. By adding enrichment routines to their day, you’re helping your dog feel calmer and more secure, which can ease some of the stress and anxiety that often come with cognitive issues.
Behavioral Improvement: Enrichment activities can make a big difference for senior Cavalier King Charles Spaniels who are restless or pacing. By offering mental and physical stimulation, these activities help reduce repetitive behaviors and keep your dog more relaxed.
Enhanced Quality of Life: Enrichment isn’t just about keeping your Cavalier busy. It’s about improving their overall quality of life. Engaging in enjoyable and stimulating activities brings more enjoyment, engagement, and a sense of purpose to their days, making their lives more fulfilling.
Simple Enrichment Ideas to Boost Your Senior Dog’s Quality of Life
Enrichment doesn’t have to be complicated or time-consuming. It’s all about finding simple, enjoyable activities that stimulate your senior Cavalier’s mind and body. Here are some ideas to get you started. And don’t forget to check out our article on Cavalier Enrichment Ideas.
Interactive Toys: Toys that dispense treats or require problem-solving are fantastic for mental stimulation. Depending on your Cavalier, you can use treat-dispensing toys or lick mats. When Dexter was younger, treat dispensing toys and frozen Tux toys were a hit. Now, he enjoys lick mats and snuffle mats. Food toys engage your dog’s sense of smell and taste.
Scent Games: Speaking of scent games, Dexter has always loved using his nose. Try hiding treats around the house or yard and let your Cavalier find them using his nose. Scent games are a natural way to keep your Cavalier active and provide both mental and physical exercise in a way most dogs love.
Positive Dog Training Sessions: Short, positive dog training sessions with simple cues or tricks are highly rewarding. They keep your Cavalier’s brain sharp and help build a stronger bond through shared activities.
Varied Walks or Strolls: Don’t get into a rut of going on the same walk, to the same park, on the same trail. Changing up your walking routes introduces new sights and smells. This variety provides your Cavalier with cognitive stimulation and keeps your walks fresh and interesting.
Comfortable Environment: Make sure your senior Cavalier’s living space is safe and cozy. Look out for any obstacles, and ensure good footing below. Whether you have carpet, carpet runners, grippy socks, ToeGrips or all of the above, traction is incredibly important for senior Cavaliers. They don’t have the same core strength to hold themselves up, and slick floors can be very scary and even cause injury if they slip or splay out.
Canine Fitness and Strength Building: I highly recommend setting up some sessions with a canine rehabilitation professional. Working with Dr. Sam, Dexter’s strength has been so important in his overall health and wellness. And our at home exercises aren’t just a way to keep him fit. They are also another form of enrichment, since he loves doing them! Engage in simple at-home exercises like sit-to-stand and sit-to-down exercises to help maintain your Cavalier’s muscle strength and joint mobility. Gentle range-of-motion exercises can also support your senior dog’s overall physical health and comfort.
Supporting Cognitive Health with Diet and Nutrition
Diet plays a crucial role in managing cognitive decline in senior dogs. According to research published in the Journal of Veterinary Internal Medicine (2019), a diet rich in specific vitamins and nutrients can significantly support cognitive health. Key vitamins such as vitamin E and vitamin C act as antioxidants, protecting brain cells from oxidative stress and easing cognitive issues. B vitamins, including B6, B12, and folic acid, are essential for maintaining healthy brain function. Omega-3 fatty acids, commonly found in fish and fish oil supplements, also play a vital role in improving cognitive function and managing symptoms of cognitive decline. Including these vitamins and nutrients in your dog’s diet, either through high-quality dog food (preferably fresh) or supplements, can help manage cognitive decline and enhance their overall quality of life.
Dexter, is proof of the benefits of a fresh diet. His meals are carefully prepared with high-quality, fresh ingredients and free from unnecessary chemicals. I’m convinced this fresh, balanced diet, rich in essential nutrients, has played a significant role in keeping his mind sharp and supporting his overall well-being.
How Positive Training Supports Cognitive Health in Senior Cavaliers
Positive training and routine play a vital role in supporting a senior dog’s mental sharpness and managing the effects of cognitive decline. As a positive dog trainer, I’ve taught Dexter plenty of fun and useful tricks, not just for good behavior, but also to keep his mind engaged and sharp. Each training session isn’t just about obedience; it’s about giving Dexter the mental stimulation he needs to stay mentally fit as he ages.
Incorporating regular training sessions into your dog’s routine is a great way to improve their cognition and their body. Focus on simple tricks and behaviors that challenge their mind and body without causing stress. I have noticed Dexter’s abilities change over the years, so it is important to change with them. By tailoring positive dog training sessions to your Cavalier’s needs and incorporating enjoyable activities into their day, you can help your Cavalier maintain their mental clarity and overall well-being.
Follow our YouTube channel for more Cavalier enrichment ideas!
Final Thoughts
Incorporating canine enrichment into Dexter’s daily routine has been essential for maintaining his quality of life. It’s not just about keeping him busy; it’s about enhancing his mental, emotional, and physical well-being. Enrichment is just one piece of the puzzle for Dexter’s health. A fresh, balanced diet and consistent, positive training are also vital for supporting his well-being as a senior dog.
Dexter’s vibrant health is a testament to how a combination of mental stimulation, nutritious food, and engaging routines can make a real difference. I encourage all Cavalier families to integrate these practices into their senior dogs’ lives. By focusing on enrichment, diet, and training, you can significantly improve your dog’s overall well-being and help them enjoy their golden years to the fullest.
I host a private Facebook group for Cavalier King Charles Spaniels, and we have a big focus on canine enrichment ideas and challenges to keep your Cavalier engaged and thriving!
How do you incorporate enrichment, diet, or training into your senior dog’s routine? Share your tips and experiences below!
Enrichment Increases Relaxation
https://www.ncbi.nlm.nih.gov/pmc/articles/PMC8772568/
https://www.sciencedirect.com/science/article/pii/S0168159123002691
Join our vibrant Cavalier King Charles Spaniel community on Facebook, support our dedication to pet wellness on Patreon, and stay updated with our weekly newsletter for invaluable tips and insights into raising happy, healthy pets. Together, let’s make a difference in our dogs’ lives!
Google Ad Below [...]Read more...
February 5, 2025How to Teach Cavalier King Charles Spaniel to Ignore Distractions
When I’m out with Stewart, my 7-month-old Cavalier, we get stopped a lot. People see his big, sweet eyes, his cute winter coat and wiggly little body and immediately want to say hello. And if this goes for people with or without their dog.
But here’s the thing, not every outing is a social event, and not every person or dog needs to be greeted.
Dog Socializing vs. Everyday Walks
There’s a time and place for socializing, and there’s a time for simply spending quality time with Stewart on our walks and outings. I make sure Stewart has appropriate and positive, structured experiences meeting new people and dogs in a controlled way. This helps him learn confidence, good manners, and appropriate greetings. But, at the same time, I’m teaching him an equally important skill, ignoring distractions such as people and dogs and walking politely with me.
If every walk turns into a meet-and-greet, dogs start to expect it. They pull toward every person or dog, they get frustrated when they don’t get to say hello. That can lead to barking, lunging, or general overexcitement, making walks stressful instead of enjoyable.
Why It’s Important to Teach Your Dog to Ignore Other Dogs and People
Not Every Dog Wants to Say Hello
Some dogs are nervous, in training, or simply not interested. Teaching Stewart to walk past other dogs calmly means he won’t invade another dog’s space or make an already anxious dog uncomfortable.
People Aren’t Always Dog People
Shocking, I know! But not everyone wants a happy little Cavalier bouncing up to them. Some people are afraid of dogs, allergic, or just in a hurry. Stewart is learning to walk past without expecting attention makes life easier for everyone.
Impulse Control is a Life Skill
Dogs who can stay focused, even when exciting things are happening around them, are safer and more enjoyable to live with. If Stewart learns that he doesn’t always get what he wants the moment he wants it, he’ll be better at handling frustration in other areas of life too.
Not Every Walk is About Socializing
Sometimes, I just want to enjoy a peaceful walk with Stewart. He doesn’t need to greet everyone to have a fulfilling experience, sometimes sniffing, walking together, and taking in the world is enough.
Better Walks in Busy Places
By teaching Stewart to walk with me instead of focusing on every dog or person, our walks are smoother and more enjoyable. Crowded sidewalks, busy parks, or narrow trails are much easier to navigate when he stays by my side rather than pulling toward distractions.
Prepping for Travel & Public Outings
I plan on traveling with Stewart, airports, dog-friendly boats, outdoor dining, places where he’ll need to stay close and focused on me. Teaching him now that he doesn’t always get to greet everyone will make these experiences stress-free and enjoyable for both of us.
Don’t forget to subscribe to @CavalierTipsandFun for more videos!
How I’m Teaching Stewart to Walk Past Distractions
Reward Calm Choices
When Stewart notices a dog or person, I reward him. I’m teaching him they=treats. Eventually, he will start to make that connection, see the distraction and look at me for the reward. This is what I’m going for. Over time, he’ll learn that staying focused on me, and it’ll be a non-event for him, he’ll simply walk past without even thinking about stopping to greet.
Use Distance
If Stewart’s too excited or distracted, I create more space between us and the distraction to help him refocus. As he gets better at ignoring, I’ll gradually close that gap, making it easier for him to pass by calmly.
Give Him a Job
I use cues like his name game, watch me, paws up, touch to keep his attention. Engaging his brain with productive tasks means he’s less likely to pull toward distractions.
Set Clear Expectations
I make sure Stewart knows that pulling towards people or dogs does not work. If he starts to pull, I either toss in his name game, stop and wait for him to renege, or add more distance. It truly depends on the situation. I do want him to be successful.
Handling Approaching People
When someone is steadily approaching your Cavalier, how you handle it depends on your goal at that moment. As a positive dog trainer, sometimes I want to explain and educate. If so, then I’ll squat down with Stewart, reward him for staying focused on me, and let the person know we’re training and practicing ignoring distractions. If I choose to say hello, I tell Stewart, “Let’s say hi,” and calmly approach. But sometimes, I just want to keep moving, so I give a quick, upbeat “We’re not saying hello, thank you!” and continue walking, keeping Stewart focused on me. It’s all about setting the tone for the interaction while making sure my dog stays engaged and confident.
Finding the Balance
There’s a time and place for socializing, and there’s also a time to focus on the walk itself. If you do want to stop and say hi, try to stop about 10 feet away from the other person or dog and ask first if it’s okay. Keep in mind that others might be training their dogs or dealing with their own challenges during the walk, so giving them some space is always a good idea. Being considerate makes the experience better for everyone, whether it’s a quick greeting or just calmly walking by each other. I then give Stewart the cue, “Let’s say hi,” so he knows he has permission to greet.
There’s nothing wrong with letting your dog greet others when it’s appropriate, but it’s just as important for them to learn that not every outing is a social event. Teaching Stewart when it’s time to engage and when it’s time to focus on me makes him a better walker and ensures our walks stay enjoyable.
When you’re walking your Cavalier King Charles Spaniel, how do you decide when it’s time to socialize and when it’s time to focus on the walk?
Google Ad Below [...]Read more...
April 21, 2024Tips for traveling with your Cavalier King Charles Spaniel. Dog-friendly vacation ideas.
Follow @CavalierTipsandFun for more videos.
Don’t forget to subscribe to @RaisingYourPetsNaturally for more!
Your comments and questions are always welcome below.
Join our vibrant Cavalier King Charles Spaniel community on Facebook, support our dedication to pet wellness on Patreon, and stay updated with our weekly newsletter for invaluable tips and insights into raising happy, healthy pets. Together, let’s make a difference in our dogs’ lives!
[...]Read more...
October 15, 2024Cavalier King Charles Spaniel Travel Tips
As a Cavalier mom and positive dog trainer, I know how important it is to help our Cavaliers feel comfortable and safe during car rides. Whether you’re planning a quick trip to the park or a longer dog-friendly road trip, making sure your Cavalier King Charles Spaniel enjoys the car ride is key to a stress-free trip for both you and your dog.
When Dexter and I hit the road, I never have to worry about how he’ll handle the ride. He’s a fantastic travel companion because I spent time training him to feel confident and at ease in the car. Today, I want to share my top tips on how you can prepare your Cavalier for car travel and road trips and turn them into a relaxed, happy traveler too.
1. Start with Short and Positive Rides
Just like with any new experience, easing your Cavalier into car rides instead of popping them into the car for a twelve-hour road trip is super important. Begin by taking short trips to fun, dog-friendly places like the local park or pet store. Keep the first few rides short and sweet, no more than ten-to-fifteen minutes. The goal is to associate the car with positive and fun destinations. A trip to the vet does not count as a fun visit for most dogs.
2. Create a Safe Space in the Car
Safety should always be a priority when traveling with your Cavalier. A secure dog car seat or crash-tested harness designed for small breeds like Cavaliers is a must. I personally recommend looking into the Center for Pet Safety’s approved products, as they conduct independent crash testing for dog travel gear. If a brand states they are crash tested, make sure to watch their crash tested video.
Dexter typically travels in a small crate. Because of his Chiari Malformation and syringomyelia and large size, travel harnesses aren’t the most comfortable for him. However, when we travel in the small car, a crash-tested and passed (yes, make sure they have passed the test) is our go-to. The key is to find a comfortable yet safe setup so your Cavalier feels relaxed without compromising their security.
3. Pack Familiar Comfort Items
Make your Cavalier feel more at home by packing some familiar items for the ride. When Dexter was a puppy, he would cozy up with his baby blanket and soft toy. Now, he has a therapeutic mat inside his crate. He likes to stay cool, so I also have a fan pointing at him. These little comforts can help reduce anxiety and make the ride smoother for dogs who may initially feel unsure about the car.
If your Cavalier is a bit anxious, place something with your scent, like a worn T-shirt next to your Cavalier. Your presence, even in the form of scent, can be calming for your Cavalier, especially if they’re a bit nervous during the first few rides.
4. Plan for Frequent Breaks
When traveling for more than an hour, make sure to schedule frequent potty and stretch breaks. Cavaliers are active little dogs, and, like all of us, they need to stretch their legs and take in their surroundings. I like to plan stops at dog-friendly rest areas or parks where Dexter can explore, do his business, and get a little energy out before continuing the journey.
Remember, each break is an opportunity for positive training. Use it as a chance to reward your dog for good behavior during the ride, and they’ll look forward to the next part of the trip.
5. Help Your Cavalier Relax with Calming Music
One of my favorite dog travel hacks is playing calming music designed for dogs during long car rides. I’ve been a fan of the iCalmDog portable speaker, which plays clinically-tested music that helps keep dogs calm and relaxed. Just be careful not to fall asleep at the wheel yourself!
Check out our all Cavalier calming playlist on YouTube!
6. Monitor Your Cavalier’s Well-Being
Keep an eye on your Cavalier’s behavior throughout the trip. Some Cavaliers may experience motion sickness, especially on longer rides. If your dog starts to drool excessively, whine, or seem uncomfortable, it might be time for a break. You can try natural remedies like ginger treats (with your vet’s approval) or consult your vet for other options.
If your Cavalier seems overly tired or stressed, don’t be afraid to cut the trip short. The goal is for travel to be a positive experience, and pushing them too far can have the opposite effect.
By starting with short, positive experiences and keeping their safety and comfort in mind, you can help your Cavalier King Charles Spaniel become a happy traveler. Dexter loves our road trips, and I’m sure your Cavalier will too!
Do you have any favorite travel tips for Cavaliers? Drop them in the comments!
Follow us on YouTube For fun dog-friendly travel adventures!
Google Ad Below [...]Read more...
December 25, 2024Winter Tips for a Cavalier King Charles Spaniel
Brrrr, it’s cold out there! Winter in Ohio can be tough, and today, it’s a chilly 15 degrees. Thankfully, Stewart and I are bundled up inside, but it’s the perfect time to share some essential winter safety tips for your Cavalier King Charles Spaniel. Whether you’re venturing outdoors or staying warm indoors, these precautions and activities will help keep your pup safe, healthy, and happy all winter long.
Safety First: Protecting Your Cavalier in Winter
Limit Outdoor Time
Our Cavaliers are family members, and they thrive indoors with us. While Stewart loves his outdoor potty breaks and a quick sniff around the yard, I always limit his time outside when temperatures dip. Frostbite and hypothermia are real risks for dogs, especially small breeds like Cavaliers. Keep outings short, and always monitor your pup for signs of discomfort.
Protect Those Paws
A dog’s paw pads aren’t built to handle extreme cold or icy surfaces. For quick potty breaks, toddler socks can be a lifesaver; they’re easy to put on and don’t need to be perfect since they’re just for a short trip. Shoot for dark colors, so that if one falls off, it’s easier to find in the snow. For longer walks or outdoor play, dog boots like Saltsox are fantastic options. If your Cavalier goes outside barefoot, be sure to clean their paws thoroughly with a warm washcloth or natural pet wipes to remove ice, salt, and chemicals that could irritate their skin. I make up a bowl of water with a splash of 4-Legger shampoo and a washcloth to clean paws. I make a new batch each day. (Order 4-Legger today with promo code RaiseNaturally20 for 20% off your first order.)
Scoop the Potty Area
I always scoop a clean, clear area in the yard for potty breaks. Cavaliers, like most dogs, prefer a neat spot for their business. A wide, shoveled path ensures your Cavalier can move around comfortably without getting buried in snow.
Coats and Sweaters for Your Cavalier
Dog coats and sweaters are a must for Cavaliers. Look for a jacket that provides full range of motion and covers your pup’s back and belly. Indoors, a cozy sweater can keep your Cavalier comfortable. If you notice your Cavalier sleeping in a tight ball, or even shivering, a dog sweater is a great idea. Stewart’s favorite sweaters are custom-made by MeekByDesign, but there are plenty of great options online or in pet stores.
Should a Cavalier Wear a Hat in the Winter?
Cavaliers’ long, luxurious ears attract snow and ice like a magnet! A lightweight dog hat or snood can protect your Cavalier’s ears during snowy adventures. Afterward, be sure to dry their ears gently with a soft towel.
Staying Warm and Cozy Indoors
When your Cavalier comes inside from the snow or cold, use a super-absorbent microfiber towel to dry him off thoroughly. For an extra touch of luxury, I like to pop a favorite blanket in the dryer so my dog can snuggle up with something warm. These little comforts make a big difference on chilly days!
Indoors, I keep Stewart active and engaged with puzzle toys, hide-and-seek games, and short training sessions. A mentally stimulated pup is a happy pup, even when it’s too cold for a long walk.
Winter Nutrition for Cavaliers
Did you know that certain foods can help your Cavalier King Charles Spaniel stay warm during the chilly months? According to Traditional Chinese Medicine (TCM), foods have energetic properties that can influence the body’s temperature and overall balance.
In the winter, it’s beneficial to incorporate “warming” proteins into your dog’s diet. Proteins like chicken, lamb, venison, and even goat are considered warming and can help offset the cold temperatures. These proteins are especially good for dogs who seem more sensitive to the cold or have lower energy during the winter.
You can also include warming spices and herbs like ginger or turmeric in small, dog-safe amounts to add a cozy touch to their meals. These not only are warming, but also support joint health during cold weather.
If you’re new to adjusting your dog’s diet seasonally, start slow by adding one or two warming ingredients to their current meals. Always consult with your vet or a canine nutrition expert to ensure your Cavalier’s diet remains balanced and meets their individual needs.
Embrace the Season
Stewart may be new to my home, but we’re already making the most of winter together. From brisk walks in his cozy new jacket to snuggling under a warm blanket on chilly evenings, these little moments remind me of the special bond we share. No matter the season, Cavaliers have a way of bringing warmth and joy to our lives.
How do you keep your Cavalier comfortable and happy during the winter months? Share your tips below, I’d love to hear them!
Google Ad Below [...]Read more...
March 30, 2025Health Benefits of Omega-3s for Cavaliers
Omega-3 fatty acids are one of the most important nutrients for Cavaliers, yet they’re often overlooked or misunderstood. These essential fats support heart health, brain function, joint mobility, skin condition, and even immune function. But not all omega-3 sources are created equal. Fresh fish, supplements, and plant-based options vary in effectiveness, and factors like oxidation and sourcing impact their quality. In this guide, I’ll break down the best omega-3 sources, how to choose high-quality options, and what to avoid to ensure your Cavalier King Charles Spaniel gets the maximum health benefits from their Omega-3s.
Skin and Coat Health
Omega-3s help maintain a healthy skin, reducing dryness, flakiness, and itchiness. They also improve coat condition, making your Cavalier’s fur shinier and softer. Cavaliers, like many other breeds, can be prone to allergies and skin sensitivities, and omega-3s can help manage these issues by reducing inflammation in the skin.
Joint Health and Mobility
As Cavaliers age, they can develop arthritis and joint stiffness. Omega-3s have been shown to reduce inflammation in the joints, helping to alleviate pain and improve mobility. Dogs receiving sufficient omega-3s often experience less stiffness and better flexibility, which is particularly important for senior Cavalier King Charles Spaniels.
Brain and Cognitive Function
DHA is a crucial component of brain cell membranes and plays a significant role in cognitive function. In Cavalier puppies, it supports brain development and learning. In senior Cavaliers, it helps prevent cognitive decline and supports memory and problem-solving skills. Studies have shown that dogs supplemented with DHA perform better on cognitive tests than those that do not receive adequate amounts.
Heart Health
Omega-3 fatty acids are essential for supporting cardiovascular function by helping regulate heart rhythm, reduce blood pressure, and improve circulation. For Cavaliers, who are especially prone to mitral valve disease (MVD), a common heart condition in the breed, omega-3s are even more important. Given their susceptibility to MVD, ensuring your Cavalier’s diet is rich in omega-3s can play a crucial role in supporting their heart health and may help slow the progression of the disease.
Immune System Support and Inflammation Control
Chronic inflammation is a factor in many health issues, including autoimmune conditions, allergies, and even cancer. For Cavaliers, who are prone to conditions like Chiari malformation, managing inflammation is especially critical. Omega 3s play an important role in regulating the body’s inflammatory response, helping to balance the immune system and reduce excessive inflammation. By incorporating omega 3s into your Cavalier’s diet, you can help protect against the inflammation that worsens conditions like Chiari malformation and support overall immune health.
Best Omega-3 Sources for Cavaliers
The best omega-3 sources for dogs are those that provide EPA (eicosapentaenoic acid) and DHA (docosahexaenoic acid) in their most bioavailable forms. These two types of omega-3s are the most beneficial for dogs, as they are directly used by the body to support a variety of vital functions, from heart health to joint mobility. The most bioavailable forms of these omega-3s are typically found in marine-based sources, such as oily fish. Fish like salmon, sardines, mackerel, and anchovies are excellent options because they contain high levels of both EPA and DHA, making them ideal for supporting your Cavalier’s health. These fish provide omega-3s in a form that’s easy for the body to absorb, ensuring that your dog gets the maximum benefits.
In addition to fish, fish oil supplements can also be a great source of omega-3s. However, it’s important to choose high-quality, purified fish oils that are free of contaminants like mercury. If your Cavalier is sensitive to fish or you prefer plant-based sources, algae oil is another excellent option, as it provides DHA without the fishy aftertaste or concerns about ocean contaminants. While flaxseed and chia seeds offer plant-based omega-3s, they contain ALA (alpha-linolenic acid), which the body must convert into EPA and DHA, an inefficient process for dogs. This means that marine-based omega-3s are typically the best option for achieving optimal health benefits. By rotating between these high-quality sources, you can help ensure your Cavalier is getting the most effective omega-3s for their needs.
Watch our fresh fish DIY and don’t forget to subscribe to @CavalierTipsandFun for more!
Fresh Fish (Whole Food Source of EPA and DHA)
Feeding fresh, oily fish is one of the most natural ways to provide omega-3s. However, choosing the right type of fish is essential due to concerns about mercury levels, sustainability, and proper sourcing.
Some of the best options for Cavaliers include:
Sardines: Small, low-mercury fish that are naturally high in omega-3s. They are one of the safest whole-food sources.
Anchovies: Similar to sardines, anchovies are rich in DHA and EPA while having minimal contamination risks.
Herring: Often used in high-quality pet foods, herring is another small, oily fish packed with omega-3s.
Atlantic Mackerel: This species is safe, but avoid king mackerel, which is high in mercury.
Wild-Caught Salmon: A great source of omega-3s, but farmed salmon may contain higher levels of contaminants.
When feeding fresh fish, it’s important to either lightly cook the fish or feed it raw if it’s safely sourced. Cooking fish too much can break down some of the omega-3s, while raw fish (from a trusted, safe source) can provide the most nutrients. However, if you choose to feed raw fish, it should be frozen for a week first to reduce the risk of parasites, which can be a concern with certain types of fish.
It’s essential to avoid fish that have been prepared with added salt, spices, or sauces. These seasonings can be harmful to dogs. Also, always avoid feeding cooked bones, as they can splinter and cause serious internal injuries.
Fish Oil Supplements
Many pet parents turn to fish oil supplements to provide omega-3s, but not all fish oil supplements are the same. Choosing the right one for your Cavalier is important to ensure you’re giving them the best quality and the most effective nutrients.
How to Choose a High-Quality Fish Oil
When selecting a fish oil supplement, look for species-specific labeling. Instead of settling for generic “fish oil,” opt for oils like sardine oil, anchovy oil, or krill oil. This ensures transparency in sourcing and gives you a better idea of where the oil is coming from.
When choosing a fish oil supplement, it’s important to look at the levels of EPA and DHA, the two types of omega-3 fatty acids that provide the most health benefits for your dog. The label on the bottle should specify the amount of EPA and DHA in each serving, not just the total amount of fish oil.
For example, a bottle might say it contains 1,000 mg of fish oil per serving. But if the label doesn’t show how much of that is EPA and DHA, it’s hard to know how much of the oil is actually providing the beneficial omega-3s your dog needs.
Some fish oils may have more EPA, which is great for joint and heart health, while others may have more DHA, which supports brain function and reduces inflammation. Knowing exactly how much of each omega-3 is in the oil allows you to be more confident that you’re giving your Cavalier the right amount for their specific health needs. This way, you can make sure you’re getting the full benefits of the omega-3s in the supplement.
Also, choose products that are third-party tested. Reputable brands will test their oils for harmful contaminants like heavy metals, PCBs, and oxidation levels. This helps ensure the oil is safe for your dog and that it hasn’t been compromised during production.
Liquid vs. Capsules
Fish oil comes in two common forms: liquid and capsules. Liquid fish oil (often found in pump bottles) is convenient because it’s easy to dose, but it’s more prone to oxidation once opened. Oxidation occurs when the oil is exposed to light, heat, or air, so it must be stored in the refrigerator and used quickly to maintain its freshness.
On the other hand, capsules are more stable since the oil is protected from air exposure, which reduces the risk of oxidation. However, they can be harder to dose accurately, especially for small dogs.
Oxidation Risks
One of the biggest concerns with fish oil is oxidation. Omega-3s are very sensitive to light, heat, and oxygen, and when the oil oxidizes, it can lose its effectiveness and even become harmful. Signs of rancid fish oil include a strong fishy smell or an unusual taste.
To minimize the risk of oxidation, here are a few tips:
Choose dark glass bottles instead of clear plastic, as glass helps protect the oil from light exposure.
Store the fish oil in the refrigerator after opening to keep it fresh.
Use the oil within 30 to 60 days of opening to ensure you’re getting the best quality.
By taking these steps to choose a high-quality fish oil and storing it properly, you can help ensure your Cavalier gets the full benefits of omega-3s for their heart, joints, and overall health.
Green-Lipped Mussels: A Powerhouse for Joint Support
Green-lipped mussels (Perna canaliculus), native to New Zealand, are one of the most beneficial natural sources of omega-3s for dogs. Unlike traditional fish-based omega-3 supplements that provide primarily EPA and DHA, green-lipped mussels contain a unique omega-3 fatty acid called ETA (Eicosatetraenoic Acid). ETA has been found to have additional anti-inflammatory properties, making it especially helpful for dogs suffering from joint issues like arthritis.
The anti-inflammatory effects of ETA, along with the presence of glucosamine and chondroitin, make green-lipped mussels an excellent option for promoting joint health. These compounds work together to support cartilage repair, reduce inflammation, and enhance mobility in dogs experiencing joint stiffness or discomfort. This combination is particularly beneficial for dog breeds, like Cavaliers, that are prone to developing joint issues as they age.
Comparing Omega-3 Content in Green-Lipped Mussels vs. Fish
In terms of EPA and DHA content, green-lipped mussels may not provide as high a concentration per serving as fatty fish, but their ETA provides an extra layer of anti-inflammatory benefits. This makes green-lipped mussels an excellent addition to a dog’s diet, particularly for those with joint concerns.
How to Feed Green-Lipped Mussels to Your Dog
Green-lipped mussels are often available as freeze-dried powder or in chewable treat forms. Both forms make it easy to incorporate them into your dog’s daily routine, but the powder can be sprinkled over food or mixed into homemade dog meals for ease of use.
As with any supplement, it’s important to start with a small amount to monitor how your dog responds, especially if they are new to green-lipped mussels or have a sensitive digestive system. For the dosing of green-lipped mussels, it’s always best to refer to the product-specific guidelines since the concentration can vary depending on the form (freeze-dried powder, chewables, etc.) and brand. However, a general recommendation often seen in supplements for dogs is:
Start with 1/4 teaspoon per 10 pounds of body weight per day for powder form. This can be adjusted based on the dog’s response and their specific needs.
Plant-Based Omega-3s: Less Effective for Dogs, but Still Valuable
When it comes to omega-3 fatty acids, plant-based options are less efficient for dogs compared to animal sources like fish, as they primarily contain ALA (alpha-linolenic acid). While ALA is an essential omega-3 fatty acid for humans, dogs face challenges in converting ALA to the more bioavailable forms, EPA (eicosapentaenoic acid) and DHA (docosahexaenoic acid), which are the forms most beneficial for their health. This makes plant-based omega-3s less effective for dogs in supporting the same health benefits as those derived from marine sources.
Why ALA Is Less Effective for Dogs
Dogs have a relatively inefficient ability to convert ALA into EPA and DHA. The process of conversion requires specific enzymes, which dogs do not produce in large enough quantities to convert sufficient ALA into the needed forms of omega-3s. As a result, while plant-based omega-3s can still offer some benefits, they are not as effective at delivering the omega-3s that support joint health, cognitive function, and heart health in the same way that fish-derived omega-3s do.
Nevertheless, plant-based sources of omega-3s are still valuable as part of a balanced diet. They can provide supplemental omega-3s and contribute to overall health but should not be relied on as the primary omega-3 source for dogs.
Common Plant-Based Omega-3 Sources
Flaxseeds: Flaxseeds are one of the most popular plant-based sources of ALA omega-3s. They can be ground and added to your dog’s food. However, the conversion rate of ALA to EPA and DHA is low in dogs, so while flaxseeds may offer some benefits, they should not be relied on exclusively for omega-3 needs.
Chia Seeds: Like flaxseeds, chia seeds are rich in ALA. These tiny seeds are highly nutritious and can be added to a dog’s meals. They can absorb water and form a gel, which can be helpful for digestive health. While chia seeds may offer some benefit, they should be seen as supplementary, not primary, sources of omega-3s for dogs.
Hemp Seeds: Hemp seeds contain ALA as well, along with a well-balanced ratio of omega-3 and omega-6 fatty acids. While these can contribute to overall fatty acid intake in dogs, their conversion to EPA and DHA is also limited. Hemp oil, a more concentrated form, may be more effective but still not as efficient as fish oil or algae oil in providing the omega-3s dogs need for optimal health.
Algae Oil: The Better Plant-Based Alternative
While plant-based sources like flaxseeds and chia seeds are valuable in certain aspects, algae oil is usually a better plant-based option for dogs. Algae oil is derived from marine algae, which naturally produce DHA (and sometimes EPA) without requiring the conversion process. Unlike other plant-based sources that contain ALA, algae oil provides a direct source of DHA, the omega-3 that plays a critical role in brain function, heart health, and reducing inflammation.
Algae oil is especially beneficial for pet parents who prefer to avoid fish-based products for ethical, environmental, or allergy reasons. It provides the same essential omega-3 fatty acids found in fish oil, but without the potential risks associated with mercury contamination or fish-based allergens. This makes algae oil a great plant-based alternative for ensuring your dog receives the health benefits of omega-3s.
Algae oil supplements are available in capsules or liquid form and can be incorporated into your dog’s diet just like fish oil. The recommended dosage varies by brand, so it’s important to follow the manufacturer’s guidelines and consult your vet to ensure the right amount for your dog.
While algae oil is a great alternative to fish oil, there are a few differences to consider. One of the main differences is that fish oil generally contains more EPA, an omega-3 that is particularly helpful for reducing inflammation and supporting joint health, while algal oil tends to have more DHA, which is important for brain and eye health. Because of this, if your dog needs more EPA for inflammation or joint issues, fish oil might be a better choice. Additionally, algae oil can be more expensive than fish oil, and it may not be as widely available in stores. Another thing to note is that fish oil is often more bioavailable, meaning it’s easier for dogs to absorb and benefit from. That said, algae oil is still a very good option, especially if you’re looking for a more sustainable, vegetarian, or fish-free supplement. It’s always a good idea to talk to your vet about which type of omega-3 is best for your dog’s specific health needs.
How Much Omega-3 Does Your Cavalier Need?
For general health, the recommended omega-3 dosage, specifically EPA and DHA, is typically between 20 to 55 mg per pound of body weight per day. If your Cavalier has specific health issues, like arthritis or inflammation, the dosage may increase to 50 to 100 mg per pound. If your dog is lacking omega-3s, you might notice signs like dry skin, excessive shedding, joint stiffness, or a dull coat. To ensure you’re giving the right amount, it’s important to consult your vet, who can recommend the proper dosage based on your dog’s size and health concerns.
Final Thoughts
Omega 3s are essential for your Cavalier’s overall health, supporting heart, brain, joint and skin function. By incorporating a variety of high quality omega 3 sources such as fish, green lipped mussels and supplements, you can ensure your Cavalier King Charles Spaniel receives a well rounded intake of these beneficial fatty acids.
Quality matters, so focus on bioavailable forms of EPA and DHA, and always rotate the sources you use to prevent imbalances. Whether you opt for fresh fish, fish oil or green lipped mussels, it’s crucial to store and handle these sources properly to avoid oxidation.
Before making any changes, check with your veterinarian to tailor an omega 3 plan that best suits your Cavalier’s individual health needs. Consistently including omega 3s in their diet will support long term health and vitality, helping your dog thrive at every stage of life.
Do you feed your Cavalier fresh fish?
Google Ad Below [...]Read more...
April 17, 2025Gentle, Safe, and Effective for Our Sensitive Cavaliers
Fleas and ticks. Just hearing those words makes me itch. But as a natural Cavalier Mom, I’ve always been cautious about what I put on or in my dogs, especially with delicate and sensitive breeds like Cavalier King Charles Spaniels. These little sweet hearts often have sensitive skin, luxurious coats, and sometimes underlying conditions like Chiari malformation or syringomyelia, which can make them more vulnerable to adverse reactions.
I’ve been on this natural journey for years, first with Dexter and now with Stewart. Along the way, I’ve learned that staying chemical-free when it comes to flea and tick care is absolutely possible, it just takes a little planning and a lot of label reading.
This is the natural flea and tick routine I’ve found works best for my Cavaliers.
Why I Choose a Natural Approach for My Cavalier King Charles Spaniels
Conventional flea and tick treatments may offer quick results, but they also come with serious risks. Side effects can range from skin irritation, itching, and digestive upset to more concerning issues like tremors, seizures, and in some cases even organ damage. These are not small concerns.
For a breed like the Cavalier King Charles Spaniel, those risks are even more concerning. Cavaliers are already prone to neurological conditions like Chiari malformation, seizures, tremors, and episodic falling syndrome. I’m especially cautious about using anything that lists seizures or neurological side effects as possible outcomes. It just doesn’t make sense to use a treatment that could trigger the very issues this breed is already vulnerable to.
Choosing a natural approach isn’t about trying to be perfect. For me, it’s about reducing chemical exposure wherever I can and building a thoughtful, layered prevention plan that supports overall health instead of relying on a single product to do it all.
My Natural Flea and Tick Prevention Plan for My Cavalier King Charles Spaniel
1. Regular Grooming and Bathing-I bathe Stewart every three to four weeks using a safe, gentle dog shampoo made without synthetic preservatives, artificial fragrances, or harsh surfactants. I’ve been using 4-Legger’s USDA-certified organic formulas for years because I trust their ingredient panel and transparency. They have a variety of formulas that help deter ticks and fleas.
Bathing regularly doesn’t just clean your Cavalier. It helps interrupt the flea life cycle. A good soak and lather can wash away flea eggs, dirt, and debris that might attract pests. When I use a shampoo that includes properly diluted essential oils known to repel fleas and ticks, it gives Stewart an extra layer of protection even after his bath is done.
2. Natural Tick and Flea Sprays for Daily Protection-Before every walk, I spray Stewart with a natural flea and tick repellent. I pay close attention to his legs, chest, tail, and belly, basically anywhere that might brush up against grass, shrubs, or wooded areas. These sprays are one of our most important layers of protection, and I use them daily during warm weather or anytime we’re heading into a high-risk area.
Over the years, I’ve rotated between trusted store-bought options and homemade recipes using properly diluted dog-safe essential oils. I always avoid sprays with synthetic preservatives or ingredients that could irritate a dog’s skin.
When I make my own, I tailor the recipe to the season, the environment, and even the behavior of my dog. Dexter, for example, used to try to catch bees, so I avoided blends with oils like rose geranium that might attract them. The key with any natural tick and flea spray is to apply it each time your Cavalier goes outside. These blends are not designed to last for hours at a time, and a quick re-spritz before each outing is what really makes the difference. I keep a bottle near the door so it becomes part of our daily walking routine.
DIY Natural Flea and Tick Spray for Dogs
This is one of my favorite natural sprays to help keep fleas and ticks at bay, without resorting to harsh chemical treatments. It’s simple to make, and you can use it on both your dog and yourself before heading outside.
What You’ll Need:
3 ounces distilled water
1/4 ounce vodka or grain alcohol (helps disperse oils evenly)
1/4 teaspoon vegetable glycerin (moisturizing and helps blend)
Essential Oils:
4 drops Cedarwood– repels fleas and ticks while being gentle on skin
4 drops Geranium– especially helpful against ticks
3 drops Lavender– calming and gently repels insects
1 drop Citronella– useful for deterring mosquitoes, fleas, and ticks
1 drop Peppermint– offers cooling relief and additional repellent support
How to Make It: Add all the ingredients to a 4-ounce (or larger) amber or cobalt blue glass spray bottle. Shake gently to combine.
How to Use It: Before walks or time outside, shake well and lightly mist your dog’s legs, belly, tail, and along the back. Always avoid spraying near the face and eyes. For areas like the ears, chest, or neck, spray a small amount into your hands first, then gently rub it into your dog’s fur. This helps you apply it more precisely and makes sure it reaches the coat and skin. Always apply when your dog is dry for best results.
Storage Tip: Store your spray in a cool, dark place and an amber or cobalt glass bottle helps protect the essential oils from light exposure, which can cause them to break down over time. Shake before each use to keep the oils properly dispersed.
Simple DIY Natural Flea and Tick Spray for Dogs
When I first started making Dexter’s flea and tick sprays, I kept things really simple. I used just distilled water and a few carefully chosen essential oils. Using just distilled water and essential oils is a great option if you plan to make small batches and use them up fairly quickly. It is easy, gentle, and perfect for Cavalier parents who want something simple. You will still need to shake the bottle well before each use, just like with any natural spray.
If you want your spray to blend a little more evenly and stay fresher a little longer, using the above recipe with the grain alcohol and vegetable glycerin can help. Alcohol acts as a natural preservative and helps the oils disperse a little better through the water. Glycerin can also add some moisture to the coat and skin.
Both options are good, it really depends on what fits best with your dog’s needs and your routine. If you are going through the spray quickly, distilled water and oils work just fine. If you want a little more staying power and an extra moisturizing boost, the version with alcohol and glycerin might be a better fit.
You can also check out four of Dexter’s natural flea and tick spray recipes on my Raising Your Pets Naturally blog.
Watch now and don’t forget to subscribe to @RaisingYourPetsNaturally YouTube for more!
Why Different Natural Tick and Flea Sprays Work for Different Dogs
One thing I learned through experience and from chatting with other natural pet parents is that not every spray works the same way for every dog. Some ticks are more common in certain regions and are repelled by specific essential oils. That’s why I rotate between formulas and stay flexible with what I use. If something stops working, I adjust. It’s not failure, it’s just part of the process.
3. Apple Cider Vinegar for Flea and Tick Support-Raw, unfiltered apple cider vinegar (ACV) is another natural tool I like to keep on hand as part of a layered approach to flea and tick prevention. While it won’t kill fleas or ticks, it can help make your dog less appealing to them.
You can make a simple spray by mixing equal parts raw ACV and distilled water in a spray bottle and lightly misting your dog’s legs and belly. Just be sure to avoid the face, and only use it on healthy, unbroken skin. If your dog has any skin sensitivities or open spots, it’s best to skip ACV topically.
You can also add a small amount of ACV to your Cavalier’s food or water. Not all dogs tolerate vinegar well, especially those with sensitive stomachs or urinary issues. It’s also important if you add it to your Cavalier’s water, they also have non-altered fresh water available.
4. Amber Collars for Natural Flea and Tick Repellent Repellant-Another layer is a raw Baltic amber collar. These collars are made from unpolished amber resin that naturally releases aromatic compounds when warmed by your dog’s body. These compounds can help repel ticks and fleas without adding any scent or chemicals to your dog’s skin.
While I wouldn’t rely on them as the only form of protection, I absolutely feel they can help in the overall care to keep our Cavaliers tick and flea free naturally. They’re lightweight, chemical-free, and easy to clip on. With Cavaliers, just make sure the collar sits comfortably behind their ears and doesn’t tangle with their feathering. If your Cavalier has Chiari malformation, this may not be an option if they can’t wear a collar comfortably.
5. Ultrasonic Tick Tags-Another tool to add to your flea and tick routine is an ultrasonic tick tag. There are various brands that make these small devices that clip onto your dog’s collar or harness. They emit a high-frequency pulse that humans and dogs can’t hear, but it’s designed to interfere with a tick or flea’s ability to orient themselves toward your dog.
These tags are scent-free and totally safe for sensitive dogs like Cavaliers. This type of tag is helpful during hikes, trail walks, or visits to areas known for higher tick populations. It’s a simple, noninvasive step that adds an extra layer of protection.
6. Diatomaceous Earth for Natural Flea and Tick Prevention-Food-grade diatomaceous earth is another natural tool I use as part of our flea and tick routine. It’s a fine powder made from fossilized algae that works by drying out the exoskeletons of pests like fleas and ticks. I don’t use it as a primary prevention method, but it’s a helpful layer, especially after we’ve been somewhere with higher pest exposure.
To apply, I lightly sprinkle a small amount down Stewart’s back and gently brush it into his coat, avoiding his eyes, nose, and mouth. It’s best used when your dog is dry and in a well-ventilated area. You can also use it on bedding or around baseboards during flea season as part of a regular cleaning routine.
Watch how I apply it and don’t forget to subscribe to @CavalierTipsandFun YouTube channel for more!
7. Using Garlic to Support Immune Health and Repel Fleas Naturally-Garlic might be controversial in some circles, but when used responsibly, it’s one of my go-to immune support tools. Garlic often gets a bad reputation because in 2000, they did a study on four dogs and gave them an extreme amount of garlic ( about 25 cloves a day for a 25-pound dog), and they had a bad reaction. That’s not even close to how we’d use garlic in a natural, supportive way. You can read the study here.
I started using fresh garlic years ago with Dexter, and it’s something I continue with Stewart now that he’s old enough for it. Garlic supports the immune system and helps repel fleas and ticks from the inside out. I only use fresh, organic garlic, peeled and minced about ten minutes before mealtime to allow the allicin to activate. Then I mix it into Stewart’s food. I never exceed the recommended amount and only feed garlic for up to three days in a row, followed by five to seven days off.
I never use garlic with puppies, pregnant or nursing dogs, dogs with anemia, or those with upcoming surgeries. It’s not a fit for every dog, so I always recommend checking with a holistic vet first.
Garlic Dose For Dogs: The approximate dose of fresh, organic garlic is 1/8 teaspoon for a 5 pound dog, 1/4 teaspoon for dogs between 6 and 10 pounds, 1/2 teaspoon for 11 to 15 pounds, 3/4 teaspoon for 16 to 20 pounds, and 1 teaspoon for dogs between 21 and 30 pounds. Dogs between 31 and 50 pounds can have 1 1/2 teaspoons, and those over 51 pounds can have up to 2 teaspoons.
8. Spotting and Removing Ticks and Fleas from Your Cavalier King Charles Spaniel-No matter how many prevention tools we use, I always do a hands-on check after walks or outings, especially during peak tick season. I check Stewart’s paws, armpits, ears, groin area, and the base of his tail. These are the spots where ticks love to latch on.
If I do find a tick, I remove it immediately with a tick remover or fine-point tweezers, making sure to grab close to the skin and pull straight out. Afterward, I place it in a bottle with alcohol and wash my hands. I’ve found this routine not only gives me peace of mind but also helps me stay in tune with any changes in Stewart’s skin or coat.
A Quick Note About Dexter’s Experience
As Dexter was in his late senior years and his neurological condition progressed, I started to notice the occasional flea here and there, more than we had seen in the past. His immune system wasn’t as strong, and that likely made him more vulnerable to pests. This isn’t uncommon in aging dogs or those with health challenges. Their bodies just don’t have the same defenses they once did.
I made it a daily routine to sit with Dexter and go over him carefully with a flea comb and a small jar of alcohol to catch any runners before they could become a real problem. I also stayed on top of sweeping and washing his bedding regularly. Thankfully, it never got out of control, just a flea here and there, but it reminded me how important it is to stay consistent.
It also reinforced why I’ve always chosen to avoid harsh flea treatments. With Dexter’s compromised system, exposing him to chemicals could have caused even more serious issues. Supporting his health naturally, with gentle and consistent care, was always the safest choice for him.
Final Thoughts on Natural Flea and Tick Care for Cavaliers
If you’re just starting your natural flea and tick care journey, start small. You don’t have to change everything at once. Pick one new step, try it, and see how it fits your dog’s life. Read labels. Ask questions. And most of all, give yourself grace as you navigate what feels right for you and your Cavalier.
Cavaliers are worth the extra effort, and with how sensitive they can be, choosing gentle, natural care just feels like the right thing to do.
Google Ad Below [...]Read more...
November 27, 2024Does your Cavalier King Charles Spaniel bark for attention? Maybe your Cavalier tosses a toy onto your lap, begging for a game of fetch. Or perhaps your Cavalier King Charles Spaniel barks incessantly to go outside and chase every squirrel in the neighborhood. These are classic examples of attention-seeking behavior and, while they may be funny at times, they can also become exhausting.
In this Cavalier blog, I’ll guide you through training your Cavalier to ask for attention politely or, even better, stop demanding attention altogether. But first, let me be clear. I am all about spending quality time with our dogs. Cavaliers thrive on love, play, and companionship, and I encourage plenty of bonding time. However, constant barking or pushy behaviors for attention are not things I would encourage in a dog. With positive dog training methods, good timing, and a proactive approach, we can change this demanding behavior.
Why Does My Cavalier Bark at Me for Attention?
Cavaliers are a playful breed and incredibly intelligent. They are quick learners and can learn behaviors we don’t even know we are teaching them, like barking for attention. Some Cavaliers may learn to bark for attention, paw, nudge, or give you the “look” for that snack. If they have done one or all of these things, and you gave them what they wanted, they’ve already made the connection: This behavior gets me what I want. For example, if barking speeds up dinner prep or prompts you to throw the ball, your Cavalier has been “trained” by their success.
But, don’t worry. You can change these demanding behaviors to better habits. So, let’s get started at teaching your Cavalier to be calm and quiet for the things they want.
Steps to Stop or at Least Curb Attention-Seeking Behaviors
Increase Quality Time: Cavaliers are highly social and crave interaction. You know that. That’s why they are your breed of choice, right? If your pup is constantly asking for attention, they may feel their current playtime or bonding time isn’t enough. Start by increasing their daily activities by about 50 percent. For example, if you play games with your Cavalier five times a day, bump it up to seven or eight short sessions. The same goes for walks, training, or cuddle sessions. Increase the duration or quantity of their interactive activities. And I do mean interactive vs. just placing a food toy on the floor. Those are all fine and well, but, in most cases, your Cavalier is craving your time. Read more about canine enrichment.
Get Ahead of the Demands: Observe when your Cavalier typically starts seeking attention. If they usually bark for play at 11 a.m., initiate a play session at 10:45 instead. By starting the activity before they ask, you’re rewarding their good and polite behavior rather than their pushiness.
Ignore Pushy Behaviors: This is key. When your Cavalier barks, paws, or demands attention in any way, practice the “invisible dog” technique. Avoid eye contact, verbal responses, or movement. Turn away, walk out of the room, or stay still. Once your Cavalier is quiet, calmly reengage and reward them for being polite. But, this only works if you do #1 and increase that quality time together. If you don’t do that, ignoring won’t work because their needs are not being met.
Pro Tip: Be prepared for an “extinction burst.” Your Cavalier may escalate their behavior temporarily, barking louder or pawing more persistently because the old tactics aren’t working. They are getting frustrated. Stay patient and consistent.
Reward Calm and Quiet: Every time your Cavalier is calm and quiet, offer attention, praise, or even a small treat. Reinforcing this behavior teaches them that being polite is the best way to get what they want. This is also the perfect time to initiate a game or play session with your Cavalier.
Teaching self control is a great way to help curb barking.
Patience Is Key
Changing established habits takes time, so be patient with your Cavalier and yourself. Remember, they’re simply trying to communicate their needs the only way they know how. With consistent positive dog training and a little extra quality time, you’ll soon have a polite pup who doesn’t feel the need to ask for attention because you are providing them all the attention they need and desire.
Real-Life Example: Dexter’s “Talking”
Even my sweet Dexter isn’t perfect. He’s been known to “talk” or snort to get his way, and sometimes it works because I’m not perfect, either. Not to mention, there are two other family members who have been known to reward his ask. And, when it’s rewarded, it persists. If I wanted to fully address this behavior, I’d need to follow the steps above consistently and MAKE SURE the other two members of the family do as well. But, in our home, a little talking is something we tolerate because it doesn’t bother us.
That’s the beauty of training: you get to decide what behaviors matter to you. If something doesn’t bother you, there’s no need to change it, as long as it’s not something that should be addressed like anxiety. Just remember that if you allow certain behaviors, it’s important not to complain about them later.
Check out my playlist on barking!
What You Can Do Next
Now that you have the tools to manage your Cavalier’s attention-seeking behavior, it’s time to put them into action. Start by increasing quality time with your dog, introducing play sessions before they ask for attention, and practicing the “invisible dog” technique when pushy behaviors pop up. Remember, consistency is key, and patience will help you both succeed. With time, you’ll see your Cavalier becoming more polite and less demanding, leading to a stronger bond and fewer unwanted behaviors.
What’s your dog’s favorite way to spend quality time with you?
Join our vibrant Cavalier King Charles Spaniel community on Facebook, support our dedication to pet wellness on Patreon, and stay updated with our weekly newsletter for invaluable tips and insights into raising happy, healthy pets. Together, let’s make a difference in our dogs’ lives!
Google Ad Below [...]Read more...
March 19, 2025How to Teach Your Cavalier King Charles Spaniel to “Leave It” | Positive Training for Cavaliers
Teaching your Cavalier King Charles Spaniel to “leave it” or ignore something on your cue can be lifesaving. Imagine dropping a pill in front of your Cavalier or going for a walk and passing garbage in the street. If your Cavalier King Charles Spaniel has a reliable “leave it” cue, you can easily ask him to leave it as you pick up the pill or walk past the garbage.
When I start the “leave it” training, what I want my dog to learn is that “leave it” doesn’t mean he doesn’t get something, but that I have something better. This helps to build a more reliable behavior, especially off-leash. If you only teach your dog that “leave it” means he doesn’t get something, he might just try to grab the item faster or run off with it. That’s not what we want!
As with all dog training, remember that you need to regularly practice these lessons. Training your Cavalier is not just about doing it once and then only when you need it. Reliable dog training takes time, patience, and consistency. Cavalier King Charles Spaniels, in particular, can be a bit food-driven, so keeping them engaged and excited about the reward is key.
So, be patient, consistent, and most importantly, have fun with your Cavalier while training!
Teaching Your Cavalier to Leave It Level 1
Start with a small, low-value dog treat in your closed hand, and place it about 12 inches to the side of your Cavalier’s face. Make sure your hand is at the right height, not too close to his face, but not too far away either. Let your dog see it there, and wait him out. As soon as he moves his face away or ignores the treat, say, “YES!” and reward him with an amazing treat from your other hand. Not going for the treat is a win, too! So, if you present the leave it treat hand and he doesn’t go for it, “YES!” and treat. Repeat this a few times.
When your Cavalier starts ignoring your treat hand altogether, move to Level 2.
Don’t forget to subscribe to our @CavalierTipsandFun for more!
Teaching a Dog to Leave It Level 2
Start like Level 1, but before you drop your hand, say your “leave it” cue once. Wait him out; as soon as he moves his face away or ignores the treat, say, “YES!” and treat from your other hand. Repeat. When he stops going for your hand after hearing the “leave it” cue, move to Level 3.
Training Your Cavalier to Leave It Level 3
Say your “leave it” cue and drop your hand with the low-value treat to your dog’s side, but leave your hand OPEN. If he goes for the treat, quickly close your hand. When he moves his face away, praise and reward him with a treat from your other hand. Repeat. When your Cavalier is reliably ignoring the treat in your open hand, move to Level 4.
Teaching Your Cavalier to Ignore Items Level 4
At this stage, it’s time to change things up a bit. Up until now, you’ve been using low-value, boring dog treats for the “leave it” item. Once your dog is starting to get the hang of it, it’s time to up the ante. Use tastier treats or toys as the “leave it” item, but remember, his reward needs to be even better.
You can try:
Tastier treats or food
Paper products, tissue, or paper towels
Toys
Subscribe to @RaisingYourPetsNaturally for more!
Here’s how to set it up when using a toy:
Pick a Toy: Choose a toy that your Cavalier likes but isn’t so high-value that your Cavalier would immediately grab it without hesitation. Start with something mildly exciting like a squeaky ball, fleece tuggy toy, or stuffed animal that your dog enjoys.
Set Up the Training Area: Find a quiet spot where you can focus and your dog isn’t too distracted by other things. Make sure it’s a place where you can manage your dog’s movement and reactions.
Start the Cue: Hold the toy in your hand and get your dog’s attention. Don’t get too silly. You just want him to know it’s there, with a bit of excitement.
Use the “Leave It” Cue: Once you’ve gotten his attention, say the “leave it” cue calmly. Hold the toy in front of your dog just out of reach, but don’t place it on the ground yet.
Wait for the Response: Your dog may try to lunge for the toy or show interest in it. The goal here is for him to move away or ignore it, not to grab it. If he goes for it, just swipe the toy up to your chest and ignore him and wait for him to ignore it. Then repeat the process of lowering your hand with the toy. As soon as your dog turns his head or steps away from the toy, immediately say “YES!” and give him a better reward (a tastier treat or something that’s even more valuable than the toy).
Repeat and Increase Difficulty: Repeat the exercise several times, and gradually increase the difficulty. Once your Cavalier reliably ignores the toy when it’s held in your hand, move on to placing the toy on the ground. To set this up, place the toy behind you, out of reach. This way, you can gently body block your dog if he tries to move toward it. When he turns away or ignores the toy, immediately reward him with a better treat or better toy.
Body Blocking: Body blocking involves using your own body to gently guide your dog away from a distraction, like a toy, by positioning yourself between your dog and the item. It’s important to note that body blocking is not about kneeing or being rough with your Cavalier. It’s a gentle, calm way to redirect their attention. However, some dogs may find body blocking intimidating or scary, so if your Cavalier shows signs of stress, it’s best to avoid this method and use alternative techniques for redirection.
Build Duration: As your Cavalier gets more comfortable with the “leave it” cue around toys, try holding the cue for a longer period of time. For example, you can wait for him to sit or stay before rewarding him. This increases his patience and focus during the exercise.
Training Your Cavalier to Leave Something Level 5
Place a low-value treat under your cupped hand, with your dog in front of you. Say your “leave it” cue, and wait for your Cavalier to ignore the treat. If he looks away or shows interest but doesn’t try to grab it, immediately reward him from your other hand with a better treat.
As he gets the hang of this, start showing the “leave it” treat under your cupped hand. If your dog ignores the treat, reward him from your other hand. If he tries to go for the treat, simply cup your hand over the treat again. Repeat this process, gradually raising the criteria by making the treat more tempting and testing his ability to resist.
Teaching Your Cavalier to Leave It Level 6 and Beyond
Now it’s time to make things more challenging. Increase the difficulty by adding distractions, different environments, or a variety of leave-it items. Always be mindful of your Cavalier’s current ability level, and don’t rush the process. If you find your Cavalier is struggling or making mistakes, step back and simplify the task again. You want to build confidence and reliability.
Reminders:
Never allow your Cavalier to get the “leave it” item. If you want your Cavalier to have it, you pick it up and give it to him. The goal is to teach him that ignoring the item leads to something better, not just an empty reward.
If your Cavalier is having trouble with the exercise, step back to easier levels or increase the value of the reward to keep him motivated and engaged. You can also try lowering the difficulty by using a less tempting “leave it” item to help him succeed.
The goal isn’t just for your Cavalier to avoid the item once, but to understand that when you say “leave it,” he has the chance to earn something even better. The more your dog experiences this rewarding outcome, the more reliable the behavior will become.
Pro Tips:
Keep training sessions short, positive, and fun! Don’t let the “leave it” item overwhelm or frustrate your Cavalier. If he’s struggling, simplify the task and increase the reward to keep him interested and motivated.
How Often Should You Practice the Leave It Behavior with Your Cavalier?
It is important to regularly practice “leave it” throughout the day, not just during formal training sessions. You can incorporate it during walks, around the house, or when playing. As you add distractions, make sure to reward your Cavalier for staying focused on you, especially when there are high value items around. Cavaliers are generally quick learners, but they can also get bored easily, so keep your training sessions positive and fun. Consistency and patience will pay off in the long run.
Pro Tip: Practice, practice, practice with various setups. You want your Cavalier to respond reliably to the “leave it” cue in real life situations, whether it is a dropped item, an enticing smell, or something on the floor. By practicing regularly, you ensure they will leave it without hesitation. I still reward those real life “leave its” to keep the behavior strong and consistent!
Conclusion
Practicing “leave it” regularly and in different situations helps ensure your Cavalier responds reliably when it matters most. Keep training sessions fun and rewarding, and don’t forget to reinforce real-life successes. Teaching a solid fetch and “drop it” will also complement “leave it,” giving your Cavalier even more useful skills. With consistency and patience, your Cavalier will continue to improve and make great choices in everyday life.
How is your leave it training going? I’d love to hear about it in the comments!
Google Ad Below [...]Read more...
April 29, 2025Your Cavalier King Charles Spaniel’s Teenage Phase
When you bring home a Cavalier King Charles Spaniel puppy, you are prepared for puppy breath, floppy ears, and all the adorable moments that melt your heart. What nobody talks about enough is what happens when that sweet ball of fluff hits adolescence.
Right now, Stewart, my Cavalier, is about 10 and a half months old and is in full-blown teenager mode. I can tell you firsthand that adolescence is real. Stewart has energy for days, wild bursts of zoomies, and a mischievous sparkle in his eyes that keeps me on my toes. My mom, who adores him, often comments, “He is always getting into trouble!” (Of course, to me, it is not real trouble. It is boredom, enthusiasm, and a young dog who is eager to interact and explore.)
She often compares him to my late Cavalier, Dexter, who lived to be 15 years old. In her memory, Dexter was the perfect, calm little gentleman. And he was, but only after years of growing up. It is easy to forget that Dexter had his own crazy adolescent phase, too. I still remember the day I found myself saying, “You are going to eat, you are going to potty, and you are going to bed!” Sometimes, when puppies get extra wild, it is not even about training. They are simply overtired and need help settling down. Just like toddlers, sometimes they push through their exhaustion and get even more wired.
If you are going through the teenage years with your Cavalier right now, you are not alone. And no, you did not do anything wrong. Adolescence is a natural stage in a dog’s development. In Cavaliers, it usually starts when those puppy teeth begin falling out (around four to six months old) and can last until about eighteen months, give or take depending on the dog.
During this phase, your Cavalier might:
Forget their basic training
Start jumping up more
Become mouthier and more vocal
Seem to ignore you sometimes
Have random bursts of wild energy (we call them “zoomies”)
Get into things they never bothered with before
Show frustration or impatience more easily
Does that sound familiar?
It is important to remember that your Cavalier’s brain is still developing. Just like human teenagers, they are caught between puppyhood and adulthood. Their impulse control is not fully in place yet. The good news? This phase is temporary. And your patience and guidance right now will shape your Cavalier for the rest of their life.
Here is how I am helping Stewart (and helped Dexter before him) navigate this time:
Stay Consistent with Positive Dog Training: Even if your Cavalier seems to have forgotten what “sit” or “stay” means, keep practicing. Short, daily sessions with positive reinforcement go a long way. Stewart and I do a lot of quick “name games,” sits, hand targets, and polite walking games to keep his brain engaged.
Build in Play and Enrichment: A bored adolescent dog is a mischievous dog. I make sure Stewart has plenty of fun activities like sniffy walks, find-it games, fetch sessions, and interactive toys. Play is not just fun, it is a training tool. A dog that plays with you is a dog that trusts you.
Manage the Environment: I always try to be proactive with management first. If I think Stewart might start getting rowdy or restless, I plan ahead. Before I get busy, I will take him for a nice walk, do some training or play a game before I need to settle in. Then, I’ll provide him with something to keep him busy, like a snuffle mat, chew toys or licky mat. That way, he already has something to focus on instead of looking for ways to entertain himself. Managing the environment is not about waiting for problems to pop up. It is about setting your Cavalier up for success before trouble starts.
Provide Enough Rest: After Stewart works on his snuffle mat, chew toy, or licky mat, and has had a little training or a nice walk, he is usually ready to settle. That is when he curls up for a siesta at my feet while I do my work. Remember that story about Dexter? Sometimes the wild behavior we see is not from a lack of exercise. It is from being overtired. Puppies and adolescent Cavaliers still need a lot of sleep throughout the day. Building in scheduled downtime helps them reset and recharge before they get into trouble from being too tired to make good choices.
Focus on Trust and Bonding: During a dog’s adolescence period, it is easy to get caught up in the frustrating moments when your Cavalier is ignoring you, getting too wild, or pushing boundaries. But I always try to remind myself that every interaction with Stewart is an opportunity to build our relationship. Trust and connection are even more important during this teenage stage. Adolescence is a time when Cavaliers are figuring out the world and deciding who and what they can count on. I want Stewart to know that I am always safe, fun, and trustworthy. That way, when things get tricky, like going to the veterinarian or navigating a new place, he will look to me for guidance and reassurance. The stronger the bond we build now, the more confident and connected he will be as an adult.
Keep a Sense of Humor: Adolescent dogs can be frustrating at times, no doubt about it. But it also brings some of the funniest, most joyful memories. Stewart’s goofy antics, the way he proudly carries a pinecone, his dramatic “flops” when he does not get his way, these are the moments I know I will smile about years from now.
If you are raising a Cavalier King Charles Spaniel and feeling overwhelmed by the ups and downs of adolescence, you are not alone. This stage can feel overwhelming on some days, but every patient, playful, and consistent moment you put in now is shaping your Cavalier’s future. All the work you are doing today will help your Cavalier grow into a confident, connected, and loving companion for many years to come.
If you would like more step-by-step help through this stage, I would love for you to join us in our Manners, Life Skills, and Foundation Training course. Inside the course, I walk you through building polite greetings, calm walking, settling skills, and helping your Cavalier stay more focused and connected with you. It is all about giving you the tools to guide your Cavalier through adolescence and beyond with patience, confidence, and fun.
At What Age Do Cavaliers Calm Down?
If you are raising a young Cavalier King Charles Spaniel and wondering when your Cavalier will calm down, it is a common question during the teenage phase. Cavaliers usually start to settle after they move through adolescence, which can last until around eighteen months to two years of age. Some Cavaliers might take a little longer depending on their personality and energy level.
Maturity comes with time, but it also comes with the foundation you build along the way. Positive training, daily routines, enrichment, plenty of rest, and building trust all help your Cavalier develop into a calmer and more confident companion. It is not something that happens overnight, but it does happen.
You have got this! Stay patient, stay positive, and focus on the progress you are making together. It is not about being perfect. It is about showing up, doing the work, and building a strong relationship one day at a time.
What has your Cavalier been doing lately that makes you say, “Yup, we are in the teenage stage”? I would love to hear your stories in the comments!
Google Ad Below [...]Read more...
May 23, 2025What to Do When an Off Leash Dog Approaches or Attacks Your Cavalier
Running into an off leash dog in a public area where leash laws are in place is one of those moments that gets my blood boiling. I’ve heard from too many Cavalier families who have gone through this, and sadly, I know several Cavaliers who were seriously injured. Even a couple that didn’t survive. It’s heartbreaking, it’s preventable, and we need to talk about it.
This post is for those of us doing our best to protect our dogs, especially small, gentle breeds like Cavalier King Charles Spaniels, when others decide the leash rules don’t apply to them. Whether you’re out walking your Cavalier, training, or just enjoying your day, here are real life ways to keep your dog safe and what to do if the worst happens.
Why Letting Your Dog Off Leash Puts Others at Risk
Just because your dog is friendly does not mean they should be off leash in public areas. You never know what someone else’s dog is going through. Some dogs are recovering from surgery or illness and need space. Others are working through fear or reactivity and are not ready for sudden greetings. Some are service dogs who may not be wearing a vest but are doing their job. And many dogs, Cavaliers included, simply do not want strange dogs running up to them.
This is why leash laws exist. They are there to protect everyone. Just because your dog wants to say hi doesn’t mean they should get to.
What to Do When an Off Leash Dog Approaches
There is no perfect solution that works in every situation, especially when an off leash dog charges unexpectedly. But being prepared both mentally and physically can make a real difference. These are practical ideas I have taught, used myself, and seen work in real life. While nothing is guaranteed, having a plan in place can help you stay calm, act quickly, and protect your Cavalier as best you can.
Watch the video demonstrations and don’t forget to subscribe to @RaisingYourPetsNaturally for more tips.
Teach a Sit Stay Behind You
One of the most helpful cues I teach is a sit stay with my dog positioned behind me. I start by practicing in low distraction settings and slowly build it up over time. If a dog approaches, I cue my Cavalier to sit and stay behind me, and I step forward to handle the situation. This helps my dog feel protected and keeps them from reacting or escalating the situation.
Throw Treats at the Approaching Dog
Yes, throw treats right at the dog’s face. It may sound odd, but it works. The goal is to startle the dog and interrupt their focus. Then toss more treats behind them, toward the direction they came from. This often gives you a few seconds to calmly retreat with your Cavalier. I always carry tasty treats for this reason.
Use a Traffic Cop Stance
Turn to face the dog, extend your arm out like a stop sign, and say firmly, “Stop. Go home.” Keep your Cavalier behind you and slowly back away. Some dogs will pause or hesitate if they’re unsure or not aggressive. Keep repeating the phrase and keep your hand out, as you and your Cavalier walk backwards away.
Carry an Air Horn
If your dog is comfortable with noise, an air horn can be a great deterrent. I always condition my dog to hear it at home first and pair it with treats. When needed, a quick blast can interrupt the loose dog’s approach and give you time to move away. It’s one of my go to tools, but only if your dog can handle the sound.
Use an Umbrella as a Visual Block
I train my dogs to be comfortable with umbrellas opening indoors, so they are not startled if I ever need to use one during a walk. If a dog is charging at you, pop open the umbrella toward them. The sudden motion and large shape often causes the dog to pause or back off. If necessary, you can shake it or move it toward the dog as you use a firm, go home, verbal cue.
Carry a Personal Safety Tool
Tools like pepper gel, citronella spray, taser, or even a She’s Birdie alarm can help in urgent moments. Pepper gel has more control than spray, and the alarm can attract attention or startle the other dog. Always practice with these tools and make sure your dog is not afraid of them.
Be Cautious About Picking Up Your Cavalier
It is tempting to scoop up your Cavalier, especially since they are small. But doing so can sometimes make things worse. The approaching dog may jump at you or become more aroused. Only pick up your Cavalier if you feel it will help and if you have a safe place to put them, like a truck bed, behind a fence, or even inside a garbage bin if it means protecting them. Use extreme caution if trying this.
If You’re Walking More Than One Cavalier
This is also one of the reasons I usually prefer walking one dog at a time. It helps me stay more aware, react quickly if something happens, and really connect with the dog I’m with. But I know that’s not always possible, so here’s how to stay prepared when walking more than one.
Walking multiple Cavaliers makes things trickier, especially when a loose dog starts heading your way. It can be harder to control space, stay calm, and manage multiple leashes at once. That’s why I recommend preparing a plan ahead of time if you regularly walk more than one Cavalier.
If possible, practice sit stays with each dog individually first, then gradually build up to group stays. Teach your Cavaliers that standing behind or beside you means safety. If you see a loose dog approaching, calmly guide all your Cavaliers behind you and keep their leashes in one hand while using your other hand to deter the loose dog, whether that’s with a verbal cue, a stop signal, or a safety tool.
This is also where tools like a treat toss or umbrella can really help, because they create distance without needing to physically wrangle multiple Cavaliers. And if things feel too tight, do not hesitate to turn and walk away together. Getting distance is often the safest move when you have more than one dog depending on you.
What to Do If a Dog Attacks Your Cavalier King Charles Spaniel
No one wants to think about this part, and I truly hope you never face it. But if a loose dog attacks your Cavalier, your priority becomes stopping the fight as quickly and safely as possible. This is not about hurting another dog out of anger. It is about protecting your own Cavalier King Charles Spaniel from serious harm or even death.
If you have a tool in hand, such as a stick, an umbrella, or pepper gel, use it to target the attacking dog’s face. Aim for the eyes, nose, or mouth. The goal is to interrupt the attack and create enough of a pause to safely separate the dogs. You may only have a second or two, and you need to respond fast and as hard as you can to protect your Cavalier.
If you are physically trying to break it up without a tool, one method is to grab the attacker’s back legs and swing them away from your dog. This can throw them off balance and give you a chance to create space. Do not reach for collars or faces with your hands. That is the most common way people get bitten during dog fights.
Once the dogs are separated, move your Cavalier to safety right away. If possible, secure the attacking dog so they cannot come back. Then take photos, report the incident, and document everything as soon as you can. Even if your Cavalier seems okay, a vet check is always important. Many bite wounds are deeper than they look.
Helping Your Cavalier Recover Emotionally After an Attack
This is one of the most important parts of the process, and it is often overlooked. A Cavalier who goes through a dog attack may seem fine physically, but emotionally, they can lose trust in the world around them. I have worked with dogs who suddenly freeze on walks, avoid places they once loved, or become uneasy around other dogs even from a distance.
Start by giving your Cavalier time to decompress. Skip your regular walks for a few days and let them rest in the comfort of home. The goal is to help them feel safe again while things settle emotionally and physically. Keep their day simple and supportive.
At home, bring in confidence through simple enrichment. Food puzzles, nose games, and easy trick training can help rebuild a sense of control and engagement. These games in a familiar space can make a big difference.
When you are ready to start walking again, choose quiet places where you are unlikely to run into other dogs. Early mornings, empty parking lots, or quiet nature trails can be good options. Let your Cavalier set the pace. If they want to pause and look around or head back early, that is okay.
Pay attention to the progress. If your Cavalier walks a little farther, seems more confident, or looks at you for guidance, tell them how smart they are. Praise, treat, give a chest scratch. That is how trust returns, little step by little step.
This healing process takes time. That is exactly why I created Supporting Your Sensitive Dog: Gentle Steps Toward Confidence. If your Cavalier is showing signs of fear or hesitation, this course will guide you through gentle, trust based steps to help them feel safe again.
You’re Not Overreacting
Your Cavalier deserves to walk safely. You deserve to walk without fear. And if someone chooses to ignore leash laws, you are completely within your right to protect your Cavalier, using your voice, your body, your training, or any tool you need.
So stay prepared. Be proactive. And most of all, trust your instincts. You’ve got this.
Google Ad Below [...]Read more...
May 14, 2025Kind, Reward-Based Training for Cavalier King Charles Spaniels and All Breeds
When people hear the term positive reinforcement, they sometimes picture a dog who only listens if you have food in your hand. Or they think it means never setting boundaries. I’ve had people say things like, “I don’t want to spoil my dog,” or “I heard that’s just bribing with treats.” But the truth is, positive reinforcement training is science-based, relationship-focused, and one of the most effective ways to help dogs feel confident and understand how to live successfully in our human world.
And it’s not just for Cavaliers. This approach works for every breed, every age, and every behavior challenge.
Let’s break down positive reinforcement dog training in a simple and practical way.
What Positive Reinforcement Dog Training Really Means
Positive reinforcement means adding something your dog enjoys immediately after they do a behavior you want to see again. That reward could be healthy dog treats, a toy, praise, a chance to sniff, or access to something fun. It doesn’t have to be a treat every time, but food is often the easiest and most meaningful place to start. If it’s going to be rewarding for your Cavalier, they decide. I mean, my Mom might think a slice of cherry pie is a good reward, but I don’t even like cherry pie. I’d need a slice of chocolate cake!
This type of training is grounded in how all animals learn, including us. When a behavior is followed by a good outcome, we’re more likely to do it again. Your dog sits, you give them a treat. Your dog walks calmly by your side, you let them go sniff a log. That’s positive reinforcement. You’re not spoiling them. You’re reinforcing behavior you want to see more of, and they get something pleasant in return.
How Dogs Actually Learn
Dogs don’t come into our homes already knowing how to live in them. They don’t know what “sit” means. They don’t know they shouldn’t jump on guests or grab food off the counter. Just like us, they learn by doing, and by figuring out what works.
Dogs learn through repetition. They make connections between what they do and what happens next. If they sit and a treat shows up, they’re more likely to sit again next time. That’s positive reinforcement. We’re showing them that their choices matter and that doing the thing we like leads to something they like.
When we use positive reinforcement, we’re not just trying to get obedience. We’re helping our dogs understand how to live in our world in a way that feels safe and rewarding to them. They’re not learning because they’re afraid of getting it wrong. They’re learning because they feel good getting it right.
And that’s what builds real, long-lasting behavior.
Luring Training Is Teaching—Not Bribing
At the start, we often use a food lure, like holding a treat near your dog’s nose to help them learn how to sit or lie down. We slowly move that treat in a way that encourages the action we want, like guiding their head up and back until their butt hits the ground.
That’s not bribing. It’s teaching. We’re showing them what we’re looking for.
After a few short sessions, we continue practicing the same way. Lure the sit. Reward the sit. Once the dog is starting to understand it, we ask them to follow our empty hand the same way. If they sit, we reward. Now they’re doing the behavior without seeing food first.
Once that’s going smoothly, we add the cue. Say “Sit,” move your empty hand like before, and when their butt hits the ground, reward it.
Over time, we fade the hand movement so that “Sit” becomes all they need to hear. The behavior is now on cue, and your dog learned it in a clear, kind, and effective way.
Dogs Don’t Generalize—They Need Practice in New Places
One of the biggest things people miss is that just because your dog knows how to sit in the living room doesn’t mean they know how to do it in the yard, at the vet’s office, or around a group of children. Dogs need practice in new environments. They need help when distractions are high or when they’re feeling unsure.
That might mean going back to the basics in new places. Using a treat to lure a sit at the park isn’t spoiling your dog. It’s helping them succeed in that moment. You’re helping them learn how to do something they already know, but in a place that’s harder or more distracting.
Why Positive Reinforcement Works for Cavalier King Charles Spaniels and All Breeds of Dogs
Cavaliers are sweet, sensitive, and deeply tuned in to their people. They often respond beautifully to kind guidance and struggle with harsh corrections. A raised voice, leash jerk, or even a stern look can shake their confidence and cause them to shut down.
But this isn’t just about Cavaliers.
Every dog, whether they are a bouncy Labrador, a headstrong terrier, a fearful rescue, or a playful senior, benefits from positive reinforcement dog training. You’re not just teaching skills. You’re building a good relationship. You’re helping your dog feel safe to try new things.
Positive dog training encourages curiosity instead of fear. It helps build lasting behavior in a way that feels good for both you and your dog.
The Risk of Punishment-Based Dog Training
Harsh training methods may seem like they work quickly, but they come with a huge cost. Dogs trained with physical corrections, yelling, or intimidation often show signs of stress, like lip licking, yawning, cowering, or even shutting down completely. They may stop doing the “bad” behavior, but not because they learned something better. They stop because they’re afraid to try.
Studies have shown that punishment-based dog training methods can increase anxiety and reactivity, and even lead to aggressive behavior in some dogs. It doesn’t teach what to do, it just teaches the dog what not to do, without giving them tools to succeed.
I’ve worked with so many families trying to rebuild trust after their dog was trained with punishment. That kind of fallout is hard to undo.
You Don’t Have to Carry Treats Forever
A common concern I hear is, “Will I always need food in my pocket?” The answer is no. As your dog becomes more confident and fluent in a behavior, you’ll reward less often. You’ll also start to mix in other rewards, like praise, sniffy walks, or play.
But here’s the thing, dogs, like us, still appreciate being recognized for a job well done. I still praised Dexter and gave him treats into his senior years. Not because I had to. But because I wanted to reinforce the connection we built over a lifetime of learning together.
You’re not creating a treat-dependent dog. You’re building a dog who trusts that good choices lead to good outcomes.
If you want to teach your dog real life manners in a kind, clear, and effective way, take a look at my Manners, Life Skills, and Foundation Training Course. It’s self paced, easy to follow, and designed to help your dog build everyday skills with confidence. You’ll learn how to prevent common problems before they start, teach polite behavior step by step, and create calm, positive routines that work in daily life. I personally answer questions, give feedback, and support you as you go through the course.
Why Positive Dog Training Works for Behavior Issues Too
Positive reinforcement is not just for basic training or fun dog tricks. It’s also one of the best ways to work through real behavior issues like jumping, barking, reactivity, anxiety, and fear-based behaviors.
A big part of dog behavior modification is emotion. When a dog is barking or lunging, they’re not just being “bad.” They’re usually feeling overwhelmed, scared, frustrated, or unsure. If we only try to stop the behavior without addressing how the dog feels, we’re not really helping them.
Positive reinforcement gives us a way to change those emotions. We teach our dogs that good things happen when they make calm, safe choices. Over time, they start to feel more relaxed in situations that used to be stressful. That change from fear to comfort, from confusion to understanding, is what creates real, lasting change.
Instead of just trying to stop the behavior, we ask, “What is my dog feeling?” Then, “How would I like them to feel instead?” and “What do I want them to do instead?” From there, we adjust the situation so we can meet all those needs and teach the new behavior in a kind, clear way. The more your dog practices that skill in the right setting, the more confident they become. And that’s where things really start to turn around.
What Your Dog Really Needs From You
At the heart of it all, positive reinforcement dog training is about more than treats. It’s about empathy. It’s about understanding how your dog sees the world and helping them learn in a way that clicks.
It’s about setting them up for success and guiding them toward the behaviors you want. Not through fear, but through trust, patience, and connection.
That’s what I want for Stewart. That’s what I wanted for Angel Dexter. And that’s what I want every dog to have, training that feels good, makes sense, and builds a life rooted in partnership, not power.
Keep it positive. Keep it patient. Keep it proactive.
Google Ad Below [...]Read more...
June 5, 2025How to Motivate and Train a Cavalier King Charles Spaniel
If your Cavalier King Charles Spaniel is not motivated to train, you’re not alone. This is something I hear from Cavalier families all the time: “My Cavalier is not food motivated,” or “My Cavalier just doesn’t care about training.” But in most cases, it’s not that your Cavalier doesn’t want to learn, it’s that something is getting in the way.
Here are a few common reasons your Cavalier might not be interested in training right now and what you can do to help them feel more motivated and ready to learn.
Reasons Your Cavalier Might Seem Unmotivated for Training
They are full
If your Cavalier just finished a meal or had a lot of snacks recently, they may not be interested in working for more food. Training with food rewards works best when your Cavalier is a little bit hungry, not stuffed. Try scheduling your training sessions before meals rather than after, or set aside part of their meal to use as training treats throughout the day.
They are tired
Just like us, Cavaliers have times when they are more alert and times when they just want to rest. If your Cavalier had a big play session, a long walk, or an active outing, they may need some quiet time before they are ready to focus again. Cavalier puppies especially need a lot of sleep, so training when they are rested can make a big difference. Try noticing when your Cavalier naturally seems more alert and ready to engage. That is usually the best time to practice a little training together.
They are not feeling well
If your Cavalier seems unusually uninterested in training or even in their favorite treats, that could be a sign they are not feeling well. Even mild health issues like nausea, pain, or dental discomfort can lower motivation. It is not always obvious at first, but changes in training interest can be an early clue that something is off. If this becomes a pattern, or if anything else seems different, reach out to your Cavalier’s holistic vet to rule out anything medical before moving forward with training.
Your Cavalier is overstimulated
Cavaliers take in a lot of information from their surroundings. If you are training your Cavalier in a busy or unfamiliar location, all those sights, sounds, and smells can be overwhelming. When there is too much going on, your Cavalier might not be able to focus or respond the way they usually do. This is especially common for puppies or sensitive Cavaliers who are still learning how to process the world around them.
If that happens, try moving to a quieter spot. You can even take a little break together for a sniffy walk and then go back to something really simple, like The Name Game or Hand Targeting. These familiar cues can help your Cavalier settle and build confidence again.
Your Cavalier is anxious or unsure
When a Cavalier is feeling unsure, whether it is because of a new environment, a stranger nearby, or something they cannot quite figure out, training can start to feel like too much. It is not about being stubborn or ignoring you. They are just trying to process how they feel before they can focus on learning anything new.
If your Cavalier seems nervous or anxious, the best thing you can do is slow things down. Sit with them quietly, speak gently, and let them look around without pressure. Sometimes just being there together is enough. Once they start to relax, you can offer praise and a treat or a “check it out” cue if they seem ready to explore.
The reward is not meaningful enough
When I hear that a Cavalier is not food motivated, the first thing I look at is the reward. Most of the time, it is not that your Cavalier is not food motivated. It is that the treat just does not matter enough to them at that moment. Dry biscuits or lower value treats usually do not get their attention, especially in busy or distracting places.
Start with real food. I usually go straight to meat. That might be small bits of cooked beef, turkey, or lamb. Freeze dried meat or single ingredient dehydrated treats are also great choices. These are often the best treats for Cavaliers because they are soft, tasty, and easy to eat. Just flip the bag over and check the ingredients. You want something simple that says one thing, like chicken breast or turkey. Avoid fillers or extras that do not need to be there.
You can also use freeze dried raw food, broken into tiny pieces. These are real food options and often made mostly from meat, which makes them a great choice for Cavaliers who need something healthy and high value. Many people use them during training and count them toward their Cavalier’s daily calories. It is an easy way to stay consistent with nutrition while still offering something special and rewarding.
I also avoid using liver or organ meats regularly. A little once in a while is fine, but too much liver can lead to vitamin A concerns. Some organ treats can also be too rich and cause diarrhea.
Use the right reward for the right moment
Once you find something that really works for your Cavalier, think about how and when to use it. The most rewarding treats should be saved for the harder training sessions. That might mean practicing outside, focusing around distractions, or trying something brand new. When the reward truly matters to your Cavalier, motivation naturally improves.
If they get their favorite treats for easy things like sitting in the living room, there is not much reason to work harder when training becomes more challenging. Save the cooked beef, freeze dried meat, or other special rewards for those moments when your Cavalier needs a little extra encouragement. Matching the value of the reward to the difficulty of the task helps keep your Cavalier engaged and willing to try.
Explore other forms of motivation
Not every Cavalier is motivated by food alone. Some respond better to toys, praise, or playful interaction. If your Cavalier enjoys toys, try using a favorite squeaky, a soft tug toy, or a quick game of fetch. Some Cavaliers are especially drawn to textures like fleece or rabbit fur, which can make a toy feel more exciting. Whatever it is, keep it put away when you are not training so it stays special and does not lose its value. Other Cavaliers are more motivated by attention and connection. A cheerful voice, a smile, or light praise can sometimes go further than anything you can hold in your hand. At the end of the day, your Cavalier is the one who decides what feels rewarding. It is not about what we think should work. It is about what actually matters to them.
Your Cavalier can learn with the right support
If your Cavalier is not showing interest in training, it does not mean something is broken. It just means they need a little help feeling ready. That might be adjusting the environment, changing up the reward, or simply giving them time to feel more confident.
This is exactly the kind of thing we work on in my Manners, Life Skills and Foundation Training Course. If you are feeling unsure about how to move forward, I will guide you through simple, kind steps to help your Cavalier feel more focused and connected. You will learn how to use rewards that actually matter to your Cavalier, when to train, and how to build everyday habits that stick. It is self-paced, easy to follow, and I am always there if you need support.
Your Cavalier wants to connect with you. With a little support and the right setup, they will start to feel more engaged and eager to participate. You do not need to rush the process. Keep it light, keep it kind, and celebrate the small wins. They all add up.
Google Ad Below [...]Read more...
Google Ad Below
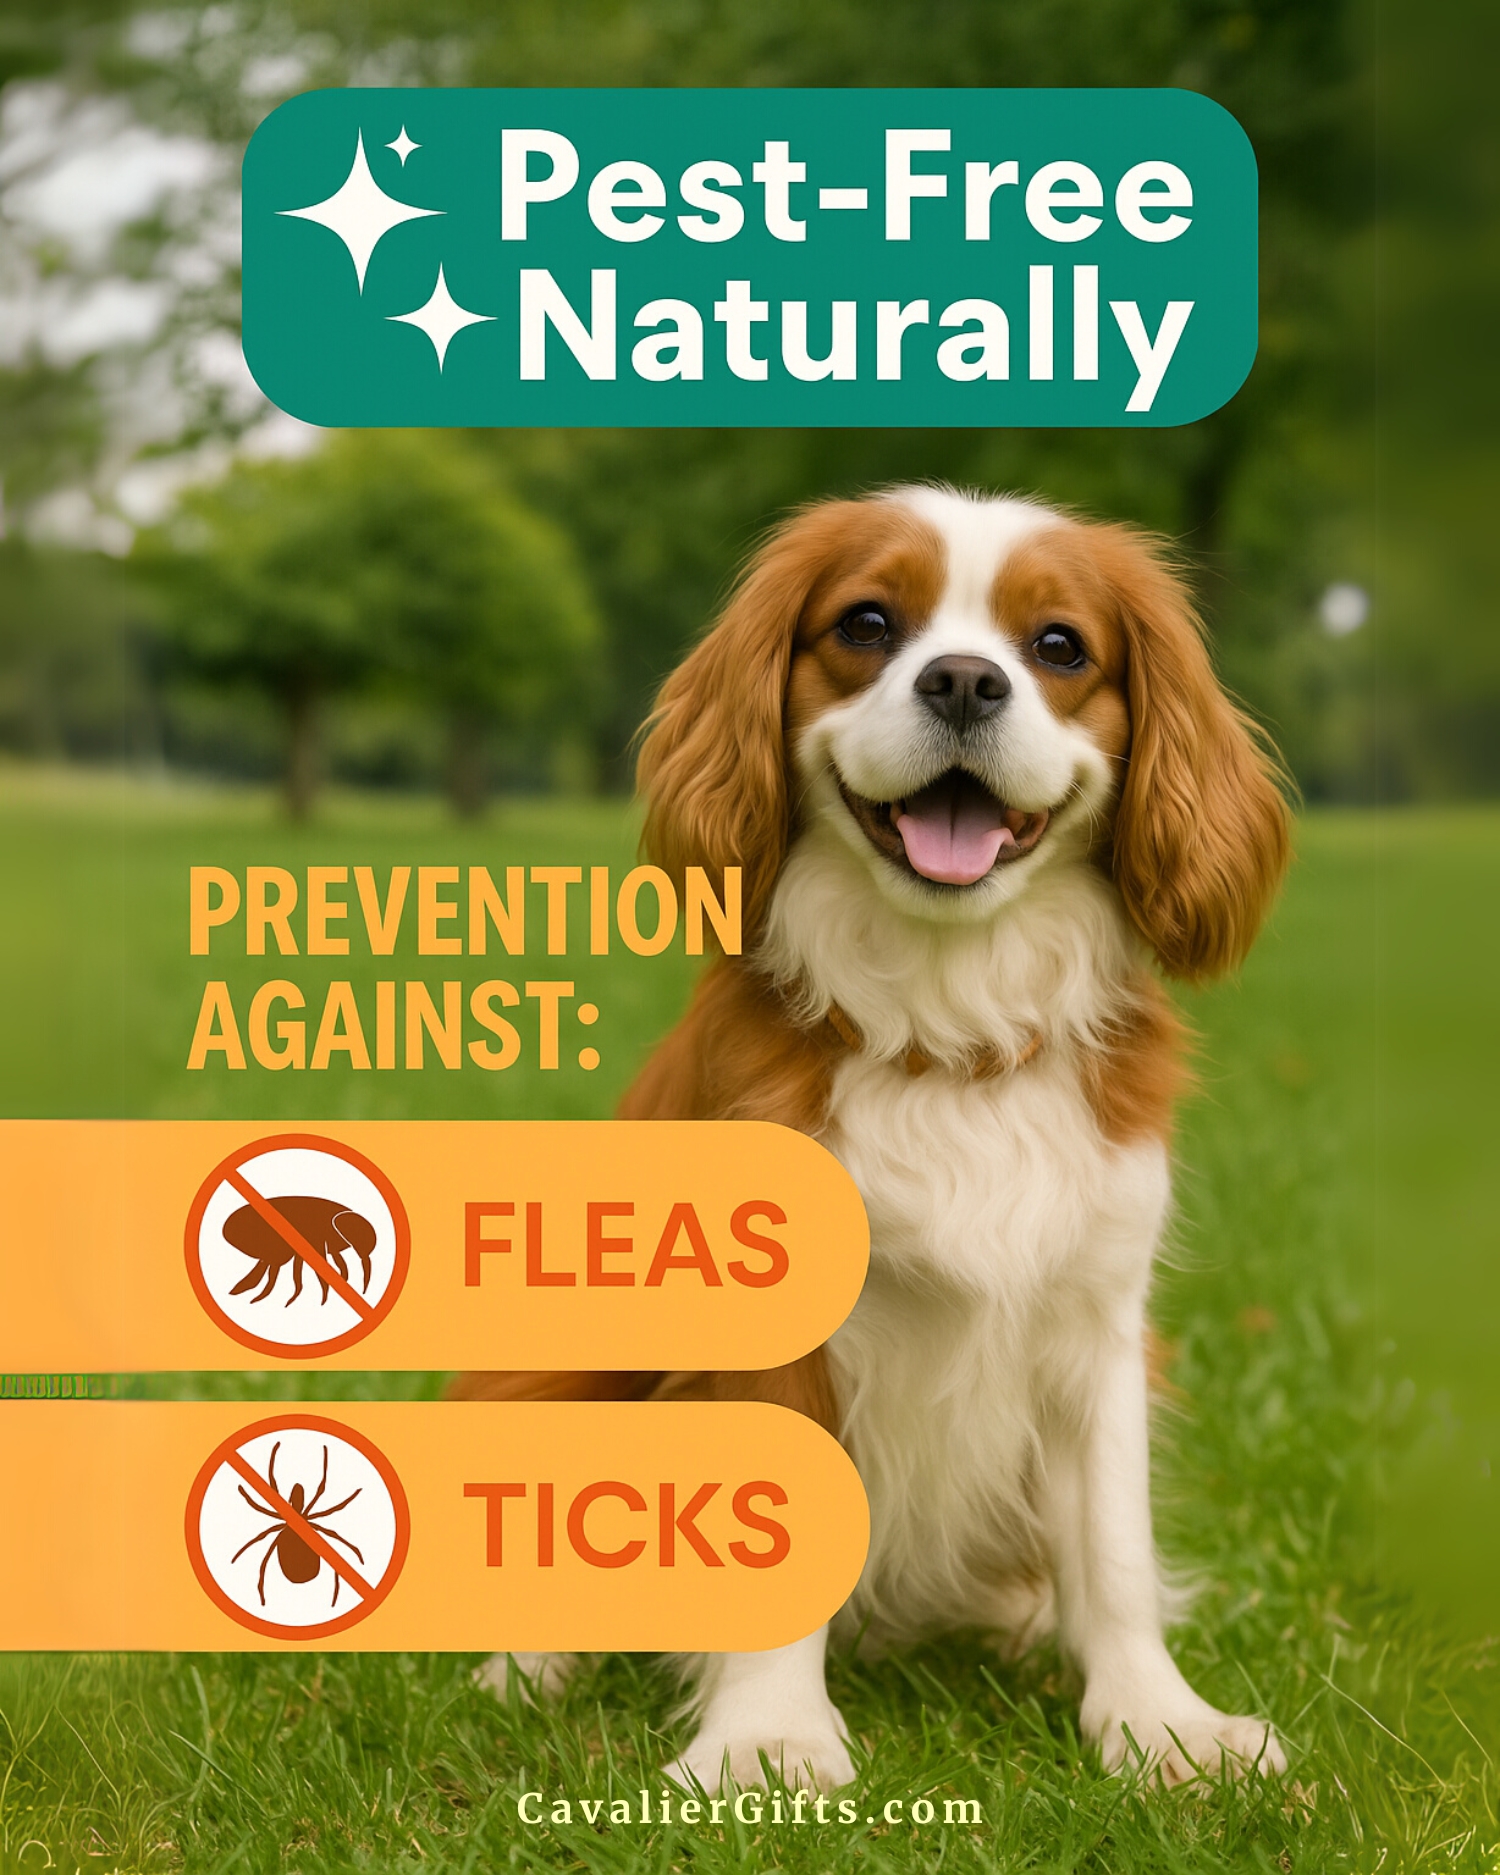
Natural Flea and Tick Prevention for Cavalier King Charles Spaniels (Early access for our Patreon community)
Gentle, Safe, and Effective for Our Sensitive Cavaliers
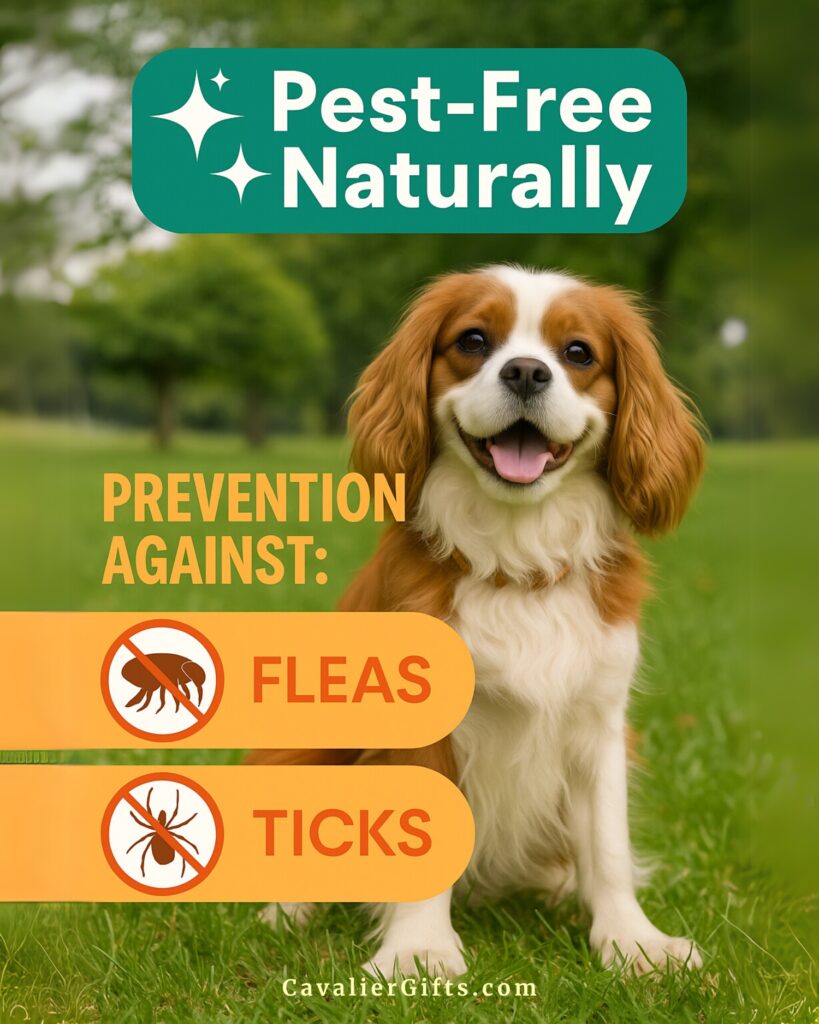
Fleas and ticks. Just hearing those words makes me itch. But as a natural Cavalier Mom, I’ve always been cautious about what I put on or in my dogs, especially with delicate and sensitive breeds like Cavalier King Charles Spaniels. These little sweet hearts often have sensitive skin, luxurious coats, and sometimes underlying conditions like Chiari malformation or syringomyelia, which can make them more vulnerable to adverse reactions.
I’ve been on this natural journey for years, first with Dexter and now with Stewart. Along the way, I’ve learned that staying chemical-free when it comes to flea and tick care is absolutely possible, it just takes a little planning and a lot of label reading.
This is the natural flea and tick routine I’ve found works best for my Cavaliers.
Why I Choose a Natural Approach for My Cavalier King Charles Spaniels
Conventional flea and tick treatments may offer quick results, but they also come with serious risks. Side effects can range from skin irritation, itching, and digestive upset to more concerning issues like tremors, seizures, and in some cases even organ damage. These are not small concerns.
For a breed like the Cavalier King Charles Spaniel, those risks are even more concerning. Cavaliers are already prone to neurological conditions like Chiari malformation, seizures, tremors, and episodic falling syndrome. I’m especially cautious about using anything that lists seizures or neurological side effects as possible outcomes. It just doesn’t make sense to use a treatment that could trigger the very issues this breed is already vulnerable to.
Choosing a natural approach isn’t about trying to be perfect. For me, it’s about reducing chemical exposure wherever I can and building a thoughtful, layered prevention plan that supports overall health instead of relying on a single product to do it all.
My Natural Flea and Tick Prevention Plan for My Cavalier King Charles Spaniel
1. Regular Grooming and Bathing-I bathe Stewart every three to four weeks using a safe, gentle dog shampoo made without synthetic preservatives, artificial fragrances, or harsh surfactants. I’ve been using 4-Legger’s USDA-certified organic formulas for years because I trust their ingredient panel and transparency. They have a variety of formulas that help deter ticks and fleas.
Bathing regularly doesn’t just clean your Cavalier. It helps interrupt the flea life cycle. A good soak and lather can wash away flea eggs, dirt, and debris that might attract pests. When I use a shampoo that includes properly diluted essential oils known to repel fleas and ticks, it gives Stewart an extra layer of protection even after his bath is done.
2. Natural Tick and Flea Sprays for Daily Protection-Before every walk, I spray Stewart with a natural flea and tick repellent. I pay close attention to his legs, chest, tail, and belly, basically anywhere that might brush up against grass, shrubs, or wooded areas. These sprays are one of our most important layers of protection, and I use them daily during warm weather or anytime we’re heading into a high-risk area.
Over the years, I’ve rotated between trusted store-bought options and homemade recipes using properly diluted dog-safe essential oils. I always avoid sprays with synthetic preservatives or ingredients that could irritate a dog’s skin.
When I make my own, I tailor the recipe to the season, the environment, and even the behavior of my dog. Dexter, for example, used to try to catch bees, so I avoided blends with oils like rose geranium that might attract them. The key with any natural tick and flea spray is to apply it each time your Cavalier goes outside. These blends are not designed to last for hours at a time, and a quick re-spritz before each outing is what really makes the difference. I keep a bottle near the door so it becomes part of our daily walking routine.
DIY Natural Flea and Tick Spray for Dogs
This is one of my favorite natural sprays to help keep fleas and ticks at bay, without resorting to harsh chemical treatments. It’s simple to make, and you can use it on both your dog and yourself before heading outside.
What You’ll Need:
- 3 ounces distilled water
- 1/4 ounce vodka or grain alcohol (helps disperse oils evenly)
- 1/4 teaspoon vegetable glycerin (moisturizing and helps blend)
Essential Oils:
- 4 drops Cedarwood– repels fleas and ticks while being gentle on skin
- 4 drops Geranium– especially helpful against ticks
- 3 drops Lavender– calming and gently repels insects
- 1 drop Citronella– useful for deterring mosquitoes, fleas, and ticks
- 1 drop Peppermint– offers cooling relief and additional repellent support

Grab my free Natural Flea and Tick Prevention Guide plus a bonus page on creating a dog-safe garden to help keep pests away naturally. Click to download your free copy!
How to Make It: Add all the ingredients to a 4-ounce (or larger) amber or cobalt blue glass spray bottle. Shake gently to combine.
How to Use It: Before walks or time outside, shake well and lightly mist your dog’s legs, belly, tail, and along the back. Always avoid spraying near the face and eyes. For areas like the ears, chest, or neck, spray a small amount into your hands first, then gently rub it into your dog’s fur. This helps you apply it more precisely and makes sure it reaches the coat and skin. Always apply when your dog is dry for best results.
Storage Tip: Store your spray in a cool, dark place and an amber or cobalt glass bottle helps protect the essential oils from light exposure, which can cause them to break down over time. Shake before each use to keep the oils properly dispersed.

Simple DIY Natural Flea and Tick Spray for Dogs
When I first started making Dexter’s flea and tick sprays, I kept things really simple. I used just distilled water and a few carefully chosen essential oils. Using just distilled water and essential oils is a great option if you plan to make small batches and use them up fairly quickly. It is easy, gentle, and perfect for Cavalier parents who want something simple. You will still need to shake the bottle well before each use, just like with any natural spray.
If you want your spray to blend a little more evenly and stay fresher a little longer, using the above recipe with the grain alcohol and vegetable glycerin can help. Alcohol acts as a natural preservative and helps the oils disperse a little better through the water. Glycerin can also add some moisture to the coat and skin.
Both options are good, it really depends on what fits best with your dog’s needs and your routine. If you are going through the spray quickly, distilled water and oils work just fine. If you want a little more staying power and an extra moisturizing boost, the version with alcohol and glycerin might be a better fit.
You can also check out four of Dexter’s natural flea and tick spray recipes on my Raising Your Pets Naturally blog.
Watch now and don’t forget to subscribe to @RaisingYourPetsNaturally YouTube for more!
Why Different Natural Tick and Flea Sprays Work for Different Dogs
One thing I learned through experience and from chatting with other natural pet parents is that not every spray works the same way for every dog. Some ticks are more common in certain regions and are repelled by specific essential oils. That’s why I rotate between formulas and stay flexible with what I use. If something stops working, I adjust. It’s not failure, it’s just part of the process.
3. Apple Cider Vinegar for Flea and Tick Support-Raw, unfiltered apple cider vinegar (ACV) is another natural tool I like to keep on hand as part of a layered approach to flea and tick prevention. While it won’t kill fleas or ticks, it can help make your dog less appealing to them.
You can make a simple spray by mixing equal parts raw ACV and distilled water in a spray bottle and lightly misting your dog’s legs and belly. Just be sure to avoid the face, and only use it on healthy, unbroken skin. If your dog has any skin sensitivities or open spots, it’s best to skip ACV topically.
You can also add a small amount of ACV to your Cavalier’s food or water. Not all dogs tolerate vinegar well, especially those with sensitive stomachs or urinary issues. It’s also important if you add it to your Cavalier’s water, they also have non-altered fresh water available.
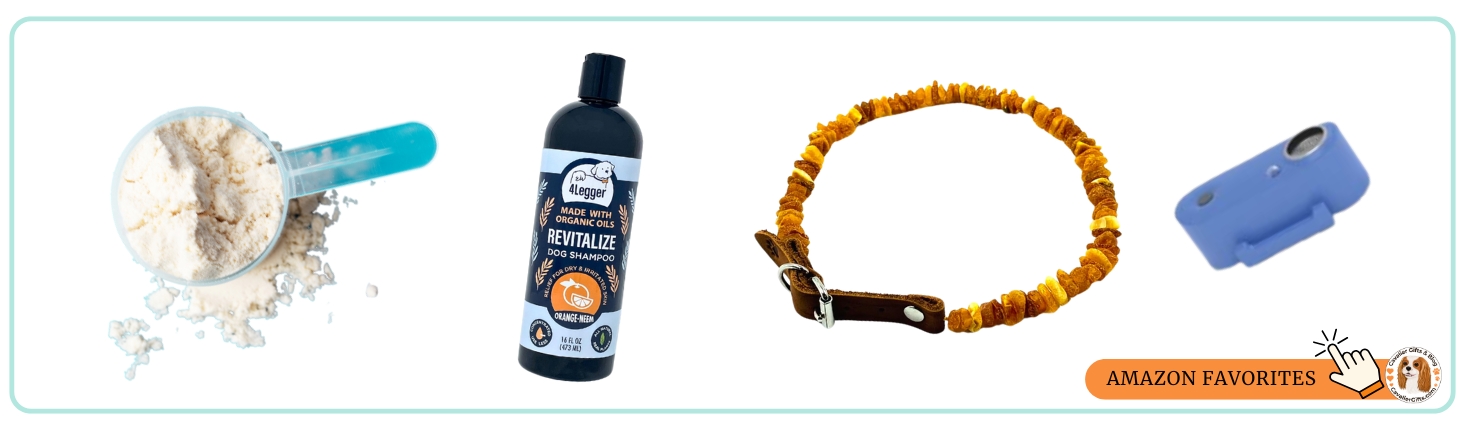
4. Amber Collars for Natural Flea and Tick Repellent Repellant-Another layer is a raw Baltic amber collar. These collars are made from unpolished amber resin that naturally releases aromatic compounds when warmed by your dog’s body. These compounds can help repel ticks and fleas without adding any scent or chemicals to your dog’s skin.
While I wouldn’t rely on them as the only form of protection, I absolutely feel they can help in the overall care to keep our Cavaliers tick and flea free naturally. They’re lightweight, chemical-free, and easy to clip on. With Cavaliers, just make sure the collar sits comfortably behind their ears and doesn’t tangle with their feathering. If your Cavalier has Chiari malformation, this may not be an option if they can’t wear a collar comfortably.
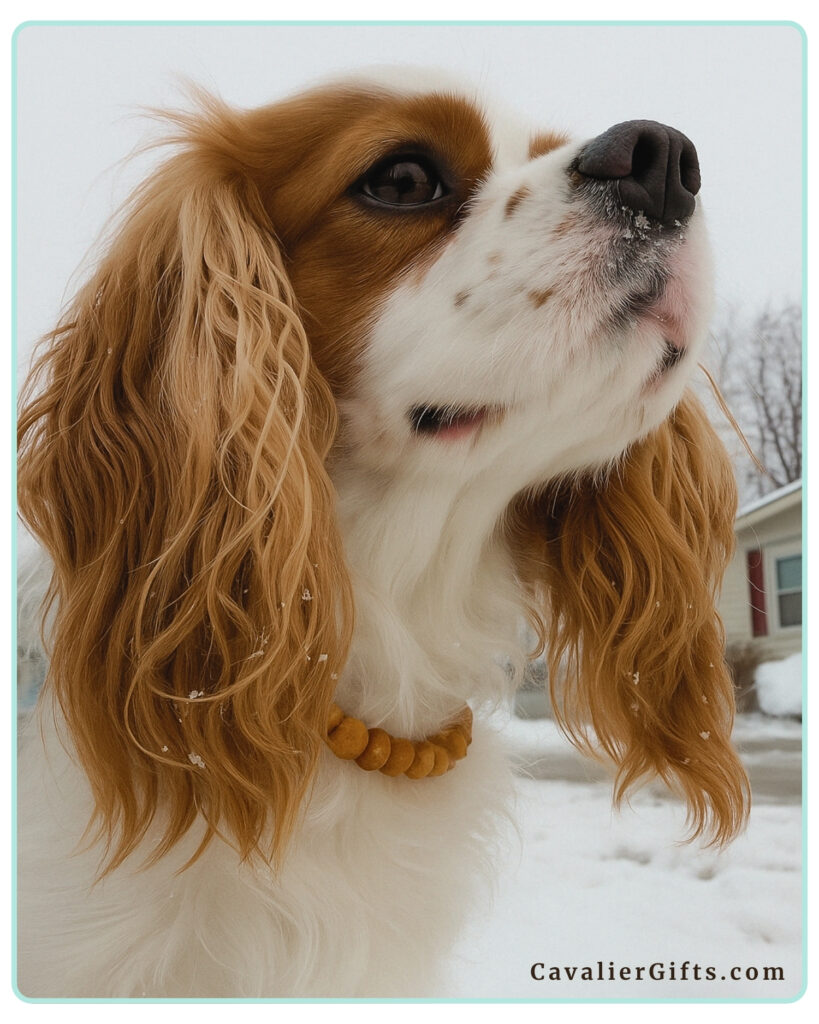
5. Ultrasonic Tick Tags-Another tool to add to your flea and tick routine is an ultrasonic tick tag. There are various brands that make these small devices that clip onto your dog’s collar or harness. They emit a high-frequency pulse that humans and dogs can’t hear, but it’s designed to interfere with a tick or flea’s ability to orient themselves toward your dog.
These tags are scent-free and totally safe for sensitive dogs like Cavaliers. This type of tag is helpful during hikes, trail walks, or visits to areas known for higher tick populations. It’s a simple, noninvasive step that adds an extra layer of protection.
6. Diatomaceous Earth for Natural Flea and Tick Prevention-Food-grade diatomaceous earth is another natural tool I use as part of our flea and tick routine. It’s a fine powder made from fossilized algae that works by drying out the exoskeletons of pests like fleas and ticks. I don’t use it as a primary prevention method, but it’s a helpful layer, especially after we’ve been somewhere with higher pest exposure.
To apply, I lightly sprinkle a small amount down Stewart’s back and gently brush it into his coat, avoiding his eyes, nose, and mouth. It’s best used when your dog is dry and in a well-ventilated area. You can also use it on bedding or around baseboards during flea season as part of a regular cleaning routine.
Watch how I apply it and don’t forget to subscribe to @CavalierTipsandFun YouTube channel for more!
7. Using Garlic to Support Immune Health and Repel Fleas Naturally-Garlic might be controversial in some circles, but when used responsibly, it’s one of my go-to immune support tools. Garlic often gets a bad reputation because in 2000, they did a study on four dogs and gave them an extreme amount of garlic ( about 25 cloves a day for a 25-pound dog), and they had a bad reaction. That’s not even close to how we’d use garlic in a natural, supportive way. You can read the study here.
I started using fresh garlic years ago with Dexter, and it’s something I continue with Stewart now that he’s old enough for it. Garlic supports the immune system and helps repel fleas and ticks from the inside out. I only use fresh, organic garlic, peeled and minced about ten minutes before mealtime to allow the allicin to activate. Then I mix it into Stewart’s food. I never exceed the recommended amount and only feed garlic for up to three days in a row, followed by five to seven days off.
I never use garlic with puppies, pregnant or nursing dogs, dogs with anemia, or those with upcoming surgeries. It’s not a fit for every dog, so I always recommend checking with a holistic vet first.
Garlic Dose For Dogs: The approximate dose of fresh, organic garlic is 1/8 teaspoon for a 5 pound dog, 1/4 teaspoon for dogs between 6 and 10 pounds, 1/2 teaspoon for 11 to 15 pounds, 3/4 teaspoon for 16 to 20 pounds, and 1 teaspoon for dogs between 21 and 30 pounds. Dogs between 31 and 50 pounds can have 1 1/2 teaspoons, and those over 51 pounds can have up to 2 teaspoons.
8. Spotting and Removing Ticks and Fleas from Your Cavalier King Charles Spaniel-No matter how many prevention tools we use, I always do a hands-on check after walks or outings, especially during peak tick season. I check Stewart’s paws, armpits, ears, groin area, and the base of his tail. These are the spots where ticks love to latch on.
If I do find a tick, I remove it immediately with a tick remover or fine-point tweezers, making sure to grab close to the skin and pull straight out. Afterward, I place it in a bottle with alcohol and wash my hands. I’ve found this routine not only gives me peace of mind but also helps me stay in tune with any changes in Stewart’s skin or coat.
A Quick Note About Dexter’s Experience
As Dexter was in his late senior years and his neurological condition progressed, I started to notice the occasional flea here and there, more than we had seen in the past. His immune system wasn’t as strong, and that likely made him more vulnerable to pests. This isn’t uncommon in aging dogs or those with health challenges. Their bodies just don’t have the same defenses they once did.
I made it a daily routine to sit with Dexter and go over him carefully with a flea comb and a small jar of alcohol to catch any runners before they could become a real problem. I also stayed on top of sweeping and washing his bedding regularly. Thankfully, it never got out of control, just a flea here and there, but it reminded me how important it is to stay consistent.
It also reinforced why I’ve always chosen to avoid harsh flea treatments. With Dexter’s compromised system, exposing him to chemicals could have caused even more serious issues. Supporting his health naturally, with gentle and consistent care, was always the safest choice for him.
Final Thoughts on Natural Flea and Tick Care for Cavaliers
If you’re just starting your natural flea and tick care journey, start small. You don’t have to change everything at once. Pick one new step, try it, and see how it fits your dog’s life. Read labels. Ask questions. And most of all, give yourself grace as you navigate what feels right for you and your Cavalier.
Cavaliers are worth the extra effort, and with how sensitive they can be, choosing gentle, natural care just feels like the right thing to do.
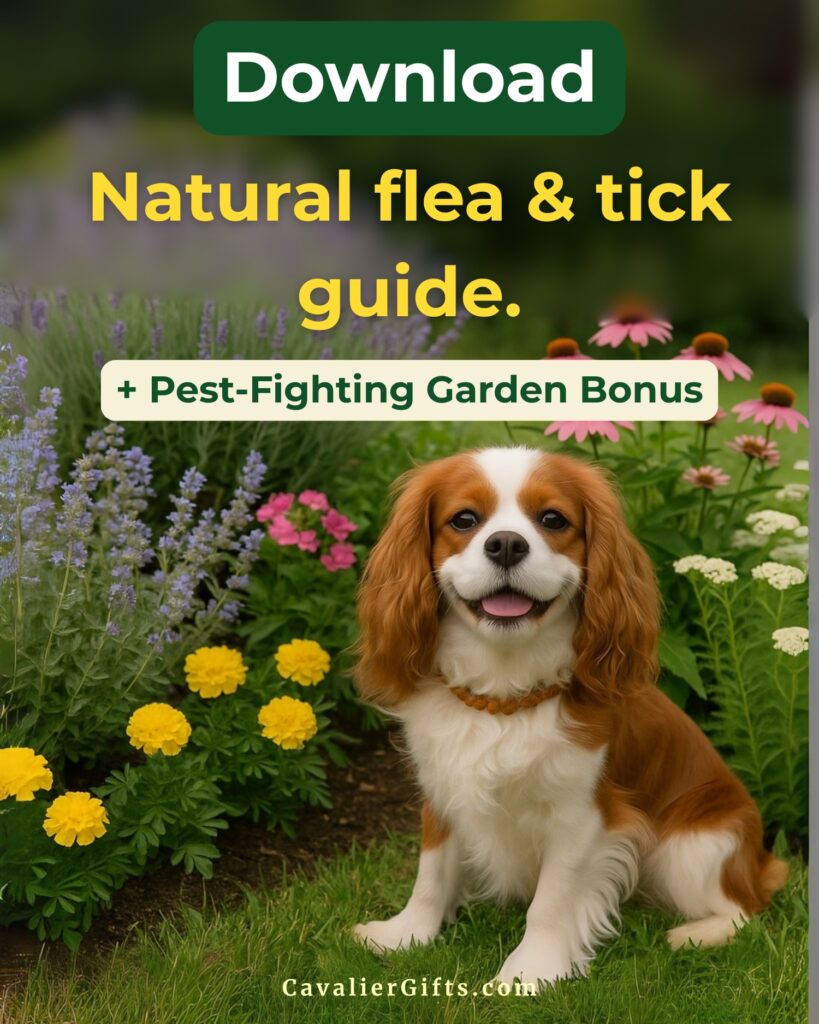
Grab my free Natural Flea and Tick Prevention Guide plus a bonus page on creating a dog-safe garden to help keep pests away naturally. Click to download your free copy!
|
|
|
|
Popular Blogs
February 26, 2025Cavalier King Charles Spaniel Heart Disease
Mitral Valve Disease (MVD) is something every Cavalier King Charles Spaniel parent should be familiar with. Sadly, this condition is extremely common in the Cavalier breed, but early awareness and proper management can greatly improve a Cavalier’s quality of life. In this blog, we’ll cover what MVD is, why Cavaliers are at risk, how the disease is staged, and which supplements can help support a healthy heart.
A heartfelt thank you to Lisa Davila, BS in Biomedical Science and Hospital Manager at Aggieland Animal Health Center in College Station, Texas, for helping me put together this article. Lisa has not only dedicated her career to animal health but has also been a loving mom to many Cavalier King Charles Spaniels. Her knowledge and experience are truly invaluable!
Understanding Mitral Valve Disease (MVD) in Cavaliers
Mitral Valve Disease (MVD) is a degenerative condition that affects the mitral valve of the heart. The mitral valve is responsible for ensuring blood flows properly between the left atrium and left ventricle. Over time, this valve can weaken and leak, allowing blood to flow backward into the atrium. This puts additional strain on the heart, eventually leading to heart enlargement and, in later stages, congestive heart failure (CHF).
MVD is considered a slow-progressing disease, but it varies from dog to dog. Some Cavaliers may live for years with a mild heart murmur, while others may progress more rapidly. Since MVD is so common in the breed, Cavaliers should be closely examined (cardiac auscultation) annually, to determine if they have a murmur. The presence of a murmur is often the first sign that a dog has degenerative valve disease.
Why Are Cavaliers at Risk of MVD?
Cavalier King Charles Spaniels are unfortunately predisposed to MVD. While any breed can develop valve disease, Cavalier King Charles Spaniels are at the greatest risk for developing degenerative mitral valve disease. Studies have shown that over 50% of Cavaliers develop a heart murmur by the age of 5, and by age 10, that number jumps to nearly 100%.Because MVD has a strong genetic component in Cavaliers, responsible breeding practices are essential. Responsible Cavalier King Charles Spaniel breeders ensure their breeding dogs undergo echocardiograms conducted by board-certified cardiologists. When considering a puppy, both parents should have cardiologist-issued heart clearances and be at least 2.5 years old at the time of breeding. Additionally, all four grandparents should be over the age of 5 and heart-clear. However, even with careful breeding, the risk remains high in the breed.
The Stages of MVD
MVD is typically classified into different stages based on its progression. Early detection and monitoring are crucial to managing the disease effectively.
Stage A – Dogs at risk for MVD but without any current signs (e.g., all Cavaliers are considered Stage A at birth because of their predisposition).
Stage B1 – A veterinarian detects a heart murmur, but there is no evidence of heart enlargement on X-rays or echocardiograms.
Stage B2 – A heart murmur is present, and imaging confirms heart enlargement. At this stage, medication such as Vetmedin (pimobendan) is often started to help delay the onset of congestive heart failure.
Stage C – Congestive heart failure (CHF) is present, meaning the heart can no longer compensate for the disease. Symptoms such as coughing, lethargy, and difficulty breathing may be noticeable. Medications are necessary to help manage the condition.
Stage D – End-stage CHF, where symptoms become harder to control even with medications.
Once a dog reaches Stage B2, most cardiologists recommend starting treatment to slow disease progression. Regular checkups and echocardiograms help ensure the right treatment plan is in place.
The Truth About Grain-Free Diets and Heart Disease in Cavaliers
With all the discussion surrounding Mitral Valve Disease (MVD) in Cavaliers, you may have come across concerns about grain-free diets and their potential link to heart disease. It’s important to separate the headlines from the facts when it comes to feeding our Cavaliers the best diet for heart health.
The debate about grain-free dog food largely stems from concerns about dilated cardiomyopathy (DCM), a condition where the heart muscle weakens, leading to poor function and potential heart failure. While DCM is a serious disease, the concern over grain-free diets has often been misinterpreted. The issue isn’t necessarily the lack of grains but rather the high levels of starchy carbohydrates like peas, lentils, legumes, and potatoes that are often used as substitutes in processed grain-free kibble.
Cavaliers are already predisposed to MVD, not DCM, which is a different heart condition with different causes. However, diet still plays a critical role in supporting heart health. The best way to provide a heart-healthy diet for your Cavalier is to focus on fresh, whole foods rich in high-quality animal proteins rather than relying on highly processed kibble, whether it contains grains or not. Read more about feeding your Cavalier a fresh diet.
Dr. Karen Becker explains it best: “The problem with grain-free formulas isn’t the lack of grains. At a minimum, it’s the high level of starchy carbohydrates coupled with the extreme high-heat processing methods used to produce these diets.”
Rather than worrying about whether a diet is labeled as “grain-free,” focus on feeding a fresh, balanced diet with high-quality proteins, healthy fats, and low-glycemic vegetables. Rotating proteins and using whole-food ingredients can help ensure your Cavalier gets the nutrients they need to support a healthy heart.
If you’re unsure about your dog’s diet, seek guidance from a veterinarian with a strong background in canine nutrition, not just one who sells prescription diets in the clinic. A certified veterinary food therapist (CVFT) can be a great resource when designing a diet that supports heart health while avoiding unnecessary fillers.
A well-balanced, species-appropriate diet can play a key role in keeping your Cavalier’s heart strong and healthy for years to come.
Heart-Healthy Supplements for Cavaliers with MVD
While MVD cannot be cured, a combination of medications, lifestyle management, and supplements can help support heart function and overall well-being. Below are some key supplements that may benefit Cavaliers with or at risk for MVD:
MCT Oil (Medium-Chain Triglycerides) – Provides an alternative energy source for the heart muscle. One recommended brand is Natural Force Organic MCT Oil (1 tsp daily with food). Before giving your Cavalier coconut oil, please read this article on MCAD in the Cavalier.
Amino Acids (Lysine, Methionine, L-Carnitine, Taurine) – Help maintain heart muscle contractility and serve as antioxidants.
Omega-3 Fatty Acids – Reduce inflammation, decrease clot risk, help prevent heart muscle loss, and support healthy blood pressure. Nordic Naturals Omega Pet Liquid is a high-quality option.
Vitamin E – Acts as both an antioxidant and anti-inflammatory.
Magnesium – Plays a crucial role in heart muscle contraction and maintaining a healthy heart rhythm.
Coenzyme Q10 (CoQ10) – A powerful antioxidant that supports heart function. Life Extension 100 mg capsules are a great choice.
Recommended Supplement Blends
If you prefer a multi-ingredient supplement, these options are formulated specifically for heart health:
Rx Vitamins for Pets Formula CV – Includes amino acids, magnesium, Vitamin E, CoQ10, and hawthorn berry extract (safe unless the dog is on Vetmedin).
VetriScience Cardio Strength Capsules – Similar to the Rx Vitamins formula but without hawthorn berry extract, making it safe for all MVD stages and medications.
Recap & Common Questions About MVD in Cavaliers
Mitral Valve Disease (MVD) is a serious but manageable heart condition that affects many Cavalier King Charles Spaniels. Early detection, responsible breeding, proper veterinary care, and supportive supplements can all play a role in keeping your Cavalier’s heart as healthy as possible.
What are the early signs of MVD in Cavaliers?
The first noticeable symptom is often a heart murmur, detected during a cardiologist visit. As the disease progresses, signs can include coughing, fatigue, labored breathing, and reduced exercise tolerance.
How long can a Cavalier live with mitral valve disease?
Many Cavaliers live for years after an MVD diagnosis, especially with early detection and proper management. While every dog is different, with the right veterinary care, medications, and supplements, Cavaliers can still enjoy a good quality of life.
What are the final stages of MVD in dogs?
In the later stages, MVD leads to congestive heart failure (CHF). Symptoms include severe coughing, difficulty breathing, lethargy, fainting, and fluid buildup in the lungs or abdomen. At this stage, medication and veterinary support are essential for comfort.
How do you treat MVD in Cavaliers?
Treatment typically includes veterinary-prescribed medications to support heart function and manage symptoms. Additionally, heart-healthy supplements, such as taurine, CoQ10, and omega-3 fatty acids, can provide extra support. Feeding a fresh, species-appropriate diet may also contribute to overall heart health.
Final Thoughts
A heart-healthy fresh diet, proper weight management, and the right combination of supplements can help support your Cavalier’s heart at any stage of MVD, even before a murmur is detected. Early intervention and regular veterinary care are key to helping our beloved Cavaliers live longer, healthier lives.
A big thank you to Lisa for sharing her knowledge on this topic! If you have any questions, feel free to ask, and don’t forget to check out Lisa and Jiminy on Instagram!
Google Ad Below [...]Read more...
April 15, 2024Cavalier King Charles Spaniel Potty Training
Congratulations on welcoming a Cavalier King Charles Spaniel into your life! They’re such charming and affectionate dogs, full of warmth and love. As a fellow Cavalier mom and positive dog trainer, I’m thrilled to share my experience on the best way to potty train a Cavalier puppy. Let’s jump right in to how to successfully housebreak your Cavalier King Charles Spaniel puppy.
I love puppies! And Cavalier puppies are just some of the cutest little things ever! There’s nothing quite like their sweet kisses, puppy breath, and zest for life! But it’s not all puppy kisses; we also must potty train our Cavaliers. Nobody likes an untrained dog.
One common question I get from Cavalier followers is how to best potty train their puppy. I’ve seen plenty of discussions about potty accidents in Cavalier King Charles Spaniel groups, and I’m here to share some potty training tips with you.
First things first. Let’s start by being realistic. Contrary to what some may suggest, potty training a puppy in a matter of days is not realistic. It’s important to realize that puppies, just like human babies, need time to learn and gain control over their bladders. So, if you’re expecting your Cavalier to hold it for hours after just a few days of training, you are setting your pup and yourself up for failure.
My own Cavalier, Dexter, wasn’t fully potty trained in a mere five days, and I’m perfectly okay with that. I prioritized consistent management and frequent potty breaks, which ultimately led to just a couple of accidents in the house. The key is to prevent accidents by being proactive, not reactive.
What’s the best way to potty train your Cavalier puppy?
It all comes down to three essential things: supervision, frequent potty breaks, and confinement when you can’t actively watch them. The goal is to reduce the chances of accidents happening indoors.
When it comes to supervision, it’s eyeballs on! This means keeping a watchful eye on your puppy at all times, ensuring that you’re there to rush them outside if it looks like they are about ready to go. You can use things like baby gates, leashes, shut doors, or X-pens so that you can keep your eyes on them at all times.
Subscribe to @CavalierTipsandFun on YouTube!
How Often Should You Take Your Puppy Potty?
As for how often to take your puppy potty, it really depends on their age and activity level. Active puppies may need to go out every 15–30 minutes, while older dogs can typically hold it for longer periods. The key is to stay ahead of the game and take your puppy out whenever you notice a change in their behavior or activity. A change in behavior or activity signals that it’s time for a bathroom break. For example, if your puppy just had a bout of puppy zoomies, out to potty we go. Did your puppy wake up from a nap? Out to potty we go. By not waiting for your puppy to ask to go out or have an accident, you are well on your way to a potty-trained dog.
When it comes to crate training, make sure the crate is just the right size to discourage accidents. The crate should be large enough for your pup to stand and lie down comfortably, but not so large that they can use one corner as a bathroom.
Whether you have a fenced yard or not, leash your puppy. This gives you the opportunity to reward your puppy for going potty outside. You will be right there to praise your puppy, give him a snack, and tell him just how smart he is. It also leads to my next potty training tip: teaching your Cavalier to potty on cue!
Teaching your Cavalier to potty on cue is a must in my book. Imagine being able to take your dog outside just before the rainstorm and ask him to pee and poo, and he does! This useful behavior isn’t just fantastic for potty training your dog; it’s incredibly convenient in daily life. The keys to teaching your Cavalier to eliminate on cue are good management, timing, and your reward. By associating a word for peeing with a separate word for defecating, you can start to teach your puppy to do either when requested.
Subscribe to @CavalierTipsandFun
Teaching Your Cavalier to Potty on Cue
Here’s how to get started:
Begin the training process in the morning, when your pup wakes up. Arm yourself with some delicious treats, leash up your Cavalier, and head outside to his favorite potty spot.
Stay close and pay attention to your puppy. Stay about 6’, so it’s not just a sniffing fest; the goal is to get him to eliminate before a big walk, play, or sniff. Pay close attention to your Cavalier’s body language. Watch for subtle cues like sniffing, circling, or squatting, which indicate he’s about to eliminate. As soon as you see a sign, use your potty cue, such as “Go potty,” and wait patiently. When your pup starts to do his business, praise quietly, and after he’s finished, give him big praise and rewards. You want to make sure you don’t interrupt the potty process by rewarding too soon.
If your dog typically follows up with a poop, repeat the process with your poop cue, like “Go poop-poop,” and reward him once he’s finished.
After your Cavalier has finished his business, it’s time for the next reward: fun! Whether it’s a walk, playtime in the yard, or simply enjoying the fresh air, make sure to give your pup some extra time to enjoy himself before heading back indoors. This helps reinforce the idea that going potty leads to enjoyable activities.
Repeat this routine each time you take your Cavalier outside, even if you’re planning on going for a walk. By always pairing potty time with rewards, you’ll motivate your pup to go more quickly.
As your Cavalier starts to make the connection between potty on cue and familiar surroundings, gradually introduce the cue in different environments, such as the park or during walks. This helps your dog understand the cue in any situation, ensuring they respond reliably wherever you are.
With patience, consistency, and plenty of positive reinforcement, you can teach your Cavalier King Charles Spaniel to potty on cue, making potty training easier.
Bell Training Your Cavalier King Charles Spaniel Puppy
While some love doggie doorbell training or puppy pads, I prefer to focus on methods that teach puppies to potty outside, not inside or on “things.” I find these methods tend to confuse puppies. Potty pads or litter boxes are teaching the puppy to potty on things that happen to be indoors. This could be a potty pad, but it also could end up being your favorite blanket.
As far as bell training goes, I’m not a fan of encouraging demanding behavior in dogs. Teaching them to ring bells to go outside may inadvertently lead to them using this to not only tell us they need to potty, but also that they may want to go outside to chase squirrels.
I believe in keeping potty training simple and straightforward, focusing on reinforcing the desired behavior of outdoor elimination. By keeping things simple and staying consistent, we can focus on potty training without having to rely on pee pads or bells.
In the end, potty training your Cavalier King Charles Spaniel is all about patience, consistency, and a whole lot of love. By following these tips and staying diligent, you’ll set your new puppy up for success.
Your comments and questions are always welcome below.
Join our vibrant Cavalier King Charles Spaniel community on Facebook, support our dedication to pet wellness on Patreon, and stay updated with our weekly newsletter for invaluable tips and insights into raising happy, healthy pets. Together, let’s make a difference in our dogs’ lives!
Google Ad Below [...]Read more...
May 29, 2024Natural Diet for Cavalier King Charles Spaniel
Dexter’s Food Journey with Raw and Homemade Food
Dexter, my Cavalier King Charles Spaniel, was a raw-fed puppy. However, because I wasn’t sure how to do it properly, and I was unaware that there were premade raw foods on the market, I fed him kibble with food toppers. After learning about how to balance a fresh dog food diet, I started to home cook for him when he was around two. Then, when he was about four, I transitioned him to a DIY raw diet. Through this journey with Dexter, I’ve learned about creating a nutritious and tailored diet that meets his unique needs. Now, I’m excited to pass along my tips and thoughts on feeding your Cavalier King Charles Spaniel. Let’s dive in!
Natural diet for Cavalier King Charles Spaniels
If you’re anything like me, you’re always on the lookout for the best pet products, natural dog grooming supplies, and the healthiest dog food brands for your Cavalier. One of the most important aspects of your Cavalier’s well-being is their diet. Dogs are natural carnivores, made to thrive on a diet of fresh meat. This means a species-appropriate diet is key to their health and vitality.
Understanding Species-Appropriate Nutrition
Let’s think about our dogs’ ancestors for a moment. They thrived on a diet of raw meat, bones, and organs. Today, we can recreate this natural diet with a raw food approach, using fresh, high-quality ingredients that focus on what dogs are meant to eat. For your Cavalier King Charles Spaniel, in a nutshell, this means focusing on a diet that’s about 90 percent meat, bone, and organ, with the remaining 10 percent coming from fruits and vegetables. This balance provides the essential nutrients and fiber they need to stay healthy. Personally, I feel if you aren’t able to go raw, this diet can also be cooked. You just would need to provide the calcium from the bones in another form, since dogs cannot eat cooked bones.
Don’t forget to subscribe to @CavalierTipsandFun for more!
The Problem with Processed Dry Kibble
Now, dry kibble. It’s processed at high temperatures, which takes away almost all the moisture and nutrients from the ingredients. Often, kibble is made with low-quality ingredients and fillers that don’t give your dog the nutrients they need. The lack of moisture in kibble can also lead to chronic dehydration, affecting everything from kidney function to skin and coat health. Plus, since kibble is made to last a long time, the ingredients can go rancid quicker than you might think, making it even less nutritious for your pup.
The Importance of Moisture in Your Dog’s Diet
Moisture is a crucial part of your dog’s diet. In the wild, dogs get most of their hydration from the food they eat. Fresh, raw diets naturally provide the moisture that kibble just can’t. This is essential for your dog’s digestion, kidney health, and overall well-being. By feeding them fresh, high-quality meat and vegetables, you’re making sure they stay hydrated naturally, without having to depend solely on drinking water.
Google Ad Below
Finding the Best Diet for Your Cavalier King Charles Spaniel
When it comes to our Cavaliers, there’s no one-size-fits-all solution. Every dog is unique, with their own health needs, behaviors, and lifestyle. Personally, I’m a big advocate for variety. This could be in the form of different proteins, suppliers or even a nice pre-made raw or mix. I steer clear of dry pet food altogether unless I’m using freeze dried food for dog training treats. For me, a balanced DIY raw diet for Dexter is the way to go. It’s fresh, it’s healthy, and I can tailor and tweak it to Dexter’s needs.
Why a Raw Food Diet is Ideal for Most Cavalier King Charles Spaniels
A raw food diet is as close to a natural diet as you can get for your Cavalier. It includes raw meat, bones, and organs, providing essential vitamins and minerals often lost in commercial dog foods. This diet can improve your Cavalier’s skin and coat health, immune system, and help maintain a healthy weight. As I mentioned earlier, I think adding an approximately 10 percent mix of fruits and vegetables is a great way to add a nutritional boost to the bowl. By avoiding the fillers and artificial additives found in many commercial foods, we ensure our dogs get the best nutrition possible.
Homemade Raw or Cooked Food: Personalized Nutrition for Your Cavalier
One of the best ways to ensure your Cavalier King Charles Spaniel is eating the healthiest diet is to make their food at home. This way, you control the quality of the ingredients and can tailor the meals to your dog’s specific needs. Homemade meals are especially beneficial if your Cavalier is a picky eater or has food allergies. Just remember to balance their diet properly to include all necessary nutrients. Whether your dog has allergies, digestion issues, or any other specific needs, you can tweak their diet to meet their needs.
Feeding Your Cavalier a Grain-Free Diet
You might have heard that grain-free foods are bad for Cavaliers because they were thought to have caused Dilated Cardiomyopathy (DCM). In 2019, the FDA released a list of grain-free pet foods that had people swearing that grain-free dog food was bad. But, guess what? It’s really not the case. In fact, in 2022 the FDA announced on their website there wasn’t a solid link between grain-free diets and DCM.
Feeding your dog grain-free can actually be a good choice for your Cavalier. But things get tricky if you are looking at a purchased grain-free alternative, particularly a dry kibble. When you’re reading the ingredient panel of a dog food (yes, read those labels), watch out for ones loaded with peas, lentils, legumes, seeds, and/or potatoes. Even if the front of the bag screams “meat-first,” it might sneak in a bunch of carbs and starches that aren’t ideal. According to experts, such as Dr. Karen Becker, it’s not about cutting out grains—it’s about making sure our pets aren’t eating too many starchy fillers. So, bottom line? Go back to that 90 percent meat recommendation.
Feeding Your Cavalier King Charles Spaniel Puppy
When it comes to feeding your Cavalier King Charles Spaniel puppy, it’s essential to consider their unique nutritional needs as they grow. If you’re not quite sure about the specifics of puppy nutrition, it’s perfectly okay to rely on trusted commercial brands known for their expertise in creating a balanced diet for puppies.
A commercial raw puppy food will include the essential proteins, fats, and calcium your puppy needs to develop strong bones. The key is to ensure whatever you choose is well-rounded and provides all the nutrients your Cavalier puppy requires during the puppy life stage.
Maintaining a Healthy Weight
Keeping your Cavalier at his ideal weight is super important. Maintaining a healthy weight isn’t just about good looks, but their health. Extra weight can contribute to health issues like joint problems and heart disease. The breed standard says they should weigh between thirteen and eighteen pounds. But, Cavaliers can vary a lot in size. Take Dexter, for instance. He’s a bit of a big guy, weighing his ideal weight at a healthy twenty-nine pounds. So, how do you know if your Cavalier is at the right weight? It’s all about getting your hands on your dog. Run your fingers lightly over their ribcage; you should be able to feel their ribs without pressing too hard. If they’re too prominent, they might be on the thin side. But if you can’t feel them at all, or if their waistline has disappeared, they might be carrying a few extra pounds. Just keep an eye on their overall body shape, and remember, every Cavalier is unique!
How Often to Feed Your Cavalier King Charles Spaniel
Consistency is key when it comes to feeding your Cavalier. Establishing a regular feeding schedule helps regulate their metabolism and digestion. Typically, feeding your Cavalier twice a day, in the morning and evening, works well. For puppies, more frequent meals might be necessary to meet their higher energy demands. I actually feed Dexter three times a day, mainly due to the fact that he gets so much food, I prefer to space it out.
Adding Supplements and Vitamins
Even with a well-balanced diet, supplements can play an essential role in your Cavalier’s health. Omega-3 fatty acids can enhance skin and coat health, probiotics can aid digestion, and joint supplements can support mobility. Always consult your Cavalier’s vet before adding new supplements to ensure they’re necessary and safe. When possible, opt for real food supplements vs. synthetic.
Food Allergies in Cavalier King Charles Spaniels
If your Cavalier has allergies, a limited-ingredient fresh diet can be incredibly beneficial. Before jumping brands, I would suggest going through a pet food elimination diet to identify triggers. Once you know what your Cavalier is allergic to, you can create a personalized diet just for him. You can read more about how and why a pet food elimination diet is helpful on my other blog, right here.
Safe Fruits and Vegetables to Feed Your Cavalier
Things like carrots, broccoli, and kale can be great sources of extra nutrients and fiber. And don’t forget the powerhouse of antioxidants fruits like blueberries, strawberries, pomegranates, and apples can provide. For best digestion, blitz them up! Introduce all new foods slowly and keep an eye on what works for your dog.
Transitioning to a Raw Food Diet
Transitioning your Cavalier to a raw food diet should be done gradually to avoid digestive upsets. Start by introducing small amounts of raw food while slowly decreasing their current food. A 75 percent and 25 percent switch usually works well. Over a week or two, increase the raw portion until it completely replaces their old diet.
Choosing the Best Raw Food Brands
Selecting high-quality raw food brands for your Cavalier ensures they get balanced and nutritious meals. Personally, I look for brands that offer meats that are antibiotic and hormone free. Ideally, any fruits and vegetables will be organic. Opt for whole foods vs synthetics when possible. But, it will be a balancing act based on what’s available to you and your budget. As I mentioned earlier, shoot for approximately 90 percent meat, bone, and organ. A few raw brand choices to consider include BJ’s Raw, Raw Paws Pet Food, Raw Wild, We Feed Raw, Primal, Vital Essentials, Smallbatch, Raw Bistro and Steve’s Real Food.
A Healthy Diet Can Improve the Immune System, Skin, and Coat Health
By providing your Cavalier with a balanced raw or homemade diet you’re not just filling their bowl, you’re nurturing their well-being from the inside out. Fresh diets, whether raw or homemade, are rich in unprocessed ingredients, offering a higher concentration of vital nutrients compared to heavily processed kibble. Fresh foods do not have the fillers and additives found in kibble, making them easier for dogs to digest and absorb. Because of this, fresh food promotes better immune function, healthier skin, and a shinier coat, making them the ideal choice for your Cavalier.
By focusing on a fresh, natural diet tailored to your Cavalier King Charles Spaniel’s specific needs, you’re setting them up for a long, healthy, and happy life. Remember, my goal is to offer guidance and support to help you navigate the journey of pet nutrition, without any judgment. Let’s work together to ensure the best possible care for you and your Cavalier!
Your comments and questions are always welcome below.
Join our vibrant Cavalier King Charles Spaniel community on Facebook, support our dedication to pet wellness on Patreon, and stay updated with our weekly newsletter for invaluable tips and insights into raising happy, healthy pets. Together, let’s make a difference in our dogs’ lives!
Google Ad Below [...]Read more...
May 14, 2024Hot Weather Tips for Cavalier King Charles Spaniels
People often think of summer as a good time to get out and about with our Cavaliers. As a dog-friendly travel blogger, I’m often pitched ideas and stories about taking Dexter to X outdoors, even in July or August. But, the reality is, that’s usually just too darn hot for my now 14.5 year-old Cavalier King Charles Spaniel, Dexter.
He’s always run a bit hot, but now, as a senior and with MVD, the summer heat is just not ideal for him. But, it’s not just Dexter. Summer heat can pose health issues such as sunburn and heatstroke. Today, I’m going to jump into some ideas on how to keep your Cavalier King Charles Spaniel cool and active during the summer or warm months.
Cavalier King Charles Spaniels and Heat Stroke
Heatstroke is a serious concern for all dog families, particularly for breeds like the Cavalier King Charles Spaniel, which can be more susceptible due to their flat-faced (brachycephalic) nature. Any dog, any breed, and any age can develop heat stroke, even on cool days! The VetCompassTM conducted a study in 2016 regarding the risk factors for heat-related illness (HRI):
Breeds with the highest incidence of HRI included the Chow Chow, Bulldog, French Bulldog, Dogue de Bordeaux, Greyhound, Cavalier King Charles Spaniel, Pug, and the Golden Retriever.
Dogs at or above the mean adult body weight for their breed/sex showed an increased risk of HRI compared to dogs below the mean body weight.
Dogs over 12 years old had the greatest odds of HRI compared to dogs under 2 years old.
Signs of Heatstroke in a Cavalier
Recognizing the signs of heatstroke and taking preventive measures are crucial to keeping your dog safe. Signs such as excessive panting, drooling, rapid pulse, and restlessness indicate your Cavalier may be overheating. If you notice these symptoms, act quickly by providing cool (not cold) water and applying damp towels to areas with good blood flow, such as the head, armpits, and groin. Then take your Cavalier to the vet to prevent things from getting worse.
How Food Affects Your Cavalier’s Ability to Tolerate Heat
Just like for us, our pet’s food does more than just provide them with calories. Food has a big impact on their overall health, affecting everything from their longevity to their behavior and how they handle hot and cold temperatures. According to traditional Chinese medicine (TCM), everything in life has a balance of energy and heat, represented by Yin and Yang. Yin embodies the cool, and yang is the hot. This includes our pets, food, and environment; they all have specific energetics.
Dexter tends to run a little more yang (hot). Therefore, when I’m creating his meals, I aim to have the foods I provide either be energetically cooling or neutral. I avoid energetically warm or hot foods and proteins. For example, common foods that are warming or hot include goat, lamb, venison, chicken, and pheasant. Whereas, cooling proteins include rabbit, duck, beaver, cold water fish, and muskrat.
Applying this feeding concept to our Cavaliers, we can tailor their diets to help regulate their internal temperature. During the warmer months, opting for cooling foods can help maintain balance and comfort for your Cavalier.
Google Ad Below
Summer Fun for You and Your Cavalier King Charles Spaniel
Despite the summer heat, Dexter and I still enjoy our summer adventures. They just need to be modified according to the weather. The first thing I do is check the weather, so I’m not out and about with Dexter and surprised! Walking or strolling Dexter in the morning is by far cooler than in the evening. I know people suggest evening walks, but, honestly, the heat from the pavement and the atmosphere seem hotter to me than in the morning. Your location may be different.
Try walking on grassy areas instead of pavement. Shady parks beat the noon sun. Breezy days while wading in the water are another fun way to help your Cavalier stay cool. However, if it’s still sunny or warm, cool water on their feet and a breeze are unlikely to cut it.
We do a lot of indoor adventures during the summer months. Pet stores, dog friendly stores and attractions are our go-tos. I also do a lot of indoor training sessions and enrichment activities to help keep Dexter engaged. The bottom line is that I don’t want to risk Dexter’s health. And I can say from experience, it’s not a good feeling. Back in 2018, I’m pretty sure Dexter almost had a heat stroke! We were in Florida in the spring, doing touristy things. I thought I was being careful, bringing Dexter inside the stores, indoor attractions, and a covered train tour, but he really wasn’t doing well. He started showing signs of heatstroke. We rushed him to the hotel and cooled him down. I was lucky. And I’m not sure what I would have done if I wasn’t so lucky.
Hot Weather Tips for a Cavalier King Charles Spaniel
Grooming & Trimming: Regularly groom your Cavalier to remove loose fur and prevent overheating. I do give Dexter a puppy cut by trimming his belly, legs, and tail. I started this because of his CM/SM, but it also helps lighten his load and keeps him cooler.
Travel Comfort: Ensure your Cavalier’s comfort during travel with a well-ventilated crate or car harness, and schedule frequent breaks for water and shade. I also use a cooling mat and fan blowing on Dexter.
Sunscreen: Dog friendly sunscreen on your Cavalier’s nose helps protect him from harmful UV rays.
Cooling Products: Invest in cooling accessories like a cooling vest, bandana, or mat to provide relief from the heat during outdoor adventures.
Avoid the Hottest Part of the Day: Schedule outdoor activities during cooler times, such as early morning or late evening.
Mind the Pavement: Hot asphalt can burn your Cavalier’s paw pads. Stick to grassy or shaded areas for walks.
Hydration: Always have fresh water available, and encourage your Cavalier to drink frequently to stay hydrated. I put bone broth cubes in Dexter’s water bottle to encourage him to drink. If not, he will ignore the water.
Indoor Play or Outings: On exceptionally hot days, opt for indoor activities like interactive games or training sessions to keep your Cavalier entertained while staying cool.
Cooling Foods: Opt for cooling or neutral proteins in your Cavalier’s diet.
Remain vigilant, provide ample shade and hydration, and monitor your Cavalier for signs of overheating. Keep your Cavalier King Charles Spaniel’s well-being in mind, and use these practical tips to make sure you and your Cavalier have a safe and enjoyable summer.
Your comments and questions are always welcome below.
Join our vibrant Cavalier King Charles Spaniel community on Facebook, support our dedication to pet wellness on Patreon, and stay updated with our weekly newsletter for invaluable tips and insights into raising happy, healthy pets. Together, let’s make a difference in our dogs’ lives!
Google Ad Below [...]Read more...
June 8, 2024Treatment options for Chiari malformation and Syringomyelia
My best friend, Dexter the Dog, was diagnosed with Chiari malformation and syringomyelia in 2012, just before his third birthday. This diagnosis hit me hard. Over the past twelve years, I’ve shared a lot about Dexter’s diagnosis, care, and treatments on my Raising Your Pets Naturally blog and YouTube channel.
Since I recently started this blog dedicated to Cavalier King Charles Spaniels, I thought it would be a good time to write an update on Dexter’s care and what I’ve learned. I am also happy to say that at almost fifteen, Dexter is doing amazingly well! I hope you find this article on Chiari malformation and syringomyelia in dogs helpful. Please share this information to help others dealing with this heartbreaking diagnosis learn about the many helpful and natural treatments for dogs with Chiari malformation and syringomyelia.
What is Chiari Malformation (CM) and Syringomyelia (SM)
Chiari malformation commonly affects Cavalier King Charles Spaniels, Chihuahuas, Brussels Griffons, Yorkshire Terriers, Maltese, Pomeranians, Toy Poodles, and Shih Tzus. In dogs with CM, the skull is too small to hold their brain properly. This overcrowding forces parts of the brain, specifically the cerebellum and medulla, out of their normal positions. The cerebellum controls movement and balance, while the medulla is connected to breathing and heart rate.
When these brain parts are pushed out of place, they obstruct the normal flow of cerebrospinal fluid (CSF). Cerebrospinal fluid is in the brain and spinal cord and acts as a natural cushion, protecting the brain. When the flow of CSF is blocked, it can lead to a buildup of pressure and result in serious neurological issues and can form syringomyelia (SM), a condition where fluid-filled cavities form within the spinal cord.
In Cavalier King Charles Spaniels, Chiari malformation is a congenital issue, meaning they are born with it. Dr. Clare Rusbridge established a breeding protocol to help reduce CM/SM in puppies. Following the breeding protocol is crucial for reducing the risk of Chiari malformation (CM) and syringomyelia (SM) in Cavalier King Charles Spaniels. If both parents have CM/SM, puppies are 92 percent likely to be affected, while the risk drops to 77 percent if only one parent is affected. If both parents are clear of CM/SM, there is a 70 percent chance their puppies will be clear, rising to 87 percent if the grandparents are also clear. Potential Cavalier families should seek breeders who perform this testing to ensure healthier puppies. The only way to diagnose Chiari malformation and syringomyelia definitively is through an MRI scan.
Recognizing Chiari malformation is vital for Cavalier King Charles Spaniel families because early detection and treatment can greatly improve the quality of life for dogs with this condition. If you notice symptoms like uncoordinated movements, sensitivity around the head and neck, or any other unusual behaviors, it’s important to consult with your veterinarian as soon as possible.
Symptoms of Chiari Malformation and Syringomyelia in Dogs
Symptoms of CM and SM in Cavalier King Charles Spaniels and other breeds can vary. About a year before Dexter’s diagnosis, he began showing some random and unusual behaviors. And they didn’t happen all the time.
Fixating at dust particles in the sunlight.
Fidgeting and biting at his rear end. His vet initially thought it was anal glands, but they really weren’t that full, and he continued to do it.
Acting strangely around flying insects. Whenever a fly was around, he would get strange and start spinning around and growling at his back end.
Then, he had a downright scary episode, where he just was going crazy over his back end, growling, at it, spinning, and I could not gain his attention. I then decided to hit record the next time it happened. After recording the next episode and consulting Dr. Lynette Cole at The Ohio State University, three veterinary neurologists suspected Chiari malformation and syringomyelia. I then made an appointment at the OSU neurology department for an MRI and spinal tap. CM and SM were confirmed.
Dexter’s episode is below.
Don’t forget to subscribe to our @RaisingYourPetsNaturally YouTube channel for more.
Other common symptoms of CM/SM in Cavalier King Charles Spaniels can include:
Air scratching, especially on walks or when excited.
Head scratching or rubbing.
Air snapping or licking.
Random yelps of pain.
Sensitivity to touch and being picked up.
Hind end weakness.
Head or body wobbles, stumbling, or squinting.
Head pressing.
Seeking darkness or solitude.
Inactivity or depression.
Restlessness.
Google Ad Below
Diagnosing Chiari Malformation and Syringomyelia
The only definitive way to diagnose CM/SM is with an MRI. If a dog shows common symptoms and belongs to a breed prone to this disease, like Cavalier King Charles Spaniels, a vet might start treatment without MRI confirmation. For me, knowing exactly what Dexter had was key. Along with an MRI, Dexter also had a spinal tap to ensure we had all the facts.
Treatment Options for Chiari Malformation and Syringomyelia
Surgery for Chiari Malformation in Cavalier King Charles Spaniels
Surgery is performed with the goal of restoring the natural flow of spinal fluid. This involves decompressing the affected area, removing bone fragments, and sometimes adding a shunt. However, the results can differ greatly from one dog to another. Despite surgical intervention, many dogs still require medication to manage their pain effectively.
Medications for Chiari Malformation in Cavalier King Charles Spaniels
The disease is progressive and varies in severity. Treatment prioritizes comfort and alleviates pain. Dr. Clare Rusbridge provides the gold standard in the medication treatment protocol. It’s essential to monitor organ functions regularly when administering long-term medications.
Natural Treatments for Syringomyelia in Dogs
There are many natural treatments to help support a dog with CM/SM. Here are some that have worked for Dexter:
Acupuncture: Restores the normal flow of energy through specific pathways.
Cold Laser Therapy: Reduces inflammation, relieves pain, repairs tissue damage, and increases blood circulation.
PEMF ( Pulsed Electromagnetic Field) Therapy: Reduces inflammation, relieves pain, promotes tissue and cell repair.
Food Therapy: A diet of home-cooked or raw dog food helps reduce inflammation. Ingredients like sardines, shiitake mushrooms, and green-lipped mussels can help.
Conscious Proprioception Exercises: Dexter wore Dr. Buzby’s ToeGrips to stimulate awareness of his feet. I also regularly work with him on footwork exercises to help him be more aware of his feet.
Canine Hydrotherapy: Water treadmill therapy strengthens Dexter’s body with low joint impact.
Core Strength Exercises: Dexter’s rehabilitation focuses on boosting his core and back end strength, crucial for enhancing balance and stability. Through a variety of exercises using different equipment, we target his abdominal, back, and hind leg muscles, ensuring he can confidently navigate any challenges.
Living with a Cavalier King Charles Spaniel with Chiari Malformation
Living with a dog diagnosed with Chiari Malformation and syringomyelia can be challenging. Dexter’s first year after diagnosis was the most challenging. Trying to figure out what worked best for him, what kinds of activities or weather would trigger breakthrough pain, and how best to manage it. His life changed, but, luckily, with a great team of professionals, I was and am able to provide Dexter with a great quality of life that is still full of adventures and enrichment.
Comfort Measures
To help keep Dexter as comfortable, happy, and pain-free as possible, I’ve incorporated a range of products.
Dog Harness: Avoid collars that can be painful due to the disease’s nature.
Dog Strollers: Great for giving Dexter a break while still being part of adventures.
Cooling Mats and Warming Blankets: Depending on Dexter’s temperature needs. I will say, now Dexter is on a cooling mat almost 100 percent of his downtime. He rarely seeks heat.
Snuggle Jackets: Some dogs find comfort in them, while others might not. In the beginning, Dexter wore one almost all the time. But, I think, after we finally found our groove with his care, they were no longer necessary.
Natural Calming Aids: Calming CDs and natural calming sprays help Dexter on rough days.
Support for Dogs with Chiari Malformation and Syringomyelia
Let’s unite in this journey. Dexter’s courage living with Chiari malformation and syringomyelia serves as a light of hope for us all. You aren’t in this alone. Seek the help of a good veterinarian team, join a support group, including ours! Together, we can provide hope and guidance to others on similar paths. Go Team Dexter!
Your comments and questions are always welcome below.
Join our vibrant Cavalier King Charles Spaniel community on Facebook, support our dedication to pet wellness on Patreon, and stay updated with our weekly newsletter for invaluable tips and insights into raising happy, healthy pets. Together, let’s make a difference in our dogs’ lives!
Google Ad Below [...]Read more...
June 26, 2024Cavalier King Charles Spaniel Enrichment Ideas
Ultimate Guide to Canine Enrichment for Cavalier King Charles Spaniels
If you are reading this blog post on ways to keep your Cavalier King Charles Spaniel entertained, you have made me a very happy lady. Mental stimulation for your Cavalier is so important, and sometimes a very overlooked part of a good positive dog training program. I’ve always said, dog training isn’t just about teaching your Cavalier to do something or not do something. Rather, there is a synergy between training your Cavalier and everything else including canine enrichment. I think bonding with your Cavalier King Charles Spaniel is the best medicine for both you and your pup. So much so, I started a Cavalier King Charles Spaniel Facebook group, with a big emphasis on enrichment ideas for Cavaliers. And the photos you are about to see on this Cavalier blog are all from members of our wonderful community! Now, let’s dive into canine enrichment and why it’s so important.
What is Canine Enrichment?
Canine enrichment is about making your dog’s life better by giving them fun activities that keep their mind and body active. I think about canine enrichment as life experiences and engaging our Cavaliers in a variety of fun and interactive activities. It’s more than just a food puzzle toy, although that’s a great introduction to enrichment for your Cavalier.
Enrichment can be interactive play, positive dog training sessions, sensory games, physical activities, food enrichment, and outdoor adventures. The goal is to keep your Cavalier happy, healthy, and mentally sharp. When you do this, it helps prevent boredom, boosts your dog’s mental skills, and strengthens your bond, which also leads to better listening and obedience.
Subscribe to @CavalierTipsandFun for more!
Beyond Food: Enrichment Through Interaction
Many people associate canine enrichment primarily with food-related activities, like filling food toys or using interactive frozen treats. While these activities are great, and I use them daily with Dexter, they are just one piece of the enrichment puzzle. When I think of canine enrichment, I think of activities that involve direct interaction with Dexter. It’s about more than just keeping him occupied with food toys—it’s about creating a connection with him, something we do together.
Incorporating various types of environmental enrichment can greatly benefit your Cavalier King Charles Spaniel, both mentally and physically. Enrichment keeps those unwanted behaviors at bay by preventing boredom. It encourages social interaction, making for a happier and more engaged dog.
Positive Training for Your Cavalier
Training is a wonderful way to enrich your Cavalier’s life. Whether you’re teaching basic obedience, fun tricks, or advanced behaviors, positive dog training sessions offer cognitive stimulation and deepen your bond. Cavaliers are smart and love to please, which makes them quick and eager learners. Remember, when you’re teaching and training your Cavalier, you want the training to be fun for both your dog and you.
Google Ad Below
Outdoor Adventures
Taking your Cavalier to the park or on a walk can be incredibly gratifying. Consider going on a “sniffy walk,” where your pup gets to explore and investigate their surroundings at their own pace. Allowing them to follow their nose is not only fun but also taps into their natural instincts.
Other fun outdoor adventures can be indoors too! Take your Cavalier to a pet store for some shopping or visit a dog-friendly indoor store. Just make sure to call the establishment first to double-check their pet policies. Those training sessions you’ve been working on will ensure your indoor fun is a positive experience and one you can feel proud of.
Fun and Beneficial Canine Fitness Activities
Incorporating canine fitness activities can be both fun and vital for your Cavalier’s health. Stretching, sits to downs to stands, using wobble boards, or even walking over cavaletti poles are a few examples. These activities help keep your Cavalier in good physical shape and engaged. Other fitness ideas include walking on slight outdoor hills, placing two paws on a curb, jumping on a sturdy boulder, and walking across a fallen tree trunk. Always prioritize safety during these exercises.
Sensory Enrichment for Your Cavalier
Sensory enrichment is another great way for keeping your Cavalier King Charles Spaniel active and entertained. This type of enrichment is all about stimulating their senses, sight, smell, hearing, touch, and even taste. Obviously, there is some overlap between enrichment “categories.”
Consider incorporating toys that make different sounds or have different textures to engage their hearing and touch senses. You can even make a scent garden in your yard with dog-friendly plants and herbs. Or, grab some outdoor things such as pine cones, grass, and flowers and place them in scent boxes for your Cavalier to smell or find. Plus, activities such as scent work, where your dog uses their sense of smell to find hidden treats or toys, can provide a great mental and physical workout..
By giving your Cavalier a variety of sensory experiences, you satisfy their natural curiosity and make them happier overall. Giving your Cavalier sensory activities like scent work or creating a scent garden not only keeps them entertained but also deepens your connection as you explore together.
Bonding Activities
Simple activities like grooming, talking to your dog, or giving them a gentle massage are also forms of enrichment. By connecting and touching your dog, you not only are able to do a lump-and-bump check, but you are laying the foundation of trust. Shared Zen moments like listening to music together or just lounging on the couch, can also be incredibly soothing for both you and your dog. Don’t forget snuggle time! Most Cavaliers love to cuddle, and those quiet, close moments can deepen your relationship even more. Did you hear that, Dexter? By incorporating these simple yet meaningful activities into your life, you’ll create a stronger relationship with your dog.
Food Games and Interactive Toys: Enhancing Mealtime for Your Cavalier
Food games like lick mats, interactive food toys, and snuffle mats are a great way to feed your Cavalier. Instead of wasting those valuable calories by tossing them in a bowl, using enrichment toys offers a fantastic activity. Don’t use extras in those food toys; use your Cavalier’s daily food or food calories.
For Cavaliers who are fed fresh food, such as a raw or fresh diet, lick-type toys like lick mats are perfect. These toys allow your Cavalier to eat their food while licking and enjoying their mealtime. Spreading the food out encourages more time eating and offers an easy enrichment activity. It also mimics natural foraging behavior.
Snuffle Mat DIY
If your Cavalier is fed dry kibble or dehydrated food, treat dispensing toys or snuffle mats are excellent choices. These toys make mealtime interactive by challenging your Cavalier to work for their food. They may knock around a toy that dispenses their meal or snuffle around a mat for their nibbles. In order to keep your Cavalier’s calories in check, you can reduce a small portion of their dry food and use fresh foods or toppers or freeze-dried 100 percent meat in these toys to add variety and excitement.
Incorporating food games and interactive toys into your Cavalier’s routine makes mealtime more enjoyable and provides an easy and daily mental enrichment activity. But, don’t just go with one treat puzzle toy. The more variety, the better.
Enriching Your Cavalier’s Life with Every Adventure
Canine enrichment is all about creating a variety of positive and fun experiences that enhance your Cavalier King Charles Spaniel’s life. Food toys are great–it’s the interactive, engaging activities that truly enhance their daily experiences.
By focusing on a variety of enrichment activities, you’ll ensure your Cavalier King Charles Spaniel is happy, content, and well-rounded.
I host a private Facebook group for Cavalier King Charles Spaniels, and we have a big focus on canine enrichment ideas and challenges to keep your Cavalier engaged and thriving!
I’d love to hear about your own enrichment ideas and experiences with your Cavalier! Share your tips and stories in the comments below and let’s keep the conversation going.
Join our vibrant Cavalier King Charles Spaniel community on Facebook, support our dedication to pet wellness on Patreon, and stay updated with our weekly newsletter for invaluable tips and insights into raising happy, healthy pets. Together, let’s make a difference in our dogs’ lives!
Google Ad Below [...]Read more...
July 24, 2024What Kind of Chew Toys and Bones are Safe for Cavalier King Charles Spaniels?
Most Cavalier King Charles Spaniels love to chew! Chewing is a natural and normal dog behavior that helps fight boredom and can even help keep your Cavalier’s teeth pearly white. But remember, brushing your Cavalier’s teeth daily is still ideal. Puppies and adolescent Cavaliers tend to have a high drive for chewing things. Sometimes, whatever they can sink those teeth into. Hopefully, you are working with a qualified dog trainer to ensure your Cavalier is learning to chew on the right items instead of your furniture, or, even worse, electrical cords or something else that can harm your Cavalier puppy.
So, what makes a chew toy or bone safe for your Cavalier King Charles Spaniel? Over the years, my opinion on this has evolved. I once opted for the harder, the better. But, now, I’m on the other side of the fence, choosing softer items. Hard and tough dog bones can chip teeth and even splinter, which can be very dangerous. Even my sweet, Dexter chipped his tooth on a hard bone….his last hard bone.
I personally do not use or recommend hard bones, antlers, hooves, plastic or nylon bones, rawhides, chews with lots of ingredients, wood bones, or weight-bearing bones. But, I will always say, this is my personal opinion, and they are your Cavaliers. You can do whatever you feel comfortable doing for them, and you will not be judged by me, nor should you be judged by your peers.
Please be aware that not every chew toy or bone will be suitable for every Cavalier. I strongly recommend active supervision when your Cavalier chews, particularly if it’s a new toy or bone or if the chew item is edible. The right size of a bone or toy is also important. You want to make sure the toy or bone is not so small that your Cavalier can place the entire item in their mouth and risk choking. This includes when the chew gets smaller. I tend to toss the end out before Dexter swallows it, with the exception of a chew that is crunchy. Finding the right chew for your Cavalier is sort of like “The Princess and the Pea.” So, let’s jump into my recommendations for safe and healthy chew bones for your Cavalier King Charles Spaniel.
Dehydrated or Freeze-Dried Fish Skins: With a good dehydrated or freeze-dried fish skin dog treat, the treat will be 100 percent fish skin with no artificial colors, preservatives, or flavors. With this list and anything I recommend, the first stop should be to read the actual ingredient panel. What’s inside. Everything. It’s also important to check out the packaging and carefully read the ingredient list and where the fish was caught and processed. Fish skins are great treats for your Cavalier, full of omega-3 fatty acids, typically low in fat, and fully edible. Most dogs love the taste and eagerly chew away. Some fish skins are crunchy, while others are chewy. Chewy ones last longer but need close supervision to make sure your Cavalier chews them up vs. swallowing a large piece. Shop now.
Bully Sticks & Pizzles: Made from the manly part of a bull, many dogs love chewing on these. What I like is that they typically just start to get soft and disappear; I haven’t seen any pieces break off. However, I have seen a stick peel every once in a while, like string cheese. You can also purchase bully stick holders to help hold the stick, which adds a second layer of safety, helping to prevent your dog from swallowing the end. I personally toss that piece into the garbage. Again, sourcing and how they are manufactured is key. Natural does not correlate to not using irradiation (radiation). I contacted my fair share of bully stick brands and asked if they used irradiation, so, make sure you do your homework. Tip: get odor-free or low-odor versions. These can stink like crazy! Shop now.
Raw Bones: Raw bones are another option for your Cavalier to chew on, especially if they are already on a raw diet or natural diet. Because the bones are not cooked, they are soft and unlikely to splinter. Cooked bones easily splinter and are very hard on teeth. The size will depend on the size of the bone and your Cavalier. A few options to consider include necks, wings, feet and tails. Once again, supervise and watch for choking or swallowing. Necks did not work for Dexter, as he thought he should just suck the whole thing down. Chewing Tips: Don’t clean the bones; feed them with some meat on them, as they come. Let your Cavalier pull on the meat and chew and lick the bone. Allow them to have them for an hour, then throw them away. It’s when they sit around the house, get buried, or get dried out that you get bacteria and splintering. They will last in the fridge for three days before feeding. They can also be frozen and thawed. Feed outside or on a towel, and make sure your Cavalier is wearing their snood!. Avoid weight-bearing bones, as dogs can chip or fracture their teeth due to how hard they are. Show now.
Dehydrated Duck/Chicken/Rabbit Feet/Ears: Duck, chicken, and rabbit feet or ears are excellent, crunchy, edible chews for Cavalier King Charles Spaniels. Dehydrated or freeze-dried. Both offer good chewing options. Chicken and duck feet are rich in chondroitin, glucosamine, and collagen, which support joint health, reducing the risk of brittle bones, improving mobility, and maintaining healthy teeth and gums. Rabbit ears and feet are particularly appealing as they are low in fat, high in protein, and help clean your dog’s teeth while reducing plaque buildup. Additionally, the fur on rabbit ears can serve as a natural dewormer. These natural chews are both nutritious and enjoyable, but always supervise your Cavalier to ensure safe chewing. Shop now.
Tripe Sticks: Tripe sticks are a fantastic chew option for Cavalier King Charles Spaniels. Typically made from the stomach lining of cattle, lamb, or goat, these chews are naturally rich in digestive enzymes and nutrients that support gut health. Tripe sticks provide a satisfying, chewy texture that most Cavaliers love, while also helping to clean their teeth and gums. They are full of nutrients that can be a great addition to your dog’s chew rotation. Shop now.
Beef Tails: Beef tails are another excellent choice for your Cavalier. They are durable and provide a long-lasting chewing experience, which helps keep your Cavalier engaged and entertained. Beef tails are also high in protein and can help naturally clean your Cavalier’s teeth. The natural toughness of beef tails makes them a good option for aggressive chewers, but always make sure to choose the appropriate size to prevent any choking hazards. Shop now.
Tendons: Tendons are a great chew for Cavaliers because they are tough yet somewhat flexible, providing a satisfying chew without being too hard on their teeth. They are also rich in collagen, which is beneficial for joint health. Tendons help keep your Cavalier’s teeth clean and their gums healthy. Most Cavaliers find the chewy texture very satisfying. Shop now.
Yak Chews: Yak chews are a fantastic option for Cavalier King Charles Spaniels, but I only recommend them when microwaved to make them poofy. Microwaving them creates a crunchy, airy texture that Cavaliers love, making them a safe and enjoyable option. They are rich in protein and calcium, supporting your dog’s overall health. Made from a mixture of yak and cow milk, these chews are rich in protein and calcium, supporting your dog’s overall health. Again, double check the ingredient label; not all are created equal.
Subscribe to @RaisingYourPetsNaturally’s YouTube channel for more!
Fillable Chew Toys: I am a fan of filling various food toys such as West Paw Tux and Toppl with healthy snacks. The key to getting your Cavalier to chew on a food toy is to stuff it! If your Cavalier is eating the toy instead of the inside food, I do not recommend it. Shop now.
Ingredients matter! If you’re considering chew bones made from various ingredients, it’s crucial to flip over the package and dive deep into the ingredient list. Not all chews are created equal, and some can contain nasty or even toxic substances that could harm your dog. Look for natural, wholesome ingredients and avoid artificial colors, flavors, and preservatives. A little extra time spent reading labels can make a big difference in keeping your Cavalier King Charles Spaniel safe and healthy.
So, there you have it. That is the current list of some healthy and natural chew toys, bones I feel comfortable providing Dexter and recommending to my dog training clients. Always remember to supervise your Cavalier when they are chewing and to choose the right size and type of chew for their needs.
Which of these chews does your Cavalier King Charles Spaniel love the most? Share your favorite chew toys or treats in the comments below!
A big thank you to all the members in our Cavalier Facebook group for your wonderful photos!
Google Ad Below
Join our vibrant Cavalier King Charles Spaniel community on Facebook, support our dedication to pet wellness on Patreon, and stay updated with our weekly newsletter for invaluable tips and insights into raising happy, healthy pets. Together, let’s make a difference in our dogs’ lives!
🐶💙Support our passion for pet wellness and unlock exclusive content, perks and early access by exploring our Patreon tiers.
Sign up for our weekly newsletter!
Join us on Facebook!
[...]Read more...
January 23, 2025Supporting Your Senior Cavalier King Charles Spaniel: The Ultimate Guide to Aging Cavaliers
After 15 amazing years with my Cavalier, Dexter it was his time to go to the rainbow bridge. It’s never an easy decision to make and since then, I have been thinking back on our life together. Over the course of his life, I wrote a lot about Dexter on my first blog, Raising Your Pets Naturally. Now, with Stewart, my 7-month-old rescue Cavalier King Charles Spaniel puppy, I’m starting fresh, but with all that I’ve learned from Dexter’s senior years. I thought this would be a good time to explore when a Cavalier King Charles Spaniel is considered a senior, their lifespan, common health concerns, and how we can support our Cavaliers through every stage of life.
At What Age Is a Cavalier King Charles Spaniel Considered a Senior?
If you’re wondering, “When does a Cavalier reach old age?” The answer varies depending on factors like genetics and health. Typically, small breed dogs like Cavaliers are considered seniors between 7 and 10 years old. While this is a general guideline, you may notice your dog showing signs of aging earlier or later.
Some indicators of senior status include:
Decreased Interest in Play: They may be less enthusiastic about toys or games they used to enjoy.
Weight Changes: Unexplained weight gain or loss can be a sign of aging or underlying health issues.
Changes in Vision or Hearing: Difficulty seeing or responding to cues may suggest declining eyesight or hearing.
Increased Time Spent Resting: Senior dogs often nap more during the day and may tire easily after exercise.
Changes in Appetite: They may eat less or show more picky eating habits.
Difficulty Climbing Stairs or Jumping: You might notice hesitancy or struggle with previously easy physical activities.
Behavioral Changes: Increased anxiety, clinginess, or even irritability may indicate aging.
Frequent Bathroom Breaks: Aging can bring bladder control issues or an increased need to urinate.
Dull or Thinning Coat: Their fur might lose its luster or feel thinner in certain areas.
Dental Issues: Bad breath, difficulty chewing, or loss of teeth can become more prominent.
Reduced Tolerance for Cold or Heat: Seniors may seek out warmth or avoid strenuous activity in hot weather.
Increased Vocalization: They may bark or whine more often, potentially due to discomfort, anxiety, or confusion.
Cognitive Changes: Signs of canine cognitive dysfunction (CCD) include disorientation, restlessness, or forgetting familiar routines.
Slower movement or stiffness in the morning: Your Cavalier may take a little longer to get going in the mornings, which can be a sign of joint stiffness or early arthritis.
Graying fur, often around the muzzle: Just like humans, dogs may develop gray hairs as they age, particularly around their face.
But don’t worry, aging doesn’t mean your Cavalier is slowing down in spirit! With the right care and attention, they can still enjoy life to the fullest.
What Is the Life Expectancy of a Cavalier?
You may have heard the question, “How long do Cavaliers live?” The average lifespan of a Cavalier King Charles Spaniel is approximately 10.45 years. This is based on a 2022 UK study of veterinary data. However, some studies suggest a slightly longer lifespan, with a 2024 UK study indicating an average of 11.8 years for the breed. The typical lifespan of a Cavalier King Charles Spaniel is around 9-14 years. That said, some Cavaliers, like Dexter, surpass this average with proper care, while others may face challenges earlier due to health conditions.
Common Health Issues in Cavaliers
Cavaliers are an incredibly loving and joyful breed, but they do have a predisposition to certain health issues. Knowing what to watch for and being proactive in their care can help them live a happy and long life.
Mitral Valve Disease (MVD): Nearly every Cavalier King Charles Spaniel owner will face mitral valve disease at some point if their dog lives long enough. This heart condition affects the valve’s ability to close properly, leading to a heart murmur and, eventually, heart failure if untreated. Yearly heart check-ups with a cardiologist can help monitor and manage this condition.
Chiari-like Malformation (CM): Because of the breed’s unique head shape, it’s estimated that 95 to 99% of Cavaliers will develop a condition called Chiari-like malformation (CM). This happens when the skull is a bit too small for the brain, causing part of the brain to push into the spinal canal. CM can result in pain, weakness, or in severe cases, even paralysis. While there’s no cure, symptoms can often be managed with medications and regular vet check-ups, helping your dog feel more comfortable.
Hip Dysplasia and Patella Luxation: While less common in Cavaliers compared to larger breeds, these conditions can cause joint pain and mobility issues. Patella luxation, which is a dislocation of the kneecap, is more common in Cavaliers and can lead to lameness and discomfort. Keeping your Cavalier at a healthy weight is key to reducing stress on their joints and managing these conditions.
Eye and Ear Problems: Cavaliers are prone to progressive retinal atrophy (PRA), cataracts, and ear infections. Regular grooming and vet visits help catch these issues early.
Intervertebral Disc Disease (IVDD): IVDD is a condition where the discs in your dog’s spine become damaged or degenerate, causing pain, weakness, or even paralysis in severe cases. Cavaliers are particularly vulnerable to this, especially as they age. Be on the lookout for signs of discomfort, difficulty moving, or dragging their back legs.
Myoclonus: Myoclonus refers to muscle twitches or jerks that can occur in Cavalier seniors, especially around the head or neck area. While it’s usually not painful, it’s important to consult with a vet to rule out underlying issues such as neurological problems.
Medium-Chain Acyl-CoA Dehydrogenase (MCAD) Deficiency: This genetic condition affects Cavaliers’ ability to properly metabolize certain fats, which can lead to serious health problems, including low blood sugar, lethargy, and, in severe cases, sudden death. The great thing is that there’s a quick and easy at-home swab test available to check if your Cavalier has MCAD. It’s a simple step that can give you peace of mind and help catch this condition early. It’s a proactive way to care for your Cavalier’s long-term health.
Subscribe to @CavalierTipsandFun for more!
Supporting Your Cavalier Through All Life Stages
Caring for a senior Cavalier means making thoughtful changes to their routine. As our dogs get older, their needs shift in different ways. They may slow down, develop new health concerns, or simply need more comfort. These changes are completely normal, and it’s up to us to help them adjust so they can continue to feel their best. With a little extra care and attention, we can make sure they stay happy, healthy, and comfortable as they age. Whether it’s modifying their diet, adjusting their exercise, or making small changes to your home, these little changes go a long way in supporting their well-being. After all, they’ve given us so many wonderful years of love and companionship, and now it’s our turn to return the favor.
Nutrition for Senior Cavaliers
As your Cavalier enters their senior years, their nutritional needs often shift to support their changing bodies. A balanced diet made with fresh, high-quality ingredients like Omega-3s, antioxidants, glucosamine, and chondroitin can help maintain joint health, cognitive function, and overall vitality. Glucosamine and chondroitin play an essential role in supporting cartilage and joint health and can be included in their diet through natural sources like bone broth, chicken feet, or beef trachea, or through supplements if needed. Adding these fresh foods as part of their meals or even as toppers can provide a natural boost that processed options often lack. Every dog is unique, so working with your vet or a canine nutritionist is key to crafting a plan that meets your Cavalier’s specific needs.
When Dexter was diagnosed with kidney issues in his senior years, I found that his diet needed some adjustments. He had been raw-fed for most of his life, but with the help of his veterinarian, I transitioned him to a customized, home-cooked diet to better support his health. Bones, which are a staple in raw feeding, are high in phosphorus, a mineral I needed to limit. To make up for the lack of bone calcium, I switched to eggshell calcium, which is lower in phosphorus and just as effective.
I also began boiling his meat and discarding the cooking water, which helped reduce the phosphorus content even further. I carefully selected foods that were naturally lower in phosphorus, like certain vegetables and proteins. Dexter was also starting to lose weight, so I added carbs like rice and sweet potatoes to help him maintain his energy and body condition.
These changes made a big difference in his quality of life. While home-cooking may not be for everyone, it’s worth exploring alternatives to prescription diets if your Cavalier develops a medical condition. A good veterinarian or certified dog nutritionist can guide you in creating a plan that meets your dog’s needs without compromising on fresh, wholesome ingredients.
💡 Pro tip: Every Cavalier is unique, and what works for one dog may not work for another. Always partner with your vet or a canine nutritionist to find the best approach for your senior Cavalier. Giving them a fresh diet tailored to their needs is one of the best ways to show your love and care during their golden years.
Exercise and Mental Enrichment
Gentle exercise is important for keeping your senior Cavalier feeling their best, but it’s all about adjusting to their abilities. When Dexter reached his senior years, mosey walks became our go-to. He loved taking his time, sniffing every blade of grass, and enjoying the world at his own pace. When he got tired, I’d pop him into his stroller so we could continue our adventure without overdoing it. That stroller wasn’t just for outdoor strolls either, it was perfect for indoor store adventures, allowing him to stay engaged and part of the action while giving his body the rest it needed.
Mental enrichment was just as important as physical exercise. One of Dexter’s favorite activities was a “find it” game with cardboard boxes. I’d hide a treat in a box, spread them around, and watch his excitement as he used his nose to uncover the prize. It was the perfect mix of mental stimulation and gentle movement. For senior Cavaliers, simple adjustments like these can make a huge difference. Whether it’s a slow walk, a stroller ride, or an engaging puzzle, finding activities that fit their needs helps them stay vibrant and connected to the world around them.
Don’t forget to subscribe to @CavalierTipsandFun for more!
Natural Therapies for Senior Cavaliers
As Cavaliers age, their bodies may need extra support to stay comfortable and mobile. Therapies like at-home laser treatments, physical therapy, and acupuncture made a big difference for Dexter in his senior years. Actually, Dexter had these treatments the majority of his life due to his Chiari malformation. These options can reduce pain, improve mobility, and help manage chronic conditions like arthritis.
Dexter had regular physical therapy visits, where he worked with a canine rehabilitation specialist to keep his joints moving and his muscles strong. I also had simple at-home exercises to follow up with between visits, ensuring he stayed as active as possible without overdoing it. Using a laser therapy device at home helped target areas of stiffness or soreness, and his PEMF (Pulsed Electromagnetic Field) bed became one of his favorite spots to rest. PEMF therapy didn’t just support his comfort but also promoted better circulation and reduced inflammation.
Order a laser for your Cavalier today!
Acupuncture was another natural treatment that worked well for Dexter, offering gentle relief from discomfort and improving his overall quality of life. These treatments, along with his regular routine, were all part of ensuring he was comfortable and able to enjoy his senior years to the fullest.
If you’re considering these therapies for your Cavalier, talk with your Cavalier’s holistic vet or a canine rehabilitation specialist. They can guide you toward the best options for your Cavalier’s individual needs and help create a plan to support their comfort and mobility.
Veterinary Care and Preventative Check-Ups
Regular vet visits are essential, especially as your Cavalier gets older. I recommend scheduling check-ups at least once a year, but if your dog is on medications or managing a condition, like Dexter was, labs every 4 months can give you a better picture of their health. Semi-annual check-ups are also a good idea to catch early signs of issues like MVD, joint problems, or anything else that may need attention. Don’t hesitate to bring up any subtle changes you’ve noticed, whether it’s weight loss, fatigue, or coughing. Early intervention is key, and your vet can provide valuable guidance to help you manage your Cavalier’s health, ensuring they stay happy and comfortable as they age.
Cardiologist Visits
I highly recommend that every Cavalier sees a cardiologist at least once a year. Cardiologists specialize in heart health and truly understand the ins and outs of heart disease, including conditions like MVD, which Cavaliers are prone to. Even if your dog hasn’t been diagnosed with anything serious yet, a cardiologist can spot early signs of issues that might not be apparent to you or your regular vet. If your Cavalier is diagnosed with MVD, your cardiologist may recommend more frequent visits to monitor the progression of the disease and adjust their treatment plan as needed. Having a heart specialist on your team gives you peace of mind and ensures you’re taking proactive steps to care for your dog’s heart health.
Making Your Home Senior-Friendly
As your Cavalier enters their senior years, small changes around the house can make a world of difference in how they move and rest. Senior dogs often experience joint stiffness, and their mobility may not be what it once was, so providing a comfortable and safe environment helps them feel at ease. These adjustments don’t have to be drastic, but they can really support your dog’s needs as they age.
Ramps or Steps: It’s always a good idea to have ramps or steps in place, even if your Cavalier is still young. Jumping down from furniture can put strain on their joints and neck, leading to potential issues down the road. Ramps or steps make it easier for them to get on and off the couch or into the car, preventing unnecessary stress on their bodies. These additions are a simple way to protect your Cavalier from injury and support their mobility throughout all stages of life, ensuring they can continue to join in on the fun without risk.
Orthopedic Beds: Comfort is key when it comes to senior Cavaliers. Cushioned orthopedic beds provide much-needed support for aging joints and pressure points. Dexter was a fan of cooling mats all year, so I made sure to place them throughout the house, including on his beds, to keep him cool. But I always left at least one bed without a cooling mat, in case he wanted to curl up and stay cozy. The goal is to ensure they have a comfortable place to rest, with options that suit their changing needs.
Non-Slip Surfaces: Slippery floors can be a senior dog’s worst enemy. To prevent falls, I recommend adding rugs or carpets to high-traffic areas, especially in places like the kitchen or hallway. You can also try ToeGrips(use promo code: DEXTER for 10% Off Your First Order), which help with traction, so your Cavalier can walk confidently. Making sure they have a stable environment to navigate helps keep them safe, especially when they’re getting around slower than they used to.
How Long Do Cavaliers Live? Cherish Every Moment
If there’s one thing Dexter taught me, it’s to appreciate the little moments, whether it was a slow morning walk, the rare occasion when he’d want to be close and rest in the nook of my legs, or simply watching him nap and snore in the sunshine. Dexter wasn’t much of a cuddler, but when he wanted to be near me, I made sure to savor those times. Our Cavaliers may not live as long as we’d like, but the joy they bring into our lives is something we’ll never forget.
When Stewart reaches his senior years, I know I’ll be ready to give him the care and love he deserves. For now, I’m soaking up every playful, puppy-filled moment.
Google Ad Below [...]Read more...
April 28, 2024Are Cavalier King Charles Spaniels Good for Therapy Dog Work?
Today, I want to chat about a topic that is close to my heart: therapy dogs! Have you ever wondered if your Cavalier King Charles Spaniel would make a good therapy dog? It’s a common question and one that has a few caveats. First, it’s not all about the dog! I know, I know, it’s always all about Dexter, but with visiting therapy dogs, it’s about teamwork.
But what is a visiting therapy dog team, and what do they do? A therapy pet team is a person and their pet (sometimes cats, bunnies, etc.) who share their companionship and comfort with those in need, visiting places like hospitals, schools, and nursing homes. These teams engage in either Animal-Assisted Activities (AAA) or Animal-Assisted Therapy (AAT). AAA therapy dog teams engage in sessions without the presence of a medical professional or specific treatment goals, aiming simply to bring joy and comfort. Whereas AAT therapy dog teams work with healthcare providers in goal-oriented sessions aimed at addressing specific issues, with progress carefully measured and tracked throughout the process.
Being a good therapy dog team isn’t just about your Cavalier; it’s also about you. Both you and your CKCS are visiting as a team. You both must have the skills and knowledge required to visit people in a wide range of settings.
Let’s discuss what humans should be bringing to a Cavalier therapy dog team. As a therapy dog handler, it’s important to be comfortable when interacting with both people and your dog. You’ll need to be able to guide your Cavalier through different situations, encouraging them and keeping them safe and happy. Understanding your dog is key to becoming a therapy dog handler. You’ve got to be able to recognize the tiniest changes in behavior and body language, and quickly respond. And at the same time, you will be multitasking by staying engaged with individuals. It’s a balancing act, for sure, especially as you start out your journey as a therapy dog team.
Now, what personality should your Cavalier King Charles Spaniel have in order to make a good therapy dog? When it comes to a well-suited therapy dog, you can look at a few key traits. A good therapy dog should be reliable, predictable, and able to follow your cues with ease. That’s not to say they have to be robots and never get flustered, but as a general rule, you want a dog that is solid in their temperament. Your dog should be friendly with strangers, as your visits will be with strangers. At the same time, they should be poised, not jump on people, and be able to walk nicely on a leash around distractions, including food. It’s not just about loving new people; it’s also about having manners in new and unfamiliar environments.
Getting Started Training Your Cavalier to Become a Visiting Therapy Dog
It’s important that your Cavalier have basic obedience and manners. Walking on a loose leash in crowded places, around dogs, and on slick floors is a must. Leaving food or dropped pills on the ground is incredibly important for your dog’s safety. If your Cavalier knows tricks, that can be a great icebreaker and is also helpful when someone wants to look at your dog but not pet them. Dexter and I were a visiting therapy dog team for many years, and tricks and activities were by far his favorite visits! If your dog needs a refresher, enroll in a positive dog training class.
Subscribe to our @CavalierTipsandFun YouTube channel for more!
Google Ad Below
After your Cavalier has mastered his basic obedience skills in a variety of environments, look for a therapy dog training prep class. This may be a weekend class or one that spans 4–8 weeks. When I taught my therapy dog prep class, each week we covered a new topic to prepare the handlers and dogs for the actual work involved and the test. My students by far enjoyed skit night, where my volunteers and I role-played different scenarios, the teams interacted, and we discussed what was good and how they could improve in that situation. It was a hoot and very eye-opening for the upcoming teams.
When you and your Cavalier are ready to take your therapy dog evaluation, you will need to find an evaluator to assess whether you are ready for therapy work. But there is more than one therapy dog organization out there. Choosing the right organization is crucial. Some facilities have specific requirements, like only accepting teams evaluated by certain organizations. So, if you have your sights set on a specific organization, reach out to them first. If your dog is on a raw food diet or you provide your dog with titers vs. yearly vaccinations, not all therapy dog organizations accept that, but some do.
Speaking of organizations, there are plenty out there, each with its own unique criteria. Some of the most common ones include Alliance of Therapy Dogs, Pet Partners, Love on a Leash, and Therapy Dogs International. Be sure to check out their specific requirements before making your decision.
Subscribe to @DextertheDogandFriends for kid-friendly content!
During the evaluation, the evaluator will test your skills to ensure you’re ready to handle various situations with confidence. Once you’ve got the green light from your evaluator, send in your paperwork and fees. While you are waiting for your official badge, it’s a good time to start reaching out to facilities you’re interested in visiting. It’s best to meet with the director, take a tour, and get a feel for the environment without your dog. When you are ready to visit with your Cavalier, keep those initial visits short and sweet. It’s all about easing them into the new surroundings and ensuring they feel comfortable and confident in their role as a therapy dog.
And remember, if you don’t think therapy work is in the cards for your Cavalier, that’s perfectly fine. There are plenty of other enjoyable activities you and your Cavalier can explore together. But if therapy work is the journey you’ve chosen, then I wish you both the best of luck on this rewarding adventure.
Your comments and questions are always welcome below.
Join our vibrant Cavalier King Charles Spaniel community on Facebook, support our dedication to pet wellness on Patreon, and stay updated with our weekly newsletter for invaluable tips and insights into raising happy, healthy pets. Together, let’s make a difference in our dogs’ lives!
Google Ad Below [...]Read more...
July 10, 2024Choosing a Cavalier King Charles Spaniel Breeder
While I understand the “adopt don’t shop” idea, there are valid reasons to purchase a purebred Cavalier King Charles Spaniel from a responsible Cavalier breeder. I’ve received numerous requests on how to find a good Cavalier King Charles Spaniel puppy breeder, so let’s dive into my personal thoughts and considerations.
Educate Yourself on the Cavalier King Charles Spaniel Breed
First things first, it’s crucial to understand the breed you’re interested in. Cavaliers are charming, affectionate, and beautiful, but they also have specific needs and characteristics. Learning about the typical Cavalier personality and care can help you in deciding if a Cavalier is the right breed for your family.
Dive into the Cavalier King Charles Spaniel Breed Information
The internet has a ton of information about Cavalier King Charles Spaniels. Not all good, so take everything with a grain of salt. I would suggest looking at Cavalier King Charles Spaniel national breed clubs and Cavalier rescues. They tend to have a lot of very helpful information. Spend time reading about Cavaliers to understand their grooming care, behavior traits, size, and medical concerns.
Cavalier King Charles Spaniel Temperament and Personality: Cavaliers are known for their friendly and affectionate nature. They thrive on companionship and are often described as “lap dogs” or “love sponges” because they love to snuggle. But, they aren’t all snuggle bugs, and it’s important to note that they are spaniels, which stem from hunting genes, so they can be very active little dogs. Interestingly, Dexter is now almost fifteen, and, over the years, I have met a lot of Cavalier families who downsized from golden retrievers, I was one of them. I think because they have that same personality of fun and eagerness to be part of the family activities.
When taught properly, they are often good with children and other dogs and adapt well to a variety of living environments. I do say when taught properly, as you can’t assume you can toss any dog into a situation and they will handle it as we had hoped. As a side note, please check out my YouTube channel, Dexter the Dog and Friends, to learn more about raising kids and dogs together.
Dexter’s school assembly!
Cavalier King Charles Spaniel Maintenance and Grooming: Cavaliers require regular grooming due to their silky and long coats. This includes brushing several times a week to prevent mats and tangles. Silky? Well, some Cavaliers have a much thicker coat than others. Take my Dexter, for example. He has very long fur, and it’s silky but also super thick. Daily brushing is even better if you can swing it. It will really help to prevent mats in the first place.
Regular baths are important too. If you are using a truly natural dog shampoo (I use 4-Legger) that does not have any harmful ingredients, you can bathe as needed. When Dexter was a visiting therapy dog, he had to have a scrub-a-dub-dub before his visits, so that was weekly or every two weeks for us. But now, he gets a bath every three to four weeks. Their nails should also be trimmed regularly, and their teeth brushed daily to maintain good dental health.
Grooming Tips. Subscribe to my @RaisingYourPetsNaturally YouTube channel for more.
Trimming Your Cavalier King Charles Spaniel: Talk about a controversy! I am always pro it’s your dog; do what is best for them and you. Dexter has Chiari malformation (more on that below) and because of that, grooming is uncomfortable. Therefore, I have always kept him in a puppy cut. I lighten that thick fur, shorten him up, trim his ears, and keep his slippers short. Slippers, BTW, are the fur around their feet, or Grinch feet. If you want to keep their Grinch feet full, it is important to still trim their foot pads to prevent slipping.
Cavalier King Charles Spaniel Medical Conditions: This is where our beloved breed suffers the most. Cavaliers are prone to several hereditary conditions. It’s essential to be aware of these and ensure your breeder is proactive in health testing because that’s the only way to help our Cavaliers out of their medical mess. Key health concerns include mitral valve disease (MVD), hip dysplasia, Chiari malformation (CM) and syringomyelia (SM), and patellar luxation. Reputable breeders will conduct specific screenings to minimize the risk of these conditions in their puppies.
Understanding Health Testing for Cavaliers
For Cavaliers, it’s crucial that both the breeding dogs and their parents are health tested for hereditary diseases. It’s not just the breeding pair, but the grandparents too! The grandparents have a longer history, testing and health records. A highly regarded breeding Cavalier should be over 2.5 years old, with parents that are MVD heart clear and MRI scanned clear of CM/SM. A reputable breeder will eagerly provide copies of health certificates of each parent and grandparents or links to tests. If not, be sure to ask. If they are hesitant to share, I would be hesitant to move forward.
Mitral Valve Disease (MVD): Every breeding Cavalier King Charles Spaniel should have an annual heart exam by a board-certified veterinary cardiologist. The parents of your prospective puppy should have heart clearances from a cardiologist and be at least 2.5 years old at the time of breeding. All four grandparents should be over the age of 5 and heart clear.
Syringomyelia (SM) and Chiari Malformation (CM): Both parents should have MRI scans showing them clear of CM/SM after reaching 2 years of age. It’s even better if the grandparents have also undergone MRI scans and are clear of CM/SM.
Hips: OFA requires that a Cavalier be a minimum of 2 years old for hips to be certified. It’s recommended for grandparents to have certified hips as well.
Patellas: Testing should be done annually to ensure healthy knees and to prevent luxation in both parents.
Medium-Chain Acyl-CoA Dehydrogenase (MCAD): MCAD is a metabolic disorder that affects how Cavalier King Charles Spaniels process certain fats for energy. It’s caused by a genetic mutation that can lead to metabolic imbalances. DNA testing is essential to identify Cavaliers carrying the mutation and prevent passing it on to their offspring. This is a newer (Summer 2023) DNA test.
Episodic Falling Syndrome (EFS): Is a hereditary neurological disorder affecting Cavaliers. Breeders should ensure all Cavalier breeding dogs undergo DNA testing for EFS before mating.
Dry Eye Curly Coat Syndrome: An inherited disease that affects the eyes, skin, and feet of Cavalier. It can be detected through a DNA test.
Dry Eye: Testing for dry eye in Cavalier King Charles Spaniels involves a DNA health test to identify the presence of the genetic mutation associated with dry eye, curly coat syndrome. Testing ensures early detection and appropriate management of this hereditary condition in breeding dogs.
Don’t forget to subscribe to our @CavalierTipsandFun YouTube channel for more!
The Importance of Puppy Socialization
Puppies develop both physically and mentally right out of the gate, and even during pregnancy! A stressed mom can produce stressed, unhealthy puppies. A responsible breeder not only ensures a Cavalier puppy is medically healthy, but behaviorally as well. Breeders should prioritize the physical and mental well-being of Cavalier puppies by starting basic socialization at home. This includes introducing puppies to children, adults, outdoor environments, handling and grooming, and exposing them to different textures and obstacles.
Finding a Good Cavalier King Charles Spaniel Breeder
Many national breed clubs provide breeder lists, which are a great starting point. Look within a specific mile radius you are willing to drive to meet the breeder and puppies. Breeder websites should have detailed information on health testing and puppy socialization.
When you find a few breeders who look good on paper, contact them via email or phone. Discuss your goals and hopes for your new family member. You are looking for a connection with a breeder just like you are looking for a connection with your puppy.
Visiting the Breeder and Their Cavaliers
I recommend setting up a date and time to meet the breeder in their home and visit with their Cavaliers. Seeing the living situation and behavior of their dogs in person is a great indicator of how the puppies will turn out. Look for happy breeding dogs that are part of the family. Some breeders may be hesitant about home visits, but it’s essential for you to feel comfortable with the environment where your puppy is being raised.
Picking out Dexter! FYI he was 5 weeks here, I would bring him home at 12 weeks.
Choosing Your Cavalier Puppy
This could be an entire article on its own, but here are a few highlights to get you started. TAKE YOUR TIME! This is not a time to make a quick decision or an impulse buy. You are choosing your next family member, a living creature with strong emotions that will hopefully be with you for the next ten to twenty years.
Before meeting the puppies, have an idea about what you want to do with your Cavalier puppy and future dog. Are you looking for a canine athlete? Or maybe a therapy dog to visit children or the elderly? The personality traits of those two puppies can be quite different, so knowing your goals will help in choosing the best Cavalier King Charles Spaniel puppy for you, your family, and your goals.
Bringing Your New Cavalier Puppy Home
Picking up a new Cavalier puppy typically happens when the pup is between 12-15 weeks of age. Prepare your car for your new puppy before arriving at the breeder’s home. Items to have on hand include a travel crate, puppy blankets, healthy treats, water and bowl, and a leash and harness. If your journey includes an overnight stay, pack items for a dog friendly hotel stay.
Air Travel Considerations
I personally would never fly any of my pets in cargo, nor would I have my puppy shipped to me. Meeting the breeder, dogs, and puppies is essential. If you plan on a plane ride home, check with the airlines on what they will need before your departure.
Maintaining Contact with Your Breeder
When breeders are committed to the breed’s well-being, they may ask you to provide specific health tests on your puppy throughout its life. This means the breeder is looking to see how the puppies develop, and if there are any medical concerns over their life, they may not breed that pair again. In my book, this speaks volumes about what a responsible breeder really is.
Now that you have a healthy and behaviorally sound Cavalier puppy, it’s your job to start socialization and training. You and your puppy are ready for a lifetime of fun and joy.
I hope this updated article helps your readers in their quest to find a reputable Cavalier King Charles Spaniel breeder. Good luck at finding your BFF!
Google Ad Below
Join our vibrant Cavalier King Charles Spaniel community on Facebook, support our dedication to pet wellness on Patreon, and stay updated with our weekly newsletter for invaluable tips and insights into raising happy, healthy pets. Together, let’s make a difference in our dogs’ lives!
🐶💙Support our passion for pet wellness and unlock exclusive content, perks and early access by exploring our Patreon tiers.
Sign up for our weekly newsletter!
Join us on Facebook!
[...]Read more...
November 12, 2024Best Treats for a Cavalier King Charles Spaniel
If you’ve found this Cavalier blog by searching for “best treats for Cavalier King Charles Spaniels,” you’re probably wondering what makes a healthy dog treat for this special breed. Whether you’re looking for the best dog-training treats for your Cavalier or just healthy dog treats, it’s essential to choose options that benefit your Cavalier King Charles Spaniel’s health and waistline. Here’s what I consider when picking out healthy treats for Dexter.
Check the Ingredients in Your Cavalier’s Treats
The very first thing I do when choosing treats for Dexter is check the ingredients list. Don’t just rely on the fancy pictures on the front of the bag; the ingredient panel tells you what your Cavalier is actually eating. Even if a treat claims to be “chicken-flavored,” that doesn’t always mean it contains real chicken. Always look for whole, natural ingredients like real meat, vegetables, and fruits.
What to Avoid in Your Cavalier King Charles Spaniel’s Treats
Artificial Flavors: If you see “flavor” in the ingredient list, it’s likely a synthetic that’s meant to mimic real food. Real food ingredients are always better for your Cavalier’s health.
Added Salt: Too much salt can be harmful, especially for dogs with heart issues, like Cavaliers. Stick to treats with no added salt, as too much sodium can lead to health problems.
Preservatives: Treats should be free of artificial preservatives like potassium sorbate, sodium benzoates, BHA and BHT. These chemicals are commonly found in cheaper treats and can be harmful in the long run.
By-Products or Mystery Meat: Avoid any treats that list “meat by-products” or vague “animal fat.” We want to know exactly what’s going into our dog’s body.
Sugar or Sweeteners: Skip the sugary treats! Cavalier King Charles Spaniels can easily gain weight, and too many sugar-filled treats can contribute to obesity, which affects their health.
Grains: Many dogs, including Cavaliers, can be sensitive to corn, wheat, and soy. Grains also pack in a lot of calories. Stick to treats with grain-free ingredients.
Healthy Treats for Cavalier King Charles Spaniels
So, what should you be looking for instead? The best treats for Cavalier King Charles Spaniels are made from whole, natural ingredients. I always opt for treats made with high-quality meats, like rabbit, chicken, beef, or duck, and ingredients that support overall health.
When choosing healthy dog treats, I think about each ingredient and how it affects my dog’s health and diet. I prefer foods that can contribute to Dexter’s overall nutrition, not add-ons. If I think the treat’s ingredients are more like a candy bar, I’ll skip it.
Best Training Treats for Cavaliers
When I’m training Dexter, I want treats that are both nutritious and irresistible. Training treats should be small, easy to chew, and made from single-source protein. Some of my favorites include freeze-dried meat or dehydrated meat. These treats are not only high-value (meaning they’ll grab your Cavalier’s attention), but they’re also healthy and easy to use in training sessions.
I also may grab freeze dried dog food that consists of healthy ingredients and no fillers. They tend to be bite-sized, and I can easily cut down on some of Dexter’s fresh food for the day and replace it with the freeze-dried dog food. No extra calories needed, and he doesn’t lose any of his daily nutritional needs.
Treats for Occasional Snacking
When it’s time for a snack, I’m okay with a treat that’s a bit more substantial, like grain-free biscuits made with sweet potato or pumpkin. These treats are great for occasional use, but they do tend to be higher in calories and more ingredients. I like to keep Dexter’s treats simple and sweet.
My Top Picks for Cavalier King Charles Spaniel Treats
Dehydrated Meat: A simple, natural treat that’s great for training or as an occasional snack. Dehydrating your Cavalier’s meat treats at home is simple and can be done using a dehydrator or your oven. To start, slice the meat (like chicken, beef, or turkey) into thin, even strips, removing any fat. If using a dehydrator, set it to around 160°F and arrange the meat strips on the trays, ensuring they don’t overlap. Dehydrate for 6-12 hours, checking for proper dryness—meat should be firm and break easily. If using an oven, place the meat on a baking rack, set the oven to the lowest possible temperature, and prop the door open slightly to allow moisture to escape. Store a few treats in your Cavalier’s treat jar and the rest in the freezer to stay fresh.
Dehydrated Fruits and Veggies: Dehydrated fruits and vegetables are a great low-calorie treat for Cavalier King Charles Spaniels, providing a crunchy, natural snack without added preservatives or artificial ingredients.
Can Cavaliers have carrots? For me, this is a yes and no. Yes, carrots are perfectly healthy and nutritious for your Cavalier. I know a lot of people recommend feeding large carrots to dogs as a chew, but I do think that may pose a choking risk. You must ensure your Cavalier is safely chewing the carrot and not swallowing big chunks. The same goes for baby carrots. For me, I prefer to feed Dexter carrots as little bits. But, I am definitely a proud helicopter mom. Make sure you read the article on healthy chews for your Cavalier King Charles Spaniel if you are wanting safe-and-natural chews.
Freeze-Dried Healthy Dog Food: Freeze-dried dog food can be an easy swap from their regular diet, making it a convenient and healthy treat option for Cavalier King Charles Spaniels. Plus it’s a great treat for picky eaters.
Freeze-Dried Meat Treats (Single Ingredient): Freeze-dried meat treats are a high-protein, single-ingredient snack for Cavaliers, providing a nutritious option.
Healthy DIY Recipes for Cavaliers. Don’t forget to subscribe to @CavalierTipsandFun for more!
Final Thoughts on Choosing the Best Treat for a Cavalier King Charles Spaniel
When choosing the best treats for your Cavalier King Charles Spaniel, always prioritize natural, healthy ingredients. Look for treats that are high-quality, free of unnecessary fillers, and made with proteins you recognize. And remember, even the healthiest treats should be given in moderation.
What treats does your Cavalier love?
Join our vibrant Cavalier King Charles Spaniel community on Facebook, support our dedication to pet wellness on Patreon, and stay updated with our weekly newsletter for invaluable tips and insights into raising happy, healthy pets. Together, let’s make a difference in our dogs’ lives!
Google Ad Below [...]Read more...
August 20, 2024Why Does My Cavalier King Charles Spaniel Eat Everything?
As a devoted Cavalier King Charles Spaniel family, you may be wondering why your Cavalier seems to eat everything in sight. Leaves, rocks, plants, grass, paper, cardboard, whatever they seem to be able to get their mouth around is fair game. This can be concerning, as it should be. If your Cavalier eats something he shouldn’t, there’s a risk of poisoning or choking. This could be caused by pica, not enough food, other health-related issues, or boredom. Let’s dive in and see if, together, we can figure out why your Cavalier King Charles Spaniel eats non-food items.
What is Pica?
Pica is a condition where dogs eat non-food items. For Cavaliers, this could include chewing on blankets, rocks, dirt or other random items. While it might seem quirky, pica can be a sign of underlying issues. Understanding the root causes can help you address the problem and ensure your Cavalier receives the best care.
The Behavior Behind Pica
Cavaliers, like all dogs, need mental and physical stimulation. Without enough engagement and enrichment, they might resort to chewing on inappropriate items. A 2019 study published in The Journal of Veterinary Medical Science discovered pica is a common behavioral issue. After surveying 2,000 cases, researchers found dogs that lacked regular enrichment, whether due to being crated for too long, being bored, or just not enough physical exercise were more likely to display pica tendencies.
Behavior Issues That Might Be Causing Your Cavalier’s Pica
Boredom and Lack of Stimulation: Cavaliers are playful and intelligent dogs that thrive on activity. If they aren’t entertained, they might turn to chewing on anything they can find. Toys and interactive games are crucial in keeping them busy and satisfied.
Stress and Anxiety: A Cavalier’s anxiety or stress is a major concern when it comes to pica. A change in routine, new family members, or other stressors can cause your Cavalier to engage in pica as a coping response. Providing a safe and secure environment along with calming activities can help reduce anxiety. If you feel your Cavalier has anxiety, it’s important to address that anxiety with a professional.
Attention-Seeking: Sometimes, Cavaliers might eat non-food items to get your attention. I always say, if a dog is asking for attention, they probably aren’t getting the attention they need. Bump up your Cavalier’s training, games, and outings.
Medical Reasons for Pica
While pica can often be a sign of boredom, medical issues can contribute to pica in dogs. This is why it’s always important to speak with your Cavalier’s holistic veterinarian. Here are some common medical issues for pica in dogs.
Nutritional Deficiencies: If your Cavalier’s diet is lacking in essential nutrients, they might chew on non-food items to make up for it. Ensure that their diet is balanced and rich in the nutrients they need.
Gastrointestinal Issues: Sometimes, dogs might eat non-food items to soothe an upset stomach. If your Cavalier seems to be eating odd items frequently, it’s worth checking with your vet to rule out any digestive issues.
Some diagnostic methods your vet might suggest include:
Biopsies: Taking tissue samples from the digestive tract to check for disease.
Therapeutic Trials: Trying a medication or diet change to see if the pica improves.
Blood Work: Checking folate and cobalamin levels, and performing a TLI (Trypsin-Like Immunoreactivity) test to assess pancreatic function.
X-rays: Ruling out gastrointestinal obstructions and other potential causes.
How to Stop Pica in Your Cavalier King Charles Spaniel
The good news is that pica can often be managed with positive training and enrichment techniques. If it’s medical, following your dog’s vet’s protocol will be essential.
Provide Engaging Toys and Enrichment Activities: Offer a variety of toys that challenge your Cavalier’s mind and body, such as puzzle toys, chew toys, and interactive games. Incorporate activities like nose work games, agility courses, or scent trails to provide mental stimulation and prevent them from seeking out inappropriate items. Check out our Cavalier enrichment ideas!
Address Anxiety with a Professional: If anxiety might be contributing to your Cavalier’s pica, consult with a dog behavior consultant. They can help identify the root causes of your dog’s anxiety and develop a tailored plan to address it.
Use Positive Reinforcement: Reward good behavior with praise and treats. When your Cavalier interacts with their toys or engages in positive activities, reinforce this behavior to guide them toward what’s encouraged.
Monitor and Redirect: Keep an eye on your Cavalier’s actions and gently redirect them if they start chewing on non-food items. Providing appropriate toys and praising them when they use them can help steer them away from unwanted behaviors.
Leash Management and OutFox Field Guard: Use a leash to manage your Cavalier and prevent them from accessing non-food items so they can’t sneak off. Consider using an OutFox Field Guard, a type of protective mesh that covers their face that can prevent dogs from eating things they shouldn’t. Unlike a muzzle, which restricts a dog’s ability to open their mouth entirely, a OutFox protects against ingestion while allowing normal breathing and drinking.
Understanding and addressing pica in your Cavalier King Charles Spaniel involves a combination of detective work, positive training, proper enrichment, and, if necessary, medical evaluation. By keeping your Cavalier mentally and physically stimulated, providing a balanced diet, and offering plenty of attention and love, you can help them steer clear of inappropriate chewing and enjoy a happy, healthy life.
Have you noticed any specific triggers for your Cavalier’s pica? Share your experiences and tips in the comments below!
Google Ad Below
Join our vibrant Cavalier King Charles Spaniel community on Facebook, support our dedication to pet wellness on Patreon, and stay updated with our weekly newsletter for invaluable tips and insights into raising happy, healthy pets. Together, let’s make a difference in our dogs’ lives!
🐶💙Support our passion for pet wellness and unlock exclusive content, perks and early access by exploring our Patreon tiers.
Sign up for our weekly newsletter!
Join us on Facebook!
[...]Read more...
March 5, 2025Preparing Your Cavalier King Charles Spaniel for Air Travel
Through Dexter’s 15 years of life, we had countless adventures together, but every single one was by car. At nearly 30 pounds, flying in the cabin wasn’t an option for him, and I would never consider putting a dog in cargo. Now, with Stewart, I have the opportunity to travel by plane since he will be between 16 and 18 pounds as an adult, which is small enough to fit in an airline-approved travel crate under the seat.
I have to admit, I’m a little nervous. It’s been almost 30 years since I last flew, and my experience wasn’t great. But I’m determined to make this a smooth process for both Stewart and myself. In September, we’ll be flying from Detroit to Portland, Maine, and I want to make sure Stewart is as comfortable and confident as possible for his first airplane trip.
Preparing Stewart, My Cavalier King Charles Spaniel for Air Travel
Since Stewart has never flown before, I’m taking a step-by-step approach to help him get used to every part of the travel experience. This isn’t just about the flight itself; it’s about everything leading up to it, from riding in his crate in the car to being in a busy airport environment.
Teaching a Cavalier to Enjoy a Travel Crate
One of the biggest adjustments for a Cavalier is spending time in a small, enclosed space. Since Stewart isn’t crate trained and has some separation anxiety, I’m taking extra care to make his travel crate a safe and positive space. An airline-approved travel crate is a much tighter fit, so here’s how I’ve been getting him used to it:
Introducing the Crate Indoors – I started with short training sessions, luring Stewart into the travel crate with treats and rewarding him for stepping inside. Since it’s a tight fit, I guided him to turn around and reinforced him for doing so. Once he was comfortable moving inside, I worked on having him stay in the crate for a few seconds before rewarding and letting him out, gradually increasing the duration.
Crate Inside a Crate – To help him transition smoothly to riding in the travel crate, I placed it inside his larger crate in the van. Since he was already used to the big crate, this made it feel more familiar. For the first couple of weeks, I left the travel crate unzipped, but zipped up the larger crate.
Zipping Up While Driving – Once he was comfortable, I started zipping up the travel crate while still inside the larger crate. This allowed him to experience confinement in a secure way without making a sudden change.
Removing the Larger Crate – The next step will be taking the travel crate out of the big crate so that he’s riding in just the small one. By gradually adjusting him to this setup, he won’t even notice the change!
Socialization and Confidence Building
Beyond the crate, I want to make sure Stewart is confident in all the different environments he’ll encounter on our trip.
Walking Politely on a Leash – Stewart will need to walk calmly on a leash through the airport. We’ve been practicing polite walking in various places with different surfaces and distractions. I will continue this training with busy locations as we progress through his training.
Exposure to Crowds and Noises – Airports are full of noises; baggage carts, intercom announcements, rolling suitcases. I’m taking Stewart to different places where he can experience a variety of sounds and people in a controlled way.
Getting Used to Security Procedures – At TSA checkpoints, I’ll need to take Stewart out of his crate and carry him through security. To prepare, I’ll work on calmly lifting him out of his crate and holding him in busier environments, helping him get comfortable with the experience before our trip.
Preparing for Time in the Airport
Most airports have designated pet relief areas, but access to them depends on the layout of the airport and TSA procedures. Some airports have relief areas before security, while others have them post-security. Since Stewart will be crated during the drive and throughout check-in and security, I’ll plan ahead to find out if there’s an opportunity for a potty break before we go through security. If not, I’ll make sure he’s had plenty of time to potty before we leave for the airport.
Practicing Extended Crate Time – I’ve been gradually increasing the amount of time Stewart spends zipped up in his crate, so he’s comfortable being inside for longer periods.
Planned Potty Breaks – Since dogs can’t relieve themselves once past security, I’ll make sure to take Stewart to the airport’s designated pet relief area before heading to the gate. This is also why I teach my dogs how to potty on cue; it makes it easier to ensure they go when needed, especially in situations like this where time and access are limited.
The Flight Itself
The actual flight is the final step in our preparation. Since Stewart will be in his crate under the seat for the duration of the flight, I want to make sure he’s as comfortable as possible.
Calm, Positive Associations – I’m making sure that his crate time is always associated with good things; treats, chew items, and a cozy space.
Chews and Enrichment for the Flight –I’ll bring along a few safe chews and likely my slippers to provide comfort for Stewart during the flight.
Staying Calm Myself – Dogs pick up on our emotions, so I’ll be focusing on staying relaxed and making this feel like just another routine adventure for Stewart.
Final Thoughts
Traveling with a Cavalier King Charles Spaniel on a plane takes preparation, but with gradual exposure and a positive approach, it can be a smooth experience. My goal is to make sure Stewart feels safe, confident, and comfortable every step of the way. While I’m still a bit nervous about my first flight in 30 years, I know that by preparing Stewart properly, we’ll both be ready for our adventure to Maine.
A big thank you to all of our Cavalier friends who sent us their travel photos! Don’t forget to follow them on social media.
Have you traveled with your Cavalier on a plane? I’d love to hear about your experiences in the comments!
Google Ad Below [...]Read more...
October 30, 2024How to Bathe a Cavalier King Charles Spaniel Puppy
If you are wondering how to bathe a Cavalier King Charles Spaniel puppy at home, I have you covered. As a Cavalier mom and positive dog trainer, I’m ready to help you make bathing your Cavalier puppy not only effective but enjoyable and stress-free for your new Cavalier King Charles Spaniel puppy.
Dexter, who is now fifteen, has had his fair share of dog baths. But, today, I’m going to share how I gave Willow her first bath at home. With the right setup, some tasty treats, taking it slow, and a cozy towel, you can create a zen atmosphere for your Cavalier’s bathtime. So here’s a step-by-step guide to giving your Cavalier King Charles Spaniel puppy their first bath.
Set Up Your Puppy’s Bath Space for Safety and Comfort
First, you want to ensure your puppy’s bathtub or sink is safe and secure. You don’t want your puppy slipping on the surface of a wet tub or sink. First things first-secure the bathtub or sink so your puppy won’t slip. A good rubber mat keeps your Cavalier from slipping, and this alone will help your puppy feel safer in the tub. If your Cavalier is small, like Willow, you can easily bathe them in the sink. But, if they are larger, like Dexter, a tub is a must, or a portable dog bathtub can also work well. I haven’t used one, but I’ve heard from other Cavalier families they are great!
Warm Towel Tip: Before starting your puppy’s bathtime, place a few towels in the dryer. Then, just before you head to the bath, grab the warm towels. Then, after bathtime, your puppy can be wrapped in a warm-and-cozy towel. If you air dry your Cavalier puppy, then add some puppy blankets too, so they can cozy up in the pile of warm blankets.
How to Choose a Puppy Shampoo That is Safe
When choosing a safe puppy shampoo, the first stop is the back of the shampoo bottle to read the entire ingredient panel. Yup, you want to read each ingredient and make sure those ingredients are safe and natural. You may be surprised at the garbage that you find in some puppy shampoos.
Full disclosure, I’ve been working with the 4-Legger brand since 2016 and, in my opinion, they are the best out there. For puppies, I like their hypoallergenic SOOTHE formula. This isn’t a puppy shampoo review, but I do want to share their ingredient panel, so you can get a better idea on what a good puppy shampoo looks like.
4-Legger SOOTHE Ingredients: Organic Aloe Juice, Organic Saponified Oils (Coconut, Shea Butter, Olive, Sunflower, and Jojoba), Organic Vegetable Glycerin, Organic Rosemary Extract Order today with promo code RaiseNaturally20 for 20% off your first order.
Keep Your Cavalier’s Inner Ears Dry
Protecting those little ears is important. You can place a cotton ball gently in each ear to prevent water from sneaking in, but remember to remove them after! Or, you can simply gently press their ear to their head as you use a warm washcloth.
Be Generous with the Tasty Treats or Lick Mats
Treats are key to conditioning your puppy that bathtime is good. Bath=Treats or Bath=Lick Mat Time Giving treats throughout the bath not only keeps it positive but also helps distract them from what is going on. Talk to your Cavalier puppy through the experience. Let your puppy know how much you love them and that this is a safe experience.
If you’re looking for more gentle routines and everyday training ideas like this, my Manners, Life Skills & Foundation Training Course walks you through simple, trust-based lessons you can use at home. It’s all about helping you and your dog feel confident and connected.
Watch Willow’s First Bath and don’t forget to subscribe to @CavalierTipsandFun for more!
Introduce Your Puppy to the Bath Gently
When it’s go-time, place your puppy gently in the sink or tub. Willow was a little unsure at first, so I kept things calm and encouraging. We went slowly, allowing her to get comfortable, and rewarded her bravery with treats. You can always do this in steps over a few days if your puppy is nervous. Teaching your Cavalier puppy to enjoy a bath is going to be so important since this is a breed that can benefit from baths to keep their luxurious coat beautiful. The benefit of puppy bathing is that the process can be much shorter than when your Cavalier has a full coat.
Start the Water Slowly
Once your puppy seems a bit settled, turn on the water. Using a shower sprayer is ideal because it’s easier to manipulate around your Cavalier and get the belly and bum area easier. Always check the temperature; you want it warm, but never hot. If your pup gets nervous, reassure them with gentle touches, talk to them, and provide healthy and tasty treats. We want bathtime to be a good thing, not something to avoid.
Wet Your Puppy and Lather Up
Begin with their back, avoiding their face for now. Once they’re damp, add a little shampoo and lather gently. Go slow and talk to your pup throughout to keep them reassured. Make sure to reach all those little spots like under the belly, armpits, and legs.
When it comes to cleaning your Cavalier’s face, be careful and gentle. Grab a soft washcloth, soak it in warm water, and wring out any excess. Gently wipe around your puppy’s face, especially near the eyes and mouth, to keep things clean without needing shampoo. Cavaliers can be sensitive around their eyes, so keep it soothing and slow, making it a comfortable moment for them. If there’s any tear staining, gently focus on those areas but avoid scrubbing.
Rinse Thoroughly
It’s so important to rinse really well to avoid any leftover shampoo that could irritate their skin. Keep the water warm and gently go over each area until you’re sure they’re squeaky clean.
How to Dry a Cavalier After a Bath
Gently squeeze out as much water as possible from their coat while they’re still in the tub, especially from their ears, legs, and belly. Be careful not to pinch their skin. Then grab a warm towel and start rubbing them down right in the tub. Begin with their back and then work down to their legs, belly, and especially those floppy ears! The towel rubdown helps absorb extra moisture and keeps your puppy from dripping everywhere.
Pro tip: When it looks like your puppy is going to shake their head, try covering their ears lightly with a towel. It can help prevent ear issues and keeps the shake-off water spray to a minimum!
Should You Blow-Dry Your Cavalier King Charles Spaniel Puppy?
For a little more drying, a low heat or cool setting on a blow dryer works great. Keep the dryer moving and avoid getting too close to their skin. And, of course, more treats and sweet talk make this part easier too! I would highly recommend desensitizing your puppy to the hair drier first. You can learn how in the video below. If you are going to allow your Cavalier to air-dry, I would suggest using a dog drying jacket and warm , snuggly blanket.
Learn how to teach your Cavalier to love drying and subscribe to our other YouTube channel @RaisingYourPetsNaturally
And there you have it—bathing your Cavalier King Charles Spaniel puppy at home for the first time! If you’re wondering, when should I bathe my puppy for the first time, or how often should I bathe my puppy, it’s usually safe to start around eight to twelve weeks, assuming you are using a truly safe puppy shampoo. With these tips and a positive approach, you’ll help set up your Cavalier King Charles Spaniel puppy for a lifetime of happy bath times.
What part of your puppy’s first bath are you most nervous about? Let me know in the comments. I’d love to help make it a fun experience for both of you!
Google Ad Below [...]Read more...
October 1, 2024MCAD deficiency in Cavalier King Charles Spaniels
Last year, on my Raising Your Pets Naturally blog, I shared information about a relatively new health condition found in Cavalier King Charles Spaniels: Medium-Chain Acyl-CoA Dehydrogenase (MCAD) deficiency. As many Cavalier families know, this breed is already prone to several health issues, and adding another one to the list is upsetting.
MCAD deficiency is a genetic condition that impacts how the body breaks down certain fats for energy. Recent research has found some Cavaliers who have symptoms such as seizures, lethargy, and other health issues may have MCAD.
The initial study that brought this to the general public’s attention focused on a three-year-old male Cavalier who was experiencing seizures and unusual tiredness. After examining his blood and urine, researchers discovered elevated medium-chain fatty acids, pointing to MCAD deficiency. They then sequenced the dog’s genome and identified a specific change in the ACADM gene, which is associated with this condition.
When the researchers tested this genetic variant in 162 Cavaliers, they found that about 23.5 percent of the dogs carried the mutation. This discovery is important because it suggests that MCAD deficiency might be the reason behind the seizures and other symptoms we sometimes see in Cavaliers.
Here are some symptoms to watch for:
Seizures: Seizures or convulsions can be a key indicator of potential MCAD deficiency.
Lethargy: Unexplained and prolonged tiredness could be a sign of an underlying issue like MCAD deficiency.
Intermittent Health Issues: These episodes might include vomiting, decreased energy, or more severe symptoms like seizures.
Unsteady Gait: Difficulty walking or balance issues could occur during episodes.
Loss of Appetite: A sudden loss of interest in food might indicate a problem.
Low Blood Sugar (Hypoglycemia): This can lead to weakness, shakiness, disorientation, and seizures.
Abnormal Behavior: Changes in behavior, such as irritability or confusion, might be linked to a metabolic disorder.
Respiratory Distress: In severe cases, dogs might experience difficulty breathing during an episode.
Frequent Infections: Some dogs with MCAD deficiency may be more prone to infections.
Neurological Symptoms: Symptoms like circling, head pressing, or lack of coordination could be signs of this condition.
I know, right? A lot of these symptoms are also symptoms of other Cavalier King Charles Spaniel medical issues. While these symptoms can be caused by various factors, it’s important to consider MCAD deficiency, especially if your Cavalier is showing multiple signs.
Consider Getting Your Cavalier Tested for MCAD Deficiency
If you’re concerned about MCAD deficiency and its impact on your Cavalier King Charles Spaniel, getting your dog tested is a straightforward step you can take. The test involves a simple at-home swab, which you can easily order and perform yourself. This can provide valuable insights into whether your Cavalier carries the gene associated with MCAD deficiency.
For those thinking about adding a new Cavalier puppy to their family, it’s encouraging to know that many responsible breeders are proactively testing their breeding pairs and even the grandparents. This testing helps ensure that future puppies are less likely to inherit MCAD deficiency, contributing to healthier generations of Cavaliers.
Testing is a proactive measure that can help you make informed decisions about your dog’s health and well-being. If you’re interested in testing, talk to your veterinarian or reach out to a reputable lab for more information on how to get started.
For Cavaliers at risk of MCAD deficiency, diet plays a crucial role. Since these dogs might struggle to break down medium-chain fatty acids (MCFAs), it’s recommended to be mindful of their diet:
Limit MCTs: Foods high in MCTs, like coconut oil, palm oil, and milk products, including yogurt might need to be limited in dogs with this genetic variant.
Watch High-Fat Diets: A balanced diet, without excessive fats, is key for Cavaliers with potential MCAD deficiency.
Cavaliers that haven’t been tested for MCAD deficiency should avoid foods high in MCTs. Without knowing their genetic status, it’s best to be cautious to prevent potential health issues like seizures or other symptoms associated with the condition. If your Cavalier has had a diet rich in MCTs for a few years without any of the symptoms listed above, you may consider continuing to feed. However, the test is pretty easy and inexpensive, so it might be just easier and safer to test to know for sure.
The research on MCAD deficiency in Cavaliers is ongoing, and it’s vital for more Cavaliers to be tested. A simple swab test can determine whether your Cavalier carries the gene associated with MCAD. This testing is important not just for your Cavalier’s care, but also for responsible breeding practices to reduce the prevalence of this mutation in future generations. If you test, please contact your Cavalier’s breeder with the results.
Testing for MCADD
Canine Genetic Testing
GenSol Animal Diagnostics
Laboklin
As of June, 2024, the latest stats from a Facebook group dedicated to MCAD deficiency in Cavaliers show the following:
Genetically Affected: 49 dogs (9.78%)
Clinically Affected: 6 dogs (1.2%)
Carriers: 238 dogs (47.5%)
Clear: 214 dogs (42.7%)
These numbers highlight the importance of testing and awareness within our Cavalier community. By staying informed and proactive, we can continue to support the health and well-being of our Cavaliers.
Managing MCAD Deficiency: Diet and Care Tips
If your Cavalier King Charles Spaniel has been diagnosed with MCAD deficiency, managing their condition effectively involves careful attention to their diet and feeding schedule. I would suggest a good heart to heart with your dog’s holistic veterinarian. If your Cavalier does have MCAD deficiency you will need to avoid a high-fat diet and avoid foods high in medium-chain triglycerides (MCTs). Don’t forget to read those ingredient panels on all the foods, treats, and chews you feed your Cavalier.
Although MCAD deficiency is serious in Cavaliers, a good food protocol can help ensure your Cavalier still leads a full and enriched life.
Google Ad Below [...]Read more...
September 18, 2024How to Celebrate a Senior Dog’s Birthday and Healthy Dog Cake Recipe
It’s hard to believe that Dexter, my best friend and constant companion, is turning fifteen! I’m over the moon that I am able to celebrate this milestone with him. He may be slowing down a bit, but his spirit and spunk remains as bright as ever. As Dexter has aged, we may have tweaked what we can do, but one thing has stayed the same: we live each day to the fullest, cherishing every moment.
Over the past couple of years, I’ve seen subtle changes in Dexter’s energy and behavior. He doesn’t have the boundless energy of his younger days, and he’s been going through some senior dog anxiety. We’ve learned to adjust our activities together, and I’ve been working on helping him feel more secure as his cognition changes. Our daily enrichment now includes slow, sniffy walks, leisurely poke arounds through the neighborhood followed by a stroll, and indoor adventures. He still enjoys simple training sessions, which keep his mind sharp, and I continue his canine fitness exercises to maintain his mobility and strength.
Earlier this year, Dexter went down in his back end after a reaction to medication. It was a scary time, and I wasn’t sure what his recovery would look like. I was actually wondering if his time was coming to an end. But after three to four months of dedicated rehab, I’m thrilled to share that he’s made a full recovery! Dexter’s resilience has always inspired me, and this experience only deepened my love for him. His ability to bounce back, even at fourteen, is a testament to his incredible spirit.
With Dexter by my side, I’ve been inspired to dive into new creative projects. Over the past year, we launched this blog dedicated to Cavalier King Charles Spaniels. This is actually our second blog! Check out our first blog, Raising Your Pets Naturally. I’ve also created a children’s coloring book, Dexter’s Adventures, bringing his playful and inspiring spirit to life for a younger audience. Which makes this his 3rd children’s book! Everything I do is shaped by Dexter, and I’m so lucky for the joy and inspiration he brings.
Our mantra has always been to live each day to the fullest, and as Dexter turns fifteen, this really hits home. Every day is a gift, and I’m beyond thrilled to have Dexter with me on this journey. Together, we continue to embrace life, even as we both slow down, finding joy in the simple moments we share.
Celebrating Dexter’s birthday is more than just a tradition, it’s a reminder of the love, laughter, and resilience we’ve shared throughout his life. During Dexter’s birthday celebrations, we always make sure to support Cavalier Rescue USA, a cause that’s close to our hearts. If you’re able to donate or volunteer your time, please consider checking them out, and be sure to tell them Dexter sent you!
Here’s to Dexter, my silly monkey, stink pot, my muse, and the one who makes every day brighter with his love.
Don’t forget to subscribe to our @CavalierTipsandFun YouTube channel for more!
Print
Pin
Dog-Friendly Strawberry Birthday Cake
Here's Dexter's 15th birthday cake recipe and photos! To make his special day even more memorable, I whipped up a dog-friendly birthday cake that’s not only tasty but also healthy. This homemade dog birthday cake is packed with ingredients Dexter loves. Whether you're planning a dog birthday celebration or looking for a healthy dog birthday cake recipe, this one is sure to be a hit with your pup.
Course cake Keyword dog friendly cake, dog birthday cake,
Prep Time 1 day day Cook Time 50 minutes minutes
Servings 12 Dogs
Author Tonya Wilhelm
IngredientsOptional Blue Spirulina Gummy Paw Print Decoration6 tbsp Beef Gelatin2 tsp Blue Spirulina2 cups Boiling WaterStrawberry Dog Friendly Cake4 cups Quinoa Flour6 Eggs16 oz Strawberries Stems Removed1/4 cup Olive OilOptional Dog Frosting8 oz Cream Cheese check the ingredients to ensure it’s dog-friendly10 oz Butternut Squash Cooked
InstructionsBlue Spirulina Gummy Paw Print DecorationIn a large mixing cup, combine the gelatin and blue spirulina.Quickly stir in the boiling water until fully dissolved.Pour the mixture into the paw print cutouts in the paw-shaped cake pan. Pour any extra in other fun silicone molds.Refrigerate until set then gently remove the paw gelatin shapes.Place the paw shapes on a cookie sheet and return to the refrigerator while preparing the cake.Dog-Friendly Strawberry CakePreheat the oven to 350°F.Purée the strawberries in a blender until smooth.In a large mixing bowl, combine the quinoa flour, eggs, olive oil, and strawberry purée.Generously grease the paw print cake pan with olive oil.Pour the cake batter into the pan and bake for approximately 50 minutes, or until set.Allow the cake to cool for 15 minutes, then carefully remove it from the pan and place it on a cooling rack to cool completely.Optional Dog FrostingPurée the cooked butternut squash in a blender.Add the cream cheese to the purée and blend until smooth and well combined.Once the cake is completely cool, frost the cake with the butternut squash and cream cheese mixture.Top with the blue spirulina gummy paw print decorations for a fun and colorful touch!
Join our vibrant Cavalier King Charles Spaniel community on Facebook, support our dedication to pet wellness on Patreon, and stay updated with our weekly newsletter for invaluable tips and insights into raising happy, healthy pets. Together, let’s make a difference in our dogs’ lives!
Google Ad Below [...]Read more...
January 8, 2025How to Stop Your Cavalier King Charles Spaniel From Licking Everything
Have you ever wondered why your Cavalier King Charles Spaniel licks you or how to curb excessive licking? If so, you’re not alone. Many Cavalier parents find themselves trying to stop their Cavalier from licking so much. Let’s take a closer look at why Cavaliers lick and what you can do if it becomes too much. Cavaliers lick for various reasons, and understanding the “why” is key to changing and managing the behavior.
Cavaliers May Lick You Because You Taste Great!
One common reason is that you simply taste good. Your Cavalier might be drawn to the salt on your skin, or maybe you’ve just eaten, and they’re picking up on lingering food scents. Even coming inside after an active day outdoors can make you extra appealing to their sensitive noses. Hormones and pheromones also play a role. For example, if you’re feeling stressed or it’s that time of the month, your Cavalier might be more inclined to lick because they’re sensing these subtle changes. Not to mention when we put hand lotion on, oh, yummy!
Cavaliers Lick During Greeting Behaviors
Another reason dogs lick is as part of their greeting ritual. When you come home, they’re excited to see you and may lick as a way of saying, “Hello! I’m so happy you’re here!” It’s a natural expression of affection and enthusiasm. This behavior is especially common in Cavalier King Charles Spaniels, a breed known for their loving and people-oriented nature. Cavaliers thrive on connection and love being close to their families, so licking during greetings is often their way of reinforcing that bond.
Greeting-related licking can also be a way for your dog to gather information about where you’ve been. Dogs rely heavily on their sense of smell and taste to explore their environment, and licking is part of how they “read” the world. If you’ve been around other dogs, eaten something particularly tasty, or even just had a long day out, your Cavalier’s greeting might include licking to learn more about your adventures.
Check out the video. Don’t forget to subscribe to our @RaisingYourPetsNaturally YouTube channel.
Your Cavalier May Be Licking Because He’s Stressed
However, not all licking is tied to happy moments. Sometimes, licking can indicate stress or anxiety. This type of licking is known as a submissive or appeasement gesture. Essentially, your dog is trying to communicate that they mean no harm. You might notice this behavior around guests or strangers, where your dog licks excessively as a way to navigate the interaction. In some cases, they may even start licking their paws or nearby objects if they’re feeling particularly anxious.
How To Stop Your Cavalier King Charles Spaniel From Licking So Much
If your Cavalier’s licking becomes excessive, there are steps you can take to manage it. For instance, if your dog is licking because you taste good or they’re excited to see you, allow a quick lick and then gently redirect them. You can offer a chew toy or a bone to give them something else to focus on. This simple redirection helps channel their energy into a more appropriate activity while still acknowledging their excitement.
When licking is tied to stress, it’s especially important to avoid punishing your Cavalier. Punishment can actually make the behavior worse, as your dog may lick even more in an attempt to appease you. Instead, remain calm and redirect their attention to another behavior, such as sitting or playing with a toy. Addressing the root cause of your Cavalier’s stress and anxiety is key. Building their confidence through positive dog training can make a big difference. As your dog becomes more comfortable in stressful situations, the need for licking as a coping mechanism will naturally decrease.
In some cases, excessive licking may require professional help. If your dog’s licking seems compulsive or tied to high levels of stress, start by consulting your holistic veterinarian. They can check for any medical issues and look at your dog’s behavior history. From there, a dog behavior specialist can help you create a customized dog behavior modification plan to address your Cavalier’s needs, making life easier and more enjoyable for everyone.
If your Cavalier King Charles Spaniel’s licking is becoming a challenge, know that you’re not alone, and there are positive steps you can take to address it. With a little patience and the right approach, you can better understand why your Cavalier licks and guide them toward healthier ways of expressing themselves. If you’re feeling stuck or need personalized guidance, I offer one-on-one phone and Skype sessions to help you and your Cavalier navigate challenges like excessive licking. Together, we can create a plan that works for your unique pup and helps strengthen your bond.
Do you have a licker on your hands?
Google Ad Below [...]Read more...
September 3, 2024The Importance of Enrichment for Senior Cavalier King Charles Spaniels
Oh, Dexter. My senior Cavalier King Charles Spaniel, will be fifteen on October 6, 2024! I’m over the moon happy that he has led a long, happy life. He was diagnosed with Chiari malformation and syringomyelia in 2012, and I didn’t think he would have a very long life. Eventually, his MVD diagnosis also rolled in. But, despite his medical conditions, he has been thriving. He’s not just alive, he’s kicking!
I’m not going to lie. He started showing his age and some cognitive decline a few years ago. I have written about his life on my first blog, Raising Your Pets Naturally, so make sure you head over there for even more about Dexter’s life and care. But today, I wanted to discuss some of the things I have done to help keep Dexter as sharp as possible and try to keep canine cognitive dysfunction syndrome (CCDS) at bay. Through my experiences and research, I’ve seen how diet, positive training, and environmental enrichment can make a significant difference in maintaining his quality of life. So, let’s jump in.
What is Canine Cognitive Dysfunction Syndrome
Canine cognitive dysfunction syndrome (CCDS), is similar to dementia in humans and affects many senior dogs. Symptoms can be different from dog to dog, but some common behaviors include: disorientation, disrupted sleep patterns, decreased activity levels, and changed interactions with their environment and people. Research, including a study from the Journal of Veterinary Behavior (2016), shows that cognitive decline in dogs can significantly impact their quality of life. But early intervention and supportive care can improve CCDS symptoms and a dog’s quality of life.
The Importance of Canine Enrichment for Senior Cavaliers
Environmental enrichment is important for helping senior Cavaliers with canine cognitive dysfunction syndrome. Canine enrichment is about engaging your Cavalier’s senses, engaging their minds, and keeping them moving. I always think about “living life to the fullest.” I mean, we brought our Cavaliers into our homes so we can enjoy them and do fun things with them. Although they are beautiful, they deserve more than just a life where they lie around all day and do nothing. Just because they are seniors, doesn’t mean this mentality should change, although their activities will need to be adjusted to meet their individual needs. And it’s not just me; there’s research that backs up this theory.
Mental Stimulation: According to a study published in the Journal of Veterinary Internal Medicine (2016), mental stimulation through enrichment activities helps slow cognitive decline in senior dogs. Puzzle toys, interactive games, and scent-based activities keep the brain engaged, potentially delaying the progression of CCDS symptoms.
Reduces Stress: Canine enrichment is a great way to help reduce anxiety and stress in senior Cavaliers dealing with cognitive decline. Engaging activities and sensory stimulation can make a big difference. By adding enrichment routines to their day, you’re helping your dog feel calmer and more secure, which can ease some of the stress and anxiety that often come with cognitive issues.
Behavioral Improvement: Enrichment activities can make a big difference for senior Cavalier King Charles Spaniels who are restless or pacing. By offering mental and physical stimulation, these activities help reduce repetitive behaviors and keep your dog more relaxed.
Enhanced Quality of Life: Enrichment isn’t just about keeping your Cavalier busy. It’s about improving their overall quality of life. Engaging in enjoyable and stimulating activities brings more enjoyment, engagement, and a sense of purpose to their days, making their lives more fulfilling.
Simple Enrichment Ideas to Boost Your Senior Dog’s Quality of Life
Enrichment doesn’t have to be complicated or time-consuming. It’s all about finding simple, enjoyable activities that stimulate your senior Cavalier’s mind and body. Here are some ideas to get you started. And don’t forget to check out our article on Cavalier Enrichment Ideas.
Interactive Toys: Toys that dispense treats or require problem-solving are fantastic for mental stimulation. Depending on your Cavalier, you can use treat-dispensing toys or lick mats. When Dexter was younger, treat dispensing toys and frozen Tux toys were a hit. Now, he enjoys lick mats and snuffle mats. Food toys engage your dog’s sense of smell and taste.
Scent Games: Speaking of scent games, Dexter has always loved using his nose. Try hiding treats around the house or yard and let your Cavalier find them using his nose. Scent games are a natural way to keep your Cavalier active and provide both mental and physical exercise in a way most dogs love.
Positive Dog Training Sessions: Short, positive dog training sessions with simple cues or tricks are highly rewarding. They keep your Cavalier’s brain sharp and help build a stronger bond through shared activities.
Varied Walks or Strolls: Don’t get into a rut of going on the same walk, to the same park, on the same trail. Changing up your walking routes introduces new sights and smells. This variety provides your Cavalier with cognitive stimulation and keeps your walks fresh and interesting.
Comfortable Environment: Make sure your senior Cavalier’s living space is safe and cozy. Look out for any obstacles, and ensure good footing below. Whether you have carpet, carpet runners, grippy socks, ToeGrips or all of the above, traction is incredibly important for senior Cavaliers. They don’t have the same core strength to hold themselves up, and slick floors can be very scary and even cause injury if they slip or splay out.
Canine Fitness and Strength Building: I highly recommend setting up some sessions with a canine rehabilitation professional. Working with Dr. Sam, Dexter’s strength has been so important in his overall health and wellness. And our at home exercises aren’t just a way to keep him fit. They are also another form of enrichment, since he loves doing them! Engage in simple at-home exercises like sit-to-stand and sit-to-down exercises to help maintain your Cavalier’s muscle strength and joint mobility. Gentle range-of-motion exercises can also support your senior dog’s overall physical health and comfort.
Supporting Cognitive Health with Diet and Nutrition
Diet plays a crucial role in managing cognitive decline in senior dogs. According to research published in the Journal of Veterinary Internal Medicine (2019), a diet rich in specific vitamins and nutrients can significantly support cognitive health. Key vitamins such as vitamin E and vitamin C act as antioxidants, protecting brain cells from oxidative stress and easing cognitive issues. B vitamins, including B6, B12, and folic acid, are essential for maintaining healthy brain function. Omega-3 fatty acids, commonly found in fish and fish oil supplements, also play a vital role in improving cognitive function and managing symptoms of cognitive decline. Including these vitamins and nutrients in your dog’s diet, either through high-quality dog food (preferably fresh) or supplements, can help manage cognitive decline and enhance their overall quality of life.
Dexter, is proof of the benefits of a fresh diet. His meals are carefully prepared with high-quality, fresh ingredients and free from unnecessary chemicals. I’m convinced this fresh, balanced diet, rich in essential nutrients, has played a significant role in keeping his mind sharp and supporting his overall well-being.
How Positive Training Supports Cognitive Health in Senior Cavaliers
Positive training and routine play a vital role in supporting a senior dog’s mental sharpness and managing the effects of cognitive decline. As a positive dog trainer, I’ve taught Dexter plenty of fun and useful tricks, not just for good behavior, but also to keep his mind engaged and sharp. Each training session isn’t just about obedience; it’s about giving Dexter the mental stimulation he needs to stay mentally fit as he ages.
Incorporating regular training sessions into your dog’s routine is a great way to improve their cognition and their body. Focus on simple tricks and behaviors that challenge their mind and body without causing stress. I have noticed Dexter’s abilities change over the years, so it is important to change with them. By tailoring positive dog training sessions to your Cavalier’s needs and incorporating enjoyable activities into their day, you can help your Cavalier maintain their mental clarity and overall well-being.
Follow our YouTube channel for more Cavalier enrichment ideas!
Final Thoughts
Incorporating canine enrichment into Dexter’s daily routine has been essential for maintaining his quality of life. It’s not just about keeping him busy; it’s about enhancing his mental, emotional, and physical well-being. Enrichment is just one piece of the puzzle for Dexter’s health. A fresh, balanced diet and consistent, positive training are also vital for supporting his well-being as a senior dog.
Dexter’s vibrant health is a testament to how a combination of mental stimulation, nutritious food, and engaging routines can make a real difference. I encourage all Cavalier families to integrate these practices into their senior dogs’ lives. By focusing on enrichment, diet, and training, you can significantly improve your dog’s overall well-being and help them enjoy their golden years to the fullest.
I host a private Facebook group for Cavalier King Charles Spaniels, and we have a big focus on canine enrichment ideas and challenges to keep your Cavalier engaged and thriving!
How do you incorporate enrichment, diet, or training into your senior dog’s routine? Share your tips and experiences below!
Enrichment Increases Relaxation
https://www.ncbi.nlm.nih.gov/pmc/articles/PMC8772568/
https://www.sciencedirect.com/science/article/pii/S0168159123002691
Join our vibrant Cavalier King Charles Spaniel community on Facebook, support our dedication to pet wellness on Patreon, and stay updated with our weekly newsletter for invaluable tips and insights into raising happy, healthy pets. Together, let’s make a difference in our dogs’ lives!
Google Ad Below [...]Read more...
February 5, 2025How to Teach Cavalier King Charles Spaniel to Ignore Distractions
When I’m out with Stewart, my 7-month-old Cavalier, we get stopped a lot. People see his big, sweet eyes, his cute winter coat and wiggly little body and immediately want to say hello. And if this goes for people with or without their dog.
But here’s the thing, not every outing is a social event, and not every person or dog needs to be greeted.
Dog Socializing vs. Everyday Walks
There’s a time and place for socializing, and there’s a time for simply spending quality time with Stewart on our walks and outings. I make sure Stewart has appropriate and positive, structured experiences meeting new people and dogs in a controlled way. This helps him learn confidence, good manners, and appropriate greetings. But, at the same time, I’m teaching him an equally important skill, ignoring distractions such as people and dogs and walking politely with me.
If every walk turns into a meet-and-greet, dogs start to expect it. They pull toward every person or dog, they get frustrated when they don’t get to say hello. That can lead to barking, lunging, or general overexcitement, making walks stressful instead of enjoyable.
Why It’s Important to Teach Your Dog to Ignore Other Dogs and People
Not Every Dog Wants to Say Hello
Some dogs are nervous, in training, or simply not interested. Teaching Stewart to walk past other dogs calmly means he won’t invade another dog’s space or make an already anxious dog uncomfortable.
People Aren’t Always Dog People
Shocking, I know! But not everyone wants a happy little Cavalier bouncing up to them. Some people are afraid of dogs, allergic, or just in a hurry. Stewart is learning to walk past without expecting attention makes life easier for everyone.
Impulse Control is a Life Skill
Dogs who can stay focused, even when exciting things are happening around them, are safer and more enjoyable to live with. If Stewart learns that he doesn’t always get what he wants the moment he wants it, he’ll be better at handling frustration in other areas of life too.
Not Every Walk is About Socializing
Sometimes, I just want to enjoy a peaceful walk with Stewart. He doesn’t need to greet everyone to have a fulfilling experience, sometimes sniffing, walking together, and taking in the world is enough.
Better Walks in Busy Places
By teaching Stewart to walk with me instead of focusing on every dog or person, our walks are smoother and more enjoyable. Crowded sidewalks, busy parks, or narrow trails are much easier to navigate when he stays by my side rather than pulling toward distractions.
Prepping for Travel & Public Outings
I plan on traveling with Stewart, airports, dog-friendly boats, outdoor dining, places where he’ll need to stay close and focused on me. Teaching him now that he doesn’t always get to greet everyone will make these experiences stress-free and enjoyable for both of us.
Don’t forget to subscribe to @CavalierTipsandFun for more videos!
How I’m Teaching Stewart to Walk Past Distractions
Reward Calm Choices
When Stewart notices a dog or person, I reward him. I’m teaching him they=treats. Eventually, he will start to make that connection, see the distraction and look at me for the reward. This is what I’m going for. Over time, he’ll learn that staying focused on me, and it’ll be a non-event for him, he’ll simply walk past without even thinking about stopping to greet.
Use Distance
If Stewart’s too excited or distracted, I create more space between us and the distraction to help him refocus. As he gets better at ignoring, I’ll gradually close that gap, making it easier for him to pass by calmly.
Give Him a Job
I use cues like his name game, watch me, paws up, touch to keep his attention. Engaging his brain with productive tasks means he’s less likely to pull toward distractions.
Set Clear Expectations
I make sure Stewart knows that pulling towards people or dogs does not work. If he starts to pull, I either toss in his name game, stop and wait for him to renege, or add more distance. It truly depends on the situation. I do want him to be successful.
Handling Approaching People
When someone is steadily approaching your Cavalier, how you handle it depends on your goal at that moment. As a positive dog trainer, sometimes I want to explain and educate. If so, then I’ll squat down with Stewart, reward him for staying focused on me, and let the person know we’re training and practicing ignoring distractions. If I choose to say hello, I tell Stewart, “Let’s say hi,” and calmly approach. But sometimes, I just want to keep moving, so I give a quick, upbeat “We’re not saying hello, thank you!” and continue walking, keeping Stewart focused on me. It’s all about setting the tone for the interaction while making sure my dog stays engaged and confident.
Finding the Balance
There’s a time and place for socializing, and there’s also a time to focus on the walk itself. If you do want to stop and say hi, try to stop about 10 feet away from the other person or dog and ask first if it’s okay. Keep in mind that others might be training their dogs or dealing with their own challenges during the walk, so giving them some space is always a good idea. Being considerate makes the experience better for everyone, whether it’s a quick greeting or just calmly walking by each other. I then give Stewart the cue, “Let’s say hi,” so he knows he has permission to greet.
There’s nothing wrong with letting your dog greet others when it’s appropriate, but it’s just as important for them to learn that not every outing is a social event. Teaching Stewart when it’s time to engage and when it’s time to focus on me makes him a better walker and ensures our walks stay enjoyable.
When you’re walking your Cavalier King Charles Spaniel, how do you decide when it’s time to socialize and when it’s time to focus on the walk?
Google Ad Below [...]Read more...
April 21, 2024Tips for traveling with your Cavalier King Charles Spaniel. Dog-friendly vacation ideas.
Follow @CavalierTipsandFun for more videos.
Don’t forget to subscribe to @RaisingYourPetsNaturally for more!
Your comments and questions are always welcome below.
Join our vibrant Cavalier King Charles Spaniel community on Facebook, support our dedication to pet wellness on Patreon, and stay updated with our weekly newsletter for invaluable tips and insights into raising happy, healthy pets. Together, let’s make a difference in our dogs’ lives!
[...]Read more...
October 15, 2024Cavalier King Charles Spaniel Travel Tips
As a Cavalier mom and positive dog trainer, I know how important it is to help our Cavaliers feel comfortable and safe during car rides. Whether you’re planning a quick trip to the park or a longer dog-friendly road trip, making sure your Cavalier King Charles Spaniel enjoys the car ride is key to a stress-free trip for both you and your dog.
When Dexter and I hit the road, I never have to worry about how he’ll handle the ride. He’s a fantastic travel companion because I spent time training him to feel confident and at ease in the car. Today, I want to share my top tips on how you can prepare your Cavalier for car travel and road trips and turn them into a relaxed, happy traveler too.
1. Start with Short and Positive Rides
Just like with any new experience, easing your Cavalier into car rides instead of popping them into the car for a twelve-hour road trip is super important. Begin by taking short trips to fun, dog-friendly places like the local park or pet store. Keep the first few rides short and sweet, no more than ten-to-fifteen minutes. The goal is to associate the car with positive and fun destinations. A trip to the vet does not count as a fun visit for most dogs.
2. Create a Safe Space in the Car
Safety should always be a priority when traveling with your Cavalier. A secure dog car seat or crash-tested harness designed for small breeds like Cavaliers is a must. I personally recommend looking into the Center for Pet Safety’s approved products, as they conduct independent crash testing for dog travel gear. If a brand states they are crash tested, make sure to watch their crash tested video.
Dexter typically travels in a small crate. Because of his Chiari Malformation and syringomyelia and large size, travel harnesses aren’t the most comfortable for him. However, when we travel in the small car, a crash-tested and passed (yes, make sure they have passed the test) is our go-to. The key is to find a comfortable yet safe setup so your Cavalier feels relaxed without compromising their security.
3. Pack Familiar Comfort Items
Make your Cavalier feel more at home by packing some familiar items for the ride. When Dexter was a puppy, he would cozy up with his baby blanket and soft toy. Now, he has a therapeutic mat inside his crate. He likes to stay cool, so I also have a fan pointing at him. These little comforts can help reduce anxiety and make the ride smoother for dogs who may initially feel unsure about the car.
If your Cavalier is a bit anxious, place something with your scent, like a worn T-shirt next to your Cavalier. Your presence, even in the form of scent, can be calming for your Cavalier, especially if they’re a bit nervous during the first few rides.
4. Plan for Frequent Breaks
When traveling for more than an hour, make sure to schedule frequent potty and stretch breaks. Cavaliers are active little dogs, and, like all of us, they need to stretch their legs and take in their surroundings. I like to plan stops at dog-friendly rest areas or parks where Dexter can explore, do his business, and get a little energy out before continuing the journey.
Remember, each break is an opportunity for positive training. Use it as a chance to reward your dog for good behavior during the ride, and they’ll look forward to the next part of the trip.
5. Help Your Cavalier Relax with Calming Music
One of my favorite dog travel hacks is playing calming music designed for dogs during long car rides. I’ve been a fan of the iCalmDog portable speaker, which plays clinically-tested music that helps keep dogs calm and relaxed. Just be careful not to fall asleep at the wheel yourself!
Check out our all Cavalier calming playlist on YouTube!
6. Monitor Your Cavalier’s Well-Being
Keep an eye on your Cavalier’s behavior throughout the trip. Some Cavaliers may experience motion sickness, especially on longer rides. If your dog starts to drool excessively, whine, or seem uncomfortable, it might be time for a break. You can try natural remedies like ginger treats (with your vet’s approval) or consult your vet for other options.
If your Cavalier seems overly tired or stressed, don’t be afraid to cut the trip short. The goal is for travel to be a positive experience, and pushing them too far can have the opposite effect.
By starting with short, positive experiences and keeping their safety and comfort in mind, you can help your Cavalier King Charles Spaniel become a happy traveler. Dexter loves our road trips, and I’m sure your Cavalier will too!
Do you have any favorite travel tips for Cavaliers? Drop them in the comments!
Follow us on YouTube For fun dog-friendly travel adventures!
Google Ad Below [...]Read more...
December 25, 2024Winter Tips for a Cavalier King Charles Spaniel
Brrrr, it’s cold out there! Winter in Ohio can be tough, and today, it’s a chilly 15 degrees. Thankfully, Stewart and I are bundled up inside, but it’s the perfect time to share some essential winter safety tips for your Cavalier King Charles Spaniel. Whether you’re venturing outdoors or staying warm indoors, these precautions and activities will help keep your pup safe, healthy, and happy all winter long.
Safety First: Protecting Your Cavalier in Winter
Limit Outdoor Time
Our Cavaliers are family members, and they thrive indoors with us. While Stewart loves his outdoor potty breaks and a quick sniff around the yard, I always limit his time outside when temperatures dip. Frostbite and hypothermia are real risks for dogs, especially small breeds like Cavaliers. Keep outings short, and always monitor your pup for signs of discomfort.
Protect Those Paws
A dog’s paw pads aren’t built to handle extreme cold or icy surfaces. For quick potty breaks, toddler socks can be a lifesaver; they’re easy to put on and don’t need to be perfect since they’re just for a short trip. Shoot for dark colors, so that if one falls off, it’s easier to find in the snow. For longer walks or outdoor play, dog boots like Saltsox are fantastic options. If your Cavalier goes outside barefoot, be sure to clean their paws thoroughly with a warm washcloth or natural pet wipes to remove ice, salt, and chemicals that could irritate their skin. I make up a bowl of water with a splash of 4-Legger shampoo and a washcloth to clean paws. I make a new batch each day. (Order 4-Legger today with promo code RaiseNaturally20 for 20% off your first order.)
Scoop the Potty Area
I always scoop a clean, clear area in the yard for potty breaks. Cavaliers, like most dogs, prefer a neat spot for their business. A wide, shoveled path ensures your Cavalier can move around comfortably without getting buried in snow.
Coats and Sweaters for Your Cavalier
Dog coats and sweaters are a must for Cavaliers. Look for a jacket that provides full range of motion and covers your pup’s back and belly. Indoors, a cozy sweater can keep your Cavalier comfortable. If you notice your Cavalier sleeping in a tight ball, or even shivering, a dog sweater is a great idea. Stewart’s favorite sweaters are custom-made by MeekByDesign, but there are plenty of great options online or in pet stores.
Should a Cavalier Wear a Hat in the Winter?
Cavaliers’ long, luxurious ears attract snow and ice like a magnet! A lightweight dog hat or snood can protect your Cavalier’s ears during snowy adventures. Afterward, be sure to dry their ears gently with a soft towel.
Staying Warm and Cozy Indoors
When your Cavalier comes inside from the snow or cold, use a super-absorbent microfiber towel to dry him off thoroughly. For an extra touch of luxury, I like to pop a favorite blanket in the dryer so my dog can snuggle up with something warm. These little comforts make a big difference on chilly days!
Indoors, I keep Stewart active and engaged with puzzle toys, hide-and-seek games, and short training sessions. A mentally stimulated pup is a happy pup, even when it’s too cold for a long walk.
Winter Nutrition for Cavaliers
Did you know that certain foods can help your Cavalier King Charles Spaniel stay warm during the chilly months? According to Traditional Chinese Medicine (TCM), foods have energetic properties that can influence the body’s temperature and overall balance.
In the winter, it’s beneficial to incorporate “warming” proteins into your dog’s diet. Proteins like chicken, lamb, venison, and even goat are considered warming and can help offset the cold temperatures. These proteins are especially good for dogs who seem more sensitive to the cold or have lower energy during the winter.
You can also include warming spices and herbs like ginger or turmeric in small, dog-safe amounts to add a cozy touch to their meals. These not only are warming, but also support joint health during cold weather.
If you’re new to adjusting your dog’s diet seasonally, start slow by adding one or two warming ingredients to their current meals. Always consult with your vet or a canine nutrition expert to ensure your Cavalier’s diet remains balanced and meets their individual needs.
Embrace the Season
Stewart may be new to my home, but we’re already making the most of winter together. From brisk walks in his cozy new jacket to snuggling under a warm blanket on chilly evenings, these little moments remind me of the special bond we share. No matter the season, Cavaliers have a way of bringing warmth and joy to our lives.
How do you keep your Cavalier comfortable and happy during the winter months? Share your tips below, I’d love to hear them!
Google Ad Below [...]Read more...
March 30, 2025Health Benefits of Omega-3s for Cavaliers
Omega-3 fatty acids are one of the most important nutrients for Cavaliers, yet they’re often overlooked or misunderstood. These essential fats support heart health, brain function, joint mobility, skin condition, and even immune function. But not all omega-3 sources are created equal. Fresh fish, supplements, and plant-based options vary in effectiveness, and factors like oxidation and sourcing impact their quality. In this guide, I’ll break down the best omega-3 sources, how to choose high-quality options, and what to avoid to ensure your Cavalier King Charles Spaniel gets the maximum health benefits from their Omega-3s.
Skin and Coat Health
Omega-3s help maintain a healthy skin, reducing dryness, flakiness, and itchiness. They also improve coat condition, making your Cavalier’s fur shinier and softer. Cavaliers, like many other breeds, can be prone to allergies and skin sensitivities, and omega-3s can help manage these issues by reducing inflammation in the skin.
Joint Health and Mobility
As Cavaliers age, they can develop arthritis and joint stiffness. Omega-3s have been shown to reduce inflammation in the joints, helping to alleviate pain and improve mobility. Dogs receiving sufficient omega-3s often experience less stiffness and better flexibility, which is particularly important for senior Cavalier King Charles Spaniels.
Brain and Cognitive Function
DHA is a crucial component of brain cell membranes and plays a significant role in cognitive function. In Cavalier puppies, it supports brain development and learning. In senior Cavaliers, it helps prevent cognitive decline and supports memory and problem-solving skills. Studies have shown that dogs supplemented with DHA perform better on cognitive tests than those that do not receive adequate amounts.
Heart Health
Omega-3 fatty acids are essential for supporting cardiovascular function by helping regulate heart rhythm, reduce blood pressure, and improve circulation. For Cavaliers, who are especially prone to mitral valve disease (MVD), a common heart condition in the breed, omega-3s are even more important. Given their susceptibility to MVD, ensuring your Cavalier’s diet is rich in omega-3s can play a crucial role in supporting their heart health and may help slow the progression of the disease.
Immune System Support and Inflammation Control
Chronic inflammation is a factor in many health issues, including autoimmune conditions, allergies, and even cancer. For Cavaliers, who are prone to conditions like Chiari malformation, managing inflammation is especially critical. Omega 3s play an important role in regulating the body’s inflammatory response, helping to balance the immune system and reduce excessive inflammation. By incorporating omega 3s into your Cavalier’s diet, you can help protect against the inflammation that worsens conditions like Chiari malformation and support overall immune health.
Best Omega-3 Sources for Cavaliers
The best omega-3 sources for dogs are those that provide EPA (eicosapentaenoic acid) and DHA (docosahexaenoic acid) in their most bioavailable forms. These two types of omega-3s are the most beneficial for dogs, as they are directly used by the body to support a variety of vital functions, from heart health to joint mobility. The most bioavailable forms of these omega-3s are typically found in marine-based sources, such as oily fish. Fish like salmon, sardines, mackerel, and anchovies are excellent options because they contain high levels of both EPA and DHA, making them ideal for supporting your Cavalier’s health. These fish provide omega-3s in a form that’s easy for the body to absorb, ensuring that your dog gets the maximum benefits.
In addition to fish, fish oil supplements can also be a great source of omega-3s. However, it’s important to choose high-quality, purified fish oils that are free of contaminants like mercury. If your Cavalier is sensitive to fish or you prefer plant-based sources, algae oil is another excellent option, as it provides DHA without the fishy aftertaste or concerns about ocean contaminants. While flaxseed and chia seeds offer plant-based omega-3s, they contain ALA (alpha-linolenic acid), which the body must convert into EPA and DHA, an inefficient process for dogs. This means that marine-based omega-3s are typically the best option for achieving optimal health benefits. By rotating between these high-quality sources, you can help ensure your Cavalier is getting the most effective omega-3s for their needs.
Watch our fresh fish DIY and don’t forget to subscribe to @CavalierTipsandFun for more!
Fresh Fish (Whole Food Source of EPA and DHA)
Feeding fresh, oily fish is one of the most natural ways to provide omega-3s. However, choosing the right type of fish is essential due to concerns about mercury levels, sustainability, and proper sourcing.
Some of the best options for Cavaliers include:
Sardines: Small, low-mercury fish that are naturally high in omega-3s. They are one of the safest whole-food sources.
Anchovies: Similar to sardines, anchovies are rich in DHA and EPA while having minimal contamination risks.
Herring: Often used in high-quality pet foods, herring is another small, oily fish packed with omega-3s.
Atlantic Mackerel: This species is safe, but avoid king mackerel, which is high in mercury.
Wild-Caught Salmon: A great source of omega-3s, but farmed salmon may contain higher levels of contaminants.
When feeding fresh fish, it’s important to either lightly cook the fish or feed it raw if it’s safely sourced. Cooking fish too much can break down some of the omega-3s, while raw fish (from a trusted, safe source) can provide the most nutrients. However, if you choose to feed raw fish, it should be frozen for a week first to reduce the risk of parasites, which can be a concern with certain types of fish.
It’s essential to avoid fish that have been prepared with added salt, spices, or sauces. These seasonings can be harmful to dogs. Also, always avoid feeding cooked bones, as they can splinter and cause serious internal injuries.
Fish Oil Supplements
Many pet parents turn to fish oil supplements to provide omega-3s, but not all fish oil supplements are the same. Choosing the right one for your Cavalier is important to ensure you’re giving them the best quality and the most effective nutrients.
How to Choose a High-Quality Fish Oil
When selecting a fish oil supplement, look for species-specific labeling. Instead of settling for generic “fish oil,” opt for oils like sardine oil, anchovy oil, or krill oil. This ensures transparency in sourcing and gives you a better idea of where the oil is coming from.
When choosing a fish oil supplement, it’s important to look at the levels of EPA and DHA, the two types of omega-3 fatty acids that provide the most health benefits for your dog. The label on the bottle should specify the amount of EPA and DHA in each serving, not just the total amount of fish oil.
For example, a bottle might say it contains 1,000 mg of fish oil per serving. But if the label doesn’t show how much of that is EPA and DHA, it’s hard to know how much of the oil is actually providing the beneficial omega-3s your dog needs.
Some fish oils may have more EPA, which is great for joint and heart health, while others may have more DHA, which supports brain function and reduces inflammation. Knowing exactly how much of each omega-3 is in the oil allows you to be more confident that you’re giving your Cavalier the right amount for their specific health needs. This way, you can make sure you’re getting the full benefits of the omega-3s in the supplement.
Also, choose products that are third-party tested. Reputable brands will test their oils for harmful contaminants like heavy metals, PCBs, and oxidation levels. This helps ensure the oil is safe for your dog and that it hasn’t been compromised during production.
Liquid vs. Capsules
Fish oil comes in two common forms: liquid and capsules. Liquid fish oil (often found in pump bottles) is convenient because it’s easy to dose, but it’s more prone to oxidation once opened. Oxidation occurs when the oil is exposed to light, heat, or air, so it must be stored in the refrigerator and used quickly to maintain its freshness.
On the other hand, capsules are more stable since the oil is protected from air exposure, which reduces the risk of oxidation. However, they can be harder to dose accurately, especially for small dogs.
Oxidation Risks
One of the biggest concerns with fish oil is oxidation. Omega-3s are very sensitive to light, heat, and oxygen, and when the oil oxidizes, it can lose its effectiveness and even become harmful. Signs of rancid fish oil include a strong fishy smell or an unusual taste.
To minimize the risk of oxidation, here are a few tips:
Choose dark glass bottles instead of clear plastic, as glass helps protect the oil from light exposure.
Store the fish oil in the refrigerator after opening to keep it fresh.
Use the oil within 30 to 60 days of opening to ensure you’re getting the best quality.
By taking these steps to choose a high-quality fish oil and storing it properly, you can help ensure your Cavalier gets the full benefits of omega-3s for their heart, joints, and overall health.
Green-Lipped Mussels: A Powerhouse for Joint Support
Green-lipped mussels (Perna canaliculus), native to New Zealand, are one of the most beneficial natural sources of omega-3s for dogs. Unlike traditional fish-based omega-3 supplements that provide primarily EPA and DHA, green-lipped mussels contain a unique omega-3 fatty acid called ETA (Eicosatetraenoic Acid). ETA has been found to have additional anti-inflammatory properties, making it especially helpful for dogs suffering from joint issues like arthritis.
The anti-inflammatory effects of ETA, along with the presence of glucosamine and chondroitin, make green-lipped mussels an excellent option for promoting joint health. These compounds work together to support cartilage repair, reduce inflammation, and enhance mobility in dogs experiencing joint stiffness or discomfort. This combination is particularly beneficial for dog breeds, like Cavaliers, that are prone to developing joint issues as they age.
Comparing Omega-3 Content in Green-Lipped Mussels vs. Fish
In terms of EPA and DHA content, green-lipped mussels may not provide as high a concentration per serving as fatty fish, but their ETA provides an extra layer of anti-inflammatory benefits. This makes green-lipped mussels an excellent addition to a dog’s diet, particularly for those with joint concerns.
How to Feed Green-Lipped Mussels to Your Dog
Green-lipped mussels are often available as freeze-dried powder or in chewable treat forms. Both forms make it easy to incorporate them into your dog’s daily routine, but the powder can be sprinkled over food or mixed into homemade dog meals for ease of use.
As with any supplement, it’s important to start with a small amount to monitor how your dog responds, especially if they are new to green-lipped mussels or have a sensitive digestive system. For the dosing of green-lipped mussels, it’s always best to refer to the product-specific guidelines since the concentration can vary depending on the form (freeze-dried powder, chewables, etc.) and brand. However, a general recommendation often seen in supplements for dogs is:
Start with 1/4 teaspoon per 10 pounds of body weight per day for powder form. This can be adjusted based on the dog’s response and their specific needs.
Plant-Based Omega-3s: Less Effective for Dogs, but Still Valuable
When it comes to omega-3 fatty acids, plant-based options are less efficient for dogs compared to animal sources like fish, as they primarily contain ALA (alpha-linolenic acid). While ALA is an essential omega-3 fatty acid for humans, dogs face challenges in converting ALA to the more bioavailable forms, EPA (eicosapentaenoic acid) and DHA (docosahexaenoic acid), which are the forms most beneficial for their health. This makes plant-based omega-3s less effective for dogs in supporting the same health benefits as those derived from marine sources.
Why ALA Is Less Effective for Dogs
Dogs have a relatively inefficient ability to convert ALA into EPA and DHA. The process of conversion requires specific enzymes, which dogs do not produce in large enough quantities to convert sufficient ALA into the needed forms of omega-3s. As a result, while plant-based omega-3s can still offer some benefits, they are not as effective at delivering the omega-3s that support joint health, cognitive function, and heart health in the same way that fish-derived omega-3s do.
Nevertheless, plant-based sources of omega-3s are still valuable as part of a balanced diet. They can provide supplemental omega-3s and contribute to overall health but should not be relied on as the primary omega-3 source for dogs.
Common Plant-Based Omega-3 Sources
Flaxseeds: Flaxseeds are one of the most popular plant-based sources of ALA omega-3s. They can be ground and added to your dog’s food. However, the conversion rate of ALA to EPA and DHA is low in dogs, so while flaxseeds may offer some benefits, they should not be relied on exclusively for omega-3 needs.
Chia Seeds: Like flaxseeds, chia seeds are rich in ALA. These tiny seeds are highly nutritious and can be added to a dog’s meals. They can absorb water and form a gel, which can be helpful for digestive health. While chia seeds may offer some benefit, they should be seen as supplementary, not primary, sources of omega-3s for dogs.
Hemp Seeds: Hemp seeds contain ALA as well, along with a well-balanced ratio of omega-3 and omega-6 fatty acids. While these can contribute to overall fatty acid intake in dogs, their conversion to EPA and DHA is also limited. Hemp oil, a more concentrated form, may be more effective but still not as efficient as fish oil or algae oil in providing the omega-3s dogs need for optimal health.
Algae Oil: The Better Plant-Based Alternative
While plant-based sources like flaxseeds and chia seeds are valuable in certain aspects, algae oil is usually a better plant-based option for dogs. Algae oil is derived from marine algae, which naturally produce DHA (and sometimes EPA) without requiring the conversion process. Unlike other plant-based sources that contain ALA, algae oil provides a direct source of DHA, the omega-3 that plays a critical role in brain function, heart health, and reducing inflammation.
Algae oil is especially beneficial for pet parents who prefer to avoid fish-based products for ethical, environmental, or allergy reasons. It provides the same essential omega-3 fatty acids found in fish oil, but without the potential risks associated with mercury contamination or fish-based allergens. This makes algae oil a great plant-based alternative for ensuring your dog receives the health benefits of omega-3s.
Algae oil supplements are available in capsules or liquid form and can be incorporated into your dog’s diet just like fish oil. The recommended dosage varies by brand, so it’s important to follow the manufacturer’s guidelines and consult your vet to ensure the right amount for your dog.
While algae oil is a great alternative to fish oil, there are a few differences to consider. One of the main differences is that fish oil generally contains more EPA, an omega-3 that is particularly helpful for reducing inflammation and supporting joint health, while algal oil tends to have more DHA, which is important for brain and eye health. Because of this, if your dog needs more EPA for inflammation or joint issues, fish oil might be a better choice. Additionally, algae oil can be more expensive than fish oil, and it may not be as widely available in stores. Another thing to note is that fish oil is often more bioavailable, meaning it’s easier for dogs to absorb and benefit from. That said, algae oil is still a very good option, especially if you’re looking for a more sustainable, vegetarian, or fish-free supplement. It’s always a good idea to talk to your vet about which type of omega-3 is best for your dog’s specific health needs.
How Much Omega-3 Does Your Cavalier Need?
For general health, the recommended omega-3 dosage, specifically EPA and DHA, is typically between 20 to 55 mg per pound of body weight per day. If your Cavalier has specific health issues, like arthritis or inflammation, the dosage may increase to 50 to 100 mg per pound. If your dog is lacking omega-3s, you might notice signs like dry skin, excessive shedding, joint stiffness, or a dull coat. To ensure you’re giving the right amount, it’s important to consult your vet, who can recommend the proper dosage based on your dog’s size and health concerns.
Final Thoughts
Omega 3s are essential for your Cavalier’s overall health, supporting heart, brain, joint and skin function. By incorporating a variety of high quality omega 3 sources such as fish, green lipped mussels and supplements, you can ensure your Cavalier King Charles Spaniel receives a well rounded intake of these beneficial fatty acids.
Quality matters, so focus on bioavailable forms of EPA and DHA, and always rotate the sources you use to prevent imbalances. Whether you opt for fresh fish, fish oil or green lipped mussels, it’s crucial to store and handle these sources properly to avoid oxidation.
Before making any changes, check with your veterinarian to tailor an omega 3 plan that best suits your Cavalier’s individual health needs. Consistently including omega 3s in their diet will support long term health and vitality, helping your dog thrive at every stage of life.
Do you feed your Cavalier fresh fish?
Google Ad Below [...]Read more...
April 17, 2025Gentle, Safe, and Effective for Our Sensitive Cavaliers
Fleas and ticks. Just hearing those words makes me itch. But as a natural Cavalier Mom, I’ve always been cautious about what I put on or in my dogs, especially with delicate and sensitive breeds like Cavalier King Charles Spaniels. These little sweet hearts often have sensitive skin, luxurious coats, and sometimes underlying conditions like Chiari malformation or syringomyelia, which can make them more vulnerable to adverse reactions.
I’ve been on this natural journey for years, first with Dexter and now with Stewart. Along the way, I’ve learned that staying chemical-free when it comes to flea and tick care is absolutely possible, it just takes a little planning and a lot of label reading.
This is the natural flea and tick routine I’ve found works best for my Cavaliers.
Why I Choose a Natural Approach for My Cavalier King Charles Spaniels
Conventional flea and tick treatments may offer quick results, but they also come with serious risks. Side effects can range from skin irritation, itching, and digestive upset to more concerning issues like tremors, seizures, and in some cases even organ damage. These are not small concerns.
For a breed like the Cavalier King Charles Spaniel, those risks are even more concerning. Cavaliers are already prone to neurological conditions like Chiari malformation, seizures, tremors, and episodic falling syndrome. I’m especially cautious about using anything that lists seizures or neurological side effects as possible outcomes. It just doesn’t make sense to use a treatment that could trigger the very issues this breed is already vulnerable to.
Choosing a natural approach isn’t about trying to be perfect. For me, it’s about reducing chemical exposure wherever I can and building a thoughtful, layered prevention plan that supports overall health instead of relying on a single product to do it all.
My Natural Flea and Tick Prevention Plan for My Cavalier King Charles Spaniel
1. Regular Grooming and Bathing-I bathe Stewart every three to four weeks using a safe, gentle dog shampoo made without synthetic preservatives, artificial fragrances, or harsh surfactants. I’ve been using 4-Legger’s USDA-certified organic formulas for years because I trust their ingredient panel and transparency. They have a variety of formulas that help deter ticks and fleas.
Bathing regularly doesn’t just clean your Cavalier. It helps interrupt the flea life cycle. A good soak and lather can wash away flea eggs, dirt, and debris that might attract pests. When I use a shampoo that includes properly diluted essential oils known to repel fleas and ticks, it gives Stewart an extra layer of protection even after his bath is done.
2. Natural Tick and Flea Sprays for Daily Protection-Before every walk, I spray Stewart with a natural flea and tick repellent. I pay close attention to his legs, chest, tail, and belly, basically anywhere that might brush up against grass, shrubs, or wooded areas. These sprays are one of our most important layers of protection, and I use them daily during warm weather or anytime we’re heading into a high-risk area.
Over the years, I’ve rotated between trusted store-bought options and homemade recipes using properly diluted dog-safe essential oils. I always avoid sprays with synthetic preservatives or ingredients that could irritate a dog’s skin.
When I make my own, I tailor the recipe to the season, the environment, and even the behavior of my dog. Dexter, for example, used to try to catch bees, so I avoided blends with oils like rose geranium that might attract them. The key with any natural tick and flea spray is to apply it each time your Cavalier goes outside. These blends are not designed to last for hours at a time, and a quick re-spritz before each outing is what really makes the difference. I keep a bottle near the door so it becomes part of our daily walking routine.
DIY Natural Flea and Tick Spray for Dogs
This is one of my favorite natural sprays to help keep fleas and ticks at bay, without resorting to harsh chemical treatments. It’s simple to make, and you can use it on both your dog and yourself before heading outside.
What You’ll Need:
3 ounces distilled water
1/4 ounce vodka or grain alcohol (helps disperse oils evenly)
1/4 teaspoon vegetable glycerin (moisturizing and helps blend)
Essential Oils:
4 drops Cedarwood– repels fleas and ticks while being gentle on skin
4 drops Geranium– especially helpful against ticks
3 drops Lavender– calming and gently repels insects
1 drop Citronella– useful for deterring mosquitoes, fleas, and ticks
1 drop Peppermint– offers cooling relief and additional repellent support
How to Make It: Add all the ingredients to a 4-ounce (or larger) amber or cobalt blue glass spray bottle. Shake gently to combine.
How to Use It: Before walks or time outside, shake well and lightly mist your dog’s legs, belly, tail, and along the back. Always avoid spraying near the face and eyes. For areas like the ears, chest, or neck, spray a small amount into your hands first, then gently rub it into your dog’s fur. This helps you apply it more precisely and makes sure it reaches the coat and skin. Always apply when your dog is dry for best results.
Storage Tip: Store your spray in a cool, dark place and an amber or cobalt glass bottle helps protect the essential oils from light exposure, which can cause them to break down over time. Shake before each use to keep the oils properly dispersed.
Simple DIY Natural Flea and Tick Spray for Dogs
When I first started making Dexter’s flea and tick sprays, I kept things really simple. I used just distilled water and a few carefully chosen essential oils. Using just distilled water and essential oils is a great option if you plan to make small batches and use them up fairly quickly. It is easy, gentle, and perfect for Cavalier parents who want something simple. You will still need to shake the bottle well before each use, just like with any natural spray.
If you want your spray to blend a little more evenly and stay fresher a little longer, using the above recipe with the grain alcohol and vegetable glycerin can help. Alcohol acts as a natural preservative and helps the oils disperse a little better through the water. Glycerin can also add some moisture to the coat and skin.
Both options are good, it really depends on what fits best with your dog’s needs and your routine. If you are going through the spray quickly, distilled water and oils work just fine. If you want a little more staying power and an extra moisturizing boost, the version with alcohol and glycerin might be a better fit.
You can also check out four of Dexter’s natural flea and tick spray recipes on my Raising Your Pets Naturally blog.
Watch now and don’t forget to subscribe to @RaisingYourPetsNaturally YouTube for more!
Why Different Natural Tick and Flea Sprays Work for Different Dogs
One thing I learned through experience and from chatting with other natural pet parents is that not every spray works the same way for every dog. Some ticks are more common in certain regions and are repelled by specific essential oils. That’s why I rotate between formulas and stay flexible with what I use. If something stops working, I adjust. It’s not failure, it’s just part of the process.
3. Apple Cider Vinegar for Flea and Tick Support-Raw, unfiltered apple cider vinegar (ACV) is another natural tool I like to keep on hand as part of a layered approach to flea and tick prevention. While it won’t kill fleas or ticks, it can help make your dog less appealing to them.
You can make a simple spray by mixing equal parts raw ACV and distilled water in a spray bottle and lightly misting your dog’s legs and belly. Just be sure to avoid the face, and only use it on healthy, unbroken skin. If your dog has any skin sensitivities or open spots, it’s best to skip ACV topically.
You can also add a small amount of ACV to your Cavalier’s food or water. Not all dogs tolerate vinegar well, especially those with sensitive stomachs or urinary issues. It’s also important if you add it to your Cavalier’s water, they also have non-altered fresh water available.
4. Amber Collars for Natural Flea and Tick Repellent Repellant-Another layer is a raw Baltic amber collar. These collars are made from unpolished amber resin that naturally releases aromatic compounds when warmed by your dog’s body. These compounds can help repel ticks and fleas without adding any scent or chemicals to your dog’s skin.
While I wouldn’t rely on them as the only form of protection, I absolutely feel they can help in the overall care to keep our Cavaliers tick and flea free naturally. They’re lightweight, chemical-free, and easy to clip on. With Cavaliers, just make sure the collar sits comfortably behind their ears and doesn’t tangle with their feathering. If your Cavalier has Chiari malformation, this may not be an option if they can’t wear a collar comfortably.
5. Ultrasonic Tick Tags-Another tool to add to your flea and tick routine is an ultrasonic tick tag. There are various brands that make these small devices that clip onto your dog’s collar or harness. They emit a high-frequency pulse that humans and dogs can’t hear, but it’s designed to interfere with a tick or flea’s ability to orient themselves toward your dog.
These tags are scent-free and totally safe for sensitive dogs like Cavaliers. This type of tag is helpful during hikes, trail walks, or visits to areas known for higher tick populations. It’s a simple, noninvasive step that adds an extra layer of protection.
6. Diatomaceous Earth for Natural Flea and Tick Prevention-Food-grade diatomaceous earth is another natural tool I use as part of our flea and tick routine. It’s a fine powder made from fossilized algae that works by drying out the exoskeletons of pests like fleas and ticks. I don’t use it as a primary prevention method, but it’s a helpful layer, especially after we’ve been somewhere with higher pest exposure.
To apply, I lightly sprinkle a small amount down Stewart’s back and gently brush it into his coat, avoiding his eyes, nose, and mouth. It’s best used when your dog is dry and in a well-ventilated area. You can also use it on bedding or around baseboards during flea season as part of a regular cleaning routine.
Watch how I apply it and don’t forget to subscribe to @CavalierTipsandFun YouTube channel for more!
7. Using Garlic to Support Immune Health and Repel Fleas Naturally-Garlic might be controversial in some circles, but when used responsibly, it’s one of my go-to immune support tools. Garlic often gets a bad reputation because in 2000, they did a study on four dogs and gave them an extreme amount of garlic ( about 25 cloves a day for a 25-pound dog), and they had a bad reaction. That’s not even close to how we’d use garlic in a natural, supportive way. You can read the study here.
I started using fresh garlic years ago with Dexter, and it’s something I continue with Stewart now that he’s old enough for it. Garlic supports the immune system and helps repel fleas and ticks from the inside out. I only use fresh, organic garlic, peeled and minced about ten minutes before mealtime to allow the allicin to activate. Then I mix it into Stewart’s food. I never exceed the recommended amount and only feed garlic for up to three days in a row, followed by five to seven days off.
I never use garlic with puppies, pregnant or nursing dogs, dogs with anemia, or those with upcoming surgeries. It’s not a fit for every dog, so I always recommend checking with a holistic vet first.
Garlic Dose For Dogs: The approximate dose of fresh, organic garlic is 1/8 teaspoon for a 5 pound dog, 1/4 teaspoon for dogs between 6 and 10 pounds, 1/2 teaspoon for 11 to 15 pounds, 3/4 teaspoon for 16 to 20 pounds, and 1 teaspoon for dogs between 21 and 30 pounds. Dogs between 31 and 50 pounds can have 1 1/2 teaspoons, and those over 51 pounds can have up to 2 teaspoons.
8. Spotting and Removing Ticks and Fleas from Your Cavalier King Charles Spaniel-No matter how many prevention tools we use, I always do a hands-on check after walks or outings, especially during peak tick season. I check Stewart’s paws, armpits, ears, groin area, and the base of his tail. These are the spots where ticks love to latch on.
If I do find a tick, I remove it immediately with a tick remover or fine-point tweezers, making sure to grab close to the skin and pull straight out. Afterward, I place it in a bottle with alcohol and wash my hands. I’ve found this routine not only gives me peace of mind but also helps me stay in tune with any changes in Stewart’s skin or coat.
A Quick Note About Dexter’s Experience
As Dexter was in his late senior years and his neurological condition progressed, I started to notice the occasional flea here and there, more than we had seen in the past. His immune system wasn’t as strong, and that likely made him more vulnerable to pests. This isn’t uncommon in aging dogs or those with health challenges. Their bodies just don’t have the same defenses they once did.
I made it a daily routine to sit with Dexter and go over him carefully with a flea comb and a small jar of alcohol to catch any runners before they could become a real problem. I also stayed on top of sweeping and washing his bedding regularly. Thankfully, it never got out of control, just a flea here and there, but it reminded me how important it is to stay consistent.
It also reinforced why I’ve always chosen to avoid harsh flea treatments. With Dexter’s compromised system, exposing him to chemicals could have caused even more serious issues. Supporting his health naturally, with gentle and consistent care, was always the safest choice for him.
Final Thoughts on Natural Flea and Tick Care for Cavaliers
If you’re just starting your natural flea and tick care journey, start small. You don’t have to change everything at once. Pick one new step, try it, and see how it fits your dog’s life. Read labels. Ask questions. And most of all, give yourself grace as you navigate what feels right for you and your Cavalier.
Cavaliers are worth the extra effort, and with how sensitive they can be, choosing gentle, natural care just feels like the right thing to do.
Google Ad Below [...]Read more...
November 27, 2024Does your Cavalier King Charles Spaniel bark for attention? Maybe your Cavalier tosses a toy onto your lap, begging for a game of fetch. Or perhaps your Cavalier King Charles Spaniel barks incessantly to go outside and chase every squirrel in the neighborhood. These are classic examples of attention-seeking behavior and, while they may be funny at times, they can also become exhausting.
In this Cavalier blog, I’ll guide you through training your Cavalier to ask for attention politely or, even better, stop demanding attention altogether. But first, let me be clear. I am all about spending quality time with our dogs. Cavaliers thrive on love, play, and companionship, and I encourage plenty of bonding time. However, constant barking or pushy behaviors for attention are not things I would encourage in a dog. With positive dog training methods, good timing, and a proactive approach, we can change this demanding behavior.
Why Does My Cavalier Bark at Me for Attention?
Cavaliers are a playful breed and incredibly intelligent. They are quick learners and can learn behaviors we don’t even know we are teaching them, like barking for attention. Some Cavaliers may learn to bark for attention, paw, nudge, or give you the “look” for that snack. If they have done one or all of these things, and you gave them what they wanted, they’ve already made the connection: This behavior gets me what I want. For example, if barking speeds up dinner prep or prompts you to throw the ball, your Cavalier has been “trained” by their success.
But, don’t worry. You can change these demanding behaviors to better habits. So, let’s get started at teaching your Cavalier to be calm and quiet for the things they want.
Steps to Stop or at Least Curb Attention-Seeking Behaviors
Increase Quality Time: Cavaliers are highly social and crave interaction. You know that. That’s why they are your breed of choice, right? If your pup is constantly asking for attention, they may feel their current playtime or bonding time isn’t enough. Start by increasing their daily activities by about 50 percent. For example, if you play games with your Cavalier five times a day, bump it up to seven or eight short sessions. The same goes for walks, training, or cuddle sessions. Increase the duration or quantity of their interactive activities. And I do mean interactive vs. just placing a food toy on the floor. Those are all fine and well, but, in most cases, your Cavalier is craving your time. Read more about canine enrichment.
Get Ahead of the Demands: Observe when your Cavalier typically starts seeking attention. If they usually bark for play at 11 a.m., initiate a play session at 10:45 instead. By starting the activity before they ask, you’re rewarding their good and polite behavior rather than their pushiness.
Ignore Pushy Behaviors: This is key. When your Cavalier barks, paws, or demands attention in any way, practice the “invisible dog” technique. Avoid eye contact, verbal responses, or movement. Turn away, walk out of the room, or stay still. Once your Cavalier is quiet, calmly reengage and reward them for being polite. But, this only works if you do #1 and increase that quality time together. If you don’t do that, ignoring won’t work because their needs are not being met.
Pro Tip: Be prepared for an “extinction burst.” Your Cavalier may escalate their behavior temporarily, barking louder or pawing more persistently because the old tactics aren’t working. They are getting frustrated. Stay patient and consistent.
Reward Calm and Quiet: Every time your Cavalier is calm and quiet, offer attention, praise, or even a small treat. Reinforcing this behavior teaches them that being polite is the best way to get what they want. This is also the perfect time to initiate a game or play session with your Cavalier.
Teaching self control is a great way to help curb barking.
Patience Is Key
Changing established habits takes time, so be patient with your Cavalier and yourself. Remember, they’re simply trying to communicate their needs the only way they know how. With consistent positive dog training and a little extra quality time, you’ll soon have a polite pup who doesn’t feel the need to ask for attention because you are providing them all the attention they need and desire.
Real-Life Example: Dexter’s “Talking”
Even my sweet Dexter isn’t perfect. He’s been known to “talk” or snort to get his way, and sometimes it works because I’m not perfect, either. Not to mention, there are two other family members who have been known to reward his ask. And, when it’s rewarded, it persists. If I wanted to fully address this behavior, I’d need to follow the steps above consistently and MAKE SURE the other two members of the family do as well. But, in our home, a little talking is something we tolerate because it doesn’t bother us.
That’s the beauty of training: you get to decide what behaviors matter to you. If something doesn’t bother you, there’s no need to change it, as long as it’s not something that should be addressed like anxiety. Just remember that if you allow certain behaviors, it’s important not to complain about them later.
Check out my playlist on barking!
What You Can Do Next
Now that you have the tools to manage your Cavalier’s attention-seeking behavior, it’s time to put them into action. Start by increasing quality time with your dog, introducing play sessions before they ask for attention, and practicing the “invisible dog” technique when pushy behaviors pop up. Remember, consistency is key, and patience will help you both succeed. With time, you’ll see your Cavalier becoming more polite and less demanding, leading to a stronger bond and fewer unwanted behaviors.
What’s your dog’s favorite way to spend quality time with you?
Join our vibrant Cavalier King Charles Spaniel community on Facebook, support our dedication to pet wellness on Patreon, and stay updated with our weekly newsletter for invaluable tips and insights into raising happy, healthy pets. Together, let’s make a difference in our dogs’ lives!
Google Ad Below [...]Read more...
March 19, 2025How to Teach Your Cavalier King Charles Spaniel to “Leave It” | Positive Training for Cavaliers
Teaching your Cavalier King Charles Spaniel to “leave it” or ignore something on your cue can be lifesaving. Imagine dropping a pill in front of your Cavalier or going for a walk and passing garbage in the street. If your Cavalier King Charles Spaniel has a reliable “leave it” cue, you can easily ask him to leave it as you pick up the pill or walk past the garbage.
When I start the “leave it” training, what I want my dog to learn is that “leave it” doesn’t mean he doesn’t get something, but that I have something better. This helps to build a more reliable behavior, especially off-leash. If you only teach your dog that “leave it” means he doesn’t get something, he might just try to grab the item faster or run off with it. That’s not what we want!
As with all dog training, remember that you need to regularly practice these lessons. Training your Cavalier is not just about doing it once and then only when you need it. Reliable dog training takes time, patience, and consistency. Cavalier King Charles Spaniels, in particular, can be a bit food-driven, so keeping them engaged and excited about the reward is key.
So, be patient, consistent, and most importantly, have fun with your Cavalier while training!
Teaching Your Cavalier to Leave It Level 1
Start with a small, low-value dog treat in your closed hand, and place it about 12 inches to the side of your Cavalier’s face. Make sure your hand is at the right height, not too close to his face, but not too far away either. Let your dog see it there, and wait him out. As soon as he moves his face away or ignores the treat, say, “YES!” and reward him with an amazing treat from your other hand. Not going for the treat is a win, too! So, if you present the leave it treat hand and he doesn’t go for it, “YES!” and treat. Repeat this a few times.
When your Cavalier starts ignoring your treat hand altogether, move to Level 2.
Don’t forget to subscribe to our @CavalierTipsandFun for more!
Teaching a Dog to Leave It Level 2
Start like Level 1, but before you drop your hand, say your “leave it” cue once. Wait him out; as soon as he moves his face away or ignores the treat, say, “YES!” and treat from your other hand. Repeat. When he stops going for your hand after hearing the “leave it” cue, move to Level 3.
Training Your Cavalier to Leave It Level 3
Say your “leave it” cue and drop your hand with the low-value treat to your dog’s side, but leave your hand OPEN. If he goes for the treat, quickly close your hand. When he moves his face away, praise and reward him with a treat from your other hand. Repeat. When your Cavalier is reliably ignoring the treat in your open hand, move to Level 4.
Teaching Your Cavalier to Ignore Items Level 4
At this stage, it’s time to change things up a bit. Up until now, you’ve been using low-value, boring dog treats for the “leave it” item. Once your dog is starting to get the hang of it, it’s time to up the ante. Use tastier treats or toys as the “leave it” item, but remember, his reward needs to be even better.
You can try:
Tastier treats or food
Paper products, tissue, or paper towels
Toys
Subscribe to @RaisingYourPetsNaturally for more!
Here’s how to set it up when using a toy:
Pick a Toy: Choose a toy that your Cavalier likes but isn’t so high-value that your Cavalier would immediately grab it without hesitation. Start with something mildly exciting like a squeaky ball, fleece tuggy toy, or stuffed animal that your dog enjoys.
Set Up the Training Area: Find a quiet spot where you can focus and your dog isn’t too distracted by other things. Make sure it’s a place where you can manage your dog’s movement and reactions.
Start the Cue: Hold the toy in your hand and get your dog’s attention. Don’t get too silly. You just want him to know it’s there, with a bit of excitement.
Use the “Leave It” Cue: Once you’ve gotten his attention, say the “leave it” cue calmly. Hold the toy in front of your dog just out of reach, but don’t place it on the ground yet.
Wait for the Response: Your dog may try to lunge for the toy or show interest in it. The goal here is for him to move away or ignore it, not to grab it. If he goes for it, just swipe the toy up to your chest and ignore him and wait for him to ignore it. Then repeat the process of lowering your hand with the toy. As soon as your dog turns his head or steps away from the toy, immediately say “YES!” and give him a better reward (a tastier treat or something that’s even more valuable than the toy).
Repeat and Increase Difficulty: Repeat the exercise several times, and gradually increase the difficulty. Once your Cavalier reliably ignores the toy when it’s held in your hand, move on to placing the toy on the ground. To set this up, place the toy behind you, out of reach. This way, you can gently body block your dog if he tries to move toward it. When he turns away or ignores the toy, immediately reward him with a better treat or better toy.
Body Blocking: Body blocking involves using your own body to gently guide your dog away from a distraction, like a toy, by positioning yourself between your dog and the item. It’s important to note that body blocking is not about kneeing or being rough with your Cavalier. It’s a gentle, calm way to redirect their attention. However, some dogs may find body blocking intimidating or scary, so if your Cavalier shows signs of stress, it’s best to avoid this method and use alternative techniques for redirection.
Build Duration: As your Cavalier gets more comfortable with the “leave it” cue around toys, try holding the cue for a longer period of time. For example, you can wait for him to sit or stay before rewarding him. This increases his patience and focus during the exercise.
Training Your Cavalier to Leave Something Level 5
Place a low-value treat under your cupped hand, with your dog in front of you. Say your “leave it” cue, and wait for your Cavalier to ignore the treat. If he looks away or shows interest but doesn’t try to grab it, immediately reward him from your other hand with a better treat.
As he gets the hang of this, start showing the “leave it” treat under your cupped hand. If your dog ignores the treat, reward him from your other hand. If he tries to go for the treat, simply cup your hand over the treat again. Repeat this process, gradually raising the criteria by making the treat more tempting and testing his ability to resist.
Teaching Your Cavalier to Leave It Level 6 and Beyond
Now it’s time to make things more challenging. Increase the difficulty by adding distractions, different environments, or a variety of leave-it items. Always be mindful of your Cavalier’s current ability level, and don’t rush the process. If you find your Cavalier is struggling or making mistakes, step back and simplify the task again. You want to build confidence and reliability.
Reminders:
Never allow your Cavalier to get the “leave it” item. If you want your Cavalier to have it, you pick it up and give it to him. The goal is to teach him that ignoring the item leads to something better, not just an empty reward.
If your Cavalier is having trouble with the exercise, step back to easier levels or increase the value of the reward to keep him motivated and engaged. You can also try lowering the difficulty by using a less tempting “leave it” item to help him succeed.
The goal isn’t just for your Cavalier to avoid the item once, but to understand that when you say “leave it,” he has the chance to earn something even better. The more your dog experiences this rewarding outcome, the more reliable the behavior will become.
Pro Tips:
Keep training sessions short, positive, and fun! Don’t let the “leave it” item overwhelm or frustrate your Cavalier. If he’s struggling, simplify the task and increase the reward to keep him interested and motivated.
How Often Should You Practice the Leave It Behavior with Your Cavalier?
It is important to regularly practice “leave it” throughout the day, not just during formal training sessions. You can incorporate it during walks, around the house, or when playing. As you add distractions, make sure to reward your Cavalier for staying focused on you, especially when there are high value items around. Cavaliers are generally quick learners, but they can also get bored easily, so keep your training sessions positive and fun. Consistency and patience will pay off in the long run.
Pro Tip: Practice, practice, practice with various setups. You want your Cavalier to respond reliably to the “leave it” cue in real life situations, whether it is a dropped item, an enticing smell, or something on the floor. By practicing regularly, you ensure they will leave it without hesitation. I still reward those real life “leave its” to keep the behavior strong and consistent!
Conclusion
Practicing “leave it” regularly and in different situations helps ensure your Cavalier responds reliably when it matters most. Keep training sessions fun and rewarding, and don’t forget to reinforce real-life successes. Teaching a solid fetch and “drop it” will also complement “leave it,” giving your Cavalier even more useful skills. With consistency and patience, your Cavalier will continue to improve and make great choices in everyday life.
How is your leave it training going? I’d love to hear about it in the comments!
Google Ad Below [...]Read more...
April 29, 2025Your Cavalier King Charles Spaniel’s Teenage Phase
When you bring home a Cavalier King Charles Spaniel puppy, you are prepared for puppy breath, floppy ears, and all the adorable moments that melt your heart. What nobody talks about enough is what happens when that sweet ball of fluff hits adolescence.
Right now, Stewart, my Cavalier, is about 10 and a half months old and is in full-blown teenager mode. I can tell you firsthand that adolescence is real. Stewart has energy for days, wild bursts of zoomies, and a mischievous sparkle in his eyes that keeps me on my toes. My mom, who adores him, often comments, “He is always getting into trouble!” (Of course, to me, it is not real trouble. It is boredom, enthusiasm, and a young dog who is eager to interact and explore.)
She often compares him to my late Cavalier, Dexter, who lived to be 15 years old. In her memory, Dexter was the perfect, calm little gentleman. And he was, but only after years of growing up. It is easy to forget that Dexter had his own crazy adolescent phase, too. I still remember the day I found myself saying, “You are going to eat, you are going to potty, and you are going to bed!” Sometimes, when puppies get extra wild, it is not even about training. They are simply overtired and need help settling down. Just like toddlers, sometimes they push through their exhaustion and get even more wired.
If you are going through the teenage years with your Cavalier right now, you are not alone. And no, you did not do anything wrong. Adolescence is a natural stage in a dog’s development. In Cavaliers, it usually starts when those puppy teeth begin falling out (around four to six months old) and can last until about eighteen months, give or take depending on the dog.
During this phase, your Cavalier might:
Forget their basic training
Start jumping up more
Become mouthier and more vocal
Seem to ignore you sometimes
Have random bursts of wild energy (we call them “zoomies”)
Get into things they never bothered with before
Show frustration or impatience more easily
Does that sound familiar?
It is important to remember that your Cavalier’s brain is still developing. Just like human teenagers, they are caught between puppyhood and adulthood. Their impulse control is not fully in place yet. The good news? This phase is temporary. And your patience and guidance right now will shape your Cavalier for the rest of their life.
Here is how I am helping Stewart (and helped Dexter before him) navigate this time:
Stay Consistent with Positive Dog Training: Even if your Cavalier seems to have forgotten what “sit” or “stay” means, keep practicing. Short, daily sessions with positive reinforcement go a long way. Stewart and I do a lot of quick “name games,” sits, hand targets, and polite walking games to keep his brain engaged.
Build in Play and Enrichment: A bored adolescent dog is a mischievous dog. I make sure Stewart has plenty of fun activities like sniffy walks, find-it games, fetch sessions, and interactive toys. Play is not just fun, it is a training tool. A dog that plays with you is a dog that trusts you.
Manage the Environment: I always try to be proactive with management first. If I think Stewart might start getting rowdy or restless, I plan ahead. Before I get busy, I will take him for a nice walk, do some training or play a game before I need to settle in. Then, I’ll provide him with something to keep him busy, like a snuffle mat, chew toys or licky mat. That way, he already has something to focus on instead of looking for ways to entertain himself. Managing the environment is not about waiting for problems to pop up. It is about setting your Cavalier up for success before trouble starts.
Provide Enough Rest: After Stewart works on his snuffle mat, chew toy, or licky mat, and has had a little training or a nice walk, he is usually ready to settle. That is when he curls up for a siesta at my feet while I do my work. Remember that story about Dexter? Sometimes the wild behavior we see is not from a lack of exercise. It is from being overtired. Puppies and adolescent Cavaliers still need a lot of sleep throughout the day. Building in scheduled downtime helps them reset and recharge before they get into trouble from being too tired to make good choices.
Focus on Trust and Bonding: During a dog’s adolescence period, it is easy to get caught up in the frustrating moments when your Cavalier is ignoring you, getting too wild, or pushing boundaries. But I always try to remind myself that every interaction with Stewart is an opportunity to build our relationship. Trust and connection are even more important during this teenage stage. Adolescence is a time when Cavaliers are figuring out the world and deciding who and what they can count on. I want Stewart to know that I am always safe, fun, and trustworthy. That way, when things get tricky, like going to the veterinarian or navigating a new place, he will look to me for guidance and reassurance. The stronger the bond we build now, the more confident and connected he will be as an adult.
Keep a Sense of Humor: Adolescent dogs can be frustrating at times, no doubt about it. But it also brings some of the funniest, most joyful memories. Stewart’s goofy antics, the way he proudly carries a pinecone, his dramatic “flops” when he does not get his way, these are the moments I know I will smile about years from now.
If you are raising a Cavalier King Charles Spaniel and feeling overwhelmed by the ups and downs of adolescence, you are not alone. This stage can feel overwhelming on some days, but every patient, playful, and consistent moment you put in now is shaping your Cavalier’s future. All the work you are doing today will help your Cavalier grow into a confident, connected, and loving companion for many years to come.
If you would like more step-by-step help through this stage, I would love for you to join us in our Manners, Life Skills, and Foundation Training course. Inside the course, I walk you through building polite greetings, calm walking, settling skills, and helping your Cavalier stay more focused and connected with you. It is all about giving you the tools to guide your Cavalier through adolescence and beyond with patience, confidence, and fun.
At What Age Do Cavaliers Calm Down?
If you are raising a young Cavalier King Charles Spaniel and wondering when your Cavalier will calm down, it is a common question during the teenage phase. Cavaliers usually start to settle after they move through adolescence, which can last until around eighteen months to two years of age. Some Cavaliers might take a little longer depending on their personality and energy level.
Maturity comes with time, but it also comes with the foundation you build along the way. Positive training, daily routines, enrichment, plenty of rest, and building trust all help your Cavalier develop into a calmer and more confident companion. It is not something that happens overnight, but it does happen.
You have got this! Stay patient, stay positive, and focus on the progress you are making together. It is not about being perfect. It is about showing up, doing the work, and building a strong relationship one day at a time.
What has your Cavalier been doing lately that makes you say, “Yup, we are in the teenage stage”? I would love to hear your stories in the comments!
Google Ad Below [...]Read more...
May 23, 2025What to Do When an Off Leash Dog Approaches or Attacks Your Cavalier
Running into an off leash dog in a public area where leash laws are in place is one of those moments that gets my blood boiling. I’ve heard from too many Cavalier families who have gone through this, and sadly, I know several Cavaliers who were seriously injured. Even a couple that didn’t survive. It’s heartbreaking, it’s preventable, and we need to talk about it.
This post is for those of us doing our best to protect our dogs, especially small, gentle breeds like Cavalier King Charles Spaniels, when others decide the leash rules don’t apply to them. Whether you’re out walking your Cavalier, training, or just enjoying your day, here are real life ways to keep your dog safe and what to do if the worst happens.
Why Letting Your Dog Off Leash Puts Others at Risk
Just because your dog is friendly does not mean they should be off leash in public areas. You never know what someone else’s dog is going through. Some dogs are recovering from surgery or illness and need space. Others are working through fear or reactivity and are not ready for sudden greetings. Some are service dogs who may not be wearing a vest but are doing their job. And many dogs, Cavaliers included, simply do not want strange dogs running up to them.
This is why leash laws exist. They are there to protect everyone. Just because your dog wants to say hi doesn’t mean they should get to.
What to Do When an Off Leash Dog Approaches
There is no perfect solution that works in every situation, especially when an off leash dog charges unexpectedly. But being prepared both mentally and physically can make a real difference. These are practical ideas I have taught, used myself, and seen work in real life. While nothing is guaranteed, having a plan in place can help you stay calm, act quickly, and protect your Cavalier as best you can.
Watch the video demonstrations and don’t forget to subscribe to @RaisingYourPetsNaturally for more tips.
Teach a Sit Stay Behind You
One of the most helpful cues I teach is a sit stay with my dog positioned behind me. I start by practicing in low distraction settings and slowly build it up over time. If a dog approaches, I cue my Cavalier to sit and stay behind me, and I step forward to handle the situation. This helps my dog feel protected and keeps them from reacting or escalating the situation.
Throw Treats at the Approaching Dog
Yes, throw treats right at the dog’s face. It may sound odd, but it works. The goal is to startle the dog and interrupt their focus. Then toss more treats behind them, toward the direction they came from. This often gives you a few seconds to calmly retreat with your Cavalier. I always carry tasty treats for this reason.
Use a Traffic Cop Stance
Turn to face the dog, extend your arm out like a stop sign, and say firmly, “Stop. Go home.” Keep your Cavalier behind you and slowly back away. Some dogs will pause or hesitate if they’re unsure or not aggressive. Keep repeating the phrase and keep your hand out, as you and your Cavalier walk backwards away.
Carry an Air Horn
If your dog is comfortable with noise, an air horn can be a great deterrent. I always condition my dog to hear it at home first and pair it with treats. When needed, a quick blast can interrupt the loose dog’s approach and give you time to move away. It’s one of my go to tools, but only if your dog can handle the sound.
Use an Umbrella as a Visual Block
I train my dogs to be comfortable with umbrellas opening indoors, so they are not startled if I ever need to use one during a walk. If a dog is charging at you, pop open the umbrella toward them. The sudden motion and large shape often causes the dog to pause or back off. If necessary, you can shake it or move it toward the dog as you use a firm, go home, verbal cue.
Carry a Personal Safety Tool
Tools like pepper gel, citronella spray, taser, or even a She’s Birdie alarm can help in urgent moments. Pepper gel has more control than spray, and the alarm can attract attention or startle the other dog. Always practice with these tools and make sure your dog is not afraid of them.
Be Cautious About Picking Up Your Cavalier
It is tempting to scoop up your Cavalier, especially since they are small. But doing so can sometimes make things worse. The approaching dog may jump at you or become more aroused. Only pick up your Cavalier if you feel it will help and if you have a safe place to put them, like a truck bed, behind a fence, or even inside a garbage bin if it means protecting them. Use extreme caution if trying this.
If You’re Walking More Than One Cavalier
This is also one of the reasons I usually prefer walking one dog at a time. It helps me stay more aware, react quickly if something happens, and really connect with the dog I’m with. But I know that’s not always possible, so here’s how to stay prepared when walking more than one.
Walking multiple Cavaliers makes things trickier, especially when a loose dog starts heading your way. It can be harder to control space, stay calm, and manage multiple leashes at once. That’s why I recommend preparing a plan ahead of time if you regularly walk more than one Cavalier.
If possible, practice sit stays with each dog individually first, then gradually build up to group stays. Teach your Cavaliers that standing behind or beside you means safety. If you see a loose dog approaching, calmly guide all your Cavaliers behind you and keep their leashes in one hand while using your other hand to deter the loose dog, whether that’s with a verbal cue, a stop signal, or a safety tool.
This is also where tools like a treat toss or umbrella can really help, because they create distance without needing to physically wrangle multiple Cavaliers. And if things feel too tight, do not hesitate to turn and walk away together. Getting distance is often the safest move when you have more than one dog depending on you.
What to Do If a Dog Attacks Your Cavalier King Charles Spaniel
No one wants to think about this part, and I truly hope you never face it. But if a loose dog attacks your Cavalier, your priority becomes stopping the fight as quickly and safely as possible. This is not about hurting another dog out of anger. It is about protecting your own Cavalier King Charles Spaniel from serious harm or even death.
If you have a tool in hand, such as a stick, an umbrella, or pepper gel, use it to target the attacking dog’s face. Aim for the eyes, nose, or mouth. The goal is to interrupt the attack and create enough of a pause to safely separate the dogs. You may only have a second or two, and you need to respond fast and as hard as you can to protect your Cavalier.
If you are physically trying to break it up without a tool, one method is to grab the attacker’s back legs and swing them away from your dog. This can throw them off balance and give you a chance to create space. Do not reach for collars or faces with your hands. That is the most common way people get bitten during dog fights.
Once the dogs are separated, move your Cavalier to safety right away. If possible, secure the attacking dog so they cannot come back. Then take photos, report the incident, and document everything as soon as you can. Even if your Cavalier seems okay, a vet check is always important. Many bite wounds are deeper than they look.
Helping Your Cavalier Recover Emotionally After an Attack
This is one of the most important parts of the process, and it is often overlooked. A Cavalier who goes through a dog attack may seem fine physically, but emotionally, they can lose trust in the world around them. I have worked with dogs who suddenly freeze on walks, avoid places they once loved, or become uneasy around other dogs even from a distance.
Start by giving your Cavalier time to decompress. Skip your regular walks for a few days and let them rest in the comfort of home. The goal is to help them feel safe again while things settle emotionally and physically. Keep their day simple and supportive.
At home, bring in confidence through simple enrichment. Food puzzles, nose games, and easy trick training can help rebuild a sense of control and engagement. These games in a familiar space can make a big difference.
When you are ready to start walking again, choose quiet places where you are unlikely to run into other dogs. Early mornings, empty parking lots, or quiet nature trails can be good options. Let your Cavalier set the pace. If they want to pause and look around or head back early, that is okay.
Pay attention to the progress. If your Cavalier walks a little farther, seems more confident, or looks at you for guidance, tell them how smart they are. Praise, treat, give a chest scratch. That is how trust returns, little step by little step.
This healing process takes time. That is exactly why I created Supporting Your Sensitive Dog: Gentle Steps Toward Confidence. If your Cavalier is showing signs of fear or hesitation, this course will guide you through gentle, trust based steps to help them feel safe again.
You’re Not Overreacting
Your Cavalier deserves to walk safely. You deserve to walk without fear. And if someone chooses to ignore leash laws, you are completely within your right to protect your Cavalier, using your voice, your body, your training, or any tool you need.
So stay prepared. Be proactive. And most of all, trust your instincts. You’ve got this.
Google Ad Below [...]Read more...
May 14, 2025Kind, Reward-Based Training for Cavalier King Charles Spaniels and All Breeds
When people hear the term positive reinforcement, they sometimes picture a dog who only listens if you have food in your hand. Or they think it means never setting boundaries. I’ve had people say things like, “I don’t want to spoil my dog,” or “I heard that’s just bribing with treats.” But the truth is, positive reinforcement training is science-based, relationship-focused, and one of the most effective ways to help dogs feel confident and understand how to live successfully in our human world.
And it’s not just for Cavaliers. This approach works for every breed, every age, and every behavior challenge.
Let’s break down positive reinforcement dog training in a simple and practical way.
What Positive Reinforcement Dog Training Really Means
Positive reinforcement means adding something your dog enjoys immediately after they do a behavior you want to see again. That reward could be healthy dog treats, a toy, praise, a chance to sniff, or access to something fun. It doesn’t have to be a treat every time, but food is often the easiest and most meaningful place to start. If it’s going to be rewarding for your Cavalier, they decide. I mean, my Mom might think a slice of cherry pie is a good reward, but I don’t even like cherry pie. I’d need a slice of chocolate cake!
This type of training is grounded in how all animals learn, including us. When a behavior is followed by a good outcome, we’re more likely to do it again. Your dog sits, you give them a treat. Your dog walks calmly by your side, you let them go sniff a log. That’s positive reinforcement. You’re not spoiling them. You’re reinforcing behavior you want to see more of, and they get something pleasant in return.
How Dogs Actually Learn
Dogs don’t come into our homes already knowing how to live in them. They don’t know what “sit” means. They don’t know they shouldn’t jump on guests or grab food off the counter. Just like us, they learn by doing, and by figuring out what works.
Dogs learn through repetition. They make connections between what they do and what happens next. If they sit and a treat shows up, they’re more likely to sit again next time. That’s positive reinforcement. We’re showing them that their choices matter and that doing the thing we like leads to something they like.
When we use positive reinforcement, we’re not just trying to get obedience. We’re helping our dogs understand how to live in our world in a way that feels safe and rewarding to them. They’re not learning because they’re afraid of getting it wrong. They’re learning because they feel good getting it right.
And that’s what builds real, long-lasting behavior.
Luring Training Is Teaching—Not Bribing
At the start, we often use a food lure, like holding a treat near your dog’s nose to help them learn how to sit or lie down. We slowly move that treat in a way that encourages the action we want, like guiding their head up and back until their butt hits the ground.
That’s not bribing. It’s teaching. We’re showing them what we’re looking for.
After a few short sessions, we continue practicing the same way. Lure the sit. Reward the sit. Once the dog is starting to understand it, we ask them to follow our empty hand the same way. If they sit, we reward. Now they’re doing the behavior without seeing food first.
Once that’s going smoothly, we add the cue. Say “Sit,” move your empty hand like before, and when their butt hits the ground, reward it.
Over time, we fade the hand movement so that “Sit” becomes all they need to hear. The behavior is now on cue, and your dog learned it in a clear, kind, and effective way.
Dogs Don’t Generalize—They Need Practice in New Places
One of the biggest things people miss is that just because your dog knows how to sit in the living room doesn’t mean they know how to do it in the yard, at the vet’s office, or around a group of children. Dogs need practice in new environments. They need help when distractions are high or when they’re feeling unsure.
That might mean going back to the basics in new places. Using a treat to lure a sit at the park isn’t spoiling your dog. It’s helping them succeed in that moment. You’re helping them learn how to do something they already know, but in a place that’s harder or more distracting.
Why Positive Reinforcement Works for Cavalier King Charles Spaniels and All Breeds of Dogs
Cavaliers are sweet, sensitive, and deeply tuned in to their people. They often respond beautifully to kind guidance and struggle with harsh corrections. A raised voice, leash jerk, or even a stern look can shake their confidence and cause them to shut down.
But this isn’t just about Cavaliers.
Every dog, whether they are a bouncy Labrador, a headstrong terrier, a fearful rescue, or a playful senior, benefits from positive reinforcement dog training. You’re not just teaching skills. You’re building a good relationship. You’re helping your dog feel safe to try new things.
Positive dog training encourages curiosity instead of fear. It helps build lasting behavior in a way that feels good for both you and your dog.
The Risk of Punishment-Based Dog Training
Harsh training methods may seem like they work quickly, but they come with a huge cost. Dogs trained with physical corrections, yelling, or intimidation often show signs of stress, like lip licking, yawning, cowering, or even shutting down completely. They may stop doing the “bad” behavior, but not because they learned something better. They stop because they’re afraid to try.
Studies have shown that punishment-based dog training methods can increase anxiety and reactivity, and even lead to aggressive behavior in some dogs. It doesn’t teach what to do, it just teaches the dog what not to do, without giving them tools to succeed.
I’ve worked with so many families trying to rebuild trust after their dog was trained with punishment. That kind of fallout is hard to undo.
You Don’t Have to Carry Treats Forever
A common concern I hear is, “Will I always need food in my pocket?” The answer is no. As your dog becomes more confident and fluent in a behavior, you’ll reward less often. You’ll also start to mix in other rewards, like praise, sniffy walks, or play.
But here’s the thing, dogs, like us, still appreciate being recognized for a job well done. I still praised Dexter and gave him treats into his senior years. Not because I had to. But because I wanted to reinforce the connection we built over a lifetime of learning together.
You’re not creating a treat-dependent dog. You’re building a dog who trusts that good choices lead to good outcomes.
If you want to teach your dog real life manners in a kind, clear, and effective way, take a look at my Manners, Life Skills, and Foundation Training Course. It’s self paced, easy to follow, and designed to help your dog build everyday skills with confidence. You’ll learn how to prevent common problems before they start, teach polite behavior step by step, and create calm, positive routines that work in daily life. I personally answer questions, give feedback, and support you as you go through the course.
Why Positive Dog Training Works for Behavior Issues Too
Positive reinforcement is not just for basic training or fun dog tricks. It’s also one of the best ways to work through real behavior issues like jumping, barking, reactivity, anxiety, and fear-based behaviors.
A big part of dog behavior modification is emotion. When a dog is barking or lunging, they’re not just being “bad.” They’re usually feeling overwhelmed, scared, frustrated, or unsure. If we only try to stop the behavior without addressing how the dog feels, we’re not really helping them.
Positive reinforcement gives us a way to change those emotions. We teach our dogs that good things happen when they make calm, safe choices. Over time, they start to feel more relaxed in situations that used to be stressful. That change from fear to comfort, from confusion to understanding, is what creates real, lasting change.
Instead of just trying to stop the behavior, we ask, “What is my dog feeling?” Then, “How would I like them to feel instead?” and “What do I want them to do instead?” From there, we adjust the situation so we can meet all those needs and teach the new behavior in a kind, clear way. The more your dog practices that skill in the right setting, the more confident they become. And that’s where things really start to turn around.
What Your Dog Really Needs From You
At the heart of it all, positive reinforcement dog training is about more than treats. It’s about empathy. It’s about understanding how your dog sees the world and helping them learn in a way that clicks.
It’s about setting them up for success and guiding them toward the behaviors you want. Not through fear, but through trust, patience, and connection.
That’s what I want for Stewart. That’s what I wanted for Angel Dexter. And that’s what I want every dog to have, training that feels good, makes sense, and builds a life rooted in partnership, not power.
Keep it positive. Keep it patient. Keep it proactive.
Google Ad Below [...]Read more...
June 5, 2025How to Motivate and Train a Cavalier King Charles Spaniel
If your Cavalier King Charles Spaniel is not motivated to train, you’re not alone. This is something I hear from Cavalier families all the time: “My Cavalier is not food motivated,” or “My Cavalier just doesn’t care about training.” But in most cases, it’s not that your Cavalier doesn’t want to learn, it’s that something is getting in the way.
Here are a few common reasons your Cavalier might not be interested in training right now and what you can do to help them feel more motivated and ready to learn.
Reasons Your Cavalier Might Seem Unmotivated for Training
They are full
If your Cavalier just finished a meal or had a lot of snacks recently, they may not be interested in working for more food. Training with food rewards works best when your Cavalier is a little bit hungry, not stuffed. Try scheduling your training sessions before meals rather than after, or set aside part of their meal to use as training treats throughout the day.
They are tired
Just like us, Cavaliers have times when they are more alert and times when they just want to rest. If your Cavalier had a big play session, a long walk, or an active outing, they may need some quiet time before they are ready to focus again. Cavalier puppies especially need a lot of sleep, so training when they are rested can make a big difference. Try noticing when your Cavalier naturally seems more alert and ready to engage. That is usually the best time to practice a little training together.
They are not feeling well
If your Cavalier seems unusually uninterested in training or even in their favorite treats, that could be a sign they are not feeling well. Even mild health issues like nausea, pain, or dental discomfort can lower motivation. It is not always obvious at first, but changes in training interest can be an early clue that something is off. If this becomes a pattern, or if anything else seems different, reach out to your Cavalier’s holistic vet to rule out anything medical before moving forward with training.
Your Cavalier is overstimulated
Cavaliers take in a lot of information from their surroundings. If you are training your Cavalier in a busy or unfamiliar location, all those sights, sounds, and smells can be overwhelming. When there is too much going on, your Cavalier might not be able to focus or respond the way they usually do. This is especially common for puppies or sensitive Cavaliers who are still learning how to process the world around them.
If that happens, try moving to a quieter spot. You can even take a little break together for a sniffy walk and then go back to something really simple, like The Name Game or Hand Targeting. These familiar cues can help your Cavalier settle and build confidence again.
Your Cavalier is anxious or unsure
When a Cavalier is feeling unsure, whether it is because of a new environment, a stranger nearby, or something they cannot quite figure out, training can start to feel like too much. It is not about being stubborn or ignoring you. They are just trying to process how they feel before they can focus on learning anything new.
If your Cavalier seems nervous or anxious, the best thing you can do is slow things down. Sit with them quietly, speak gently, and let them look around without pressure. Sometimes just being there together is enough. Once they start to relax, you can offer praise and a treat or a “check it out” cue if they seem ready to explore.
The reward is not meaningful enough
When I hear that a Cavalier is not food motivated, the first thing I look at is the reward. Most of the time, it is not that your Cavalier is not food motivated. It is that the treat just does not matter enough to them at that moment. Dry biscuits or lower value treats usually do not get their attention, especially in busy or distracting places.
Start with real food. I usually go straight to meat. That might be small bits of cooked beef, turkey, or lamb. Freeze dried meat or single ingredient dehydrated treats are also great choices. These are often the best treats for Cavaliers because they are soft, tasty, and easy to eat. Just flip the bag over and check the ingredients. You want something simple that says one thing, like chicken breast or turkey. Avoid fillers or extras that do not need to be there.
You can also use freeze dried raw food, broken into tiny pieces. These are real food options and often made mostly from meat, which makes them a great choice for Cavaliers who need something healthy and high value. Many people use them during training and count them toward their Cavalier’s daily calories. It is an easy way to stay consistent with nutrition while still offering something special and rewarding.
I also avoid using liver or organ meats regularly. A little once in a while is fine, but too much liver can lead to vitamin A concerns. Some organ treats can also be too rich and cause diarrhea.
Use the right reward for the right moment
Once you find something that really works for your Cavalier, think about how and when to use it. The most rewarding treats should be saved for the harder training sessions. That might mean practicing outside, focusing around distractions, or trying something brand new. When the reward truly matters to your Cavalier, motivation naturally improves.
If they get their favorite treats for easy things like sitting in the living room, there is not much reason to work harder when training becomes more challenging. Save the cooked beef, freeze dried meat, or other special rewards for those moments when your Cavalier needs a little extra encouragement. Matching the value of the reward to the difficulty of the task helps keep your Cavalier engaged and willing to try.
Explore other forms of motivation
Not every Cavalier is motivated by food alone. Some respond better to toys, praise, or playful interaction. If your Cavalier enjoys toys, try using a favorite squeaky, a soft tug toy, or a quick game of fetch. Some Cavaliers are especially drawn to textures like fleece or rabbit fur, which can make a toy feel more exciting. Whatever it is, keep it put away when you are not training so it stays special and does not lose its value. Other Cavaliers are more motivated by attention and connection. A cheerful voice, a smile, or light praise can sometimes go further than anything you can hold in your hand. At the end of the day, your Cavalier is the one who decides what feels rewarding. It is not about what we think should work. It is about what actually matters to them.
Your Cavalier can learn with the right support
If your Cavalier is not showing interest in training, it does not mean something is broken. It just means they need a little help feeling ready. That might be adjusting the environment, changing up the reward, or simply giving them time to feel more confident.
This is exactly the kind of thing we work on in my Manners, Life Skills and Foundation Training Course. If you are feeling unsure about how to move forward, I will guide you through simple, kind steps to help your Cavalier feel more focused and connected. You will learn how to use rewards that actually matter to your Cavalier, when to train, and how to build everyday habits that stick. It is self-paced, easy to follow, and I am always there if you need support.
Your Cavalier wants to connect with you. With a little support and the right setup, they will start to feel more engaged and eager to participate. You do not need to rush the process. Keep it light, keep it kind, and celebrate the small wins. They all add up.
Google Ad Below [...]Read more...
Google Ad Below
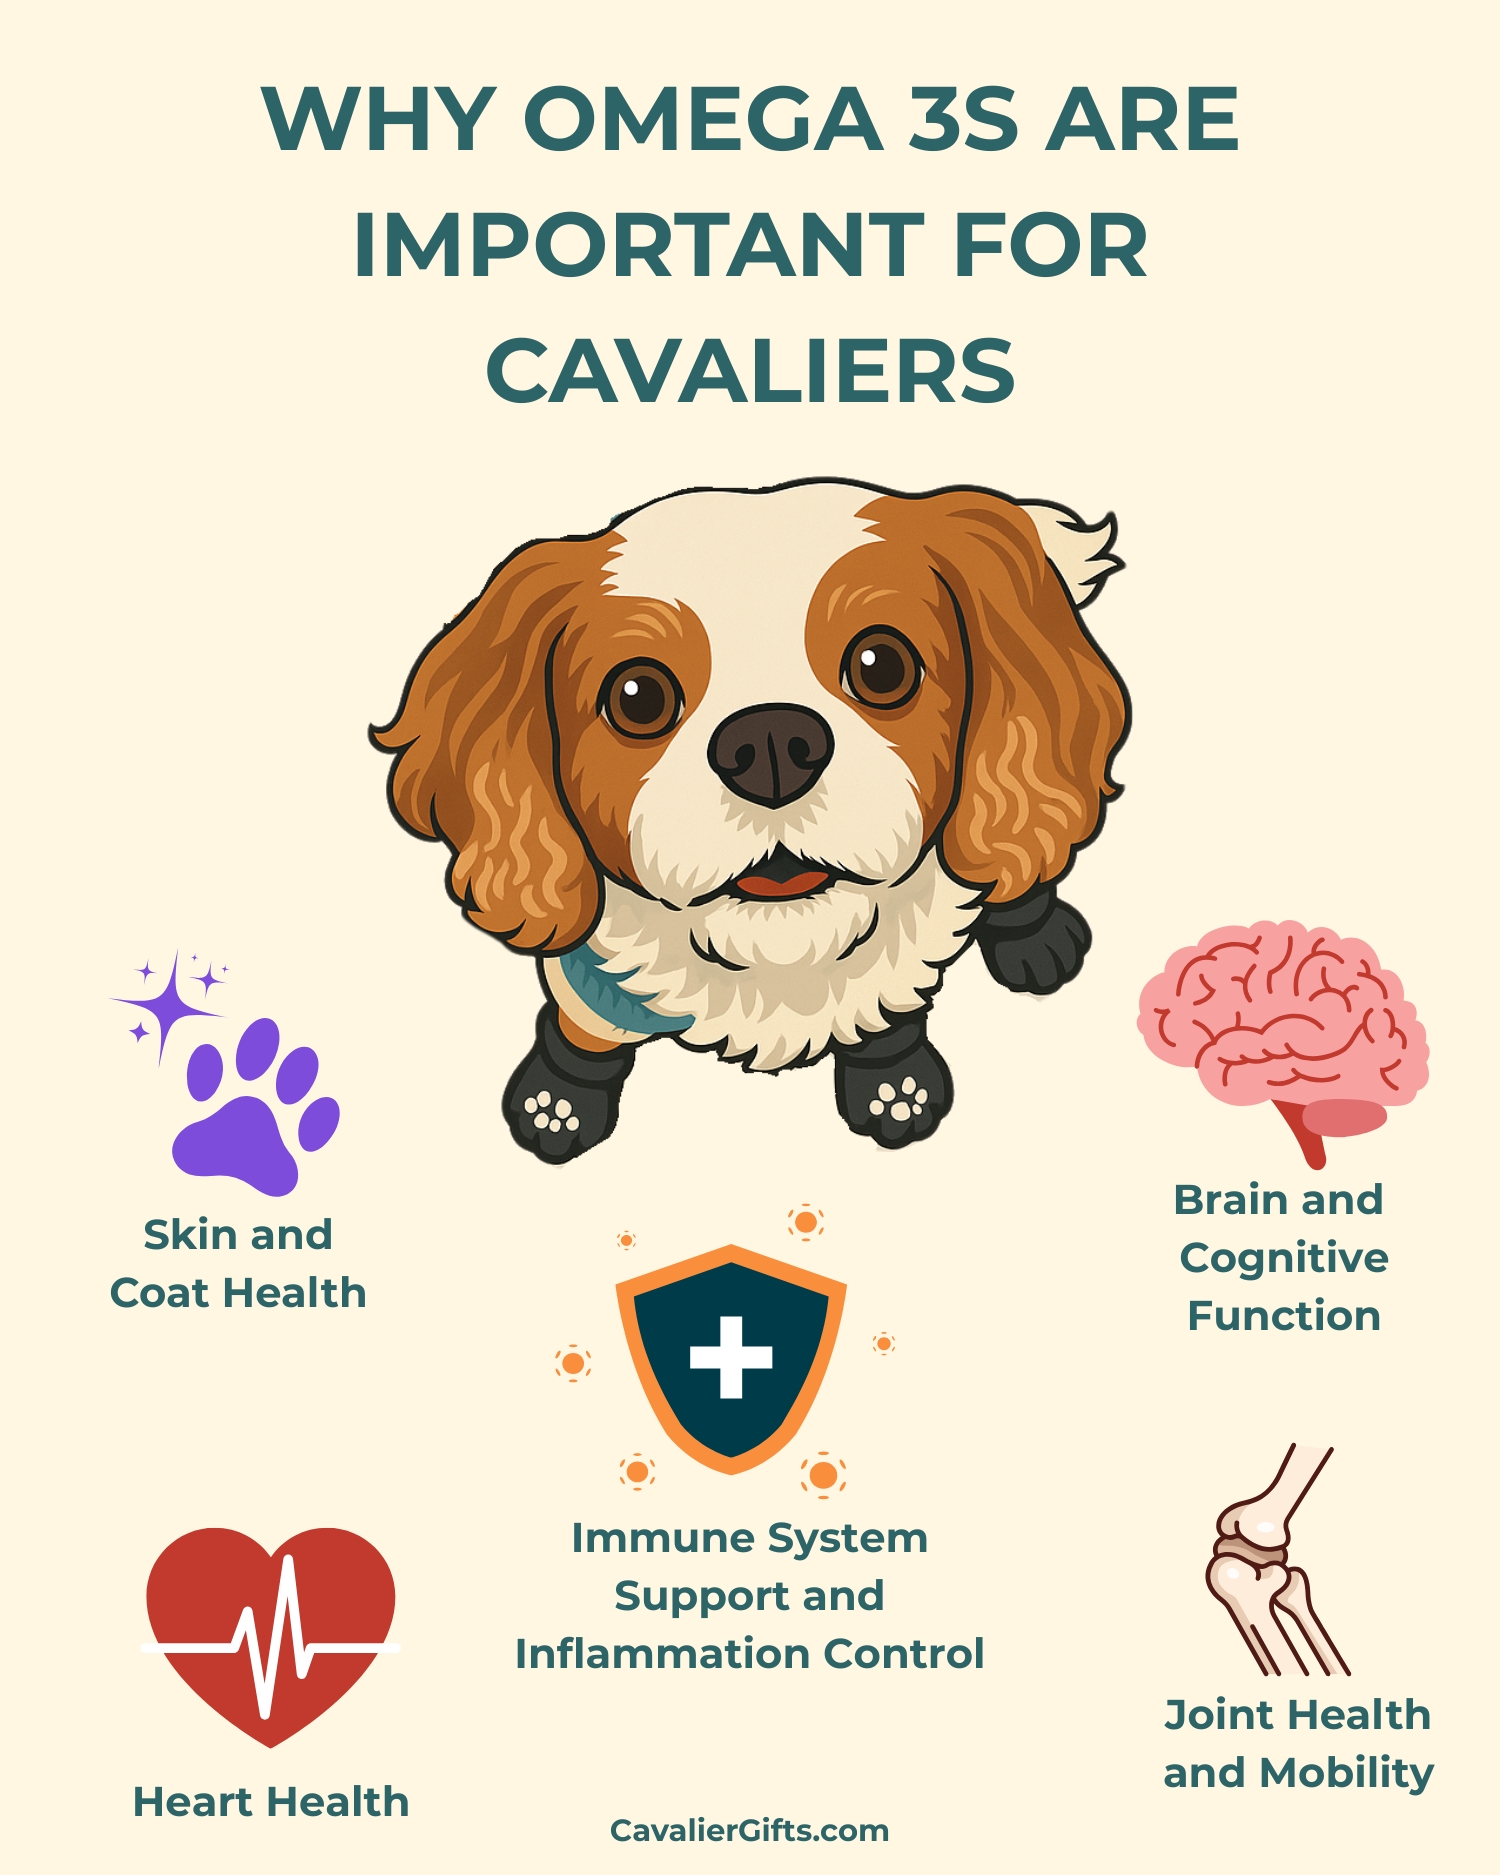
Health Benefits of Omega-3s for Cavaliers (Early access for our Patreon community)
Health Benefits of Omega-3s for Cavaliers
Omega-3 fatty acids are one of the most important nutrients for Cavaliers, yet they’re often overlooked or misunderstood. These essential fats support heart health, brain function, joint mobility, skin condition, and even immune function. But not all omega-3 sources are created equal. Fresh fish, supplements, and plant-based options vary in effectiveness, and factors like oxidation and sourcing impact their quality. In this guide, I’ll break down the best omega-3 sources, how to choose high-quality options, and what to avoid to ensure your Cavalier King Charles Spaniel gets the maximum health benefits from their Omega-3s.
Skin and Coat Health
Omega-3s help maintain a healthy skin, reducing dryness, flakiness, and itchiness. They also improve coat condition, making your Cavalier’s fur shinier and softer. Cavaliers, like many other breeds, can be prone to allergies and skin sensitivities, and omega-3s can help manage these issues by reducing inflammation in the skin.
Joint Health and Mobility
As Cavaliers age, they can develop arthritis and joint stiffness. Omega-3s have been shown to reduce inflammation in the joints, helping to alleviate pain and improve mobility. Dogs receiving sufficient omega-3s often experience less stiffness and better flexibility, which is particularly important for senior Cavalier King Charles Spaniels.
Brain and Cognitive Function
DHA is a crucial component of brain cell membranes and plays a significant role in cognitive function. In Cavalier puppies, it supports brain development and learning. In senior Cavaliers, it helps prevent cognitive decline and supports memory and problem-solving skills. Studies have shown that dogs supplemented with DHA perform better on cognitive tests than those that do not receive adequate amounts.
Heart Health
Omega-3 fatty acids are essential for supporting cardiovascular function by helping regulate heart rhythm, reduce blood pressure, and improve circulation. For Cavaliers, who are especially prone to mitral valve disease (MVD), a common heart condition in the breed, omega-3s are even more important. Given their susceptibility to MVD, ensuring your Cavalier’s diet is rich in omega-3s can play a crucial role in supporting their heart health and may help slow the progression of the disease.
Immune System Support and Inflammation Control
Chronic inflammation is a factor in many health issues, including autoimmune conditions, allergies, and even cancer. For Cavaliers, who are prone to conditions like Chiari malformation, managing inflammation is especially critical. Omega 3s play an important role in regulating the body’s inflammatory response, helping to balance the immune system and reduce excessive inflammation. By incorporating omega 3s into your Cavalier’s diet, you can help protect against the inflammation that worsens conditions like Chiari malformation and support overall immune health.
Best Omega-3 Sources for Cavaliers
The best omega-3 sources for dogs are those that provide EPA (eicosapentaenoic acid) and DHA (docosahexaenoic acid) in their most bioavailable forms. These two types of omega-3s are the most beneficial for dogs, as they are directly used by the body to support a variety of vital functions, from heart health to joint mobility. The most bioavailable forms of these omega-3s are typically found in marine-based sources, such as oily fish. Fish like salmon, sardines, mackerel, and anchovies are excellent options because they contain high levels of both EPA and DHA, making them ideal for supporting your Cavalier’s health. These fish provide omega-3s in a form that’s easy for the body to absorb, ensuring that your dog gets the maximum benefits.
In addition to fish, fish oil supplements can also be a great source of omega-3s. However, it’s important to choose high-quality, purified fish oils that are free of contaminants like mercury. If your Cavalier is sensitive to fish or you prefer plant-based sources, algae oil is another excellent option, as it provides DHA without the fishy aftertaste or concerns about ocean contaminants. While flaxseed and chia seeds offer plant-based omega-3s, they contain ALA (alpha-linolenic acid), which the body must convert into EPA and DHA, an inefficient process for dogs. This means that marine-based omega-3s are typically the best option for achieving optimal health benefits. By rotating between these high-quality sources, you can help ensure your Cavalier is getting the most effective omega-3s for their needs.
Watch our fresh fish DIY and don’t forget to subscribe to @CavalierTipsandFun for more!
Fresh Fish (Whole Food Source of EPA and DHA)
Feeding fresh, oily fish is one of the most natural ways to provide omega-3s. However, choosing the right type of fish is essential due to concerns about mercury levels, sustainability, and proper sourcing.
Some of the best options for Cavaliers include:
- Sardines: Small, low-mercury fish that are naturally high in omega-3s. They are one of the safest whole-food sources.
- Anchovies: Similar to sardines, anchovies are rich in DHA and EPA while having minimal contamination risks.
- Herring: Often used in high-quality pet foods, herring is another small, oily fish packed with omega-3s.
- Atlantic Mackerel: This species is safe, but avoid king mackerel, which is high in mercury.
- Wild-Caught Salmon: A great source of omega-3s, but farmed salmon may contain higher levels of contaminants.
When feeding fresh fish, it’s important to either lightly cook the fish or feed it raw if it’s safely sourced. Cooking fish too much can break down some of the omega-3s, while raw fish (from a trusted, safe source) can provide the most nutrients. However, if you choose to feed raw fish, it should be frozen for a week first to reduce the risk of parasites, which can be a concern with certain types of fish.
It’s essential to avoid fish that have been prepared with added salt, spices, or sauces. These seasonings can be harmful to dogs. Also, always avoid feeding cooked bones, as they can splinter and cause serious internal injuries.
Fish Oil Supplements
Many pet parents turn to fish oil supplements to provide omega-3s, but not all fish oil supplements are the same. Choosing the right one for your Cavalier is important to ensure you’re giving them the best quality and the most effective nutrients.
How to Choose a High-Quality Fish Oil
When selecting a fish oil supplement, look for species-specific labeling. Instead of settling for generic “fish oil,” opt for oils like sardine oil, anchovy oil, or krill oil. This ensures transparency in sourcing and gives you a better idea of where the oil is coming from.
When choosing a fish oil supplement, it’s important to look at the levels of EPA and DHA, the two types of omega-3 fatty acids that provide the most health benefits for your dog. The label on the bottle should specify the amount of EPA and DHA in each serving, not just the total amount of fish oil.
For example, a bottle might say it contains 1,000 mg of fish oil per serving. But if the label doesn’t show how much of that is EPA and DHA, it’s hard to know how much of the oil is actually providing the beneficial omega-3s your dog needs.
Some fish oils may have more EPA, which is great for joint and heart health, while others may have more DHA, which supports brain function and reduces inflammation. Knowing exactly how much of each omega-3 is in the oil allows you to be more confident that you’re giving your Cavalier the right amount for their specific health needs. This way, you can make sure you’re getting the full benefits of the omega-3s in the supplement.
Also, choose products that are third-party tested. Reputable brands will test their oils for harmful contaminants like heavy metals, PCBs, and oxidation levels. This helps ensure the oil is safe for your dog and that it hasn’t been compromised during production.
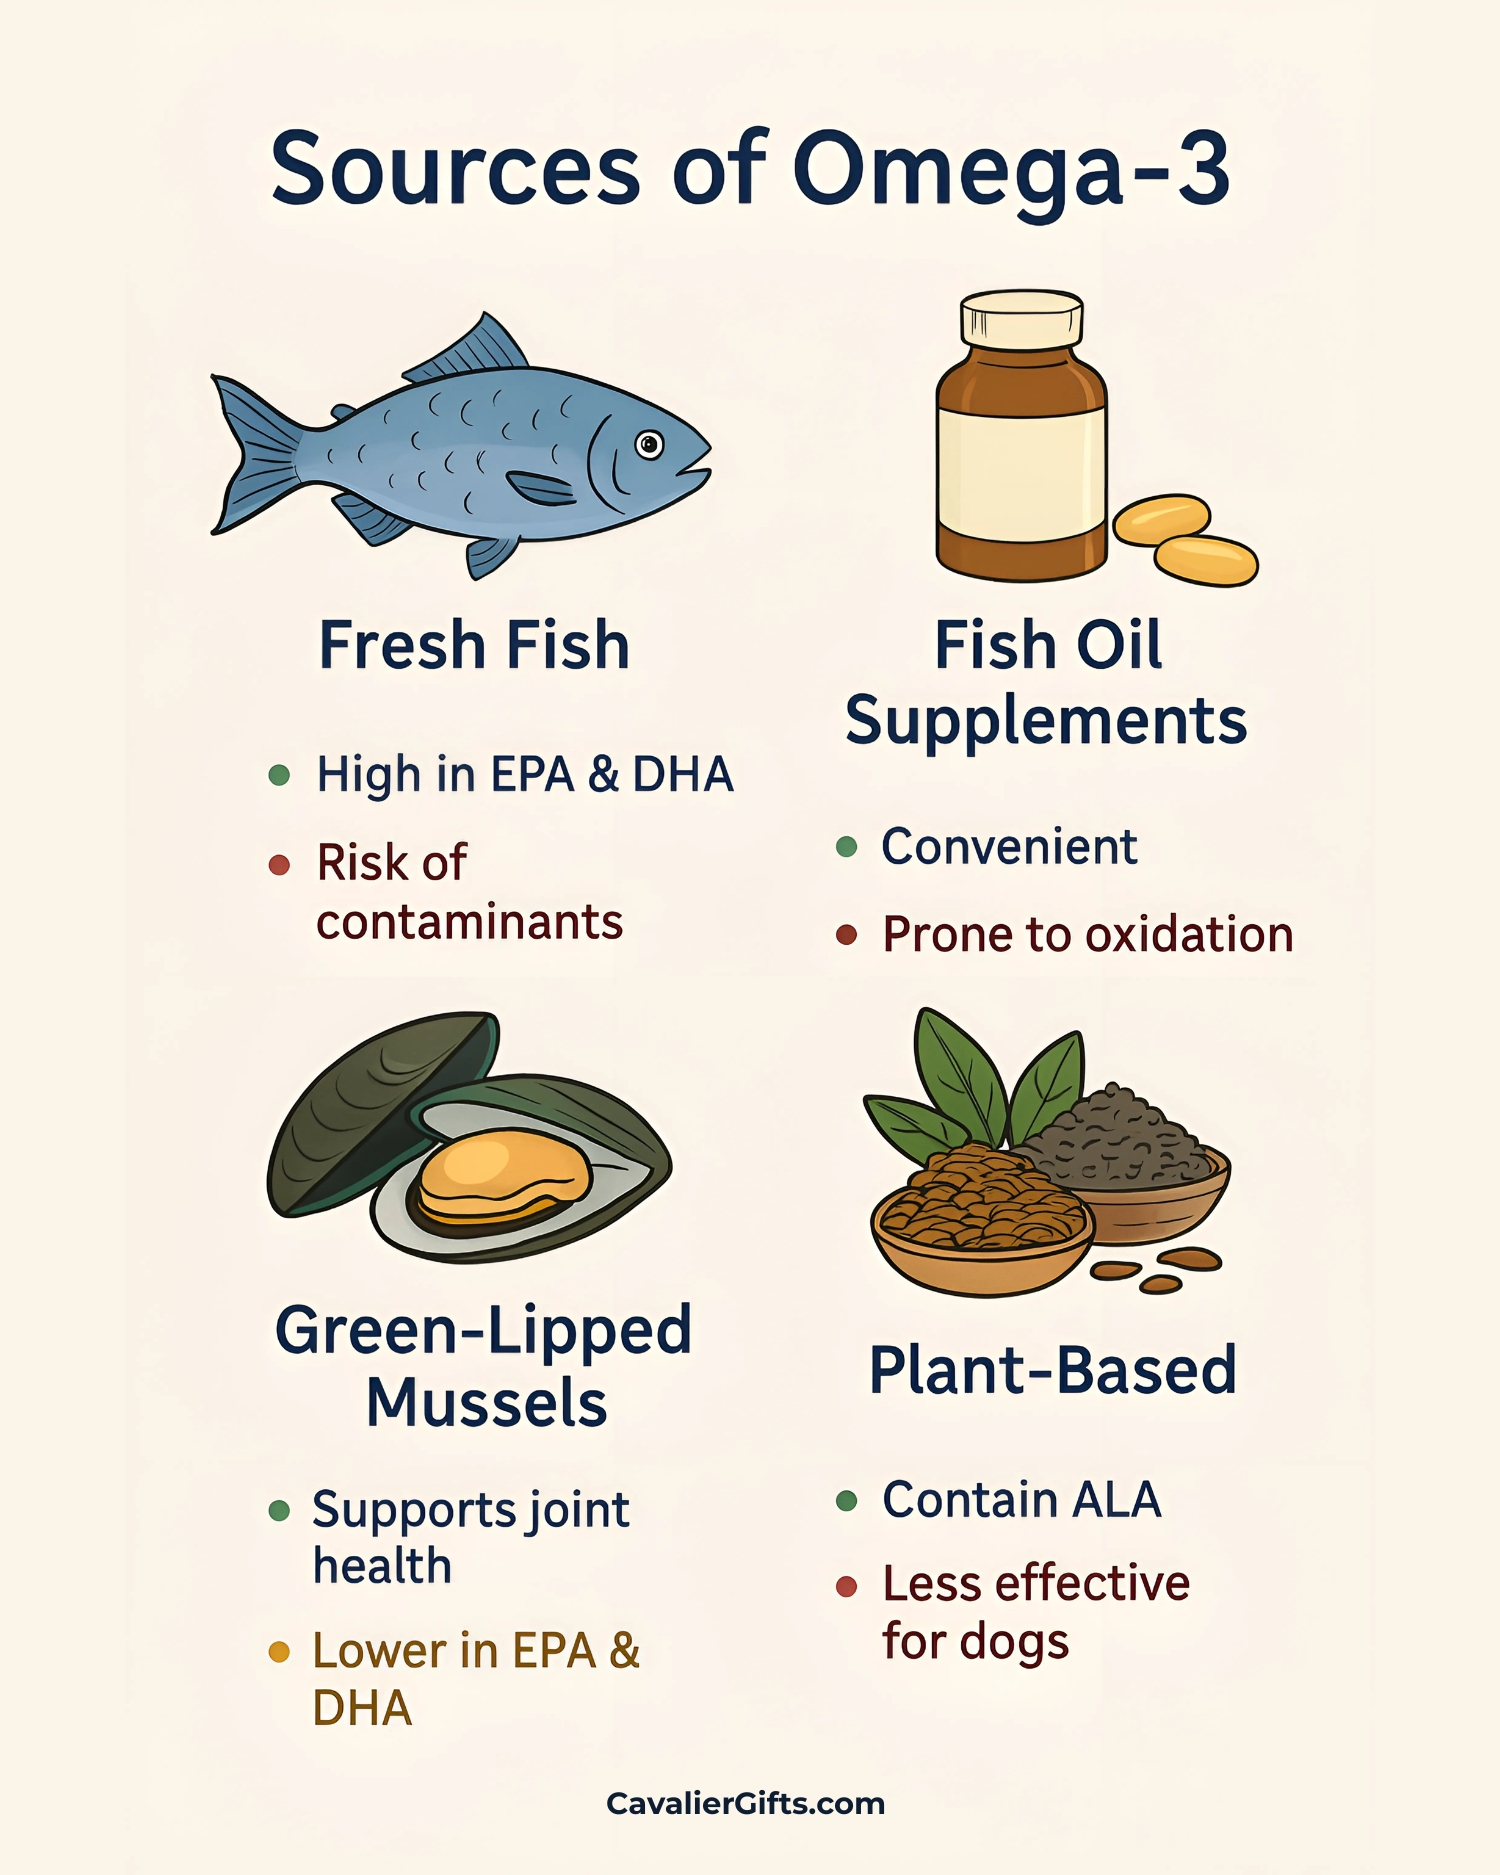
Liquid vs. Capsules
Fish oil comes in two common forms: liquid and capsules. Liquid fish oil (often found in pump bottles) is convenient because it’s easy to dose, but it’s more prone to oxidation once opened. Oxidation occurs when the oil is exposed to light, heat, or air, so it must be stored in the refrigerator and used quickly to maintain its freshness.
On the other hand, capsules are more stable since the oil is protected from air exposure, which reduces the risk of oxidation. However, they can be harder to dose accurately, especially for small dogs.
Oxidation Risks
One of the biggest concerns with fish oil is oxidation. Omega-3s are very sensitive to light, heat, and oxygen, and when the oil oxidizes, it can lose its effectiveness and even become harmful. Signs of rancid fish oil include a strong fishy smell or an unusual taste.
To minimize the risk of oxidation, here are a few tips:
- Choose dark glass bottles instead of clear plastic, as glass helps protect the oil from light exposure.
- Store the fish oil in the refrigerator after opening to keep it fresh.
- Use the oil within 30 to 60 days of opening to ensure you’re getting the best quality.
By taking these steps to choose a high-quality fish oil and storing it properly, you can help ensure your Cavalier gets the full benefits of omega-3s for their heart, joints, and overall health.
Green-Lipped Mussels: A Powerhouse for Joint Support
Green-lipped mussels (Perna canaliculus), native to New Zealand, are one of the most beneficial natural sources of omega-3s for dogs. Unlike traditional fish-based omega-3 supplements that provide primarily EPA and DHA, green-lipped mussels contain a unique omega-3 fatty acid called ETA (Eicosatetraenoic Acid). ETA has been found to have additional anti-inflammatory properties, making it especially helpful for dogs suffering from joint issues like arthritis.
The anti-inflammatory effects of ETA, along with the presence of glucosamine and chondroitin, make green-lipped mussels an excellent option for promoting joint health. These compounds work together to support cartilage repair, reduce inflammation, and enhance mobility in dogs experiencing joint stiffness or discomfort. This combination is particularly beneficial for dog breeds, like Cavaliers, that are prone to developing joint issues as they age.
Comparing Omega-3 Content in Green-Lipped Mussels vs. Fish
In terms of EPA and DHA content, green-lipped mussels may not provide as high a concentration per serving as fatty fish, but their ETA provides an extra layer of anti-inflammatory benefits. This makes green-lipped mussels an excellent addition to a dog’s diet, particularly for those with joint concerns.
How to Feed Green-Lipped Mussels to Your Dog
Green-lipped mussels are often available as freeze-dried powder or in chewable treat forms. Both forms make it easy to incorporate them into your dog’s daily routine, but the powder can be sprinkled over food or mixed into homemade dog meals for ease of use.
As with any supplement, it’s important to start with a small amount to monitor how your dog responds, especially if they are new to green-lipped mussels or have a sensitive digestive system. For the dosing of green-lipped mussels, it’s always best to refer to the product-specific guidelines since the concentration can vary depending on the form (freeze-dried powder, chewables, etc.) and brand. However, a general recommendation often seen in supplements for dogs is:
- Start with 1/4 teaspoon per 10 pounds of body weight per day for powder form. This can be adjusted based on the dog’s response and their specific needs.
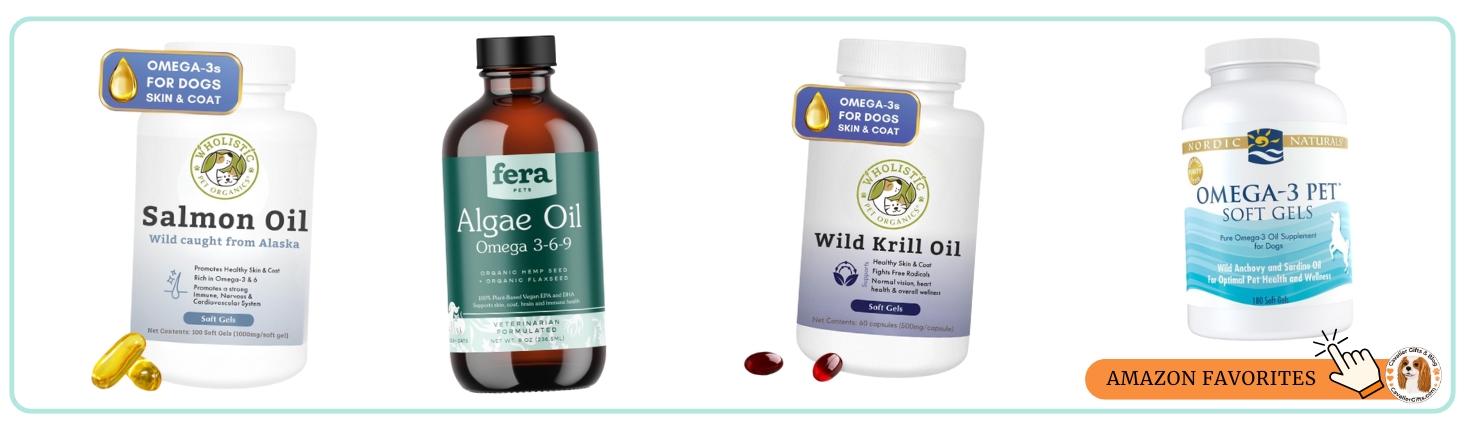
Plant-Based Omega-3s: Less Effective for Dogs, but Still Valuable
When it comes to omega-3 fatty acids, plant-based options are less efficient for dogs compared to animal sources like fish, as they primarily contain ALA (alpha-linolenic acid). While ALA is an essential omega-3 fatty acid for humans, dogs face challenges in converting ALA to the more bioavailable forms, EPA (eicosapentaenoic acid) and DHA (docosahexaenoic acid), which are the forms most beneficial for their health. This makes plant-based omega-3s less effective for dogs in supporting the same health benefits as those derived from marine sources.
Why ALA Is Less Effective for Dogs
Dogs have a relatively inefficient ability to convert ALA into EPA and DHA. The process of conversion requires specific enzymes, which dogs do not produce in large enough quantities to convert sufficient ALA into the needed forms of omega-3s. As a result, while plant-based omega-3s can still offer some benefits, they are not as effective at delivering the omega-3s that support joint health, cognitive function, and heart health in the same way that fish-derived omega-3s do.
Nevertheless, plant-based sources of omega-3s are still valuable as part of a balanced diet. They can provide supplemental omega-3s and contribute to overall health but should not be relied on as the primary omega-3 source for dogs.
Common Plant-Based Omega-3 Sources
- Flaxseeds: Flaxseeds are one of the most popular plant-based sources of ALA omega-3s. They can be ground and added to your dog’s food. However, the conversion rate of ALA to EPA and DHA is low in dogs, so while flaxseeds may offer some benefits, they should not be relied on exclusively for omega-3 needs.
- Chia Seeds: Like flaxseeds, chia seeds are rich in ALA. These tiny seeds are highly nutritious and can be added to a dog’s meals. They can absorb water and form a gel, which can be helpful for digestive health. While chia seeds may offer some benefit, they should be seen as supplementary, not primary, sources of omega-3s for dogs.
- Hemp Seeds: Hemp seeds contain ALA as well, along with a well-balanced ratio of omega-3 and omega-6 fatty acids. While these can contribute to overall fatty acid intake in dogs, their conversion to EPA and DHA is also limited. Hemp oil, a more concentrated form, may be more effective but still not as efficient as fish oil or algae oil in providing the omega-3s dogs need for optimal health.
Algae Oil: The Better Plant-Based Alternative
While plant-based sources like flaxseeds and chia seeds are valuable in certain aspects, algae oil is usually a better plant-based option for dogs. Algae oil is derived from marine algae, which naturally produce DHA (and sometimes EPA) without requiring the conversion process. Unlike other plant-based sources that contain ALA, algae oil provides a direct source of DHA, the omega-3 that plays a critical role in brain function, heart health, and reducing inflammation.
Algae oil is especially beneficial for pet parents who prefer to avoid fish-based products for ethical, environmental, or allergy reasons. It provides the same essential omega-3 fatty acids found in fish oil, but without the potential risks associated with mercury contamination or fish-based allergens. This makes algae oil a great plant-based alternative for ensuring your dog receives the health benefits of omega-3s.
Algae oil supplements are available in capsules or liquid form and can be incorporated into your dog’s diet just like fish oil. The recommended dosage varies by brand, so it’s important to follow the manufacturer’s guidelines and consult your vet to ensure the right amount for your dog.
While algae oil is a great alternative to fish oil, there are a few differences to consider. One of the main differences is that fish oil generally contains more EPA, an omega-3 that is particularly helpful for reducing inflammation and supporting joint health, while algal oil tends to have more DHA, which is important for brain and eye health. Because of this, if your dog needs more EPA for inflammation or joint issues, fish oil might be a better choice. Additionally, algae oil can be more expensive than fish oil, and it may not be as widely available in stores. Another thing to note is that fish oil is often more bioavailable, meaning it’s easier for dogs to absorb and benefit from. That said, algae oil is still a very good option, especially if you’re looking for a more sustainable, vegetarian, or fish-free supplement. It’s always a good idea to talk to your vet about which type of omega-3 is best for your dog’s specific health needs.
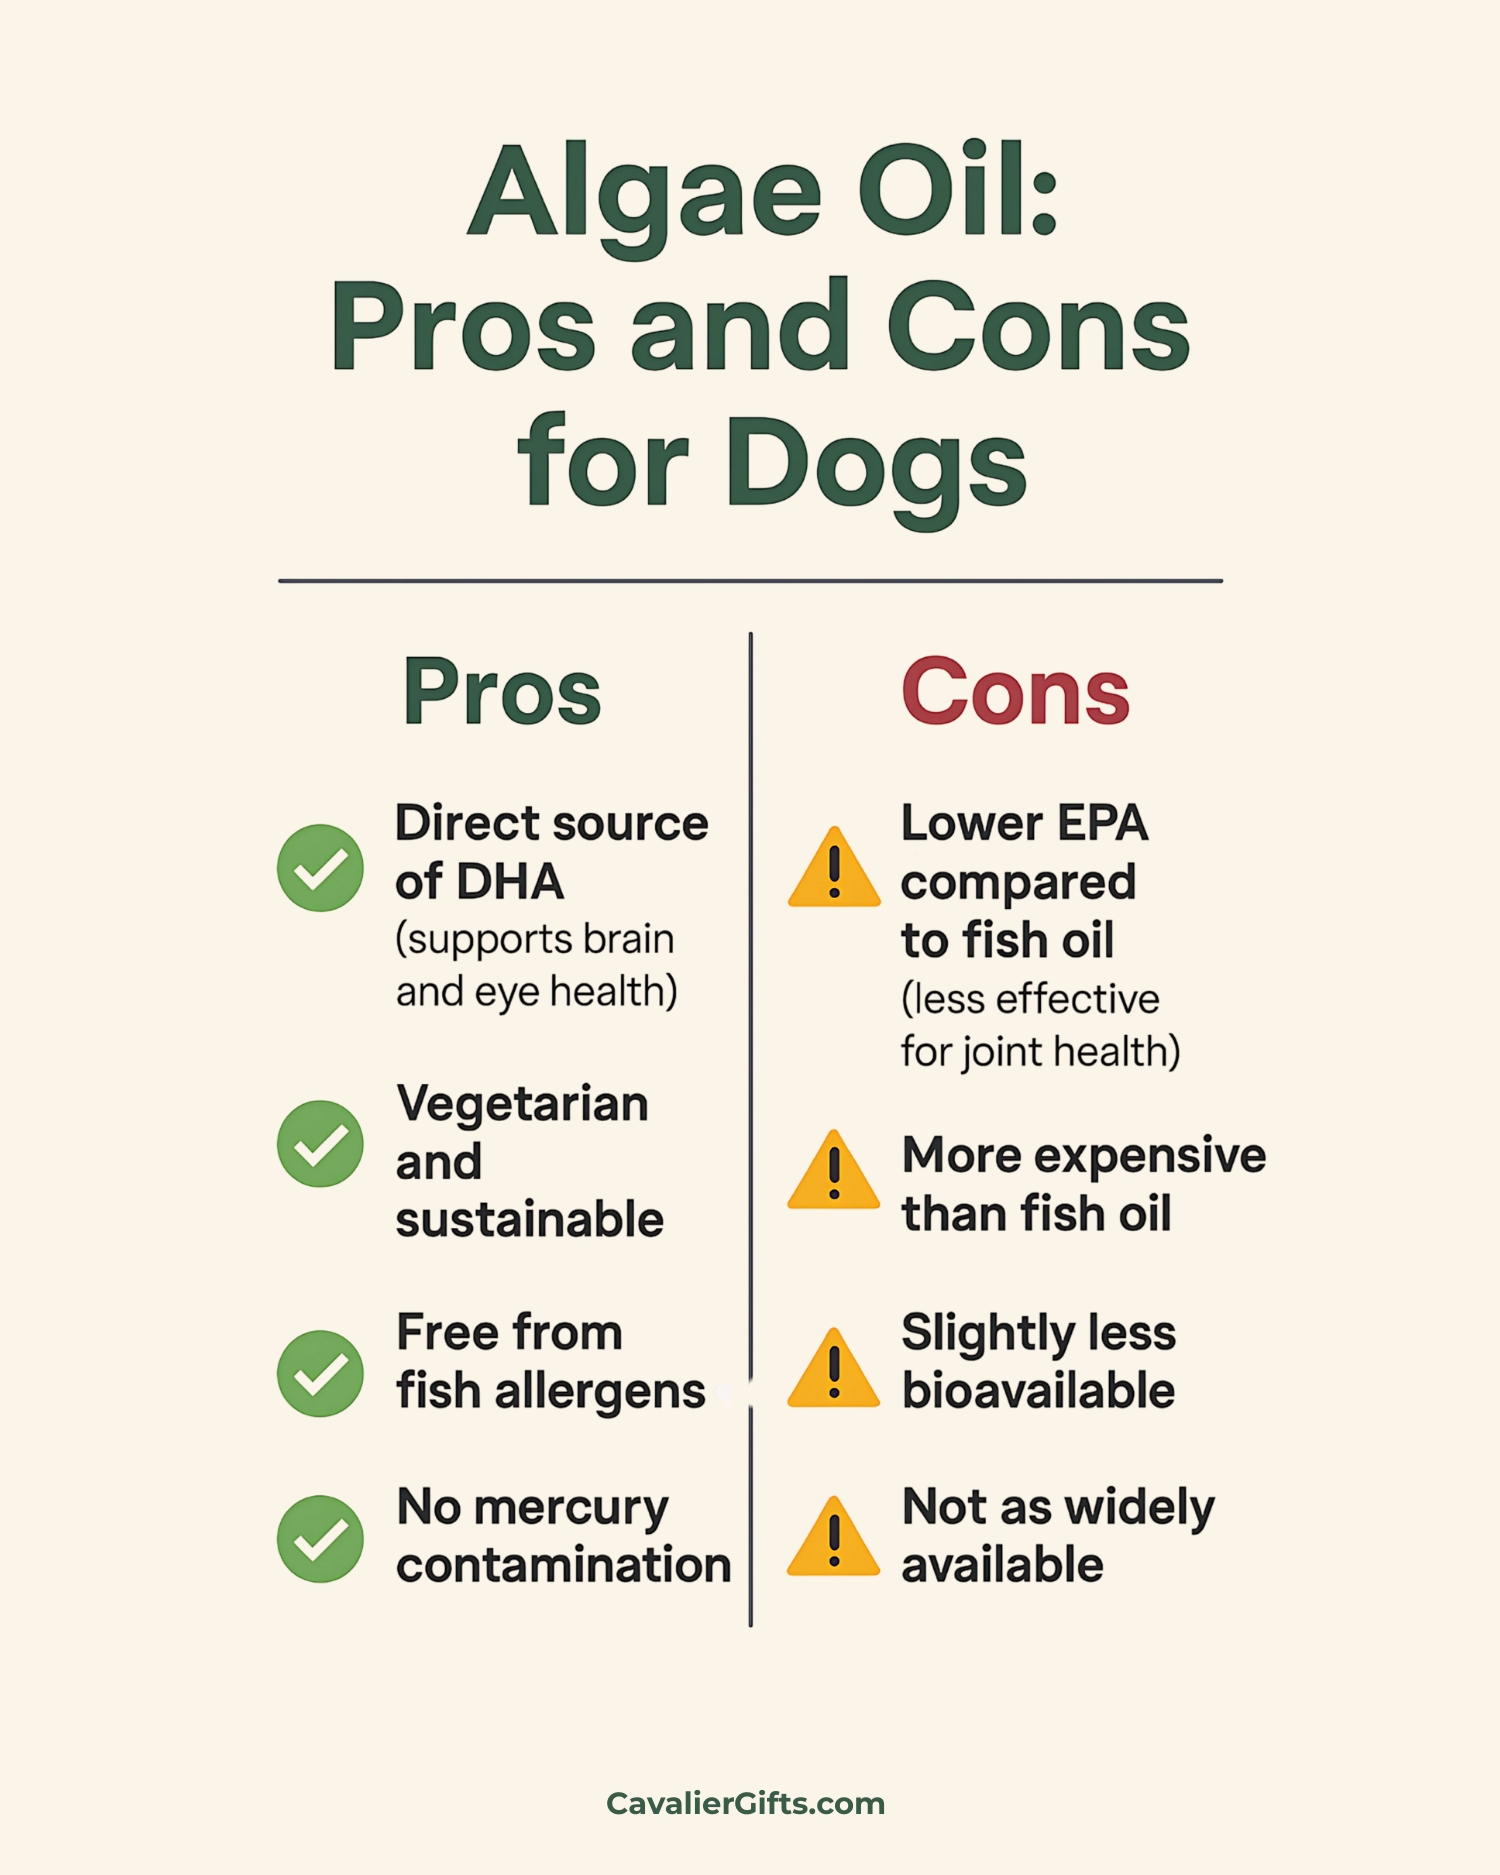
How Much Omega-3 Does Your Cavalier Need?
For general health, the recommended omega-3 dosage, specifically EPA and DHA, is typically between 20 to 55 mg per pound of body weight per day. If your Cavalier has specific health issues, like arthritis or inflammation, the dosage may increase to 50 to 100 mg per pound. If your dog is lacking omega-3s, you might notice signs like dry skin, excessive shedding, joint stiffness, or a dull coat. To ensure you’re giving the right amount, it’s important to consult your vet, who can recommend the proper dosage based on your dog’s size and health concerns.
Final Thoughts
Omega 3s are essential for your Cavalier’s overall health, supporting heart, brain, joint and skin function. By incorporating a variety of high quality omega 3 sources such as fish, green lipped mussels and supplements, you can ensure your Cavalier King Charles Spaniel receives a well rounded intake of these beneficial fatty acids.
Quality matters, so focus on bioavailable forms of EPA and DHA, and always rotate the sources you use to prevent imbalances. Whether you opt for fresh fish, fish oil or green lipped mussels, it’s crucial to store and handle these sources properly to avoid oxidation.
Before making any changes, check with your veterinarian to tailor an omega 3 plan that best suits your Cavalier’s individual health needs. Consistently including omega 3s in their diet will support long term health and vitality, helping your dog thrive at every stage of life.
Do you feed your Cavalier fresh fish?
|
|
|
|
Popular Blogs
February 26, 2025Cavalier King Charles Spaniel Heart Disease
Mitral Valve Disease (MVD) is something every Cavalier King Charles Spaniel parent should be familiar with. Sadly, this condition is extremely common in the Cavalier breed, but early awareness and proper management can greatly improve a Cavalier’s quality of life. In this blog, we’ll cover what MVD is, why Cavaliers are at risk, how the disease is staged, and which supplements can help support a healthy heart.
A heartfelt thank you to Lisa Davila, BS in Biomedical Science and Hospital Manager at Aggieland Animal Health Center in College Station, Texas, for helping me put together this article. Lisa has not only dedicated her career to animal health but has also been a loving mom to many Cavalier King Charles Spaniels. Her knowledge and experience are truly invaluable!
Understanding Mitral Valve Disease (MVD) in Cavaliers
Mitral Valve Disease (MVD) is a degenerative condition that affects the mitral valve of the heart. The mitral valve is responsible for ensuring blood flows properly between the left atrium and left ventricle. Over time, this valve can weaken and leak, allowing blood to flow backward into the atrium. This puts additional strain on the heart, eventually leading to heart enlargement and, in later stages, congestive heart failure (CHF).
MVD is considered a slow-progressing disease, but it varies from dog to dog. Some Cavaliers may live for years with a mild heart murmur, while others may progress more rapidly. Since MVD is so common in the breed, Cavaliers should be closely examined (cardiac auscultation) annually, to determine if they have a murmur. The presence of a murmur is often the first sign that a dog has degenerative valve disease.
Why Are Cavaliers at Risk of MVD?
Cavalier King Charles Spaniels are unfortunately predisposed to MVD. While any breed can develop valve disease, Cavalier King Charles Spaniels are at the greatest risk for developing degenerative mitral valve disease. Studies have shown that over 50% of Cavaliers develop a heart murmur by the age of 5, and by age 10, that number jumps to nearly 100%.Because MVD has a strong genetic component in Cavaliers, responsible breeding practices are essential. Responsible Cavalier King Charles Spaniel breeders ensure their breeding dogs undergo echocardiograms conducted by board-certified cardiologists. When considering a puppy, both parents should have cardiologist-issued heart clearances and be at least 2.5 years old at the time of breeding. Additionally, all four grandparents should be over the age of 5 and heart-clear. However, even with careful breeding, the risk remains high in the breed.
The Stages of MVD
MVD is typically classified into different stages based on its progression. Early detection and monitoring are crucial to managing the disease effectively.
Stage A – Dogs at risk for MVD but without any current signs (e.g., all Cavaliers are considered Stage A at birth because of their predisposition).
Stage B1 – A veterinarian detects a heart murmur, but there is no evidence of heart enlargement on X-rays or echocardiograms.
Stage B2 – A heart murmur is present, and imaging confirms heart enlargement. At this stage, medication such as Vetmedin (pimobendan) is often started to help delay the onset of congestive heart failure.
Stage C – Congestive heart failure (CHF) is present, meaning the heart can no longer compensate for the disease. Symptoms such as coughing, lethargy, and difficulty breathing may be noticeable. Medications are necessary to help manage the condition.
Stage D – End-stage CHF, where symptoms become harder to control even with medications.
Once a dog reaches Stage B2, most cardiologists recommend starting treatment to slow disease progression. Regular checkups and echocardiograms help ensure the right treatment plan is in place.
The Truth About Grain-Free Diets and Heart Disease in Cavaliers
With all the discussion surrounding Mitral Valve Disease (MVD) in Cavaliers, you may have come across concerns about grain-free diets and their potential link to heart disease. It’s important to separate the headlines from the facts when it comes to feeding our Cavaliers the best diet for heart health.
The debate about grain-free dog food largely stems from concerns about dilated cardiomyopathy (DCM), a condition where the heart muscle weakens, leading to poor function and potential heart failure. While DCM is a serious disease, the concern over grain-free diets has often been misinterpreted. The issue isn’t necessarily the lack of grains but rather the high levels of starchy carbohydrates like peas, lentils, legumes, and potatoes that are often used as substitutes in processed grain-free kibble.
Cavaliers are already predisposed to MVD, not DCM, which is a different heart condition with different causes. However, diet still plays a critical role in supporting heart health. The best way to provide a heart-healthy diet for your Cavalier is to focus on fresh, whole foods rich in high-quality animal proteins rather than relying on highly processed kibble, whether it contains grains or not. Read more about feeding your Cavalier a fresh diet.
Dr. Karen Becker explains it best: “The problem with grain-free formulas isn’t the lack of grains. At a minimum, it’s the high level of starchy carbohydrates coupled with the extreme high-heat processing methods used to produce these diets.”
Rather than worrying about whether a diet is labeled as “grain-free,” focus on feeding a fresh, balanced diet with high-quality proteins, healthy fats, and low-glycemic vegetables. Rotating proteins and using whole-food ingredients can help ensure your Cavalier gets the nutrients they need to support a healthy heart.
If you’re unsure about your dog’s diet, seek guidance from a veterinarian with a strong background in canine nutrition, not just one who sells prescription diets in the clinic. A certified veterinary food therapist (CVFT) can be a great resource when designing a diet that supports heart health while avoiding unnecessary fillers.
A well-balanced, species-appropriate diet can play a key role in keeping your Cavalier’s heart strong and healthy for years to come.
Heart-Healthy Supplements for Cavaliers with MVD
While MVD cannot be cured, a combination of medications, lifestyle management, and supplements can help support heart function and overall well-being. Below are some key supplements that may benefit Cavaliers with or at risk for MVD:
MCT Oil (Medium-Chain Triglycerides) – Provides an alternative energy source for the heart muscle. One recommended brand is Natural Force Organic MCT Oil (1 tsp daily with food). Before giving your Cavalier coconut oil, please read this article on MCAD in the Cavalier.
Amino Acids (Lysine, Methionine, L-Carnitine, Taurine) – Help maintain heart muscle contractility and serve as antioxidants.
Omega-3 Fatty Acids – Reduce inflammation, decrease clot risk, help prevent heart muscle loss, and support healthy blood pressure. Nordic Naturals Omega Pet Liquid is a high-quality option.
Vitamin E – Acts as both an antioxidant and anti-inflammatory.
Magnesium – Plays a crucial role in heart muscle contraction and maintaining a healthy heart rhythm.
Coenzyme Q10 (CoQ10) – A powerful antioxidant that supports heart function. Life Extension 100 mg capsules are a great choice.
Recommended Supplement Blends
If you prefer a multi-ingredient supplement, these options are formulated specifically for heart health:
Rx Vitamins for Pets Formula CV – Includes amino acids, magnesium, Vitamin E, CoQ10, and hawthorn berry extract (safe unless the dog is on Vetmedin).
VetriScience Cardio Strength Capsules – Similar to the Rx Vitamins formula but without hawthorn berry extract, making it safe for all MVD stages and medications.
Recap & Common Questions About MVD in Cavaliers
Mitral Valve Disease (MVD) is a serious but manageable heart condition that affects many Cavalier King Charles Spaniels. Early detection, responsible breeding, proper veterinary care, and supportive supplements can all play a role in keeping your Cavalier’s heart as healthy as possible.
What are the early signs of MVD in Cavaliers?
The first noticeable symptom is often a heart murmur, detected during a cardiologist visit. As the disease progresses, signs can include coughing, fatigue, labored breathing, and reduced exercise tolerance.
How long can a Cavalier live with mitral valve disease?
Many Cavaliers live for years after an MVD diagnosis, especially with early detection and proper management. While every dog is different, with the right veterinary care, medications, and supplements, Cavaliers can still enjoy a good quality of life.
What are the final stages of MVD in dogs?
In the later stages, MVD leads to congestive heart failure (CHF). Symptoms include severe coughing, difficulty breathing, lethargy, fainting, and fluid buildup in the lungs or abdomen. At this stage, medication and veterinary support are essential for comfort.
How do you treat MVD in Cavaliers?
Treatment typically includes veterinary-prescribed medications to support heart function and manage symptoms. Additionally, heart-healthy supplements, such as taurine, CoQ10, and omega-3 fatty acids, can provide extra support. Feeding a fresh, species-appropriate diet may also contribute to overall heart health.
Final Thoughts
A heart-healthy fresh diet, proper weight management, and the right combination of supplements can help support your Cavalier’s heart at any stage of MVD, even before a murmur is detected. Early intervention and regular veterinary care are key to helping our beloved Cavaliers live longer, healthier lives.
A big thank you to Lisa for sharing her knowledge on this topic! If you have any questions, feel free to ask, and don’t forget to check out Lisa and Jiminy on Instagram!
Google Ad Below [...]Read more...
April 15, 2024Cavalier King Charles Spaniel Potty Training
Congratulations on welcoming a Cavalier King Charles Spaniel into your life! They’re such charming and affectionate dogs, full of warmth and love. As a fellow Cavalier mom and positive dog trainer, I’m thrilled to share my experience on the best way to potty train a Cavalier puppy. Let’s jump right in to how to successfully housebreak your Cavalier King Charles Spaniel puppy.
I love puppies! And Cavalier puppies are just some of the cutest little things ever! There’s nothing quite like their sweet kisses, puppy breath, and zest for life! But it’s not all puppy kisses; we also must potty train our Cavaliers. Nobody likes an untrained dog.
One common question I get from Cavalier followers is how to best potty train their puppy. I’ve seen plenty of discussions about potty accidents in Cavalier King Charles Spaniel groups, and I’m here to share some potty training tips with you.
First things first. Let’s start by being realistic. Contrary to what some may suggest, potty training a puppy in a matter of days is not realistic. It’s important to realize that puppies, just like human babies, need time to learn and gain control over their bladders. So, if you’re expecting your Cavalier to hold it for hours after just a few days of training, you are setting your pup and yourself up for failure.
My own Cavalier, Dexter, wasn’t fully potty trained in a mere five days, and I’m perfectly okay with that. I prioritized consistent management and frequent potty breaks, which ultimately led to just a couple of accidents in the house. The key is to prevent accidents by being proactive, not reactive.
What’s the best way to potty train your Cavalier puppy?
It all comes down to three essential things: supervision, frequent potty breaks, and confinement when you can’t actively watch them. The goal is to reduce the chances of accidents happening indoors.
When it comes to supervision, it’s eyeballs on! This means keeping a watchful eye on your puppy at all times, ensuring that you’re there to rush them outside if it looks like they are about ready to go. You can use things like baby gates, leashes, shut doors, or X-pens so that you can keep your eyes on them at all times.
Subscribe to @CavalierTipsandFun on YouTube!
How Often Should You Take Your Puppy Potty?
As for how often to take your puppy potty, it really depends on their age and activity level. Active puppies may need to go out every 15–30 minutes, while older dogs can typically hold it for longer periods. The key is to stay ahead of the game and take your puppy out whenever you notice a change in their behavior or activity. A change in behavior or activity signals that it’s time for a bathroom break. For example, if your puppy just had a bout of puppy zoomies, out to potty we go. Did your puppy wake up from a nap? Out to potty we go. By not waiting for your puppy to ask to go out or have an accident, you are well on your way to a potty-trained dog.
When it comes to crate training, make sure the crate is just the right size to discourage accidents. The crate should be large enough for your pup to stand and lie down comfortably, but not so large that they can use one corner as a bathroom.
Whether you have a fenced yard or not, leash your puppy. This gives you the opportunity to reward your puppy for going potty outside. You will be right there to praise your puppy, give him a snack, and tell him just how smart he is. It also leads to my next potty training tip: teaching your Cavalier to potty on cue!
Teaching your Cavalier to potty on cue is a must in my book. Imagine being able to take your dog outside just before the rainstorm and ask him to pee and poo, and he does! This useful behavior isn’t just fantastic for potty training your dog; it’s incredibly convenient in daily life. The keys to teaching your Cavalier to eliminate on cue are good management, timing, and your reward. By associating a word for peeing with a separate word for defecating, you can start to teach your puppy to do either when requested.
Subscribe to @CavalierTipsandFun
Teaching Your Cavalier to Potty on Cue
Here’s how to get started:
Begin the training process in the morning, when your pup wakes up. Arm yourself with some delicious treats, leash up your Cavalier, and head outside to his favorite potty spot.
Stay close and pay attention to your puppy. Stay about 6’, so it’s not just a sniffing fest; the goal is to get him to eliminate before a big walk, play, or sniff. Pay close attention to your Cavalier’s body language. Watch for subtle cues like sniffing, circling, or squatting, which indicate he’s about to eliminate. As soon as you see a sign, use your potty cue, such as “Go potty,” and wait patiently. When your pup starts to do his business, praise quietly, and after he’s finished, give him big praise and rewards. You want to make sure you don’t interrupt the potty process by rewarding too soon.
If your dog typically follows up with a poop, repeat the process with your poop cue, like “Go poop-poop,” and reward him once he’s finished.
After your Cavalier has finished his business, it’s time for the next reward: fun! Whether it’s a walk, playtime in the yard, or simply enjoying the fresh air, make sure to give your pup some extra time to enjoy himself before heading back indoors. This helps reinforce the idea that going potty leads to enjoyable activities.
Repeat this routine each time you take your Cavalier outside, even if you’re planning on going for a walk. By always pairing potty time with rewards, you’ll motivate your pup to go more quickly.
As your Cavalier starts to make the connection between potty on cue and familiar surroundings, gradually introduce the cue in different environments, such as the park or during walks. This helps your dog understand the cue in any situation, ensuring they respond reliably wherever you are.
With patience, consistency, and plenty of positive reinforcement, you can teach your Cavalier King Charles Spaniel to potty on cue, making potty training easier.
Bell Training Your Cavalier King Charles Spaniel Puppy
While some love doggie doorbell training or puppy pads, I prefer to focus on methods that teach puppies to potty outside, not inside or on “things.” I find these methods tend to confuse puppies. Potty pads or litter boxes are teaching the puppy to potty on things that happen to be indoors. This could be a potty pad, but it also could end up being your favorite blanket.
As far as bell training goes, I’m not a fan of encouraging demanding behavior in dogs. Teaching them to ring bells to go outside may inadvertently lead to them using this to not only tell us they need to potty, but also that they may want to go outside to chase squirrels.
I believe in keeping potty training simple and straightforward, focusing on reinforcing the desired behavior of outdoor elimination. By keeping things simple and staying consistent, we can focus on potty training without having to rely on pee pads or bells.
In the end, potty training your Cavalier King Charles Spaniel is all about patience, consistency, and a whole lot of love. By following these tips and staying diligent, you’ll set your new puppy up for success.
Your comments and questions are always welcome below.
Join our vibrant Cavalier King Charles Spaniel community on Facebook, support our dedication to pet wellness on Patreon, and stay updated with our weekly newsletter for invaluable tips and insights into raising happy, healthy pets. Together, let’s make a difference in our dogs’ lives!
Google Ad Below [...]Read more...
May 29, 2024Natural Diet for Cavalier King Charles Spaniel
Dexter’s Food Journey with Raw and Homemade Food
Dexter, my Cavalier King Charles Spaniel, was a raw-fed puppy. However, because I wasn’t sure how to do it properly, and I was unaware that there were premade raw foods on the market, I fed him kibble with food toppers. After learning about how to balance a fresh dog food diet, I started to home cook for him when he was around two. Then, when he was about four, I transitioned him to a DIY raw diet. Through this journey with Dexter, I’ve learned about creating a nutritious and tailored diet that meets his unique needs. Now, I’m excited to pass along my tips and thoughts on feeding your Cavalier King Charles Spaniel. Let’s dive in!
Natural diet for Cavalier King Charles Spaniels
If you’re anything like me, you’re always on the lookout for the best pet products, natural dog grooming supplies, and the healthiest dog food brands for your Cavalier. One of the most important aspects of your Cavalier’s well-being is their diet. Dogs are natural carnivores, made to thrive on a diet of fresh meat. This means a species-appropriate diet is key to their health and vitality.
Understanding Species-Appropriate Nutrition
Let’s think about our dogs’ ancestors for a moment. They thrived on a diet of raw meat, bones, and organs. Today, we can recreate this natural diet with a raw food approach, using fresh, high-quality ingredients that focus on what dogs are meant to eat. For your Cavalier King Charles Spaniel, in a nutshell, this means focusing on a diet that’s about 90 percent meat, bone, and organ, with the remaining 10 percent coming from fruits and vegetables. This balance provides the essential nutrients and fiber they need to stay healthy. Personally, I feel if you aren’t able to go raw, this diet can also be cooked. You just would need to provide the calcium from the bones in another form, since dogs cannot eat cooked bones.
Don’t forget to subscribe to @CavalierTipsandFun for more!
The Problem with Processed Dry Kibble
Now, dry kibble. It’s processed at high temperatures, which takes away almost all the moisture and nutrients from the ingredients. Often, kibble is made with low-quality ingredients and fillers that don’t give your dog the nutrients they need. The lack of moisture in kibble can also lead to chronic dehydration, affecting everything from kidney function to skin and coat health. Plus, since kibble is made to last a long time, the ingredients can go rancid quicker than you might think, making it even less nutritious for your pup.
The Importance of Moisture in Your Dog’s Diet
Moisture is a crucial part of your dog’s diet. In the wild, dogs get most of their hydration from the food they eat. Fresh, raw diets naturally provide the moisture that kibble just can’t. This is essential for your dog’s digestion, kidney health, and overall well-being. By feeding them fresh, high-quality meat and vegetables, you’re making sure they stay hydrated naturally, without having to depend solely on drinking water.
Google Ad Below
Finding the Best Diet for Your Cavalier King Charles Spaniel
When it comes to our Cavaliers, there’s no one-size-fits-all solution. Every dog is unique, with their own health needs, behaviors, and lifestyle. Personally, I’m a big advocate for variety. This could be in the form of different proteins, suppliers or even a nice pre-made raw or mix. I steer clear of dry pet food altogether unless I’m using freeze dried food for dog training treats. For me, a balanced DIY raw diet for Dexter is the way to go. It’s fresh, it’s healthy, and I can tailor and tweak it to Dexter’s needs.
Why a Raw Food Diet is Ideal for Most Cavalier King Charles Spaniels
A raw food diet is as close to a natural diet as you can get for your Cavalier. It includes raw meat, bones, and organs, providing essential vitamins and minerals often lost in commercial dog foods. This diet can improve your Cavalier’s skin and coat health, immune system, and help maintain a healthy weight. As I mentioned earlier, I think adding an approximately 10 percent mix of fruits and vegetables is a great way to add a nutritional boost to the bowl. By avoiding the fillers and artificial additives found in many commercial foods, we ensure our dogs get the best nutrition possible.
Homemade Raw or Cooked Food: Personalized Nutrition for Your Cavalier
One of the best ways to ensure your Cavalier King Charles Spaniel is eating the healthiest diet is to make their food at home. This way, you control the quality of the ingredients and can tailor the meals to your dog’s specific needs. Homemade meals are especially beneficial if your Cavalier is a picky eater or has food allergies. Just remember to balance their diet properly to include all necessary nutrients. Whether your dog has allergies, digestion issues, or any other specific needs, you can tweak their diet to meet their needs.
Feeding Your Cavalier a Grain-Free Diet
You might have heard that grain-free foods are bad for Cavaliers because they were thought to have caused Dilated Cardiomyopathy (DCM). In 2019, the FDA released a list of grain-free pet foods that had people swearing that grain-free dog food was bad. But, guess what? It’s really not the case. In fact, in 2022 the FDA announced on their website there wasn’t a solid link between grain-free diets and DCM.
Feeding your dog grain-free can actually be a good choice for your Cavalier. But things get tricky if you are looking at a purchased grain-free alternative, particularly a dry kibble. When you’re reading the ingredient panel of a dog food (yes, read those labels), watch out for ones loaded with peas, lentils, legumes, seeds, and/or potatoes. Even if the front of the bag screams “meat-first,” it might sneak in a bunch of carbs and starches that aren’t ideal. According to experts, such as Dr. Karen Becker, it’s not about cutting out grains—it’s about making sure our pets aren’t eating too many starchy fillers. So, bottom line? Go back to that 90 percent meat recommendation.
Feeding Your Cavalier King Charles Spaniel Puppy
When it comes to feeding your Cavalier King Charles Spaniel puppy, it’s essential to consider their unique nutritional needs as they grow. If you’re not quite sure about the specifics of puppy nutrition, it’s perfectly okay to rely on trusted commercial brands known for their expertise in creating a balanced diet for puppies.
A commercial raw puppy food will include the essential proteins, fats, and calcium your puppy needs to develop strong bones. The key is to ensure whatever you choose is well-rounded and provides all the nutrients your Cavalier puppy requires during the puppy life stage.
Maintaining a Healthy Weight
Keeping your Cavalier at his ideal weight is super important. Maintaining a healthy weight isn’t just about good looks, but their health. Extra weight can contribute to health issues like joint problems and heart disease. The breed standard says they should weigh between thirteen and eighteen pounds. But, Cavaliers can vary a lot in size. Take Dexter, for instance. He’s a bit of a big guy, weighing his ideal weight at a healthy twenty-nine pounds. So, how do you know if your Cavalier is at the right weight? It’s all about getting your hands on your dog. Run your fingers lightly over their ribcage; you should be able to feel their ribs without pressing too hard. If they’re too prominent, they might be on the thin side. But if you can’t feel them at all, or if their waistline has disappeared, they might be carrying a few extra pounds. Just keep an eye on their overall body shape, and remember, every Cavalier is unique!
How Often to Feed Your Cavalier King Charles Spaniel
Consistency is key when it comes to feeding your Cavalier. Establishing a regular feeding schedule helps regulate their metabolism and digestion. Typically, feeding your Cavalier twice a day, in the morning and evening, works well. For puppies, more frequent meals might be necessary to meet their higher energy demands. I actually feed Dexter three times a day, mainly due to the fact that he gets so much food, I prefer to space it out.
Adding Supplements and Vitamins
Even with a well-balanced diet, supplements can play an essential role in your Cavalier’s health. Omega-3 fatty acids can enhance skin and coat health, probiotics can aid digestion, and joint supplements can support mobility. Always consult your Cavalier’s vet before adding new supplements to ensure they’re necessary and safe. When possible, opt for real food supplements vs. synthetic.
Food Allergies in Cavalier King Charles Spaniels
If your Cavalier has allergies, a limited-ingredient fresh diet can be incredibly beneficial. Before jumping brands, I would suggest going through a pet food elimination diet to identify triggers. Once you know what your Cavalier is allergic to, you can create a personalized diet just for him. You can read more about how and why a pet food elimination diet is helpful on my other blog, right here.
Safe Fruits and Vegetables to Feed Your Cavalier
Things like carrots, broccoli, and kale can be great sources of extra nutrients and fiber. And don’t forget the powerhouse of antioxidants fruits like blueberries, strawberries, pomegranates, and apples can provide. For best digestion, blitz them up! Introduce all new foods slowly and keep an eye on what works for your dog.
Transitioning to a Raw Food Diet
Transitioning your Cavalier to a raw food diet should be done gradually to avoid digestive upsets. Start by introducing small amounts of raw food while slowly decreasing their current food. A 75 percent and 25 percent switch usually works well. Over a week or two, increase the raw portion until it completely replaces their old diet.
Choosing the Best Raw Food Brands
Selecting high-quality raw food brands for your Cavalier ensures they get balanced and nutritious meals. Personally, I look for brands that offer meats that are antibiotic and hormone free. Ideally, any fruits and vegetables will be organic. Opt for whole foods vs synthetics when possible. But, it will be a balancing act based on what’s available to you and your budget. As I mentioned earlier, shoot for approximately 90 percent meat, bone, and organ. A few raw brand choices to consider include BJ’s Raw, Raw Paws Pet Food, Raw Wild, We Feed Raw, Primal, Vital Essentials, Smallbatch, Raw Bistro and Steve’s Real Food.
A Healthy Diet Can Improve the Immune System, Skin, and Coat Health
By providing your Cavalier with a balanced raw or homemade diet you’re not just filling their bowl, you’re nurturing their well-being from the inside out. Fresh diets, whether raw or homemade, are rich in unprocessed ingredients, offering a higher concentration of vital nutrients compared to heavily processed kibble. Fresh foods do not have the fillers and additives found in kibble, making them easier for dogs to digest and absorb. Because of this, fresh food promotes better immune function, healthier skin, and a shinier coat, making them the ideal choice for your Cavalier.
By focusing on a fresh, natural diet tailored to your Cavalier King Charles Spaniel’s specific needs, you’re setting them up for a long, healthy, and happy life. Remember, my goal is to offer guidance and support to help you navigate the journey of pet nutrition, without any judgment. Let’s work together to ensure the best possible care for you and your Cavalier!
Your comments and questions are always welcome below.
Join our vibrant Cavalier King Charles Spaniel community on Facebook, support our dedication to pet wellness on Patreon, and stay updated with our weekly newsletter for invaluable tips and insights into raising happy, healthy pets. Together, let’s make a difference in our dogs’ lives!
Google Ad Below [...]Read more...
May 14, 2024Hot Weather Tips for Cavalier King Charles Spaniels
People often think of summer as a good time to get out and about with our Cavaliers. As a dog-friendly travel blogger, I’m often pitched ideas and stories about taking Dexter to X outdoors, even in July or August. But, the reality is, that’s usually just too darn hot for my now 14.5 year-old Cavalier King Charles Spaniel, Dexter.
He’s always run a bit hot, but now, as a senior and with MVD, the summer heat is just not ideal for him. But, it’s not just Dexter. Summer heat can pose health issues such as sunburn and heatstroke. Today, I’m going to jump into some ideas on how to keep your Cavalier King Charles Spaniel cool and active during the summer or warm months.
Cavalier King Charles Spaniels and Heat Stroke
Heatstroke is a serious concern for all dog families, particularly for breeds like the Cavalier King Charles Spaniel, which can be more susceptible due to their flat-faced (brachycephalic) nature. Any dog, any breed, and any age can develop heat stroke, even on cool days! The VetCompassTM conducted a study in 2016 regarding the risk factors for heat-related illness (HRI):
Breeds with the highest incidence of HRI included the Chow Chow, Bulldog, French Bulldog, Dogue de Bordeaux, Greyhound, Cavalier King Charles Spaniel, Pug, and the Golden Retriever.
Dogs at or above the mean adult body weight for their breed/sex showed an increased risk of HRI compared to dogs below the mean body weight.
Dogs over 12 years old had the greatest odds of HRI compared to dogs under 2 years old.
Signs of Heatstroke in a Cavalier
Recognizing the signs of heatstroke and taking preventive measures are crucial to keeping your dog safe. Signs such as excessive panting, drooling, rapid pulse, and restlessness indicate your Cavalier may be overheating. If you notice these symptoms, act quickly by providing cool (not cold) water and applying damp towels to areas with good blood flow, such as the head, armpits, and groin. Then take your Cavalier to the vet to prevent things from getting worse.
How Food Affects Your Cavalier’s Ability to Tolerate Heat
Just like for us, our pet’s food does more than just provide them with calories. Food has a big impact on their overall health, affecting everything from their longevity to their behavior and how they handle hot and cold temperatures. According to traditional Chinese medicine (TCM), everything in life has a balance of energy and heat, represented by Yin and Yang. Yin embodies the cool, and yang is the hot. This includes our pets, food, and environment; they all have specific energetics.
Dexter tends to run a little more yang (hot). Therefore, when I’m creating his meals, I aim to have the foods I provide either be energetically cooling or neutral. I avoid energetically warm or hot foods and proteins. For example, common foods that are warming or hot include goat, lamb, venison, chicken, and pheasant. Whereas, cooling proteins include rabbit, duck, beaver, cold water fish, and muskrat.
Applying this feeding concept to our Cavaliers, we can tailor their diets to help regulate their internal temperature. During the warmer months, opting for cooling foods can help maintain balance and comfort for your Cavalier.
Google Ad Below
Summer Fun for You and Your Cavalier King Charles Spaniel
Despite the summer heat, Dexter and I still enjoy our summer adventures. They just need to be modified according to the weather. The first thing I do is check the weather, so I’m not out and about with Dexter and surprised! Walking or strolling Dexter in the morning is by far cooler than in the evening. I know people suggest evening walks, but, honestly, the heat from the pavement and the atmosphere seem hotter to me than in the morning. Your location may be different.
Try walking on grassy areas instead of pavement. Shady parks beat the noon sun. Breezy days while wading in the water are another fun way to help your Cavalier stay cool. However, if it’s still sunny or warm, cool water on their feet and a breeze are unlikely to cut it.
We do a lot of indoor adventures during the summer months. Pet stores, dog friendly stores and attractions are our go-tos. I also do a lot of indoor training sessions and enrichment activities to help keep Dexter engaged. The bottom line is that I don’t want to risk Dexter’s health. And I can say from experience, it’s not a good feeling. Back in 2018, I’m pretty sure Dexter almost had a heat stroke! We were in Florida in the spring, doing touristy things. I thought I was being careful, bringing Dexter inside the stores, indoor attractions, and a covered train tour, but he really wasn’t doing well. He started showing signs of heatstroke. We rushed him to the hotel and cooled him down. I was lucky. And I’m not sure what I would have done if I wasn’t so lucky.
Hot Weather Tips for a Cavalier King Charles Spaniel
Grooming & Trimming: Regularly groom your Cavalier to remove loose fur and prevent overheating. I do give Dexter a puppy cut by trimming his belly, legs, and tail. I started this because of his CM/SM, but it also helps lighten his load and keeps him cooler.
Travel Comfort: Ensure your Cavalier’s comfort during travel with a well-ventilated crate or car harness, and schedule frequent breaks for water and shade. I also use a cooling mat and fan blowing on Dexter.
Sunscreen: Dog friendly sunscreen on your Cavalier’s nose helps protect him from harmful UV rays.
Cooling Products: Invest in cooling accessories like a cooling vest, bandana, or mat to provide relief from the heat during outdoor adventures.
Avoid the Hottest Part of the Day: Schedule outdoor activities during cooler times, such as early morning or late evening.
Mind the Pavement: Hot asphalt can burn your Cavalier’s paw pads. Stick to grassy or shaded areas for walks.
Hydration: Always have fresh water available, and encourage your Cavalier to drink frequently to stay hydrated. I put bone broth cubes in Dexter’s water bottle to encourage him to drink. If not, he will ignore the water.
Indoor Play or Outings: On exceptionally hot days, opt for indoor activities like interactive games or training sessions to keep your Cavalier entertained while staying cool.
Cooling Foods: Opt for cooling or neutral proteins in your Cavalier’s diet.
Remain vigilant, provide ample shade and hydration, and monitor your Cavalier for signs of overheating. Keep your Cavalier King Charles Spaniel’s well-being in mind, and use these practical tips to make sure you and your Cavalier have a safe and enjoyable summer.
Your comments and questions are always welcome below.
Join our vibrant Cavalier King Charles Spaniel community on Facebook, support our dedication to pet wellness on Patreon, and stay updated with our weekly newsletter for invaluable tips and insights into raising happy, healthy pets. Together, let’s make a difference in our dogs’ lives!
Google Ad Below [...]Read more...
June 8, 2024Treatment options for Chiari malformation and Syringomyelia
My best friend, Dexter the Dog, was diagnosed with Chiari malformation and syringomyelia in 2012, just before his third birthday. This diagnosis hit me hard. Over the past twelve years, I’ve shared a lot about Dexter’s diagnosis, care, and treatments on my Raising Your Pets Naturally blog and YouTube channel.
Since I recently started this blog dedicated to Cavalier King Charles Spaniels, I thought it would be a good time to write an update on Dexter’s care and what I’ve learned. I am also happy to say that at almost fifteen, Dexter is doing amazingly well! I hope you find this article on Chiari malformation and syringomyelia in dogs helpful. Please share this information to help others dealing with this heartbreaking diagnosis learn about the many helpful and natural treatments for dogs with Chiari malformation and syringomyelia.
What is Chiari Malformation (CM) and Syringomyelia (SM)
Chiari malformation commonly affects Cavalier King Charles Spaniels, Chihuahuas, Brussels Griffons, Yorkshire Terriers, Maltese, Pomeranians, Toy Poodles, and Shih Tzus. In dogs with CM, the skull is too small to hold their brain properly. This overcrowding forces parts of the brain, specifically the cerebellum and medulla, out of their normal positions. The cerebellum controls movement and balance, while the medulla is connected to breathing and heart rate.
When these brain parts are pushed out of place, they obstruct the normal flow of cerebrospinal fluid (CSF). Cerebrospinal fluid is in the brain and spinal cord and acts as a natural cushion, protecting the brain. When the flow of CSF is blocked, it can lead to a buildup of pressure and result in serious neurological issues and can form syringomyelia (SM), a condition where fluid-filled cavities form within the spinal cord.
In Cavalier King Charles Spaniels, Chiari malformation is a congenital issue, meaning they are born with it. Dr. Clare Rusbridge established a breeding protocol to help reduce CM/SM in puppies. Following the breeding protocol is crucial for reducing the risk of Chiari malformation (CM) and syringomyelia (SM) in Cavalier King Charles Spaniels. If both parents have CM/SM, puppies are 92 percent likely to be affected, while the risk drops to 77 percent if only one parent is affected. If both parents are clear of CM/SM, there is a 70 percent chance their puppies will be clear, rising to 87 percent if the grandparents are also clear. Potential Cavalier families should seek breeders who perform this testing to ensure healthier puppies. The only way to diagnose Chiari malformation and syringomyelia definitively is through an MRI scan.
Recognizing Chiari malformation is vital for Cavalier King Charles Spaniel families because early detection and treatment can greatly improve the quality of life for dogs with this condition. If you notice symptoms like uncoordinated movements, sensitivity around the head and neck, or any other unusual behaviors, it’s important to consult with your veterinarian as soon as possible.
Symptoms of Chiari Malformation and Syringomyelia in Dogs
Symptoms of CM and SM in Cavalier King Charles Spaniels and other breeds can vary. About a year before Dexter’s diagnosis, he began showing some random and unusual behaviors. And they didn’t happen all the time.
Fixating at dust particles in the sunlight.
Fidgeting and biting at his rear end. His vet initially thought it was anal glands, but they really weren’t that full, and he continued to do it.
Acting strangely around flying insects. Whenever a fly was around, he would get strange and start spinning around and growling at his back end.
Then, he had a downright scary episode, where he just was going crazy over his back end, growling, at it, spinning, and I could not gain his attention. I then decided to hit record the next time it happened. After recording the next episode and consulting Dr. Lynette Cole at The Ohio State University, three veterinary neurologists suspected Chiari malformation and syringomyelia. I then made an appointment at the OSU neurology department for an MRI and spinal tap. CM and SM were confirmed.
Dexter’s episode is below.
Don’t forget to subscribe to our @RaisingYourPetsNaturally YouTube channel for more.
Other common symptoms of CM/SM in Cavalier King Charles Spaniels can include:
Air scratching, especially on walks or when excited.
Head scratching or rubbing.
Air snapping or licking.
Random yelps of pain.
Sensitivity to touch and being picked up.
Hind end weakness.
Head or body wobbles, stumbling, or squinting.
Head pressing.
Seeking darkness or solitude.
Inactivity or depression.
Restlessness.
Google Ad Below
Diagnosing Chiari Malformation and Syringomyelia
The only definitive way to diagnose CM/SM is with an MRI. If a dog shows common symptoms and belongs to a breed prone to this disease, like Cavalier King Charles Spaniels, a vet might start treatment without MRI confirmation. For me, knowing exactly what Dexter had was key. Along with an MRI, Dexter also had a spinal tap to ensure we had all the facts.
Treatment Options for Chiari Malformation and Syringomyelia
Surgery for Chiari Malformation in Cavalier King Charles Spaniels
Surgery is performed with the goal of restoring the natural flow of spinal fluid. This involves decompressing the affected area, removing bone fragments, and sometimes adding a shunt. However, the results can differ greatly from one dog to another. Despite surgical intervention, many dogs still require medication to manage their pain effectively.
Medications for Chiari Malformation in Cavalier King Charles Spaniels
The disease is progressive and varies in severity. Treatment prioritizes comfort and alleviates pain. Dr. Clare Rusbridge provides the gold standard in the medication treatment protocol. It’s essential to monitor organ functions regularly when administering long-term medications.
Natural Treatments for Syringomyelia in Dogs
There are many natural treatments to help support a dog with CM/SM. Here are some that have worked for Dexter:
Acupuncture: Restores the normal flow of energy through specific pathways.
Cold Laser Therapy: Reduces inflammation, relieves pain, repairs tissue damage, and increases blood circulation.
PEMF ( Pulsed Electromagnetic Field) Therapy: Reduces inflammation, relieves pain, promotes tissue and cell repair.
Food Therapy: A diet of home-cooked or raw dog food helps reduce inflammation. Ingredients like sardines, shiitake mushrooms, and green-lipped mussels can help.
Conscious Proprioception Exercises: Dexter wore Dr. Buzby’s ToeGrips to stimulate awareness of his feet. I also regularly work with him on footwork exercises to help him be more aware of his feet.
Canine Hydrotherapy: Water treadmill therapy strengthens Dexter’s body with low joint impact.
Core Strength Exercises: Dexter’s rehabilitation focuses on boosting his core and back end strength, crucial for enhancing balance and stability. Through a variety of exercises using different equipment, we target his abdominal, back, and hind leg muscles, ensuring he can confidently navigate any challenges.
Living with a Cavalier King Charles Spaniel with Chiari Malformation
Living with a dog diagnosed with Chiari Malformation and syringomyelia can be challenging. Dexter’s first year after diagnosis was the most challenging. Trying to figure out what worked best for him, what kinds of activities or weather would trigger breakthrough pain, and how best to manage it. His life changed, but, luckily, with a great team of professionals, I was and am able to provide Dexter with a great quality of life that is still full of adventures and enrichment.
Comfort Measures
To help keep Dexter as comfortable, happy, and pain-free as possible, I’ve incorporated a range of products.
Dog Harness: Avoid collars that can be painful due to the disease’s nature.
Dog Strollers: Great for giving Dexter a break while still being part of adventures.
Cooling Mats and Warming Blankets: Depending on Dexter’s temperature needs. I will say, now Dexter is on a cooling mat almost 100 percent of his downtime. He rarely seeks heat.
Snuggle Jackets: Some dogs find comfort in them, while others might not. In the beginning, Dexter wore one almost all the time. But, I think, after we finally found our groove with his care, they were no longer necessary.
Natural Calming Aids: Calming CDs and natural calming sprays help Dexter on rough days.
Support for Dogs with Chiari Malformation and Syringomyelia
Let’s unite in this journey. Dexter’s courage living with Chiari malformation and syringomyelia serves as a light of hope for us all. You aren’t in this alone. Seek the help of a good veterinarian team, join a support group, including ours! Together, we can provide hope and guidance to others on similar paths. Go Team Dexter!
Your comments and questions are always welcome below.
Join our vibrant Cavalier King Charles Spaniel community on Facebook, support our dedication to pet wellness on Patreon, and stay updated with our weekly newsletter for invaluable tips and insights into raising happy, healthy pets. Together, let’s make a difference in our dogs’ lives!
Google Ad Below [...]Read more...
June 26, 2024Cavalier King Charles Spaniel Enrichment Ideas
Ultimate Guide to Canine Enrichment for Cavalier King Charles Spaniels
If you are reading this blog post on ways to keep your Cavalier King Charles Spaniel entertained, you have made me a very happy lady. Mental stimulation for your Cavalier is so important, and sometimes a very overlooked part of a good positive dog training program. I’ve always said, dog training isn’t just about teaching your Cavalier to do something or not do something. Rather, there is a synergy between training your Cavalier and everything else including canine enrichment. I think bonding with your Cavalier King Charles Spaniel is the best medicine for both you and your pup. So much so, I started a Cavalier King Charles Spaniel Facebook group, with a big emphasis on enrichment ideas for Cavaliers. And the photos you are about to see on this Cavalier blog are all from members of our wonderful community! Now, let’s dive into canine enrichment and why it’s so important.
What is Canine Enrichment?
Canine enrichment is about making your dog’s life better by giving them fun activities that keep their mind and body active. I think about canine enrichment as life experiences and engaging our Cavaliers in a variety of fun and interactive activities. It’s more than just a food puzzle toy, although that’s a great introduction to enrichment for your Cavalier.
Enrichment can be interactive play, positive dog training sessions, sensory games, physical activities, food enrichment, and outdoor adventures. The goal is to keep your Cavalier happy, healthy, and mentally sharp. When you do this, it helps prevent boredom, boosts your dog’s mental skills, and strengthens your bond, which also leads to better listening and obedience.
Subscribe to @CavalierTipsandFun for more!
Beyond Food: Enrichment Through Interaction
Many people associate canine enrichment primarily with food-related activities, like filling food toys or using interactive frozen treats. While these activities are great, and I use them daily with Dexter, they are just one piece of the enrichment puzzle. When I think of canine enrichment, I think of activities that involve direct interaction with Dexter. It’s about more than just keeping him occupied with food toys—it’s about creating a connection with him, something we do together.
Incorporating various types of environmental enrichment can greatly benefit your Cavalier King Charles Spaniel, both mentally and physically. Enrichment keeps those unwanted behaviors at bay by preventing boredom. It encourages social interaction, making for a happier and more engaged dog.
Positive Training for Your Cavalier
Training is a wonderful way to enrich your Cavalier’s life. Whether you’re teaching basic obedience, fun tricks, or advanced behaviors, positive dog training sessions offer cognitive stimulation and deepen your bond. Cavaliers are smart and love to please, which makes them quick and eager learners. Remember, when you’re teaching and training your Cavalier, you want the training to be fun for both your dog and you.
Google Ad Below
Outdoor Adventures
Taking your Cavalier to the park or on a walk can be incredibly gratifying. Consider going on a “sniffy walk,” where your pup gets to explore and investigate their surroundings at their own pace. Allowing them to follow their nose is not only fun but also taps into their natural instincts.
Other fun outdoor adventures can be indoors too! Take your Cavalier to a pet store for some shopping or visit a dog-friendly indoor store. Just make sure to call the establishment first to double-check their pet policies. Those training sessions you’ve been working on will ensure your indoor fun is a positive experience and one you can feel proud of.
Fun and Beneficial Canine Fitness Activities
Incorporating canine fitness activities can be both fun and vital for your Cavalier’s health. Stretching, sits to downs to stands, using wobble boards, or even walking over cavaletti poles are a few examples. These activities help keep your Cavalier in good physical shape and engaged. Other fitness ideas include walking on slight outdoor hills, placing two paws on a curb, jumping on a sturdy boulder, and walking across a fallen tree trunk. Always prioritize safety during these exercises.
Sensory Enrichment for Your Cavalier
Sensory enrichment is another great way for keeping your Cavalier King Charles Spaniel active and entertained. This type of enrichment is all about stimulating their senses, sight, smell, hearing, touch, and even taste. Obviously, there is some overlap between enrichment “categories.”
Consider incorporating toys that make different sounds or have different textures to engage their hearing and touch senses. You can even make a scent garden in your yard with dog-friendly plants and herbs. Or, grab some outdoor things such as pine cones, grass, and flowers and place them in scent boxes for your Cavalier to smell or find. Plus, activities such as scent work, where your dog uses their sense of smell to find hidden treats or toys, can provide a great mental and physical workout..
By giving your Cavalier a variety of sensory experiences, you satisfy their natural curiosity and make them happier overall. Giving your Cavalier sensory activities like scent work or creating a scent garden not only keeps them entertained but also deepens your connection as you explore together.
Bonding Activities
Simple activities like grooming, talking to your dog, or giving them a gentle massage are also forms of enrichment. By connecting and touching your dog, you not only are able to do a lump-and-bump check, but you are laying the foundation of trust. Shared Zen moments like listening to music together or just lounging on the couch, can also be incredibly soothing for both you and your dog. Don’t forget snuggle time! Most Cavaliers love to cuddle, and those quiet, close moments can deepen your relationship even more. Did you hear that, Dexter? By incorporating these simple yet meaningful activities into your life, you’ll create a stronger relationship with your dog.
Food Games and Interactive Toys: Enhancing Mealtime for Your Cavalier
Food games like lick mats, interactive food toys, and snuffle mats are a great way to feed your Cavalier. Instead of wasting those valuable calories by tossing them in a bowl, using enrichment toys offers a fantastic activity. Don’t use extras in those food toys; use your Cavalier’s daily food or food calories.
For Cavaliers who are fed fresh food, such as a raw or fresh diet, lick-type toys like lick mats are perfect. These toys allow your Cavalier to eat their food while licking and enjoying their mealtime. Spreading the food out encourages more time eating and offers an easy enrichment activity. It also mimics natural foraging behavior.
Snuffle Mat DIY
If your Cavalier is fed dry kibble or dehydrated food, treat dispensing toys or snuffle mats are excellent choices. These toys make mealtime interactive by challenging your Cavalier to work for their food. They may knock around a toy that dispenses their meal or snuffle around a mat for their nibbles. In order to keep your Cavalier’s calories in check, you can reduce a small portion of their dry food and use fresh foods or toppers or freeze-dried 100 percent meat in these toys to add variety and excitement.
Incorporating food games and interactive toys into your Cavalier’s routine makes mealtime more enjoyable and provides an easy and daily mental enrichment activity. But, don’t just go with one treat puzzle toy. The more variety, the better.
Enriching Your Cavalier’s Life with Every Adventure
Canine enrichment is all about creating a variety of positive and fun experiences that enhance your Cavalier King Charles Spaniel’s life. Food toys are great–it’s the interactive, engaging activities that truly enhance their daily experiences.
By focusing on a variety of enrichment activities, you’ll ensure your Cavalier King Charles Spaniel is happy, content, and well-rounded.
I host a private Facebook group for Cavalier King Charles Spaniels, and we have a big focus on canine enrichment ideas and challenges to keep your Cavalier engaged and thriving!
I’d love to hear about your own enrichment ideas and experiences with your Cavalier! Share your tips and stories in the comments below and let’s keep the conversation going.
Join our vibrant Cavalier King Charles Spaniel community on Facebook, support our dedication to pet wellness on Patreon, and stay updated with our weekly newsletter for invaluable tips and insights into raising happy, healthy pets. Together, let’s make a difference in our dogs’ lives!
Google Ad Below [...]Read more...
July 24, 2024What Kind of Chew Toys and Bones are Safe for Cavalier King Charles Spaniels?
Most Cavalier King Charles Spaniels love to chew! Chewing is a natural and normal dog behavior that helps fight boredom and can even help keep your Cavalier’s teeth pearly white. But remember, brushing your Cavalier’s teeth daily is still ideal. Puppies and adolescent Cavaliers tend to have a high drive for chewing things. Sometimes, whatever they can sink those teeth into. Hopefully, you are working with a qualified dog trainer to ensure your Cavalier is learning to chew on the right items instead of your furniture, or, even worse, electrical cords or something else that can harm your Cavalier puppy.
So, what makes a chew toy or bone safe for your Cavalier King Charles Spaniel? Over the years, my opinion on this has evolved. I once opted for the harder, the better. But, now, I’m on the other side of the fence, choosing softer items. Hard and tough dog bones can chip teeth and even splinter, which can be very dangerous. Even my sweet, Dexter chipped his tooth on a hard bone….his last hard bone.
I personally do not use or recommend hard bones, antlers, hooves, plastic or nylon bones, rawhides, chews with lots of ingredients, wood bones, or weight-bearing bones. But, I will always say, this is my personal opinion, and they are your Cavaliers. You can do whatever you feel comfortable doing for them, and you will not be judged by me, nor should you be judged by your peers.
Please be aware that not every chew toy or bone will be suitable for every Cavalier. I strongly recommend active supervision when your Cavalier chews, particularly if it’s a new toy or bone or if the chew item is edible. The right size of a bone or toy is also important. You want to make sure the toy or bone is not so small that your Cavalier can place the entire item in their mouth and risk choking. This includes when the chew gets smaller. I tend to toss the end out before Dexter swallows it, with the exception of a chew that is crunchy. Finding the right chew for your Cavalier is sort of like “The Princess and the Pea.” So, let’s jump into my recommendations for safe and healthy chew bones for your Cavalier King Charles Spaniel.
Dehydrated or Freeze-Dried Fish Skins: With a good dehydrated or freeze-dried fish skin dog treat, the treat will be 100 percent fish skin with no artificial colors, preservatives, or flavors. With this list and anything I recommend, the first stop should be to read the actual ingredient panel. What’s inside. Everything. It’s also important to check out the packaging and carefully read the ingredient list and where the fish was caught and processed. Fish skins are great treats for your Cavalier, full of omega-3 fatty acids, typically low in fat, and fully edible. Most dogs love the taste and eagerly chew away. Some fish skins are crunchy, while others are chewy. Chewy ones last longer but need close supervision to make sure your Cavalier chews them up vs. swallowing a large piece. Shop now.
Bully Sticks & Pizzles: Made from the manly part of a bull, many dogs love chewing on these. What I like is that they typically just start to get soft and disappear; I haven’t seen any pieces break off. However, I have seen a stick peel every once in a while, like string cheese. You can also purchase bully stick holders to help hold the stick, which adds a second layer of safety, helping to prevent your dog from swallowing the end. I personally toss that piece into the garbage. Again, sourcing and how they are manufactured is key. Natural does not correlate to not using irradiation (radiation). I contacted my fair share of bully stick brands and asked if they used irradiation, so, make sure you do your homework. Tip: get odor-free or low-odor versions. These can stink like crazy! Shop now.
Raw Bones: Raw bones are another option for your Cavalier to chew on, especially if they are already on a raw diet or natural diet. Because the bones are not cooked, they are soft and unlikely to splinter. Cooked bones easily splinter and are very hard on teeth. The size will depend on the size of the bone and your Cavalier. A few options to consider include necks, wings, feet and tails. Once again, supervise and watch for choking or swallowing. Necks did not work for Dexter, as he thought he should just suck the whole thing down. Chewing Tips: Don’t clean the bones; feed them with some meat on them, as they come. Let your Cavalier pull on the meat and chew and lick the bone. Allow them to have them for an hour, then throw them away. It’s when they sit around the house, get buried, or get dried out that you get bacteria and splintering. They will last in the fridge for three days before feeding. They can also be frozen and thawed. Feed outside or on a towel, and make sure your Cavalier is wearing their snood!. Avoid weight-bearing bones, as dogs can chip or fracture their teeth due to how hard they are. Show now.
Dehydrated Duck/Chicken/Rabbit Feet/Ears: Duck, chicken, and rabbit feet or ears are excellent, crunchy, edible chews for Cavalier King Charles Spaniels. Dehydrated or freeze-dried. Both offer good chewing options. Chicken and duck feet are rich in chondroitin, glucosamine, and collagen, which support joint health, reducing the risk of brittle bones, improving mobility, and maintaining healthy teeth and gums. Rabbit ears and feet are particularly appealing as they are low in fat, high in protein, and help clean your dog’s teeth while reducing plaque buildup. Additionally, the fur on rabbit ears can serve as a natural dewormer. These natural chews are both nutritious and enjoyable, but always supervise your Cavalier to ensure safe chewing. Shop now.
Tripe Sticks: Tripe sticks are a fantastic chew option for Cavalier King Charles Spaniels. Typically made from the stomach lining of cattle, lamb, or goat, these chews are naturally rich in digestive enzymes and nutrients that support gut health. Tripe sticks provide a satisfying, chewy texture that most Cavaliers love, while also helping to clean their teeth and gums. They are full of nutrients that can be a great addition to your dog’s chew rotation. Shop now.
Beef Tails: Beef tails are another excellent choice for your Cavalier. They are durable and provide a long-lasting chewing experience, which helps keep your Cavalier engaged and entertained. Beef tails are also high in protein and can help naturally clean your Cavalier’s teeth. The natural toughness of beef tails makes them a good option for aggressive chewers, but always make sure to choose the appropriate size to prevent any choking hazards. Shop now.
Tendons: Tendons are a great chew for Cavaliers because they are tough yet somewhat flexible, providing a satisfying chew without being too hard on their teeth. They are also rich in collagen, which is beneficial for joint health. Tendons help keep your Cavalier’s teeth clean and their gums healthy. Most Cavaliers find the chewy texture very satisfying. Shop now.
Yak Chews: Yak chews are a fantastic option for Cavalier King Charles Spaniels, but I only recommend them when microwaved to make them poofy. Microwaving them creates a crunchy, airy texture that Cavaliers love, making them a safe and enjoyable option. They are rich in protein and calcium, supporting your dog’s overall health. Made from a mixture of yak and cow milk, these chews are rich in protein and calcium, supporting your dog’s overall health. Again, double check the ingredient label; not all are created equal.
Subscribe to @RaisingYourPetsNaturally’s YouTube channel for more!
Fillable Chew Toys: I am a fan of filling various food toys such as West Paw Tux and Toppl with healthy snacks. The key to getting your Cavalier to chew on a food toy is to stuff it! If your Cavalier is eating the toy instead of the inside food, I do not recommend it. Shop now.
Ingredients matter! If you’re considering chew bones made from various ingredients, it’s crucial to flip over the package and dive deep into the ingredient list. Not all chews are created equal, and some can contain nasty or even toxic substances that could harm your dog. Look for natural, wholesome ingredients and avoid artificial colors, flavors, and preservatives. A little extra time spent reading labels can make a big difference in keeping your Cavalier King Charles Spaniel safe and healthy.
So, there you have it. That is the current list of some healthy and natural chew toys, bones I feel comfortable providing Dexter and recommending to my dog training clients. Always remember to supervise your Cavalier when they are chewing and to choose the right size and type of chew for their needs.
Which of these chews does your Cavalier King Charles Spaniel love the most? Share your favorite chew toys or treats in the comments below!
A big thank you to all the members in our Cavalier Facebook group for your wonderful photos!
Google Ad Below
Join our vibrant Cavalier King Charles Spaniel community on Facebook, support our dedication to pet wellness on Patreon, and stay updated with our weekly newsletter for invaluable tips and insights into raising happy, healthy pets. Together, let’s make a difference in our dogs’ lives!
🐶💙Support our passion for pet wellness and unlock exclusive content, perks and early access by exploring our Patreon tiers.
Sign up for our weekly newsletter!
Join us on Facebook!
[...]Read more...
January 23, 2025Supporting Your Senior Cavalier King Charles Spaniel: The Ultimate Guide to Aging Cavaliers
After 15 amazing years with my Cavalier, Dexter it was his time to go to the rainbow bridge. It’s never an easy decision to make and since then, I have been thinking back on our life together. Over the course of his life, I wrote a lot about Dexter on my first blog, Raising Your Pets Naturally. Now, with Stewart, my 7-month-old rescue Cavalier King Charles Spaniel puppy, I’m starting fresh, but with all that I’ve learned from Dexter’s senior years. I thought this would be a good time to explore when a Cavalier King Charles Spaniel is considered a senior, their lifespan, common health concerns, and how we can support our Cavaliers through every stage of life.
At What Age Is a Cavalier King Charles Spaniel Considered a Senior?
If you’re wondering, “When does a Cavalier reach old age?” The answer varies depending on factors like genetics and health. Typically, small breed dogs like Cavaliers are considered seniors between 7 and 10 years old. While this is a general guideline, you may notice your dog showing signs of aging earlier or later.
Some indicators of senior status include:
Decreased Interest in Play: They may be less enthusiastic about toys or games they used to enjoy.
Weight Changes: Unexplained weight gain or loss can be a sign of aging or underlying health issues.
Changes in Vision or Hearing: Difficulty seeing or responding to cues may suggest declining eyesight or hearing.
Increased Time Spent Resting: Senior dogs often nap more during the day and may tire easily after exercise.
Changes in Appetite: They may eat less or show more picky eating habits.
Difficulty Climbing Stairs or Jumping: You might notice hesitancy or struggle with previously easy physical activities.
Behavioral Changes: Increased anxiety, clinginess, or even irritability may indicate aging.
Frequent Bathroom Breaks: Aging can bring bladder control issues or an increased need to urinate.
Dull or Thinning Coat: Their fur might lose its luster or feel thinner in certain areas.
Dental Issues: Bad breath, difficulty chewing, or loss of teeth can become more prominent.
Reduced Tolerance for Cold or Heat: Seniors may seek out warmth or avoid strenuous activity in hot weather.
Increased Vocalization: They may bark or whine more often, potentially due to discomfort, anxiety, or confusion.
Cognitive Changes: Signs of canine cognitive dysfunction (CCD) include disorientation, restlessness, or forgetting familiar routines.
Slower movement or stiffness in the morning: Your Cavalier may take a little longer to get going in the mornings, which can be a sign of joint stiffness or early arthritis.
Graying fur, often around the muzzle: Just like humans, dogs may develop gray hairs as they age, particularly around their face.
But don’t worry, aging doesn’t mean your Cavalier is slowing down in spirit! With the right care and attention, they can still enjoy life to the fullest.
What Is the Life Expectancy of a Cavalier?
You may have heard the question, “How long do Cavaliers live?” The average lifespan of a Cavalier King Charles Spaniel is approximately 10.45 years. This is based on a 2022 UK study of veterinary data. However, some studies suggest a slightly longer lifespan, with a 2024 UK study indicating an average of 11.8 years for the breed. The typical lifespan of a Cavalier King Charles Spaniel is around 9-14 years. That said, some Cavaliers, like Dexter, surpass this average with proper care, while others may face challenges earlier due to health conditions.
Common Health Issues in Cavaliers
Cavaliers are an incredibly loving and joyful breed, but they do have a predisposition to certain health issues. Knowing what to watch for and being proactive in their care can help them live a happy and long life.
Mitral Valve Disease (MVD): Nearly every Cavalier King Charles Spaniel owner will face mitral valve disease at some point if their dog lives long enough. This heart condition affects the valve’s ability to close properly, leading to a heart murmur and, eventually, heart failure if untreated. Yearly heart check-ups with a cardiologist can help monitor and manage this condition.
Chiari-like Malformation (CM): Because of the breed’s unique head shape, it’s estimated that 95 to 99% of Cavaliers will develop a condition called Chiari-like malformation (CM). This happens when the skull is a bit too small for the brain, causing part of the brain to push into the spinal canal. CM can result in pain, weakness, or in severe cases, even paralysis. While there’s no cure, symptoms can often be managed with medications and regular vet check-ups, helping your dog feel more comfortable.
Hip Dysplasia and Patella Luxation: While less common in Cavaliers compared to larger breeds, these conditions can cause joint pain and mobility issues. Patella luxation, which is a dislocation of the kneecap, is more common in Cavaliers and can lead to lameness and discomfort. Keeping your Cavalier at a healthy weight is key to reducing stress on their joints and managing these conditions.
Eye and Ear Problems: Cavaliers are prone to progressive retinal atrophy (PRA), cataracts, and ear infections. Regular grooming and vet visits help catch these issues early.
Intervertebral Disc Disease (IVDD): IVDD is a condition where the discs in your dog’s spine become damaged or degenerate, causing pain, weakness, or even paralysis in severe cases. Cavaliers are particularly vulnerable to this, especially as they age. Be on the lookout for signs of discomfort, difficulty moving, or dragging their back legs.
Myoclonus: Myoclonus refers to muscle twitches or jerks that can occur in Cavalier seniors, especially around the head or neck area. While it’s usually not painful, it’s important to consult with a vet to rule out underlying issues such as neurological problems.
Medium-Chain Acyl-CoA Dehydrogenase (MCAD) Deficiency: This genetic condition affects Cavaliers’ ability to properly metabolize certain fats, which can lead to serious health problems, including low blood sugar, lethargy, and, in severe cases, sudden death. The great thing is that there’s a quick and easy at-home swab test available to check if your Cavalier has MCAD. It’s a simple step that can give you peace of mind and help catch this condition early. It’s a proactive way to care for your Cavalier’s long-term health.
Subscribe to @CavalierTipsandFun for more!
Supporting Your Cavalier Through All Life Stages
Caring for a senior Cavalier means making thoughtful changes to their routine. As our dogs get older, their needs shift in different ways. They may slow down, develop new health concerns, or simply need more comfort. These changes are completely normal, and it’s up to us to help them adjust so they can continue to feel their best. With a little extra care and attention, we can make sure they stay happy, healthy, and comfortable as they age. Whether it’s modifying their diet, adjusting their exercise, or making small changes to your home, these little changes go a long way in supporting their well-being. After all, they’ve given us so many wonderful years of love and companionship, and now it’s our turn to return the favor.
Nutrition for Senior Cavaliers
As your Cavalier enters their senior years, their nutritional needs often shift to support their changing bodies. A balanced diet made with fresh, high-quality ingredients like Omega-3s, antioxidants, glucosamine, and chondroitin can help maintain joint health, cognitive function, and overall vitality. Glucosamine and chondroitin play an essential role in supporting cartilage and joint health and can be included in their diet through natural sources like bone broth, chicken feet, or beef trachea, or through supplements if needed. Adding these fresh foods as part of their meals or even as toppers can provide a natural boost that processed options often lack. Every dog is unique, so working with your vet or a canine nutritionist is key to crafting a plan that meets your Cavalier’s specific needs.
When Dexter was diagnosed with kidney issues in his senior years, I found that his diet needed some adjustments. He had been raw-fed for most of his life, but with the help of his veterinarian, I transitioned him to a customized, home-cooked diet to better support his health. Bones, which are a staple in raw feeding, are high in phosphorus, a mineral I needed to limit. To make up for the lack of bone calcium, I switched to eggshell calcium, which is lower in phosphorus and just as effective.
I also began boiling his meat and discarding the cooking water, which helped reduce the phosphorus content even further. I carefully selected foods that were naturally lower in phosphorus, like certain vegetables and proteins. Dexter was also starting to lose weight, so I added carbs like rice and sweet potatoes to help him maintain his energy and body condition.
These changes made a big difference in his quality of life. While home-cooking may not be for everyone, it’s worth exploring alternatives to prescription diets if your Cavalier develops a medical condition. A good veterinarian or certified dog nutritionist can guide you in creating a plan that meets your dog’s needs without compromising on fresh, wholesome ingredients.
💡 Pro tip: Every Cavalier is unique, and what works for one dog may not work for another. Always partner with your vet or a canine nutritionist to find the best approach for your senior Cavalier. Giving them a fresh diet tailored to their needs is one of the best ways to show your love and care during their golden years.
Exercise and Mental Enrichment
Gentle exercise is important for keeping your senior Cavalier feeling their best, but it’s all about adjusting to their abilities. When Dexter reached his senior years, mosey walks became our go-to. He loved taking his time, sniffing every blade of grass, and enjoying the world at his own pace. When he got tired, I’d pop him into his stroller so we could continue our adventure without overdoing it. That stroller wasn’t just for outdoor strolls either, it was perfect for indoor store adventures, allowing him to stay engaged and part of the action while giving his body the rest it needed.
Mental enrichment was just as important as physical exercise. One of Dexter’s favorite activities was a “find it” game with cardboard boxes. I’d hide a treat in a box, spread them around, and watch his excitement as he used his nose to uncover the prize. It was the perfect mix of mental stimulation and gentle movement. For senior Cavaliers, simple adjustments like these can make a huge difference. Whether it’s a slow walk, a stroller ride, or an engaging puzzle, finding activities that fit their needs helps them stay vibrant and connected to the world around them.
Don’t forget to subscribe to @CavalierTipsandFun for more!
Natural Therapies for Senior Cavaliers
As Cavaliers age, their bodies may need extra support to stay comfortable and mobile. Therapies like at-home laser treatments, physical therapy, and acupuncture made a big difference for Dexter in his senior years. Actually, Dexter had these treatments the majority of his life due to his Chiari malformation. These options can reduce pain, improve mobility, and help manage chronic conditions like arthritis.
Dexter had regular physical therapy visits, where he worked with a canine rehabilitation specialist to keep his joints moving and his muscles strong. I also had simple at-home exercises to follow up with between visits, ensuring he stayed as active as possible without overdoing it. Using a laser therapy device at home helped target areas of stiffness or soreness, and his PEMF (Pulsed Electromagnetic Field) bed became one of his favorite spots to rest. PEMF therapy didn’t just support his comfort but also promoted better circulation and reduced inflammation.
Order a laser for your Cavalier today!
Acupuncture was another natural treatment that worked well for Dexter, offering gentle relief from discomfort and improving his overall quality of life. These treatments, along with his regular routine, were all part of ensuring he was comfortable and able to enjoy his senior years to the fullest.
If you’re considering these therapies for your Cavalier, talk with your Cavalier’s holistic vet or a canine rehabilitation specialist. They can guide you toward the best options for your Cavalier’s individual needs and help create a plan to support their comfort and mobility.
Veterinary Care and Preventative Check-Ups
Regular vet visits are essential, especially as your Cavalier gets older. I recommend scheduling check-ups at least once a year, but if your dog is on medications or managing a condition, like Dexter was, labs every 4 months can give you a better picture of their health. Semi-annual check-ups are also a good idea to catch early signs of issues like MVD, joint problems, or anything else that may need attention. Don’t hesitate to bring up any subtle changes you’ve noticed, whether it’s weight loss, fatigue, or coughing. Early intervention is key, and your vet can provide valuable guidance to help you manage your Cavalier’s health, ensuring they stay happy and comfortable as they age.
Cardiologist Visits
I highly recommend that every Cavalier sees a cardiologist at least once a year. Cardiologists specialize in heart health and truly understand the ins and outs of heart disease, including conditions like MVD, which Cavaliers are prone to. Even if your dog hasn’t been diagnosed with anything serious yet, a cardiologist can spot early signs of issues that might not be apparent to you or your regular vet. If your Cavalier is diagnosed with MVD, your cardiologist may recommend more frequent visits to monitor the progression of the disease and adjust their treatment plan as needed. Having a heart specialist on your team gives you peace of mind and ensures you’re taking proactive steps to care for your dog’s heart health.
Making Your Home Senior-Friendly
As your Cavalier enters their senior years, small changes around the house can make a world of difference in how they move and rest. Senior dogs often experience joint stiffness, and their mobility may not be what it once was, so providing a comfortable and safe environment helps them feel at ease. These adjustments don’t have to be drastic, but they can really support your dog’s needs as they age.
Ramps or Steps: It’s always a good idea to have ramps or steps in place, even if your Cavalier is still young. Jumping down from furniture can put strain on their joints and neck, leading to potential issues down the road. Ramps or steps make it easier for them to get on and off the couch or into the car, preventing unnecessary stress on their bodies. These additions are a simple way to protect your Cavalier from injury and support their mobility throughout all stages of life, ensuring they can continue to join in on the fun without risk.
Orthopedic Beds: Comfort is key when it comes to senior Cavaliers. Cushioned orthopedic beds provide much-needed support for aging joints and pressure points. Dexter was a fan of cooling mats all year, so I made sure to place them throughout the house, including on his beds, to keep him cool. But I always left at least one bed without a cooling mat, in case he wanted to curl up and stay cozy. The goal is to ensure they have a comfortable place to rest, with options that suit their changing needs.
Non-Slip Surfaces: Slippery floors can be a senior dog’s worst enemy. To prevent falls, I recommend adding rugs or carpets to high-traffic areas, especially in places like the kitchen or hallway. You can also try ToeGrips(use promo code: DEXTER for 10% Off Your First Order), which help with traction, so your Cavalier can walk confidently. Making sure they have a stable environment to navigate helps keep them safe, especially when they’re getting around slower than they used to.
How Long Do Cavaliers Live? Cherish Every Moment
If there’s one thing Dexter taught me, it’s to appreciate the little moments, whether it was a slow morning walk, the rare occasion when he’d want to be close and rest in the nook of my legs, or simply watching him nap and snore in the sunshine. Dexter wasn’t much of a cuddler, but when he wanted to be near me, I made sure to savor those times. Our Cavaliers may not live as long as we’d like, but the joy they bring into our lives is something we’ll never forget.
When Stewart reaches his senior years, I know I’ll be ready to give him the care and love he deserves. For now, I’m soaking up every playful, puppy-filled moment.
Google Ad Below [...]Read more...
April 28, 2024Are Cavalier King Charles Spaniels Good for Therapy Dog Work?
Today, I want to chat about a topic that is close to my heart: therapy dogs! Have you ever wondered if your Cavalier King Charles Spaniel would make a good therapy dog? It’s a common question and one that has a few caveats. First, it’s not all about the dog! I know, I know, it’s always all about Dexter, but with visiting therapy dogs, it’s about teamwork.
But what is a visiting therapy dog team, and what do they do? A therapy pet team is a person and their pet (sometimes cats, bunnies, etc.) who share their companionship and comfort with those in need, visiting places like hospitals, schools, and nursing homes. These teams engage in either Animal-Assisted Activities (AAA) or Animal-Assisted Therapy (AAT). AAA therapy dog teams engage in sessions without the presence of a medical professional or specific treatment goals, aiming simply to bring joy and comfort. Whereas AAT therapy dog teams work with healthcare providers in goal-oriented sessions aimed at addressing specific issues, with progress carefully measured and tracked throughout the process.
Being a good therapy dog team isn’t just about your Cavalier; it’s also about you. Both you and your CKCS are visiting as a team. You both must have the skills and knowledge required to visit people in a wide range of settings.
Let’s discuss what humans should be bringing to a Cavalier therapy dog team. As a therapy dog handler, it’s important to be comfortable when interacting with both people and your dog. You’ll need to be able to guide your Cavalier through different situations, encouraging them and keeping them safe and happy. Understanding your dog is key to becoming a therapy dog handler. You’ve got to be able to recognize the tiniest changes in behavior and body language, and quickly respond. And at the same time, you will be multitasking by staying engaged with individuals. It’s a balancing act, for sure, especially as you start out your journey as a therapy dog team.
Now, what personality should your Cavalier King Charles Spaniel have in order to make a good therapy dog? When it comes to a well-suited therapy dog, you can look at a few key traits. A good therapy dog should be reliable, predictable, and able to follow your cues with ease. That’s not to say they have to be robots and never get flustered, but as a general rule, you want a dog that is solid in their temperament. Your dog should be friendly with strangers, as your visits will be with strangers. At the same time, they should be poised, not jump on people, and be able to walk nicely on a leash around distractions, including food. It’s not just about loving new people; it’s also about having manners in new and unfamiliar environments.
Getting Started Training Your Cavalier to Become a Visiting Therapy Dog
It’s important that your Cavalier have basic obedience and manners. Walking on a loose leash in crowded places, around dogs, and on slick floors is a must. Leaving food or dropped pills on the ground is incredibly important for your dog’s safety. If your Cavalier knows tricks, that can be a great icebreaker and is also helpful when someone wants to look at your dog but not pet them. Dexter and I were a visiting therapy dog team for many years, and tricks and activities were by far his favorite visits! If your dog needs a refresher, enroll in a positive dog training class.
Subscribe to our @CavalierTipsandFun YouTube channel for more!
Google Ad Below
After your Cavalier has mastered his basic obedience skills in a variety of environments, look for a therapy dog training prep class. This may be a weekend class or one that spans 4–8 weeks. When I taught my therapy dog prep class, each week we covered a new topic to prepare the handlers and dogs for the actual work involved and the test. My students by far enjoyed skit night, where my volunteers and I role-played different scenarios, the teams interacted, and we discussed what was good and how they could improve in that situation. It was a hoot and very eye-opening for the upcoming teams.
When you and your Cavalier are ready to take your therapy dog evaluation, you will need to find an evaluator to assess whether you are ready for therapy work. But there is more than one therapy dog organization out there. Choosing the right organization is crucial. Some facilities have specific requirements, like only accepting teams evaluated by certain organizations. So, if you have your sights set on a specific organization, reach out to them first. If your dog is on a raw food diet or you provide your dog with titers vs. yearly vaccinations, not all therapy dog organizations accept that, but some do.
Speaking of organizations, there are plenty out there, each with its own unique criteria. Some of the most common ones include Alliance of Therapy Dogs, Pet Partners, Love on a Leash, and Therapy Dogs International. Be sure to check out their specific requirements before making your decision.
Subscribe to @DextertheDogandFriends for kid-friendly content!
During the evaluation, the evaluator will test your skills to ensure you’re ready to handle various situations with confidence. Once you’ve got the green light from your evaluator, send in your paperwork and fees. While you are waiting for your official badge, it’s a good time to start reaching out to facilities you’re interested in visiting. It’s best to meet with the director, take a tour, and get a feel for the environment without your dog. When you are ready to visit with your Cavalier, keep those initial visits short and sweet. It’s all about easing them into the new surroundings and ensuring they feel comfortable and confident in their role as a therapy dog.
And remember, if you don’t think therapy work is in the cards for your Cavalier, that’s perfectly fine. There are plenty of other enjoyable activities you and your Cavalier can explore together. But if therapy work is the journey you’ve chosen, then I wish you both the best of luck on this rewarding adventure.
Your comments and questions are always welcome below.
Join our vibrant Cavalier King Charles Spaniel community on Facebook, support our dedication to pet wellness on Patreon, and stay updated with our weekly newsletter for invaluable tips and insights into raising happy, healthy pets. Together, let’s make a difference in our dogs’ lives!
Google Ad Below [...]Read more...
July 10, 2024Choosing a Cavalier King Charles Spaniel Breeder
While I understand the “adopt don’t shop” idea, there are valid reasons to purchase a purebred Cavalier King Charles Spaniel from a responsible Cavalier breeder. I’ve received numerous requests on how to find a good Cavalier King Charles Spaniel puppy breeder, so let’s dive into my personal thoughts and considerations.
Educate Yourself on the Cavalier King Charles Spaniel Breed
First things first, it’s crucial to understand the breed you’re interested in. Cavaliers are charming, affectionate, and beautiful, but they also have specific needs and characteristics. Learning about the typical Cavalier personality and care can help you in deciding if a Cavalier is the right breed for your family.
Dive into the Cavalier King Charles Spaniel Breed Information
The internet has a ton of information about Cavalier King Charles Spaniels. Not all good, so take everything with a grain of salt. I would suggest looking at Cavalier King Charles Spaniel national breed clubs and Cavalier rescues. They tend to have a lot of very helpful information. Spend time reading about Cavaliers to understand their grooming care, behavior traits, size, and medical concerns.
Cavalier King Charles Spaniel Temperament and Personality: Cavaliers are known for their friendly and affectionate nature. They thrive on companionship and are often described as “lap dogs” or “love sponges” because they love to snuggle. But, they aren’t all snuggle bugs, and it’s important to note that they are spaniels, which stem from hunting genes, so they can be very active little dogs. Interestingly, Dexter is now almost fifteen, and, over the years, I have met a lot of Cavalier families who downsized from golden retrievers, I was one of them. I think because they have that same personality of fun and eagerness to be part of the family activities.
When taught properly, they are often good with children and other dogs and adapt well to a variety of living environments. I do say when taught properly, as you can’t assume you can toss any dog into a situation and they will handle it as we had hoped. As a side note, please check out my YouTube channel, Dexter the Dog and Friends, to learn more about raising kids and dogs together.
Dexter’s school assembly!
Cavalier King Charles Spaniel Maintenance and Grooming: Cavaliers require regular grooming due to their silky and long coats. This includes brushing several times a week to prevent mats and tangles. Silky? Well, some Cavaliers have a much thicker coat than others. Take my Dexter, for example. He has very long fur, and it’s silky but also super thick. Daily brushing is even better if you can swing it. It will really help to prevent mats in the first place.
Regular baths are important too. If you are using a truly natural dog shampoo (I use 4-Legger) that does not have any harmful ingredients, you can bathe as needed. When Dexter was a visiting therapy dog, he had to have a scrub-a-dub-dub before his visits, so that was weekly or every two weeks for us. But now, he gets a bath every three to four weeks. Their nails should also be trimmed regularly, and their teeth brushed daily to maintain good dental health.
Grooming Tips. Subscribe to my @RaisingYourPetsNaturally YouTube channel for more.
Trimming Your Cavalier King Charles Spaniel: Talk about a controversy! I am always pro it’s your dog; do what is best for them and you. Dexter has Chiari malformation (more on that below) and because of that, grooming is uncomfortable. Therefore, I have always kept him in a puppy cut. I lighten that thick fur, shorten him up, trim his ears, and keep his slippers short. Slippers, BTW, are the fur around their feet, or Grinch feet. If you want to keep their Grinch feet full, it is important to still trim their foot pads to prevent slipping.
Cavalier King Charles Spaniel Medical Conditions: This is where our beloved breed suffers the most. Cavaliers are prone to several hereditary conditions. It’s essential to be aware of these and ensure your breeder is proactive in health testing because that’s the only way to help our Cavaliers out of their medical mess. Key health concerns include mitral valve disease (MVD), hip dysplasia, Chiari malformation (CM) and syringomyelia (SM), and patellar luxation. Reputable breeders will conduct specific screenings to minimize the risk of these conditions in their puppies.
Understanding Health Testing for Cavaliers
For Cavaliers, it’s crucial that both the breeding dogs and their parents are health tested for hereditary diseases. It’s not just the breeding pair, but the grandparents too! The grandparents have a longer history, testing and health records. A highly regarded breeding Cavalier should be over 2.5 years old, with parents that are MVD heart clear and MRI scanned clear of CM/SM. A reputable breeder will eagerly provide copies of health certificates of each parent and grandparents or links to tests. If not, be sure to ask. If they are hesitant to share, I would be hesitant to move forward.
Mitral Valve Disease (MVD): Every breeding Cavalier King Charles Spaniel should have an annual heart exam by a board-certified veterinary cardiologist. The parents of your prospective puppy should have heart clearances from a cardiologist and be at least 2.5 years old at the time of breeding. All four grandparents should be over the age of 5 and heart clear.
Syringomyelia (SM) and Chiari Malformation (CM): Both parents should have MRI scans showing them clear of CM/SM after reaching 2 years of age. It’s even better if the grandparents have also undergone MRI scans and are clear of CM/SM.
Hips: OFA requires that a Cavalier be a minimum of 2 years old for hips to be certified. It’s recommended for grandparents to have certified hips as well.
Patellas: Testing should be done annually to ensure healthy knees and to prevent luxation in both parents.
Medium-Chain Acyl-CoA Dehydrogenase (MCAD): MCAD is a metabolic disorder that affects how Cavalier King Charles Spaniels process certain fats for energy. It’s caused by a genetic mutation that can lead to metabolic imbalances. DNA testing is essential to identify Cavaliers carrying the mutation and prevent passing it on to their offspring. This is a newer (Summer 2023) DNA test.
Episodic Falling Syndrome (EFS): Is a hereditary neurological disorder affecting Cavaliers. Breeders should ensure all Cavalier breeding dogs undergo DNA testing for EFS before mating.
Dry Eye Curly Coat Syndrome: An inherited disease that affects the eyes, skin, and feet of Cavalier. It can be detected through a DNA test.
Dry Eye: Testing for dry eye in Cavalier King Charles Spaniels involves a DNA health test to identify the presence of the genetic mutation associated with dry eye, curly coat syndrome. Testing ensures early detection and appropriate management of this hereditary condition in breeding dogs.
Don’t forget to subscribe to our @CavalierTipsandFun YouTube channel for more!
The Importance of Puppy Socialization
Puppies develop both physically and mentally right out of the gate, and even during pregnancy! A stressed mom can produce stressed, unhealthy puppies. A responsible breeder not only ensures a Cavalier puppy is medically healthy, but behaviorally as well. Breeders should prioritize the physical and mental well-being of Cavalier puppies by starting basic socialization at home. This includes introducing puppies to children, adults, outdoor environments, handling and grooming, and exposing them to different textures and obstacles.
Finding a Good Cavalier King Charles Spaniel Breeder
Many national breed clubs provide breeder lists, which are a great starting point. Look within a specific mile radius you are willing to drive to meet the breeder and puppies. Breeder websites should have detailed information on health testing and puppy socialization.
When you find a few breeders who look good on paper, contact them via email or phone. Discuss your goals and hopes for your new family member. You are looking for a connection with a breeder just like you are looking for a connection with your puppy.
Visiting the Breeder and Their Cavaliers
I recommend setting up a date and time to meet the breeder in their home and visit with their Cavaliers. Seeing the living situation and behavior of their dogs in person is a great indicator of how the puppies will turn out. Look for happy breeding dogs that are part of the family. Some breeders may be hesitant about home visits, but it’s essential for you to feel comfortable with the environment where your puppy is being raised.
Picking out Dexter! FYI he was 5 weeks here, I would bring him home at 12 weeks.
Choosing Your Cavalier Puppy
This could be an entire article on its own, but here are a few highlights to get you started. TAKE YOUR TIME! This is not a time to make a quick decision or an impulse buy. You are choosing your next family member, a living creature with strong emotions that will hopefully be with you for the next ten to twenty years.
Before meeting the puppies, have an idea about what you want to do with your Cavalier puppy and future dog. Are you looking for a canine athlete? Or maybe a therapy dog to visit children or the elderly? The personality traits of those two puppies can be quite different, so knowing your goals will help in choosing the best Cavalier King Charles Spaniel puppy for you, your family, and your goals.
Bringing Your New Cavalier Puppy Home
Picking up a new Cavalier puppy typically happens when the pup is between 12-15 weeks of age. Prepare your car for your new puppy before arriving at the breeder’s home. Items to have on hand include a travel crate, puppy blankets, healthy treats, water and bowl, and a leash and harness. If your journey includes an overnight stay, pack items for a dog friendly hotel stay.
Air Travel Considerations
I personally would never fly any of my pets in cargo, nor would I have my puppy shipped to me. Meeting the breeder, dogs, and puppies is essential. If you plan on a plane ride home, check with the airlines on what they will need before your departure.
Maintaining Contact with Your Breeder
When breeders are committed to the breed’s well-being, they may ask you to provide specific health tests on your puppy throughout its life. This means the breeder is looking to see how the puppies develop, and if there are any medical concerns over their life, they may not breed that pair again. In my book, this speaks volumes about what a responsible breeder really is.
Now that you have a healthy and behaviorally sound Cavalier puppy, it’s your job to start socialization and training. You and your puppy are ready for a lifetime of fun and joy.
I hope this updated article helps your readers in their quest to find a reputable Cavalier King Charles Spaniel breeder. Good luck at finding your BFF!
Google Ad Below
Join our vibrant Cavalier King Charles Spaniel community on Facebook, support our dedication to pet wellness on Patreon, and stay updated with our weekly newsletter for invaluable tips and insights into raising happy, healthy pets. Together, let’s make a difference in our dogs’ lives!
🐶💙Support our passion for pet wellness and unlock exclusive content, perks and early access by exploring our Patreon tiers.
Sign up for our weekly newsletter!
Join us on Facebook!
[...]Read more...
November 12, 2024Best Treats for a Cavalier King Charles Spaniel
If you’ve found this Cavalier blog by searching for “best treats for Cavalier King Charles Spaniels,” you’re probably wondering what makes a healthy dog treat for this special breed. Whether you’re looking for the best dog-training treats for your Cavalier or just healthy dog treats, it’s essential to choose options that benefit your Cavalier King Charles Spaniel’s health and waistline. Here’s what I consider when picking out healthy treats for Dexter.
Check the Ingredients in Your Cavalier’s Treats
The very first thing I do when choosing treats for Dexter is check the ingredients list. Don’t just rely on the fancy pictures on the front of the bag; the ingredient panel tells you what your Cavalier is actually eating. Even if a treat claims to be “chicken-flavored,” that doesn’t always mean it contains real chicken. Always look for whole, natural ingredients like real meat, vegetables, and fruits.
What to Avoid in Your Cavalier King Charles Spaniel’s Treats
Artificial Flavors: If you see “flavor” in the ingredient list, it’s likely a synthetic that’s meant to mimic real food. Real food ingredients are always better for your Cavalier’s health.
Added Salt: Too much salt can be harmful, especially for dogs with heart issues, like Cavaliers. Stick to treats with no added salt, as too much sodium can lead to health problems.
Preservatives: Treats should be free of artificial preservatives like potassium sorbate, sodium benzoates, BHA and BHT. These chemicals are commonly found in cheaper treats and can be harmful in the long run.
By-Products or Mystery Meat: Avoid any treats that list “meat by-products” or vague “animal fat.” We want to know exactly what’s going into our dog’s body.
Sugar or Sweeteners: Skip the sugary treats! Cavalier King Charles Spaniels can easily gain weight, and too many sugar-filled treats can contribute to obesity, which affects their health.
Grains: Many dogs, including Cavaliers, can be sensitive to corn, wheat, and soy. Grains also pack in a lot of calories. Stick to treats with grain-free ingredients.
Healthy Treats for Cavalier King Charles Spaniels
So, what should you be looking for instead? The best treats for Cavalier King Charles Spaniels are made from whole, natural ingredients. I always opt for treats made with high-quality meats, like rabbit, chicken, beef, or duck, and ingredients that support overall health.
When choosing healthy dog treats, I think about each ingredient and how it affects my dog’s health and diet. I prefer foods that can contribute to Dexter’s overall nutrition, not add-ons. If I think the treat’s ingredients are more like a candy bar, I’ll skip it.
Best Training Treats for Cavaliers
When I’m training Dexter, I want treats that are both nutritious and irresistible. Training treats should be small, easy to chew, and made from single-source protein. Some of my favorites include freeze-dried meat or dehydrated meat. These treats are not only high-value (meaning they’ll grab your Cavalier’s attention), but they’re also healthy and easy to use in training sessions.
I also may grab freeze dried dog food that consists of healthy ingredients and no fillers. They tend to be bite-sized, and I can easily cut down on some of Dexter’s fresh food for the day and replace it with the freeze-dried dog food. No extra calories needed, and he doesn’t lose any of his daily nutritional needs.
Treats for Occasional Snacking
When it’s time for a snack, I’m okay with a treat that’s a bit more substantial, like grain-free biscuits made with sweet potato or pumpkin. These treats are great for occasional use, but they do tend to be higher in calories and more ingredients. I like to keep Dexter’s treats simple and sweet.
My Top Picks for Cavalier King Charles Spaniel Treats
Dehydrated Meat: A simple, natural treat that’s great for training or as an occasional snack. Dehydrating your Cavalier’s meat treats at home is simple and can be done using a dehydrator or your oven. To start, slice the meat (like chicken, beef, or turkey) into thin, even strips, removing any fat. If using a dehydrator, set it to around 160°F and arrange the meat strips on the trays, ensuring they don’t overlap. Dehydrate for 6-12 hours, checking for proper dryness—meat should be firm and break easily. If using an oven, place the meat on a baking rack, set the oven to the lowest possible temperature, and prop the door open slightly to allow moisture to escape. Store a few treats in your Cavalier’s treat jar and the rest in the freezer to stay fresh.
Dehydrated Fruits and Veggies: Dehydrated fruits and vegetables are a great low-calorie treat for Cavalier King Charles Spaniels, providing a crunchy, natural snack without added preservatives or artificial ingredients.
Can Cavaliers have carrots? For me, this is a yes and no. Yes, carrots are perfectly healthy and nutritious for your Cavalier. I know a lot of people recommend feeding large carrots to dogs as a chew, but I do think that may pose a choking risk. You must ensure your Cavalier is safely chewing the carrot and not swallowing big chunks. The same goes for baby carrots. For me, I prefer to feed Dexter carrots as little bits. But, I am definitely a proud helicopter mom. Make sure you read the article on healthy chews for your Cavalier King Charles Spaniel if you are wanting safe-and-natural chews.
Freeze-Dried Healthy Dog Food: Freeze-dried dog food can be an easy swap from their regular diet, making it a convenient and healthy treat option for Cavalier King Charles Spaniels. Plus it’s a great treat for picky eaters.
Freeze-Dried Meat Treats (Single Ingredient): Freeze-dried meat treats are a high-protein, single-ingredient snack for Cavaliers, providing a nutritious option.
Healthy DIY Recipes for Cavaliers. Don’t forget to subscribe to @CavalierTipsandFun for more!
Final Thoughts on Choosing the Best Treat for a Cavalier King Charles Spaniel
When choosing the best treats for your Cavalier King Charles Spaniel, always prioritize natural, healthy ingredients. Look for treats that are high-quality, free of unnecessary fillers, and made with proteins you recognize. And remember, even the healthiest treats should be given in moderation.
What treats does your Cavalier love?
Join our vibrant Cavalier King Charles Spaniel community on Facebook, support our dedication to pet wellness on Patreon, and stay updated with our weekly newsletter for invaluable tips and insights into raising happy, healthy pets. Together, let’s make a difference in our dogs’ lives!
Google Ad Below [...]Read more...
August 20, 2024Why Does My Cavalier King Charles Spaniel Eat Everything?
As a devoted Cavalier King Charles Spaniel family, you may be wondering why your Cavalier seems to eat everything in sight. Leaves, rocks, plants, grass, paper, cardboard, whatever they seem to be able to get their mouth around is fair game. This can be concerning, as it should be. If your Cavalier eats something he shouldn’t, there’s a risk of poisoning or choking. This could be caused by pica, not enough food, other health-related issues, or boredom. Let’s dive in and see if, together, we can figure out why your Cavalier King Charles Spaniel eats non-food items.
What is Pica?
Pica is a condition where dogs eat non-food items. For Cavaliers, this could include chewing on blankets, rocks, dirt or other random items. While it might seem quirky, pica can be a sign of underlying issues. Understanding the root causes can help you address the problem and ensure your Cavalier receives the best care.
The Behavior Behind Pica
Cavaliers, like all dogs, need mental and physical stimulation. Without enough engagement and enrichment, they might resort to chewing on inappropriate items. A 2019 study published in The Journal of Veterinary Medical Science discovered pica is a common behavioral issue. After surveying 2,000 cases, researchers found dogs that lacked regular enrichment, whether due to being crated for too long, being bored, or just not enough physical exercise were more likely to display pica tendencies.
Behavior Issues That Might Be Causing Your Cavalier’s Pica
Boredom and Lack of Stimulation: Cavaliers are playful and intelligent dogs that thrive on activity. If they aren’t entertained, they might turn to chewing on anything they can find. Toys and interactive games are crucial in keeping them busy and satisfied.
Stress and Anxiety: A Cavalier’s anxiety or stress is a major concern when it comes to pica. A change in routine, new family members, or other stressors can cause your Cavalier to engage in pica as a coping response. Providing a safe and secure environment along with calming activities can help reduce anxiety. If you feel your Cavalier has anxiety, it’s important to address that anxiety with a professional.
Attention-Seeking: Sometimes, Cavaliers might eat non-food items to get your attention. I always say, if a dog is asking for attention, they probably aren’t getting the attention they need. Bump up your Cavalier’s training, games, and outings.
Medical Reasons for Pica
While pica can often be a sign of boredom, medical issues can contribute to pica in dogs. This is why it’s always important to speak with your Cavalier’s holistic veterinarian. Here are some common medical issues for pica in dogs.
Nutritional Deficiencies: If your Cavalier’s diet is lacking in essential nutrients, they might chew on non-food items to make up for it. Ensure that their diet is balanced and rich in the nutrients they need.
Gastrointestinal Issues: Sometimes, dogs might eat non-food items to soothe an upset stomach. If your Cavalier seems to be eating odd items frequently, it’s worth checking with your vet to rule out any digestive issues.
Some diagnostic methods your vet might suggest include:
Biopsies: Taking tissue samples from the digestive tract to check for disease.
Therapeutic Trials: Trying a medication or diet change to see if the pica improves.
Blood Work: Checking folate and cobalamin levels, and performing a TLI (Trypsin-Like Immunoreactivity) test to assess pancreatic function.
X-rays: Ruling out gastrointestinal obstructions and other potential causes.
How to Stop Pica in Your Cavalier King Charles Spaniel
The good news is that pica can often be managed with positive training and enrichment techniques. If it’s medical, following your dog’s vet’s protocol will be essential.
Provide Engaging Toys and Enrichment Activities: Offer a variety of toys that challenge your Cavalier’s mind and body, such as puzzle toys, chew toys, and interactive games. Incorporate activities like nose work games, agility courses, or scent trails to provide mental stimulation and prevent them from seeking out inappropriate items. Check out our Cavalier enrichment ideas!
Address Anxiety with a Professional: If anxiety might be contributing to your Cavalier’s pica, consult with a dog behavior consultant. They can help identify the root causes of your dog’s anxiety and develop a tailored plan to address it.
Use Positive Reinforcement: Reward good behavior with praise and treats. When your Cavalier interacts with their toys or engages in positive activities, reinforce this behavior to guide them toward what’s encouraged.
Monitor and Redirect: Keep an eye on your Cavalier’s actions and gently redirect them if they start chewing on non-food items. Providing appropriate toys and praising them when they use them can help steer them away from unwanted behaviors.
Leash Management and OutFox Field Guard: Use a leash to manage your Cavalier and prevent them from accessing non-food items so they can’t sneak off. Consider using an OutFox Field Guard, a type of protective mesh that covers their face that can prevent dogs from eating things they shouldn’t. Unlike a muzzle, which restricts a dog’s ability to open their mouth entirely, a OutFox protects against ingestion while allowing normal breathing and drinking.
Understanding and addressing pica in your Cavalier King Charles Spaniel involves a combination of detective work, positive training, proper enrichment, and, if necessary, medical evaluation. By keeping your Cavalier mentally and physically stimulated, providing a balanced diet, and offering plenty of attention and love, you can help them steer clear of inappropriate chewing and enjoy a happy, healthy life.
Have you noticed any specific triggers for your Cavalier’s pica? Share your experiences and tips in the comments below!
Google Ad Below
Join our vibrant Cavalier King Charles Spaniel community on Facebook, support our dedication to pet wellness on Patreon, and stay updated with our weekly newsletter for invaluable tips and insights into raising happy, healthy pets. Together, let’s make a difference in our dogs’ lives!
🐶💙Support our passion for pet wellness and unlock exclusive content, perks and early access by exploring our Patreon tiers.
Sign up for our weekly newsletter!
Join us on Facebook!
[...]Read more...
March 5, 2025Preparing Your Cavalier King Charles Spaniel for Air Travel
Through Dexter’s 15 years of life, we had countless adventures together, but every single one was by car. At nearly 30 pounds, flying in the cabin wasn’t an option for him, and I would never consider putting a dog in cargo. Now, with Stewart, I have the opportunity to travel by plane since he will be between 16 and 18 pounds as an adult, which is small enough to fit in an airline-approved travel crate under the seat.
I have to admit, I’m a little nervous. It’s been almost 30 years since I last flew, and my experience wasn’t great. But I’m determined to make this a smooth process for both Stewart and myself. In September, we’ll be flying from Detroit to Portland, Maine, and I want to make sure Stewart is as comfortable and confident as possible for his first airplane trip.
Preparing Stewart, My Cavalier King Charles Spaniel for Air Travel
Since Stewart has never flown before, I’m taking a step-by-step approach to help him get used to every part of the travel experience. This isn’t just about the flight itself; it’s about everything leading up to it, from riding in his crate in the car to being in a busy airport environment.
Teaching a Cavalier to Enjoy a Travel Crate
One of the biggest adjustments for a Cavalier is spending time in a small, enclosed space. Since Stewart isn’t crate trained and has some separation anxiety, I’m taking extra care to make his travel crate a safe and positive space. An airline-approved travel crate is a much tighter fit, so here’s how I’ve been getting him used to it:
Introducing the Crate Indoors – I started with short training sessions, luring Stewart into the travel crate with treats and rewarding him for stepping inside. Since it’s a tight fit, I guided him to turn around and reinforced him for doing so. Once he was comfortable moving inside, I worked on having him stay in the crate for a few seconds before rewarding and letting him out, gradually increasing the duration.
Crate Inside a Crate – To help him transition smoothly to riding in the travel crate, I placed it inside his larger crate in the van. Since he was already used to the big crate, this made it feel more familiar. For the first couple of weeks, I left the travel crate unzipped, but zipped up the larger crate.
Zipping Up While Driving – Once he was comfortable, I started zipping up the travel crate while still inside the larger crate. This allowed him to experience confinement in a secure way without making a sudden change.
Removing the Larger Crate – The next step will be taking the travel crate out of the big crate so that he’s riding in just the small one. By gradually adjusting him to this setup, he won’t even notice the change!
Socialization and Confidence Building
Beyond the crate, I want to make sure Stewart is confident in all the different environments he’ll encounter on our trip.
Walking Politely on a Leash – Stewart will need to walk calmly on a leash through the airport. We’ve been practicing polite walking in various places with different surfaces and distractions. I will continue this training with busy locations as we progress through his training.
Exposure to Crowds and Noises – Airports are full of noises; baggage carts, intercom announcements, rolling suitcases. I’m taking Stewart to different places where he can experience a variety of sounds and people in a controlled way.
Getting Used to Security Procedures – At TSA checkpoints, I’ll need to take Stewart out of his crate and carry him through security. To prepare, I’ll work on calmly lifting him out of his crate and holding him in busier environments, helping him get comfortable with the experience before our trip.
Preparing for Time in the Airport
Most airports have designated pet relief areas, but access to them depends on the layout of the airport and TSA procedures. Some airports have relief areas before security, while others have them post-security. Since Stewart will be crated during the drive and throughout check-in and security, I’ll plan ahead to find out if there’s an opportunity for a potty break before we go through security. If not, I’ll make sure he’s had plenty of time to potty before we leave for the airport.
Practicing Extended Crate Time – I’ve been gradually increasing the amount of time Stewart spends zipped up in his crate, so he’s comfortable being inside for longer periods.
Planned Potty Breaks – Since dogs can’t relieve themselves once past security, I’ll make sure to take Stewart to the airport’s designated pet relief area before heading to the gate. This is also why I teach my dogs how to potty on cue; it makes it easier to ensure they go when needed, especially in situations like this where time and access are limited.
The Flight Itself
The actual flight is the final step in our preparation. Since Stewart will be in his crate under the seat for the duration of the flight, I want to make sure he’s as comfortable as possible.
Calm, Positive Associations – I’m making sure that his crate time is always associated with good things; treats, chew items, and a cozy space.
Chews and Enrichment for the Flight –I’ll bring along a few safe chews and likely my slippers to provide comfort for Stewart during the flight.
Staying Calm Myself – Dogs pick up on our emotions, so I’ll be focusing on staying relaxed and making this feel like just another routine adventure for Stewart.
Final Thoughts
Traveling with a Cavalier King Charles Spaniel on a plane takes preparation, but with gradual exposure and a positive approach, it can be a smooth experience. My goal is to make sure Stewart feels safe, confident, and comfortable every step of the way. While I’m still a bit nervous about my first flight in 30 years, I know that by preparing Stewart properly, we’ll both be ready for our adventure to Maine.
A big thank you to all of our Cavalier friends who sent us their travel photos! Don’t forget to follow them on social media.
Have you traveled with your Cavalier on a plane? I’d love to hear about your experiences in the comments!
Google Ad Below [...]Read more...
October 30, 2024How to Bathe a Cavalier King Charles Spaniel Puppy
If you are wondering how to bathe a Cavalier King Charles Spaniel puppy at home, I have you covered. As a Cavalier mom and positive dog trainer, I’m ready to help you make bathing your Cavalier puppy not only effective but enjoyable and stress-free for your new Cavalier King Charles Spaniel puppy.
Dexter, who is now fifteen, has had his fair share of dog baths. But, today, I’m going to share how I gave Willow her first bath at home. With the right setup, some tasty treats, taking it slow, and a cozy towel, you can create a zen atmosphere for your Cavalier’s bathtime. So here’s a step-by-step guide to giving your Cavalier King Charles Spaniel puppy their first bath.
Set Up Your Puppy’s Bath Space for Safety and Comfort
First, you want to ensure your puppy’s bathtub or sink is safe and secure. You don’t want your puppy slipping on the surface of a wet tub or sink. First things first-secure the bathtub or sink so your puppy won’t slip. A good rubber mat keeps your Cavalier from slipping, and this alone will help your puppy feel safer in the tub. If your Cavalier is small, like Willow, you can easily bathe them in the sink. But, if they are larger, like Dexter, a tub is a must, or a portable dog bathtub can also work well. I haven’t used one, but I’ve heard from other Cavalier families they are great!
Warm Towel Tip: Before starting your puppy’s bathtime, place a few towels in the dryer. Then, just before you head to the bath, grab the warm towels. Then, after bathtime, your puppy can be wrapped in a warm-and-cozy towel. If you air dry your Cavalier puppy, then add some puppy blankets too, so they can cozy up in the pile of warm blankets.
How to Choose a Puppy Shampoo That is Safe
When choosing a safe puppy shampoo, the first stop is the back of the shampoo bottle to read the entire ingredient panel. Yup, you want to read each ingredient and make sure those ingredients are safe and natural. You may be surprised at the garbage that you find in some puppy shampoos.
Full disclosure, I’ve been working with the 4-Legger brand since 2016 and, in my opinion, they are the best out there. For puppies, I like their hypoallergenic SOOTHE formula. This isn’t a puppy shampoo review, but I do want to share their ingredient panel, so you can get a better idea on what a good puppy shampoo looks like.
4-Legger SOOTHE Ingredients: Organic Aloe Juice, Organic Saponified Oils (Coconut, Shea Butter, Olive, Sunflower, and Jojoba), Organic Vegetable Glycerin, Organic Rosemary Extract Order today with promo code RaiseNaturally20 for 20% off your first order.
Keep Your Cavalier’s Inner Ears Dry
Protecting those little ears is important. You can place a cotton ball gently in each ear to prevent water from sneaking in, but remember to remove them after! Or, you can simply gently press their ear to their head as you use a warm washcloth.
Be Generous with the Tasty Treats or Lick Mats
Treats are key to conditioning your puppy that bathtime is good. Bath=Treats or Bath=Lick Mat Time Giving treats throughout the bath not only keeps it positive but also helps distract them from what is going on. Talk to your Cavalier puppy through the experience. Let your puppy know how much you love them and that this is a safe experience.
If you’re looking for more gentle routines and everyday training ideas like this, my Manners, Life Skills & Foundation Training Course walks you through simple, trust-based lessons you can use at home. It’s all about helping you and your dog feel confident and connected.
Watch Willow’s First Bath and don’t forget to subscribe to @CavalierTipsandFun for more!
Introduce Your Puppy to the Bath Gently
When it’s go-time, place your puppy gently in the sink or tub. Willow was a little unsure at first, so I kept things calm and encouraging. We went slowly, allowing her to get comfortable, and rewarded her bravery with treats. You can always do this in steps over a few days if your puppy is nervous. Teaching your Cavalier puppy to enjoy a bath is going to be so important since this is a breed that can benefit from baths to keep their luxurious coat beautiful. The benefit of puppy bathing is that the process can be much shorter than when your Cavalier has a full coat.
Start the Water Slowly
Once your puppy seems a bit settled, turn on the water. Using a shower sprayer is ideal because it’s easier to manipulate around your Cavalier and get the belly and bum area easier. Always check the temperature; you want it warm, but never hot. If your pup gets nervous, reassure them with gentle touches, talk to them, and provide healthy and tasty treats. We want bathtime to be a good thing, not something to avoid.
Wet Your Puppy and Lather Up
Begin with their back, avoiding their face for now. Once they’re damp, add a little shampoo and lather gently. Go slow and talk to your pup throughout to keep them reassured. Make sure to reach all those little spots like under the belly, armpits, and legs.
When it comes to cleaning your Cavalier’s face, be careful and gentle. Grab a soft washcloth, soak it in warm water, and wring out any excess. Gently wipe around your puppy’s face, especially near the eyes and mouth, to keep things clean without needing shampoo. Cavaliers can be sensitive around their eyes, so keep it soothing and slow, making it a comfortable moment for them. If there’s any tear staining, gently focus on those areas but avoid scrubbing.
Rinse Thoroughly
It’s so important to rinse really well to avoid any leftover shampoo that could irritate their skin. Keep the water warm and gently go over each area until you’re sure they’re squeaky clean.
How to Dry a Cavalier After a Bath
Gently squeeze out as much water as possible from their coat while they’re still in the tub, especially from their ears, legs, and belly. Be careful not to pinch their skin. Then grab a warm towel and start rubbing them down right in the tub. Begin with their back and then work down to their legs, belly, and especially those floppy ears! The towel rubdown helps absorb extra moisture and keeps your puppy from dripping everywhere.
Pro tip: When it looks like your puppy is going to shake their head, try covering their ears lightly with a towel. It can help prevent ear issues and keeps the shake-off water spray to a minimum!
Should You Blow-Dry Your Cavalier King Charles Spaniel Puppy?
For a little more drying, a low heat or cool setting on a blow dryer works great. Keep the dryer moving and avoid getting too close to their skin. And, of course, more treats and sweet talk make this part easier too! I would highly recommend desensitizing your puppy to the hair drier first. You can learn how in the video below. If you are going to allow your Cavalier to air-dry, I would suggest using a dog drying jacket and warm , snuggly blanket.
Learn how to teach your Cavalier to love drying and subscribe to our other YouTube channel @RaisingYourPetsNaturally
And there you have it—bathing your Cavalier King Charles Spaniel puppy at home for the first time! If you’re wondering, when should I bathe my puppy for the first time, or how often should I bathe my puppy, it’s usually safe to start around eight to twelve weeks, assuming you are using a truly safe puppy shampoo. With these tips and a positive approach, you’ll help set up your Cavalier King Charles Spaniel puppy for a lifetime of happy bath times.
What part of your puppy’s first bath are you most nervous about? Let me know in the comments. I’d love to help make it a fun experience for both of you!
Google Ad Below [...]Read more...
October 1, 2024MCAD deficiency in Cavalier King Charles Spaniels
Last year, on my Raising Your Pets Naturally blog, I shared information about a relatively new health condition found in Cavalier King Charles Spaniels: Medium-Chain Acyl-CoA Dehydrogenase (MCAD) deficiency. As many Cavalier families know, this breed is already prone to several health issues, and adding another one to the list is upsetting.
MCAD deficiency is a genetic condition that impacts how the body breaks down certain fats for energy. Recent research has found some Cavaliers who have symptoms such as seizures, lethargy, and other health issues may have MCAD.
The initial study that brought this to the general public’s attention focused on a three-year-old male Cavalier who was experiencing seizures and unusual tiredness. After examining his blood and urine, researchers discovered elevated medium-chain fatty acids, pointing to MCAD deficiency. They then sequenced the dog’s genome and identified a specific change in the ACADM gene, which is associated with this condition.
When the researchers tested this genetic variant in 162 Cavaliers, they found that about 23.5 percent of the dogs carried the mutation. This discovery is important because it suggests that MCAD deficiency might be the reason behind the seizures and other symptoms we sometimes see in Cavaliers.
Here are some symptoms to watch for:
Seizures: Seizures or convulsions can be a key indicator of potential MCAD deficiency.
Lethargy: Unexplained and prolonged tiredness could be a sign of an underlying issue like MCAD deficiency.
Intermittent Health Issues: These episodes might include vomiting, decreased energy, or more severe symptoms like seizures.
Unsteady Gait: Difficulty walking or balance issues could occur during episodes.
Loss of Appetite: A sudden loss of interest in food might indicate a problem.
Low Blood Sugar (Hypoglycemia): This can lead to weakness, shakiness, disorientation, and seizures.
Abnormal Behavior: Changes in behavior, such as irritability or confusion, might be linked to a metabolic disorder.
Respiratory Distress: In severe cases, dogs might experience difficulty breathing during an episode.
Frequent Infections: Some dogs with MCAD deficiency may be more prone to infections.
Neurological Symptoms: Symptoms like circling, head pressing, or lack of coordination could be signs of this condition.
I know, right? A lot of these symptoms are also symptoms of other Cavalier King Charles Spaniel medical issues. While these symptoms can be caused by various factors, it’s important to consider MCAD deficiency, especially if your Cavalier is showing multiple signs.
Consider Getting Your Cavalier Tested for MCAD Deficiency
If you’re concerned about MCAD deficiency and its impact on your Cavalier King Charles Spaniel, getting your dog tested is a straightforward step you can take. The test involves a simple at-home swab, which you can easily order and perform yourself. This can provide valuable insights into whether your Cavalier carries the gene associated with MCAD deficiency.
For those thinking about adding a new Cavalier puppy to their family, it’s encouraging to know that many responsible breeders are proactively testing their breeding pairs and even the grandparents. This testing helps ensure that future puppies are less likely to inherit MCAD deficiency, contributing to healthier generations of Cavaliers.
Testing is a proactive measure that can help you make informed decisions about your dog’s health and well-being. If you’re interested in testing, talk to your veterinarian or reach out to a reputable lab for more information on how to get started.
For Cavaliers at risk of MCAD deficiency, diet plays a crucial role. Since these dogs might struggle to break down medium-chain fatty acids (MCFAs), it’s recommended to be mindful of their diet:
Limit MCTs: Foods high in MCTs, like coconut oil, palm oil, and milk products, including yogurt might need to be limited in dogs with this genetic variant.
Watch High-Fat Diets: A balanced diet, without excessive fats, is key for Cavaliers with potential MCAD deficiency.
Cavaliers that haven’t been tested for MCAD deficiency should avoid foods high in MCTs. Without knowing their genetic status, it’s best to be cautious to prevent potential health issues like seizures or other symptoms associated with the condition. If your Cavalier has had a diet rich in MCTs for a few years without any of the symptoms listed above, you may consider continuing to feed. However, the test is pretty easy and inexpensive, so it might be just easier and safer to test to know for sure.
The research on MCAD deficiency in Cavaliers is ongoing, and it’s vital for more Cavaliers to be tested. A simple swab test can determine whether your Cavalier carries the gene associated with MCAD. This testing is important not just for your Cavalier’s care, but also for responsible breeding practices to reduce the prevalence of this mutation in future generations. If you test, please contact your Cavalier’s breeder with the results.
Testing for MCADD
Canine Genetic Testing
GenSol Animal Diagnostics
Laboklin
As of June, 2024, the latest stats from a Facebook group dedicated to MCAD deficiency in Cavaliers show the following:
Genetically Affected: 49 dogs (9.78%)
Clinically Affected: 6 dogs (1.2%)
Carriers: 238 dogs (47.5%)
Clear: 214 dogs (42.7%)
These numbers highlight the importance of testing and awareness within our Cavalier community. By staying informed and proactive, we can continue to support the health and well-being of our Cavaliers.
Managing MCAD Deficiency: Diet and Care Tips
If your Cavalier King Charles Spaniel has been diagnosed with MCAD deficiency, managing their condition effectively involves careful attention to their diet and feeding schedule. I would suggest a good heart to heart with your dog’s holistic veterinarian. If your Cavalier does have MCAD deficiency you will need to avoid a high-fat diet and avoid foods high in medium-chain triglycerides (MCTs). Don’t forget to read those ingredient panels on all the foods, treats, and chews you feed your Cavalier.
Although MCAD deficiency is serious in Cavaliers, a good food protocol can help ensure your Cavalier still leads a full and enriched life.
Google Ad Below [...]Read more...
September 18, 2024How to Celebrate a Senior Dog’s Birthday and Healthy Dog Cake Recipe
It’s hard to believe that Dexter, my best friend and constant companion, is turning fifteen! I’m over the moon that I am able to celebrate this milestone with him. He may be slowing down a bit, but his spirit and spunk remains as bright as ever. As Dexter has aged, we may have tweaked what we can do, but one thing has stayed the same: we live each day to the fullest, cherishing every moment.
Over the past couple of years, I’ve seen subtle changes in Dexter’s energy and behavior. He doesn’t have the boundless energy of his younger days, and he’s been going through some senior dog anxiety. We’ve learned to adjust our activities together, and I’ve been working on helping him feel more secure as his cognition changes. Our daily enrichment now includes slow, sniffy walks, leisurely poke arounds through the neighborhood followed by a stroll, and indoor adventures. He still enjoys simple training sessions, which keep his mind sharp, and I continue his canine fitness exercises to maintain his mobility and strength.
Earlier this year, Dexter went down in his back end after a reaction to medication. It was a scary time, and I wasn’t sure what his recovery would look like. I was actually wondering if his time was coming to an end. But after three to four months of dedicated rehab, I’m thrilled to share that he’s made a full recovery! Dexter’s resilience has always inspired me, and this experience only deepened my love for him. His ability to bounce back, even at fourteen, is a testament to his incredible spirit.
With Dexter by my side, I’ve been inspired to dive into new creative projects. Over the past year, we launched this blog dedicated to Cavalier King Charles Spaniels. This is actually our second blog! Check out our first blog, Raising Your Pets Naturally. I’ve also created a children’s coloring book, Dexter’s Adventures, bringing his playful and inspiring spirit to life for a younger audience. Which makes this his 3rd children’s book! Everything I do is shaped by Dexter, and I’m so lucky for the joy and inspiration he brings.
Our mantra has always been to live each day to the fullest, and as Dexter turns fifteen, this really hits home. Every day is a gift, and I’m beyond thrilled to have Dexter with me on this journey. Together, we continue to embrace life, even as we both slow down, finding joy in the simple moments we share.
Celebrating Dexter’s birthday is more than just a tradition, it’s a reminder of the love, laughter, and resilience we’ve shared throughout his life. During Dexter’s birthday celebrations, we always make sure to support Cavalier Rescue USA, a cause that’s close to our hearts. If you’re able to donate or volunteer your time, please consider checking them out, and be sure to tell them Dexter sent you!
Here’s to Dexter, my silly monkey, stink pot, my muse, and the one who makes every day brighter with his love.
Don’t forget to subscribe to our @CavalierTipsandFun YouTube channel for more!
Print
Pin
Dog-Friendly Strawberry Birthday Cake
Here's Dexter's 15th birthday cake recipe and photos! To make his special day even more memorable, I whipped up a dog-friendly birthday cake that’s not only tasty but also healthy. This homemade dog birthday cake is packed with ingredients Dexter loves. Whether you're planning a dog birthday celebration or looking for a healthy dog birthday cake recipe, this one is sure to be a hit with your pup.
Course cake Keyword dog friendly cake, dog birthday cake,
Prep Time 1 day day Cook Time 50 minutes minutes
Servings 12 Dogs
Author Tonya Wilhelm
IngredientsOptional Blue Spirulina Gummy Paw Print Decoration6 tbsp Beef Gelatin2 tsp Blue Spirulina2 cups Boiling WaterStrawberry Dog Friendly Cake4 cups Quinoa Flour6 Eggs16 oz Strawberries Stems Removed1/4 cup Olive OilOptional Dog Frosting8 oz Cream Cheese check the ingredients to ensure it’s dog-friendly10 oz Butternut Squash Cooked
InstructionsBlue Spirulina Gummy Paw Print DecorationIn a large mixing cup, combine the gelatin and blue spirulina.Quickly stir in the boiling water until fully dissolved.Pour the mixture into the paw print cutouts in the paw-shaped cake pan. Pour any extra in other fun silicone molds.Refrigerate until set then gently remove the paw gelatin shapes.Place the paw shapes on a cookie sheet and return to the refrigerator while preparing the cake.Dog-Friendly Strawberry CakePreheat the oven to 350°F.Purée the strawberries in a blender until smooth.In a large mixing bowl, combine the quinoa flour, eggs, olive oil, and strawberry purée.Generously grease the paw print cake pan with olive oil.Pour the cake batter into the pan and bake for approximately 50 minutes, or until set.Allow the cake to cool for 15 minutes, then carefully remove it from the pan and place it on a cooling rack to cool completely.Optional Dog FrostingPurée the cooked butternut squash in a blender.Add the cream cheese to the purée and blend until smooth and well combined.Once the cake is completely cool, frost the cake with the butternut squash and cream cheese mixture.Top with the blue spirulina gummy paw print decorations for a fun and colorful touch!
Join our vibrant Cavalier King Charles Spaniel community on Facebook, support our dedication to pet wellness on Patreon, and stay updated with our weekly newsletter for invaluable tips and insights into raising happy, healthy pets. Together, let’s make a difference in our dogs’ lives!
Google Ad Below [...]Read more...
January 8, 2025How to Stop Your Cavalier King Charles Spaniel From Licking Everything
Have you ever wondered why your Cavalier King Charles Spaniel licks you or how to curb excessive licking? If so, you’re not alone. Many Cavalier parents find themselves trying to stop their Cavalier from licking so much. Let’s take a closer look at why Cavaliers lick and what you can do if it becomes too much. Cavaliers lick for various reasons, and understanding the “why” is key to changing and managing the behavior.
Cavaliers May Lick You Because You Taste Great!
One common reason is that you simply taste good. Your Cavalier might be drawn to the salt on your skin, or maybe you’ve just eaten, and they’re picking up on lingering food scents. Even coming inside after an active day outdoors can make you extra appealing to their sensitive noses. Hormones and pheromones also play a role. For example, if you’re feeling stressed or it’s that time of the month, your Cavalier might be more inclined to lick because they’re sensing these subtle changes. Not to mention when we put hand lotion on, oh, yummy!
Cavaliers Lick During Greeting Behaviors
Another reason dogs lick is as part of their greeting ritual. When you come home, they’re excited to see you and may lick as a way of saying, “Hello! I’m so happy you’re here!” It’s a natural expression of affection and enthusiasm. This behavior is especially common in Cavalier King Charles Spaniels, a breed known for their loving and people-oriented nature. Cavaliers thrive on connection and love being close to their families, so licking during greetings is often their way of reinforcing that bond.
Greeting-related licking can also be a way for your dog to gather information about where you’ve been. Dogs rely heavily on their sense of smell and taste to explore their environment, and licking is part of how they “read” the world. If you’ve been around other dogs, eaten something particularly tasty, or even just had a long day out, your Cavalier’s greeting might include licking to learn more about your adventures.
Check out the video. Don’t forget to subscribe to our @RaisingYourPetsNaturally YouTube channel.
Your Cavalier May Be Licking Because He’s Stressed
However, not all licking is tied to happy moments. Sometimes, licking can indicate stress or anxiety. This type of licking is known as a submissive or appeasement gesture. Essentially, your dog is trying to communicate that they mean no harm. You might notice this behavior around guests or strangers, where your dog licks excessively as a way to navigate the interaction. In some cases, they may even start licking their paws or nearby objects if they’re feeling particularly anxious.
How To Stop Your Cavalier King Charles Spaniel From Licking So Much
If your Cavalier’s licking becomes excessive, there are steps you can take to manage it. For instance, if your dog is licking because you taste good or they’re excited to see you, allow a quick lick and then gently redirect them. You can offer a chew toy or a bone to give them something else to focus on. This simple redirection helps channel their energy into a more appropriate activity while still acknowledging their excitement.
When licking is tied to stress, it’s especially important to avoid punishing your Cavalier. Punishment can actually make the behavior worse, as your dog may lick even more in an attempt to appease you. Instead, remain calm and redirect their attention to another behavior, such as sitting or playing with a toy. Addressing the root cause of your Cavalier’s stress and anxiety is key. Building their confidence through positive dog training can make a big difference. As your dog becomes more comfortable in stressful situations, the need for licking as a coping mechanism will naturally decrease.
In some cases, excessive licking may require professional help. If your dog’s licking seems compulsive or tied to high levels of stress, start by consulting your holistic veterinarian. They can check for any medical issues and look at your dog’s behavior history. From there, a dog behavior specialist can help you create a customized dog behavior modification plan to address your Cavalier’s needs, making life easier and more enjoyable for everyone.
If your Cavalier King Charles Spaniel’s licking is becoming a challenge, know that you’re not alone, and there are positive steps you can take to address it. With a little patience and the right approach, you can better understand why your Cavalier licks and guide them toward healthier ways of expressing themselves. If you’re feeling stuck or need personalized guidance, I offer one-on-one phone and Skype sessions to help you and your Cavalier navigate challenges like excessive licking. Together, we can create a plan that works for your unique pup and helps strengthen your bond.
Do you have a licker on your hands?
Google Ad Below [...]Read more...
September 3, 2024The Importance of Enrichment for Senior Cavalier King Charles Spaniels
Oh, Dexter. My senior Cavalier King Charles Spaniel, will be fifteen on October 6, 2024! I’m over the moon happy that he has led a long, happy life. He was diagnosed with Chiari malformation and syringomyelia in 2012, and I didn’t think he would have a very long life. Eventually, his MVD diagnosis also rolled in. But, despite his medical conditions, he has been thriving. He’s not just alive, he’s kicking!
I’m not going to lie. He started showing his age and some cognitive decline a few years ago. I have written about his life on my first blog, Raising Your Pets Naturally, so make sure you head over there for even more about Dexter’s life and care. But today, I wanted to discuss some of the things I have done to help keep Dexter as sharp as possible and try to keep canine cognitive dysfunction syndrome (CCDS) at bay. Through my experiences and research, I’ve seen how diet, positive training, and environmental enrichment can make a significant difference in maintaining his quality of life. So, let’s jump in.
What is Canine Cognitive Dysfunction Syndrome
Canine cognitive dysfunction syndrome (CCDS), is similar to dementia in humans and affects many senior dogs. Symptoms can be different from dog to dog, but some common behaviors include: disorientation, disrupted sleep patterns, decreased activity levels, and changed interactions with their environment and people. Research, including a study from the Journal of Veterinary Behavior (2016), shows that cognitive decline in dogs can significantly impact their quality of life. But early intervention and supportive care can improve CCDS symptoms and a dog’s quality of life.
The Importance of Canine Enrichment for Senior Cavaliers
Environmental enrichment is important for helping senior Cavaliers with canine cognitive dysfunction syndrome. Canine enrichment is about engaging your Cavalier’s senses, engaging their minds, and keeping them moving. I always think about “living life to the fullest.” I mean, we brought our Cavaliers into our homes so we can enjoy them and do fun things with them. Although they are beautiful, they deserve more than just a life where they lie around all day and do nothing. Just because they are seniors, doesn’t mean this mentality should change, although their activities will need to be adjusted to meet their individual needs. And it’s not just me; there’s research that backs up this theory.
Mental Stimulation: According to a study published in the Journal of Veterinary Internal Medicine (2016), mental stimulation through enrichment activities helps slow cognitive decline in senior dogs. Puzzle toys, interactive games, and scent-based activities keep the brain engaged, potentially delaying the progression of CCDS symptoms.
Reduces Stress: Canine enrichment is a great way to help reduce anxiety and stress in senior Cavaliers dealing with cognitive decline. Engaging activities and sensory stimulation can make a big difference. By adding enrichment routines to their day, you’re helping your dog feel calmer and more secure, which can ease some of the stress and anxiety that often come with cognitive issues.
Behavioral Improvement: Enrichment activities can make a big difference for senior Cavalier King Charles Spaniels who are restless or pacing. By offering mental and physical stimulation, these activities help reduce repetitive behaviors and keep your dog more relaxed.
Enhanced Quality of Life: Enrichment isn’t just about keeping your Cavalier busy. It’s about improving their overall quality of life. Engaging in enjoyable and stimulating activities brings more enjoyment, engagement, and a sense of purpose to their days, making their lives more fulfilling.
Simple Enrichment Ideas to Boost Your Senior Dog’s Quality of Life
Enrichment doesn’t have to be complicated or time-consuming. It’s all about finding simple, enjoyable activities that stimulate your senior Cavalier’s mind and body. Here are some ideas to get you started. And don’t forget to check out our article on Cavalier Enrichment Ideas.
Interactive Toys: Toys that dispense treats or require problem-solving are fantastic for mental stimulation. Depending on your Cavalier, you can use treat-dispensing toys or lick mats. When Dexter was younger, treat dispensing toys and frozen Tux toys were a hit. Now, he enjoys lick mats and snuffle mats. Food toys engage your dog’s sense of smell and taste.
Scent Games: Speaking of scent games, Dexter has always loved using his nose. Try hiding treats around the house or yard and let your Cavalier find them using his nose. Scent games are a natural way to keep your Cavalier active and provide both mental and physical exercise in a way most dogs love.
Positive Dog Training Sessions: Short, positive dog training sessions with simple cues or tricks are highly rewarding. They keep your Cavalier’s brain sharp and help build a stronger bond through shared activities.
Varied Walks or Strolls: Don’t get into a rut of going on the same walk, to the same park, on the same trail. Changing up your walking routes introduces new sights and smells. This variety provides your Cavalier with cognitive stimulation and keeps your walks fresh and interesting.
Comfortable Environment: Make sure your senior Cavalier’s living space is safe and cozy. Look out for any obstacles, and ensure good footing below. Whether you have carpet, carpet runners, grippy socks, ToeGrips or all of the above, traction is incredibly important for senior Cavaliers. They don’t have the same core strength to hold themselves up, and slick floors can be very scary and even cause injury if they slip or splay out.
Canine Fitness and Strength Building: I highly recommend setting up some sessions with a canine rehabilitation professional. Working with Dr. Sam, Dexter’s strength has been so important in his overall health and wellness. And our at home exercises aren’t just a way to keep him fit. They are also another form of enrichment, since he loves doing them! Engage in simple at-home exercises like sit-to-stand and sit-to-down exercises to help maintain your Cavalier’s muscle strength and joint mobility. Gentle range-of-motion exercises can also support your senior dog’s overall physical health and comfort.
Supporting Cognitive Health with Diet and Nutrition
Diet plays a crucial role in managing cognitive decline in senior dogs. According to research published in the Journal of Veterinary Internal Medicine (2019), a diet rich in specific vitamins and nutrients can significantly support cognitive health. Key vitamins such as vitamin E and vitamin C act as antioxidants, protecting brain cells from oxidative stress and easing cognitive issues. B vitamins, including B6, B12, and folic acid, are essential for maintaining healthy brain function. Omega-3 fatty acids, commonly found in fish and fish oil supplements, also play a vital role in improving cognitive function and managing symptoms of cognitive decline. Including these vitamins and nutrients in your dog’s diet, either through high-quality dog food (preferably fresh) or supplements, can help manage cognitive decline and enhance their overall quality of life.
Dexter, is proof of the benefits of a fresh diet. His meals are carefully prepared with high-quality, fresh ingredients and free from unnecessary chemicals. I’m convinced this fresh, balanced diet, rich in essential nutrients, has played a significant role in keeping his mind sharp and supporting his overall well-being.
How Positive Training Supports Cognitive Health in Senior Cavaliers
Positive training and routine play a vital role in supporting a senior dog’s mental sharpness and managing the effects of cognitive decline. As a positive dog trainer, I’ve taught Dexter plenty of fun and useful tricks, not just for good behavior, but also to keep his mind engaged and sharp. Each training session isn’t just about obedience; it’s about giving Dexter the mental stimulation he needs to stay mentally fit as he ages.
Incorporating regular training sessions into your dog’s routine is a great way to improve their cognition and their body. Focus on simple tricks and behaviors that challenge their mind and body without causing stress. I have noticed Dexter’s abilities change over the years, so it is important to change with them. By tailoring positive dog training sessions to your Cavalier’s needs and incorporating enjoyable activities into their day, you can help your Cavalier maintain their mental clarity and overall well-being.
Follow our YouTube channel for more Cavalier enrichment ideas!
Final Thoughts
Incorporating canine enrichment into Dexter’s daily routine has been essential for maintaining his quality of life. It’s not just about keeping him busy; it’s about enhancing his mental, emotional, and physical well-being. Enrichment is just one piece of the puzzle for Dexter’s health. A fresh, balanced diet and consistent, positive training are also vital for supporting his well-being as a senior dog.
Dexter’s vibrant health is a testament to how a combination of mental stimulation, nutritious food, and engaging routines can make a real difference. I encourage all Cavalier families to integrate these practices into their senior dogs’ lives. By focusing on enrichment, diet, and training, you can significantly improve your dog’s overall well-being and help them enjoy their golden years to the fullest.
I host a private Facebook group for Cavalier King Charles Spaniels, and we have a big focus on canine enrichment ideas and challenges to keep your Cavalier engaged and thriving!
How do you incorporate enrichment, diet, or training into your senior dog’s routine? Share your tips and experiences below!
Enrichment Increases Relaxation
https://www.ncbi.nlm.nih.gov/pmc/articles/PMC8772568/
https://www.sciencedirect.com/science/article/pii/S0168159123002691
Join our vibrant Cavalier King Charles Spaniel community on Facebook, support our dedication to pet wellness on Patreon, and stay updated with our weekly newsletter for invaluable tips and insights into raising happy, healthy pets. Together, let’s make a difference in our dogs’ lives!
Google Ad Below [...]Read more...
February 5, 2025How to Teach Cavalier King Charles Spaniel to Ignore Distractions
When I’m out with Stewart, my 7-month-old Cavalier, we get stopped a lot. People see his big, sweet eyes, his cute winter coat and wiggly little body and immediately want to say hello. And if this goes for people with or without their dog.
But here’s the thing, not every outing is a social event, and not every person or dog needs to be greeted.
Dog Socializing vs. Everyday Walks
There’s a time and place for socializing, and there’s a time for simply spending quality time with Stewart on our walks and outings. I make sure Stewart has appropriate and positive, structured experiences meeting new people and dogs in a controlled way. This helps him learn confidence, good manners, and appropriate greetings. But, at the same time, I’m teaching him an equally important skill, ignoring distractions such as people and dogs and walking politely with me.
If every walk turns into a meet-and-greet, dogs start to expect it. They pull toward every person or dog, they get frustrated when they don’t get to say hello. That can lead to barking, lunging, or general overexcitement, making walks stressful instead of enjoyable.
Why It’s Important to Teach Your Dog to Ignore Other Dogs and People
Not Every Dog Wants to Say Hello
Some dogs are nervous, in training, or simply not interested. Teaching Stewart to walk past other dogs calmly means he won’t invade another dog’s space or make an already anxious dog uncomfortable.
People Aren’t Always Dog People
Shocking, I know! But not everyone wants a happy little Cavalier bouncing up to them. Some people are afraid of dogs, allergic, or just in a hurry. Stewart is learning to walk past without expecting attention makes life easier for everyone.
Impulse Control is a Life Skill
Dogs who can stay focused, even when exciting things are happening around them, are safer and more enjoyable to live with. If Stewart learns that he doesn’t always get what he wants the moment he wants it, he’ll be better at handling frustration in other areas of life too.
Not Every Walk is About Socializing
Sometimes, I just want to enjoy a peaceful walk with Stewart. He doesn’t need to greet everyone to have a fulfilling experience, sometimes sniffing, walking together, and taking in the world is enough.
Better Walks in Busy Places
By teaching Stewart to walk with me instead of focusing on every dog or person, our walks are smoother and more enjoyable. Crowded sidewalks, busy parks, or narrow trails are much easier to navigate when he stays by my side rather than pulling toward distractions.
Prepping for Travel & Public Outings
I plan on traveling with Stewart, airports, dog-friendly boats, outdoor dining, places where he’ll need to stay close and focused on me. Teaching him now that he doesn’t always get to greet everyone will make these experiences stress-free and enjoyable for both of us.
Don’t forget to subscribe to @CavalierTipsandFun for more videos!
How I’m Teaching Stewart to Walk Past Distractions
Reward Calm Choices
When Stewart notices a dog or person, I reward him. I’m teaching him they=treats. Eventually, he will start to make that connection, see the distraction and look at me for the reward. This is what I’m going for. Over time, he’ll learn that staying focused on me, and it’ll be a non-event for him, he’ll simply walk past without even thinking about stopping to greet.
Use Distance
If Stewart’s too excited or distracted, I create more space between us and the distraction to help him refocus. As he gets better at ignoring, I’ll gradually close that gap, making it easier for him to pass by calmly.
Give Him a Job
I use cues like his name game, watch me, paws up, touch to keep his attention. Engaging his brain with productive tasks means he’s less likely to pull toward distractions.
Set Clear Expectations
I make sure Stewart knows that pulling towards people or dogs does not work. If he starts to pull, I either toss in his name game, stop and wait for him to renege, or add more distance. It truly depends on the situation. I do want him to be successful.
Handling Approaching People
When someone is steadily approaching your Cavalier, how you handle it depends on your goal at that moment. As a positive dog trainer, sometimes I want to explain and educate. If so, then I’ll squat down with Stewart, reward him for staying focused on me, and let the person know we’re training and practicing ignoring distractions. If I choose to say hello, I tell Stewart, “Let’s say hi,” and calmly approach. But sometimes, I just want to keep moving, so I give a quick, upbeat “We’re not saying hello, thank you!” and continue walking, keeping Stewart focused on me. It’s all about setting the tone for the interaction while making sure my dog stays engaged and confident.
Finding the Balance
There’s a time and place for socializing, and there’s also a time to focus on the walk itself. If you do want to stop and say hi, try to stop about 10 feet away from the other person or dog and ask first if it’s okay. Keep in mind that others might be training their dogs or dealing with their own challenges during the walk, so giving them some space is always a good idea. Being considerate makes the experience better for everyone, whether it’s a quick greeting or just calmly walking by each other. I then give Stewart the cue, “Let’s say hi,” so he knows he has permission to greet.
There’s nothing wrong with letting your dog greet others when it’s appropriate, but it’s just as important for them to learn that not every outing is a social event. Teaching Stewart when it’s time to engage and when it’s time to focus on me makes him a better walker and ensures our walks stay enjoyable.
When you’re walking your Cavalier King Charles Spaniel, how do you decide when it’s time to socialize and when it’s time to focus on the walk?
Google Ad Below [...]Read more...
April 21, 2024Tips for traveling with your Cavalier King Charles Spaniel. Dog-friendly vacation ideas.
Follow @CavalierTipsandFun for more videos.
Don’t forget to subscribe to @RaisingYourPetsNaturally for more!
Your comments and questions are always welcome below.
Join our vibrant Cavalier King Charles Spaniel community on Facebook, support our dedication to pet wellness on Patreon, and stay updated with our weekly newsletter for invaluable tips and insights into raising happy, healthy pets. Together, let’s make a difference in our dogs’ lives!
[...]Read more...
October 15, 2024Cavalier King Charles Spaniel Travel Tips
As a Cavalier mom and positive dog trainer, I know how important it is to help our Cavaliers feel comfortable and safe during car rides. Whether you’re planning a quick trip to the park or a longer dog-friendly road trip, making sure your Cavalier King Charles Spaniel enjoys the car ride is key to a stress-free trip for both you and your dog.
When Dexter and I hit the road, I never have to worry about how he’ll handle the ride. He’s a fantastic travel companion because I spent time training him to feel confident and at ease in the car. Today, I want to share my top tips on how you can prepare your Cavalier for car travel and road trips and turn them into a relaxed, happy traveler too.
1. Start with Short and Positive Rides
Just like with any new experience, easing your Cavalier into car rides instead of popping them into the car for a twelve-hour road trip is super important. Begin by taking short trips to fun, dog-friendly places like the local park or pet store. Keep the first few rides short and sweet, no more than ten-to-fifteen minutes. The goal is to associate the car with positive and fun destinations. A trip to the vet does not count as a fun visit for most dogs.
2. Create a Safe Space in the Car
Safety should always be a priority when traveling with your Cavalier. A secure dog car seat or crash-tested harness designed for small breeds like Cavaliers is a must. I personally recommend looking into the Center for Pet Safety’s approved products, as they conduct independent crash testing for dog travel gear. If a brand states they are crash tested, make sure to watch their crash tested video.
Dexter typically travels in a small crate. Because of his Chiari Malformation and syringomyelia and large size, travel harnesses aren’t the most comfortable for him. However, when we travel in the small car, a crash-tested and passed (yes, make sure they have passed the test) is our go-to. The key is to find a comfortable yet safe setup so your Cavalier feels relaxed without compromising their security.
3. Pack Familiar Comfort Items
Make your Cavalier feel more at home by packing some familiar items for the ride. When Dexter was a puppy, he would cozy up with his baby blanket and soft toy. Now, he has a therapeutic mat inside his crate. He likes to stay cool, so I also have a fan pointing at him. These little comforts can help reduce anxiety and make the ride smoother for dogs who may initially feel unsure about the car.
If your Cavalier is a bit anxious, place something with your scent, like a worn T-shirt next to your Cavalier. Your presence, even in the form of scent, can be calming for your Cavalier, especially if they’re a bit nervous during the first few rides.
4. Plan for Frequent Breaks
When traveling for more than an hour, make sure to schedule frequent potty and stretch breaks. Cavaliers are active little dogs, and, like all of us, they need to stretch their legs and take in their surroundings. I like to plan stops at dog-friendly rest areas or parks where Dexter can explore, do his business, and get a little energy out before continuing the journey.
Remember, each break is an opportunity for positive training. Use it as a chance to reward your dog for good behavior during the ride, and they’ll look forward to the next part of the trip.
5. Help Your Cavalier Relax with Calming Music
One of my favorite dog travel hacks is playing calming music designed for dogs during long car rides. I’ve been a fan of the iCalmDog portable speaker, which plays clinically-tested music that helps keep dogs calm and relaxed. Just be careful not to fall asleep at the wheel yourself!
Check out our all Cavalier calming playlist on YouTube!
6. Monitor Your Cavalier’s Well-Being
Keep an eye on your Cavalier’s behavior throughout the trip. Some Cavaliers may experience motion sickness, especially on longer rides. If your dog starts to drool excessively, whine, or seem uncomfortable, it might be time for a break. You can try natural remedies like ginger treats (with your vet’s approval) or consult your vet for other options.
If your Cavalier seems overly tired or stressed, don’t be afraid to cut the trip short. The goal is for travel to be a positive experience, and pushing them too far can have the opposite effect.
By starting with short, positive experiences and keeping their safety and comfort in mind, you can help your Cavalier King Charles Spaniel become a happy traveler. Dexter loves our road trips, and I’m sure your Cavalier will too!
Do you have any favorite travel tips for Cavaliers? Drop them in the comments!
Follow us on YouTube For fun dog-friendly travel adventures!
Google Ad Below [...]Read more...
December 25, 2024Winter Tips for a Cavalier King Charles Spaniel
Brrrr, it’s cold out there! Winter in Ohio can be tough, and today, it’s a chilly 15 degrees. Thankfully, Stewart and I are bundled up inside, but it’s the perfect time to share some essential winter safety tips for your Cavalier King Charles Spaniel. Whether you’re venturing outdoors or staying warm indoors, these precautions and activities will help keep your pup safe, healthy, and happy all winter long.
Safety First: Protecting Your Cavalier in Winter
Limit Outdoor Time
Our Cavaliers are family members, and they thrive indoors with us. While Stewart loves his outdoor potty breaks and a quick sniff around the yard, I always limit his time outside when temperatures dip. Frostbite and hypothermia are real risks for dogs, especially small breeds like Cavaliers. Keep outings short, and always monitor your pup for signs of discomfort.
Protect Those Paws
A dog’s paw pads aren’t built to handle extreme cold or icy surfaces. For quick potty breaks, toddler socks can be a lifesaver; they’re easy to put on and don’t need to be perfect since they’re just for a short trip. Shoot for dark colors, so that if one falls off, it’s easier to find in the snow. For longer walks or outdoor play, dog boots like Saltsox are fantastic options. If your Cavalier goes outside barefoot, be sure to clean their paws thoroughly with a warm washcloth or natural pet wipes to remove ice, salt, and chemicals that could irritate their skin. I make up a bowl of water with a splash of 4-Legger shampoo and a washcloth to clean paws. I make a new batch each day. (Order 4-Legger today with promo code RaiseNaturally20 for 20% off your first order.)
Scoop the Potty Area
I always scoop a clean, clear area in the yard for potty breaks. Cavaliers, like most dogs, prefer a neat spot for their business. A wide, shoveled path ensures your Cavalier can move around comfortably without getting buried in snow.
Coats and Sweaters for Your Cavalier
Dog coats and sweaters are a must for Cavaliers. Look for a jacket that provides full range of motion and covers your pup’s back and belly. Indoors, a cozy sweater can keep your Cavalier comfortable. If you notice your Cavalier sleeping in a tight ball, or even shivering, a dog sweater is a great idea. Stewart’s favorite sweaters are custom-made by MeekByDesign, but there are plenty of great options online or in pet stores.
Should a Cavalier Wear a Hat in the Winter?
Cavaliers’ long, luxurious ears attract snow and ice like a magnet! A lightweight dog hat or snood can protect your Cavalier’s ears during snowy adventures. Afterward, be sure to dry their ears gently with a soft towel.
Staying Warm and Cozy Indoors
When your Cavalier comes inside from the snow or cold, use a super-absorbent microfiber towel to dry him off thoroughly. For an extra touch of luxury, I like to pop a favorite blanket in the dryer so my dog can snuggle up with something warm. These little comforts make a big difference on chilly days!
Indoors, I keep Stewart active and engaged with puzzle toys, hide-and-seek games, and short training sessions. A mentally stimulated pup is a happy pup, even when it’s too cold for a long walk.
Winter Nutrition for Cavaliers
Did you know that certain foods can help your Cavalier King Charles Spaniel stay warm during the chilly months? According to Traditional Chinese Medicine (TCM), foods have energetic properties that can influence the body’s temperature and overall balance.
In the winter, it’s beneficial to incorporate “warming” proteins into your dog’s diet. Proteins like chicken, lamb, venison, and even goat are considered warming and can help offset the cold temperatures. These proteins are especially good for dogs who seem more sensitive to the cold or have lower energy during the winter.
You can also include warming spices and herbs like ginger or turmeric in small, dog-safe amounts to add a cozy touch to their meals. These not only are warming, but also support joint health during cold weather.
If you’re new to adjusting your dog’s diet seasonally, start slow by adding one or two warming ingredients to their current meals. Always consult with your vet or a canine nutrition expert to ensure your Cavalier’s diet remains balanced and meets their individual needs.
Embrace the Season
Stewart may be new to my home, but we’re already making the most of winter together. From brisk walks in his cozy new jacket to snuggling under a warm blanket on chilly evenings, these little moments remind me of the special bond we share. No matter the season, Cavaliers have a way of bringing warmth and joy to our lives.
How do you keep your Cavalier comfortable and happy during the winter months? Share your tips below, I’d love to hear them!
Google Ad Below [...]Read more...
March 30, 2025Health Benefits of Omega-3s for Cavaliers
Omega-3 fatty acids are one of the most important nutrients for Cavaliers, yet they’re often overlooked or misunderstood. These essential fats support heart health, brain function, joint mobility, skin condition, and even immune function. But not all omega-3 sources are created equal. Fresh fish, supplements, and plant-based options vary in effectiveness, and factors like oxidation and sourcing impact their quality. In this guide, I’ll break down the best omega-3 sources, how to choose high-quality options, and what to avoid to ensure your Cavalier King Charles Spaniel gets the maximum health benefits from their Omega-3s.
Skin and Coat Health
Omega-3s help maintain a healthy skin, reducing dryness, flakiness, and itchiness. They also improve coat condition, making your Cavalier’s fur shinier and softer. Cavaliers, like many other breeds, can be prone to allergies and skin sensitivities, and omega-3s can help manage these issues by reducing inflammation in the skin.
Joint Health and Mobility
As Cavaliers age, they can develop arthritis and joint stiffness. Omega-3s have been shown to reduce inflammation in the joints, helping to alleviate pain and improve mobility. Dogs receiving sufficient omega-3s often experience less stiffness and better flexibility, which is particularly important for senior Cavalier King Charles Spaniels.
Brain and Cognitive Function
DHA is a crucial component of brain cell membranes and plays a significant role in cognitive function. In Cavalier puppies, it supports brain development and learning. In senior Cavaliers, it helps prevent cognitive decline and supports memory and problem-solving skills. Studies have shown that dogs supplemented with DHA perform better on cognitive tests than those that do not receive adequate amounts.
Heart Health
Omega-3 fatty acids are essential for supporting cardiovascular function by helping regulate heart rhythm, reduce blood pressure, and improve circulation. For Cavaliers, who are especially prone to mitral valve disease (MVD), a common heart condition in the breed, omega-3s are even more important. Given their susceptibility to MVD, ensuring your Cavalier’s diet is rich in omega-3s can play a crucial role in supporting their heart health and may help slow the progression of the disease.
Immune System Support and Inflammation Control
Chronic inflammation is a factor in many health issues, including autoimmune conditions, allergies, and even cancer. For Cavaliers, who are prone to conditions like Chiari malformation, managing inflammation is especially critical. Omega 3s play an important role in regulating the body’s inflammatory response, helping to balance the immune system and reduce excessive inflammation. By incorporating omega 3s into your Cavalier’s diet, you can help protect against the inflammation that worsens conditions like Chiari malformation and support overall immune health.
Best Omega-3 Sources for Cavaliers
The best omega-3 sources for dogs are those that provide EPA (eicosapentaenoic acid) and DHA (docosahexaenoic acid) in their most bioavailable forms. These two types of omega-3s are the most beneficial for dogs, as they are directly used by the body to support a variety of vital functions, from heart health to joint mobility. The most bioavailable forms of these omega-3s are typically found in marine-based sources, such as oily fish. Fish like salmon, sardines, mackerel, and anchovies are excellent options because they contain high levels of both EPA and DHA, making them ideal for supporting your Cavalier’s health. These fish provide omega-3s in a form that’s easy for the body to absorb, ensuring that your dog gets the maximum benefits.
In addition to fish, fish oil supplements can also be a great source of omega-3s. However, it’s important to choose high-quality, purified fish oils that are free of contaminants like mercury. If your Cavalier is sensitive to fish or you prefer plant-based sources, algae oil is another excellent option, as it provides DHA without the fishy aftertaste or concerns about ocean contaminants. While flaxseed and chia seeds offer plant-based omega-3s, they contain ALA (alpha-linolenic acid), which the body must convert into EPA and DHA, an inefficient process for dogs. This means that marine-based omega-3s are typically the best option for achieving optimal health benefits. By rotating between these high-quality sources, you can help ensure your Cavalier is getting the most effective omega-3s for their needs.
Watch our fresh fish DIY and don’t forget to subscribe to @CavalierTipsandFun for more!
Fresh Fish (Whole Food Source of EPA and DHA)
Feeding fresh, oily fish is one of the most natural ways to provide omega-3s. However, choosing the right type of fish is essential due to concerns about mercury levels, sustainability, and proper sourcing.
Some of the best options for Cavaliers include:
Sardines: Small, low-mercury fish that are naturally high in omega-3s. They are one of the safest whole-food sources.
Anchovies: Similar to sardines, anchovies are rich in DHA and EPA while having minimal contamination risks.
Herring: Often used in high-quality pet foods, herring is another small, oily fish packed with omega-3s.
Atlantic Mackerel: This species is safe, but avoid king mackerel, which is high in mercury.
Wild-Caught Salmon: A great source of omega-3s, but farmed salmon may contain higher levels of contaminants.
When feeding fresh fish, it’s important to either lightly cook the fish or feed it raw if it’s safely sourced. Cooking fish too much can break down some of the omega-3s, while raw fish (from a trusted, safe source) can provide the most nutrients. However, if you choose to feed raw fish, it should be frozen for a week first to reduce the risk of parasites, which can be a concern with certain types of fish.
It’s essential to avoid fish that have been prepared with added salt, spices, or sauces. These seasonings can be harmful to dogs. Also, always avoid feeding cooked bones, as they can splinter and cause serious internal injuries.
Fish Oil Supplements
Many pet parents turn to fish oil supplements to provide omega-3s, but not all fish oil supplements are the same. Choosing the right one for your Cavalier is important to ensure you’re giving them the best quality and the most effective nutrients.
How to Choose a High-Quality Fish Oil
When selecting a fish oil supplement, look for species-specific labeling. Instead of settling for generic “fish oil,” opt for oils like sardine oil, anchovy oil, or krill oil. This ensures transparency in sourcing and gives you a better idea of where the oil is coming from.
When choosing a fish oil supplement, it’s important to look at the levels of EPA and DHA, the two types of omega-3 fatty acids that provide the most health benefits for your dog. The label on the bottle should specify the amount of EPA and DHA in each serving, not just the total amount of fish oil.
For example, a bottle might say it contains 1,000 mg of fish oil per serving. But if the label doesn’t show how much of that is EPA and DHA, it’s hard to know how much of the oil is actually providing the beneficial omega-3s your dog needs.
Some fish oils may have more EPA, which is great for joint and heart health, while others may have more DHA, which supports brain function and reduces inflammation. Knowing exactly how much of each omega-3 is in the oil allows you to be more confident that you’re giving your Cavalier the right amount for their specific health needs. This way, you can make sure you’re getting the full benefits of the omega-3s in the supplement.
Also, choose products that are third-party tested. Reputable brands will test their oils for harmful contaminants like heavy metals, PCBs, and oxidation levels. This helps ensure the oil is safe for your dog and that it hasn’t been compromised during production.
Liquid vs. Capsules
Fish oil comes in two common forms: liquid and capsules. Liquid fish oil (often found in pump bottles) is convenient because it’s easy to dose, but it’s more prone to oxidation once opened. Oxidation occurs when the oil is exposed to light, heat, or air, so it must be stored in the refrigerator and used quickly to maintain its freshness.
On the other hand, capsules are more stable since the oil is protected from air exposure, which reduces the risk of oxidation. However, they can be harder to dose accurately, especially for small dogs.
Oxidation Risks
One of the biggest concerns with fish oil is oxidation. Omega-3s are very sensitive to light, heat, and oxygen, and when the oil oxidizes, it can lose its effectiveness and even become harmful. Signs of rancid fish oil include a strong fishy smell or an unusual taste.
To minimize the risk of oxidation, here are a few tips:
Choose dark glass bottles instead of clear plastic, as glass helps protect the oil from light exposure.
Store the fish oil in the refrigerator after opening to keep it fresh.
Use the oil within 30 to 60 days of opening to ensure you’re getting the best quality.
By taking these steps to choose a high-quality fish oil and storing it properly, you can help ensure your Cavalier gets the full benefits of omega-3s for their heart, joints, and overall health.
Green-Lipped Mussels: A Powerhouse for Joint Support
Green-lipped mussels (Perna canaliculus), native to New Zealand, are one of the most beneficial natural sources of omega-3s for dogs. Unlike traditional fish-based omega-3 supplements that provide primarily EPA and DHA, green-lipped mussels contain a unique omega-3 fatty acid called ETA (Eicosatetraenoic Acid). ETA has been found to have additional anti-inflammatory properties, making it especially helpful for dogs suffering from joint issues like arthritis.
The anti-inflammatory effects of ETA, along with the presence of glucosamine and chondroitin, make green-lipped mussels an excellent option for promoting joint health. These compounds work together to support cartilage repair, reduce inflammation, and enhance mobility in dogs experiencing joint stiffness or discomfort. This combination is particularly beneficial for dog breeds, like Cavaliers, that are prone to developing joint issues as they age.
Comparing Omega-3 Content in Green-Lipped Mussels vs. Fish
In terms of EPA and DHA content, green-lipped mussels may not provide as high a concentration per serving as fatty fish, but their ETA provides an extra layer of anti-inflammatory benefits. This makes green-lipped mussels an excellent addition to a dog’s diet, particularly for those with joint concerns.
How to Feed Green-Lipped Mussels to Your Dog
Green-lipped mussels are often available as freeze-dried powder or in chewable treat forms. Both forms make it easy to incorporate them into your dog’s daily routine, but the powder can be sprinkled over food or mixed into homemade dog meals for ease of use.
As with any supplement, it’s important to start with a small amount to monitor how your dog responds, especially if they are new to green-lipped mussels or have a sensitive digestive system. For the dosing of green-lipped mussels, it’s always best to refer to the product-specific guidelines since the concentration can vary depending on the form (freeze-dried powder, chewables, etc.) and brand. However, a general recommendation often seen in supplements for dogs is:
Start with 1/4 teaspoon per 10 pounds of body weight per day for powder form. This can be adjusted based on the dog’s response and their specific needs.
Plant-Based Omega-3s: Less Effective for Dogs, but Still Valuable
When it comes to omega-3 fatty acids, plant-based options are less efficient for dogs compared to animal sources like fish, as they primarily contain ALA (alpha-linolenic acid). While ALA is an essential omega-3 fatty acid for humans, dogs face challenges in converting ALA to the more bioavailable forms, EPA (eicosapentaenoic acid) and DHA (docosahexaenoic acid), which are the forms most beneficial for their health. This makes plant-based omega-3s less effective for dogs in supporting the same health benefits as those derived from marine sources.
Why ALA Is Less Effective for Dogs
Dogs have a relatively inefficient ability to convert ALA into EPA and DHA. The process of conversion requires specific enzymes, which dogs do not produce in large enough quantities to convert sufficient ALA into the needed forms of omega-3s. As a result, while plant-based omega-3s can still offer some benefits, they are not as effective at delivering the omega-3s that support joint health, cognitive function, and heart health in the same way that fish-derived omega-3s do.
Nevertheless, plant-based sources of omega-3s are still valuable as part of a balanced diet. They can provide supplemental omega-3s and contribute to overall health but should not be relied on as the primary omega-3 source for dogs.
Common Plant-Based Omega-3 Sources
Flaxseeds: Flaxseeds are one of the most popular plant-based sources of ALA omega-3s. They can be ground and added to your dog’s food. However, the conversion rate of ALA to EPA and DHA is low in dogs, so while flaxseeds may offer some benefits, they should not be relied on exclusively for omega-3 needs.
Chia Seeds: Like flaxseeds, chia seeds are rich in ALA. These tiny seeds are highly nutritious and can be added to a dog’s meals. They can absorb water and form a gel, which can be helpful for digestive health. While chia seeds may offer some benefit, they should be seen as supplementary, not primary, sources of omega-3s for dogs.
Hemp Seeds: Hemp seeds contain ALA as well, along with a well-balanced ratio of omega-3 and omega-6 fatty acids. While these can contribute to overall fatty acid intake in dogs, their conversion to EPA and DHA is also limited. Hemp oil, a more concentrated form, may be more effective but still not as efficient as fish oil or algae oil in providing the omega-3s dogs need for optimal health.
Algae Oil: The Better Plant-Based Alternative
While plant-based sources like flaxseeds and chia seeds are valuable in certain aspects, algae oil is usually a better plant-based option for dogs. Algae oil is derived from marine algae, which naturally produce DHA (and sometimes EPA) without requiring the conversion process. Unlike other plant-based sources that contain ALA, algae oil provides a direct source of DHA, the omega-3 that plays a critical role in brain function, heart health, and reducing inflammation.
Algae oil is especially beneficial for pet parents who prefer to avoid fish-based products for ethical, environmental, or allergy reasons. It provides the same essential omega-3 fatty acids found in fish oil, but without the potential risks associated with mercury contamination or fish-based allergens. This makes algae oil a great plant-based alternative for ensuring your dog receives the health benefits of omega-3s.
Algae oil supplements are available in capsules or liquid form and can be incorporated into your dog’s diet just like fish oil. The recommended dosage varies by brand, so it’s important to follow the manufacturer’s guidelines and consult your vet to ensure the right amount for your dog.
While algae oil is a great alternative to fish oil, there are a few differences to consider. One of the main differences is that fish oil generally contains more EPA, an omega-3 that is particularly helpful for reducing inflammation and supporting joint health, while algal oil tends to have more DHA, which is important for brain and eye health. Because of this, if your dog needs more EPA for inflammation or joint issues, fish oil might be a better choice. Additionally, algae oil can be more expensive than fish oil, and it may not be as widely available in stores. Another thing to note is that fish oil is often more bioavailable, meaning it’s easier for dogs to absorb and benefit from. That said, algae oil is still a very good option, especially if you’re looking for a more sustainable, vegetarian, or fish-free supplement. It’s always a good idea to talk to your vet about which type of omega-3 is best for your dog’s specific health needs.
How Much Omega-3 Does Your Cavalier Need?
For general health, the recommended omega-3 dosage, specifically EPA and DHA, is typically between 20 to 55 mg per pound of body weight per day. If your Cavalier has specific health issues, like arthritis or inflammation, the dosage may increase to 50 to 100 mg per pound. If your dog is lacking omega-3s, you might notice signs like dry skin, excessive shedding, joint stiffness, or a dull coat. To ensure you’re giving the right amount, it’s important to consult your vet, who can recommend the proper dosage based on your dog’s size and health concerns.
Final Thoughts
Omega 3s are essential for your Cavalier’s overall health, supporting heart, brain, joint and skin function. By incorporating a variety of high quality omega 3 sources such as fish, green lipped mussels and supplements, you can ensure your Cavalier King Charles Spaniel receives a well rounded intake of these beneficial fatty acids.
Quality matters, so focus on bioavailable forms of EPA and DHA, and always rotate the sources you use to prevent imbalances. Whether you opt for fresh fish, fish oil or green lipped mussels, it’s crucial to store and handle these sources properly to avoid oxidation.
Before making any changes, check with your veterinarian to tailor an omega 3 plan that best suits your Cavalier’s individual health needs. Consistently including omega 3s in their diet will support long term health and vitality, helping your dog thrive at every stage of life.
Do you feed your Cavalier fresh fish?
Google Ad Below [...]Read more...
April 17, 2025Gentle, Safe, and Effective for Our Sensitive Cavaliers
Fleas and ticks. Just hearing those words makes me itch. But as a natural Cavalier Mom, I’ve always been cautious about what I put on or in my dogs, especially with delicate and sensitive breeds like Cavalier King Charles Spaniels. These little sweet hearts often have sensitive skin, luxurious coats, and sometimes underlying conditions like Chiari malformation or syringomyelia, which can make them more vulnerable to adverse reactions.
I’ve been on this natural journey for years, first with Dexter and now with Stewart. Along the way, I’ve learned that staying chemical-free when it comes to flea and tick care is absolutely possible, it just takes a little planning and a lot of label reading.
This is the natural flea and tick routine I’ve found works best for my Cavaliers.
Why I Choose a Natural Approach for My Cavalier King Charles Spaniels
Conventional flea and tick treatments may offer quick results, but they also come with serious risks. Side effects can range from skin irritation, itching, and digestive upset to more concerning issues like tremors, seizures, and in some cases even organ damage. These are not small concerns.
For a breed like the Cavalier King Charles Spaniel, those risks are even more concerning. Cavaliers are already prone to neurological conditions like Chiari malformation, seizures, tremors, and episodic falling syndrome. I’m especially cautious about using anything that lists seizures or neurological side effects as possible outcomes. It just doesn’t make sense to use a treatment that could trigger the very issues this breed is already vulnerable to.
Choosing a natural approach isn’t about trying to be perfect. For me, it’s about reducing chemical exposure wherever I can and building a thoughtful, layered prevention plan that supports overall health instead of relying on a single product to do it all.
My Natural Flea and Tick Prevention Plan for My Cavalier King Charles Spaniel
1. Regular Grooming and Bathing-I bathe Stewart every three to four weeks using a safe, gentle dog shampoo made without synthetic preservatives, artificial fragrances, or harsh surfactants. I’ve been using 4-Legger’s USDA-certified organic formulas for years because I trust their ingredient panel and transparency. They have a variety of formulas that help deter ticks and fleas.
Bathing regularly doesn’t just clean your Cavalier. It helps interrupt the flea life cycle. A good soak and lather can wash away flea eggs, dirt, and debris that might attract pests. When I use a shampoo that includes properly diluted essential oils known to repel fleas and ticks, it gives Stewart an extra layer of protection even after his bath is done.
2. Natural Tick and Flea Sprays for Daily Protection-Before every walk, I spray Stewart with a natural flea and tick repellent. I pay close attention to his legs, chest, tail, and belly, basically anywhere that might brush up against grass, shrubs, or wooded areas. These sprays are one of our most important layers of protection, and I use them daily during warm weather or anytime we’re heading into a high-risk area.
Over the years, I’ve rotated between trusted store-bought options and homemade recipes using properly diluted dog-safe essential oils. I always avoid sprays with synthetic preservatives or ingredients that could irritate a dog’s skin.
When I make my own, I tailor the recipe to the season, the environment, and even the behavior of my dog. Dexter, for example, used to try to catch bees, so I avoided blends with oils like rose geranium that might attract them. The key with any natural tick and flea spray is to apply it each time your Cavalier goes outside. These blends are not designed to last for hours at a time, and a quick re-spritz before each outing is what really makes the difference. I keep a bottle near the door so it becomes part of our daily walking routine.
DIY Natural Flea and Tick Spray for Dogs
This is one of my favorite natural sprays to help keep fleas and ticks at bay, without resorting to harsh chemical treatments. It’s simple to make, and you can use it on both your dog and yourself before heading outside.
What You’ll Need:
3 ounces distilled water
1/4 ounce vodka or grain alcohol (helps disperse oils evenly)
1/4 teaspoon vegetable glycerin (moisturizing and helps blend)
Essential Oils:
4 drops Cedarwood– repels fleas and ticks while being gentle on skin
4 drops Geranium– especially helpful against ticks
3 drops Lavender– calming and gently repels insects
1 drop Citronella– useful for deterring mosquitoes, fleas, and ticks
1 drop Peppermint– offers cooling relief and additional repellent support
How to Make It: Add all the ingredients to a 4-ounce (or larger) amber or cobalt blue glass spray bottle. Shake gently to combine.
How to Use It: Before walks or time outside, shake well and lightly mist your dog’s legs, belly, tail, and along the back. Always avoid spraying near the face and eyes. For areas like the ears, chest, or neck, spray a small amount into your hands first, then gently rub it into your dog’s fur. This helps you apply it more precisely and makes sure it reaches the coat and skin. Always apply when your dog is dry for best results.
Storage Tip: Store your spray in a cool, dark place and an amber or cobalt glass bottle helps protect the essential oils from light exposure, which can cause them to break down over time. Shake before each use to keep the oils properly dispersed.
Simple DIY Natural Flea and Tick Spray for Dogs
When I first started making Dexter’s flea and tick sprays, I kept things really simple. I used just distilled water and a few carefully chosen essential oils. Using just distilled water and essential oils is a great option if you plan to make small batches and use them up fairly quickly. It is easy, gentle, and perfect for Cavalier parents who want something simple. You will still need to shake the bottle well before each use, just like with any natural spray.
If you want your spray to blend a little more evenly and stay fresher a little longer, using the above recipe with the grain alcohol and vegetable glycerin can help. Alcohol acts as a natural preservative and helps the oils disperse a little better through the water. Glycerin can also add some moisture to the coat and skin.
Both options are good, it really depends on what fits best with your dog’s needs and your routine. If you are going through the spray quickly, distilled water and oils work just fine. If you want a little more staying power and an extra moisturizing boost, the version with alcohol and glycerin might be a better fit.
You can also check out four of Dexter’s natural flea and tick spray recipes on my Raising Your Pets Naturally blog.
Watch now and don’t forget to subscribe to @RaisingYourPetsNaturally YouTube for more!
Why Different Natural Tick and Flea Sprays Work for Different Dogs
One thing I learned through experience and from chatting with other natural pet parents is that not every spray works the same way for every dog. Some ticks are more common in certain regions and are repelled by specific essential oils. That’s why I rotate between formulas and stay flexible with what I use. If something stops working, I adjust. It’s not failure, it’s just part of the process.
3. Apple Cider Vinegar for Flea and Tick Support-Raw, unfiltered apple cider vinegar (ACV) is another natural tool I like to keep on hand as part of a layered approach to flea and tick prevention. While it won’t kill fleas or ticks, it can help make your dog less appealing to them.
You can make a simple spray by mixing equal parts raw ACV and distilled water in a spray bottle and lightly misting your dog’s legs and belly. Just be sure to avoid the face, and only use it on healthy, unbroken skin. If your dog has any skin sensitivities or open spots, it’s best to skip ACV topically.
You can also add a small amount of ACV to your Cavalier’s food or water. Not all dogs tolerate vinegar well, especially those with sensitive stomachs or urinary issues. It’s also important if you add it to your Cavalier’s water, they also have non-altered fresh water available.
4. Amber Collars for Natural Flea and Tick Repellent Repellant-Another layer is a raw Baltic amber collar. These collars are made from unpolished amber resin that naturally releases aromatic compounds when warmed by your dog’s body. These compounds can help repel ticks and fleas without adding any scent or chemicals to your dog’s skin.
While I wouldn’t rely on them as the only form of protection, I absolutely feel they can help in the overall care to keep our Cavaliers tick and flea free naturally. They’re lightweight, chemical-free, and easy to clip on. With Cavaliers, just make sure the collar sits comfortably behind their ears and doesn’t tangle with their feathering. If your Cavalier has Chiari malformation, this may not be an option if they can’t wear a collar comfortably.
5. Ultrasonic Tick Tags-Another tool to add to your flea and tick routine is an ultrasonic tick tag. There are various brands that make these small devices that clip onto your dog’s collar or harness. They emit a high-frequency pulse that humans and dogs can’t hear, but it’s designed to interfere with a tick or flea’s ability to orient themselves toward your dog.
These tags are scent-free and totally safe for sensitive dogs like Cavaliers. This type of tag is helpful during hikes, trail walks, or visits to areas known for higher tick populations. It’s a simple, noninvasive step that adds an extra layer of protection.
6. Diatomaceous Earth for Natural Flea and Tick Prevention-Food-grade diatomaceous earth is another natural tool I use as part of our flea and tick routine. It’s a fine powder made from fossilized algae that works by drying out the exoskeletons of pests like fleas and ticks. I don’t use it as a primary prevention method, but it’s a helpful layer, especially after we’ve been somewhere with higher pest exposure.
To apply, I lightly sprinkle a small amount down Stewart’s back and gently brush it into his coat, avoiding his eyes, nose, and mouth. It’s best used when your dog is dry and in a well-ventilated area. You can also use it on bedding or around baseboards during flea season as part of a regular cleaning routine.
Watch how I apply it and don’t forget to subscribe to @CavalierTipsandFun YouTube channel for more!
7. Using Garlic to Support Immune Health and Repel Fleas Naturally-Garlic might be controversial in some circles, but when used responsibly, it’s one of my go-to immune support tools. Garlic often gets a bad reputation because in 2000, they did a study on four dogs and gave them an extreme amount of garlic ( about 25 cloves a day for a 25-pound dog), and they had a bad reaction. That’s not even close to how we’d use garlic in a natural, supportive way. You can read the study here.
I started using fresh garlic years ago with Dexter, and it’s something I continue with Stewart now that he’s old enough for it. Garlic supports the immune system and helps repel fleas and ticks from the inside out. I only use fresh, organic garlic, peeled and minced about ten minutes before mealtime to allow the allicin to activate. Then I mix it into Stewart’s food. I never exceed the recommended amount and only feed garlic for up to three days in a row, followed by five to seven days off.
I never use garlic with puppies, pregnant or nursing dogs, dogs with anemia, or those with upcoming surgeries. It’s not a fit for every dog, so I always recommend checking with a holistic vet first.
Garlic Dose For Dogs: The approximate dose of fresh, organic garlic is 1/8 teaspoon for a 5 pound dog, 1/4 teaspoon for dogs between 6 and 10 pounds, 1/2 teaspoon for 11 to 15 pounds, 3/4 teaspoon for 16 to 20 pounds, and 1 teaspoon for dogs between 21 and 30 pounds. Dogs between 31 and 50 pounds can have 1 1/2 teaspoons, and those over 51 pounds can have up to 2 teaspoons.
8. Spotting and Removing Ticks and Fleas from Your Cavalier King Charles Spaniel-No matter how many prevention tools we use, I always do a hands-on check after walks or outings, especially during peak tick season. I check Stewart’s paws, armpits, ears, groin area, and the base of his tail. These are the spots where ticks love to latch on.
If I do find a tick, I remove it immediately with a tick remover or fine-point tweezers, making sure to grab close to the skin and pull straight out. Afterward, I place it in a bottle with alcohol and wash my hands. I’ve found this routine not only gives me peace of mind but also helps me stay in tune with any changes in Stewart’s skin or coat.
A Quick Note About Dexter’s Experience
As Dexter was in his late senior years and his neurological condition progressed, I started to notice the occasional flea here and there, more than we had seen in the past. His immune system wasn’t as strong, and that likely made him more vulnerable to pests. This isn’t uncommon in aging dogs or those with health challenges. Their bodies just don’t have the same defenses they once did.
I made it a daily routine to sit with Dexter and go over him carefully with a flea comb and a small jar of alcohol to catch any runners before they could become a real problem. I also stayed on top of sweeping and washing his bedding regularly. Thankfully, it never got out of control, just a flea here and there, but it reminded me how important it is to stay consistent.
It also reinforced why I’ve always chosen to avoid harsh flea treatments. With Dexter’s compromised system, exposing him to chemicals could have caused even more serious issues. Supporting his health naturally, with gentle and consistent care, was always the safest choice for him.
Final Thoughts on Natural Flea and Tick Care for Cavaliers
If you’re just starting your natural flea and tick care journey, start small. You don’t have to change everything at once. Pick one new step, try it, and see how it fits your dog’s life. Read labels. Ask questions. And most of all, give yourself grace as you navigate what feels right for you and your Cavalier.
Cavaliers are worth the extra effort, and with how sensitive they can be, choosing gentle, natural care just feels like the right thing to do.
Google Ad Below [...]Read more...
November 27, 2024Does your Cavalier King Charles Spaniel bark for attention? Maybe your Cavalier tosses a toy onto your lap, begging for a game of fetch. Or perhaps your Cavalier King Charles Spaniel barks incessantly to go outside and chase every squirrel in the neighborhood. These are classic examples of attention-seeking behavior and, while they may be funny at times, they can also become exhausting.
In this Cavalier blog, I’ll guide you through training your Cavalier to ask for attention politely or, even better, stop demanding attention altogether. But first, let me be clear. I am all about spending quality time with our dogs. Cavaliers thrive on love, play, and companionship, and I encourage plenty of bonding time. However, constant barking or pushy behaviors for attention are not things I would encourage in a dog. With positive dog training methods, good timing, and a proactive approach, we can change this demanding behavior.
Why Does My Cavalier Bark at Me for Attention?
Cavaliers are a playful breed and incredibly intelligent. They are quick learners and can learn behaviors we don’t even know we are teaching them, like barking for attention. Some Cavaliers may learn to bark for attention, paw, nudge, or give you the “look” for that snack. If they have done one or all of these things, and you gave them what they wanted, they’ve already made the connection: This behavior gets me what I want. For example, if barking speeds up dinner prep or prompts you to throw the ball, your Cavalier has been “trained” by their success.
But, don’t worry. You can change these demanding behaviors to better habits. So, let’s get started at teaching your Cavalier to be calm and quiet for the things they want.
Steps to Stop or at Least Curb Attention-Seeking Behaviors
Increase Quality Time: Cavaliers are highly social and crave interaction. You know that. That’s why they are your breed of choice, right? If your pup is constantly asking for attention, they may feel their current playtime or bonding time isn’t enough. Start by increasing their daily activities by about 50 percent. For example, if you play games with your Cavalier five times a day, bump it up to seven or eight short sessions. The same goes for walks, training, or cuddle sessions. Increase the duration or quantity of their interactive activities. And I do mean interactive vs. just placing a food toy on the floor. Those are all fine and well, but, in most cases, your Cavalier is craving your time. Read more about canine enrichment.
Get Ahead of the Demands: Observe when your Cavalier typically starts seeking attention. If they usually bark for play at 11 a.m., initiate a play session at 10:45 instead. By starting the activity before they ask, you’re rewarding their good and polite behavior rather than their pushiness.
Ignore Pushy Behaviors: This is key. When your Cavalier barks, paws, or demands attention in any way, practice the “invisible dog” technique. Avoid eye contact, verbal responses, or movement. Turn away, walk out of the room, or stay still. Once your Cavalier is quiet, calmly reengage and reward them for being polite. But, this only works if you do #1 and increase that quality time together. If you don’t do that, ignoring won’t work because their needs are not being met.
Pro Tip: Be prepared for an “extinction burst.” Your Cavalier may escalate their behavior temporarily, barking louder or pawing more persistently because the old tactics aren’t working. They are getting frustrated. Stay patient and consistent.
Reward Calm and Quiet: Every time your Cavalier is calm and quiet, offer attention, praise, or even a small treat. Reinforcing this behavior teaches them that being polite is the best way to get what they want. This is also the perfect time to initiate a game or play session with your Cavalier.
Teaching self control is a great way to help curb barking.
Patience Is Key
Changing established habits takes time, so be patient with your Cavalier and yourself. Remember, they’re simply trying to communicate their needs the only way they know how. With consistent positive dog training and a little extra quality time, you’ll soon have a polite pup who doesn’t feel the need to ask for attention because you are providing them all the attention they need and desire.
Real-Life Example: Dexter’s “Talking”
Even my sweet Dexter isn’t perfect. He’s been known to “talk” or snort to get his way, and sometimes it works because I’m not perfect, either. Not to mention, there are two other family members who have been known to reward his ask. And, when it’s rewarded, it persists. If I wanted to fully address this behavior, I’d need to follow the steps above consistently and MAKE SURE the other two members of the family do as well. But, in our home, a little talking is something we tolerate because it doesn’t bother us.
That’s the beauty of training: you get to decide what behaviors matter to you. If something doesn’t bother you, there’s no need to change it, as long as it’s not something that should be addressed like anxiety. Just remember that if you allow certain behaviors, it’s important not to complain about them later.
Check out my playlist on barking!
What You Can Do Next
Now that you have the tools to manage your Cavalier’s attention-seeking behavior, it’s time to put them into action. Start by increasing quality time with your dog, introducing play sessions before they ask for attention, and practicing the “invisible dog” technique when pushy behaviors pop up. Remember, consistency is key, and patience will help you both succeed. With time, you’ll see your Cavalier becoming more polite and less demanding, leading to a stronger bond and fewer unwanted behaviors.
What’s your dog’s favorite way to spend quality time with you?
Join our vibrant Cavalier King Charles Spaniel community on Facebook, support our dedication to pet wellness on Patreon, and stay updated with our weekly newsletter for invaluable tips and insights into raising happy, healthy pets. Together, let’s make a difference in our dogs’ lives!
Google Ad Below [...]Read more...
March 19, 2025How to Teach Your Cavalier King Charles Spaniel to “Leave It” | Positive Training for Cavaliers
Teaching your Cavalier King Charles Spaniel to “leave it” or ignore something on your cue can be lifesaving. Imagine dropping a pill in front of your Cavalier or going for a walk and passing garbage in the street. If your Cavalier King Charles Spaniel has a reliable “leave it” cue, you can easily ask him to leave it as you pick up the pill or walk past the garbage.
When I start the “leave it” training, what I want my dog to learn is that “leave it” doesn’t mean he doesn’t get something, but that I have something better. This helps to build a more reliable behavior, especially off-leash. If you only teach your dog that “leave it” means he doesn’t get something, he might just try to grab the item faster or run off with it. That’s not what we want!
As with all dog training, remember that you need to regularly practice these lessons. Training your Cavalier is not just about doing it once and then only when you need it. Reliable dog training takes time, patience, and consistency. Cavalier King Charles Spaniels, in particular, can be a bit food-driven, so keeping them engaged and excited about the reward is key.
So, be patient, consistent, and most importantly, have fun with your Cavalier while training!
Teaching Your Cavalier to Leave It Level 1
Start with a small, low-value dog treat in your closed hand, and place it about 12 inches to the side of your Cavalier’s face. Make sure your hand is at the right height, not too close to his face, but not too far away either. Let your dog see it there, and wait him out. As soon as he moves his face away or ignores the treat, say, “YES!” and reward him with an amazing treat from your other hand. Not going for the treat is a win, too! So, if you present the leave it treat hand and he doesn’t go for it, “YES!” and treat. Repeat this a few times.
When your Cavalier starts ignoring your treat hand altogether, move to Level 2.
Don’t forget to subscribe to our @CavalierTipsandFun for more!
Teaching a Dog to Leave It Level 2
Start like Level 1, but before you drop your hand, say your “leave it” cue once. Wait him out; as soon as he moves his face away or ignores the treat, say, “YES!” and treat from your other hand. Repeat. When he stops going for your hand after hearing the “leave it” cue, move to Level 3.
Training Your Cavalier to Leave It Level 3
Say your “leave it” cue and drop your hand with the low-value treat to your dog’s side, but leave your hand OPEN. If he goes for the treat, quickly close your hand. When he moves his face away, praise and reward him with a treat from your other hand. Repeat. When your Cavalier is reliably ignoring the treat in your open hand, move to Level 4.
Teaching Your Cavalier to Ignore Items Level 4
At this stage, it’s time to change things up a bit. Up until now, you’ve been using low-value, boring dog treats for the “leave it” item. Once your dog is starting to get the hang of it, it’s time to up the ante. Use tastier treats or toys as the “leave it” item, but remember, his reward needs to be even better.
You can try:
Tastier treats or food
Paper products, tissue, or paper towels
Toys
Subscribe to @RaisingYourPetsNaturally for more!
Here’s how to set it up when using a toy:
Pick a Toy: Choose a toy that your Cavalier likes but isn’t so high-value that your Cavalier would immediately grab it without hesitation. Start with something mildly exciting like a squeaky ball, fleece tuggy toy, or stuffed animal that your dog enjoys.
Set Up the Training Area: Find a quiet spot where you can focus and your dog isn’t too distracted by other things. Make sure it’s a place where you can manage your dog’s movement and reactions.
Start the Cue: Hold the toy in your hand and get your dog’s attention. Don’t get too silly. You just want him to know it’s there, with a bit of excitement.
Use the “Leave It” Cue: Once you’ve gotten his attention, say the “leave it” cue calmly. Hold the toy in front of your dog just out of reach, but don’t place it on the ground yet.
Wait for the Response: Your dog may try to lunge for the toy or show interest in it. The goal here is for him to move away or ignore it, not to grab it. If he goes for it, just swipe the toy up to your chest and ignore him and wait for him to ignore it. Then repeat the process of lowering your hand with the toy. As soon as your dog turns his head or steps away from the toy, immediately say “YES!” and give him a better reward (a tastier treat or something that’s even more valuable than the toy).
Repeat and Increase Difficulty: Repeat the exercise several times, and gradually increase the difficulty. Once your Cavalier reliably ignores the toy when it’s held in your hand, move on to placing the toy on the ground. To set this up, place the toy behind you, out of reach. This way, you can gently body block your dog if he tries to move toward it. When he turns away or ignores the toy, immediately reward him with a better treat or better toy.
Body Blocking: Body blocking involves using your own body to gently guide your dog away from a distraction, like a toy, by positioning yourself between your dog and the item. It’s important to note that body blocking is not about kneeing or being rough with your Cavalier. It’s a gentle, calm way to redirect their attention. However, some dogs may find body blocking intimidating or scary, so if your Cavalier shows signs of stress, it’s best to avoid this method and use alternative techniques for redirection.
Build Duration: As your Cavalier gets more comfortable with the “leave it” cue around toys, try holding the cue for a longer period of time. For example, you can wait for him to sit or stay before rewarding him. This increases his patience and focus during the exercise.
Training Your Cavalier to Leave Something Level 5
Place a low-value treat under your cupped hand, with your dog in front of you. Say your “leave it” cue, and wait for your Cavalier to ignore the treat. If he looks away or shows interest but doesn’t try to grab it, immediately reward him from your other hand with a better treat.
As he gets the hang of this, start showing the “leave it” treat under your cupped hand. If your dog ignores the treat, reward him from your other hand. If he tries to go for the treat, simply cup your hand over the treat again. Repeat this process, gradually raising the criteria by making the treat more tempting and testing his ability to resist.
Teaching Your Cavalier to Leave It Level 6 and Beyond
Now it’s time to make things more challenging. Increase the difficulty by adding distractions, different environments, or a variety of leave-it items. Always be mindful of your Cavalier’s current ability level, and don’t rush the process. If you find your Cavalier is struggling or making mistakes, step back and simplify the task again. You want to build confidence and reliability.
Reminders:
Never allow your Cavalier to get the “leave it” item. If you want your Cavalier to have it, you pick it up and give it to him. The goal is to teach him that ignoring the item leads to something better, not just an empty reward.
If your Cavalier is having trouble with the exercise, step back to easier levels or increase the value of the reward to keep him motivated and engaged. You can also try lowering the difficulty by using a less tempting “leave it” item to help him succeed.
The goal isn’t just for your Cavalier to avoid the item once, but to understand that when you say “leave it,” he has the chance to earn something even better. The more your dog experiences this rewarding outcome, the more reliable the behavior will become.
Pro Tips:
Keep training sessions short, positive, and fun! Don’t let the “leave it” item overwhelm or frustrate your Cavalier. If he’s struggling, simplify the task and increase the reward to keep him interested and motivated.
How Often Should You Practice the Leave It Behavior with Your Cavalier?
It is important to regularly practice “leave it” throughout the day, not just during formal training sessions. You can incorporate it during walks, around the house, or when playing. As you add distractions, make sure to reward your Cavalier for staying focused on you, especially when there are high value items around. Cavaliers are generally quick learners, but they can also get bored easily, so keep your training sessions positive and fun. Consistency and patience will pay off in the long run.
Pro Tip: Practice, practice, practice with various setups. You want your Cavalier to respond reliably to the “leave it” cue in real life situations, whether it is a dropped item, an enticing smell, or something on the floor. By practicing regularly, you ensure they will leave it without hesitation. I still reward those real life “leave its” to keep the behavior strong and consistent!
Conclusion
Practicing “leave it” regularly and in different situations helps ensure your Cavalier responds reliably when it matters most. Keep training sessions fun and rewarding, and don’t forget to reinforce real-life successes. Teaching a solid fetch and “drop it” will also complement “leave it,” giving your Cavalier even more useful skills. With consistency and patience, your Cavalier will continue to improve and make great choices in everyday life.
How is your leave it training going? I’d love to hear about it in the comments!
Google Ad Below [...]Read more...
April 29, 2025Your Cavalier King Charles Spaniel’s Teenage Phase
When you bring home a Cavalier King Charles Spaniel puppy, you are prepared for puppy breath, floppy ears, and all the adorable moments that melt your heart. What nobody talks about enough is what happens when that sweet ball of fluff hits adolescence.
Right now, Stewart, my Cavalier, is about 10 and a half months old and is in full-blown teenager mode. I can tell you firsthand that adolescence is real. Stewart has energy for days, wild bursts of zoomies, and a mischievous sparkle in his eyes that keeps me on my toes. My mom, who adores him, often comments, “He is always getting into trouble!” (Of course, to me, it is not real trouble. It is boredom, enthusiasm, and a young dog who is eager to interact and explore.)
She often compares him to my late Cavalier, Dexter, who lived to be 15 years old. In her memory, Dexter was the perfect, calm little gentleman. And he was, but only after years of growing up. It is easy to forget that Dexter had his own crazy adolescent phase, too. I still remember the day I found myself saying, “You are going to eat, you are going to potty, and you are going to bed!” Sometimes, when puppies get extra wild, it is not even about training. They are simply overtired and need help settling down. Just like toddlers, sometimes they push through their exhaustion and get even more wired.
If you are going through the teenage years with your Cavalier right now, you are not alone. And no, you did not do anything wrong. Adolescence is a natural stage in a dog’s development. In Cavaliers, it usually starts when those puppy teeth begin falling out (around four to six months old) and can last until about eighteen months, give or take depending on the dog.
During this phase, your Cavalier might:
Forget their basic training
Start jumping up more
Become mouthier and more vocal
Seem to ignore you sometimes
Have random bursts of wild energy (we call them “zoomies”)
Get into things they never bothered with before
Show frustration or impatience more easily
Does that sound familiar?
It is important to remember that your Cavalier’s brain is still developing. Just like human teenagers, they are caught between puppyhood and adulthood. Their impulse control is not fully in place yet. The good news? This phase is temporary. And your patience and guidance right now will shape your Cavalier for the rest of their life.
Here is how I am helping Stewart (and helped Dexter before him) navigate this time:
Stay Consistent with Positive Dog Training: Even if your Cavalier seems to have forgotten what “sit” or “stay” means, keep practicing. Short, daily sessions with positive reinforcement go a long way. Stewart and I do a lot of quick “name games,” sits, hand targets, and polite walking games to keep his brain engaged.
Build in Play and Enrichment: A bored adolescent dog is a mischievous dog. I make sure Stewart has plenty of fun activities like sniffy walks, find-it games, fetch sessions, and interactive toys. Play is not just fun, it is a training tool. A dog that plays with you is a dog that trusts you.
Manage the Environment: I always try to be proactive with management first. If I think Stewart might start getting rowdy or restless, I plan ahead. Before I get busy, I will take him for a nice walk, do some training or play a game before I need to settle in. Then, I’ll provide him with something to keep him busy, like a snuffle mat, chew toys or licky mat. That way, he already has something to focus on instead of looking for ways to entertain himself. Managing the environment is not about waiting for problems to pop up. It is about setting your Cavalier up for success before trouble starts.
Provide Enough Rest: After Stewart works on his snuffle mat, chew toy, or licky mat, and has had a little training or a nice walk, he is usually ready to settle. That is when he curls up for a siesta at my feet while I do my work. Remember that story about Dexter? Sometimes the wild behavior we see is not from a lack of exercise. It is from being overtired. Puppies and adolescent Cavaliers still need a lot of sleep throughout the day. Building in scheduled downtime helps them reset and recharge before they get into trouble from being too tired to make good choices.
Focus on Trust and Bonding: During a dog’s adolescence period, it is easy to get caught up in the frustrating moments when your Cavalier is ignoring you, getting too wild, or pushing boundaries. But I always try to remind myself that every interaction with Stewart is an opportunity to build our relationship. Trust and connection are even more important during this teenage stage. Adolescence is a time when Cavaliers are figuring out the world and deciding who and what they can count on. I want Stewart to know that I am always safe, fun, and trustworthy. That way, when things get tricky, like going to the veterinarian or navigating a new place, he will look to me for guidance and reassurance. The stronger the bond we build now, the more confident and connected he will be as an adult.
Keep a Sense of Humor: Adolescent dogs can be frustrating at times, no doubt about it. But it also brings some of the funniest, most joyful memories. Stewart’s goofy antics, the way he proudly carries a pinecone, his dramatic “flops” when he does not get his way, these are the moments I know I will smile about years from now.
If you are raising a Cavalier King Charles Spaniel and feeling overwhelmed by the ups and downs of adolescence, you are not alone. This stage can feel overwhelming on some days, but every patient, playful, and consistent moment you put in now is shaping your Cavalier’s future. All the work you are doing today will help your Cavalier grow into a confident, connected, and loving companion for many years to come.
If you would like more step-by-step help through this stage, I would love for you to join us in our Manners, Life Skills, and Foundation Training course. Inside the course, I walk you through building polite greetings, calm walking, settling skills, and helping your Cavalier stay more focused and connected with you. It is all about giving you the tools to guide your Cavalier through adolescence and beyond with patience, confidence, and fun.
At What Age Do Cavaliers Calm Down?
If you are raising a young Cavalier King Charles Spaniel and wondering when your Cavalier will calm down, it is a common question during the teenage phase. Cavaliers usually start to settle after they move through adolescence, which can last until around eighteen months to two years of age. Some Cavaliers might take a little longer depending on their personality and energy level.
Maturity comes with time, but it also comes with the foundation you build along the way. Positive training, daily routines, enrichment, plenty of rest, and building trust all help your Cavalier develop into a calmer and more confident companion. It is not something that happens overnight, but it does happen.
You have got this! Stay patient, stay positive, and focus on the progress you are making together. It is not about being perfect. It is about showing up, doing the work, and building a strong relationship one day at a time.
What has your Cavalier been doing lately that makes you say, “Yup, we are in the teenage stage”? I would love to hear your stories in the comments!
Google Ad Below [...]Read more...
May 23, 2025What to Do When an Off Leash Dog Approaches or Attacks Your Cavalier
Running into an off leash dog in a public area where leash laws are in place is one of those moments that gets my blood boiling. I’ve heard from too many Cavalier families who have gone through this, and sadly, I know several Cavaliers who were seriously injured. Even a couple that didn’t survive. It’s heartbreaking, it’s preventable, and we need to talk about it.
This post is for those of us doing our best to protect our dogs, especially small, gentle breeds like Cavalier King Charles Spaniels, when others decide the leash rules don’t apply to them. Whether you’re out walking your Cavalier, training, or just enjoying your day, here are real life ways to keep your dog safe and what to do if the worst happens.
Why Letting Your Dog Off Leash Puts Others at Risk
Just because your dog is friendly does not mean they should be off leash in public areas. You never know what someone else’s dog is going through. Some dogs are recovering from surgery or illness and need space. Others are working through fear or reactivity and are not ready for sudden greetings. Some are service dogs who may not be wearing a vest but are doing their job. And many dogs, Cavaliers included, simply do not want strange dogs running up to them.
This is why leash laws exist. They are there to protect everyone. Just because your dog wants to say hi doesn’t mean they should get to.
What to Do When an Off Leash Dog Approaches
There is no perfect solution that works in every situation, especially when an off leash dog charges unexpectedly. But being prepared both mentally and physically can make a real difference. These are practical ideas I have taught, used myself, and seen work in real life. While nothing is guaranteed, having a plan in place can help you stay calm, act quickly, and protect your Cavalier as best you can.
Watch the video demonstrations and don’t forget to subscribe to @RaisingYourPetsNaturally for more tips.
Teach a Sit Stay Behind You
One of the most helpful cues I teach is a sit stay with my dog positioned behind me. I start by practicing in low distraction settings and slowly build it up over time. If a dog approaches, I cue my Cavalier to sit and stay behind me, and I step forward to handle the situation. This helps my dog feel protected and keeps them from reacting or escalating the situation.
Throw Treats at the Approaching Dog
Yes, throw treats right at the dog’s face. It may sound odd, but it works. The goal is to startle the dog and interrupt their focus. Then toss more treats behind them, toward the direction they came from. This often gives you a few seconds to calmly retreat with your Cavalier. I always carry tasty treats for this reason.
Use a Traffic Cop Stance
Turn to face the dog, extend your arm out like a stop sign, and say firmly, “Stop. Go home.” Keep your Cavalier behind you and slowly back away. Some dogs will pause or hesitate if they’re unsure or not aggressive. Keep repeating the phrase and keep your hand out, as you and your Cavalier walk backwards away.
Carry an Air Horn
If your dog is comfortable with noise, an air horn can be a great deterrent. I always condition my dog to hear it at home first and pair it with treats. When needed, a quick blast can interrupt the loose dog’s approach and give you time to move away. It’s one of my go to tools, but only if your dog can handle the sound.
Use an Umbrella as a Visual Block
I train my dogs to be comfortable with umbrellas opening indoors, so they are not startled if I ever need to use one during a walk. If a dog is charging at you, pop open the umbrella toward them. The sudden motion and large shape often causes the dog to pause or back off. If necessary, you can shake it or move it toward the dog as you use a firm, go home, verbal cue.
Carry a Personal Safety Tool
Tools like pepper gel, citronella spray, taser, or even a She’s Birdie alarm can help in urgent moments. Pepper gel has more control than spray, and the alarm can attract attention or startle the other dog. Always practice with these tools and make sure your dog is not afraid of them.
Be Cautious About Picking Up Your Cavalier
It is tempting to scoop up your Cavalier, especially since they are small. But doing so can sometimes make things worse. The approaching dog may jump at you or become more aroused. Only pick up your Cavalier if you feel it will help and if you have a safe place to put them, like a truck bed, behind a fence, or even inside a garbage bin if it means protecting them. Use extreme caution if trying this.
If You’re Walking More Than One Cavalier
This is also one of the reasons I usually prefer walking one dog at a time. It helps me stay more aware, react quickly if something happens, and really connect with the dog I’m with. But I know that’s not always possible, so here’s how to stay prepared when walking more than one.
Walking multiple Cavaliers makes things trickier, especially when a loose dog starts heading your way. It can be harder to control space, stay calm, and manage multiple leashes at once. That’s why I recommend preparing a plan ahead of time if you regularly walk more than one Cavalier.
If possible, practice sit stays with each dog individually first, then gradually build up to group stays. Teach your Cavaliers that standing behind or beside you means safety. If you see a loose dog approaching, calmly guide all your Cavaliers behind you and keep their leashes in one hand while using your other hand to deter the loose dog, whether that’s with a verbal cue, a stop signal, or a safety tool.
This is also where tools like a treat toss or umbrella can really help, because they create distance without needing to physically wrangle multiple Cavaliers. And if things feel too tight, do not hesitate to turn and walk away together. Getting distance is often the safest move when you have more than one dog depending on you.
What to Do If a Dog Attacks Your Cavalier King Charles Spaniel
No one wants to think about this part, and I truly hope you never face it. But if a loose dog attacks your Cavalier, your priority becomes stopping the fight as quickly and safely as possible. This is not about hurting another dog out of anger. It is about protecting your own Cavalier King Charles Spaniel from serious harm or even death.
If you have a tool in hand, such as a stick, an umbrella, or pepper gel, use it to target the attacking dog’s face. Aim for the eyes, nose, or mouth. The goal is to interrupt the attack and create enough of a pause to safely separate the dogs. You may only have a second or two, and you need to respond fast and as hard as you can to protect your Cavalier.
If you are physically trying to break it up without a tool, one method is to grab the attacker’s back legs and swing them away from your dog. This can throw them off balance and give you a chance to create space. Do not reach for collars or faces with your hands. That is the most common way people get bitten during dog fights.
Once the dogs are separated, move your Cavalier to safety right away. If possible, secure the attacking dog so they cannot come back. Then take photos, report the incident, and document everything as soon as you can. Even if your Cavalier seems okay, a vet check is always important. Many bite wounds are deeper than they look.
Helping Your Cavalier Recover Emotionally After an Attack
This is one of the most important parts of the process, and it is often overlooked. A Cavalier who goes through a dog attack may seem fine physically, but emotionally, they can lose trust in the world around them. I have worked with dogs who suddenly freeze on walks, avoid places they once loved, or become uneasy around other dogs even from a distance.
Start by giving your Cavalier time to decompress. Skip your regular walks for a few days and let them rest in the comfort of home. The goal is to help them feel safe again while things settle emotionally and physically. Keep their day simple and supportive.
At home, bring in confidence through simple enrichment. Food puzzles, nose games, and easy trick training can help rebuild a sense of control and engagement. These games in a familiar space can make a big difference.
When you are ready to start walking again, choose quiet places where you are unlikely to run into other dogs. Early mornings, empty parking lots, or quiet nature trails can be good options. Let your Cavalier set the pace. If they want to pause and look around or head back early, that is okay.
Pay attention to the progress. If your Cavalier walks a little farther, seems more confident, or looks at you for guidance, tell them how smart they are. Praise, treat, give a chest scratch. That is how trust returns, little step by little step.
This healing process takes time. That is exactly why I created Supporting Your Sensitive Dog: Gentle Steps Toward Confidence. If your Cavalier is showing signs of fear or hesitation, this course will guide you through gentle, trust based steps to help them feel safe again.
You’re Not Overreacting
Your Cavalier deserves to walk safely. You deserve to walk without fear. And if someone chooses to ignore leash laws, you are completely within your right to protect your Cavalier, using your voice, your body, your training, or any tool you need.
So stay prepared. Be proactive. And most of all, trust your instincts. You’ve got this.
Google Ad Below [...]Read more...
May 14, 2025Kind, Reward-Based Training for Cavalier King Charles Spaniels and All Breeds
When people hear the term positive reinforcement, they sometimes picture a dog who only listens if you have food in your hand. Or they think it means never setting boundaries. I’ve had people say things like, “I don’t want to spoil my dog,” or “I heard that’s just bribing with treats.” But the truth is, positive reinforcement training is science-based, relationship-focused, and one of the most effective ways to help dogs feel confident and understand how to live successfully in our human world.
And it’s not just for Cavaliers. This approach works for every breed, every age, and every behavior challenge.
Let’s break down positive reinforcement dog training in a simple and practical way.
What Positive Reinforcement Dog Training Really Means
Positive reinforcement means adding something your dog enjoys immediately after they do a behavior you want to see again. That reward could be healthy dog treats, a toy, praise, a chance to sniff, or access to something fun. It doesn’t have to be a treat every time, but food is often the easiest and most meaningful place to start. If it’s going to be rewarding for your Cavalier, they decide. I mean, my Mom might think a slice of cherry pie is a good reward, but I don’t even like cherry pie. I’d need a slice of chocolate cake!
This type of training is grounded in how all animals learn, including us. When a behavior is followed by a good outcome, we’re more likely to do it again. Your dog sits, you give them a treat. Your dog walks calmly by your side, you let them go sniff a log. That’s positive reinforcement. You’re not spoiling them. You’re reinforcing behavior you want to see more of, and they get something pleasant in return.
How Dogs Actually Learn
Dogs don’t come into our homes already knowing how to live in them. They don’t know what “sit” means. They don’t know they shouldn’t jump on guests or grab food off the counter. Just like us, they learn by doing, and by figuring out what works.
Dogs learn through repetition. They make connections between what they do and what happens next. If they sit and a treat shows up, they’re more likely to sit again next time. That’s positive reinforcement. We’re showing them that their choices matter and that doing the thing we like leads to something they like.
When we use positive reinforcement, we’re not just trying to get obedience. We’re helping our dogs understand how to live in our world in a way that feels safe and rewarding to them. They’re not learning because they’re afraid of getting it wrong. They’re learning because they feel good getting it right.
And that’s what builds real, long-lasting behavior.
Luring Training Is Teaching—Not Bribing
At the start, we often use a food lure, like holding a treat near your dog’s nose to help them learn how to sit or lie down. We slowly move that treat in a way that encourages the action we want, like guiding their head up and back until their butt hits the ground.
That’s not bribing. It’s teaching. We’re showing them what we’re looking for.
After a few short sessions, we continue practicing the same way. Lure the sit. Reward the sit. Once the dog is starting to understand it, we ask them to follow our empty hand the same way. If they sit, we reward. Now they’re doing the behavior without seeing food first.
Once that’s going smoothly, we add the cue. Say “Sit,” move your empty hand like before, and when their butt hits the ground, reward it.
Over time, we fade the hand movement so that “Sit” becomes all they need to hear. The behavior is now on cue, and your dog learned it in a clear, kind, and effective way.
Dogs Don’t Generalize—They Need Practice in New Places
One of the biggest things people miss is that just because your dog knows how to sit in the living room doesn’t mean they know how to do it in the yard, at the vet’s office, or around a group of children. Dogs need practice in new environments. They need help when distractions are high or when they’re feeling unsure.
That might mean going back to the basics in new places. Using a treat to lure a sit at the park isn’t spoiling your dog. It’s helping them succeed in that moment. You’re helping them learn how to do something they already know, but in a place that’s harder or more distracting.
Why Positive Reinforcement Works for Cavalier King Charles Spaniels and All Breeds of Dogs
Cavaliers are sweet, sensitive, and deeply tuned in to their people. They often respond beautifully to kind guidance and struggle with harsh corrections. A raised voice, leash jerk, or even a stern look can shake their confidence and cause them to shut down.
But this isn’t just about Cavaliers.
Every dog, whether they are a bouncy Labrador, a headstrong terrier, a fearful rescue, or a playful senior, benefits from positive reinforcement dog training. You’re not just teaching skills. You’re building a good relationship. You’re helping your dog feel safe to try new things.
Positive dog training encourages curiosity instead of fear. It helps build lasting behavior in a way that feels good for both you and your dog.
The Risk of Punishment-Based Dog Training
Harsh training methods may seem like they work quickly, but they come with a huge cost. Dogs trained with physical corrections, yelling, or intimidation often show signs of stress, like lip licking, yawning, cowering, or even shutting down completely. They may stop doing the “bad” behavior, but not because they learned something better. They stop because they’re afraid to try.
Studies have shown that punishment-based dog training methods can increase anxiety and reactivity, and even lead to aggressive behavior in some dogs. It doesn’t teach what to do, it just teaches the dog what not to do, without giving them tools to succeed.
I’ve worked with so many families trying to rebuild trust after their dog was trained with punishment. That kind of fallout is hard to undo.
You Don’t Have to Carry Treats Forever
A common concern I hear is, “Will I always need food in my pocket?” The answer is no. As your dog becomes more confident and fluent in a behavior, you’ll reward less often. You’ll also start to mix in other rewards, like praise, sniffy walks, or play.
But here’s the thing, dogs, like us, still appreciate being recognized for a job well done. I still praised Dexter and gave him treats into his senior years. Not because I had to. But because I wanted to reinforce the connection we built over a lifetime of learning together.
You’re not creating a treat-dependent dog. You’re building a dog who trusts that good choices lead to good outcomes.
If you want to teach your dog real life manners in a kind, clear, and effective way, take a look at my Manners, Life Skills, and Foundation Training Course. It’s self paced, easy to follow, and designed to help your dog build everyday skills with confidence. You’ll learn how to prevent common problems before they start, teach polite behavior step by step, and create calm, positive routines that work in daily life. I personally answer questions, give feedback, and support you as you go through the course.
Why Positive Dog Training Works for Behavior Issues Too
Positive reinforcement is not just for basic training or fun dog tricks. It’s also one of the best ways to work through real behavior issues like jumping, barking, reactivity, anxiety, and fear-based behaviors.
A big part of dog behavior modification is emotion. When a dog is barking or lunging, they’re not just being “bad.” They’re usually feeling overwhelmed, scared, frustrated, or unsure. If we only try to stop the behavior without addressing how the dog feels, we’re not really helping them.
Positive reinforcement gives us a way to change those emotions. We teach our dogs that good things happen when they make calm, safe choices. Over time, they start to feel more relaxed in situations that used to be stressful. That change from fear to comfort, from confusion to understanding, is what creates real, lasting change.
Instead of just trying to stop the behavior, we ask, “What is my dog feeling?” Then, “How would I like them to feel instead?” and “What do I want them to do instead?” From there, we adjust the situation so we can meet all those needs and teach the new behavior in a kind, clear way. The more your dog practices that skill in the right setting, the more confident they become. And that’s where things really start to turn around.
What Your Dog Really Needs From You
At the heart of it all, positive reinforcement dog training is about more than treats. It’s about empathy. It’s about understanding how your dog sees the world and helping them learn in a way that clicks.
It’s about setting them up for success and guiding them toward the behaviors you want. Not through fear, but through trust, patience, and connection.
That’s what I want for Stewart. That’s what I wanted for Angel Dexter. And that’s what I want every dog to have, training that feels good, makes sense, and builds a life rooted in partnership, not power.
Keep it positive. Keep it patient. Keep it proactive.
Google Ad Below [...]Read more...
June 5, 2025How to Motivate and Train a Cavalier King Charles Spaniel
If your Cavalier King Charles Spaniel is not motivated to train, you’re not alone. This is something I hear from Cavalier families all the time: “My Cavalier is not food motivated,” or “My Cavalier just doesn’t care about training.” But in most cases, it’s not that your Cavalier doesn’t want to learn, it’s that something is getting in the way.
Here are a few common reasons your Cavalier might not be interested in training right now and what you can do to help them feel more motivated and ready to learn.
Reasons Your Cavalier Might Seem Unmotivated for Training
They are full
If your Cavalier just finished a meal or had a lot of snacks recently, they may not be interested in working for more food. Training with food rewards works best when your Cavalier is a little bit hungry, not stuffed. Try scheduling your training sessions before meals rather than after, or set aside part of their meal to use as training treats throughout the day.
They are tired
Just like us, Cavaliers have times when they are more alert and times when they just want to rest. If your Cavalier had a big play session, a long walk, or an active outing, they may need some quiet time before they are ready to focus again. Cavalier puppies especially need a lot of sleep, so training when they are rested can make a big difference. Try noticing when your Cavalier naturally seems more alert and ready to engage. That is usually the best time to practice a little training together.
They are not feeling well
If your Cavalier seems unusually uninterested in training or even in their favorite treats, that could be a sign they are not feeling well. Even mild health issues like nausea, pain, or dental discomfort can lower motivation. It is not always obvious at first, but changes in training interest can be an early clue that something is off. If this becomes a pattern, or if anything else seems different, reach out to your Cavalier’s holistic vet to rule out anything medical before moving forward with training.
Your Cavalier is overstimulated
Cavaliers take in a lot of information from their surroundings. If you are training your Cavalier in a busy or unfamiliar location, all those sights, sounds, and smells can be overwhelming. When there is too much going on, your Cavalier might not be able to focus or respond the way they usually do. This is especially common for puppies or sensitive Cavaliers who are still learning how to process the world around them.
If that happens, try moving to a quieter spot. You can even take a little break together for a sniffy walk and then go back to something really simple, like The Name Game or Hand Targeting. These familiar cues can help your Cavalier settle and build confidence again.
Your Cavalier is anxious or unsure
When a Cavalier is feeling unsure, whether it is because of a new environment, a stranger nearby, or something they cannot quite figure out, training can start to feel like too much. It is not about being stubborn or ignoring you. They are just trying to process how they feel before they can focus on learning anything new.
If your Cavalier seems nervous or anxious, the best thing you can do is slow things down. Sit with them quietly, speak gently, and let them look around without pressure. Sometimes just being there together is enough. Once they start to relax, you can offer praise and a treat or a “check it out” cue if they seem ready to explore.
The reward is not meaningful enough
When I hear that a Cavalier is not food motivated, the first thing I look at is the reward. Most of the time, it is not that your Cavalier is not food motivated. It is that the treat just does not matter enough to them at that moment. Dry biscuits or lower value treats usually do not get their attention, especially in busy or distracting places.
Start with real food. I usually go straight to meat. That might be small bits of cooked beef, turkey, or lamb. Freeze dried meat or single ingredient dehydrated treats are also great choices. These are often the best treats for Cavaliers because they are soft, tasty, and easy to eat. Just flip the bag over and check the ingredients. You want something simple that says one thing, like chicken breast or turkey. Avoid fillers or extras that do not need to be there.
You can also use freeze dried raw food, broken into tiny pieces. These are real food options and often made mostly from meat, which makes them a great choice for Cavaliers who need something healthy and high value. Many people use them during training and count them toward their Cavalier’s daily calories. It is an easy way to stay consistent with nutrition while still offering something special and rewarding.
I also avoid using liver or organ meats regularly. A little once in a while is fine, but too much liver can lead to vitamin A concerns. Some organ treats can also be too rich and cause diarrhea.
Use the right reward for the right moment
Once you find something that really works for your Cavalier, think about how and when to use it. The most rewarding treats should be saved for the harder training sessions. That might mean practicing outside, focusing around distractions, or trying something brand new. When the reward truly matters to your Cavalier, motivation naturally improves.
If they get their favorite treats for easy things like sitting in the living room, there is not much reason to work harder when training becomes more challenging. Save the cooked beef, freeze dried meat, or other special rewards for those moments when your Cavalier needs a little extra encouragement. Matching the value of the reward to the difficulty of the task helps keep your Cavalier engaged and willing to try.
Explore other forms of motivation
Not every Cavalier is motivated by food alone. Some respond better to toys, praise, or playful interaction. If your Cavalier enjoys toys, try using a favorite squeaky, a soft tug toy, or a quick game of fetch. Some Cavaliers are especially drawn to textures like fleece or rabbit fur, which can make a toy feel more exciting. Whatever it is, keep it put away when you are not training so it stays special and does not lose its value. Other Cavaliers are more motivated by attention and connection. A cheerful voice, a smile, or light praise can sometimes go further than anything you can hold in your hand. At the end of the day, your Cavalier is the one who decides what feels rewarding. It is not about what we think should work. It is about what actually matters to them.
Your Cavalier can learn with the right support
If your Cavalier is not showing interest in training, it does not mean something is broken. It just means they need a little help feeling ready. That might be adjusting the environment, changing up the reward, or simply giving them time to feel more confident.
This is exactly the kind of thing we work on in my Manners, Life Skills and Foundation Training Course. If you are feeling unsure about how to move forward, I will guide you through simple, kind steps to help your Cavalier feel more focused and connected. You will learn how to use rewards that actually matter to your Cavalier, when to train, and how to build everyday habits that stick. It is self-paced, easy to follow, and I am always there if you need support.
Your Cavalier wants to connect with you. With a little support and the right setup, they will start to feel more engaged and eager to participate. You do not need to rush the process. Keep it light, keep it kind, and celebrate the small wins. They all add up.
Google Ad Below [...]Read more...
Google Ad Below
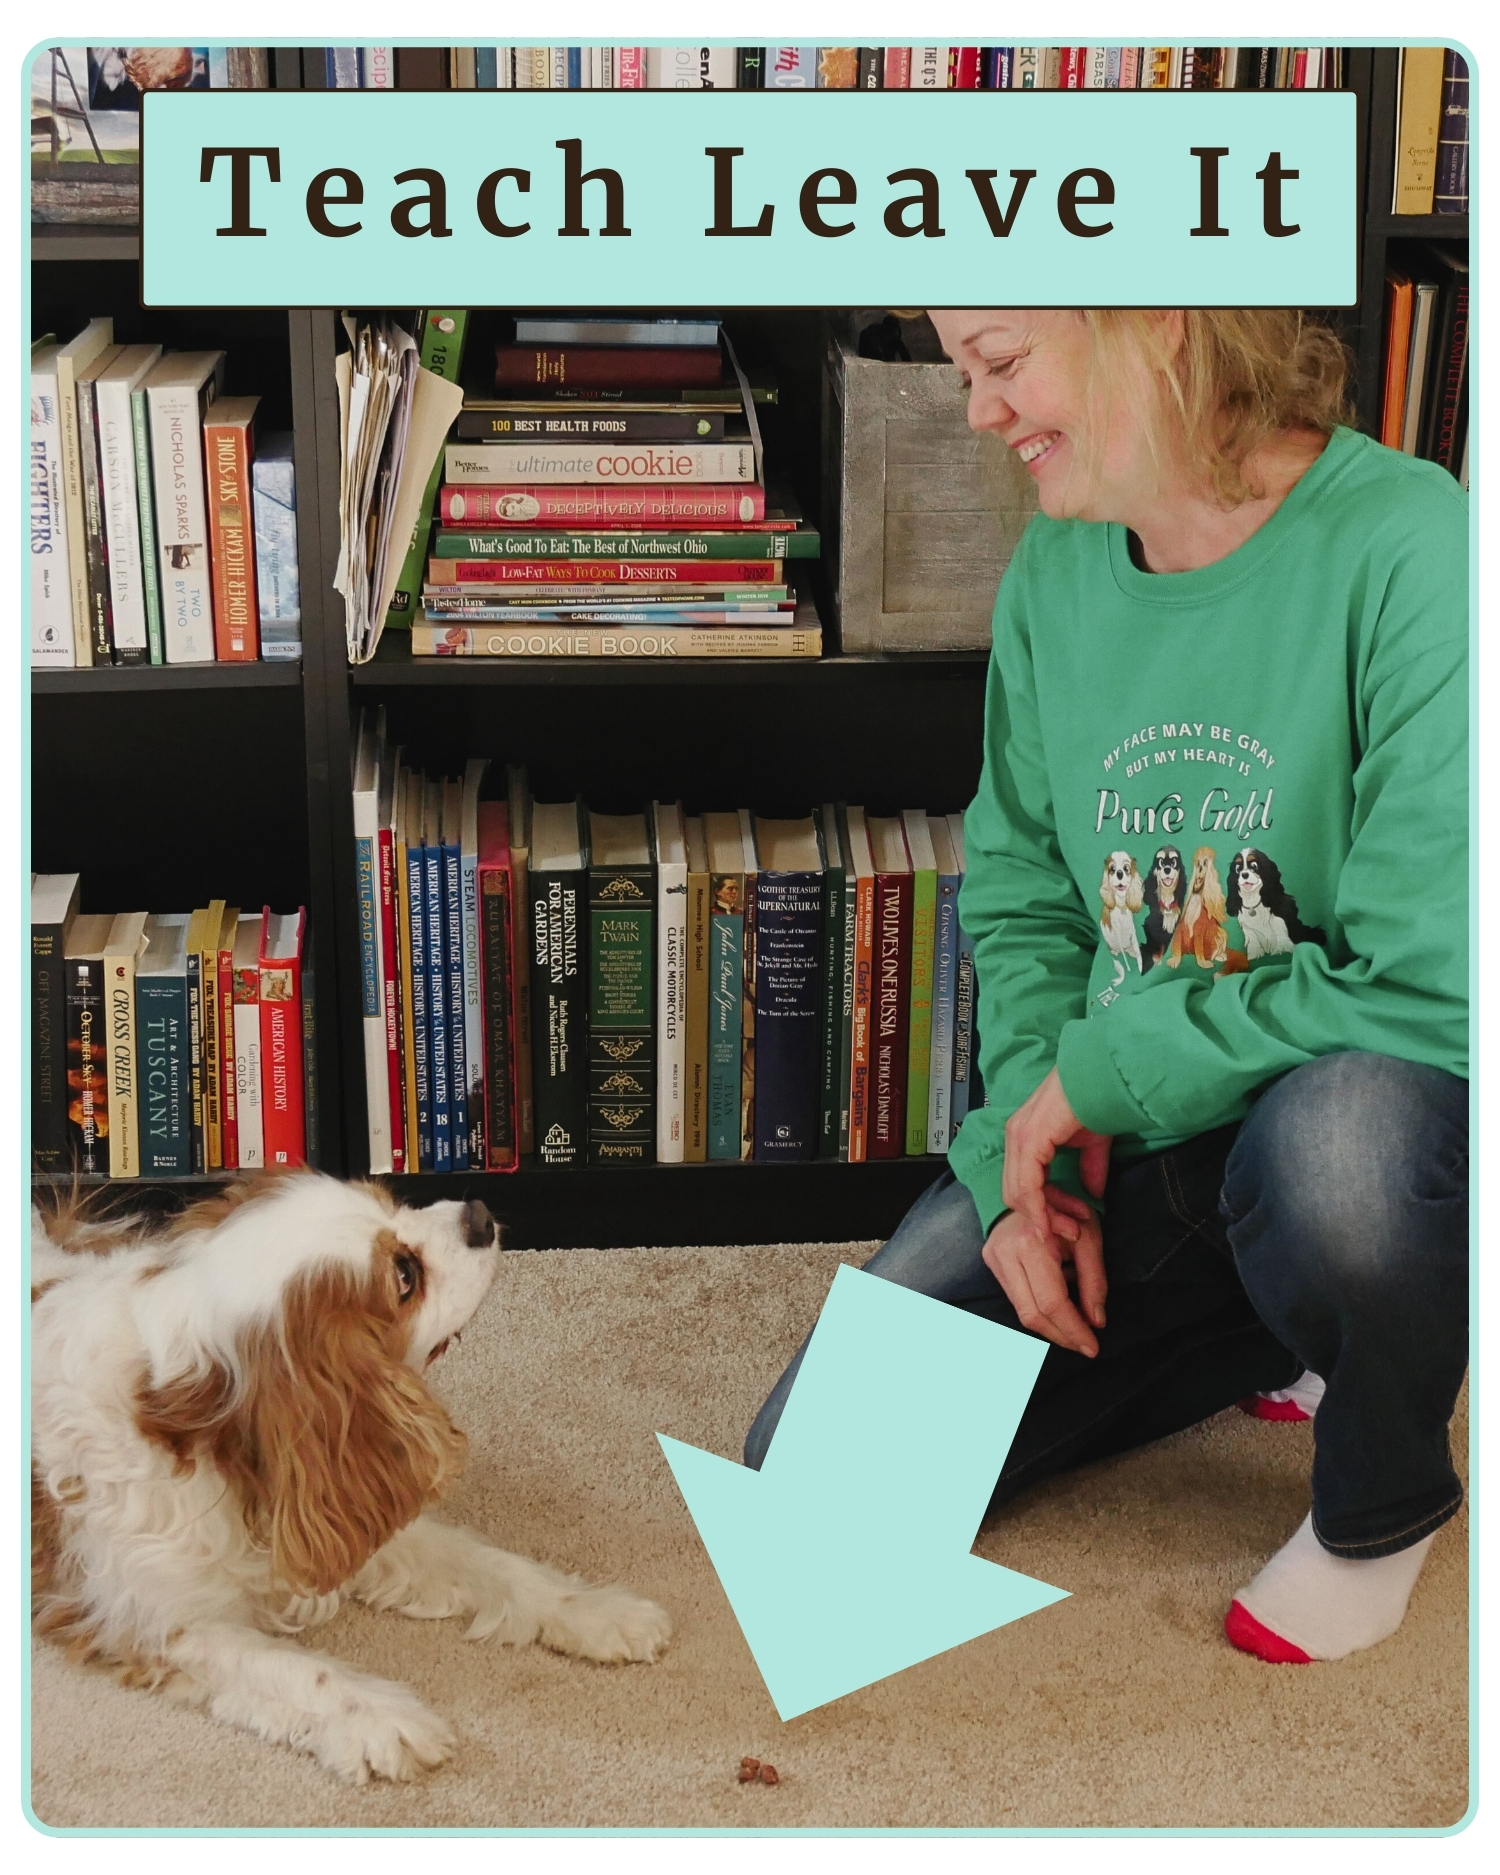
How to Teach Your Cavalier King Charles Spaniel to “Leave It” | Positive Training for Cavaliers (Early access for our Patreon community)
How to Teach Your Cavalier King Charles Spaniel to “Leave It” | Positive Training for Cavaliers
Teaching your Cavalier King Charles Spaniel to “leave it” or ignore something on your cue can be lifesaving. Imagine dropping a pill in front of your Cavalier or going for a walk and passing garbage in the street. If your Cavalier King Charles Spaniel has a reliable “leave it” cue, you can easily ask him to leave it as you pick up the pill or walk past the garbage.
When I start the “leave it” training, what I want my dog to learn is that “leave it” doesn’t mean he doesn’t get something, but that I have something better. This helps to build a more reliable behavior, especially off-leash. If you only teach your dog that “leave it” means he doesn’t get something, he might just try to grab the item faster or run off with it. That’s not what we want!
As with all dog training, remember that you need to regularly practice these lessons. Training your Cavalier is not just about doing it once and then only when you need it. Reliable dog training takes time, patience, and consistency. Cavalier King Charles Spaniels, in particular, can be a bit food-driven, so keeping them engaged and excited about the reward is key.
So, be patient, consistent, and most importantly, have fun with your Cavalier while training!
Teaching Your Cavalier to Leave It Level 1
Start with a small, low-value dog treat in your closed hand, and place it about 12 inches to the side of your Cavalier’s face. Make sure your hand is at the right height, not too close to his face, but not too far away either. Let your dog see it there, and wait him out. As soon as he moves his face away or ignores the treat, say, “YES!” and reward him with an amazing treat from your other hand. Not going for the treat is a win, too! So, if you present the leave it treat hand and he doesn’t go for it, “YES!” and treat. Repeat this a few times.
When your Cavalier starts ignoring your treat hand altogether, move to Level 2.
Don’t forget to subscribe to our @CavalierTipsandFun for more!
Teaching a Dog to Leave It Level 2
Start like Level 1, but before you drop your hand, say your “leave it” cue once. Wait him out; as soon as he moves his face away or ignores the treat, say, “YES!” and treat from your other hand. Repeat. When he stops going for your hand after hearing the “leave it” cue, move to Level 3.
Training Your Cavalier to Leave It Level 3
Say your “leave it” cue and drop your hand with the low-value treat to your dog’s side, but leave your hand OPEN. If he goes for the treat, quickly close your hand. When he moves his face away, praise and reward him with a treat from your other hand. Repeat. When your Cavalier is reliably ignoring the treat in your open hand, move to Level 4.
Teaching Your Cavalier to Ignore Items Level 4
At this stage, it’s time to change things up a bit. Up until now, you’ve been using low-value, boring dog treats for the “leave it” item. Once your dog is starting to get the hang of it, it’s time to up the ante. Use tastier treats or toys as the “leave it” item, but remember, his reward needs to be even better.
You can try:
- Tastier treats or food
- Paper products, tissue, or paper towels
- Toys
Subscribe to @RaisingYourPetsNaturally for more!
Here’s how to set it up when using a toy:
- Pick a Toy: Choose a toy that your Cavalier likes but isn’t so high-value that your Cavalier would immediately grab it without hesitation. Start with something mildly exciting like a squeaky ball, fleece tuggy toy, or stuffed animal that your dog enjoys.
- Set Up the Training Area: Find a quiet spot where you can focus and your dog isn’t too distracted by other things. Make sure it’s a place where you can manage your dog’s movement and reactions.
- Start the Cue: Hold the toy in your hand and get your dog’s attention. Don’t get too silly. You just want him to know it’s there, with a bit of excitement.
- Use the “Leave It” Cue: Once you’ve gotten his attention, say the “leave it” cue calmly. Hold the toy in front of your dog just out of reach, but don’t place it on the ground yet.
- Wait for the Response: Your dog may try to lunge for the toy or show interest in it. The goal here is for him to move away or ignore it, not to grab it. If he goes for it, just swipe the toy up to your chest and ignore him and wait for him to ignore it. Then repeat the process of lowering your hand with the toy. As soon as your dog turns his head or steps away from the toy, immediately say “YES!” and give him a better reward (a tastier treat or something that’s even more valuable than the toy).
- Repeat and Increase Difficulty: Repeat the exercise several times, and gradually increase the difficulty. Once your Cavalier reliably ignores the toy when it’s held in your hand, move on to placing the toy on the ground. To set this up, place the toy behind you, out of reach. This way, you can gently body block your dog if he tries to move toward it. When he turns away or ignores the toy, immediately reward him with a better treat or better toy.
- Body Blocking: Body blocking involves using your own body to gently guide your dog away from a distraction, like a toy, by positioning yourself between your dog and the item. It’s important to note that body blocking is not about kneeing or being rough with your Cavalier. It’s a gentle, calm way to redirect their attention. However, some dogs may find body blocking intimidating or scary, so if your Cavalier shows signs of stress, it’s best to avoid this method and use alternative techniques for redirection.
- Build Duration: As your Cavalier gets more comfortable with the “leave it” cue around toys, try holding the cue for a longer period of time. For example, you can wait for him to sit or stay before rewarding him. This increases his patience and focus during the exercise.
Training Your Cavalier to Leave Something Level 5
Place a low-value treat under your cupped hand, with your dog in front of you. Say your “leave it” cue, and wait for your Cavalier to ignore the treat. If he looks away or shows interest but doesn’t try to grab it, immediately reward him from your other hand with a better treat.
As he gets the hang of this, start showing the “leave it” treat under your cupped hand. If your dog ignores the treat, reward him from your other hand. If he tries to go for the treat, simply cup your hand over the treat again. Repeat this process, gradually raising the criteria by making the treat more tempting and testing his ability to resist.
Teaching Your Cavalier to Leave It Level 6 and Beyond
Now it’s time to make things more challenging. Increase the difficulty by adding distractions, different environments, or a variety of leave-it items. Always be mindful of your Cavalier’s current ability level, and don’t rush the process. If you find your Cavalier is struggling or making mistakes, step back and simplify the task again. You want to build confidence and reliability.
Reminders:
- Never allow your Cavalier to get the “leave it” item. If you want your Cavalier to have it, you pick it up and give it to him. The goal is to teach him that ignoring the item leads to something better, not just an empty reward.
- If your Cavalier is having trouble with the exercise, step back to easier levels or increase the value of the reward to keep him motivated and engaged. You can also try lowering the difficulty by using a less tempting “leave it” item to help him succeed.
- The goal isn’t just for your Cavalier to avoid the item once, but to understand that when you say “leave it,” he has the chance to earn something even better. The more your dog experiences this rewarding outcome, the more reliable the behavior will become.
Pro Tips:
- Keep training sessions short, positive, and fun! Don’t let the “leave it” item overwhelm or frustrate your Cavalier. If he’s struggling, simplify the task and increase the reward to keep him interested and motivated.
How Often Should You Practice the Leave It Behavior with Your Cavalier?
It is important to regularly practice “leave it” throughout the day, not just during formal training sessions. You can incorporate it during walks, around the house, or when playing. As you add distractions, make sure to reward your Cavalier for staying focused on you, especially when there are high value items around. Cavaliers are generally quick learners, but they can also get bored easily, so keep your training sessions positive and fun. Consistency and patience will pay off in the long run.
Pro Tip: Practice, practice, practice with various setups. You want your Cavalier to respond reliably to the “leave it” cue in real life situations, whether it is a dropped item, an enticing smell, or something on the floor. By practicing regularly, you ensure they will leave it without hesitation. I still reward those real life “leave its” to keep the behavior strong and consistent!
Conclusion
Practicing “leave it” regularly and in different situations helps ensure your Cavalier responds reliably when it matters most. Keep training sessions fun and rewarding, and don’t forget to reinforce real-life successes. Teaching a solid fetch and “drop it” will also complement “leave it,” giving your Cavalier even more useful skills. With consistency and patience, your Cavalier will continue to improve and make great choices in everyday life.
How is your leave it training going? I’d love to hear about it in the comments!
|
|
|
|
Popular Blogs
February 26, 2025Cavalier King Charles Spaniel Heart Disease
Mitral Valve Disease (MVD) is something every Cavalier King Charles Spaniel parent should be familiar with. Sadly, this condition is extremely common in the Cavalier breed, but early awareness and proper management can greatly improve a Cavalier’s quality of life. In this blog, we’ll cover what MVD is, why Cavaliers are at risk, how the disease is staged, and which supplements can help support a healthy heart.
A heartfelt thank you to Lisa Davila, BS in Biomedical Science and Hospital Manager at Aggieland Animal Health Center in College Station, Texas, for helping me put together this article. Lisa has not only dedicated her career to animal health but has also been a loving mom to many Cavalier King Charles Spaniels. Her knowledge and experience are truly invaluable!
Understanding Mitral Valve Disease (MVD) in Cavaliers
Mitral Valve Disease (MVD) is a degenerative condition that affects the mitral valve of the heart. The mitral valve is responsible for ensuring blood flows properly between the left atrium and left ventricle. Over time, this valve can weaken and leak, allowing blood to flow backward into the atrium. This puts additional strain on the heart, eventually leading to heart enlargement and, in later stages, congestive heart failure (CHF).
MVD is considered a slow-progressing disease, but it varies from dog to dog. Some Cavaliers may live for years with a mild heart murmur, while others may progress more rapidly. Since MVD is so common in the breed, Cavaliers should be closely examined (cardiac auscultation) annually, to determine if they have a murmur. The presence of a murmur is often the first sign that a dog has degenerative valve disease.
Why Are Cavaliers at Risk of MVD?
Cavalier King Charles Spaniels are unfortunately predisposed to MVD. While any breed can develop valve disease, Cavalier King Charles Spaniels are at the greatest risk for developing degenerative mitral valve disease. Studies have shown that over 50% of Cavaliers develop a heart murmur by the age of 5, and by age 10, that number jumps to nearly 100%.Because MVD has a strong genetic component in Cavaliers, responsible breeding practices are essential. Responsible Cavalier King Charles Spaniel breeders ensure their breeding dogs undergo echocardiograms conducted by board-certified cardiologists. When considering a puppy, both parents should have cardiologist-issued heart clearances and be at least 2.5 years old at the time of breeding. Additionally, all four grandparents should be over the age of 5 and heart-clear. However, even with careful breeding, the risk remains high in the breed.
The Stages of MVD
MVD is typically classified into different stages based on its progression. Early detection and monitoring are crucial to managing the disease effectively.
Stage A – Dogs at risk for MVD but without any current signs (e.g., all Cavaliers are considered Stage A at birth because of their predisposition).
Stage B1 – A veterinarian detects a heart murmur, but there is no evidence of heart enlargement on X-rays or echocardiograms.
Stage B2 – A heart murmur is present, and imaging confirms heart enlargement. At this stage, medication such as Vetmedin (pimobendan) is often started to help delay the onset of congestive heart failure.
Stage C – Congestive heart failure (CHF) is present, meaning the heart can no longer compensate for the disease. Symptoms such as coughing, lethargy, and difficulty breathing may be noticeable. Medications are necessary to help manage the condition.
Stage D – End-stage CHF, where symptoms become harder to control even with medications.
Once a dog reaches Stage B2, most cardiologists recommend starting treatment to slow disease progression. Regular checkups and echocardiograms help ensure the right treatment plan is in place.
The Truth About Grain-Free Diets and Heart Disease in Cavaliers
With all the discussion surrounding Mitral Valve Disease (MVD) in Cavaliers, you may have come across concerns about grain-free diets and their potential link to heart disease. It’s important to separate the headlines from the facts when it comes to feeding our Cavaliers the best diet for heart health.
The debate about grain-free dog food largely stems from concerns about dilated cardiomyopathy (DCM), a condition where the heart muscle weakens, leading to poor function and potential heart failure. While DCM is a serious disease, the concern over grain-free diets has often been misinterpreted. The issue isn’t necessarily the lack of grains but rather the high levels of starchy carbohydrates like peas, lentils, legumes, and potatoes that are often used as substitutes in processed grain-free kibble.
Cavaliers are already predisposed to MVD, not DCM, which is a different heart condition with different causes. However, diet still plays a critical role in supporting heart health. The best way to provide a heart-healthy diet for your Cavalier is to focus on fresh, whole foods rich in high-quality animal proteins rather than relying on highly processed kibble, whether it contains grains or not. Read more about feeding your Cavalier a fresh diet.
Dr. Karen Becker explains it best: “The problem with grain-free formulas isn’t the lack of grains. At a minimum, it’s the high level of starchy carbohydrates coupled with the extreme high-heat processing methods used to produce these diets.”
Rather than worrying about whether a diet is labeled as “grain-free,” focus on feeding a fresh, balanced diet with high-quality proteins, healthy fats, and low-glycemic vegetables. Rotating proteins and using whole-food ingredients can help ensure your Cavalier gets the nutrients they need to support a healthy heart.
If you’re unsure about your dog’s diet, seek guidance from a veterinarian with a strong background in canine nutrition, not just one who sells prescription diets in the clinic. A certified veterinary food therapist (CVFT) can be a great resource when designing a diet that supports heart health while avoiding unnecessary fillers.
A well-balanced, species-appropriate diet can play a key role in keeping your Cavalier’s heart strong and healthy for years to come.
Heart-Healthy Supplements for Cavaliers with MVD
While MVD cannot be cured, a combination of medications, lifestyle management, and supplements can help support heart function and overall well-being. Below are some key supplements that may benefit Cavaliers with or at risk for MVD:
MCT Oil (Medium-Chain Triglycerides) – Provides an alternative energy source for the heart muscle. One recommended brand is Natural Force Organic MCT Oil (1 tsp daily with food). Before giving your Cavalier coconut oil, please read this article on MCAD in the Cavalier.
Amino Acids (Lysine, Methionine, L-Carnitine, Taurine) – Help maintain heart muscle contractility and serve as antioxidants.
Omega-3 Fatty Acids – Reduce inflammation, decrease clot risk, help prevent heart muscle loss, and support healthy blood pressure. Nordic Naturals Omega Pet Liquid is a high-quality option.
Vitamin E – Acts as both an antioxidant and anti-inflammatory.
Magnesium – Plays a crucial role in heart muscle contraction and maintaining a healthy heart rhythm.
Coenzyme Q10 (CoQ10) – A powerful antioxidant that supports heart function. Life Extension 100 mg capsules are a great choice.
Recommended Supplement Blends
If you prefer a multi-ingredient supplement, these options are formulated specifically for heart health:
Rx Vitamins for Pets Formula CV – Includes amino acids, magnesium, Vitamin E, CoQ10, and hawthorn berry extract (safe unless the dog is on Vetmedin).
VetriScience Cardio Strength Capsules – Similar to the Rx Vitamins formula but without hawthorn berry extract, making it safe for all MVD stages and medications.
Recap & Common Questions About MVD in Cavaliers
Mitral Valve Disease (MVD) is a serious but manageable heart condition that affects many Cavalier King Charles Spaniels. Early detection, responsible breeding, proper veterinary care, and supportive supplements can all play a role in keeping your Cavalier’s heart as healthy as possible.
What are the early signs of MVD in Cavaliers?
The first noticeable symptom is often a heart murmur, detected during a cardiologist visit. As the disease progresses, signs can include coughing, fatigue, labored breathing, and reduced exercise tolerance.
How long can a Cavalier live with mitral valve disease?
Many Cavaliers live for years after an MVD diagnosis, especially with early detection and proper management. While every dog is different, with the right veterinary care, medications, and supplements, Cavaliers can still enjoy a good quality of life.
What are the final stages of MVD in dogs?
In the later stages, MVD leads to congestive heart failure (CHF). Symptoms include severe coughing, difficulty breathing, lethargy, fainting, and fluid buildup in the lungs or abdomen. At this stage, medication and veterinary support are essential for comfort.
How do you treat MVD in Cavaliers?
Treatment typically includes veterinary-prescribed medications to support heart function and manage symptoms. Additionally, heart-healthy supplements, such as taurine, CoQ10, and omega-3 fatty acids, can provide extra support. Feeding a fresh, species-appropriate diet may also contribute to overall heart health.
Final Thoughts
A heart-healthy fresh diet, proper weight management, and the right combination of supplements can help support your Cavalier’s heart at any stage of MVD, even before a murmur is detected. Early intervention and regular veterinary care are key to helping our beloved Cavaliers live longer, healthier lives.
A big thank you to Lisa for sharing her knowledge on this topic! If you have any questions, feel free to ask, and don’t forget to check out Lisa and Jiminy on Instagram!
Google Ad Below [...]Read more...
April 15, 2024Cavalier King Charles Spaniel Potty Training
Congratulations on welcoming a Cavalier King Charles Spaniel into your life! They’re such charming and affectionate dogs, full of warmth and love. As a fellow Cavalier mom and positive dog trainer, I’m thrilled to share my experience on the best way to potty train a Cavalier puppy. Let’s jump right in to how to successfully housebreak your Cavalier King Charles Spaniel puppy.
I love puppies! And Cavalier puppies are just some of the cutest little things ever! There’s nothing quite like their sweet kisses, puppy breath, and zest for life! But it’s not all puppy kisses; we also must potty train our Cavaliers. Nobody likes an untrained dog.
One common question I get from Cavalier followers is how to best potty train their puppy. I’ve seen plenty of discussions about potty accidents in Cavalier King Charles Spaniel groups, and I’m here to share some potty training tips with you.
First things first. Let’s start by being realistic. Contrary to what some may suggest, potty training a puppy in a matter of days is not realistic. It’s important to realize that puppies, just like human babies, need time to learn and gain control over their bladders. So, if you’re expecting your Cavalier to hold it for hours after just a few days of training, you are setting your pup and yourself up for failure.
My own Cavalier, Dexter, wasn’t fully potty trained in a mere five days, and I’m perfectly okay with that. I prioritized consistent management and frequent potty breaks, which ultimately led to just a couple of accidents in the house. The key is to prevent accidents by being proactive, not reactive.
What’s the best way to potty train your Cavalier puppy?
It all comes down to three essential things: supervision, frequent potty breaks, and confinement when you can’t actively watch them. The goal is to reduce the chances of accidents happening indoors.
When it comes to supervision, it’s eyeballs on! This means keeping a watchful eye on your puppy at all times, ensuring that you’re there to rush them outside if it looks like they are about ready to go. You can use things like baby gates, leashes, shut doors, or X-pens so that you can keep your eyes on them at all times.
Subscribe to @CavalierTipsandFun on YouTube!
How Often Should You Take Your Puppy Potty?
As for how often to take your puppy potty, it really depends on their age and activity level. Active puppies may need to go out every 15–30 minutes, while older dogs can typically hold it for longer periods. The key is to stay ahead of the game and take your puppy out whenever you notice a change in their behavior or activity. A change in behavior or activity signals that it’s time for a bathroom break. For example, if your puppy just had a bout of puppy zoomies, out to potty we go. Did your puppy wake up from a nap? Out to potty we go. By not waiting for your puppy to ask to go out or have an accident, you are well on your way to a potty-trained dog.
When it comes to crate training, make sure the crate is just the right size to discourage accidents. The crate should be large enough for your pup to stand and lie down comfortably, but not so large that they can use one corner as a bathroom.
Whether you have a fenced yard or not, leash your puppy. This gives you the opportunity to reward your puppy for going potty outside. You will be right there to praise your puppy, give him a snack, and tell him just how smart he is. It also leads to my next potty training tip: teaching your Cavalier to potty on cue!
Teaching your Cavalier to potty on cue is a must in my book. Imagine being able to take your dog outside just before the rainstorm and ask him to pee and poo, and he does! This useful behavior isn’t just fantastic for potty training your dog; it’s incredibly convenient in daily life. The keys to teaching your Cavalier to eliminate on cue are good management, timing, and your reward. By associating a word for peeing with a separate word for defecating, you can start to teach your puppy to do either when requested.
Subscribe to @CavalierTipsandFun
Teaching Your Cavalier to Potty on Cue
Here’s how to get started:
Begin the training process in the morning, when your pup wakes up. Arm yourself with some delicious treats, leash up your Cavalier, and head outside to his favorite potty spot.
Stay close and pay attention to your puppy. Stay about 6’, so it’s not just a sniffing fest; the goal is to get him to eliminate before a big walk, play, or sniff. Pay close attention to your Cavalier’s body language. Watch for subtle cues like sniffing, circling, or squatting, which indicate he’s about to eliminate. As soon as you see a sign, use your potty cue, such as “Go potty,” and wait patiently. When your pup starts to do his business, praise quietly, and after he’s finished, give him big praise and rewards. You want to make sure you don’t interrupt the potty process by rewarding too soon.
If your dog typically follows up with a poop, repeat the process with your poop cue, like “Go poop-poop,” and reward him once he’s finished.
After your Cavalier has finished his business, it’s time for the next reward: fun! Whether it’s a walk, playtime in the yard, or simply enjoying the fresh air, make sure to give your pup some extra time to enjoy himself before heading back indoors. This helps reinforce the idea that going potty leads to enjoyable activities.
Repeat this routine each time you take your Cavalier outside, even if you’re planning on going for a walk. By always pairing potty time with rewards, you’ll motivate your pup to go more quickly.
As your Cavalier starts to make the connection between potty on cue and familiar surroundings, gradually introduce the cue in different environments, such as the park or during walks. This helps your dog understand the cue in any situation, ensuring they respond reliably wherever you are.
With patience, consistency, and plenty of positive reinforcement, you can teach your Cavalier King Charles Spaniel to potty on cue, making potty training easier.
Bell Training Your Cavalier King Charles Spaniel Puppy
While some love doggie doorbell training or puppy pads, I prefer to focus on methods that teach puppies to potty outside, not inside or on “things.” I find these methods tend to confuse puppies. Potty pads or litter boxes are teaching the puppy to potty on things that happen to be indoors. This could be a potty pad, but it also could end up being your favorite blanket.
As far as bell training goes, I’m not a fan of encouraging demanding behavior in dogs. Teaching them to ring bells to go outside may inadvertently lead to them using this to not only tell us they need to potty, but also that they may want to go outside to chase squirrels.
I believe in keeping potty training simple and straightforward, focusing on reinforcing the desired behavior of outdoor elimination. By keeping things simple and staying consistent, we can focus on potty training without having to rely on pee pads or bells.
In the end, potty training your Cavalier King Charles Spaniel is all about patience, consistency, and a whole lot of love. By following these tips and staying diligent, you’ll set your new puppy up for success.
Your comments and questions are always welcome below.
Join our vibrant Cavalier King Charles Spaniel community on Facebook, support our dedication to pet wellness on Patreon, and stay updated with our weekly newsletter for invaluable tips and insights into raising happy, healthy pets. Together, let’s make a difference in our dogs’ lives!
Google Ad Below [...]Read more...
May 29, 2024Natural Diet for Cavalier King Charles Spaniel
Dexter’s Food Journey with Raw and Homemade Food
Dexter, my Cavalier King Charles Spaniel, was a raw-fed puppy. However, because I wasn’t sure how to do it properly, and I was unaware that there were premade raw foods on the market, I fed him kibble with food toppers. After learning about how to balance a fresh dog food diet, I started to home cook for him when he was around two. Then, when he was about four, I transitioned him to a DIY raw diet. Through this journey with Dexter, I’ve learned about creating a nutritious and tailored diet that meets his unique needs. Now, I’m excited to pass along my tips and thoughts on feeding your Cavalier King Charles Spaniel. Let’s dive in!
Natural diet for Cavalier King Charles Spaniels
If you’re anything like me, you’re always on the lookout for the best pet products, natural dog grooming supplies, and the healthiest dog food brands for your Cavalier. One of the most important aspects of your Cavalier’s well-being is their diet. Dogs are natural carnivores, made to thrive on a diet of fresh meat. This means a species-appropriate diet is key to their health and vitality.
Understanding Species-Appropriate Nutrition
Let’s think about our dogs’ ancestors for a moment. They thrived on a diet of raw meat, bones, and organs. Today, we can recreate this natural diet with a raw food approach, using fresh, high-quality ingredients that focus on what dogs are meant to eat. For your Cavalier King Charles Spaniel, in a nutshell, this means focusing on a diet that’s about 90 percent meat, bone, and organ, with the remaining 10 percent coming from fruits and vegetables. This balance provides the essential nutrients and fiber they need to stay healthy. Personally, I feel if you aren’t able to go raw, this diet can also be cooked. You just would need to provide the calcium from the bones in another form, since dogs cannot eat cooked bones.
Don’t forget to subscribe to @CavalierTipsandFun for more!
The Problem with Processed Dry Kibble
Now, dry kibble. It’s processed at high temperatures, which takes away almost all the moisture and nutrients from the ingredients. Often, kibble is made with low-quality ingredients and fillers that don’t give your dog the nutrients they need. The lack of moisture in kibble can also lead to chronic dehydration, affecting everything from kidney function to skin and coat health. Plus, since kibble is made to last a long time, the ingredients can go rancid quicker than you might think, making it even less nutritious for your pup.
The Importance of Moisture in Your Dog’s Diet
Moisture is a crucial part of your dog’s diet. In the wild, dogs get most of their hydration from the food they eat. Fresh, raw diets naturally provide the moisture that kibble just can’t. This is essential for your dog’s digestion, kidney health, and overall well-being. By feeding them fresh, high-quality meat and vegetables, you’re making sure they stay hydrated naturally, without having to depend solely on drinking water.
Google Ad Below
Finding the Best Diet for Your Cavalier King Charles Spaniel
When it comes to our Cavaliers, there’s no one-size-fits-all solution. Every dog is unique, with their own health needs, behaviors, and lifestyle. Personally, I’m a big advocate for variety. This could be in the form of different proteins, suppliers or even a nice pre-made raw or mix. I steer clear of dry pet food altogether unless I’m using freeze dried food for dog training treats. For me, a balanced DIY raw diet for Dexter is the way to go. It’s fresh, it’s healthy, and I can tailor and tweak it to Dexter’s needs.
Why a Raw Food Diet is Ideal for Most Cavalier King Charles Spaniels
A raw food diet is as close to a natural diet as you can get for your Cavalier. It includes raw meat, bones, and organs, providing essential vitamins and minerals often lost in commercial dog foods. This diet can improve your Cavalier’s skin and coat health, immune system, and help maintain a healthy weight. As I mentioned earlier, I think adding an approximately 10 percent mix of fruits and vegetables is a great way to add a nutritional boost to the bowl. By avoiding the fillers and artificial additives found in many commercial foods, we ensure our dogs get the best nutrition possible.
Homemade Raw or Cooked Food: Personalized Nutrition for Your Cavalier
One of the best ways to ensure your Cavalier King Charles Spaniel is eating the healthiest diet is to make their food at home. This way, you control the quality of the ingredients and can tailor the meals to your dog’s specific needs. Homemade meals are especially beneficial if your Cavalier is a picky eater or has food allergies. Just remember to balance their diet properly to include all necessary nutrients. Whether your dog has allergies, digestion issues, or any other specific needs, you can tweak their diet to meet their needs.
Feeding Your Cavalier a Grain-Free Diet
You might have heard that grain-free foods are bad for Cavaliers because they were thought to have caused Dilated Cardiomyopathy (DCM). In 2019, the FDA released a list of grain-free pet foods that had people swearing that grain-free dog food was bad. But, guess what? It’s really not the case. In fact, in 2022 the FDA announced on their website there wasn’t a solid link between grain-free diets and DCM.
Feeding your dog grain-free can actually be a good choice for your Cavalier. But things get tricky if you are looking at a purchased grain-free alternative, particularly a dry kibble. When you’re reading the ingredient panel of a dog food (yes, read those labels), watch out for ones loaded with peas, lentils, legumes, seeds, and/or potatoes. Even if the front of the bag screams “meat-first,” it might sneak in a bunch of carbs and starches that aren’t ideal. According to experts, such as Dr. Karen Becker, it’s not about cutting out grains—it’s about making sure our pets aren’t eating too many starchy fillers. So, bottom line? Go back to that 90 percent meat recommendation.
Feeding Your Cavalier King Charles Spaniel Puppy
When it comes to feeding your Cavalier King Charles Spaniel puppy, it’s essential to consider their unique nutritional needs as they grow. If you’re not quite sure about the specifics of puppy nutrition, it’s perfectly okay to rely on trusted commercial brands known for their expertise in creating a balanced diet for puppies.
A commercial raw puppy food will include the essential proteins, fats, and calcium your puppy needs to develop strong bones. The key is to ensure whatever you choose is well-rounded and provides all the nutrients your Cavalier puppy requires during the puppy life stage.
Maintaining a Healthy Weight
Keeping your Cavalier at his ideal weight is super important. Maintaining a healthy weight isn’t just about good looks, but their health. Extra weight can contribute to health issues like joint problems and heart disease. The breed standard says they should weigh between thirteen and eighteen pounds. But, Cavaliers can vary a lot in size. Take Dexter, for instance. He’s a bit of a big guy, weighing his ideal weight at a healthy twenty-nine pounds. So, how do you know if your Cavalier is at the right weight? It’s all about getting your hands on your dog. Run your fingers lightly over their ribcage; you should be able to feel their ribs without pressing too hard. If they’re too prominent, they might be on the thin side. But if you can’t feel them at all, or if their waistline has disappeared, they might be carrying a few extra pounds. Just keep an eye on their overall body shape, and remember, every Cavalier is unique!
How Often to Feed Your Cavalier King Charles Spaniel
Consistency is key when it comes to feeding your Cavalier. Establishing a regular feeding schedule helps regulate their metabolism and digestion. Typically, feeding your Cavalier twice a day, in the morning and evening, works well. For puppies, more frequent meals might be necessary to meet their higher energy demands. I actually feed Dexter three times a day, mainly due to the fact that he gets so much food, I prefer to space it out.
Adding Supplements and Vitamins
Even with a well-balanced diet, supplements can play an essential role in your Cavalier’s health. Omega-3 fatty acids can enhance skin and coat health, probiotics can aid digestion, and joint supplements can support mobility. Always consult your Cavalier’s vet before adding new supplements to ensure they’re necessary and safe. When possible, opt for real food supplements vs. synthetic.
Food Allergies in Cavalier King Charles Spaniels
If your Cavalier has allergies, a limited-ingredient fresh diet can be incredibly beneficial. Before jumping brands, I would suggest going through a pet food elimination diet to identify triggers. Once you know what your Cavalier is allergic to, you can create a personalized diet just for him. You can read more about how and why a pet food elimination diet is helpful on my other blog, right here.
Safe Fruits and Vegetables to Feed Your Cavalier
Things like carrots, broccoli, and kale can be great sources of extra nutrients and fiber. And don’t forget the powerhouse of antioxidants fruits like blueberries, strawberries, pomegranates, and apples can provide. For best digestion, blitz them up! Introduce all new foods slowly and keep an eye on what works for your dog.
Transitioning to a Raw Food Diet
Transitioning your Cavalier to a raw food diet should be done gradually to avoid digestive upsets. Start by introducing small amounts of raw food while slowly decreasing their current food. A 75 percent and 25 percent switch usually works well. Over a week or two, increase the raw portion until it completely replaces their old diet.
Choosing the Best Raw Food Brands
Selecting high-quality raw food brands for your Cavalier ensures they get balanced and nutritious meals. Personally, I look for brands that offer meats that are antibiotic and hormone free. Ideally, any fruits and vegetables will be organic. Opt for whole foods vs synthetics when possible. But, it will be a balancing act based on what’s available to you and your budget. As I mentioned earlier, shoot for approximately 90 percent meat, bone, and organ. A few raw brand choices to consider include BJ’s Raw, Raw Paws Pet Food, Raw Wild, We Feed Raw, Primal, Vital Essentials, Smallbatch, Raw Bistro and Steve’s Real Food.
A Healthy Diet Can Improve the Immune System, Skin, and Coat Health
By providing your Cavalier with a balanced raw or homemade diet you’re not just filling their bowl, you’re nurturing their well-being from the inside out. Fresh diets, whether raw or homemade, are rich in unprocessed ingredients, offering a higher concentration of vital nutrients compared to heavily processed kibble. Fresh foods do not have the fillers and additives found in kibble, making them easier for dogs to digest and absorb. Because of this, fresh food promotes better immune function, healthier skin, and a shinier coat, making them the ideal choice for your Cavalier.
By focusing on a fresh, natural diet tailored to your Cavalier King Charles Spaniel’s specific needs, you’re setting them up for a long, healthy, and happy life. Remember, my goal is to offer guidance and support to help you navigate the journey of pet nutrition, without any judgment. Let’s work together to ensure the best possible care for you and your Cavalier!
Your comments and questions are always welcome below.
Join our vibrant Cavalier King Charles Spaniel community on Facebook, support our dedication to pet wellness on Patreon, and stay updated with our weekly newsletter for invaluable tips and insights into raising happy, healthy pets. Together, let’s make a difference in our dogs’ lives!
Google Ad Below [...]Read more...
May 14, 2024Hot Weather Tips for Cavalier King Charles Spaniels
People often think of summer as a good time to get out and about with our Cavaliers. As a dog-friendly travel blogger, I’m often pitched ideas and stories about taking Dexter to X outdoors, even in July or August. But, the reality is, that’s usually just too darn hot for my now 14.5 year-old Cavalier King Charles Spaniel, Dexter.
He’s always run a bit hot, but now, as a senior and with MVD, the summer heat is just not ideal for him. But, it’s not just Dexter. Summer heat can pose health issues such as sunburn and heatstroke. Today, I’m going to jump into some ideas on how to keep your Cavalier King Charles Spaniel cool and active during the summer or warm months.
Cavalier King Charles Spaniels and Heat Stroke
Heatstroke is a serious concern for all dog families, particularly for breeds like the Cavalier King Charles Spaniel, which can be more susceptible due to their flat-faced (brachycephalic) nature. Any dog, any breed, and any age can develop heat stroke, even on cool days! The VetCompassTM conducted a study in 2016 regarding the risk factors for heat-related illness (HRI):
Breeds with the highest incidence of HRI included the Chow Chow, Bulldog, French Bulldog, Dogue de Bordeaux, Greyhound, Cavalier King Charles Spaniel, Pug, and the Golden Retriever.
Dogs at or above the mean adult body weight for their breed/sex showed an increased risk of HRI compared to dogs below the mean body weight.
Dogs over 12 years old had the greatest odds of HRI compared to dogs under 2 years old.
Signs of Heatstroke in a Cavalier
Recognizing the signs of heatstroke and taking preventive measures are crucial to keeping your dog safe. Signs such as excessive panting, drooling, rapid pulse, and restlessness indicate your Cavalier may be overheating. If you notice these symptoms, act quickly by providing cool (not cold) water and applying damp towels to areas with good blood flow, such as the head, armpits, and groin. Then take your Cavalier to the vet to prevent things from getting worse.
How Food Affects Your Cavalier’s Ability to Tolerate Heat
Just like for us, our pet’s food does more than just provide them with calories. Food has a big impact on their overall health, affecting everything from their longevity to their behavior and how they handle hot and cold temperatures. According to traditional Chinese medicine (TCM), everything in life has a balance of energy and heat, represented by Yin and Yang. Yin embodies the cool, and yang is the hot. This includes our pets, food, and environment; they all have specific energetics.
Dexter tends to run a little more yang (hot). Therefore, when I’m creating his meals, I aim to have the foods I provide either be energetically cooling or neutral. I avoid energetically warm or hot foods and proteins. For example, common foods that are warming or hot include goat, lamb, venison, chicken, and pheasant. Whereas, cooling proteins include rabbit, duck, beaver, cold water fish, and muskrat.
Applying this feeding concept to our Cavaliers, we can tailor their diets to help regulate their internal temperature. During the warmer months, opting for cooling foods can help maintain balance and comfort for your Cavalier.
Google Ad Below
Summer Fun for You and Your Cavalier King Charles Spaniel
Despite the summer heat, Dexter and I still enjoy our summer adventures. They just need to be modified according to the weather. The first thing I do is check the weather, so I’m not out and about with Dexter and surprised! Walking or strolling Dexter in the morning is by far cooler than in the evening. I know people suggest evening walks, but, honestly, the heat from the pavement and the atmosphere seem hotter to me than in the morning. Your location may be different.
Try walking on grassy areas instead of pavement. Shady parks beat the noon sun. Breezy days while wading in the water are another fun way to help your Cavalier stay cool. However, if it’s still sunny or warm, cool water on their feet and a breeze are unlikely to cut it.
We do a lot of indoor adventures during the summer months. Pet stores, dog friendly stores and attractions are our go-tos. I also do a lot of indoor training sessions and enrichment activities to help keep Dexter engaged. The bottom line is that I don’t want to risk Dexter’s health. And I can say from experience, it’s not a good feeling. Back in 2018, I’m pretty sure Dexter almost had a heat stroke! We were in Florida in the spring, doing touristy things. I thought I was being careful, bringing Dexter inside the stores, indoor attractions, and a covered train tour, but he really wasn’t doing well. He started showing signs of heatstroke. We rushed him to the hotel and cooled him down. I was lucky. And I’m not sure what I would have done if I wasn’t so lucky.
Hot Weather Tips for a Cavalier King Charles Spaniel
Grooming & Trimming: Regularly groom your Cavalier to remove loose fur and prevent overheating. I do give Dexter a puppy cut by trimming his belly, legs, and tail. I started this because of his CM/SM, but it also helps lighten his load and keeps him cooler.
Travel Comfort: Ensure your Cavalier’s comfort during travel with a well-ventilated crate or car harness, and schedule frequent breaks for water and shade. I also use a cooling mat and fan blowing on Dexter.
Sunscreen: Dog friendly sunscreen on your Cavalier’s nose helps protect him from harmful UV rays.
Cooling Products: Invest in cooling accessories like a cooling vest, bandana, or mat to provide relief from the heat during outdoor adventures.
Avoid the Hottest Part of the Day: Schedule outdoor activities during cooler times, such as early morning or late evening.
Mind the Pavement: Hot asphalt can burn your Cavalier’s paw pads. Stick to grassy or shaded areas for walks.
Hydration: Always have fresh water available, and encourage your Cavalier to drink frequently to stay hydrated. I put bone broth cubes in Dexter’s water bottle to encourage him to drink. If not, he will ignore the water.
Indoor Play or Outings: On exceptionally hot days, opt for indoor activities like interactive games or training sessions to keep your Cavalier entertained while staying cool.
Cooling Foods: Opt for cooling or neutral proteins in your Cavalier’s diet.
Remain vigilant, provide ample shade and hydration, and monitor your Cavalier for signs of overheating. Keep your Cavalier King Charles Spaniel’s well-being in mind, and use these practical tips to make sure you and your Cavalier have a safe and enjoyable summer.
Your comments and questions are always welcome below.
Join our vibrant Cavalier King Charles Spaniel community on Facebook, support our dedication to pet wellness on Patreon, and stay updated with our weekly newsletter for invaluable tips and insights into raising happy, healthy pets. Together, let’s make a difference in our dogs’ lives!
Google Ad Below [...]Read more...
June 8, 2024Treatment options for Chiari malformation and Syringomyelia
My best friend, Dexter the Dog, was diagnosed with Chiari malformation and syringomyelia in 2012, just before his third birthday. This diagnosis hit me hard. Over the past twelve years, I’ve shared a lot about Dexter’s diagnosis, care, and treatments on my Raising Your Pets Naturally blog and YouTube channel.
Since I recently started this blog dedicated to Cavalier King Charles Spaniels, I thought it would be a good time to write an update on Dexter’s care and what I’ve learned. I am also happy to say that at almost fifteen, Dexter is doing amazingly well! I hope you find this article on Chiari malformation and syringomyelia in dogs helpful. Please share this information to help others dealing with this heartbreaking diagnosis learn about the many helpful and natural treatments for dogs with Chiari malformation and syringomyelia.
What is Chiari Malformation (CM) and Syringomyelia (SM)
Chiari malformation commonly affects Cavalier King Charles Spaniels, Chihuahuas, Brussels Griffons, Yorkshire Terriers, Maltese, Pomeranians, Toy Poodles, and Shih Tzus. In dogs with CM, the skull is too small to hold their brain properly. This overcrowding forces parts of the brain, specifically the cerebellum and medulla, out of their normal positions. The cerebellum controls movement and balance, while the medulla is connected to breathing and heart rate.
When these brain parts are pushed out of place, they obstruct the normal flow of cerebrospinal fluid (CSF). Cerebrospinal fluid is in the brain and spinal cord and acts as a natural cushion, protecting the brain. When the flow of CSF is blocked, it can lead to a buildup of pressure and result in serious neurological issues and can form syringomyelia (SM), a condition where fluid-filled cavities form within the spinal cord.
In Cavalier King Charles Spaniels, Chiari malformation is a congenital issue, meaning they are born with it. Dr. Clare Rusbridge established a breeding protocol to help reduce CM/SM in puppies. Following the breeding protocol is crucial for reducing the risk of Chiari malformation (CM) and syringomyelia (SM) in Cavalier King Charles Spaniels. If both parents have CM/SM, puppies are 92 percent likely to be affected, while the risk drops to 77 percent if only one parent is affected. If both parents are clear of CM/SM, there is a 70 percent chance their puppies will be clear, rising to 87 percent if the grandparents are also clear. Potential Cavalier families should seek breeders who perform this testing to ensure healthier puppies. The only way to diagnose Chiari malformation and syringomyelia definitively is through an MRI scan.
Recognizing Chiari malformation is vital for Cavalier King Charles Spaniel families because early detection and treatment can greatly improve the quality of life for dogs with this condition. If you notice symptoms like uncoordinated movements, sensitivity around the head and neck, or any other unusual behaviors, it’s important to consult with your veterinarian as soon as possible.
Symptoms of Chiari Malformation and Syringomyelia in Dogs
Symptoms of CM and SM in Cavalier King Charles Spaniels and other breeds can vary. About a year before Dexter’s diagnosis, he began showing some random and unusual behaviors. And they didn’t happen all the time.
Fixating at dust particles in the sunlight.
Fidgeting and biting at his rear end. His vet initially thought it was anal glands, but they really weren’t that full, and he continued to do it.
Acting strangely around flying insects. Whenever a fly was around, he would get strange and start spinning around and growling at his back end.
Then, he had a downright scary episode, where he just was going crazy over his back end, growling, at it, spinning, and I could not gain his attention. I then decided to hit record the next time it happened. After recording the next episode and consulting Dr. Lynette Cole at The Ohio State University, three veterinary neurologists suspected Chiari malformation and syringomyelia. I then made an appointment at the OSU neurology department for an MRI and spinal tap. CM and SM were confirmed.
Dexter’s episode is below.
Don’t forget to subscribe to our @RaisingYourPetsNaturally YouTube channel for more.
Other common symptoms of CM/SM in Cavalier King Charles Spaniels can include:
Air scratching, especially on walks or when excited.
Head scratching or rubbing.
Air snapping or licking.
Random yelps of pain.
Sensitivity to touch and being picked up.
Hind end weakness.
Head or body wobbles, stumbling, or squinting.
Head pressing.
Seeking darkness or solitude.
Inactivity or depression.
Restlessness.
Google Ad Below
Diagnosing Chiari Malformation and Syringomyelia
The only definitive way to diagnose CM/SM is with an MRI. If a dog shows common symptoms and belongs to a breed prone to this disease, like Cavalier King Charles Spaniels, a vet might start treatment without MRI confirmation. For me, knowing exactly what Dexter had was key. Along with an MRI, Dexter also had a spinal tap to ensure we had all the facts.
Treatment Options for Chiari Malformation and Syringomyelia
Surgery for Chiari Malformation in Cavalier King Charles Spaniels
Surgery is performed with the goal of restoring the natural flow of spinal fluid. This involves decompressing the affected area, removing bone fragments, and sometimes adding a shunt. However, the results can differ greatly from one dog to another. Despite surgical intervention, many dogs still require medication to manage their pain effectively.
Medications for Chiari Malformation in Cavalier King Charles Spaniels
The disease is progressive and varies in severity. Treatment prioritizes comfort and alleviates pain. Dr. Clare Rusbridge provides the gold standard in the medication treatment protocol. It’s essential to monitor organ functions regularly when administering long-term medications.
Natural Treatments for Syringomyelia in Dogs
There are many natural treatments to help support a dog with CM/SM. Here are some that have worked for Dexter:
Acupuncture: Restores the normal flow of energy through specific pathways.
Cold Laser Therapy: Reduces inflammation, relieves pain, repairs tissue damage, and increases blood circulation.
PEMF ( Pulsed Electromagnetic Field) Therapy: Reduces inflammation, relieves pain, promotes tissue and cell repair.
Food Therapy: A diet of home-cooked or raw dog food helps reduce inflammation. Ingredients like sardines, shiitake mushrooms, and green-lipped mussels can help.
Conscious Proprioception Exercises: Dexter wore Dr. Buzby’s ToeGrips to stimulate awareness of his feet. I also regularly work with him on footwork exercises to help him be more aware of his feet.
Canine Hydrotherapy: Water treadmill therapy strengthens Dexter’s body with low joint impact.
Core Strength Exercises: Dexter’s rehabilitation focuses on boosting his core and back end strength, crucial for enhancing balance and stability. Through a variety of exercises using different equipment, we target his abdominal, back, and hind leg muscles, ensuring he can confidently navigate any challenges.
Living with a Cavalier King Charles Spaniel with Chiari Malformation
Living with a dog diagnosed with Chiari Malformation and syringomyelia can be challenging. Dexter’s first year after diagnosis was the most challenging. Trying to figure out what worked best for him, what kinds of activities or weather would trigger breakthrough pain, and how best to manage it. His life changed, but, luckily, with a great team of professionals, I was and am able to provide Dexter with a great quality of life that is still full of adventures and enrichment.
Comfort Measures
To help keep Dexter as comfortable, happy, and pain-free as possible, I’ve incorporated a range of products.
Dog Harness: Avoid collars that can be painful due to the disease’s nature.
Dog Strollers: Great for giving Dexter a break while still being part of adventures.
Cooling Mats and Warming Blankets: Depending on Dexter’s temperature needs. I will say, now Dexter is on a cooling mat almost 100 percent of his downtime. He rarely seeks heat.
Snuggle Jackets: Some dogs find comfort in them, while others might not. In the beginning, Dexter wore one almost all the time. But, I think, after we finally found our groove with his care, they were no longer necessary.
Natural Calming Aids: Calming CDs and natural calming sprays help Dexter on rough days.
Support for Dogs with Chiari Malformation and Syringomyelia
Let’s unite in this journey. Dexter’s courage living with Chiari malformation and syringomyelia serves as a light of hope for us all. You aren’t in this alone. Seek the help of a good veterinarian team, join a support group, including ours! Together, we can provide hope and guidance to others on similar paths. Go Team Dexter!
Your comments and questions are always welcome below.
Join our vibrant Cavalier King Charles Spaniel community on Facebook, support our dedication to pet wellness on Patreon, and stay updated with our weekly newsletter for invaluable tips and insights into raising happy, healthy pets. Together, let’s make a difference in our dogs’ lives!
Google Ad Below [...]Read more...
June 26, 2024Cavalier King Charles Spaniel Enrichment Ideas
Ultimate Guide to Canine Enrichment for Cavalier King Charles Spaniels
If you are reading this blog post on ways to keep your Cavalier King Charles Spaniel entertained, you have made me a very happy lady. Mental stimulation for your Cavalier is so important, and sometimes a very overlooked part of a good positive dog training program. I’ve always said, dog training isn’t just about teaching your Cavalier to do something or not do something. Rather, there is a synergy between training your Cavalier and everything else including canine enrichment. I think bonding with your Cavalier King Charles Spaniel is the best medicine for both you and your pup. So much so, I started a Cavalier King Charles Spaniel Facebook group, with a big emphasis on enrichment ideas for Cavaliers. And the photos you are about to see on this Cavalier blog are all from members of our wonderful community! Now, let’s dive into canine enrichment and why it’s so important.
What is Canine Enrichment?
Canine enrichment is about making your dog’s life better by giving them fun activities that keep their mind and body active. I think about canine enrichment as life experiences and engaging our Cavaliers in a variety of fun and interactive activities. It’s more than just a food puzzle toy, although that’s a great introduction to enrichment for your Cavalier.
Enrichment can be interactive play, positive dog training sessions, sensory games, physical activities, food enrichment, and outdoor adventures. The goal is to keep your Cavalier happy, healthy, and mentally sharp. When you do this, it helps prevent boredom, boosts your dog’s mental skills, and strengthens your bond, which also leads to better listening and obedience.
Subscribe to @CavalierTipsandFun for more!
Beyond Food: Enrichment Through Interaction
Many people associate canine enrichment primarily with food-related activities, like filling food toys or using interactive frozen treats. While these activities are great, and I use them daily with Dexter, they are just one piece of the enrichment puzzle. When I think of canine enrichment, I think of activities that involve direct interaction with Dexter. It’s about more than just keeping him occupied with food toys—it’s about creating a connection with him, something we do together.
Incorporating various types of environmental enrichment can greatly benefit your Cavalier King Charles Spaniel, both mentally and physically. Enrichment keeps those unwanted behaviors at bay by preventing boredom. It encourages social interaction, making for a happier and more engaged dog.
Positive Training for Your Cavalier
Training is a wonderful way to enrich your Cavalier’s life. Whether you’re teaching basic obedience, fun tricks, or advanced behaviors, positive dog training sessions offer cognitive stimulation and deepen your bond. Cavaliers are smart and love to please, which makes them quick and eager learners. Remember, when you’re teaching and training your Cavalier, you want the training to be fun for both your dog and you.
Google Ad Below
Outdoor Adventures
Taking your Cavalier to the park or on a walk can be incredibly gratifying. Consider going on a “sniffy walk,” where your pup gets to explore and investigate their surroundings at their own pace. Allowing them to follow their nose is not only fun but also taps into their natural instincts.
Other fun outdoor adventures can be indoors too! Take your Cavalier to a pet store for some shopping or visit a dog-friendly indoor store. Just make sure to call the establishment first to double-check their pet policies. Those training sessions you’ve been working on will ensure your indoor fun is a positive experience and one you can feel proud of.
Fun and Beneficial Canine Fitness Activities
Incorporating canine fitness activities can be both fun and vital for your Cavalier’s health. Stretching, sits to downs to stands, using wobble boards, or even walking over cavaletti poles are a few examples. These activities help keep your Cavalier in good physical shape and engaged. Other fitness ideas include walking on slight outdoor hills, placing two paws on a curb, jumping on a sturdy boulder, and walking across a fallen tree trunk. Always prioritize safety during these exercises.
Sensory Enrichment for Your Cavalier
Sensory enrichment is another great way for keeping your Cavalier King Charles Spaniel active and entertained. This type of enrichment is all about stimulating their senses, sight, smell, hearing, touch, and even taste. Obviously, there is some overlap between enrichment “categories.”
Consider incorporating toys that make different sounds or have different textures to engage their hearing and touch senses. You can even make a scent garden in your yard with dog-friendly plants and herbs. Or, grab some outdoor things such as pine cones, grass, and flowers and place them in scent boxes for your Cavalier to smell or find. Plus, activities such as scent work, where your dog uses their sense of smell to find hidden treats or toys, can provide a great mental and physical workout..
By giving your Cavalier a variety of sensory experiences, you satisfy their natural curiosity and make them happier overall. Giving your Cavalier sensory activities like scent work or creating a scent garden not only keeps them entertained but also deepens your connection as you explore together.
Bonding Activities
Simple activities like grooming, talking to your dog, or giving them a gentle massage are also forms of enrichment. By connecting and touching your dog, you not only are able to do a lump-and-bump check, but you are laying the foundation of trust. Shared Zen moments like listening to music together or just lounging on the couch, can also be incredibly soothing for both you and your dog. Don’t forget snuggle time! Most Cavaliers love to cuddle, and those quiet, close moments can deepen your relationship even more. Did you hear that, Dexter? By incorporating these simple yet meaningful activities into your life, you’ll create a stronger relationship with your dog.
Food Games and Interactive Toys: Enhancing Mealtime for Your Cavalier
Food games like lick mats, interactive food toys, and snuffle mats are a great way to feed your Cavalier. Instead of wasting those valuable calories by tossing them in a bowl, using enrichment toys offers a fantastic activity. Don’t use extras in those food toys; use your Cavalier’s daily food or food calories.
For Cavaliers who are fed fresh food, such as a raw or fresh diet, lick-type toys like lick mats are perfect. These toys allow your Cavalier to eat their food while licking and enjoying their mealtime. Spreading the food out encourages more time eating and offers an easy enrichment activity. It also mimics natural foraging behavior.
Snuffle Mat DIY
If your Cavalier is fed dry kibble or dehydrated food, treat dispensing toys or snuffle mats are excellent choices. These toys make mealtime interactive by challenging your Cavalier to work for their food. They may knock around a toy that dispenses their meal or snuffle around a mat for their nibbles. In order to keep your Cavalier’s calories in check, you can reduce a small portion of their dry food and use fresh foods or toppers or freeze-dried 100 percent meat in these toys to add variety and excitement.
Incorporating food games and interactive toys into your Cavalier’s routine makes mealtime more enjoyable and provides an easy and daily mental enrichment activity. But, don’t just go with one treat puzzle toy. The more variety, the better.
Enriching Your Cavalier’s Life with Every Adventure
Canine enrichment is all about creating a variety of positive and fun experiences that enhance your Cavalier King Charles Spaniel’s life. Food toys are great–it’s the interactive, engaging activities that truly enhance their daily experiences.
By focusing on a variety of enrichment activities, you’ll ensure your Cavalier King Charles Spaniel is happy, content, and well-rounded.
I host a private Facebook group for Cavalier King Charles Spaniels, and we have a big focus on canine enrichment ideas and challenges to keep your Cavalier engaged and thriving!
I’d love to hear about your own enrichment ideas and experiences with your Cavalier! Share your tips and stories in the comments below and let’s keep the conversation going.
Join our vibrant Cavalier King Charles Spaniel community on Facebook, support our dedication to pet wellness on Patreon, and stay updated with our weekly newsletter for invaluable tips and insights into raising happy, healthy pets. Together, let’s make a difference in our dogs’ lives!
Google Ad Below [...]Read more...
July 24, 2024What Kind of Chew Toys and Bones are Safe for Cavalier King Charles Spaniels?
Most Cavalier King Charles Spaniels love to chew! Chewing is a natural and normal dog behavior that helps fight boredom and can even help keep your Cavalier’s teeth pearly white. But remember, brushing your Cavalier’s teeth daily is still ideal. Puppies and adolescent Cavaliers tend to have a high drive for chewing things. Sometimes, whatever they can sink those teeth into. Hopefully, you are working with a qualified dog trainer to ensure your Cavalier is learning to chew on the right items instead of your furniture, or, even worse, electrical cords or something else that can harm your Cavalier puppy.
So, what makes a chew toy or bone safe for your Cavalier King Charles Spaniel? Over the years, my opinion on this has evolved. I once opted for the harder, the better. But, now, I’m on the other side of the fence, choosing softer items. Hard and tough dog bones can chip teeth and even splinter, which can be very dangerous. Even my sweet, Dexter chipped his tooth on a hard bone….his last hard bone.
I personally do not use or recommend hard bones, antlers, hooves, plastic or nylon bones, rawhides, chews with lots of ingredients, wood bones, or weight-bearing bones. But, I will always say, this is my personal opinion, and they are your Cavaliers. You can do whatever you feel comfortable doing for them, and you will not be judged by me, nor should you be judged by your peers.
Please be aware that not every chew toy or bone will be suitable for every Cavalier. I strongly recommend active supervision when your Cavalier chews, particularly if it’s a new toy or bone or if the chew item is edible. The right size of a bone or toy is also important. You want to make sure the toy or bone is not so small that your Cavalier can place the entire item in their mouth and risk choking. This includes when the chew gets smaller. I tend to toss the end out before Dexter swallows it, with the exception of a chew that is crunchy. Finding the right chew for your Cavalier is sort of like “The Princess and the Pea.” So, let’s jump into my recommendations for safe and healthy chew bones for your Cavalier King Charles Spaniel.
Dehydrated or Freeze-Dried Fish Skins: With a good dehydrated or freeze-dried fish skin dog treat, the treat will be 100 percent fish skin with no artificial colors, preservatives, or flavors. With this list and anything I recommend, the first stop should be to read the actual ingredient panel. What’s inside. Everything. It’s also important to check out the packaging and carefully read the ingredient list and where the fish was caught and processed. Fish skins are great treats for your Cavalier, full of omega-3 fatty acids, typically low in fat, and fully edible. Most dogs love the taste and eagerly chew away. Some fish skins are crunchy, while others are chewy. Chewy ones last longer but need close supervision to make sure your Cavalier chews them up vs. swallowing a large piece. Shop now.
Bully Sticks & Pizzles: Made from the manly part of a bull, many dogs love chewing on these. What I like is that they typically just start to get soft and disappear; I haven’t seen any pieces break off. However, I have seen a stick peel every once in a while, like string cheese. You can also purchase bully stick holders to help hold the stick, which adds a second layer of safety, helping to prevent your dog from swallowing the end. I personally toss that piece into the garbage. Again, sourcing and how they are manufactured is key. Natural does not correlate to not using irradiation (radiation). I contacted my fair share of bully stick brands and asked if they used irradiation, so, make sure you do your homework. Tip: get odor-free or low-odor versions. These can stink like crazy! Shop now.
Raw Bones: Raw bones are another option for your Cavalier to chew on, especially if they are already on a raw diet or natural diet. Because the bones are not cooked, they are soft and unlikely to splinter. Cooked bones easily splinter and are very hard on teeth. The size will depend on the size of the bone and your Cavalier. A few options to consider include necks, wings, feet and tails. Once again, supervise and watch for choking or swallowing. Necks did not work for Dexter, as he thought he should just suck the whole thing down. Chewing Tips: Don’t clean the bones; feed them with some meat on them, as they come. Let your Cavalier pull on the meat and chew and lick the bone. Allow them to have them for an hour, then throw them away. It’s when they sit around the house, get buried, or get dried out that you get bacteria and splintering. They will last in the fridge for three days before feeding. They can also be frozen and thawed. Feed outside or on a towel, and make sure your Cavalier is wearing their snood!. Avoid weight-bearing bones, as dogs can chip or fracture their teeth due to how hard they are. Show now.
Dehydrated Duck/Chicken/Rabbit Feet/Ears: Duck, chicken, and rabbit feet or ears are excellent, crunchy, edible chews for Cavalier King Charles Spaniels. Dehydrated or freeze-dried. Both offer good chewing options. Chicken and duck feet are rich in chondroitin, glucosamine, and collagen, which support joint health, reducing the risk of brittle bones, improving mobility, and maintaining healthy teeth and gums. Rabbit ears and feet are particularly appealing as they are low in fat, high in protein, and help clean your dog’s teeth while reducing plaque buildup. Additionally, the fur on rabbit ears can serve as a natural dewormer. These natural chews are both nutritious and enjoyable, but always supervise your Cavalier to ensure safe chewing. Shop now.
Tripe Sticks: Tripe sticks are a fantastic chew option for Cavalier King Charles Spaniels. Typically made from the stomach lining of cattle, lamb, or goat, these chews are naturally rich in digestive enzymes and nutrients that support gut health. Tripe sticks provide a satisfying, chewy texture that most Cavaliers love, while also helping to clean their teeth and gums. They are full of nutrients that can be a great addition to your dog’s chew rotation. Shop now.
Beef Tails: Beef tails are another excellent choice for your Cavalier. They are durable and provide a long-lasting chewing experience, which helps keep your Cavalier engaged and entertained. Beef tails are also high in protein and can help naturally clean your Cavalier’s teeth. The natural toughness of beef tails makes them a good option for aggressive chewers, but always make sure to choose the appropriate size to prevent any choking hazards. Shop now.
Tendons: Tendons are a great chew for Cavaliers because they are tough yet somewhat flexible, providing a satisfying chew without being too hard on their teeth. They are also rich in collagen, which is beneficial for joint health. Tendons help keep your Cavalier’s teeth clean and their gums healthy. Most Cavaliers find the chewy texture very satisfying. Shop now.
Yak Chews: Yak chews are a fantastic option for Cavalier King Charles Spaniels, but I only recommend them when microwaved to make them poofy. Microwaving them creates a crunchy, airy texture that Cavaliers love, making them a safe and enjoyable option. They are rich in protein and calcium, supporting your dog’s overall health. Made from a mixture of yak and cow milk, these chews are rich in protein and calcium, supporting your dog’s overall health. Again, double check the ingredient label; not all are created equal.
Subscribe to @RaisingYourPetsNaturally’s YouTube channel for more!
Fillable Chew Toys: I am a fan of filling various food toys such as West Paw Tux and Toppl with healthy snacks. The key to getting your Cavalier to chew on a food toy is to stuff it! If your Cavalier is eating the toy instead of the inside food, I do not recommend it. Shop now.
Ingredients matter! If you’re considering chew bones made from various ingredients, it’s crucial to flip over the package and dive deep into the ingredient list. Not all chews are created equal, and some can contain nasty or even toxic substances that could harm your dog. Look for natural, wholesome ingredients and avoid artificial colors, flavors, and preservatives. A little extra time spent reading labels can make a big difference in keeping your Cavalier King Charles Spaniel safe and healthy.
So, there you have it. That is the current list of some healthy and natural chew toys, bones I feel comfortable providing Dexter and recommending to my dog training clients. Always remember to supervise your Cavalier when they are chewing and to choose the right size and type of chew for their needs.
Which of these chews does your Cavalier King Charles Spaniel love the most? Share your favorite chew toys or treats in the comments below!
A big thank you to all the members in our Cavalier Facebook group for your wonderful photos!
Google Ad Below
Join our vibrant Cavalier King Charles Spaniel community on Facebook, support our dedication to pet wellness on Patreon, and stay updated with our weekly newsletter for invaluable tips and insights into raising happy, healthy pets. Together, let’s make a difference in our dogs’ lives!
🐶💙Support our passion for pet wellness and unlock exclusive content, perks and early access by exploring our Patreon tiers.
Sign up for our weekly newsletter!
Join us on Facebook!
[...]Read more...
January 23, 2025Supporting Your Senior Cavalier King Charles Spaniel: The Ultimate Guide to Aging Cavaliers
After 15 amazing years with my Cavalier, Dexter it was his time to go to the rainbow bridge. It’s never an easy decision to make and since then, I have been thinking back on our life together. Over the course of his life, I wrote a lot about Dexter on my first blog, Raising Your Pets Naturally. Now, with Stewart, my 7-month-old rescue Cavalier King Charles Spaniel puppy, I’m starting fresh, but with all that I’ve learned from Dexter’s senior years. I thought this would be a good time to explore when a Cavalier King Charles Spaniel is considered a senior, their lifespan, common health concerns, and how we can support our Cavaliers through every stage of life.
At What Age Is a Cavalier King Charles Spaniel Considered a Senior?
If you’re wondering, “When does a Cavalier reach old age?” The answer varies depending on factors like genetics and health. Typically, small breed dogs like Cavaliers are considered seniors between 7 and 10 years old. While this is a general guideline, you may notice your dog showing signs of aging earlier or later.
Some indicators of senior status include:
Decreased Interest in Play: They may be less enthusiastic about toys or games they used to enjoy.
Weight Changes: Unexplained weight gain or loss can be a sign of aging or underlying health issues.
Changes in Vision or Hearing: Difficulty seeing or responding to cues may suggest declining eyesight or hearing.
Increased Time Spent Resting: Senior dogs often nap more during the day and may tire easily after exercise.
Changes in Appetite: They may eat less or show more picky eating habits.
Difficulty Climbing Stairs or Jumping: You might notice hesitancy or struggle with previously easy physical activities.
Behavioral Changes: Increased anxiety, clinginess, or even irritability may indicate aging.
Frequent Bathroom Breaks: Aging can bring bladder control issues or an increased need to urinate.
Dull or Thinning Coat: Their fur might lose its luster or feel thinner in certain areas.
Dental Issues: Bad breath, difficulty chewing, or loss of teeth can become more prominent.
Reduced Tolerance for Cold or Heat: Seniors may seek out warmth or avoid strenuous activity in hot weather.
Increased Vocalization: They may bark or whine more often, potentially due to discomfort, anxiety, or confusion.
Cognitive Changes: Signs of canine cognitive dysfunction (CCD) include disorientation, restlessness, or forgetting familiar routines.
Slower movement or stiffness in the morning: Your Cavalier may take a little longer to get going in the mornings, which can be a sign of joint stiffness or early arthritis.
Graying fur, often around the muzzle: Just like humans, dogs may develop gray hairs as they age, particularly around their face.
But don’t worry, aging doesn’t mean your Cavalier is slowing down in spirit! With the right care and attention, they can still enjoy life to the fullest.
What Is the Life Expectancy of a Cavalier?
You may have heard the question, “How long do Cavaliers live?” The average lifespan of a Cavalier King Charles Spaniel is approximately 10.45 years. This is based on a 2022 UK study of veterinary data. However, some studies suggest a slightly longer lifespan, with a 2024 UK study indicating an average of 11.8 years for the breed. The typical lifespan of a Cavalier King Charles Spaniel is around 9-14 years. That said, some Cavaliers, like Dexter, surpass this average with proper care, while others may face challenges earlier due to health conditions.
Common Health Issues in Cavaliers
Cavaliers are an incredibly loving and joyful breed, but they do have a predisposition to certain health issues. Knowing what to watch for and being proactive in their care can help them live a happy and long life.
Mitral Valve Disease (MVD): Nearly every Cavalier King Charles Spaniel owner will face mitral valve disease at some point if their dog lives long enough. This heart condition affects the valve’s ability to close properly, leading to a heart murmur and, eventually, heart failure if untreated. Yearly heart check-ups with a cardiologist can help monitor and manage this condition.
Chiari-like Malformation (CM): Because of the breed’s unique head shape, it’s estimated that 95 to 99% of Cavaliers will develop a condition called Chiari-like malformation (CM). This happens when the skull is a bit too small for the brain, causing part of the brain to push into the spinal canal. CM can result in pain, weakness, or in severe cases, even paralysis. While there’s no cure, symptoms can often be managed with medications and regular vet check-ups, helping your dog feel more comfortable.
Hip Dysplasia and Patella Luxation: While less common in Cavaliers compared to larger breeds, these conditions can cause joint pain and mobility issues. Patella luxation, which is a dislocation of the kneecap, is more common in Cavaliers and can lead to lameness and discomfort. Keeping your Cavalier at a healthy weight is key to reducing stress on their joints and managing these conditions.
Eye and Ear Problems: Cavaliers are prone to progressive retinal atrophy (PRA), cataracts, and ear infections. Regular grooming and vet visits help catch these issues early.
Intervertebral Disc Disease (IVDD): IVDD is a condition where the discs in your dog’s spine become damaged or degenerate, causing pain, weakness, or even paralysis in severe cases. Cavaliers are particularly vulnerable to this, especially as they age. Be on the lookout for signs of discomfort, difficulty moving, or dragging their back legs.
Myoclonus: Myoclonus refers to muscle twitches or jerks that can occur in Cavalier seniors, especially around the head or neck area. While it’s usually not painful, it’s important to consult with a vet to rule out underlying issues such as neurological problems.
Medium-Chain Acyl-CoA Dehydrogenase (MCAD) Deficiency: This genetic condition affects Cavaliers’ ability to properly metabolize certain fats, which can lead to serious health problems, including low blood sugar, lethargy, and, in severe cases, sudden death. The great thing is that there’s a quick and easy at-home swab test available to check if your Cavalier has MCAD. It’s a simple step that can give you peace of mind and help catch this condition early. It’s a proactive way to care for your Cavalier’s long-term health.
Subscribe to @CavalierTipsandFun for more!
Supporting Your Cavalier Through All Life Stages
Caring for a senior Cavalier means making thoughtful changes to their routine. As our dogs get older, their needs shift in different ways. They may slow down, develop new health concerns, or simply need more comfort. These changes are completely normal, and it’s up to us to help them adjust so they can continue to feel their best. With a little extra care and attention, we can make sure they stay happy, healthy, and comfortable as they age. Whether it’s modifying their diet, adjusting their exercise, or making small changes to your home, these little changes go a long way in supporting their well-being. After all, they’ve given us so many wonderful years of love and companionship, and now it’s our turn to return the favor.
Nutrition for Senior Cavaliers
As your Cavalier enters their senior years, their nutritional needs often shift to support their changing bodies. A balanced diet made with fresh, high-quality ingredients like Omega-3s, antioxidants, glucosamine, and chondroitin can help maintain joint health, cognitive function, and overall vitality. Glucosamine and chondroitin play an essential role in supporting cartilage and joint health and can be included in their diet through natural sources like bone broth, chicken feet, or beef trachea, or through supplements if needed. Adding these fresh foods as part of their meals or even as toppers can provide a natural boost that processed options often lack. Every dog is unique, so working with your vet or a canine nutritionist is key to crafting a plan that meets your Cavalier’s specific needs.
When Dexter was diagnosed with kidney issues in his senior years, I found that his diet needed some adjustments. He had been raw-fed for most of his life, but with the help of his veterinarian, I transitioned him to a customized, home-cooked diet to better support his health. Bones, which are a staple in raw feeding, are high in phosphorus, a mineral I needed to limit. To make up for the lack of bone calcium, I switched to eggshell calcium, which is lower in phosphorus and just as effective.
I also began boiling his meat and discarding the cooking water, which helped reduce the phosphorus content even further. I carefully selected foods that were naturally lower in phosphorus, like certain vegetables and proteins. Dexter was also starting to lose weight, so I added carbs like rice and sweet potatoes to help him maintain his energy and body condition.
These changes made a big difference in his quality of life. While home-cooking may not be for everyone, it’s worth exploring alternatives to prescription diets if your Cavalier develops a medical condition. A good veterinarian or certified dog nutritionist can guide you in creating a plan that meets your dog’s needs without compromising on fresh, wholesome ingredients.
💡 Pro tip: Every Cavalier is unique, and what works for one dog may not work for another. Always partner with your vet or a canine nutritionist to find the best approach for your senior Cavalier. Giving them a fresh diet tailored to their needs is one of the best ways to show your love and care during their golden years.
Exercise and Mental Enrichment
Gentle exercise is important for keeping your senior Cavalier feeling their best, but it’s all about adjusting to their abilities. When Dexter reached his senior years, mosey walks became our go-to. He loved taking his time, sniffing every blade of grass, and enjoying the world at his own pace. When he got tired, I’d pop him into his stroller so we could continue our adventure without overdoing it. That stroller wasn’t just for outdoor strolls either, it was perfect for indoor store adventures, allowing him to stay engaged and part of the action while giving his body the rest it needed.
Mental enrichment was just as important as physical exercise. One of Dexter’s favorite activities was a “find it” game with cardboard boxes. I’d hide a treat in a box, spread them around, and watch his excitement as he used his nose to uncover the prize. It was the perfect mix of mental stimulation and gentle movement. For senior Cavaliers, simple adjustments like these can make a huge difference. Whether it’s a slow walk, a stroller ride, or an engaging puzzle, finding activities that fit their needs helps them stay vibrant and connected to the world around them.
Don’t forget to subscribe to @CavalierTipsandFun for more!
Natural Therapies for Senior Cavaliers
As Cavaliers age, their bodies may need extra support to stay comfortable and mobile. Therapies like at-home laser treatments, physical therapy, and acupuncture made a big difference for Dexter in his senior years. Actually, Dexter had these treatments the majority of his life due to his Chiari malformation. These options can reduce pain, improve mobility, and help manage chronic conditions like arthritis.
Dexter had regular physical therapy visits, where he worked with a canine rehabilitation specialist to keep his joints moving and his muscles strong. I also had simple at-home exercises to follow up with between visits, ensuring he stayed as active as possible without overdoing it. Using a laser therapy device at home helped target areas of stiffness or soreness, and his PEMF (Pulsed Electromagnetic Field) bed became one of his favorite spots to rest. PEMF therapy didn’t just support his comfort but also promoted better circulation and reduced inflammation.
Order a laser for your Cavalier today!
Acupuncture was another natural treatment that worked well for Dexter, offering gentle relief from discomfort and improving his overall quality of life. These treatments, along with his regular routine, were all part of ensuring he was comfortable and able to enjoy his senior years to the fullest.
If you’re considering these therapies for your Cavalier, talk with your Cavalier’s holistic vet or a canine rehabilitation specialist. They can guide you toward the best options for your Cavalier’s individual needs and help create a plan to support their comfort and mobility.
Veterinary Care and Preventative Check-Ups
Regular vet visits are essential, especially as your Cavalier gets older. I recommend scheduling check-ups at least once a year, but if your dog is on medications or managing a condition, like Dexter was, labs every 4 months can give you a better picture of their health. Semi-annual check-ups are also a good idea to catch early signs of issues like MVD, joint problems, or anything else that may need attention. Don’t hesitate to bring up any subtle changes you’ve noticed, whether it’s weight loss, fatigue, or coughing. Early intervention is key, and your vet can provide valuable guidance to help you manage your Cavalier’s health, ensuring they stay happy and comfortable as they age.
Cardiologist Visits
I highly recommend that every Cavalier sees a cardiologist at least once a year. Cardiologists specialize in heart health and truly understand the ins and outs of heart disease, including conditions like MVD, which Cavaliers are prone to. Even if your dog hasn’t been diagnosed with anything serious yet, a cardiologist can spot early signs of issues that might not be apparent to you or your regular vet. If your Cavalier is diagnosed with MVD, your cardiologist may recommend more frequent visits to monitor the progression of the disease and adjust their treatment plan as needed. Having a heart specialist on your team gives you peace of mind and ensures you’re taking proactive steps to care for your dog’s heart health.
Making Your Home Senior-Friendly
As your Cavalier enters their senior years, small changes around the house can make a world of difference in how they move and rest. Senior dogs often experience joint stiffness, and their mobility may not be what it once was, so providing a comfortable and safe environment helps them feel at ease. These adjustments don’t have to be drastic, but they can really support your dog’s needs as they age.
Ramps or Steps: It’s always a good idea to have ramps or steps in place, even if your Cavalier is still young. Jumping down from furniture can put strain on their joints and neck, leading to potential issues down the road. Ramps or steps make it easier for them to get on and off the couch or into the car, preventing unnecessary stress on their bodies. These additions are a simple way to protect your Cavalier from injury and support their mobility throughout all stages of life, ensuring they can continue to join in on the fun without risk.
Orthopedic Beds: Comfort is key when it comes to senior Cavaliers. Cushioned orthopedic beds provide much-needed support for aging joints and pressure points. Dexter was a fan of cooling mats all year, so I made sure to place them throughout the house, including on his beds, to keep him cool. But I always left at least one bed without a cooling mat, in case he wanted to curl up and stay cozy. The goal is to ensure they have a comfortable place to rest, with options that suit their changing needs.
Non-Slip Surfaces: Slippery floors can be a senior dog’s worst enemy. To prevent falls, I recommend adding rugs or carpets to high-traffic areas, especially in places like the kitchen or hallway. You can also try ToeGrips(use promo code: DEXTER for 10% Off Your First Order), which help with traction, so your Cavalier can walk confidently. Making sure they have a stable environment to navigate helps keep them safe, especially when they’re getting around slower than they used to.
How Long Do Cavaliers Live? Cherish Every Moment
If there’s one thing Dexter taught me, it’s to appreciate the little moments, whether it was a slow morning walk, the rare occasion when he’d want to be close and rest in the nook of my legs, or simply watching him nap and snore in the sunshine. Dexter wasn’t much of a cuddler, but when he wanted to be near me, I made sure to savor those times. Our Cavaliers may not live as long as we’d like, but the joy they bring into our lives is something we’ll never forget.
When Stewart reaches his senior years, I know I’ll be ready to give him the care and love he deserves. For now, I’m soaking up every playful, puppy-filled moment.
Google Ad Below [...]Read more...
April 28, 2024Are Cavalier King Charles Spaniels Good for Therapy Dog Work?
Today, I want to chat about a topic that is close to my heart: therapy dogs! Have you ever wondered if your Cavalier King Charles Spaniel would make a good therapy dog? It’s a common question and one that has a few caveats. First, it’s not all about the dog! I know, I know, it’s always all about Dexter, but with visiting therapy dogs, it’s about teamwork.
But what is a visiting therapy dog team, and what do they do? A therapy pet team is a person and their pet (sometimes cats, bunnies, etc.) who share their companionship and comfort with those in need, visiting places like hospitals, schools, and nursing homes. These teams engage in either Animal-Assisted Activities (AAA) or Animal-Assisted Therapy (AAT). AAA therapy dog teams engage in sessions without the presence of a medical professional or specific treatment goals, aiming simply to bring joy and comfort. Whereas AAT therapy dog teams work with healthcare providers in goal-oriented sessions aimed at addressing specific issues, with progress carefully measured and tracked throughout the process.
Being a good therapy dog team isn’t just about your Cavalier; it’s also about you. Both you and your CKCS are visiting as a team. You both must have the skills and knowledge required to visit people in a wide range of settings.
Let’s discuss what humans should be bringing to a Cavalier therapy dog team. As a therapy dog handler, it’s important to be comfortable when interacting with both people and your dog. You’ll need to be able to guide your Cavalier through different situations, encouraging them and keeping them safe and happy. Understanding your dog is key to becoming a therapy dog handler. You’ve got to be able to recognize the tiniest changes in behavior and body language, and quickly respond. And at the same time, you will be multitasking by staying engaged with individuals. It’s a balancing act, for sure, especially as you start out your journey as a therapy dog team.
Now, what personality should your Cavalier King Charles Spaniel have in order to make a good therapy dog? When it comes to a well-suited therapy dog, you can look at a few key traits. A good therapy dog should be reliable, predictable, and able to follow your cues with ease. That’s not to say they have to be robots and never get flustered, but as a general rule, you want a dog that is solid in their temperament. Your dog should be friendly with strangers, as your visits will be with strangers. At the same time, they should be poised, not jump on people, and be able to walk nicely on a leash around distractions, including food. It’s not just about loving new people; it’s also about having manners in new and unfamiliar environments.
Getting Started Training Your Cavalier to Become a Visiting Therapy Dog
It’s important that your Cavalier have basic obedience and manners. Walking on a loose leash in crowded places, around dogs, and on slick floors is a must. Leaving food or dropped pills on the ground is incredibly important for your dog’s safety. If your Cavalier knows tricks, that can be a great icebreaker and is also helpful when someone wants to look at your dog but not pet them. Dexter and I were a visiting therapy dog team for many years, and tricks and activities were by far his favorite visits! If your dog needs a refresher, enroll in a positive dog training class.
Subscribe to our @CavalierTipsandFun YouTube channel for more!
Google Ad Below
After your Cavalier has mastered his basic obedience skills in a variety of environments, look for a therapy dog training prep class. This may be a weekend class or one that spans 4–8 weeks. When I taught my therapy dog prep class, each week we covered a new topic to prepare the handlers and dogs for the actual work involved and the test. My students by far enjoyed skit night, where my volunteers and I role-played different scenarios, the teams interacted, and we discussed what was good and how they could improve in that situation. It was a hoot and very eye-opening for the upcoming teams.
When you and your Cavalier are ready to take your therapy dog evaluation, you will need to find an evaluator to assess whether you are ready for therapy work. But there is more than one therapy dog organization out there. Choosing the right organization is crucial. Some facilities have specific requirements, like only accepting teams evaluated by certain organizations. So, if you have your sights set on a specific organization, reach out to them first. If your dog is on a raw food diet or you provide your dog with titers vs. yearly vaccinations, not all therapy dog organizations accept that, but some do.
Speaking of organizations, there are plenty out there, each with its own unique criteria. Some of the most common ones include Alliance of Therapy Dogs, Pet Partners, Love on a Leash, and Therapy Dogs International. Be sure to check out their specific requirements before making your decision.
Subscribe to @DextertheDogandFriends for kid-friendly content!
During the evaluation, the evaluator will test your skills to ensure you’re ready to handle various situations with confidence. Once you’ve got the green light from your evaluator, send in your paperwork and fees. While you are waiting for your official badge, it’s a good time to start reaching out to facilities you’re interested in visiting. It’s best to meet with the director, take a tour, and get a feel for the environment without your dog. When you are ready to visit with your Cavalier, keep those initial visits short and sweet. It’s all about easing them into the new surroundings and ensuring they feel comfortable and confident in their role as a therapy dog.
And remember, if you don’t think therapy work is in the cards for your Cavalier, that’s perfectly fine. There are plenty of other enjoyable activities you and your Cavalier can explore together. But if therapy work is the journey you’ve chosen, then I wish you both the best of luck on this rewarding adventure.
Your comments and questions are always welcome below.
Join our vibrant Cavalier King Charles Spaniel community on Facebook, support our dedication to pet wellness on Patreon, and stay updated with our weekly newsletter for invaluable tips and insights into raising happy, healthy pets. Together, let’s make a difference in our dogs’ lives!
Google Ad Below [...]Read more...
July 10, 2024Choosing a Cavalier King Charles Spaniel Breeder
While I understand the “adopt don’t shop” idea, there are valid reasons to purchase a purebred Cavalier King Charles Spaniel from a responsible Cavalier breeder. I’ve received numerous requests on how to find a good Cavalier King Charles Spaniel puppy breeder, so let’s dive into my personal thoughts and considerations.
Educate Yourself on the Cavalier King Charles Spaniel Breed
First things first, it’s crucial to understand the breed you’re interested in. Cavaliers are charming, affectionate, and beautiful, but they also have specific needs and characteristics. Learning about the typical Cavalier personality and care can help you in deciding if a Cavalier is the right breed for your family.
Dive into the Cavalier King Charles Spaniel Breed Information
The internet has a ton of information about Cavalier King Charles Spaniels. Not all good, so take everything with a grain of salt. I would suggest looking at Cavalier King Charles Spaniel national breed clubs and Cavalier rescues. They tend to have a lot of very helpful information. Spend time reading about Cavaliers to understand their grooming care, behavior traits, size, and medical concerns.
Cavalier King Charles Spaniel Temperament and Personality: Cavaliers are known for their friendly and affectionate nature. They thrive on companionship and are often described as “lap dogs” or “love sponges” because they love to snuggle. But, they aren’t all snuggle bugs, and it’s important to note that they are spaniels, which stem from hunting genes, so they can be very active little dogs. Interestingly, Dexter is now almost fifteen, and, over the years, I have met a lot of Cavalier families who downsized from golden retrievers, I was one of them. I think because they have that same personality of fun and eagerness to be part of the family activities.
When taught properly, they are often good with children and other dogs and adapt well to a variety of living environments. I do say when taught properly, as you can’t assume you can toss any dog into a situation and they will handle it as we had hoped. As a side note, please check out my YouTube channel, Dexter the Dog and Friends, to learn more about raising kids and dogs together.
Dexter’s school assembly!
Cavalier King Charles Spaniel Maintenance and Grooming: Cavaliers require regular grooming due to their silky and long coats. This includes brushing several times a week to prevent mats and tangles. Silky? Well, some Cavaliers have a much thicker coat than others. Take my Dexter, for example. He has very long fur, and it’s silky but also super thick. Daily brushing is even better if you can swing it. It will really help to prevent mats in the first place.
Regular baths are important too. If you are using a truly natural dog shampoo (I use 4-Legger) that does not have any harmful ingredients, you can bathe as needed. When Dexter was a visiting therapy dog, he had to have a scrub-a-dub-dub before his visits, so that was weekly or every two weeks for us. But now, he gets a bath every three to four weeks. Their nails should also be trimmed regularly, and their teeth brushed daily to maintain good dental health.
Grooming Tips. Subscribe to my @RaisingYourPetsNaturally YouTube channel for more.
Trimming Your Cavalier King Charles Spaniel: Talk about a controversy! I am always pro it’s your dog; do what is best for them and you. Dexter has Chiari malformation (more on that below) and because of that, grooming is uncomfortable. Therefore, I have always kept him in a puppy cut. I lighten that thick fur, shorten him up, trim his ears, and keep his slippers short. Slippers, BTW, are the fur around their feet, or Grinch feet. If you want to keep their Grinch feet full, it is important to still trim their foot pads to prevent slipping.
Cavalier King Charles Spaniel Medical Conditions: This is where our beloved breed suffers the most. Cavaliers are prone to several hereditary conditions. It’s essential to be aware of these and ensure your breeder is proactive in health testing because that’s the only way to help our Cavaliers out of their medical mess. Key health concerns include mitral valve disease (MVD), hip dysplasia, Chiari malformation (CM) and syringomyelia (SM), and patellar luxation. Reputable breeders will conduct specific screenings to minimize the risk of these conditions in their puppies.
Understanding Health Testing for Cavaliers
For Cavaliers, it’s crucial that both the breeding dogs and their parents are health tested for hereditary diseases. It’s not just the breeding pair, but the grandparents too! The grandparents have a longer history, testing and health records. A highly regarded breeding Cavalier should be over 2.5 years old, with parents that are MVD heart clear and MRI scanned clear of CM/SM. A reputable breeder will eagerly provide copies of health certificates of each parent and grandparents or links to tests. If not, be sure to ask. If they are hesitant to share, I would be hesitant to move forward.
Mitral Valve Disease (MVD): Every breeding Cavalier King Charles Spaniel should have an annual heart exam by a board-certified veterinary cardiologist. The parents of your prospective puppy should have heart clearances from a cardiologist and be at least 2.5 years old at the time of breeding. All four grandparents should be over the age of 5 and heart clear.
Syringomyelia (SM) and Chiari Malformation (CM): Both parents should have MRI scans showing them clear of CM/SM after reaching 2 years of age. It’s even better if the grandparents have also undergone MRI scans and are clear of CM/SM.
Hips: OFA requires that a Cavalier be a minimum of 2 years old for hips to be certified. It’s recommended for grandparents to have certified hips as well.
Patellas: Testing should be done annually to ensure healthy knees and to prevent luxation in both parents.
Medium-Chain Acyl-CoA Dehydrogenase (MCAD): MCAD is a metabolic disorder that affects how Cavalier King Charles Spaniels process certain fats for energy. It’s caused by a genetic mutation that can lead to metabolic imbalances. DNA testing is essential to identify Cavaliers carrying the mutation and prevent passing it on to their offspring. This is a newer (Summer 2023) DNA test.
Episodic Falling Syndrome (EFS): Is a hereditary neurological disorder affecting Cavaliers. Breeders should ensure all Cavalier breeding dogs undergo DNA testing for EFS before mating.
Dry Eye Curly Coat Syndrome: An inherited disease that affects the eyes, skin, and feet of Cavalier. It can be detected through a DNA test.
Dry Eye: Testing for dry eye in Cavalier King Charles Spaniels involves a DNA health test to identify the presence of the genetic mutation associated with dry eye, curly coat syndrome. Testing ensures early detection and appropriate management of this hereditary condition in breeding dogs.
Don’t forget to subscribe to our @CavalierTipsandFun YouTube channel for more!
The Importance of Puppy Socialization
Puppies develop both physically and mentally right out of the gate, and even during pregnancy! A stressed mom can produce stressed, unhealthy puppies. A responsible breeder not only ensures a Cavalier puppy is medically healthy, but behaviorally as well. Breeders should prioritize the physical and mental well-being of Cavalier puppies by starting basic socialization at home. This includes introducing puppies to children, adults, outdoor environments, handling and grooming, and exposing them to different textures and obstacles.
Finding a Good Cavalier King Charles Spaniel Breeder
Many national breed clubs provide breeder lists, which are a great starting point. Look within a specific mile radius you are willing to drive to meet the breeder and puppies. Breeder websites should have detailed information on health testing and puppy socialization.
When you find a few breeders who look good on paper, contact them via email or phone. Discuss your goals and hopes for your new family member. You are looking for a connection with a breeder just like you are looking for a connection with your puppy.
Visiting the Breeder and Their Cavaliers
I recommend setting up a date and time to meet the breeder in their home and visit with their Cavaliers. Seeing the living situation and behavior of their dogs in person is a great indicator of how the puppies will turn out. Look for happy breeding dogs that are part of the family. Some breeders may be hesitant about home visits, but it’s essential for you to feel comfortable with the environment where your puppy is being raised.
Picking out Dexter! FYI he was 5 weeks here, I would bring him home at 12 weeks.
Choosing Your Cavalier Puppy
This could be an entire article on its own, but here are a few highlights to get you started. TAKE YOUR TIME! This is not a time to make a quick decision or an impulse buy. You are choosing your next family member, a living creature with strong emotions that will hopefully be with you for the next ten to twenty years.
Before meeting the puppies, have an idea about what you want to do with your Cavalier puppy and future dog. Are you looking for a canine athlete? Or maybe a therapy dog to visit children or the elderly? The personality traits of those two puppies can be quite different, so knowing your goals will help in choosing the best Cavalier King Charles Spaniel puppy for you, your family, and your goals.
Bringing Your New Cavalier Puppy Home
Picking up a new Cavalier puppy typically happens when the pup is between 12-15 weeks of age. Prepare your car for your new puppy before arriving at the breeder’s home. Items to have on hand include a travel crate, puppy blankets, healthy treats, water and bowl, and a leash and harness. If your journey includes an overnight stay, pack items for a dog friendly hotel stay.
Air Travel Considerations
I personally would never fly any of my pets in cargo, nor would I have my puppy shipped to me. Meeting the breeder, dogs, and puppies is essential. If you plan on a plane ride home, check with the airlines on what they will need before your departure.
Maintaining Contact with Your Breeder
When breeders are committed to the breed’s well-being, they may ask you to provide specific health tests on your puppy throughout its life. This means the breeder is looking to see how the puppies develop, and if there are any medical concerns over their life, they may not breed that pair again. In my book, this speaks volumes about what a responsible breeder really is.
Now that you have a healthy and behaviorally sound Cavalier puppy, it’s your job to start socialization and training. You and your puppy are ready for a lifetime of fun and joy.
I hope this updated article helps your readers in their quest to find a reputable Cavalier King Charles Spaniel breeder. Good luck at finding your BFF!
Google Ad Below
Join our vibrant Cavalier King Charles Spaniel community on Facebook, support our dedication to pet wellness on Patreon, and stay updated with our weekly newsletter for invaluable tips and insights into raising happy, healthy pets. Together, let’s make a difference in our dogs’ lives!
🐶💙Support our passion for pet wellness and unlock exclusive content, perks and early access by exploring our Patreon tiers.
Sign up for our weekly newsletter!
Join us on Facebook!
[...]Read more...
November 12, 2024Best Treats for a Cavalier King Charles Spaniel
If you’ve found this Cavalier blog by searching for “best treats for Cavalier King Charles Spaniels,” you’re probably wondering what makes a healthy dog treat for this special breed. Whether you’re looking for the best dog-training treats for your Cavalier or just healthy dog treats, it’s essential to choose options that benefit your Cavalier King Charles Spaniel’s health and waistline. Here’s what I consider when picking out healthy treats for Dexter.
Check the Ingredients in Your Cavalier’s Treats
The very first thing I do when choosing treats for Dexter is check the ingredients list. Don’t just rely on the fancy pictures on the front of the bag; the ingredient panel tells you what your Cavalier is actually eating. Even if a treat claims to be “chicken-flavored,” that doesn’t always mean it contains real chicken. Always look for whole, natural ingredients like real meat, vegetables, and fruits.
What to Avoid in Your Cavalier King Charles Spaniel’s Treats
Artificial Flavors: If you see “flavor” in the ingredient list, it’s likely a synthetic that’s meant to mimic real food. Real food ingredients are always better for your Cavalier’s health.
Added Salt: Too much salt can be harmful, especially for dogs with heart issues, like Cavaliers. Stick to treats with no added salt, as too much sodium can lead to health problems.
Preservatives: Treats should be free of artificial preservatives like potassium sorbate, sodium benzoates, BHA and BHT. These chemicals are commonly found in cheaper treats and can be harmful in the long run.
By-Products or Mystery Meat: Avoid any treats that list “meat by-products” or vague “animal fat.” We want to know exactly what’s going into our dog’s body.
Sugar or Sweeteners: Skip the sugary treats! Cavalier King Charles Spaniels can easily gain weight, and too many sugar-filled treats can contribute to obesity, which affects their health.
Grains: Many dogs, including Cavaliers, can be sensitive to corn, wheat, and soy. Grains also pack in a lot of calories. Stick to treats with grain-free ingredients.
Healthy Treats for Cavalier King Charles Spaniels
So, what should you be looking for instead? The best treats for Cavalier King Charles Spaniels are made from whole, natural ingredients. I always opt for treats made with high-quality meats, like rabbit, chicken, beef, or duck, and ingredients that support overall health.
When choosing healthy dog treats, I think about each ingredient and how it affects my dog’s health and diet. I prefer foods that can contribute to Dexter’s overall nutrition, not add-ons. If I think the treat’s ingredients are more like a candy bar, I’ll skip it.
Best Training Treats for Cavaliers
When I’m training Dexter, I want treats that are both nutritious and irresistible. Training treats should be small, easy to chew, and made from single-source protein. Some of my favorites include freeze-dried meat or dehydrated meat. These treats are not only high-value (meaning they’ll grab your Cavalier’s attention), but they’re also healthy and easy to use in training sessions.
I also may grab freeze dried dog food that consists of healthy ingredients and no fillers. They tend to be bite-sized, and I can easily cut down on some of Dexter’s fresh food for the day and replace it with the freeze-dried dog food. No extra calories needed, and he doesn’t lose any of his daily nutritional needs.
Treats for Occasional Snacking
When it’s time for a snack, I’m okay with a treat that’s a bit more substantial, like grain-free biscuits made with sweet potato or pumpkin. These treats are great for occasional use, but they do tend to be higher in calories and more ingredients. I like to keep Dexter’s treats simple and sweet.
My Top Picks for Cavalier King Charles Spaniel Treats
Dehydrated Meat: A simple, natural treat that’s great for training or as an occasional snack. Dehydrating your Cavalier’s meat treats at home is simple and can be done using a dehydrator or your oven. To start, slice the meat (like chicken, beef, or turkey) into thin, even strips, removing any fat. If using a dehydrator, set it to around 160°F and arrange the meat strips on the trays, ensuring they don’t overlap. Dehydrate for 6-12 hours, checking for proper dryness—meat should be firm and break easily. If using an oven, place the meat on a baking rack, set the oven to the lowest possible temperature, and prop the door open slightly to allow moisture to escape. Store a few treats in your Cavalier’s treat jar and the rest in the freezer to stay fresh.
Dehydrated Fruits and Veggies: Dehydrated fruits and vegetables are a great low-calorie treat for Cavalier King Charles Spaniels, providing a crunchy, natural snack without added preservatives or artificial ingredients.
Can Cavaliers have carrots? For me, this is a yes and no. Yes, carrots are perfectly healthy and nutritious for your Cavalier. I know a lot of people recommend feeding large carrots to dogs as a chew, but I do think that may pose a choking risk. You must ensure your Cavalier is safely chewing the carrot and not swallowing big chunks. The same goes for baby carrots. For me, I prefer to feed Dexter carrots as little bits. But, I am definitely a proud helicopter mom. Make sure you read the article on healthy chews for your Cavalier King Charles Spaniel if you are wanting safe-and-natural chews.
Freeze-Dried Healthy Dog Food: Freeze-dried dog food can be an easy swap from their regular diet, making it a convenient and healthy treat option for Cavalier King Charles Spaniels. Plus it’s a great treat for picky eaters.
Freeze-Dried Meat Treats (Single Ingredient): Freeze-dried meat treats are a high-protein, single-ingredient snack for Cavaliers, providing a nutritious option.
Healthy DIY Recipes for Cavaliers. Don’t forget to subscribe to @CavalierTipsandFun for more!
Final Thoughts on Choosing the Best Treat for a Cavalier King Charles Spaniel
When choosing the best treats for your Cavalier King Charles Spaniel, always prioritize natural, healthy ingredients. Look for treats that are high-quality, free of unnecessary fillers, and made with proteins you recognize. And remember, even the healthiest treats should be given in moderation.
What treats does your Cavalier love?
Join our vibrant Cavalier King Charles Spaniel community on Facebook, support our dedication to pet wellness on Patreon, and stay updated with our weekly newsletter for invaluable tips and insights into raising happy, healthy pets. Together, let’s make a difference in our dogs’ lives!
Google Ad Below [...]Read more...
August 20, 2024Why Does My Cavalier King Charles Spaniel Eat Everything?
As a devoted Cavalier King Charles Spaniel family, you may be wondering why your Cavalier seems to eat everything in sight. Leaves, rocks, plants, grass, paper, cardboard, whatever they seem to be able to get their mouth around is fair game. This can be concerning, as it should be. If your Cavalier eats something he shouldn’t, there’s a risk of poisoning or choking. This could be caused by pica, not enough food, other health-related issues, or boredom. Let’s dive in and see if, together, we can figure out why your Cavalier King Charles Spaniel eats non-food items.
What is Pica?
Pica is a condition where dogs eat non-food items. For Cavaliers, this could include chewing on blankets, rocks, dirt or other random items. While it might seem quirky, pica can be a sign of underlying issues. Understanding the root causes can help you address the problem and ensure your Cavalier receives the best care.
The Behavior Behind Pica
Cavaliers, like all dogs, need mental and physical stimulation. Without enough engagement and enrichment, they might resort to chewing on inappropriate items. A 2019 study published in The Journal of Veterinary Medical Science discovered pica is a common behavioral issue. After surveying 2,000 cases, researchers found dogs that lacked regular enrichment, whether due to being crated for too long, being bored, or just not enough physical exercise were more likely to display pica tendencies.
Behavior Issues That Might Be Causing Your Cavalier’s Pica
Boredom and Lack of Stimulation: Cavaliers are playful and intelligent dogs that thrive on activity. If they aren’t entertained, they might turn to chewing on anything they can find. Toys and interactive games are crucial in keeping them busy and satisfied.
Stress and Anxiety: A Cavalier’s anxiety or stress is a major concern when it comes to pica. A change in routine, new family members, or other stressors can cause your Cavalier to engage in pica as a coping response. Providing a safe and secure environment along with calming activities can help reduce anxiety. If you feel your Cavalier has anxiety, it’s important to address that anxiety with a professional.
Attention-Seeking: Sometimes, Cavaliers might eat non-food items to get your attention. I always say, if a dog is asking for attention, they probably aren’t getting the attention they need. Bump up your Cavalier’s training, games, and outings.
Medical Reasons for Pica
While pica can often be a sign of boredom, medical issues can contribute to pica in dogs. This is why it’s always important to speak with your Cavalier’s holistic veterinarian. Here are some common medical issues for pica in dogs.
Nutritional Deficiencies: If your Cavalier’s diet is lacking in essential nutrients, they might chew on non-food items to make up for it. Ensure that their diet is balanced and rich in the nutrients they need.
Gastrointestinal Issues: Sometimes, dogs might eat non-food items to soothe an upset stomach. If your Cavalier seems to be eating odd items frequently, it’s worth checking with your vet to rule out any digestive issues.
Some diagnostic methods your vet might suggest include:
Biopsies: Taking tissue samples from the digestive tract to check for disease.
Therapeutic Trials: Trying a medication or diet change to see if the pica improves.
Blood Work: Checking folate and cobalamin levels, and performing a TLI (Trypsin-Like Immunoreactivity) test to assess pancreatic function.
X-rays: Ruling out gastrointestinal obstructions and other potential causes.
How to Stop Pica in Your Cavalier King Charles Spaniel
The good news is that pica can often be managed with positive training and enrichment techniques. If it’s medical, following your dog’s vet’s protocol will be essential.
Provide Engaging Toys and Enrichment Activities: Offer a variety of toys that challenge your Cavalier’s mind and body, such as puzzle toys, chew toys, and interactive games. Incorporate activities like nose work games, agility courses, or scent trails to provide mental stimulation and prevent them from seeking out inappropriate items. Check out our Cavalier enrichment ideas!
Address Anxiety with a Professional: If anxiety might be contributing to your Cavalier’s pica, consult with a dog behavior consultant. They can help identify the root causes of your dog’s anxiety and develop a tailored plan to address it.
Use Positive Reinforcement: Reward good behavior with praise and treats. When your Cavalier interacts with their toys or engages in positive activities, reinforce this behavior to guide them toward what’s encouraged.
Monitor and Redirect: Keep an eye on your Cavalier’s actions and gently redirect them if they start chewing on non-food items. Providing appropriate toys and praising them when they use them can help steer them away from unwanted behaviors.
Leash Management and OutFox Field Guard: Use a leash to manage your Cavalier and prevent them from accessing non-food items so they can’t sneak off. Consider using an OutFox Field Guard, a type of protective mesh that covers their face that can prevent dogs from eating things they shouldn’t. Unlike a muzzle, which restricts a dog’s ability to open their mouth entirely, a OutFox protects against ingestion while allowing normal breathing and drinking.
Understanding and addressing pica in your Cavalier King Charles Spaniel involves a combination of detective work, positive training, proper enrichment, and, if necessary, medical evaluation. By keeping your Cavalier mentally and physically stimulated, providing a balanced diet, and offering plenty of attention and love, you can help them steer clear of inappropriate chewing and enjoy a happy, healthy life.
Have you noticed any specific triggers for your Cavalier’s pica? Share your experiences and tips in the comments below!
Google Ad Below
Join our vibrant Cavalier King Charles Spaniel community on Facebook, support our dedication to pet wellness on Patreon, and stay updated with our weekly newsletter for invaluable tips and insights into raising happy, healthy pets. Together, let’s make a difference in our dogs’ lives!
🐶💙Support our passion for pet wellness and unlock exclusive content, perks and early access by exploring our Patreon tiers.
Sign up for our weekly newsletter!
Join us on Facebook!
[...]Read more...
March 5, 2025Preparing Your Cavalier King Charles Spaniel for Air Travel
Through Dexter’s 15 years of life, we had countless adventures together, but every single one was by car. At nearly 30 pounds, flying in the cabin wasn’t an option for him, and I would never consider putting a dog in cargo. Now, with Stewart, I have the opportunity to travel by plane since he will be between 16 and 18 pounds as an adult, which is small enough to fit in an airline-approved travel crate under the seat.
I have to admit, I’m a little nervous. It’s been almost 30 years since I last flew, and my experience wasn’t great. But I’m determined to make this a smooth process for both Stewart and myself. In September, we’ll be flying from Detroit to Portland, Maine, and I want to make sure Stewart is as comfortable and confident as possible for his first airplane trip.
Preparing Stewart, My Cavalier King Charles Spaniel for Air Travel
Since Stewart has never flown before, I’m taking a step-by-step approach to help him get used to every part of the travel experience. This isn’t just about the flight itself; it’s about everything leading up to it, from riding in his crate in the car to being in a busy airport environment.
Teaching a Cavalier to Enjoy a Travel Crate
One of the biggest adjustments for a Cavalier is spending time in a small, enclosed space. Since Stewart isn’t crate trained and has some separation anxiety, I’m taking extra care to make his travel crate a safe and positive space. An airline-approved travel crate is a much tighter fit, so here’s how I’ve been getting him used to it:
Introducing the Crate Indoors – I started with short training sessions, luring Stewart into the travel crate with treats and rewarding him for stepping inside. Since it’s a tight fit, I guided him to turn around and reinforced him for doing so. Once he was comfortable moving inside, I worked on having him stay in the crate for a few seconds before rewarding and letting him out, gradually increasing the duration.
Crate Inside a Crate – To help him transition smoothly to riding in the travel crate, I placed it inside his larger crate in the van. Since he was already used to the big crate, this made it feel more familiar. For the first couple of weeks, I left the travel crate unzipped, but zipped up the larger crate.
Zipping Up While Driving – Once he was comfortable, I started zipping up the travel crate while still inside the larger crate. This allowed him to experience confinement in a secure way without making a sudden change.
Removing the Larger Crate – The next step will be taking the travel crate out of the big crate so that he’s riding in just the small one. By gradually adjusting him to this setup, he won’t even notice the change!
Socialization and Confidence Building
Beyond the crate, I want to make sure Stewart is confident in all the different environments he’ll encounter on our trip.
Walking Politely on a Leash – Stewart will need to walk calmly on a leash through the airport. We’ve been practicing polite walking in various places with different surfaces and distractions. I will continue this training with busy locations as we progress through his training.
Exposure to Crowds and Noises – Airports are full of noises; baggage carts, intercom announcements, rolling suitcases. I’m taking Stewart to different places where he can experience a variety of sounds and people in a controlled way.
Getting Used to Security Procedures – At TSA checkpoints, I’ll need to take Stewart out of his crate and carry him through security. To prepare, I’ll work on calmly lifting him out of his crate and holding him in busier environments, helping him get comfortable with the experience before our trip.
Preparing for Time in the Airport
Most airports have designated pet relief areas, but access to them depends on the layout of the airport and TSA procedures. Some airports have relief areas before security, while others have them post-security. Since Stewart will be crated during the drive and throughout check-in and security, I’ll plan ahead to find out if there’s an opportunity for a potty break before we go through security. If not, I’ll make sure he’s had plenty of time to potty before we leave for the airport.
Practicing Extended Crate Time – I’ve been gradually increasing the amount of time Stewart spends zipped up in his crate, so he’s comfortable being inside for longer periods.
Planned Potty Breaks – Since dogs can’t relieve themselves once past security, I’ll make sure to take Stewart to the airport’s designated pet relief area before heading to the gate. This is also why I teach my dogs how to potty on cue; it makes it easier to ensure they go when needed, especially in situations like this where time and access are limited.
The Flight Itself
The actual flight is the final step in our preparation. Since Stewart will be in his crate under the seat for the duration of the flight, I want to make sure he’s as comfortable as possible.
Calm, Positive Associations – I’m making sure that his crate time is always associated with good things; treats, chew items, and a cozy space.
Chews and Enrichment for the Flight –I’ll bring along a few safe chews and likely my slippers to provide comfort for Stewart during the flight.
Staying Calm Myself – Dogs pick up on our emotions, so I’ll be focusing on staying relaxed and making this feel like just another routine adventure for Stewart.
Final Thoughts
Traveling with a Cavalier King Charles Spaniel on a plane takes preparation, but with gradual exposure and a positive approach, it can be a smooth experience. My goal is to make sure Stewart feels safe, confident, and comfortable every step of the way. While I’m still a bit nervous about my first flight in 30 years, I know that by preparing Stewart properly, we’ll both be ready for our adventure to Maine.
A big thank you to all of our Cavalier friends who sent us their travel photos! Don’t forget to follow them on social media.
Have you traveled with your Cavalier on a plane? I’d love to hear about your experiences in the comments!
Google Ad Below [...]Read more...
October 30, 2024How to Bathe a Cavalier King Charles Spaniel Puppy
If you are wondering how to bathe a Cavalier King Charles Spaniel puppy at home, I have you covered. As a Cavalier mom and positive dog trainer, I’m ready to help you make bathing your Cavalier puppy not only effective but enjoyable and stress-free for your new Cavalier King Charles Spaniel puppy.
Dexter, who is now fifteen, has had his fair share of dog baths. But, today, I’m going to share how I gave Willow her first bath at home. With the right setup, some tasty treats, taking it slow, and a cozy towel, you can create a zen atmosphere for your Cavalier’s bathtime. So here’s a step-by-step guide to giving your Cavalier King Charles Spaniel puppy their first bath.
Set Up Your Puppy’s Bath Space for Safety and Comfort
First, you want to ensure your puppy’s bathtub or sink is safe and secure. You don’t want your puppy slipping on the surface of a wet tub or sink. First things first-secure the bathtub or sink so your puppy won’t slip. A good rubber mat keeps your Cavalier from slipping, and this alone will help your puppy feel safer in the tub. If your Cavalier is small, like Willow, you can easily bathe them in the sink. But, if they are larger, like Dexter, a tub is a must, or a portable dog bathtub can also work well. I haven’t used one, but I’ve heard from other Cavalier families they are great!
Warm Towel Tip: Before starting your puppy’s bathtime, place a few towels in the dryer. Then, just before you head to the bath, grab the warm towels. Then, after bathtime, your puppy can be wrapped in a warm-and-cozy towel. If you air dry your Cavalier puppy, then add some puppy blankets too, so they can cozy up in the pile of warm blankets.
How to Choose a Puppy Shampoo That is Safe
When choosing a safe puppy shampoo, the first stop is the back of the shampoo bottle to read the entire ingredient panel. Yup, you want to read each ingredient and make sure those ingredients are safe and natural. You may be surprised at the garbage that you find in some puppy shampoos.
Full disclosure, I’ve been working with the 4-Legger brand since 2016 and, in my opinion, they are the best out there. For puppies, I like their hypoallergenic SOOTHE formula. This isn’t a puppy shampoo review, but I do want to share their ingredient panel, so you can get a better idea on what a good puppy shampoo looks like.
4-Legger SOOTHE Ingredients: Organic Aloe Juice, Organic Saponified Oils (Coconut, Shea Butter, Olive, Sunflower, and Jojoba), Organic Vegetable Glycerin, Organic Rosemary Extract Order today with promo code RaiseNaturally20 for 20% off your first order.
Keep Your Cavalier’s Inner Ears Dry
Protecting those little ears is important. You can place a cotton ball gently in each ear to prevent water from sneaking in, but remember to remove them after! Or, you can simply gently press their ear to their head as you use a warm washcloth.
Be Generous with the Tasty Treats or Lick Mats
Treats are key to conditioning your puppy that bathtime is good. Bath=Treats or Bath=Lick Mat Time Giving treats throughout the bath not only keeps it positive but also helps distract them from what is going on. Talk to your Cavalier puppy through the experience. Let your puppy know how much you love them and that this is a safe experience.
If you’re looking for more gentle routines and everyday training ideas like this, my Manners, Life Skills & Foundation Training Course walks you through simple, trust-based lessons you can use at home. It’s all about helping you and your dog feel confident and connected.
Watch Willow’s First Bath and don’t forget to subscribe to @CavalierTipsandFun for more!
Introduce Your Puppy to the Bath Gently
When it’s go-time, place your puppy gently in the sink or tub. Willow was a little unsure at first, so I kept things calm and encouraging. We went slowly, allowing her to get comfortable, and rewarded her bravery with treats. You can always do this in steps over a few days if your puppy is nervous. Teaching your Cavalier puppy to enjoy a bath is going to be so important since this is a breed that can benefit from baths to keep their luxurious coat beautiful. The benefit of puppy bathing is that the process can be much shorter than when your Cavalier has a full coat.
Start the Water Slowly
Once your puppy seems a bit settled, turn on the water. Using a shower sprayer is ideal because it’s easier to manipulate around your Cavalier and get the belly and bum area easier. Always check the temperature; you want it warm, but never hot. If your pup gets nervous, reassure them with gentle touches, talk to them, and provide healthy and tasty treats. We want bathtime to be a good thing, not something to avoid.
Wet Your Puppy and Lather Up
Begin with their back, avoiding their face for now. Once they’re damp, add a little shampoo and lather gently. Go slow and talk to your pup throughout to keep them reassured. Make sure to reach all those little spots like under the belly, armpits, and legs.
When it comes to cleaning your Cavalier’s face, be careful and gentle. Grab a soft washcloth, soak it in warm water, and wring out any excess. Gently wipe around your puppy’s face, especially near the eyes and mouth, to keep things clean without needing shampoo. Cavaliers can be sensitive around their eyes, so keep it soothing and slow, making it a comfortable moment for them. If there’s any tear staining, gently focus on those areas but avoid scrubbing.
Rinse Thoroughly
It’s so important to rinse really well to avoid any leftover shampoo that could irritate their skin. Keep the water warm and gently go over each area until you’re sure they’re squeaky clean.
How to Dry a Cavalier After a Bath
Gently squeeze out as much water as possible from their coat while they’re still in the tub, especially from their ears, legs, and belly. Be careful not to pinch their skin. Then grab a warm towel and start rubbing them down right in the tub. Begin with their back and then work down to their legs, belly, and especially those floppy ears! The towel rubdown helps absorb extra moisture and keeps your puppy from dripping everywhere.
Pro tip: When it looks like your puppy is going to shake their head, try covering their ears lightly with a towel. It can help prevent ear issues and keeps the shake-off water spray to a minimum!
Should You Blow-Dry Your Cavalier King Charles Spaniel Puppy?
For a little more drying, a low heat or cool setting on a blow dryer works great. Keep the dryer moving and avoid getting too close to their skin. And, of course, more treats and sweet talk make this part easier too! I would highly recommend desensitizing your puppy to the hair drier first. You can learn how in the video below. If you are going to allow your Cavalier to air-dry, I would suggest using a dog drying jacket and warm , snuggly blanket.
Learn how to teach your Cavalier to love drying and subscribe to our other YouTube channel @RaisingYourPetsNaturally
And there you have it—bathing your Cavalier King Charles Spaniel puppy at home for the first time! If you’re wondering, when should I bathe my puppy for the first time, or how often should I bathe my puppy, it’s usually safe to start around eight to twelve weeks, assuming you are using a truly safe puppy shampoo. With these tips and a positive approach, you’ll help set up your Cavalier King Charles Spaniel puppy for a lifetime of happy bath times.
What part of your puppy’s first bath are you most nervous about? Let me know in the comments. I’d love to help make it a fun experience for both of you!
Google Ad Below [...]Read more...
October 1, 2024MCAD deficiency in Cavalier King Charles Spaniels
Last year, on my Raising Your Pets Naturally blog, I shared information about a relatively new health condition found in Cavalier King Charles Spaniels: Medium-Chain Acyl-CoA Dehydrogenase (MCAD) deficiency. As many Cavalier families know, this breed is already prone to several health issues, and adding another one to the list is upsetting.
MCAD deficiency is a genetic condition that impacts how the body breaks down certain fats for energy. Recent research has found some Cavaliers who have symptoms such as seizures, lethargy, and other health issues may have MCAD.
The initial study that brought this to the general public’s attention focused on a three-year-old male Cavalier who was experiencing seizures and unusual tiredness. After examining his blood and urine, researchers discovered elevated medium-chain fatty acids, pointing to MCAD deficiency. They then sequenced the dog’s genome and identified a specific change in the ACADM gene, which is associated with this condition.
When the researchers tested this genetic variant in 162 Cavaliers, they found that about 23.5 percent of the dogs carried the mutation. This discovery is important because it suggests that MCAD deficiency might be the reason behind the seizures and other symptoms we sometimes see in Cavaliers.
Here are some symptoms to watch for:
Seizures: Seizures or convulsions can be a key indicator of potential MCAD deficiency.
Lethargy: Unexplained and prolonged tiredness could be a sign of an underlying issue like MCAD deficiency.
Intermittent Health Issues: These episodes might include vomiting, decreased energy, or more severe symptoms like seizures.
Unsteady Gait: Difficulty walking or balance issues could occur during episodes.
Loss of Appetite: A sudden loss of interest in food might indicate a problem.
Low Blood Sugar (Hypoglycemia): This can lead to weakness, shakiness, disorientation, and seizures.
Abnormal Behavior: Changes in behavior, such as irritability or confusion, might be linked to a metabolic disorder.
Respiratory Distress: In severe cases, dogs might experience difficulty breathing during an episode.
Frequent Infections: Some dogs with MCAD deficiency may be more prone to infections.
Neurological Symptoms: Symptoms like circling, head pressing, or lack of coordination could be signs of this condition.
I know, right? A lot of these symptoms are also symptoms of other Cavalier King Charles Spaniel medical issues. While these symptoms can be caused by various factors, it’s important to consider MCAD deficiency, especially if your Cavalier is showing multiple signs.
Consider Getting Your Cavalier Tested for MCAD Deficiency
If you’re concerned about MCAD deficiency and its impact on your Cavalier King Charles Spaniel, getting your dog tested is a straightforward step you can take. The test involves a simple at-home swab, which you can easily order and perform yourself. This can provide valuable insights into whether your Cavalier carries the gene associated with MCAD deficiency.
For those thinking about adding a new Cavalier puppy to their family, it’s encouraging to know that many responsible breeders are proactively testing their breeding pairs and even the grandparents. This testing helps ensure that future puppies are less likely to inherit MCAD deficiency, contributing to healthier generations of Cavaliers.
Testing is a proactive measure that can help you make informed decisions about your dog’s health and well-being. If you’re interested in testing, talk to your veterinarian or reach out to a reputable lab for more information on how to get started.
For Cavaliers at risk of MCAD deficiency, diet plays a crucial role. Since these dogs might struggle to break down medium-chain fatty acids (MCFAs), it’s recommended to be mindful of their diet:
Limit MCTs: Foods high in MCTs, like coconut oil, palm oil, and milk products, including yogurt might need to be limited in dogs with this genetic variant.
Watch High-Fat Diets: A balanced diet, without excessive fats, is key for Cavaliers with potential MCAD deficiency.
Cavaliers that haven’t been tested for MCAD deficiency should avoid foods high in MCTs. Without knowing their genetic status, it’s best to be cautious to prevent potential health issues like seizures or other symptoms associated with the condition. If your Cavalier has had a diet rich in MCTs for a few years without any of the symptoms listed above, you may consider continuing to feed. However, the test is pretty easy and inexpensive, so it might be just easier and safer to test to know for sure.
The research on MCAD deficiency in Cavaliers is ongoing, and it’s vital for more Cavaliers to be tested. A simple swab test can determine whether your Cavalier carries the gene associated with MCAD. This testing is important not just for your Cavalier’s care, but also for responsible breeding practices to reduce the prevalence of this mutation in future generations. If you test, please contact your Cavalier’s breeder with the results.
Testing for MCADD
Canine Genetic Testing
GenSol Animal Diagnostics
Laboklin
As of June, 2024, the latest stats from a Facebook group dedicated to MCAD deficiency in Cavaliers show the following:
Genetically Affected: 49 dogs (9.78%)
Clinically Affected: 6 dogs (1.2%)
Carriers: 238 dogs (47.5%)
Clear: 214 dogs (42.7%)
These numbers highlight the importance of testing and awareness within our Cavalier community. By staying informed and proactive, we can continue to support the health and well-being of our Cavaliers.
Managing MCAD Deficiency: Diet and Care Tips
If your Cavalier King Charles Spaniel has been diagnosed with MCAD deficiency, managing their condition effectively involves careful attention to their diet and feeding schedule. I would suggest a good heart to heart with your dog’s holistic veterinarian. If your Cavalier does have MCAD deficiency you will need to avoid a high-fat diet and avoid foods high in medium-chain triglycerides (MCTs). Don’t forget to read those ingredient panels on all the foods, treats, and chews you feed your Cavalier.
Although MCAD deficiency is serious in Cavaliers, a good food protocol can help ensure your Cavalier still leads a full and enriched life.
Google Ad Below [...]Read more...
September 18, 2024How to Celebrate a Senior Dog’s Birthday and Healthy Dog Cake Recipe
It’s hard to believe that Dexter, my best friend and constant companion, is turning fifteen! I’m over the moon that I am able to celebrate this milestone with him. He may be slowing down a bit, but his spirit and spunk remains as bright as ever. As Dexter has aged, we may have tweaked what we can do, but one thing has stayed the same: we live each day to the fullest, cherishing every moment.
Over the past couple of years, I’ve seen subtle changes in Dexter’s energy and behavior. He doesn’t have the boundless energy of his younger days, and he’s been going through some senior dog anxiety. We’ve learned to adjust our activities together, and I’ve been working on helping him feel more secure as his cognition changes. Our daily enrichment now includes slow, sniffy walks, leisurely poke arounds through the neighborhood followed by a stroll, and indoor adventures. He still enjoys simple training sessions, which keep his mind sharp, and I continue his canine fitness exercises to maintain his mobility and strength.
Earlier this year, Dexter went down in his back end after a reaction to medication. It was a scary time, and I wasn’t sure what his recovery would look like. I was actually wondering if his time was coming to an end. But after three to four months of dedicated rehab, I’m thrilled to share that he’s made a full recovery! Dexter’s resilience has always inspired me, and this experience only deepened my love for him. His ability to bounce back, even at fourteen, is a testament to his incredible spirit.
With Dexter by my side, I’ve been inspired to dive into new creative projects. Over the past year, we launched this blog dedicated to Cavalier King Charles Spaniels. This is actually our second blog! Check out our first blog, Raising Your Pets Naturally. I’ve also created a children’s coloring book, Dexter’s Adventures, bringing his playful and inspiring spirit to life for a younger audience. Which makes this his 3rd children’s book! Everything I do is shaped by Dexter, and I’m so lucky for the joy and inspiration he brings.
Our mantra has always been to live each day to the fullest, and as Dexter turns fifteen, this really hits home. Every day is a gift, and I’m beyond thrilled to have Dexter with me on this journey. Together, we continue to embrace life, even as we both slow down, finding joy in the simple moments we share.
Celebrating Dexter’s birthday is more than just a tradition, it’s a reminder of the love, laughter, and resilience we’ve shared throughout his life. During Dexter’s birthday celebrations, we always make sure to support Cavalier Rescue USA, a cause that’s close to our hearts. If you’re able to donate or volunteer your time, please consider checking them out, and be sure to tell them Dexter sent you!
Here’s to Dexter, my silly monkey, stink pot, my muse, and the one who makes every day brighter with his love.
Don’t forget to subscribe to our @CavalierTipsandFun YouTube channel for more!
Print
Pin
Dog-Friendly Strawberry Birthday Cake
Here's Dexter's 15th birthday cake recipe and photos! To make his special day even more memorable, I whipped up a dog-friendly birthday cake that’s not only tasty but also healthy. This homemade dog birthday cake is packed with ingredients Dexter loves. Whether you're planning a dog birthday celebration or looking for a healthy dog birthday cake recipe, this one is sure to be a hit with your pup.
Course cake Keyword dog friendly cake, dog birthday cake,
Prep Time 1 day day Cook Time 50 minutes minutes
Servings 12 Dogs
Author Tonya Wilhelm
IngredientsOptional Blue Spirulina Gummy Paw Print Decoration6 tbsp Beef Gelatin2 tsp Blue Spirulina2 cups Boiling WaterStrawberry Dog Friendly Cake4 cups Quinoa Flour6 Eggs16 oz Strawberries Stems Removed1/4 cup Olive OilOptional Dog Frosting8 oz Cream Cheese check the ingredients to ensure it’s dog-friendly10 oz Butternut Squash Cooked
InstructionsBlue Spirulina Gummy Paw Print DecorationIn a large mixing cup, combine the gelatin and blue spirulina.Quickly stir in the boiling water until fully dissolved.Pour the mixture into the paw print cutouts in the paw-shaped cake pan. Pour any extra in other fun silicone molds.Refrigerate until set then gently remove the paw gelatin shapes.Place the paw shapes on a cookie sheet and return to the refrigerator while preparing the cake.Dog-Friendly Strawberry CakePreheat the oven to 350°F.Purée the strawberries in a blender until smooth.In a large mixing bowl, combine the quinoa flour, eggs, olive oil, and strawberry purée.Generously grease the paw print cake pan with olive oil.Pour the cake batter into the pan and bake for approximately 50 minutes, or until set.Allow the cake to cool for 15 minutes, then carefully remove it from the pan and place it on a cooling rack to cool completely.Optional Dog FrostingPurée the cooked butternut squash in a blender.Add the cream cheese to the purée and blend until smooth and well combined.Once the cake is completely cool, frost the cake with the butternut squash and cream cheese mixture.Top with the blue spirulina gummy paw print decorations for a fun and colorful touch!
Join our vibrant Cavalier King Charles Spaniel community on Facebook, support our dedication to pet wellness on Patreon, and stay updated with our weekly newsletter for invaluable tips and insights into raising happy, healthy pets. Together, let’s make a difference in our dogs’ lives!
Google Ad Below [...]Read more...
January 8, 2025How to Stop Your Cavalier King Charles Spaniel From Licking Everything
Have you ever wondered why your Cavalier King Charles Spaniel licks you or how to curb excessive licking? If so, you’re not alone. Many Cavalier parents find themselves trying to stop their Cavalier from licking so much. Let’s take a closer look at why Cavaliers lick and what you can do if it becomes too much. Cavaliers lick for various reasons, and understanding the “why” is key to changing and managing the behavior.
Cavaliers May Lick You Because You Taste Great!
One common reason is that you simply taste good. Your Cavalier might be drawn to the salt on your skin, or maybe you’ve just eaten, and they’re picking up on lingering food scents. Even coming inside after an active day outdoors can make you extra appealing to their sensitive noses. Hormones and pheromones also play a role. For example, if you’re feeling stressed or it’s that time of the month, your Cavalier might be more inclined to lick because they’re sensing these subtle changes. Not to mention when we put hand lotion on, oh, yummy!
Cavaliers Lick During Greeting Behaviors
Another reason dogs lick is as part of their greeting ritual. When you come home, they’re excited to see you and may lick as a way of saying, “Hello! I’m so happy you’re here!” It’s a natural expression of affection and enthusiasm. This behavior is especially common in Cavalier King Charles Spaniels, a breed known for their loving and people-oriented nature. Cavaliers thrive on connection and love being close to their families, so licking during greetings is often their way of reinforcing that bond.
Greeting-related licking can also be a way for your dog to gather information about where you’ve been. Dogs rely heavily on their sense of smell and taste to explore their environment, and licking is part of how they “read” the world. If you’ve been around other dogs, eaten something particularly tasty, or even just had a long day out, your Cavalier’s greeting might include licking to learn more about your adventures.
Check out the video. Don’t forget to subscribe to our @RaisingYourPetsNaturally YouTube channel.
Your Cavalier May Be Licking Because He’s Stressed
However, not all licking is tied to happy moments. Sometimes, licking can indicate stress or anxiety. This type of licking is known as a submissive or appeasement gesture. Essentially, your dog is trying to communicate that they mean no harm. You might notice this behavior around guests or strangers, where your dog licks excessively as a way to navigate the interaction. In some cases, they may even start licking their paws or nearby objects if they’re feeling particularly anxious.
How To Stop Your Cavalier King Charles Spaniel From Licking So Much
If your Cavalier’s licking becomes excessive, there are steps you can take to manage it. For instance, if your dog is licking because you taste good or they’re excited to see you, allow a quick lick and then gently redirect them. You can offer a chew toy or a bone to give them something else to focus on. This simple redirection helps channel their energy into a more appropriate activity while still acknowledging their excitement.
When licking is tied to stress, it’s especially important to avoid punishing your Cavalier. Punishment can actually make the behavior worse, as your dog may lick even more in an attempt to appease you. Instead, remain calm and redirect their attention to another behavior, such as sitting or playing with a toy. Addressing the root cause of your Cavalier’s stress and anxiety is key. Building their confidence through positive dog training can make a big difference. As your dog becomes more comfortable in stressful situations, the need for licking as a coping mechanism will naturally decrease.
In some cases, excessive licking may require professional help. If your dog’s licking seems compulsive or tied to high levels of stress, start by consulting your holistic veterinarian. They can check for any medical issues and look at your dog’s behavior history. From there, a dog behavior specialist can help you create a customized dog behavior modification plan to address your Cavalier’s needs, making life easier and more enjoyable for everyone.
If your Cavalier King Charles Spaniel’s licking is becoming a challenge, know that you’re not alone, and there are positive steps you can take to address it. With a little patience and the right approach, you can better understand why your Cavalier licks and guide them toward healthier ways of expressing themselves. If you’re feeling stuck or need personalized guidance, I offer one-on-one phone and Skype sessions to help you and your Cavalier navigate challenges like excessive licking. Together, we can create a plan that works for your unique pup and helps strengthen your bond.
Do you have a licker on your hands?
Google Ad Below [...]Read more...
September 3, 2024The Importance of Enrichment for Senior Cavalier King Charles Spaniels
Oh, Dexter. My senior Cavalier King Charles Spaniel, will be fifteen on October 6, 2024! I’m over the moon happy that he has led a long, happy life. He was diagnosed with Chiari malformation and syringomyelia in 2012, and I didn’t think he would have a very long life. Eventually, his MVD diagnosis also rolled in. But, despite his medical conditions, he has been thriving. He’s not just alive, he’s kicking!
I’m not going to lie. He started showing his age and some cognitive decline a few years ago. I have written about his life on my first blog, Raising Your Pets Naturally, so make sure you head over there for even more about Dexter’s life and care. But today, I wanted to discuss some of the things I have done to help keep Dexter as sharp as possible and try to keep canine cognitive dysfunction syndrome (CCDS) at bay. Through my experiences and research, I’ve seen how diet, positive training, and environmental enrichment can make a significant difference in maintaining his quality of life. So, let’s jump in.
What is Canine Cognitive Dysfunction Syndrome
Canine cognitive dysfunction syndrome (CCDS), is similar to dementia in humans and affects many senior dogs. Symptoms can be different from dog to dog, but some common behaviors include: disorientation, disrupted sleep patterns, decreased activity levels, and changed interactions with their environment and people. Research, including a study from the Journal of Veterinary Behavior (2016), shows that cognitive decline in dogs can significantly impact their quality of life. But early intervention and supportive care can improve CCDS symptoms and a dog’s quality of life.
The Importance of Canine Enrichment for Senior Cavaliers
Environmental enrichment is important for helping senior Cavaliers with canine cognitive dysfunction syndrome. Canine enrichment is about engaging your Cavalier’s senses, engaging their minds, and keeping them moving. I always think about “living life to the fullest.” I mean, we brought our Cavaliers into our homes so we can enjoy them and do fun things with them. Although they are beautiful, they deserve more than just a life where they lie around all day and do nothing. Just because they are seniors, doesn’t mean this mentality should change, although their activities will need to be adjusted to meet their individual needs. And it’s not just me; there’s research that backs up this theory.
Mental Stimulation: According to a study published in the Journal of Veterinary Internal Medicine (2016), mental stimulation through enrichment activities helps slow cognitive decline in senior dogs. Puzzle toys, interactive games, and scent-based activities keep the brain engaged, potentially delaying the progression of CCDS symptoms.
Reduces Stress: Canine enrichment is a great way to help reduce anxiety and stress in senior Cavaliers dealing with cognitive decline. Engaging activities and sensory stimulation can make a big difference. By adding enrichment routines to their day, you’re helping your dog feel calmer and more secure, which can ease some of the stress and anxiety that often come with cognitive issues.
Behavioral Improvement: Enrichment activities can make a big difference for senior Cavalier King Charles Spaniels who are restless or pacing. By offering mental and physical stimulation, these activities help reduce repetitive behaviors and keep your dog more relaxed.
Enhanced Quality of Life: Enrichment isn’t just about keeping your Cavalier busy. It’s about improving their overall quality of life. Engaging in enjoyable and stimulating activities brings more enjoyment, engagement, and a sense of purpose to their days, making their lives more fulfilling.
Simple Enrichment Ideas to Boost Your Senior Dog’s Quality of Life
Enrichment doesn’t have to be complicated or time-consuming. It’s all about finding simple, enjoyable activities that stimulate your senior Cavalier’s mind and body. Here are some ideas to get you started. And don’t forget to check out our article on Cavalier Enrichment Ideas.
Interactive Toys: Toys that dispense treats or require problem-solving are fantastic for mental stimulation. Depending on your Cavalier, you can use treat-dispensing toys or lick mats. When Dexter was younger, treat dispensing toys and frozen Tux toys were a hit. Now, he enjoys lick mats and snuffle mats. Food toys engage your dog’s sense of smell and taste.
Scent Games: Speaking of scent games, Dexter has always loved using his nose. Try hiding treats around the house or yard and let your Cavalier find them using his nose. Scent games are a natural way to keep your Cavalier active and provide both mental and physical exercise in a way most dogs love.
Positive Dog Training Sessions: Short, positive dog training sessions with simple cues or tricks are highly rewarding. They keep your Cavalier’s brain sharp and help build a stronger bond through shared activities.
Varied Walks or Strolls: Don’t get into a rut of going on the same walk, to the same park, on the same trail. Changing up your walking routes introduces new sights and smells. This variety provides your Cavalier with cognitive stimulation and keeps your walks fresh and interesting.
Comfortable Environment: Make sure your senior Cavalier’s living space is safe and cozy. Look out for any obstacles, and ensure good footing below. Whether you have carpet, carpet runners, grippy socks, ToeGrips or all of the above, traction is incredibly important for senior Cavaliers. They don’t have the same core strength to hold themselves up, and slick floors can be very scary and even cause injury if they slip or splay out.
Canine Fitness and Strength Building: I highly recommend setting up some sessions with a canine rehabilitation professional. Working with Dr. Sam, Dexter’s strength has been so important in his overall health and wellness. And our at home exercises aren’t just a way to keep him fit. They are also another form of enrichment, since he loves doing them! Engage in simple at-home exercises like sit-to-stand and sit-to-down exercises to help maintain your Cavalier’s muscle strength and joint mobility. Gentle range-of-motion exercises can also support your senior dog’s overall physical health and comfort.
Supporting Cognitive Health with Diet and Nutrition
Diet plays a crucial role in managing cognitive decline in senior dogs. According to research published in the Journal of Veterinary Internal Medicine (2019), a diet rich in specific vitamins and nutrients can significantly support cognitive health. Key vitamins such as vitamin E and vitamin C act as antioxidants, protecting brain cells from oxidative stress and easing cognitive issues. B vitamins, including B6, B12, and folic acid, are essential for maintaining healthy brain function. Omega-3 fatty acids, commonly found in fish and fish oil supplements, also play a vital role in improving cognitive function and managing symptoms of cognitive decline. Including these vitamins and nutrients in your dog’s diet, either through high-quality dog food (preferably fresh) or supplements, can help manage cognitive decline and enhance their overall quality of life.
Dexter, is proof of the benefits of a fresh diet. His meals are carefully prepared with high-quality, fresh ingredients and free from unnecessary chemicals. I’m convinced this fresh, balanced diet, rich in essential nutrients, has played a significant role in keeping his mind sharp and supporting his overall well-being.
How Positive Training Supports Cognitive Health in Senior Cavaliers
Positive training and routine play a vital role in supporting a senior dog’s mental sharpness and managing the effects of cognitive decline. As a positive dog trainer, I’ve taught Dexter plenty of fun and useful tricks, not just for good behavior, but also to keep his mind engaged and sharp. Each training session isn’t just about obedience; it’s about giving Dexter the mental stimulation he needs to stay mentally fit as he ages.
Incorporating regular training sessions into your dog’s routine is a great way to improve their cognition and their body. Focus on simple tricks and behaviors that challenge their mind and body without causing stress. I have noticed Dexter’s abilities change over the years, so it is important to change with them. By tailoring positive dog training sessions to your Cavalier’s needs and incorporating enjoyable activities into their day, you can help your Cavalier maintain their mental clarity and overall well-being.
Follow our YouTube channel for more Cavalier enrichment ideas!
Final Thoughts
Incorporating canine enrichment into Dexter’s daily routine has been essential for maintaining his quality of life. It’s not just about keeping him busy; it’s about enhancing his mental, emotional, and physical well-being. Enrichment is just one piece of the puzzle for Dexter’s health. A fresh, balanced diet and consistent, positive training are also vital for supporting his well-being as a senior dog.
Dexter’s vibrant health is a testament to how a combination of mental stimulation, nutritious food, and engaging routines can make a real difference. I encourage all Cavalier families to integrate these practices into their senior dogs’ lives. By focusing on enrichment, diet, and training, you can significantly improve your dog’s overall well-being and help them enjoy their golden years to the fullest.
I host a private Facebook group for Cavalier King Charles Spaniels, and we have a big focus on canine enrichment ideas and challenges to keep your Cavalier engaged and thriving!
How do you incorporate enrichment, diet, or training into your senior dog’s routine? Share your tips and experiences below!
Enrichment Increases Relaxation
https://www.ncbi.nlm.nih.gov/pmc/articles/PMC8772568/
https://www.sciencedirect.com/science/article/pii/S0168159123002691
Join our vibrant Cavalier King Charles Spaniel community on Facebook, support our dedication to pet wellness on Patreon, and stay updated with our weekly newsletter for invaluable tips and insights into raising happy, healthy pets. Together, let’s make a difference in our dogs’ lives!
Google Ad Below [...]Read more...
February 5, 2025How to Teach Cavalier King Charles Spaniel to Ignore Distractions
When I’m out with Stewart, my 7-month-old Cavalier, we get stopped a lot. People see his big, sweet eyes, his cute winter coat and wiggly little body and immediately want to say hello. And if this goes for people with or without their dog.
But here’s the thing, not every outing is a social event, and not every person or dog needs to be greeted.
Dog Socializing vs. Everyday Walks
There’s a time and place for socializing, and there’s a time for simply spending quality time with Stewart on our walks and outings. I make sure Stewart has appropriate and positive, structured experiences meeting new people and dogs in a controlled way. This helps him learn confidence, good manners, and appropriate greetings. But, at the same time, I’m teaching him an equally important skill, ignoring distractions such as people and dogs and walking politely with me.
If every walk turns into a meet-and-greet, dogs start to expect it. They pull toward every person or dog, they get frustrated when they don’t get to say hello. That can lead to barking, lunging, or general overexcitement, making walks stressful instead of enjoyable.
Why It’s Important to Teach Your Dog to Ignore Other Dogs and People
Not Every Dog Wants to Say Hello
Some dogs are nervous, in training, or simply not interested. Teaching Stewart to walk past other dogs calmly means he won’t invade another dog’s space or make an already anxious dog uncomfortable.
People Aren’t Always Dog People
Shocking, I know! But not everyone wants a happy little Cavalier bouncing up to them. Some people are afraid of dogs, allergic, or just in a hurry. Stewart is learning to walk past without expecting attention makes life easier for everyone.
Impulse Control is a Life Skill
Dogs who can stay focused, even when exciting things are happening around them, are safer and more enjoyable to live with. If Stewart learns that he doesn’t always get what he wants the moment he wants it, he’ll be better at handling frustration in other areas of life too.
Not Every Walk is About Socializing
Sometimes, I just want to enjoy a peaceful walk with Stewart. He doesn’t need to greet everyone to have a fulfilling experience, sometimes sniffing, walking together, and taking in the world is enough.
Better Walks in Busy Places
By teaching Stewart to walk with me instead of focusing on every dog or person, our walks are smoother and more enjoyable. Crowded sidewalks, busy parks, or narrow trails are much easier to navigate when he stays by my side rather than pulling toward distractions.
Prepping for Travel & Public Outings
I plan on traveling with Stewart, airports, dog-friendly boats, outdoor dining, places where he’ll need to stay close and focused on me. Teaching him now that he doesn’t always get to greet everyone will make these experiences stress-free and enjoyable for both of us.
Don’t forget to subscribe to @CavalierTipsandFun for more videos!
How I’m Teaching Stewart to Walk Past Distractions
Reward Calm Choices
When Stewart notices a dog or person, I reward him. I’m teaching him they=treats. Eventually, he will start to make that connection, see the distraction and look at me for the reward. This is what I’m going for. Over time, he’ll learn that staying focused on me, and it’ll be a non-event for him, he’ll simply walk past without even thinking about stopping to greet.
Use Distance
If Stewart’s too excited or distracted, I create more space between us and the distraction to help him refocus. As he gets better at ignoring, I’ll gradually close that gap, making it easier for him to pass by calmly.
Give Him a Job
I use cues like his name game, watch me, paws up, touch to keep his attention. Engaging his brain with productive tasks means he’s less likely to pull toward distractions.
Set Clear Expectations
I make sure Stewart knows that pulling towards people or dogs does not work. If he starts to pull, I either toss in his name game, stop and wait for him to renege, or add more distance. It truly depends on the situation. I do want him to be successful.
Handling Approaching People
When someone is steadily approaching your Cavalier, how you handle it depends on your goal at that moment. As a positive dog trainer, sometimes I want to explain and educate. If so, then I’ll squat down with Stewart, reward him for staying focused on me, and let the person know we’re training and practicing ignoring distractions. If I choose to say hello, I tell Stewart, “Let’s say hi,” and calmly approach. But sometimes, I just want to keep moving, so I give a quick, upbeat “We’re not saying hello, thank you!” and continue walking, keeping Stewart focused on me. It’s all about setting the tone for the interaction while making sure my dog stays engaged and confident.
Finding the Balance
There’s a time and place for socializing, and there’s also a time to focus on the walk itself. If you do want to stop and say hi, try to stop about 10 feet away from the other person or dog and ask first if it’s okay. Keep in mind that others might be training their dogs or dealing with their own challenges during the walk, so giving them some space is always a good idea. Being considerate makes the experience better for everyone, whether it’s a quick greeting or just calmly walking by each other. I then give Stewart the cue, “Let’s say hi,” so he knows he has permission to greet.
There’s nothing wrong with letting your dog greet others when it’s appropriate, but it’s just as important for them to learn that not every outing is a social event. Teaching Stewart when it’s time to engage and when it’s time to focus on me makes him a better walker and ensures our walks stay enjoyable.
When you’re walking your Cavalier King Charles Spaniel, how do you decide when it’s time to socialize and when it’s time to focus on the walk?
Google Ad Below [...]Read more...
April 21, 2024Tips for traveling with your Cavalier King Charles Spaniel. Dog-friendly vacation ideas.
Follow @CavalierTipsandFun for more videos.
Don’t forget to subscribe to @RaisingYourPetsNaturally for more!
Your comments and questions are always welcome below.
Join our vibrant Cavalier King Charles Spaniel community on Facebook, support our dedication to pet wellness on Patreon, and stay updated with our weekly newsletter for invaluable tips and insights into raising happy, healthy pets. Together, let’s make a difference in our dogs’ lives!
[...]Read more...
October 15, 2024Cavalier King Charles Spaniel Travel Tips
As a Cavalier mom and positive dog trainer, I know how important it is to help our Cavaliers feel comfortable and safe during car rides. Whether you’re planning a quick trip to the park or a longer dog-friendly road trip, making sure your Cavalier King Charles Spaniel enjoys the car ride is key to a stress-free trip for both you and your dog.
When Dexter and I hit the road, I never have to worry about how he’ll handle the ride. He’s a fantastic travel companion because I spent time training him to feel confident and at ease in the car. Today, I want to share my top tips on how you can prepare your Cavalier for car travel and road trips and turn them into a relaxed, happy traveler too.
1. Start with Short and Positive Rides
Just like with any new experience, easing your Cavalier into car rides instead of popping them into the car for a twelve-hour road trip is super important. Begin by taking short trips to fun, dog-friendly places like the local park or pet store. Keep the first few rides short and sweet, no more than ten-to-fifteen minutes. The goal is to associate the car with positive and fun destinations. A trip to the vet does not count as a fun visit for most dogs.
2. Create a Safe Space in the Car
Safety should always be a priority when traveling with your Cavalier. A secure dog car seat or crash-tested harness designed for small breeds like Cavaliers is a must. I personally recommend looking into the Center for Pet Safety’s approved products, as they conduct independent crash testing for dog travel gear. If a brand states they are crash tested, make sure to watch their crash tested video.
Dexter typically travels in a small crate. Because of his Chiari Malformation and syringomyelia and large size, travel harnesses aren’t the most comfortable for him. However, when we travel in the small car, a crash-tested and passed (yes, make sure they have passed the test) is our go-to. The key is to find a comfortable yet safe setup so your Cavalier feels relaxed without compromising their security.
3. Pack Familiar Comfort Items
Make your Cavalier feel more at home by packing some familiar items for the ride. When Dexter was a puppy, he would cozy up with his baby blanket and soft toy. Now, he has a therapeutic mat inside his crate. He likes to stay cool, so I also have a fan pointing at him. These little comforts can help reduce anxiety and make the ride smoother for dogs who may initially feel unsure about the car.
If your Cavalier is a bit anxious, place something with your scent, like a worn T-shirt next to your Cavalier. Your presence, even in the form of scent, can be calming for your Cavalier, especially if they’re a bit nervous during the first few rides.
4. Plan for Frequent Breaks
When traveling for more than an hour, make sure to schedule frequent potty and stretch breaks. Cavaliers are active little dogs, and, like all of us, they need to stretch their legs and take in their surroundings. I like to plan stops at dog-friendly rest areas or parks where Dexter can explore, do his business, and get a little energy out before continuing the journey.
Remember, each break is an opportunity for positive training. Use it as a chance to reward your dog for good behavior during the ride, and they’ll look forward to the next part of the trip.
5. Help Your Cavalier Relax with Calming Music
One of my favorite dog travel hacks is playing calming music designed for dogs during long car rides. I’ve been a fan of the iCalmDog portable speaker, which plays clinically-tested music that helps keep dogs calm and relaxed. Just be careful not to fall asleep at the wheel yourself!
Check out our all Cavalier calming playlist on YouTube!
6. Monitor Your Cavalier’s Well-Being
Keep an eye on your Cavalier’s behavior throughout the trip. Some Cavaliers may experience motion sickness, especially on longer rides. If your dog starts to drool excessively, whine, or seem uncomfortable, it might be time for a break. You can try natural remedies like ginger treats (with your vet’s approval) or consult your vet for other options.
If your Cavalier seems overly tired or stressed, don’t be afraid to cut the trip short. The goal is for travel to be a positive experience, and pushing them too far can have the opposite effect.
By starting with short, positive experiences and keeping their safety and comfort in mind, you can help your Cavalier King Charles Spaniel become a happy traveler. Dexter loves our road trips, and I’m sure your Cavalier will too!
Do you have any favorite travel tips for Cavaliers? Drop them in the comments!
Follow us on YouTube For fun dog-friendly travel adventures!
Google Ad Below [...]Read more...
December 25, 2024Winter Tips for a Cavalier King Charles Spaniel
Brrrr, it’s cold out there! Winter in Ohio can be tough, and today, it’s a chilly 15 degrees. Thankfully, Stewart and I are bundled up inside, but it’s the perfect time to share some essential winter safety tips for your Cavalier King Charles Spaniel. Whether you’re venturing outdoors or staying warm indoors, these precautions and activities will help keep your pup safe, healthy, and happy all winter long.
Safety First: Protecting Your Cavalier in Winter
Limit Outdoor Time
Our Cavaliers are family members, and they thrive indoors with us. While Stewart loves his outdoor potty breaks and a quick sniff around the yard, I always limit his time outside when temperatures dip. Frostbite and hypothermia are real risks for dogs, especially small breeds like Cavaliers. Keep outings short, and always monitor your pup for signs of discomfort.
Protect Those Paws
A dog’s paw pads aren’t built to handle extreme cold or icy surfaces. For quick potty breaks, toddler socks can be a lifesaver; they’re easy to put on and don’t need to be perfect since they’re just for a short trip. Shoot for dark colors, so that if one falls off, it’s easier to find in the snow. For longer walks or outdoor play, dog boots like Saltsox are fantastic options. If your Cavalier goes outside barefoot, be sure to clean their paws thoroughly with a warm washcloth or natural pet wipes to remove ice, salt, and chemicals that could irritate their skin. I make up a bowl of water with a splash of 4-Legger shampoo and a washcloth to clean paws. I make a new batch each day. (Order 4-Legger today with promo code RaiseNaturally20 for 20% off your first order.)
Scoop the Potty Area
I always scoop a clean, clear area in the yard for potty breaks. Cavaliers, like most dogs, prefer a neat spot for their business. A wide, shoveled path ensures your Cavalier can move around comfortably without getting buried in snow.
Coats and Sweaters for Your Cavalier
Dog coats and sweaters are a must for Cavaliers. Look for a jacket that provides full range of motion and covers your pup’s back and belly. Indoors, a cozy sweater can keep your Cavalier comfortable. If you notice your Cavalier sleeping in a tight ball, or even shivering, a dog sweater is a great idea. Stewart’s favorite sweaters are custom-made by MeekByDesign, but there are plenty of great options online or in pet stores.
Should a Cavalier Wear a Hat in the Winter?
Cavaliers’ long, luxurious ears attract snow and ice like a magnet! A lightweight dog hat or snood can protect your Cavalier’s ears during snowy adventures. Afterward, be sure to dry their ears gently with a soft towel.
Staying Warm and Cozy Indoors
When your Cavalier comes inside from the snow or cold, use a super-absorbent microfiber towel to dry him off thoroughly. For an extra touch of luxury, I like to pop a favorite blanket in the dryer so my dog can snuggle up with something warm. These little comforts make a big difference on chilly days!
Indoors, I keep Stewart active and engaged with puzzle toys, hide-and-seek games, and short training sessions. A mentally stimulated pup is a happy pup, even when it’s too cold for a long walk.
Winter Nutrition for Cavaliers
Did you know that certain foods can help your Cavalier King Charles Spaniel stay warm during the chilly months? According to Traditional Chinese Medicine (TCM), foods have energetic properties that can influence the body’s temperature and overall balance.
In the winter, it’s beneficial to incorporate “warming” proteins into your dog’s diet. Proteins like chicken, lamb, venison, and even goat are considered warming and can help offset the cold temperatures. These proteins are especially good for dogs who seem more sensitive to the cold or have lower energy during the winter.
You can also include warming spices and herbs like ginger or turmeric in small, dog-safe amounts to add a cozy touch to their meals. These not only are warming, but also support joint health during cold weather.
If you’re new to adjusting your dog’s diet seasonally, start slow by adding one or two warming ingredients to their current meals. Always consult with your vet or a canine nutrition expert to ensure your Cavalier’s diet remains balanced and meets their individual needs.
Embrace the Season
Stewart may be new to my home, but we’re already making the most of winter together. From brisk walks in his cozy new jacket to snuggling under a warm blanket on chilly evenings, these little moments remind me of the special bond we share. No matter the season, Cavaliers have a way of bringing warmth and joy to our lives.
How do you keep your Cavalier comfortable and happy during the winter months? Share your tips below, I’d love to hear them!
Google Ad Below [...]Read more...
March 30, 2025Health Benefits of Omega-3s for Cavaliers
Omega-3 fatty acids are one of the most important nutrients for Cavaliers, yet they’re often overlooked or misunderstood. These essential fats support heart health, brain function, joint mobility, skin condition, and even immune function. But not all omega-3 sources are created equal. Fresh fish, supplements, and plant-based options vary in effectiveness, and factors like oxidation and sourcing impact their quality. In this guide, I’ll break down the best omega-3 sources, how to choose high-quality options, and what to avoid to ensure your Cavalier King Charles Spaniel gets the maximum health benefits from their Omega-3s.
Skin and Coat Health
Omega-3s help maintain a healthy skin, reducing dryness, flakiness, and itchiness. They also improve coat condition, making your Cavalier’s fur shinier and softer. Cavaliers, like many other breeds, can be prone to allergies and skin sensitivities, and omega-3s can help manage these issues by reducing inflammation in the skin.
Joint Health and Mobility
As Cavaliers age, they can develop arthritis and joint stiffness. Omega-3s have been shown to reduce inflammation in the joints, helping to alleviate pain and improve mobility. Dogs receiving sufficient omega-3s often experience less stiffness and better flexibility, which is particularly important for senior Cavalier King Charles Spaniels.
Brain and Cognitive Function
DHA is a crucial component of brain cell membranes and plays a significant role in cognitive function. In Cavalier puppies, it supports brain development and learning. In senior Cavaliers, it helps prevent cognitive decline and supports memory and problem-solving skills. Studies have shown that dogs supplemented with DHA perform better on cognitive tests than those that do not receive adequate amounts.
Heart Health
Omega-3 fatty acids are essential for supporting cardiovascular function by helping regulate heart rhythm, reduce blood pressure, and improve circulation. For Cavaliers, who are especially prone to mitral valve disease (MVD), a common heart condition in the breed, omega-3s are even more important. Given their susceptibility to MVD, ensuring your Cavalier’s diet is rich in omega-3s can play a crucial role in supporting their heart health and may help slow the progression of the disease.
Immune System Support and Inflammation Control
Chronic inflammation is a factor in many health issues, including autoimmune conditions, allergies, and even cancer. For Cavaliers, who are prone to conditions like Chiari malformation, managing inflammation is especially critical. Omega 3s play an important role in regulating the body’s inflammatory response, helping to balance the immune system and reduce excessive inflammation. By incorporating omega 3s into your Cavalier’s diet, you can help protect against the inflammation that worsens conditions like Chiari malformation and support overall immune health.
Best Omega-3 Sources for Cavaliers
The best omega-3 sources for dogs are those that provide EPA (eicosapentaenoic acid) and DHA (docosahexaenoic acid) in their most bioavailable forms. These two types of omega-3s are the most beneficial for dogs, as they are directly used by the body to support a variety of vital functions, from heart health to joint mobility. The most bioavailable forms of these omega-3s are typically found in marine-based sources, such as oily fish. Fish like salmon, sardines, mackerel, and anchovies are excellent options because they contain high levels of both EPA and DHA, making them ideal for supporting your Cavalier’s health. These fish provide omega-3s in a form that’s easy for the body to absorb, ensuring that your dog gets the maximum benefits.
In addition to fish, fish oil supplements can also be a great source of omega-3s. However, it’s important to choose high-quality, purified fish oils that are free of contaminants like mercury. If your Cavalier is sensitive to fish or you prefer plant-based sources, algae oil is another excellent option, as it provides DHA without the fishy aftertaste or concerns about ocean contaminants. While flaxseed and chia seeds offer plant-based omega-3s, they contain ALA (alpha-linolenic acid), which the body must convert into EPA and DHA, an inefficient process for dogs. This means that marine-based omega-3s are typically the best option for achieving optimal health benefits. By rotating between these high-quality sources, you can help ensure your Cavalier is getting the most effective omega-3s for their needs.
Watch our fresh fish DIY and don’t forget to subscribe to @CavalierTipsandFun for more!
Fresh Fish (Whole Food Source of EPA and DHA)
Feeding fresh, oily fish is one of the most natural ways to provide omega-3s. However, choosing the right type of fish is essential due to concerns about mercury levels, sustainability, and proper sourcing.
Some of the best options for Cavaliers include:
Sardines: Small, low-mercury fish that are naturally high in omega-3s. They are one of the safest whole-food sources.
Anchovies: Similar to sardines, anchovies are rich in DHA and EPA while having minimal contamination risks.
Herring: Often used in high-quality pet foods, herring is another small, oily fish packed with omega-3s.
Atlantic Mackerel: This species is safe, but avoid king mackerel, which is high in mercury.
Wild-Caught Salmon: A great source of omega-3s, but farmed salmon may contain higher levels of contaminants.
When feeding fresh fish, it’s important to either lightly cook the fish or feed it raw if it’s safely sourced. Cooking fish too much can break down some of the omega-3s, while raw fish (from a trusted, safe source) can provide the most nutrients. However, if you choose to feed raw fish, it should be frozen for a week first to reduce the risk of parasites, which can be a concern with certain types of fish.
It’s essential to avoid fish that have been prepared with added salt, spices, or sauces. These seasonings can be harmful to dogs. Also, always avoid feeding cooked bones, as they can splinter and cause serious internal injuries.
Fish Oil Supplements
Many pet parents turn to fish oil supplements to provide omega-3s, but not all fish oil supplements are the same. Choosing the right one for your Cavalier is important to ensure you’re giving them the best quality and the most effective nutrients.
How to Choose a High-Quality Fish Oil
When selecting a fish oil supplement, look for species-specific labeling. Instead of settling for generic “fish oil,” opt for oils like sardine oil, anchovy oil, or krill oil. This ensures transparency in sourcing and gives you a better idea of where the oil is coming from.
When choosing a fish oil supplement, it’s important to look at the levels of EPA and DHA, the two types of omega-3 fatty acids that provide the most health benefits for your dog. The label on the bottle should specify the amount of EPA and DHA in each serving, not just the total amount of fish oil.
For example, a bottle might say it contains 1,000 mg of fish oil per serving. But if the label doesn’t show how much of that is EPA and DHA, it’s hard to know how much of the oil is actually providing the beneficial omega-3s your dog needs.
Some fish oils may have more EPA, which is great for joint and heart health, while others may have more DHA, which supports brain function and reduces inflammation. Knowing exactly how much of each omega-3 is in the oil allows you to be more confident that you’re giving your Cavalier the right amount for their specific health needs. This way, you can make sure you’re getting the full benefits of the omega-3s in the supplement.
Also, choose products that are third-party tested. Reputable brands will test their oils for harmful contaminants like heavy metals, PCBs, and oxidation levels. This helps ensure the oil is safe for your dog and that it hasn’t been compromised during production.
Liquid vs. Capsules
Fish oil comes in two common forms: liquid and capsules. Liquid fish oil (often found in pump bottles) is convenient because it’s easy to dose, but it’s more prone to oxidation once opened. Oxidation occurs when the oil is exposed to light, heat, or air, so it must be stored in the refrigerator and used quickly to maintain its freshness.
On the other hand, capsules are more stable since the oil is protected from air exposure, which reduces the risk of oxidation. However, they can be harder to dose accurately, especially for small dogs.
Oxidation Risks
One of the biggest concerns with fish oil is oxidation. Omega-3s are very sensitive to light, heat, and oxygen, and when the oil oxidizes, it can lose its effectiveness and even become harmful. Signs of rancid fish oil include a strong fishy smell or an unusual taste.
To minimize the risk of oxidation, here are a few tips:
Choose dark glass bottles instead of clear plastic, as glass helps protect the oil from light exposure.
Store the fish oil in the refrigerator after opening to keep it fresh.
Use the oil within 30 to 60 days of opening to ensure you’re getting the best quality.
By taking these steps to choose a high-quality fish oil and storing it properly, you can help ensure your Cavalier gets the full benefits of omega-3s for their heart, joints, and overall health.
Green-Lipped Mussels: A Powerhouse for Joint Support
Green-lipped mussels (Perna canaliculus), native to New Zealand, are one of the most beneficial natural sources of omega-3s for dogs. Unlike traditional fish-based omega-3 supplements that provide primarily EPA and DHA, green-lipped mussels contain a unique omega-3 fatty acid called ETA (Eicosatetraenoic Acid). ETA has been found to have additional anti-inflammatory properties, making it especially helpful for dogs suffering from joint issues like arthritis.
The anti-inflammatory effects of ETA, along with the presence of glucosamine and chondroitin, make green-lipped mussels an excellent option for promoting joint health. These compounds work together to support cartilage repair, reduce inflammation, and enhance mobility in dogs experiencing joint stiffness or discomfort. This combination is particularly beneficial for dog breeds, like Cavaliers, that are prone to developing joint issues as they age.
Comparing Omega-3 Content in Green-Lipped Mussels vs. Fish
In terms of EPA and DHA content, green-lipped mussels may not provide as high a concentration per serving as fatty fish, but their ETA provides an extra layer of anti-inflammatory benefits. This makes green-lipped mussels an excellent addition to a dog’s diet, particularly for those with joint concerns.
How to Feed Green-Lipped Mussels to Your Dog
Green-lipped mussels are often available as freeze-dried powder or in chewable treat forms. Both forms make it easy to incorporate them into your dog’s daily routine, but the powder can be sprinkled over food or mixed into homemade dog meals for ease of use.
As with any supplement, it’s important to start with a small amount to monitor how your dog responds, especially if they are new to green-lipped mussels or have a sensitive digestive system. For the dosing of green-lipped mussels, it’s always best to refer to the product-specific guidelines since the concentration can vary depending on the form (freeze-dried powder, chewables, etc.) and brand. However, a general recommendation often seen in supplements for dogs is:
Start with 1/4 teaspoon per 10 pounds of body weight per day for powder form. This can be adjusted based on the dog’s response and their specific needs.
Plant-Based Omega-3s: Less Effective for Dogs, but Still Valuable
When it comes to omega-3 fatty acids, plant-based options are less efficient for dogs compared to animal sources like fish, as they primarily contain ALA (alpha-linolenic acid). While ALA is an essential omega-3 fatty acid for humans, dogs face challenges in converting ALA to the more bioavailable forms, EPA (eicosapentaenoic acid) and DHA (docosahexaenoic acid), which are the forms most beneficial for their health. This makes plant-based omega-3s less effective for dogs in supporting the same health benefits as those derived from marine sources.
Why ALA Is Less Effective for Dogs
Dogs have a relatively inefficient ability to convert ALA into EPA and DHA. The process of conversion requires specific enzymes, which dogs do not produce in large enough quantities to convert sufficient ALA into the needed forms of omega-3s. As a result, while plant-based omega-3s can still offer some benefits, they are not as effective at delivering the omega-3s that support joint health, cognitive function, and heart health in the same way that fish-derived omega-3s do.
Nevertheless, plant-based sources of omega-3s are still valuable as part of a balanced diet. They can provide supplemental omega-3s and contribute to overall health but should not be relied on as the primary omega-3 source for dogs.
Common Plant-Based Omega-3 Sources
Flaxseeds: Flaxseeds are one of the most popular plant-based sources of ALA omega-3s. They can be ground and added to your dog’s food. However, the conversion rate of ALA to EPA and DHA is low in dogs, so while flaxseeds may offer some benefits, they should not be relied on exclusively for omega-3 needs.
Chia Seeds: Like flaxseeds, chia seeds are rich in ALA. These tiny seeds are highly nutritious and can be added to a dog’s meals. They can absorb water and form a gel, which can be helpful for digestive health. While chia seeds may offer some benefit, they should be seen as supplementary, not primary, sources of omega-3s for dogs.
Hemp Seeds: Hemp seeds contain ALA as well, along with a well-balanced ratio of omega-3 and omega-6 fatty acids. While these can contribute to overall fatty acid intake in dogs, their conversion to EPA and DHA is also limited. Hemp oil, a more concentrated form, may be more effective but still not as efficient as fish oil or algae oil in providing the omega-3s dogs need for optimal health.
Algae Oil: The Better Plant-Based Alternative
While plant-based sources like flaxseeds and chia seeds are valuable in certain aspects, algae oil is usually a better plant-based option for dogs. Algae oil is derived from marine algae, which naturally produce DHA (and sometimes EPA) without requiring the conversion process. Unlike other plant-based sources that contain ALA, algae oil provides a direct source of DHA, the omega-3 that plays a critical role in brain function, heart health, and reducing inflammation.
Algae oil is especially beneficial for pet parents who prefer to avoid fish-based products for ethical, environmental, or allergy reasons. It provides the same essential omega-3 fatty acids found in fish oil, but without the potential risks associated with mercury contamination or fish-based allergens. This makes algae oil a great plant-based alternative for ensuring your dog receives the health benefits of omega-3s.
Algae oil supplements are available in capsules or liquid form and can be incorporated into your dog’s diet just like fish oil. The recommended dosage varies by brand, so it’s important to follow the manufacturer’s guidelines and consult your vet to ensure the right amount for your dog.
While algae oil is a great alternative to fish oil, there are a few differences to consider. One of the main differences is that fish oil generally contains more EPA, an omega-3 that is particularly helpful for reducing inflammation and supporting joint health, while algal oil tends to have more DHA, which is important for brain and eye health. Because of this, if your dog needs more EPA for inflammation or joint issues, fish oil might be a better choice. Additionally, algae oil can be more expensive than fish oil, and it may not be as widely available in stores. Another thing to note is that fish oil is often more bioavailable, meaning it’s easier for dogs to absorb and benefit from. That said, algae oil is still a very good option, especially if you’re looking for a more sustainable, vegetarian, or fish-free supplement. It’s always a good idea to talk to your vet about which type of omega-3 is best for your dog’s specific health needs.
How Much Omega-3 Does Your Cavalier Need?
For general health, the recommended omega-3 dosage, specifically EPA and DHA, is typically between 20 to 55 mg per pound of body weight per day. If your Cavalier has specific health issues, like arthritis or inflammation, the dosage may increase to 50 to 100 mg per pound. If your dog is lacking omega-3s, you might notice signs like dry skin, excessive shedding, joint stiffness, or a dull coat. To ensure you’re giving the right amount, it’s important to consult your vet, who can recommend the proper dosage based on your dog’s size and health concerns.
Final Thoughts
Omega 3s are essential for your Cavalier’s overall health, supporting heart, brain, joint and skin function. By incorporating a variety of high quality omega 3 sources such as fish, green lipped mussels and supplements, you can ensure your Cavalier King Charles Spaniel receives a well rounded intake of these beneficial fatty acids.
Quality matters, so focus on bioavailable forms of EPA and DHA, and always rotate the sources you use to prevent imbalances. Whether you opt for fresh fish, fish oil or green lipped mussels, it’s crucial to store and handle these sources properly to avoid oxidation.
Before making any changes, check with your veterinarian to tailor an omega 3 plan that best suits your Cavalier’s individual health needs. Consistently including omega 3s in their diet will support long term health and vitality, helping your dog thrive at every stage of life.
Do you feed your Cavalier fresh fish?
Google Ad Below [...]Read more...
April 17, 2025Gentle, Safe, and Effective for Our Sensitive Cavaliers
Fleas and ticks. Just hearing those words makes me itch. But as a natural Cavalier Mom, I’ve always been cautious about what I put on or in my dogs, especially with delicate and sensitive breeds like Cavalier King Charles Spaniels. These little sweet hearts often have sensitive skin, luxurious coats, and sometimes underlying conditions like Chiari malformation or syringomyelia, which can make them more vulnerable to adverse reactions.
I’ve been on this natural journey for years, first with Dexter and now with Stewart. Along the way, I’ve learned that staying chemical-free when it comes to flea and tick care is absolutely possible, it just takes a little planning and a lot of label reading.
This is the natural flea and tick routine I’ve found works best for my Cavaliers.
Why I Choose a Natural Approach for My Cavalier King Charles Spaniels
Conventional flea and tick treatments may offer quick results, but they also come with serious risks. Side effects can range from skin irritation, itching, and digestive upset to more concerning issues like tremors, seizures, and in some cases even organ damage. These are not small concerns.
For a breed like the Cavalier King Charles Spaniel, those risks are even more concerning. Cavaliers are already prone to neurological conditions like Chiari malformation, seizures, tremors, and episodic falling syndrome. I’m especially cautious about using anything that lists seizures or neurological side effects as possible outcomes. It just doesn’t make sense to use a treatment that could trigger the very issues this breed is already vulnerable to.
Choosing a natural approach isn’t about trying to be perfect. For me, it’s about reducing chemical exposure wherever I can and building a thoughtful, layered prevention plan that supports overall health instead of relying on a single product to do it all.
My Natural Flea and Tick Prevention Plan for My Cavalier King Charles Spaniel
1. Regular Grooming and Bathing-I bathe Stewart every three to four weeks using a safe, gentle dog shampoo made without synthetic preservatives, artificial fragrances, or harsh surfactants. I’ve been using 4-Legger’s USDA-certified organic formulas for years because I trust their ingredient panel and transparency. They have a variety of formulas that help deter ticks and fleas.
Bathing regularly doesn’t just clean your Cavalier. It helps interrupt the flea life cycle. A good soak and lather can wash away flea eggs, dirt, and debris that might attract pests. When I use a shampoo that includes properly diluted essential oils known to repel fleas and ticks, it gives Stewart an extra layer of protection even after his bath is done.
2. Natural Tick and Flea Sprays for Daily Protection-Before every walk, I spray Stewart with a natural flea and tick repellent. I pay close attention to his legs, chest, tail, and belly, basically anywhere that might brush up against grass, shrubs, or wooded areas. These sprays are one of our most important layers of protection, and I use them daily during warm weather or anytime we’re heading into a high-risk area.
Over the years, I’ve rotated between trusted store-bought options and homemade recipes using properly diluted dog-safe essential oils. I always avoid sprays with synthetic preservatives or ingredients that could irritate a dog’s skin.
When I make my own, I tailor the recipe to the season, the environment, and even the behavior of my dog. Dexter, for example, used to try to catch bees, so I avoided blends with oils like rose geranium that might attract them. The key with any natural tick and flea spray is to apply it each time your Cavalier goes outside. These blends are not designed to last for hours at a time, and a quick re-spritz before each outing is what really makes the difference. I keep a bottle near the door so it becomes part of our daily walking routine.
DIY Natural Flea and Tick Spray for Dogs
This is one of my favorite natural sprays to help keep fleas and ticks at bay, without resorting to harsh chemical treatments. It’s simple to make, and you can use it on both your dog and yourself before heading outside.
What You’ll Need:
3 ounces distilled water
1/4 ounce vodka or grain alcohol (helps disperse oils evenly)
1/4 teaspoon vegetable glycerin (moisturizing and helps blend)
Essential Oils:
4 drops Cedarwood– repels fleas and ticks while being gentle on skin
4 drops Geranium– especially helpful against ticks
3 drops Lavender– calming and gently repels insects
1 drop Citronella– useful for deterring mosquitoes, fleas, and ticks
1 drop Peppermint– offers cooling relief and additional repellent support
How to Make It: Add all the ingredients to a 4-ounce (or larger) amber or cobalt blue glass spray bottle. Shake gently to combine.
How to Use It: Before walks or time outside, shake well and lightly mist your dog’s legs, belly, tail, and along the back. Always avoid spraying near the face and eyes. For areas like the ears, chest, or neck, spray a small amount into your hands first, then gently rub it into your dog’s fur. This helps you apply it more precisely and makes sure it reaches the coat and skin. Always apply when your dog is dry for best results.
Storage Tip: Store your spray in a cool, dark place and an amber or cobalt glass bottle helps protect the essential oils from light exposure, which can cause them to break down over time. Shake before each use to keep the oils properly dispersed.
Simple DIY Natural Flea and Tick Spray for Dogs
When I first started making Dexter’s flea and tick sprays, I kept things really simple. I used just distilled water and a few carefully chosen essential oils. Using just distilled water and essential oils is a great option if you plan to make small batches and use them up fairly quickly. It is easy, gentle, and perfect for Cavalier parents who want something simple. You will still need to shake the bottle well before each use, just like with any natural spray.
If you want your spray to blend a little more evenly and stay fresher a little longer, using the above recipe with the grain alcohol and vegetable glycerin can help. Alcohol acts as a natural preservative and helps the oils disperse a little better through the water. Glycerin can also add some moisture to the coat and skin.
Both options are good, it really depends on what fits best with your dog’s needs and your routine. If you are going through the spray quickly, distilled water and oils work just fine. If you want a little more staying power and an extra moisturizing boost, the version with alcohol and glycerin might be a better fit.
You can also check out four of Dexter’s natural flea and tick spray recipes on my Raising Your Pets Naturally blog.
Watch now and don’t forget to subscribe to @RaisingYourPetsNaturally YouTube for more!
Why Different Natural Tick and Flea Sprays Work for Different Dogs
One thing I learned through experience and from chatting with other natural pet parents is that not every spray works the same way for every dog. Some ticks are more common in certain regions and are repelled by specific essential oils. That’s why I rotate between formulas and stay flexible with what I use. If something stops working, I adjust. It’s not failure, it’s just part of the process.
3. Apple Cider Vinegar for Flea and Tick Support-Raw, unfiltered apple cider vinegar (ACV) is another natural tool I like to keep on hand as part of a layered approach to flea and tick prevention. While it won’t kill fleas or ticks, it can help make your dog less appealing to them.
You can make a simple spray by mixing equal parts raw ACV and distilled water in a spray bottle and lightly misting your dog’s legs and belly. Just be sure to avoid the face, and only use it on healthy, unbroken skin. If your dog has any skin sensitivities or open spots, it’s best to skip ACV topically.
You can also add a small amount of ACV to your Cavalier’s food or water. Not all dogs tolerate vinegar well, especially those with sensitive stomachs or urinary issues. It’s also important if you add it to your Cavalier’s water, they also have non-altered fresh water available.
4. Amber Collars for Natural Flea and Tick Repellent Repellant-Another layer is a raw Baltic amber collar. These collars are made from unpolished amber resin that naturally releases aromatic compounds when warmed by your dog’s body. These compounds can help repel ticks and fleas without adding any scent or chemicals to your dog’s skin.
While I wouldn’t rely on them as the only form of protection, I absolutely feel they can help in the overall care to keep our Cavaliers tick and flea free naturally. They’re lightweight, chemical-free, and easy to clip on. With Cavaliers, just make sure the collar sits comfortably behind their ears and doesn’t tangle with their feathering. If your Cavalier has Chiari malformation, this may not be an option if they can’t wear a collar comfortably.
5. Ultrasonic Tick Tags-Another tool to add to your flea and tick routine is an ultrasonic tick tag. There are various brands that make these small devices that clip onto your dog’s collar or harness. They emit a high-frequency pulse that humans and dogs can’t hear, but it’s designed to interfere with a tick or flea’s ability to orient themselves toward your dog.
These tags are scent-free and totally safe for sensitive dogs like Cavaliers. This type of tag is helpful during hikes, trail walks, or visits to areas known for higher tick populations. It’s a simple, noninvasive step that adds an extra layer of protection.
6. Diatomaceous Earth for Natural Flea and Tick Prevention-Food-grade diatomaceous earth is another natural tool I use as part of our flea and tick routine. It’s a fine powder made from fossilized algae that works by drying out the exoskeletons of pests like fleas and ticks. I don’t use it as a primary prevention method, but it’s a helpful layer, especially after we’ve been somewhere with higher pest exposure.
To apply, I lightly sprinkle a small amount down Stewart’s back and gently brush it into his coat, avoiding his eyes, nose, and mouth. It’s best used when your dog is dry and in a well-ventilated area. You can also use it on bedding or around baseboards during flea season as part of a regular cleaning routine.
Watch how I apply it and don’t forget to subscribe to @CavalierTipsandFun YouTube channel for more!
7. Using Garlic to Support Immune Health and Repel Fleas Naturally-Garlic might be controversial in some circles, but when used responsibly, it’s one of my go-to immune support tools. Garlic often gets a bad reputation because in 2000, they did a study on four dogs and gave them an extreme amount of garlic ( about 25 cloves a day for a 25-pound dog), and they had a bad reaction. That’s not even close to how we’d use garlic in a natural, supportive way. You can read the study here.
I started using fresh garlic years ago with Dexter, and it’s something I continue with Stewart now that he’s old enough for it. Garlic supports the immune system and helps repel fleas and ticks from the inside out. I only use fresh, organic garlic, peeled and minced about ten minutes before mealtime to allow the allicin to activate. Then I mix it into Stewart’s food. I never exceed the recommended amount and only feed garlic for up to three days in a row, followed by five to seven days off.
I never use garlic with puppies, pregnant or nursing dogs, dogs with anemia, or those with upcoming surgeries. It’s not a fit for every dog, so I always recommend checking with a holistic vet first.
Garlic Dose For Dogs: The approximate dose of fresh, organic garlic is 1/8 teaspoon for a 5 pound dog, 1/4 teaspoon for dogs between 6 and 10 pounds, 1/2 teaspoon for 11 to 15 pounds, 3/4 teaspoon for 16 to 20 pounds, and 1 teaspoon for dogs between 21 and 30 pounds. Dogs between 31 and 50 pounds can have 1 1/2 teaspoons, and those over 51 pounds can have up to 2 teaspoons.
8. Spotting and Removing Ticks and Fleas from Your Cavalier King Charles Spaniel-No matter how many prevention tools we use, I always do a hands-on check after walks or outings, especially during peak tick season. I check Stewart’s paws, armpits, ears, groin area, and the base of his tail. These are the spots where ticks love to latch on.
If I do find a tick, I remove it immediately with a tick remover or fine-point tweezers, making sure to grab close to the skin and pull straight out. Afterward, I place it in a bottle with alcohol and wash my hands. I’ve found this routine not only gives me peace of mind but also helps me stay in tune with any changes in Stewart’s skin or coat.
A Quick Note About Dexter’s Experience
As Dexter was in his late senior years and his neurological condition progressed, I started to notice the occasional flea here and there, more than we had seen in the past. His immune system wasn’t as strong, and that likely made him more vulnerable to pests. This isn’t uncommon in aging dogs or those with health challenges. Their bodies just don’t have the same defenses they once did.
I made it a daily routine to sit with Dexter and go over him carefully with a flea comb and a small jar of alcohol to catch any runners before they could become a real problem. I also stayed on top of sweeping and washing his bedding regularly. Thankfully, it never got out of control, just a flea here and there, but it reminded me how important it is to stay consistent.
It also reinforced why I’ve always chosen to avoid harsh flea treatments. With Dexter’s compromised system, exposing him to chemicals could have caused even more serious issues. Supporting his health naturally, with gentle and consistent care, was always the safest choice for him.
Final Thoughts on Natural Flea and Tick Care for Cavaliers
If you’re just starting your natural flea and tick care journey, start small. You don’t have to change everything at once. Pick one new step, try it, and see how it fits your dog’s life. Read labels. Ask questions. And most of all, give yourself grace as you navigate what feels right for you and your Cavalier.
Cavaliers are worth the extra effort, and with how sensitive they can be, choosing gentle, natural care just feels like the right thing to do.
Google Ad Below [...]Read more...
November 27, 2024Does your Cavalier King Charles Spaniel bark for attention? Maybe your Cavalier tosses a toy onto your lap, begging for a game of fetch. Or perhaps your Cavalier King Charles Spaniel barks incessantly to go outside and chase every squirrel in the neighborhood. These are classic examples of attention-seeking behavior and, while they may be funny at times, they can also become exhausting.
In this Cavalier blog, I’ll guide you through training your Cavalier to ask for attention politely or, even better, stop demanding attention altogether. But first, let me be clear. I am all about spending quality time with our dogs. Cavaliers thrive on love, play, and companionship, and I encourage plenty of bonding time. However, constant barking or pushy behaviors for attention are not things I would encourage in a dog. With positive dog training methods, good timing, and a proactive approach, we can change this demanding behavior.
Why Does My Cavalier Bark at Me for Attention?
Cavaliers are a playful breed and incredibly intelligent. They are quick learners and can learn behaviors we don’t even know we are teaching them, like barking for attention. Some Cavaliers may learn to bark for attention, paw, nudge, or give you the “look” for that snack. If they have done one or all of these things, and you gave them what they wanted, they’ve already made the connection: This behavior gets me what I want. For example, if barking speeds up dinner prep or prompts you to throw the ball, your Cavalier has been “trained” by their success.
But, don’t worry. You can change these demanding behaviors to better habits. So, let’s get started at teaching your Cavalier to be calm and quiet for the things they want.
Steps to Stop or at Least Curb Attention-Seeking Behaviors
Increase Quality Time: Cavaliers are highly social and crave interaction. You know that. That’s why they are your breed of choice, right? If your pup is constantly asking for attention, they may feel their current playtime or bonding time isn’t enough. Start by increasing their daily activities by about 50 percent. For example, if you play games with your Cavalier five times a day, bump it up to seven or eight short sessions. The same goes for walks, training, or cuddle sessions. Increase the duration or quantity of their interactive activities. And I do mean interactive vs. just placing a food toy on the floor. Those are all fine and well, but, in most cases, your Cavalier is craving your time. Read more about canine enrichment.
Get Ahead of the Demands: Observe when your Cavalier typically starts seeking attention. If they usually bark for play at 11 a.m., initiate a play session at 10:45 instead. By starting the activity before they ask, you’re rewarding their good and polite behavior rather than their pushiness.
Ignore Pushy Behaviors: This is key. When your Cavalier barks, paws, or demands attention in any way, practice the “invisible dog” technique. Avoid eye contact, verbal responses, or movement. Turn away, walk out of the room, or stay still. Once your Cavalier is quiet, calmly reengage and reward them for being polite. But, this only works if you do #1 and increase that quality time together. If you don’t do that, ignoring won’t work because their needs are not being met.
Pro Tip: Be prepared for an “extinction burst.” Your Cavalier may escalate their behavior temporarily, barking louder or pawing more persistently because the old tactics aren’t working. They are getting frustrated. Stay patient and consistent.
Reward Calm and Quiet: Every time your Cavalier is calm and quiet, offer attention, praise, or even a small treat. Reinforcing this behavior teaches them that being polite is the best way to get what they want. This is also the perfect time to initiate a game or play session with your Cavalier.
Teaching self control is a great way to help curb barking.
Patience Is Key
Changing established habits takes time, so be patient with your Cavalier and yourself. Remember, they’re simply trying to communicate their needs the only way they know how. With consistent positive dog training and a little extra quality time, you’ll soon have a polite pup who doesn’t feel the need to ask for attention because you are providing them all the attention they need and desire.
Real-Life Example: Dexter’s “Talking”
Even my sweet Dexter isn’t perfect. He’s been known to “talk” or snort to get his way, and sometimes it works because I’m not perfect, either. Not to mention, there are two other family members who have been known to reward his ask. And, when it’s rewarded, it persists. If I wanted to fully address this behavior, I’d need to follow the steps above consistently and MAKE SURE the other two members of the family do as well. But, in our home, a little talking is something we tolerate because it doesn’t bother us.
That’s the beauty of training: you get to decide what behaviors matter to you. If something doesn’t bother you, there’s no need to change it, as long as it’s not something that should be addressed like anxiety. Just remember that if you allow certain behaviors, it’s important not to complain about them later.
Check out my playlist on barking!
What You Can Do Next
Now that you have the tools to manage your Cavalier’s attention-seeking behavior, it’s time to put them into action. Start by increasing quality time with your dog, introducing play sessions before they ask for attention, and practicing the “invisible dog” technique when pushy behaviors pop up. Remember, consistency is key, and patience will help you both succeed. With time, you’ll see your Cavalier becoming more polite and less demanding, leading to a stronger bond and fewer unwanted behaviors.
What’s your dog’s favorite way to spend quality time with you?
Join our vibrant Cavalier King Charles Spaniel community on Facebook, support our dedication to pet wellness on Patreon, and stay updated with our weekly newsletter for invaluable tips and insights into raising happy, healthy pets. Together, let’s make a difference in our dogs’ lives!
Google Ad Below [...]Read more...
March 19, 2025How to Teach Your Cavalier King Charles Spaniel to “Leave It” | Positive Training for Cavaliers
Teaching your Cavalier King Charles Spaniel to “leave it” or ignore something on your cue can be lifesaving. Imagine dropping a pill in front of your Cavalier or going for a walk and passing garbage in the street. If your Cavalier King Charles Spaniel has a reliable “leave it” cue, you can easily ask him to leave it as you pick up the pill or walk past the garbage.
When I start the “leave it” training, what I want my dog to learn is that “leave it” doesn’t mean he doesn’t get something, but that I have something better. This helps to build a more reliable behavior, especially off-leash. If you only teach your dog that “leave it” means he doesn’t get something, he might just try to grab the item faster or run off with it. That’s not what we want!
As with all dog training, remember that you need to regularly practice these lessons. Training your Cavalier is not just about doing it once and then only when you need it. Reliable dog training takes time, patience, and consistency. Cavalier King Charles Spaniels, in particular, can be a bit food-driven, so keeping them engaged and excited about the reward is key.
So, be patient, consistent, and most importantly, have fun with your Cavalier while training!
Teaching Your Cavalier to Leave It Level 1
Start with a small, low-value dog treat in your closed hand, and place it about 12 inches to the side of your Cavalier’s face. Make sure your hand is at the right height, not too close to his face, but not too far away either. Let your dog see it there, and wait him out. As soon as he moves his face away or ignores the treat, say, “YES!” and reward him with an amazing treat from your other hand. Not going for the treat is a win, too! So, if you present the leave it treat hand and he doesn’t go for it, “YES!” and treat. Repeat this a few times.
When your Cavalier starts ignoring your treat hand altogether, move to Level 2.
Don’t forget to subscribe to our @CavalierTipsandFun for more!
Teaching a Dog to Leave It Level 2
Start like Level 1, but before you drop your hand, say your “leave it” cue once. Wait him out; as soon as he moves his face away or ignores the treat, say, “YES!” and treat from your other hand. Repeat. When he stops going for your hand after hearing the “leave it” cue, move to Level 3.
Training Your Cavalier to Leave It Level 3
Say your “leave it” cue and drop your hand with the low-value treat to your dog’s side, but leave your hand OPEN. If he goes for the treat, quickly close your hand. When he moves his face away, praise and reward him with a treat from your other hand. Repeat. When your Cavalier is reliably ignoring the treat in your open hand, move to Level 4.
Teaching Your Cavalier to Ignore Items Level 4
At this stage, it’s time to change things up a bit. Up until now, you’ve been using low-value, boring dog treats for the “leave it” item. Once your dog is starting to get the hang of it, it’s time to up the ante. Use tastier treats or toys as the “leave it” item, but remember, his reward needs to be even better.
You can try:
Tastier treats or food
Paper products, tissue, or paper towels
Toys
Subscribe to @RaisingYourPetsNaturally for more!
Here’s how to set it up when using a toy:
Pick a Toy: Choose a toy that your Cavalier likes but isn’t so high-value that your Cavalier would immediately grab it without hesitation. Start with something mildly exciting like a squeaky ball, fleece tuggy toy, or stuffed animal that your dog enjoys.
Set Up the Training Area: Find a quiet spot where you can focus and your dog isn’t too distracted by other things. Make sure it’s a place where you can manage your dog’s movement and reactions.
Start the Cue: Hold the toy in your hand and get your dog’s attention. Don’t get too silly. You just want him to know it’s there, with a bit of excitement.
Use the “Leave It” Cue: Once you’ve gotten his attention, say the “leave it” cue calmly. Hold the toy in front of your dog just out of reach, but don’t place it on the ground yet.
Wait for the Response: Your dog may try to lunge for the toy or show interest in it. The goal here is for him to move away or ignore it, not to grab it. If he goes for it, just swipe the toy up to your chest and ignore him and wait for him to ignore it. Then repeat the process of lowering your hand with the toy. As soon as your dog turns his head or steps away from the toy, immediately say “YES!” and give him a better reward (a tastier treat or something that’s even more valuable than the toy).
Repeat and Increase Difficulty: Repeat the exercise several times, and gradually increase the difficulty. Once your Cavalier reliably ignores the toy when it’s held in your hand, move on to placing the toy on the ground. To set this up, place the toy behind you, out of reach. This way, you can gently body block your dog if he tries to move toward it. When he turns away or ignores the toy, immediately reward him with a better treat or better toy.
Body Blocking: Body blocking involves using your own body to gently guide your dog away from a distraction, like a toy, by positioning yourself between your dog and the item. It’s important to note that body blocking is not about kneeing or being rough with your Cavalier. It’s a gentle, calm way to redirect their attention. However, some dogs may find body blocking intimidating or scary, so if your Cavalier shows signs of stress, it’s best to avoid this method and use alternative techniques for redirection.
Build Duration: As your Cavalier gets more comfortable with the “leave it” cue around toys, try holding the cue for a longer period of time. For example, you can wait for him to sit or stay before rewarding him. This increases his patience and focus during the exercise.
Training Your Cavalier to Leave Something Level 5
Place a low-value treat under your cupped hand, with your dog in front of you. Say your “leave it” cue, and wait for your Cavalier to ignore the treat. If he looks away or shows interest but doesn’t try to grab it, immediately reward him from your other hand with a better treat.
As he gets the hang of this, start showing the “leave it” treat under your cupped hand. If your dog ignores the treat, reward him from your other hand. If he tries to go for the treat, simply cup your hand over the treat again. Repeat this process, gradually raising the criteria by making the treat more tempting and testing his ability to resist.
Teaching Your Cavalier to Leave It Level 6 and Beyond
Now it’s time to make things more challenging. Increase the difficulty by adding distractions, different environments, or a variety of leave-it items. Always be mindful of your Cavalier’s current ability level, and don’t rush the process. If you find your Cavalier is struggling or making mistakes, step back and simplify the task again. You want to build confidence and reliability.
Reminders:
Never allow your Cavalier to get the “leave it” item. If you want your Cavalier to have it, you pick it up and give it to him. The goal is to teach him that ignoring the item leads to something better, not just an empty reward.
If your Cavalier is having trouble with the exercise, step back to easier levels or increase the value of the reward to keep him motivated and engaged. You can also try lowering the difficulty by using a less tempting “leave it” item to help him succeed.
The goal isn’t just for your Cavalier to avoid the item once, but to understand that when you say “leave it,” he has the chance to earn something even better. The more your dog experiences this rewarding outcome, the more reliable the behavior will become.
Pro Tips:
Keep training sessions short, positive, and fun! Don’t let the “leave it” item overwhelm or frustrate your Cavalier. If he’s struggling, simplify the task and increase the reward to keep him interested and motivated.
How Often Should You Practice the Leave It Behavior with Your Cavalier?
It is important to regularly practice “leave it” throughout the day, not just during formal training sessions. You can incorporate it during walks, around the house, or when playing. As you add distractions, make sure to reward your Cavalier for staying focused on you, especially when there are high value items around. Cavaliers are generally quick learners, but they can also get bored easily, so keep your training sessions positive and fun. Consistency and patience will pay off in the long run.
Pro Tip: Practice, practice, practice with various setups. You want your Cavalier to respond reliably to the “leave it” cue in real life situations, whether it is a dropped item, an enticing smell, or something on the floor. By practicing regularly, you ensure they will leave it without hesitation. I still reward those real life “leave its” to keep the behavior strong and consistent!
Conclusion
Practicing “leave it” regularly and in different situations helps ensure your Cavalier responds reliably when it matters most. Keep training sessions fun and rewarding, and don’t forget to reinforce real-life successes. Teaching a solid fetch and “drop it” will also complement “leave it,” giving your Cavalier even more useful skills. With consistency and patience, your Cavalier will continue to improve and make great choices in everyday life.
How is your leave it training going? I’d love to hear about it in the comments!
Google Ad Below [...]Read more...
April 29, 2025Your Cavalier King Charles Spaniel’s Teenage Phase
When you bring home a Cavalier King Charles Spaniel puppy, you are prepared for puppy breath, floppy ears, and all the adorable moments that melt your heart. What nobody talks about enough is what happens when that sweet ball of fluff hits adolescence.
Right now, Stewart, my Cavalier, is about 10 and a half months old and is in full-blown teenager mode. I can tell you firsthand that adolescence is real. Stewart has energy for days, wild bursts of zoomies, and a mischievous sparkle in his eyes that keeps me on my toes. My mom, who adores him, often comments, “He is always getting into trouble!” (Of course, to me, it is not real trouble. It is boredom, enthusiasm, and a young dog who is eager to interact and explore.)
She often compares him to my late Cavalier, Dexter, who lived to be 15 years old. In her memory, Dexter was the perfect, calm little gentleman. And he was, but only after years of growing up. It is easy to forget that Dexter had his own crazy adolescent phase, too. I still remember the day I found myself saying, “You are going to eat, you are going to potty, and you are going to bed!” Sometimes, when puppies get extra wild, it is not even about training. They are simply overtired and need help settling down. Just like toddlers, sometimes they push through their exhaustion and get even more wired.
If you are going through the teenage years with your Cavalier right now, you are not alone. And no, you did not do anything wrong. Adolescence is a natural stage in a dog’s development. In Cavaliers, it usually starts when those puppy teeth begin falling out (around four to six months old) and can last until about eighteen months, give or take depending on the dog.
During this phase, your Cavalier might:
Forget their basic training
Start jumping up more
Become mouthier and more vocal
Seem to ignore you sometimes
Have random bursts of wild energy (we call them “zoomies”)
Get into things they never bothered with before
Show frustration or impatience more easily
Does that sound familiar?
It is important to remember that your Cavalier’s brain is still developing. Just like human teenagers, they are caught between puppyhood and adulthood. Their impulse control is not fully in place yet. The good news? This phase is temporary. And your patience and guidance right now will shape your Cavalier for the rest of their life.
Here is how I am helping Stewart (and helped Dexter before him) navigate this time:
Stay Consistent with Positive Dog Training: Even if your Cavalier seems to have forgotten what “sit” or “stay” means, keep practicing. Short, daily sessions with positive reinforcement go a long way. Stewart and I do a lot of quick “name games,” sits, hand targets, and polite walking games to keep his brain engaged.
Build in Play and Enrichment: A bored adolescent dog is a mischievous dog. I make sure Stewart has plenty of fun activities like sniffy walks, find-it games, fetch sessions, and interactive toys. Play is not just fun, it is a training tool. A dog that plays with you is a dog that trusts you.
Manage the Environment: I always try to be proactive with management first. If I think Stewart might start getting rowdy or restless, I plan ahead. Before I get busy, I will take him for a nice walk, do some training or play a game before I need to settle in. Then, I’ll provide him with something to keep him busy, like a snuffle mat, chew toys or licky mat. That way, he already has something to focus on instead of looking for ways to entertain himself. Managing the environment is not about waiting for problems to pop up. It is about setting your Cavalier up for success before trouble starts.
Provide Enough Rest: After Stewart works on his snuffle mat, chew toy, or licky mat, and has had a little training or a nice walk, he is usually ready to settle. That is when he curls up for a siesta at my feet while I do my work. Remember that story about Dexter? Sometimes the wild behavior we see is not from a lack of exercise. It is from being overtired. Puppies and adolescent Cavaliers still need a lot of sleep throughout the day. Building in scheduled downtime helps them reset and recharge before they get into trouble from being too tired to make good choices.
Focus on Trust and Bonding: During a dog’s adolescence period, it is easy to get caught up in the frustrating moments when your Cavalier is ignoring you, getting too wild, or pushing boundaries. But I always try to remind myself that every interaction with Stewart is an opportunity to build our relationship. Trust and connection are even more important during this teenage stage. Adolescence is a time when Cavaliers are figuring out the world and deciding who and what they can count on. I want Stewart to know that I am always safe, fun, and trustworthy. That way, when things get tricky, like going to the veterinarian or navigating a new place, he will look to me for guidance and reassurance. The stronger the bond we build now, the more confident and connected he will be as an adult.
Keep a Sense of Humor: Adolescent dogs can be frustrating at times, no doubt about it. But it also brings some of the funniest, most joyful memories. Stewart’s goofy antics, the way he proudly carries a pinecone, his dramatic “flops” when he does not get his way, these are the moments I know I will smile about years from now.
If you are raising a Cavalier King Charles Spaniel and feeling overwhelmed by the ups and downs of adolescence, you are not alone. This stage can feel overwhelming on some days, but every patient, playful, and consistent moment you put in now is shaping your Cavalier’s future. All the work you are doing today will help your Cavalier grow into a confident, connected, and loving companion for many years to come.
If you would like more step-by-step help through this stage, I would love for you to join us in our Manners, Life Skills, and Foundation Training course. Inside the course, I walk you through building polite greetings, calm walking, settling skills, and helping your Cavalier stay more focused and connected with you. It is all about giving you the tools to guide your Cavalier through adolescence and beyond with patience, confidence, and fun.
At What Age Do Cavaliers Calm Down?
If you are raising a young Cavalier King Charles Spaniel and wondering when your Cavalier will calm down, it is a common question during the teenage phase. Cavaliers usually start to settle after they move through adolescence, which can last until around eighteen months to two years of age. Some Cavaliers might take a little longer depending on their personality and energy level.
Maturity comes with time, but it also comes with the foundation you build along the way. Positive training, daily routines, enrichment, plenty of rest, and building trust all help your Cavalier develop into a calmer and more confident companion. It is not something that happens overnight, but it does happen.
You have got this! Stay patient, stay positive, and focus on the progress you are making together. It is not about being perfect. It is about showing up, doing the work, and building a strong relationship one day at a time.
What has your Cavalier been doing lately that makes you say, “Yup, we are in the teenage stage”? I would love to hear your stories in the comments!
Google Ad Below [...]Read more...
May 23, 2025What to Do When an Off Leash Dog Approaches or Attacks Your Cavalier
Running into an off leash dog in a public area where leash laws are in place is one of those moments that gets my blood boiling. I’ve heard from too many Cavalier families who have gone through this, and sadly, I know several Cavaliers who were seriously injured. Even a couple that didn’t survive. It’s heartbreaking, it’s preventable, and we need to talk about it.
This post is for those of us doing our best to protect our dogs, especially small, gentle breeds like Cavalier King Charles Spaniels, when others decide the leash rules don’t apply to them. Whether you’re out walking your Cavalier, training, or just enjoying your day, here are real life ways to keep your dog safe and what to do if the worst happens.
Why Letting Your Dog Off Leash Puts Others at Risk
Just because your dog is friendly does not mean they should be off leash in public areas. You never know what someone else’s dog is going through. Some dogs are recovering from surgery or illness and need space. Others are working through fear or reactivity and are not ready for sudden greetings. Some are service dogs who may not be wearing a vest but are doing their job. And many dogs, Cavaliers included, simply do not want strange dogs running up to them.
This is why leash laws exist. They are there to protect everyone. Just because your dog wants to say hi doesn’t mean they should get to.
What to Do When an Off Leash Dog Approaches
There is no perfect solution that works in every situation, especially when an off leash dog charges unexpectedly. But being prepared both mentally and physically can make a real difference. These are practical ideas I have taught, used myself, and seen work in real life. While nothing is guaranteed, having a plan in place can help you stay calm, act quickly, and protect your Cavalier as best you can.
Watch the video demonstrations and don’t forget to subscribe to @RaisingYourPetsNaturally for more tips.
Teach a Sit Stay Behind You
One of the most helpful cues I teach is a sit stay with my dog positioned behind me. I start by practicing in low distraction settings and slowly build it up over time. If a dog approaches, I cue my Cavalier to sit and stay behind me, and I step forward to handle the situation. This helps my dog feel protected and keeps them from reacting or escalating the situation.
Throw Treats at the Approaching Dog
Yes, throw treats right at the dog’s face. It may sound odd, but it works. The goal is to startle the dog and interrupt their focus. Then toss more treats behind them, toward the direction they came from. This often gives you a few seconds to calmly retreat with your Cavalier. I always carry tasty treats for this reason.
Use a Traffic Cop Stance
Turn to face the dog, extend your arm out like a stop sign, and say firmly, “Stop. Go home.” Keep your Cavalier behind you and slowly back away. Some dogs will pause or hesitate if they’re unsure or not aggressive. Keep repeating the phrase and keep your hand out, as you and your Cavalier walk backwards away.
Carry an Air Horn
If your dog is comfortable with noise, an air horn can be a great deterrent. I always condition my dog to hear it at home first and pair it with treats. When needed, a quick blast can interrupt the loose dog’s approach and give you time to move away. It’s one of my go to tools, but only if your dog can handle the sound.
Use an Umbrella as a Visual Block
I train my dogs to be comfortable with umbrellas opening indoors, so they are not startled if I ever need to use one during a walk. If a dog is charging at you, pop open the umbrella toward them. The sudden motion and large shape often causes the dog to pause or back off. If necessary, you can shake it or move it toward the dog as you use a firm, go home, verbal cue.
Carry a Personal Safety Tool
Tools like pepper gel, citronella spray, taser, or even a She’s Birdie alarm can help in urgent moments. Pepper gel has more control than spray, and the alarm can attract attention or startle the other dog. Always practice with these tools and make sure your dog is not afraid of them.
Be Cautious About Picking Up Your Cavalier
It is tempting to scoop up your Cavalier, especially since they are small. But doing so can sometimes make things worse. The approaching dog may jump at you or become more aroused. Only pick up your Cavalier if you feel it will help and if you have a safe place to put them, like a truck bed, behind a fence, or even inside a garbage bin if it means protecting them. Use extreme caution if trying this.
If You’re Walking More Than One Cavalier
This is also one of the reasons I usually prefer walking one dog at a time. It helps me stay more aware, react quickly if something happens, and really connect with the dog I’m with. But I know that’s not always possible, so here’s how to stay prepared when walking more than one.
Walking multiple Cavaliers makes things trickier, especially when a loose dog starts heading your way. It can be harder to control space, stay calm, and manage multiple leashes at once. That’s why I recommend preparing a plan ahead of time if you regularly walk more than one Cavalier.
If possible, practice sit stays with each dog individually first, then gradually build up to group stays. Teach your Cavaliers that standing behind or beside you means safety. If you see a loose dog approaching, calmly guide all your Cavaliers behind you and keep their leashes in one hand while using your other hand to deter the loose dog, whether that’s with a verbal cue, a stop signal, or a safety tool.
This is also where tools like a treat toss or umbrella can really help, because they create distance without needing to physically wrangle multiple Cavaliers. And if things feel too tight, do not hesitate to turn and walk away together. Getting distance is often the safest move when you have more than one dog depending on you.
What to Do If a Dog Attacks Your Cavalier King Charles Spaniel
No one wants to think about this part, and I truly hope you never face it. But if a loose dog attacks your Cavalier, your priority becomes stopping the fight as quickly and safely as possible. This is not about hurting another dog out of anger. It is about protecting your own Cavalier King Charles Spaniel from serious harm or even death.
If you have a tool in hand, such as a stick, an umbrella, or pepper gel, use it to target the attacking dog’s face. Aim for the eyes, nose, or mouth. The goal is to interrupt the attack and create enough of a pause to safely separate the dogs. You may only have a second or two, and you need to respond fast and as hard as you can to protect your Cavalier.
If you are physically trying to break it up without a tool, one method is to grab the attacker’s back legs and swing them away from your dog. This can throw them off balance and give you a chance to create space. Do not reach for collars or faces with your hands. That is the most common way people get bitten during dog fights.
Once the dogs are separated, move your Cavalier to safety right away. If possible, secure the attacking dog so they cannot come back. Then take photos, report the incident, and document everything as soon as you can. Even if your Cavalier seems okay, a vet check is always important. Many bite wounds are deeper than they look.
Helping Your Cavalier Recover Emotionally After an Attack
This is one of the most important parts of the process, and it is often overlooked. A Cavalier who goes through a dog attack may seem fine physically, but emotionally, they can lose trust in the world around them. I have worked with dogs who suddenly freeze on walks, avoid places they once loved, or become uneasy around other dogs even from a distance.
Start by giving your Cavalier time to decompress. Skip your regular walks for a few days and let them rest in the comfort of home. The goal is to help them feel safe again while things settle emotionally and physically. Keep their day simple and supportive.
At home, bring in confidence through simple enrichment. Food puzzles, nose games, and easy trick training can help rebuild a sense of control and engagement. These games in a familiar space can make a big difference.
When you are ready to start walking again, choose quiet places where you are unlikely to run into other dogs. Early mornings, empty parking lots, or quiet nature trails can be good options. Let your Cavalier set the pace. If they want to pause and look around or head back early, that is okay.
Pay attention to the progress. If your Cavalier walks a little farther, seems more confident, or looks at you for guidance, tell them how smart they are. Praise, treat, give a chest scratch. That is how trust returns, little step by little step.
This healing process takes time. That is exactly why I created Supporting Your Sensitive Dog: Gentle Steps Toward Confidence. If your Cavalier is showing signs of fear or hesitation, this course will guide you through gentle, trust based steps to help them feel safe again.
You’re Not Overreacting
Your Cavalier deserves to walk safely. You deserve to walk without fear. And if someone chooses to ignore leash laws, you are completely within your right to protect your Cavalier, using your voice, your body, your training, or any tool you need.
So stay prepared. Be proactive. And most of all, trust your instincts. You’ve got this.
Google Ad Below [...]Read more...
May 14, 2025Kind, Reward-Based Training for Cavalier King Charles Spaniels and All Breeds
When people hear the term positive reinforcement, they sometimes picture a dog who only listens if you have food in your hand. Or they think it means never setting boundaries. I’ve had people say things like, “I don’t want to spoil my dog,” or “I heard that’s just bribing with treats.” But the truth is, positive reinforcement training is science-based, relationship-focused, and one of the most effective ways to help dogs feel confident and understand how to live successfully in our human world.
And it’s not just for Cavaliers. This approach works for every breed, every age, and every behavior challenge.
Let’s break down positive reinforcement dog training in a simple and practical way.
What Positive Reinforcement Dog Training Really Means
Positive reinforcement means adding something your dog enjoys immediately after they do a behavior you want to see again. That reward could be healthy dog treats, a toy, praise, a chance to sniff, or access to something fun. It doesn’t have to be a treat every time, but food is often the easiest and most meaningful place to start. If it’s going to be rewarding for your Cavalier, they decide. I mean, my Mom might think a slice of cherry pie is a good reward, but I don’t even like cherry pie. I’d need a slice of chocolate cake!
This type of training is grounded in how all animals learn, including us. When a behavior is followed by a good outcome, we’re more likely to do it again. Your dog sits, you give them a treat. Your dog walks calmly by your side, you let them go sniff a log. That’s positive reinforcement. You’re not spoiling them. You’re reinforcing behavior you want to see more of, and they get something pleasant in return.
How Dogs Actually Learn
Dogs don’t come into our homes already knowing how to live in them. They don’t know what “sit” means. They don’t know they shouldn’t jump on guests or grab food off the counter. Just like us, they learn by doing, and by figuring out what works.
Dogs learn through repetition. They make connections between what they do and what happens next. If they sit and a treat shows up, they’re more likely to sit again next time. That’s positive reinforcement. We’re showing them that their choices matter and that doing the thing we like leads to something they like.
When we use positive reinforcement, we’re not just trying to get obedience. We’re helping our dogs understand how to live in our world in a way that feels safe and rewarding to them. They’re not learning because they’re afraid of getting it wrong. They’re learning because they feel good getting it right.
And that’s what builds real, long-lasting behavior.
Luring Training Is Teaching—Not Bribing
At the start, we often use a food lure, like holding a treat near your dog’s nose to help them learn how to sit or lie down. We slowly move that treat in a way that encourages the action we want, like guiding their head up and back until their butt hits the ground.
That’s not bribing. It’s teaching. We’re showing them what we’re looking for.
After a few short sessions, we continue practicing the same way. Lure the sit. Reward the sit. Once the dog is starting to understand it, we ask them to follow our empty hand the same way. If they sit, we reward. Now they’re doing the behavior without seeing food first.
Once that’s going smoothly, we add the cue. Say “Sit,” move your empty hand like before, and when their butt hits the ground, reward it.
Over time, we fade the hand movement so that “Sit” becomes all they need to hear. The behavior is now on cue, and your dog learned it in a clear, kind, and effective way.
Dogs Don’t Generalize—They Need Practice in New Places
One of the biggest things people miss is that just because your dog knows how to sit in the living room doesn’t mean they know how to do it in the yard, at the vet’s office, or around a group of children. Dogs need practice in new environments. They need help when distractions are high or when they’re feeling unsure.
That might mean going back to the basics in new places. Using a treat to lure a sit at the park isn’t spoiling your dog. It’s helping them succeed in that moment. You’re helping them learn how to do something they already know, but in a place that’s harder or more distracting.
Why Positive Reinforcement Works for Cavalier King Charles Spaniels and All Breeds of Dogs
Cavaliers are sweet, sensitive, and deeply tuned in to their people. They often respond beautifully to kind guidance and struggle with harsh corrections. A raised voice, leash jerk, or even a stern look can shake their confidence and cause them to shut down.
But this isn’t just about Cavaliers.
Every dog, whether they are a bouncy Labrador, a headstrong terrier, a fearful rescue, or a playful senior, benefits from positive reinforcement dog training. You’re not just teaching skills. You’re building a good relationship. You’re helping your dog feel safe to try new things.
Positive dog training encourages curiosity instead of fear. It helps build lasting behavior in a way that feels good for both you and your dog.
The Risk of Punishment-Based Dog Training
Harsh training methods may seem like they work quickly, but they come with a huge cost. Dogs trained with physical corrections, yelling, or intimidation often show signs of stress, like lip licking, yawning, cowering, or even shutting down completely. They may stop doing the “bad” behavior, but not because they learned something better. They stop because they’re afraid to try.
Studies have shown that punishment-based dog training methods can increase anxiety and reactivity, and even lead to aggressive behavior in some dogs. It doesn’t teach what to do, it just teaches the dog what not to do, without giving them tools to succeed.
I’ve worked with so many families trying to rebuild trust after their dog was trained with punishment. That kind of fallout is hard to undo.
You Don’t Have to Carry Treats Forever
A common concern I hear is, “Will I always need food in my pocket?” The answer is no. As your dog becomes more confident and fluent in a behavior, you’ll reward less often. You’ll also start to mix in other rewards, like praise, sniffy walks, or play.
But here’s the thing, dogs, like us, still appreciate being recognized for a job well done. I still praised Dexter and gave him treats into his senior years. Not because I had to. But because I wanted to reinforce the connection we built over a lifetime of learning together.
You’re not creating a treat-dependent dog. You’re building a dog who trusts that good choices lead to good outcomes.
If you want to teach your dog real life manners in a kind, clear, and effective way, take a look at my Manners, Life Skills, and Foundation Training Course. It’s self paced, easy to follow, and designed to help your dog build everyday skills with confidence. You’ll learn how to prevent common problems before they start, teach polite behavior step by step, and create calm, positive routines that work in daily life. I personally answer questions, give feedback, and support you as you go through the course.
Why Positive Dog Training Works for Behavior Issues Too
Positive reinforcement is not just for basic training or fun dog tricks. It’s also one of the best ways to work through real behavior issues like jumping, barking, reactivity, anxiety, and fear-based behaviors.
A big part of dog behavior modification is emotion. When a dog is barking or lunging, they’re not just being “bad.” They’re usually feeling overwhelmed, scared, frustrated, or unsure. If we only try to stop the behavior without addressing how the dog feels, we’re not really helping them.
Positive reinforcement gives us a way to change those emotions. We teach our dogs that good things happen when they make calm, safe choices. Over time, they start to feel more relaxed in situations that used to be stressful. That change from fear to comfort, from confusion to understanding, is what creates real, lasting change.
Instead of just trying to stop the behavior, we ask, “What is my dog feeling?” Then, “How would I like them to feel instead?” and “What do I want them to do instead?” From there, we adjust the situation so we can meet all those needs and teach the new behavior in a kind, clear way. The more your dog practices that skill in the right setting, the more confident they become. And that’s where things really start to turn around.
What Your Dog Really Needs From You
At the heart of it all, positive reinforcement dog training is about more than treats. It’s about empathy. It’s about understanding how your dog sees the world and helping them learn in a way that clicks.
It’s about setting them up for success and guiding them toward the behaviors you want. Not through fear, but through trust, patience, and connection.
That’s what I want for Stewart. That’s what I wanted for Angel Dexter. And that’s what I want every dog to have, training that feels good, makes sense, and builds a life rooted in partnership, not power.
Keep it positive. Keep it patient. Keep it proactive.
Google Ad Below [...]Read more...
June 5, 2025How to Motivate and Train a Cavalier King Charles Spaniel
If your Cavalier King Charles Spaniel is not motivated to train, you’re not alone. This is something I hear from Cavalier families all the time: “My Cavalier is not food motivated,” or “My Cavalier just doesn’t care about training.” But in most cases, it’s not that your Cavalier doesn’t want to learn, it’s that something is getting in the way.
Here are a few common reasons your Cavalier might not be interested in training right now and what you can do to help them feel more motivated and ready to learn.
Reasons Your Cavalier Might Seem Unmotivated for Training
They are full
If your Cavalier just finished a meal or had a lot of snacks recently, they may not be interested in working for more food. Training with food rewards works best when your Cavalier is a little bit hungry, not stuffed. Try scheduling your training sessions before meals rather than after, or set aside part of their meal to use as training treats throughout the day.
They are tired
Just like us, Cavaliers have times when they are more alert and times when they just want to rest. If your Cavalier had a big play session, a long walk, or an active outing, they may need some quiet time before they are ready to focus again. Cavalier puppies especially need a lot of sleep, so training when they are rested can make a big difference. Try noticing when your Cavalier naturally seems more alert and ready to engage. That is usually the best time to practice a little training together.
They are not feeling well
If your Cavalier seems unusually uninterested in training or even in their favorite treats, that could be a sign they are not feeling well. Even mild health issues like nausea, pain, or dental discomfort can lower motivation. It is not always obvious at first, but changes in training interest can be an early clue that something is off. If this becomes a pattern, or if anything else seems different, reach out to your Cavalier’s holistic vet to rule out anything medical before moving forward with training.
Your Cavalier is overstimulated
Cavaliers take in a lot of information from their surroundings. If you are training your Cavalier in a busy or unfamiliar location, all those sights, sounds, and smells can be overwhelming. When there is too much going on, your Cavalier might not be able to focus or respond the way they usually do. This is especially common for puppies or sensitive Cavaliers who are still learning how to process the world around them.
If that happens, try moving to a quieter spot. You can even take a little break together for a sniffy walk and then go back to something really simple, like The Name Game or Hand Targeting. These familiar cues can help your Cavalier settle and build confidence again.
Your Cavalier is anxious or unsure
When a Cavalier is feeling unsure, whether it is because of a new environment, a stranger nearby, or something they cannot quite figure out, training can start to feel like too much. It is not about being stubborn or ignoring you. They are just trying to process how they feel before they can focus on learning anything new.
If your Cavalier seems nervous or anxious, the best thing you can do is slow things down. Sit with them quietly, speak gently, and let them look around without pressure. Sometimes just being there together is enough. Once they start to relax, you can offer praise and a treat or a “check it out” cue if they seem ready to explore.
The reward is not meaningful enough
When I hear that a Cavalier is not food motivated, the first thing I look at is the reward. Most of the time, it is not that your Cavalier is not food motivated. It is that the treat just does not matter enough to them at that moment. Dry biscuits or lower value treats usually do not get their attention, especially in busy or distracting places.
Start with real food. I usually go straight to meat. That might be small bits of cooked beef, turkey, or lamb. Freeze dried meat or single ingredient dehydrated treats are also great choices. These are often the best treats for Cavaliers because they are soft, tasty, and easy to eat. Just flip the bag over and check the ingredients. You want something simple that says one thing, like chicken breast or turkey. Avoid fillers or extras that do not need to be there.
You can also use freeze dried raw food, broken into tiny pieces. These are real food options and often made mostly from meat, which makes them a great choice for Cavaliers who need something healthy and high value. Many people use them during training and count them toward their Cavalier’s daily calories. It is an easy way to stay consistent with nutrition while still offering something special and rewarding.
I also avoid using liver or organ meats regularly. A little once in a while is fine, but too much liver can lead to vitamin A concerns. Some organ treats can also be too rich and cause diarrhea.
Use the right reward for the right moment
Once you find something that really works for your Cavalier, think about how and when to use it. The most rewarding treats should be saved for the harder training sessions. That might mean practicing outside, focusing around distractions, or trying something brand new. When the reward truly matters to your Cavalier, motivation naturally improves.
If they get their favorite treats for easy things like sitting in the living room, there is not much reason to work harder when training becomes more challenging. Save the cooked beef, freeze dried meat, or other special rewards for those moments when your Cavalier needs a little extra encouragement. Matching the value of the reward to the difficulty of the task helps keep your Cavalier engaged and willing to try.
Explore other forms of motivation
Not every Cavalier is motivated by food alone. Some respond better to toys, praise, or playful interaction. If your Cavalier enjoys toys, try using a favorite squeaky, a soft tug toy, or a quick game of fetch. Some Cavaliers are especially drawn to textures like fleece or rabbit fur, which can make a toy feel more exciting. Whatever it is, keep it put away when you are not training so it stays special and does not lose its value. Other Cavaliers are more motivated by attention and connection. A cheerful voice, a smile, or light praise can sometimes go further than anything you can hold in your hand. At the end of the day, your Cavalier is the one who decides what feels rewarding. It is not about what we think should work. It is about what actually matters to them.
Your Cavalier can learn with the right support
If your Cavalier is not showing interest in training, it does not mean something is broken. It just means they need a little help feeling ready. That might be adjusting the environment, changing up the reward, or simply giving them time to feel more confident.
This is exactly the kind of thing we work on in my Manners, Life Skills and Foundation Training Course. If you are feeling unsure about how to move forward, I will guide you through simple, kind steps to help your Cavalier feel more focused and connected. You will learn how to use rewards that actually matter to your Cavalier, when to train, and how to build everyday habits that stick. It is self-paced, easy to follow, and I am always there if you need support.
Your Cavalier wants to connect with you. With a little support and the right setup, they will start to feel more engaged and eager to participate. You do not need to rush the process. Keep it light, keep it kind, and celebrate the small wins. They all add up.
Google Ad Below [...]Read more...
Google Ad Below
Preparing Your Cavalier King Charles Spaniel for Air Travel (Early access for our Patreon community)
Preparing Your Cavalier King Charles Spaniel for Air Travel
Through Dexter’s 15 years of life, we had countless adventures together, but every single one was by car. At nearly 30 pounds, flying in the cabin wasn’t an option for him, and I would never consider putting a dog in cargo. Now, with Stewart, I have the opportunity to travel by plane since he will be between 16 and 18 pounds as an adult, which is small enough to fit in an airline-approved travel crate under the seat.
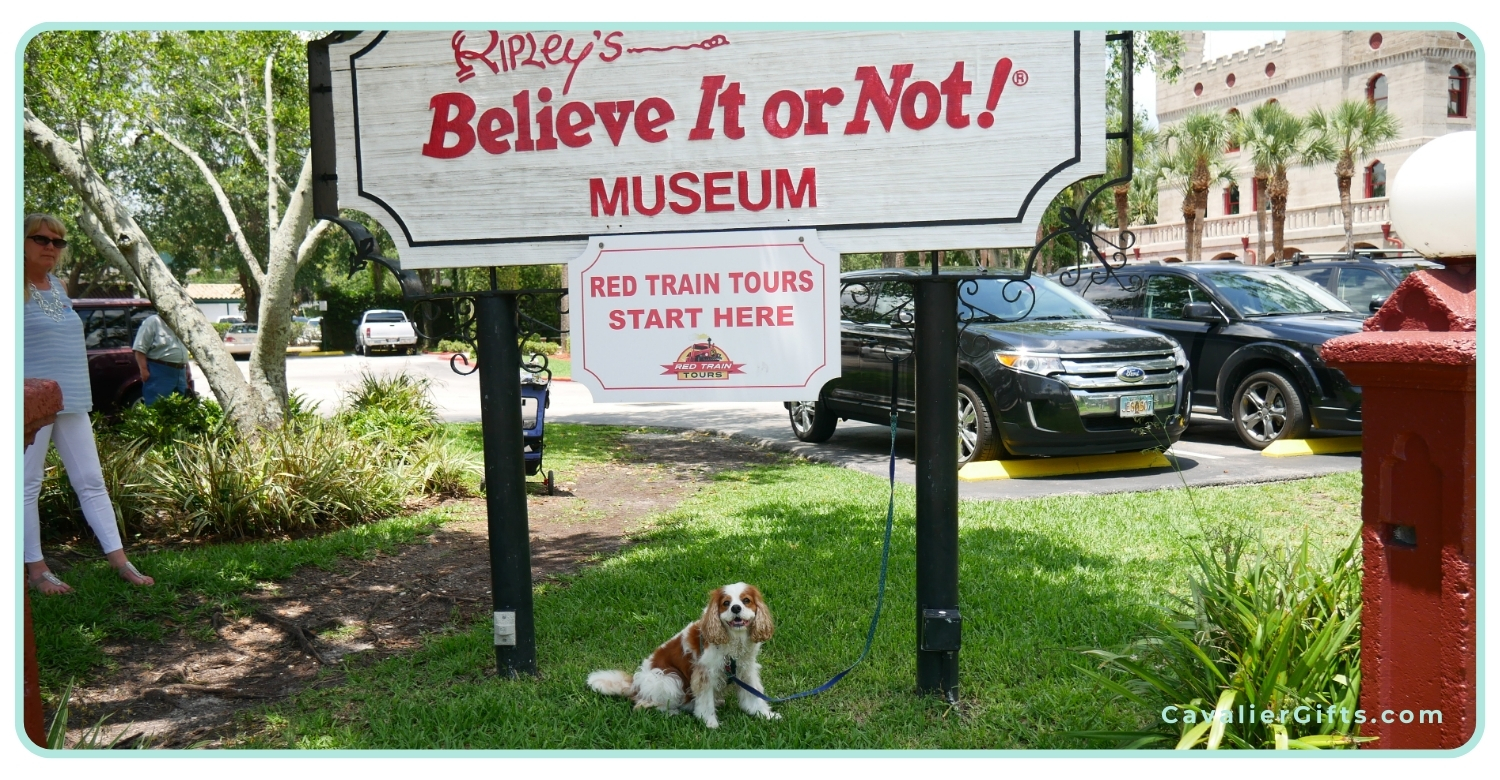
I have to admit, I’m a little nervous. It’s been almost 30 years since I last flew, and my experience wasn’t great. But I’m determined to make this a smooth process for both Stewart and myself. In September, we’ll be flying from Detroit to Portland, Maine, and I want to make sure Stewart is as comfortable and confident as possible for his first airplane trip.
Preparing Stewart, My Cavalier King Charles Spaniel for Air Travel
Since Stewart has never flown before, I’m taking a step-by-step approach to help him get used to every part of the travel experience. This isn’t just about the flight itself; it’s about everything leading up to it, from riding in his crate in the car to being in a busy airport environment.
Teaching a Cavalier to Enjoy a Travel Crate
One of the biggest adjustments for a Cavalier is spending time in a small, enclosed space. Since Stewart isn’t crate trained and has some separation anxiety, I’m taking extra care to make his travel crate a safe and positive space. An airline-approved travel crate is a much tighter fit, so here’s how I’ve been getting him used to it:
- Introducing the Crate Indoors – I started with short training sessions, luring Stewart into the travel crate with treats and rewarding him for stepping inside. Since it’s a tight fit, I guided him to turn around and reinforced him for doing so. Once he was comfortable moving inside, I worked on having him stay in the crate for a few seconds before rewarding and letting him out, gradually increasing the duration.
- Crate Inside a Crate – To help him transition smoothly to riding in the travel crate, I placed it inside his larger crate in the van. Since he was already used to the big crate, this made it feel more familiar. For the first couple of weeks, I left the travel crate unzipped, but zipped up the larger crate.
Stewart learning how to travel in his airplane approved carrier. - Zipping Up While Driving – Once he was comfortable, I started zipping up the travel crate while still inside the larger crate. This allowed him to experience confinement in a secure way without making a sudden change.
Stewart zipped up in his carrier. - Removing the Larger Crate – The next step will be taking the travel crate out of the big crate so that he’s riding in just the small one. By gradually adjusting him to this setup, he won’t even notice the change!
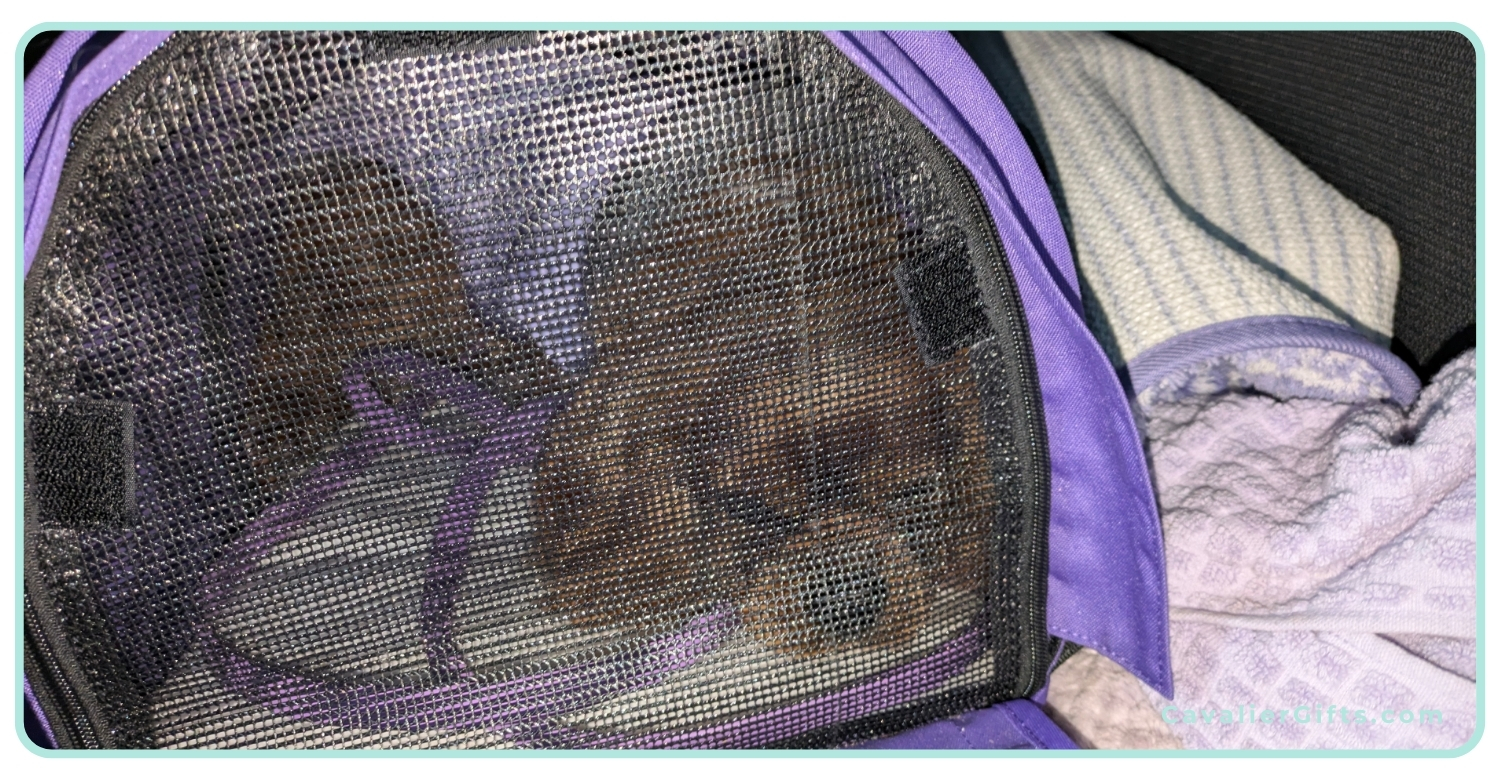
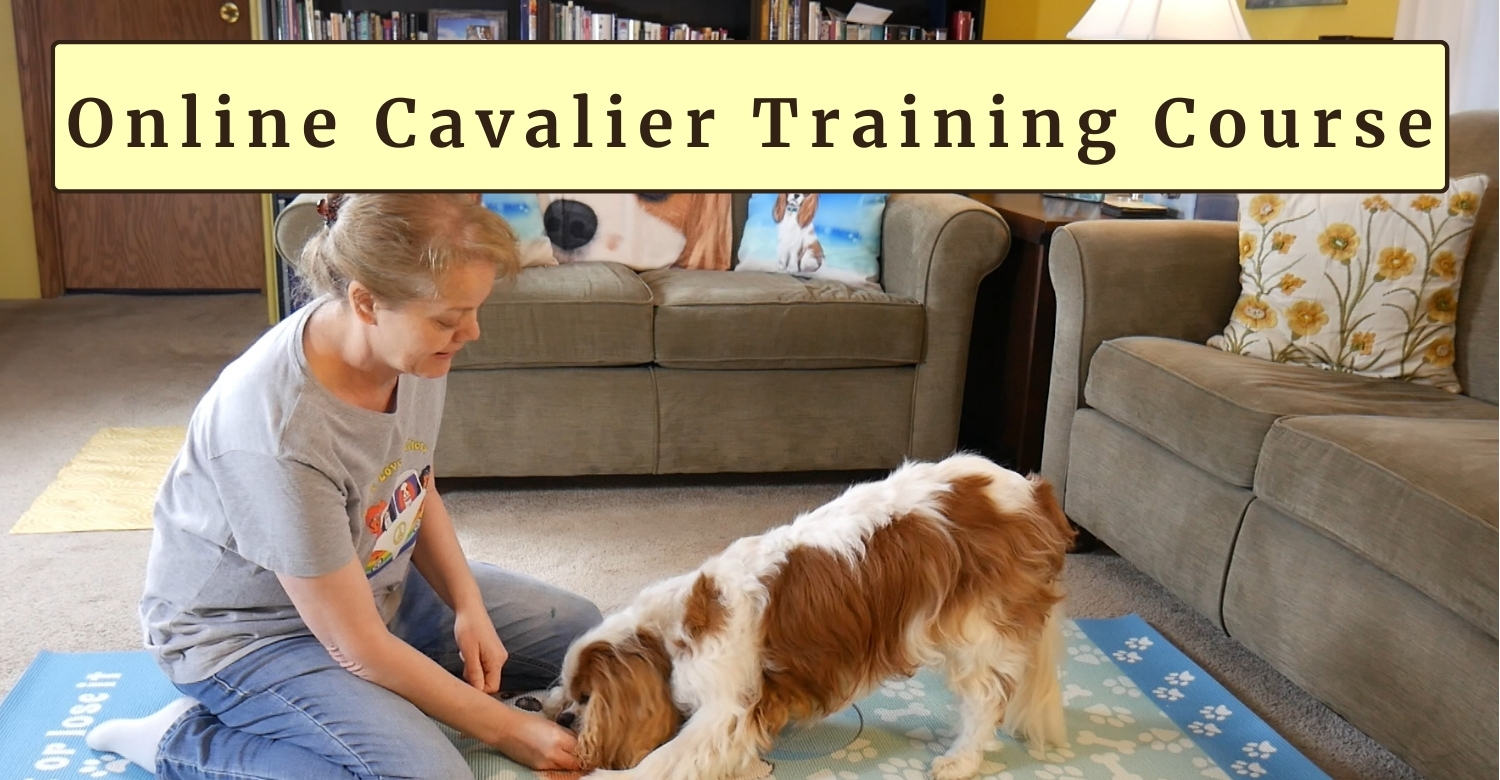
Socialization and Confidence Building
Beyond the crate, I want to make sure Stewart is confident in all the different environments he’ll encounter on our trip.
- Walking Politely on a Leash – Stewart will need to walk calmly on a leash through the airport. We’ve been practicing polite walking in various places with different surfaces and distractions. I will continue this training with busy locations as we progress through his training.
- Exposure to Crowds and Noises – Airports are full of noises; baggage carts, intercom announcements, rolling suitcases. I’m taking Stewart to different places where he can experience a variety of sounds and people in a controlled way.
- Getting Used to Security Procedures – At TSA checkpoints, I’ll need to take Stewart out of his crate and carry him through security. To prepare, I’ll work on calmly lifting him out of his crate and holding him in busier environments, helping him get comfortable with the experience before our trip.
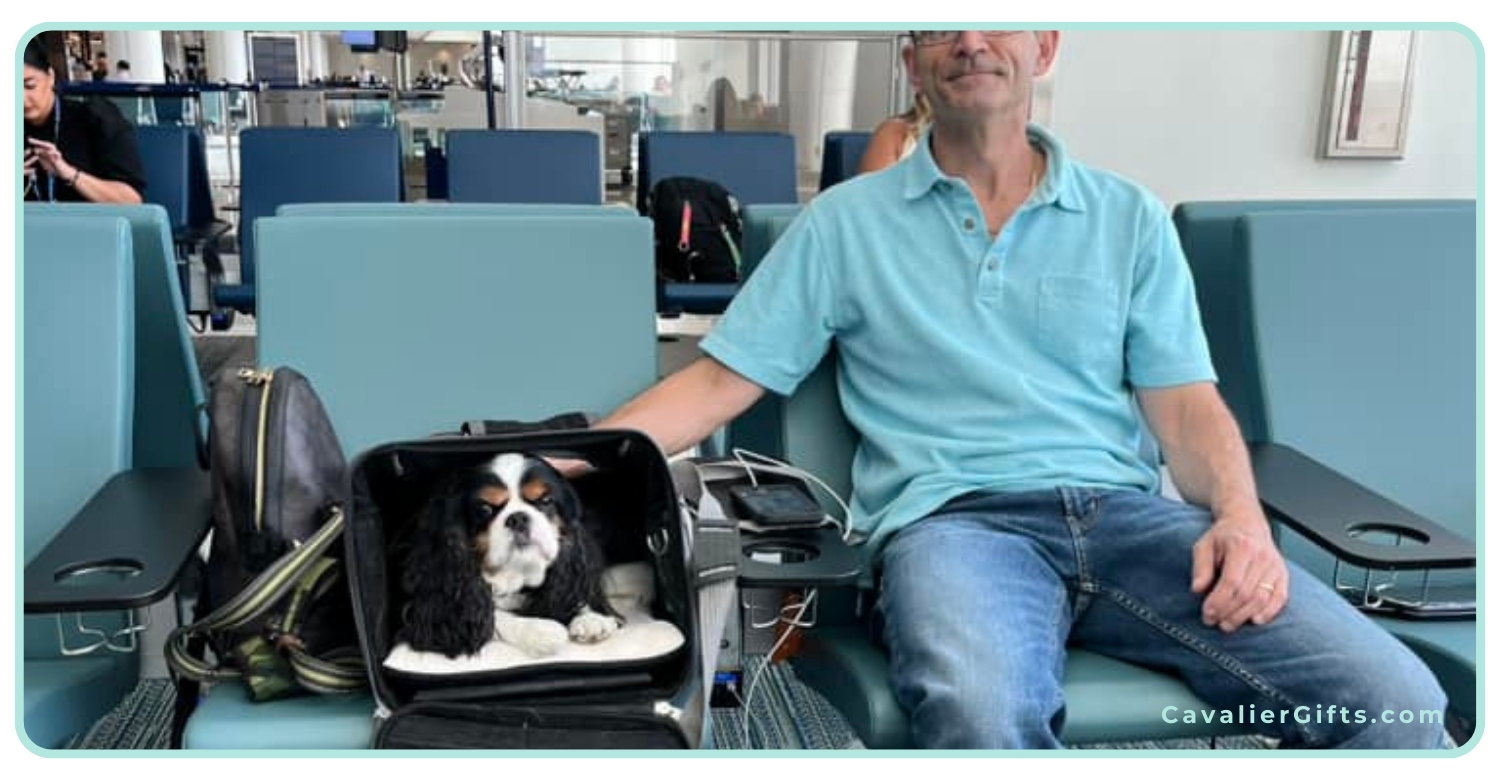
Preparing for Time in the Airport
Most airports have designated pet relief areas, but access to them depends on the layout of the airport and TSA procedures. Some airports have relief areas before security, while others have them post-security. Since Stewart will be crated during the drive and throughout check-in and security, I’ll plan ahead to find out if there’s an opportunity for a potty break before we go through security. If not, I’ll make sure he’s had plenty of time to potty before we leave for the airport.
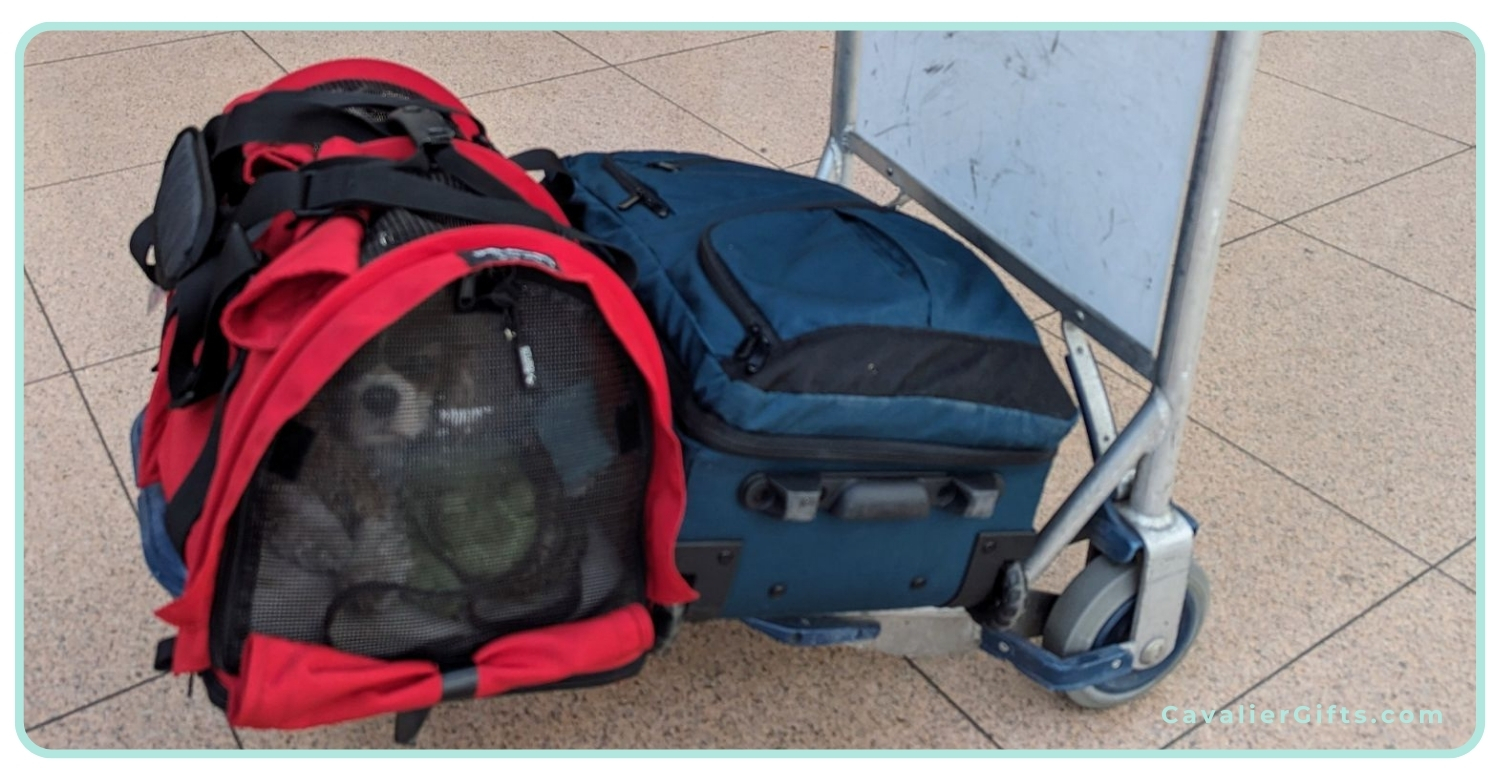
- Practicing Extended Crate Time – I’ve been gradually increasing the amount of time Stewart spends zipped up in his crate, so he’s comfortable being inside for longer periods.
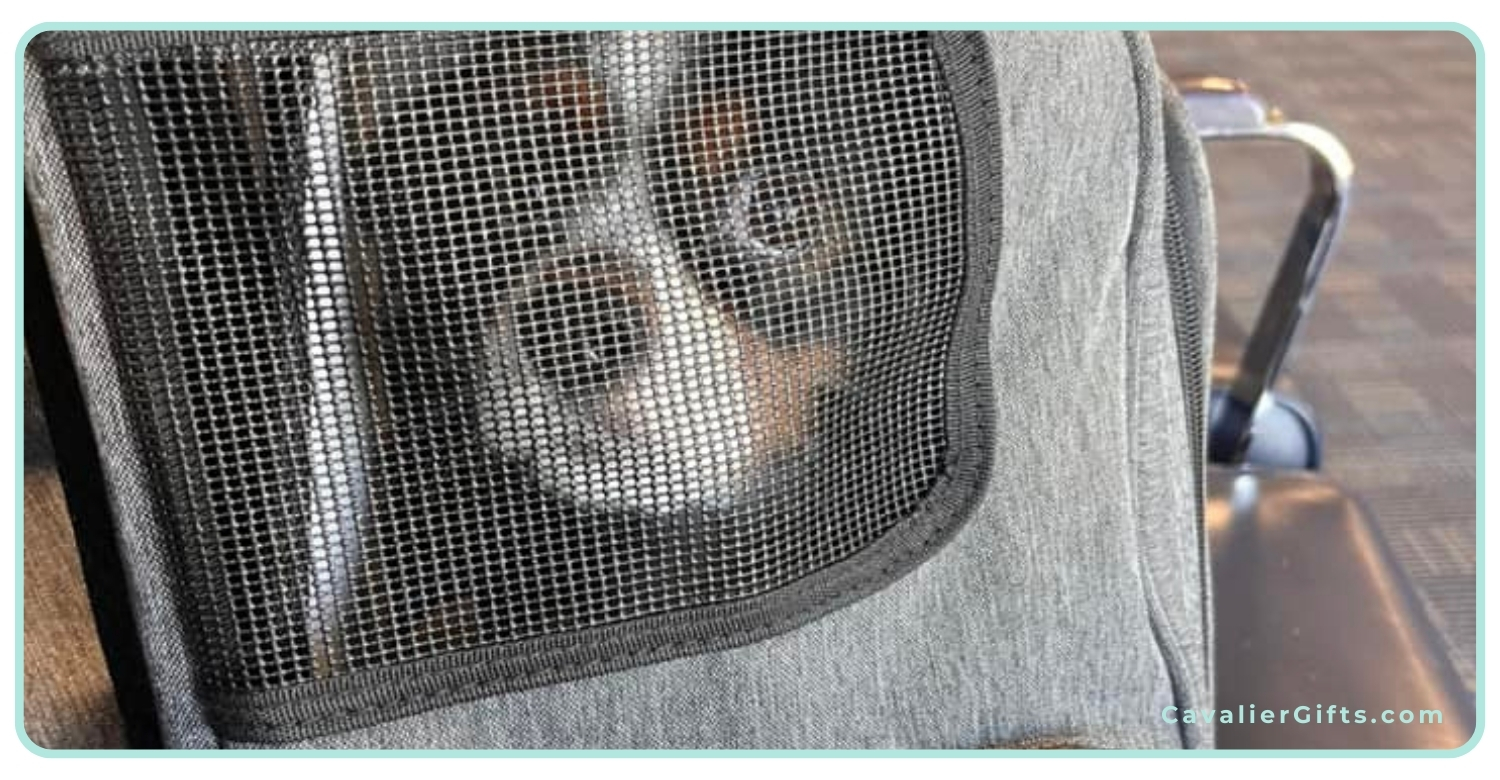
- Planned Potty Breaks – Since dogs can’t relieve themselves once past security, I’ll make sure to take Stewart to the airport’s designated pet relief area before heading to the gate. This is also why I teach my dogs how to potty on cue; it makes it easier to ensure they go when needed, especially in situations like this where time and access are limited.

The Flight Itself
The actual flight is the final step in our preparation. Since Stewart will be in his crate under the seat for the duration of the flight, I want to make sure he’s as comfortable as possible.
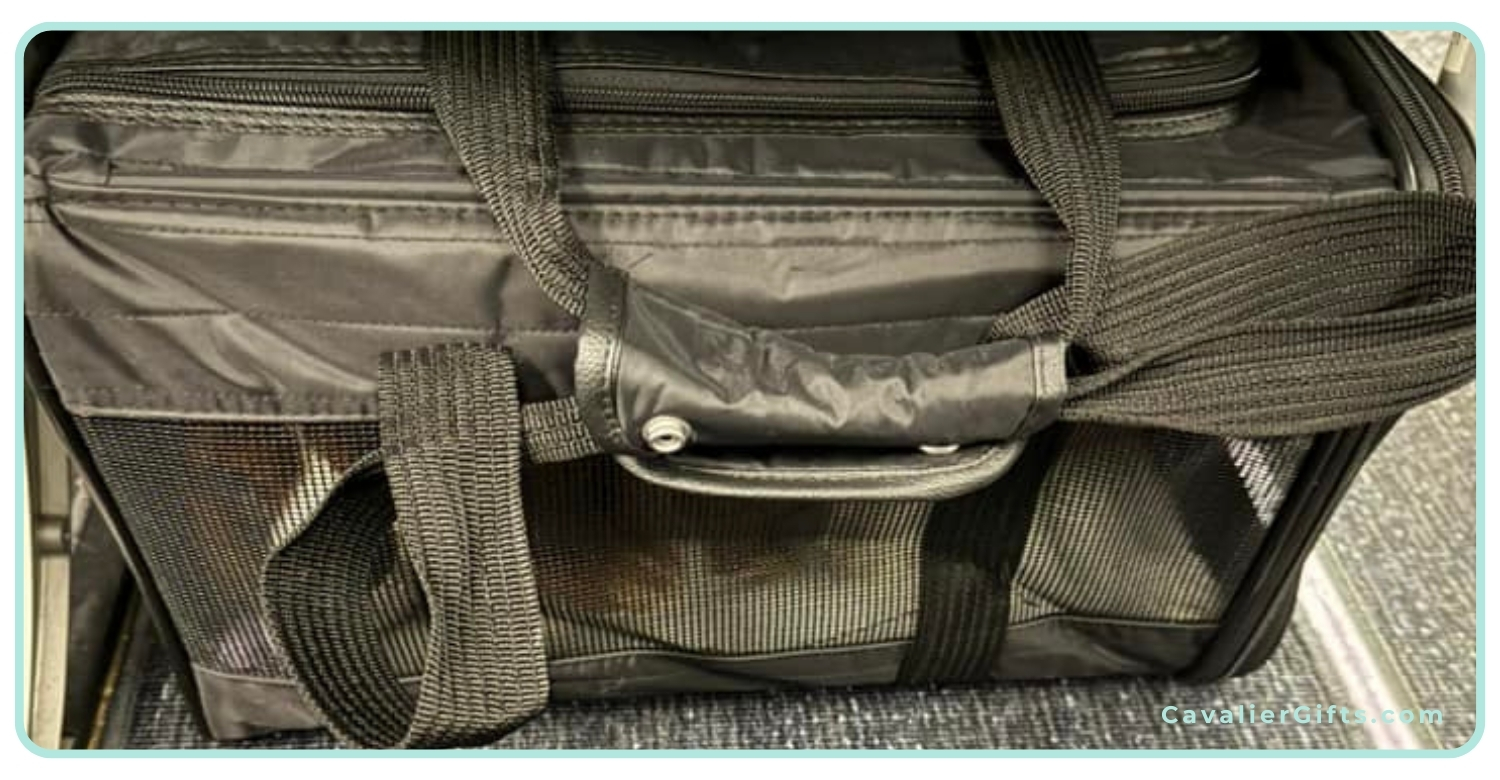
- Calm, Positive Associations – I’m making sure that his crate time is always associated with good things; treats, chew items, and a cozy space.
- Chews and Enrichment for the Flight –I’ll bring along a few safe chews and likely my slippers to provide comfort for Stewart during the flight.
- Staying Calm Myself – Dogs pick up on our emotions, so I’ll be focusing on staying relaxed and making this feel like just another routine adventure for Stewart.

Final Thoughts
Traveling with a Cavalier King Charles Spaniel on a plane takes preparation, but with gradual exposure and a positive approach, it can be a smooth experience. My goal is to make sure Stewart feels safe, confident, and comfortable every step of the way. While I’m still a bit nervous about my first flight in 30 years, I know that by preparing Stewart properly, we’ll both be ready for our adventure to Maine.
A big thank you to all of our Cavalier friends who sent us their travel photos! Don’t forget to follow them on social media.
Have you traveled with your Cavalier on a plane? I’d love to hear about your experiences in the comments!
|
|
|
|
Popular Blogs
February 26, 2025Cavalier King Charles Spaniel Heart Disease
Mitral Valve Disease (MVD) is something every Cavalier King Charles Spaniel parent should be familiar with. Sadly, this condition is extremely common in the Cavalier breed, but early awareness and proper management can greatly improve a Cavalier’s quality of life. In this blog, we’ll cover what MVD is, why Cavaliers are at risk, how the disease is staged, and which supplements can help support a healthy heart.
A heartfelt thank you to Lisa Davila, BS in Biomedical Science and Hospital Manager at Aggieland Animal Health Center in College Station, Texas, for helping me put together this article. Lisa has not only dedicated her career to animal health but has also been a loving mom to many Cavalier King Charles Spaniels. Her knowledge and experience are truly invaluable!
Understanding Mitral Valve Disease (MVD) in Cavaliers
Mitral Valve Disease (MVD) is a degenerative condition that affects the mitral valve of the heart. The mitral valve is responsible for ensuring blood flows properly between the left atrium and left ventricle. Over time, this valve can weaken and leak, allowing blood to flow backward into the atrium. This puts additional strain on the heart, eventually leading to heart enlargement and, in later stages, congestive heart failure (CHF).
MVD is considered a slow-progressing disease, but it varies from dog to dog. Some Cavaliers may live for years with a mild heart murmur, while others may progress more rapidly. Since MVD is so common in the breed, Cavaliers should be closely examined (cardiac auscultation) annually, to determine if they have a murmur. The presence of a murmur is often the first sign that a dog has degenerative valve disease.
Why Are Cavaliers at Risk of MVD?
Cavalier King Charles Spaniels are unfortunately predisposed to MVD. While any breed can develop valve disease, Cavalier King Charles Spaniels are at the greatest risk for developing degenerative mitral valve disease. Studies have shown that over 50% of Cavaliers develop a heart murmur by the age of 5, and by age 10, that number jumps to nearly 100%.Because MVD has a strong genetic component in Cavaliers, responsible breeding practices are essential. Responsible Cavalier King Charles Spaniel breeders ensure their breeding dogs undergo echocardiograms conducted by board-certified cardiologists. When considering a puppy, both parents should have cardiologist-issued heart clearances and be at least 2.5 years old at the time of breeding. Additionally, all four grandparents should be over the age of 5 and heart-clear. However, even with careful breeding, the risk remains high in the breed.
The Stages of MVD
MVD is typically classified into different stages based on its progression. Early detection and monitoring are crucial to managing the disease effectively.
Stage A – Dogs at risk for MVD but without any current signs (e.g., all Cavaliers are considered Stage A at birth because of their predisposition).
Stage B1 – A veterinarian detects a heart murmur, but there is no evidence of heart enlargement on X-rays or echocardiograms.
Stage B2 – A heart murmur is present, and imaging confirms heart enlargement. At this stage, medication such as Vetmedin (pimobendan) is often started to help delay the onset of congestive heart failure.
Stage C – Congestive heart failure (CHF) is present, meaning the heart can no longer compensate for the disease. Symptoms such as coughing, lethargy, and difficulty breathing may be noticeable. Medications are necessary to help manage the condition.
Stage D – End-stage CHF, where symptoms become harder to control even with medications.
Once a dog reaches Stage B2, most cardiologists recommend starting treatment to slow disease progression. Regular checkups and echocardiograms help ensure the right treatment plan is in place.
The Truth About Grain-Free Diets and Heart Disease in Cavaliers
With all the discussion surrounding Mitral Valve Disease (MVD) in Cavaliers, you may have come across concerns about grain-free diets and their potential link to heart disease. It’s important to separate the headlines from the facts when it comes to feeding our Cavaliers the best diet for heart health.
The debate about grain-free dog food largely stems from concerns about dilated cardiomyopathy (DCM), a condition where the heart muscle weakens, leading to poor function and potential heart failure. While DCM is a serious disease, the concern over grain-free diets has often been misinterpreted. The issue isn’t necessarily the lack of grains but rather the high levels of starchy carbohydrates like peas, lentils, legumes, and potatoes that are often used as substitutes in processed grain-free kibble.
Cavaliers are already predisposed to MVD, not DCM, which is a different heart condition with different causes. However, diet still plays a critical role in supporting heart health. The best way to provide a heart-healthy diet for your Cavalier is to focus on fresh, whole foods rich in high-quality animal proteins rather than relying on highly processed kibble, whether it contains grains or not. Read more about feeding your Cavalier a fresh diet.
Dr. Karen Becker explains it best: “The problem with grain-free formulas isn’t the lack of grains. At a minimum, it’s the high level of starchy carbohydrates coupled with the extreme high-heat processing methods used to produce these diets.”
Rather than worrying about whether a diet is labeled as “grain-free,” focus on feeding a fresh, balanced diet with high-quality proteins, healthy fats, and low-glycemic vegetables. Rotating proteins and using whole-food ingredients can help ensure your Cavalier gets the nutrients they need to support a healthy heart.
If you’re unsure about your dog’s diet, seek guidance from a veterinarian with a strong background in canine nutrition, not just one who sells prescription diets in the clinic. A certified veterinary food therapist (CVFT) can be a great resource when designing a diet that supports heart health while avoiding unnecessary fillers.
A well-balanced, species-appropriate diet can play a key role in keeping your Cavalier’s heart strong and healthy for years to come.
Heart-Healthy Supplements for Cavaliers with MVD
While MVD cannot be cured, a combination of medications, lifestyle management, and supplements can help support heart function and overall well-being. Below are some key supplements that may benefit Cavaliers with or at risk for MVD:
MCT Oil (Medium-Chain Triglycerides) – Provides an alternative energy source for the heart muscle. One recommended brand is Natural Force Organic MCT Oil (1 tsp daily with food). Before giving your Cavalier coconut oil, please read this article on MCAD in the Cavalier.
Amino Acids (Lysine, Methionine, L-Carnitine, Taurine) – Help maintain heart muscle contractility and serve as antioxidants.
Omega-3 Fatty Acids – Reduce inflammation, decrease clot risk, help prevent heart muscle loss, and support healthy blood pressure. Nordic Naturals Omega Pet Liquid is a high-quality option.
Vitamin E – Acts as both an antioxidant and anti-inflammatory.
Magnesium – Plays a crucial role in heart muscle contraction and maintaining a healthy heart rhythm.
Coenzyme Q10 (CoQ10) – A powerful antioxidant that supports heart function. Life Extension 100 mg capsules are a great choice.
Recommended Supplement Blends
If you prefer a multi-ingredient supplement, these options are formulated specifically for heart health:
Rx Vitamins for Pets Formula CV – Includes amino acids, magnesium, Vitamin E, CoQ10, and hawthorn berry extract (safe unless the dog is on Vetmedin).
VetriScience Cardio Strength Capsules – Similar to the Rx Vitamins formula but without hawthorn berry extract, making it safe for all MVD stages and medications.
Recap & Common Questions About MVD in Cavaliers
Mitral Valve Disease (MVD) is a serious but manageable heart condition that affects many Cavalier King Charles Spaniels. Early detection, responsible breeding, proper veterinary care, and supportive supplements can all play a role in keeping your Cavalier’s heart as healthy as possible.
What are the early signs of MVD in Cavaliers?
The first noticeable symptom is often a heart murmur, detected during a cardiologist visit. As the disease progresses, signs can include coughing, fatigue, labored breathing, and reduced exercise tolerance.
How long can a Cavalier live with mitral valve disease?
Many Cavaliers live for years after an MVD diagnosis, especially with early detection and proper management. While every dog is different, with the right veterinary care, medications, and supplements, Cavaliers can still enjoy a good quality of life.
What are the final stages of MVD in dogs?
In the later stages, MVD leads to congestive heart failure (CHF). Symptoms include severe coughing, difficulty breathing, lethargy, fainting, and fluid buildup in the lungs or abdomen. At this stage, medication and veterinary support are essential for comfort.
How do you treat MVD in Cavaliers?
Treatment typically includes veterinary-prescribed medications to support heart function and manage symptoms. Additionally, heart-healthy supplements, such as taurine, CoQ10, and omega-3 fatty acids, can provide extra support. Feeding a fresh, species-appropriate diet may also contribute to overall heart health.
Final Thoughts
A heart-healthy fresh diet, proper weight management, and the right combination of supplements can help support your Cavalier’s heart at any stage of MVD, even before a murmur is detected. Early intervention and regular veterinary care are key to helping our beloved Cavaliers live longer, healthier lives.
A big thank you to Lisa for sharing her knowledge on this topic! If you have any questions, feel free to ask, and don’t forget to check out Lisa and Jiminy on Instagram!
Google Ad Below [...]Read more...
April 15, 2024Cavalier King Charles Spaniel Potty Training
Congratulations on welcoming a Cavalier King Charles Spaniel into your life! They’re such charming and affectionate dogs, full of warmth and love. As a fellow Cavalier mom and positive dog trainer, I’m thrilled to share my experience on the best way to potty train a Cavalier puppy. Let’s jump right in to how to successfully housebreak your Cavalier King Charles Spaniel puppy.
I love puppies! And Cavalier puppies are just some of the cutest little things ever! There’s nothing quite like their sweet kisses, puppy breath, and zest for life! But it’s not all puppy kisses; we also must potty train our Cavaliers. Nobody likes an untrained dog.
One common question I get from Cavalier followers is how to best potty train their puppy. I’ve seen plenty of discussions about potty accidents in Cavalier King Charles Spaniel groups, and I’m here to share some potty training tips with you.
First things first. Let’s start by being realistic. Contrary to what some may suggest, potty training a puppy in a matter of days is not realistic. It’s important to realize that puppies, just like human babies, need time to learn and gain control over their bladders. So, if you’re expecting your Cavalier to hold it for hours after just a few days of training, you are setting your pup and yourself up for failure.
My own Cavalier, Dexter, wasn’t fully potty trained in a mere five days, and I’m perfectly okay with that. I prioritized consistent management and frequent potty breaks, which ultimately led to just a couple of accidents in the house. The key is to prevent accidents by being proactive, not reactive.
What’s the best way to potty train your Cavalier puppy?
It all comes down to three essential things: supervision, frequent potty breaks, and confinement when you can’t actively watch them. The goal is to reduce the chances of accidents happening indoors.
When it comes to supervision, it’s eyeballs on! This means keeping a watchful eye on your puppy at all times, ensuring that you’re there to rush them outside if it looks like they are about ready to go. You can use things like baby gates, leashes, shut doors, or X-pens so that you can keep your eyes on them at all times.
Subscribe to @CavalierTipsandFun on YouTube!
How Often Should You Take Your Puppy Potty?
As for how often to take your puppy potty, it really depends on their age and activity level. Active puppies may need to go out every 15–30 minutes, while older dogs can typically hold it for longer periods. The key is to stay ahead of the game and take your puppy out whenever you notice a change in their behavior or activity. A change in behavior or activity signals that it’s time for a bathroom break. For example, if your puppy just had a bout of puppy zoomies, out to potty we go. Did your puppy wake up from a nap? Out to potty we go. By not waiting for your puppy to ask to go out or have an accident, you are well on your way to a potty-trained dog.
When it comes to crate training, make sure the crate is just the right size to discourage accidents. The crate should be large enough for your pup to stand and lie down comfortably, but not so large that they can use one corner as a bathroom.
Whether you have a fenced yard or not, leash your puppy. This gives you the opportunity to reward your puppy for going potty outside. You will be right there to praise your puppy, give him a snack, and tell him just how smart he is. It also leads to my next potty training tip: teaching your Cavalier to potty on cue!
Teaching your Cavalier to potty on cue is a must in my book. Imagine being able to take your dog outside just before the rainstorm and ask him to pee and poo, and he does! This useful behavior isn’t just fantastic for potty training your dog; it’s incredibly convenient in daily life. The keys to teaching your Cavalier to eliminate on cue are good management, timing, and your reward. By associating a word for peeing with a separate word for defecating, you can start to teach your puppy to do either when requested.
Subscribe to @CavalierTipsandFun
Teaching Your Cavalier to Potty on Cue
Here’s how to get started:
Begin the training process in the morning, when your pup wakes up. Arm yourself with some delicious treats, leash up your Cavalier, and head outside to his favorite potty spot.
Stay close and pay attention to your puppy. Stay about 6’, so it’s not just a sniffing fest; the goal is to get him to eliminate before a big walk, play, or sniff. Pay close attention to your Cavalier’s body language. Watch for subtle cues like sniffing, circling, or squatting, which indicate he’s about to eliminate. As soon as you see a sign, use your potty cue, such as “Go potty,” and wait patiently. When your pup starts to do his business, praise quietly, and after he’s finished, give him big praise and rewards. You want to make sure you don’t interrupt the potty process by rewarding too soon.
If your dog typically follows up with a poop, repeat the process with your poop cue, like “Go poop-poop,” and reward him once he’s finished.
After your Cavalier has finished his business, it’s time for the next reward: fun! Whether it’s a walk, playtime in the yard, or simply enjoying the fresh air, make sure to give your pup some extra time to enjoy himself before heading back indoors. This helps reinforce the idea that going potty leads to enjoyable activities.
Repeat this routine each time you take your Cavalier outside, even if you’re planning on going for a walk. By always pairing potty time with rewards, you’ll motivate your pup to go more quickly.
As your Cavalier starts to make the connection between potty on cue and familiar surroundings, gradually introduce the cue in different environments, such as the park or during walks. This helps your dog understand the cue in any situation, ensuring they respond reliably wherever you are.
With patience, consistency, and plenty of positive reinforcement, you can teach your Cavalier King Charles Spaniel to potty on cue, making potty training easier.
Bell Training Your Cavalier King Charles Spaniel Puppy
While some love doggie doorbell training or puppy pads, I prefer to focus on methods that teach puppies to potty outside, not inside or on “things.” I find these methods tend to confuse puppies. Potty pads or litter boxes are teaching the puppy to potty on things that happen to be indoors. This could be a potty pad, but it also could end up being your favorite blanket.
As far as bell training goes, I’m not a fan of encouraging demanding behavior in dogs. Teaching them to ring bells to go outside may inadvertently lead to them using this to not only tell us they need to potty, but also that they may want to go outside to chase squirrels.
I believe in keeping potty training simple and straightforward, focusing on reinforcing the desired behavior of outdoor elimination. By keeping things simple and staying consistent, we can focus on potty training without having to rely on pee pads or bells.
In the end, potty training your Cavalier King Charles Spaniel is all about patience, consistency, and a whole lot of love. By following these tips and staying diligent, you’ll set your new puppy up for success.
Your comments and questions are always welcome below.
Join our vibrant Cavalier King Charles Spaniel community on Facebook, support our dedication to pet wellness on Patreon, and stay updated with our weekly newsletter for invaluable tips and insights into raising happy, healthy pets. Together, let’s make a difference in our dogs’ lives!
Google Ad Below [...]Read more...
May 29, 2024Natural Diet for Cavalier King Charles Spaniel
Dexter’s Food Journey with Raw and Homemade Food
Dexter, my Cavalier King Charles Spaniel, was a raw-fed puppy. However, because I wasn’t sure how to do it properly, and I was unaware that there were premade raw foods on the market, I fed him kibble with food toppers. After learning about how to balance a fresh dog food diet, I started to home cook for him when he was around two. Then, when he was about four, I transitioned him to a DIY raw diet. Through this journey with Dexter, I’ve learned about creating a nutritious and tailored diet that meets his unique needs. Now, I’m excited to pass along my tips and thoughts on feeding your Cavalier King Charles Spaniel. Let’s dive in!
Natural diet for Cavalier King Charles Spaniels
If you’re anything like me, you’re always on the lookout for the best pet products, natural dog grooming supplies, and the healthiest dog food brands for your Cavalier. One of the most important aspects of your Cavalier’s well-being is their diet. Dogs are natural carnivores, made to thrive on a diet of fresh meat. This means a species-appropriate diet is key to their health and vitality.
Understanding Species-Appropriate Nutrition
Let’s think about our dogs’ ancestors for a moment. They thrived on a diet of raw meat, bones, and organs. Today, we can recreate this natural diet with a raw food approach, using fresh, high-quality ingredients that focus on what dogs are meant to eat. For your Cavalier King Charles Spaniel, in a nutshell, this means focusing on a diet that’s about 90 percent meat, bone, and organ, with the remaining 10 percent coming from fruits and vegetables. This balance provides the essential nutrients and fiber they need to stay healthy. Personally, I feel if you aren’t able to go raw, this diet can also be cooked. You just would need to provide the calcium from the bones in another form, since dogs cannot eat cooked bones.
Don’t forget to subscribe to @CavalierTipsandFun for more!
The Problem with Processed Dry Kibble
Now, dry kibble. It’s processed at high temperatures, which takes away almost all the moisture and nutrients from the ingredients. Often, kibble is made with low-quality ingredients and fillers that don’t give your dog the nutrients they need. The lack of moisture in kibble can also lead to chronic dehydration, affecting everything from kidney function to skin and coat health. Plus, since kibble is made to last a long time, the ingredients can go rancid quicker than you might think, making it even less nutritious for your pup.
The Importance of Moisture in Your Dog’s Diet
Moisture is a crucial part of your dog’s diet. In the wild, dogs get most of their hydration from the food they eat. Fresh, raw diets naturally provide the moisture that kibble just can’t. This is essential for your dog’s digestion, kidney health, and overall well-being. By feeding them fresh, high-quality meat and vegetables, you’re making sure they stay hydrated naturally, without having to depend solely on drinking water.
Google Ad Below
Finding the Best Diet for Your Cavalier King Charles Spaniel
When it comes to our Cavaliers, there’s no one-size-fits-all solution. Every dog is unique, with their own health needs, behaviors, and lifestyle. Personally, I’m a big advocate for variety. This could be in the form of different proteins, suppliers or even a nice pre-made raw or mix. I steer clear of dry pet food altogether unless I’m using freeze dried food for dog training treats. For me, a balanced DIY raw diet for Dexter is the way to go. It’s fresh, it’s healthy, and I can tailor and tweak it to Dexter’s needs.
Why a Raw Food Diet is Ideal for Most Cavalier King Charles Spaniels
A raw food diet is as close to a natural diet as you can get for your Cavalier. It includes raw meat, bones, and organs, providing essential vitamins and minerals often lost in commercial dog foods. This diet can improve your Cavalier’s skin and coat health, immune system, and help maintain a healthy weight. As I mentioned earlier, I think adding an approximately 10 percent mix of fruits and vegetables is a great way to add a nutritional boost to the bowl. By avoiding the fillers and artificial additives found in many commercial foods, we ensure our dogs get the best nutrition possible.
Homemade Raw or Cooked Food: Personalized Nutrition for Your Cavalier
One of the best ways to ensure your Cavalier King Charles Spaniel is eating the healthiest diet is to make their food at home. This way, you control the quality of the ingredients and can tailor the meals to your dog’s specific needs. Homemade meals are especially beneficial if your Cavalier is a picky eater or has food allergies. Just remember to balance their diet properly to include all necessary nutrients. Whether your dog has allergies, digestion issues, or any other specific needs, you can tweak their diet to meet their needs.
Feeding Your Cavalier a Grain-Free Diet
You might have heard that grain-free foods are bad for Cavaliers because they were thought to have caused Dilated Cardiomyopathy (DCM). In 2019, the FDA released a list of grain-free pet foods that had people swearing that grain-free dog food was bad. But, guess what? It’s really not the case. In fact, in 2022 the FDA announced on their website there wasn’t a solid link between grain-free diets and DCM.
Feeding your dog grain-free can actually be a good choice for your Cavalier. But things get tricky if you are looking at a purchased grain-free alternative, particularly a dry kibble. When you’re reading the ingredient panel of a dog food (yes, read those labels), watch out for ones loaded with peas, lentils, legumes, seeds, and/or potatoes. Even if the front of the bag screams “meat-first,” it might sneak in a bunch of carbs and starches that aren’t ideal. According to experts, such as Dr. Karen Becker, it’s not about cutting out grains—it’s about making sure our pets aren’t eating too many starchy fillers. So, bottom line? Go back to that 90 percent meat recommendation.
Feeding Your Cavalier King Charles Spaniel Puppy
When it comes to feeding your Cavalier King Charles Spaniel puppy, it’s essential to consider their unique nutritional needs as they grow. If you’re not quite sure about the specifics of puppy nutrition, it’s perfectly okay to rely on trusted commercial brands known for their expertise in creating a balanced diet for puppies.
A commercial raw puppy food will include the essential proteins, fats, and calcium your puppy needs to develop strong bones. The key is to ensure whatever you choose is well-rounded and provides all the nutrients your Cavalier puppy requires during the puppy life stage.
Maintaining a Healthy Weight
Keeping your Cavalier at his ideal weight is super important. Maintaining a healthy weight isn’t just about good looks, but their health. Extra weight can contribute to health issues like joint problems and heart disease. The breed standard says they should weigh between thirteen and eighteen pounds. But, Cavaliers can vary a lot in size. Take Dexter, for instance. He’s a bit of a big guy, weighing his ideal weight at a healthy twenty-nine pounds. So, how do you know if your Cavalier is at the right weight? It’s all about getting your hands on your dog. Run your fingers lightly over their ribcage; you should be able to feel their ribs without pressing too hard. If they’re too prominent, they might be on the thin side. But if you can’t feel them at all, or if their waistline has disappeared, they might be carrying a few extra pounds. Just keep an eye on their overall body shape, and remember, every Cavalier is unique!
How Often to Feed Your Cavalier King Charles Spaniel
Consistency is key when it comes to feeding your Cavalier. Establishing a regular feeding schedule helps regulate their metabolism and digestion. Typically, feeding your Cavalier twice a day, in the morning and evening, works well. For puppies, more frequent meals might be necessary to meet their higher energy demands. I actually feed Dexter three times a day, mainly due to the fact that he gets so much food, I prefer to space it out.
Adding Supplements and Vitamins
Even with a well-balanced diet, supplements can play an essential role in your Cavalier’s health. Omega-3 fatty acids can enhance skin and coat health, probiotics can aid digestion, and joint supplements can support mobility. Always consult your Cavalier’s vet before adding new supplements to ensure they’re necessary and safe. When possible, opt for real food supplements vs. synthetic.
Food Allergies in Cavalier King Charles Spaniels
If your Cavalier has allergies, a limited-ingredient fresh diet can be incredibly beneficial. Before jumping brands, I would suggest going through a pet food elimination diet to identify triggers. Once you know what your Cavalier is allergic to, you can create a personalized diet just for him. You can read more about how and why a pet food elimination diet is helpful on my other blog, right here.
Safe Fruits and Vegetables to Feed Your Cavalier
Things like carrots, broccoli, and kale can be great sources of extra nutrients and fiber. And don’t forget the powerhouse of antioxidants fruits like blueberries, strawberries, pomegranates, and apples can provide. For best digestion, blitz them up! Introduce all new foods slowly and keep an eye on what works for your dog.
Transitioning to a Raw Food Diet
Transitioning your Cavalier to a raw food diet should be done gradually to avoid digestive upsets. Start by introducing small amounts of raw food while slowly decreasing their current food. A 75 percent and 25 percent switch usually works well. Over a week or two, increase the raw portion until it completely replaces their old diet.
Choosing the Best Raw Food Brands
Selecting high-quality raw food brands for your Cavalier ensures they get balanced and nutritious meals. Personally, I look for brands that offer meats that are antibiotic and hormone free. Ideally, any fruits and vegetables will be organic. Opt for whole foods vs synthetics when possible. But, it will be a balancing act based on what’s available to you and your budget. As I mentioned earlier, shoot for approximately 90 percent meat, bone, and organ. A few raw brand choices to consider include BJ’s Raw, Raw Paws Pet Food, Raw Wild, We Feed Raw, Primal, Vital Essentials, Smallbatch, Raw Bistro and Steve’s Real Food.
A Healthy Diet Can Improve the Immune System, Skin, and Coat Health
By providing your Cavalier with a balanced raw or homemade diet you’re not just filling their bowl, you’re nurturing their well-being from the inside out. Fresh diets, whether raw or homemade, are rich in unprocessed ingredients, offering a higher concentration of vital nutrients compared to heavily processed kibble. Fresh foods do not have the fillers and additives found in kibble, making them easier for dogs to digest and absorb. Because of this, fresh food promotes better immune function, healthier skin, and a shinier coat, making them the ideal choice for your Cavalier.
By focusing on a fresh, natural diet tailored to your Cavalier King Charles Spaniel’s specific needs, you’re setting them up for a long, healthy, and happy life. Remember, my goal is to offer guidance and support to help you navigate the journey of pet nutrition, without any judgment. Let’s work together to ensure the best possible care for you and your Cavalier!
Your comments and questions are always welcome below.
Join our vibrant Cavalier King Charles Spaniel community on Facebook, support our dedication to pet wellness on Patreon, and stay updated with our weekly newsletter for invaluable tips and insights into raising happy, healthy pets. Together, let’s make a difference in our dogs’ lives!
Google Ad Below [...]Read more...
May 14, 2024Hot Weather Tips for Cavalier King Charles Spaniels
People often think of summer as a good time to get out and about with our Cavaliers. As a dog-friendly travel blogger, I’m often pitched ideas and stories about taking Dexter to X outdoors, even in July or August. But, the reality is, that’s usually just too darn hot for my now 14.5 year-old Cavalier King Charles Spaniel, Dexter.
He’s always run a bit hot, but now, as a senior and with MVD, the summer heat is just not ideal for him. But, it’s not just Dexter. Summer heat can pose health issues such as sunburn and heatstroke. Today, I’m going to jump into some ideas on how to keep your Cavalier King Charles Spaniel cool and active during the summer or warm months.
Cavalier King Charles Spaniels and Heat Stroke
Heatstroke is a serious concern for all dog families, particularly for breeds like the Cavalier King Charles Spaniel, which can be more susceptible due to their flat-faced (brachycephalic) nature. Any dog, any breed, and any age can develop heat stroke, even on cool days! The VetCompassTM conducted a study in 2016 regarding the risk factors for heat-related illness (HRI):
Breeds with the highest incidence of HRI included the Chow Chow, Bulldog, French Bulldog, Dogue de Bordeaux, Greyhound, Cavalier King Charles Spaniel, Pug, and the Golden Retriever.
Dogs at or above the mean adult body weight for their breed/sex showed an increased risk of HRI compared to dogs below the mean body weight.
Dogs over 12 years old had the greatest odds of HRI compared to dogs under 2 years old.
Signs of Heatstroke in a Cavalier
Recognizing the signs of heatstroke and taking preventive measures are crucial to keeping your dog safe. Signs such as excessive panting, drooling, rapid pulse, and restlessness indicate your Cavalier may be overheating. If you notice these symptoms, act quickly by providing cool (not cold) water and applying damp towels to areas with good blood flow, such as the head, armpits, and groin. Then take your Cavalier to the vet to prevent things from getting worse.
How Food Affects Your Cavalier’s Ability to Tolerate Heat
Just like for us, our pet’s food does more than just provide them with calories. Food has a big impact on their overall health, affecting everything from their longevity to their behavior and how they handle hot and cold temperatures. According to traditional Chinese medicine (TCM), everything in life has a balance of energy and heat, represented by Yin and Yang. Yin embodies the cool, and yang is the hot. This includes our pets, food, and environment; they all have specific energetics.
Dexter tends to run a little more yang (hot). Therefore, when I’m creating his meals, I aim to have the foods I provide either be energetically cooling or neutral. I avoid energetically warm or hot foods and proteins. For example, common foods that are warming or hot include goat, lamb, venison, chicken, and pheasant. Whereas, cooling proteins include rabbit, duck, beaver, cold water fish, and muskrat.
Applying this feeding concept to our Cavaliers, we can tailor their diets to help regulate their internal temperature. During the warmer months, opting for cooling foods can help maintain balance and comfort for your Cavalier.
Google Ad Below
Summer Fun for You and Your Cavalier King Charles Spaniel
Despite the summer heat, Dexter and I still enjoy our summer adventures. They just need to be modified according to the weather. The first thing I do is check the weather, so I’m not out and about with Dexter and surprised! Walking or strolling Dexter in the morning is by far cooler than in the evening. I know people suggest evening walks, but, honestly, the heat from the pavement and the atmosphere seem hotter to me than in the morning. Your location may be different.
Try walking on grassy areas instead of pavement. Shady parks beat the noon sun. Breezy days while wading in the water are another fun way to help your Cavalier stay cool. However, if it’s still sunny or warm, cool water on their feet and a breeze are unlikely to cut it.
We do a lot of indoor adventures during the summer months. Pet stores, dog friendly stores and attractions are our go-tos. I also do a lot of indoor training sessions and enrichment activities to help keep Dexter engaged. The bottom line is that I don’t want to risk Dexter’s health. And I can say from experience, it’s not a good feeling. Back in 2018, I’m pretty sure Dexter almost had a heat stroke! We were in Florida in the spring, doing touristy things. I thought I was being careful, bringing Dexter inside the stores, indoor attractions, and a covered train tour, but he really wasn’t doing well. He started showing signs of heatstroke. We rushed him to the hotel and cooled him down. I was lucky. And I’m not sure what I would have done if I wasn’t so lucky.
Hot Weather Tips for a Cavalier King Charles Spaniel
Grooming & Trimming: Regularly groom your Cavalier to remove loose fur and prevent overheating. I do give Dexter a puppy cut by trimming his belly, legs, and tail. I started this because of his CM/SM, but it also helps lighten his load and keeps him cooler.
Travel Comfort: Ensure your Cavalier’s comfort during travel with a well-ventilated crate or car harness, and schedule frequent breaks for water and shade. I also use a cooling mat and fan blowing on Dexter.
Sunscreen: Dog friendly sunscreen on your Cavalier’s nose helps protect him from harmful UV rays.
Cooling Products: Invest in cooling accessories like a cooling vest, bandana, or mat to provide relief from the heat during outdoor adventures.
Avoid the Hottest Part of the Day: Schedule outdoor activities during cooler times, such as early morning or late evening.
Mind the Pavement: Hot asphalt can burn your Cavalier’s paw pads. Stick to grassy or shaded areas for walks.
Hydration: Always have fresh water available, and encourage your Cavalier to drink frequently to stay hydrated. I put bone broth cubes in Dexter’s water bottle to encourage him to drink. If not, he will ignore the water.
Indoor Play or Outings: On exceptionally hot days, opt for indoor activities like interactive games or training sessions to keep your Cavalier entertained while staying cool.
Cooling Foods: Opt for cooling or neutral proteins in your Cavalier’s diet.
Remain vigilant, provide ample shade and hydration, and monitor your Cavalier for signs of overheating. Keep your Cavalier King Charles Spaniel’s well-being in mind, and use these practical tips to make sure you and your Cavalier have a safe and enjoyable summer.
Your comments and questions are always welcome below.
Join our vibrant Cavalier King Charles Spaniel community on Facebook, support our dedication to pet wellness on Patreon, and stay updated with our weekly newsletter for invaluable tips and insights into raising happy, healthy pets. Together, let’s make a difference in our dogs’ lives!
Google Ad Below [...]Read more...
June 8, 2024Treatment options for Chiari malformation and Syringomyelia
My best friend, Dexter the Dog, was diagnosed with Chiari malformation and syringomyelia in 2012, just before his third birthday. This diagnosis hit me hard. Over the past twelve years, I’ve shared a lot about Dexter’s diagnosis, care, and treatments on my Raising Your Pets Naturally blog and YouTube channel.
Since I recently started this blog dedicated to Cavalier King Charles Spaniels, I thought it would be a good time to write an update on Dexter’s care and what I’ve learned. I am also happy to say that at almost fifteen, Dexter is doing amazingly well! I hope you find this article on Chiari malformation and syringomyelia in dogs helpful. Please share this information to help others dealing with this heartbreaking diagnosis learn about the many helpful and natural treatments for dogs with Chiari malformation and syringomyelia.
What is Chiari Malformation (CM) and Syringomyelia (SM)
Chiari malformation commonly affects Cavalier King Charles Spaniels, Chihuahuas, Brussels Griffons, Yorkshire Terriers, Maltese, Pomeranians, Toy Poodles, and Shih Tzus. In dogs with CM, the skull is too small to hold their brain properly. This overcrowding forces parts of the brain, specifically the cerebellum and medulla, out of their normal positions. The cerebellum controls movement and balance, while the medulla is connected to breathing and heart rate.
When these brain parts are pushed out of place, they obstruct the normal flow of cerebrospinal fluid (CSF). Cerebrospinal fluid is in the brain and spinal cord and acts as a natural cushion, protecting the brain. When the flow of CSF is blocked, it can lead to a buildup of pressure and result in serious neurological issues and can form syringomyelia (SM), a condition where fluid-filled cavities form within the spinal cord.
In Cavalier King Charles Spaniels, Chiari malformation is a congenital issue, meaning they are born with it. Dr. Clare Rusbridge established a breeding protocol to help reduce CM/SM in puppies. Following the breeding protocol is crucial for reducing the risk of Chiari malformation (CM) and syringomyelia (SM) in Cavalier King Charles Spaniels. If both parents have CM/SM, puppies are 92 percent likely to be affected, while the risk drops to 77 percent if only one parent is affected. If both parents are clear of CM/SM, there is a 70 percent chance their puppies will be clear, rising to 87 percent if the grandparents are also clear. Potential Cavalier families should seek breeders who perform this testing to ensure healthier puppies. The only way to diagnose Chiari malformation and syringomyelia definitively is through an MRI scan.
Recognizing Chiari malformation is vital for Cavalier King Charles Spaniel families because early detection and treatment can greatly improve the quality of life for dogs with this condition. If you notice symptoms like uncoordinated movements, sensitivity around the head and neck, or any other unusual behaviors, it’s important to consult with your veterinarian as soon as possible.
Symptoms of Chiari Malformation and Syringomyelia in Dogs
Symptoms of CM and SM in Cavalier King Charles Spaniels and other breeds can vary. About a year before Dexter’s diagnosis, he began showing some random and unusual behaviors. And they didn’t happen all the time.
Fixating at dust particles in the sunlight.
Fidgeting and biting at his rear end. His vet initially thought it was anal glands, but they really weren’t that full, and he continued to do it.
Acting strangely around flying insects. Whenever a fly was around, he would get strange and start spinning around and growling at his back end.
Then, he had a downright scary episode, where he just was going crazy over his back end, growling, at it, spinning, and I could not gain his attention. I then decided to hit record the next time it happened. After recording the next episode and consulting Dr. Lynette Cole at The Ohio State University, three veterinary neurologists suspected Chiari malformation and syringomyelia. I then made an appointment at the OSU neurology department for an MRI and spinal tap. CM and SM were confirmed.
Dexter’s episode is below.
Don’t forget to subscribe to our @RaisingYourPetsNaturally YouTube channel for more.
Other common symptoms of CM/SM in Cavalier King Charles Spaniels can include:
Air scratching, especially on walks or when excited.
Head scratching or rubbing.
Air snapping or licking.
Random yelps of pain.
Sensitivity to touch and being picked up.
Hind end weakness.
Head or body wobbles, stumbling, or squinting.
Head pressing.
Seeking darkness or solitude.
Inactivity or depression.
Restlessness.
Google Ad Below
Diagnosing Chiari Malformation and Syringomyelia
The only definitive way to diagnose CM/SM is with an MRI. If a dog shows common symptoms and belongs to a breed prone to this disease, like Cavalier King Charles Spaniels, a vet might start treatment without MRI confirmation. For me, knowing exactly what Dexter had was key. Along with an MRI, Dexter also had a spinal tap to ensure we had all the facts.
Treatment Options for Chiari Malformation and Syringomyelia
Surgery for Chiari Malformation in Cavalier King Charles Spaniels
Surgery is performed with the goal of restoring the natural flow of spinal fluid. This involves decompressing the affected area, removing bone fragments, and sometimes adding a shunt. However, the results can differ greatly from one dog to another. Despite surgical intervention, many dogs still require medication to manage their pain effectively.
Medications for Chiari Malformation in Cavalier King Charles Spaniels
The disease is progressive and varies in severity. Treatment prioritizes comfort and alleviates pain. Dr. Clare Rusbridge provides the gold standard in the medication treatment protocol. It’s essential to monitor organ functions regularly when administering long-term medications.
Natural Treatments for Syringomyelia in Dogs
There are many natural treatments to help support a dog with CM/SM. Here are some that have worked for Dexter:
Acupuncture: Restores the normal flow of energy through specific pathways.
Cold Laser Therapy: Reduces inflammation, relieves pain, repairs tissue damage, and increases blood circulation.
PEMF ( Pulsed Electromagnetic Field) Therapy: Reduces inflammation, relieves pain, promotes tissue and cell repair.
Food Therapy: A diet of home-cooked or raw dog food helps reduce inflammation. Ingredients like sardines, shiitake mushrooms, and green-lipped mussels can help.
Conscious Proprioception Exercises: Dexter wore Dr. Buzby’s ToeGrips to stimulate awareness of his feet. I also regularly work with him on footwork exercises to help him be more aware of his feet.
Canine Hydrotherapy: Water treadmill therapy strengthens Dexter’s body with low joint impact.
Core Strength Exercises: Dexter’s rehabilitation focuses on boosting his core and back end strength, crucial for enhancing balance and stability. Through a variety of exercises using different equipment, we target his abdominal, back, and hind leg muscles, ensuring he can confidently navigate any challenges.
Living with a Cavalier King Charles Spaniel with Chiari Malformation
Living with a dog diagnosed with Chiari Malformation and syringomyelia can be challenging. Dexter’s first year after diagnosis was the most challenging. Trying to figure out what worked best for him, what kinds of activities or weather would trigger breakthrough pain, and how best to manage it. His life changed, but, luckily, with a great team of professionals, I was and am able to provide Dexter with a great quality of life that is still full of adventures and enrichment.
Comfort Measures
To help keep Dexter as comfortable, happy, and pain-free as possible, I’ve incorporated a range of products.
Dog Harness: Avoid collars that can be painful due to the disease’s nature.
Dog Strollers: Great for giving Dexter a break while still being part of adventures.
Cooling Mats and Warming Blankets: Depending on Dexter’s temperature needs. I will say, now Dexter is on a cooling mat almost 100 percent of his downtime. He rarely seeks heat.
Snuggle Jackets: Some dogs find comfort in them, while others might not. In the beginning, Dexter wore one almost all the time. But, I think, after we finally found our groove with his care, they were no longer necessary.
Natural Calming Aids: Calming CDs and natural calming sprays help Dexter on rough days.
Support for Dogs with Chiari Malformation and Syringomyelia
Let’s unite in this journey. Dexter’s courage living with Chiari malformation and syringomyelia serves as a light of hope for us all. You aren’t in this alone. Seek the help of a good veterinarian team, join a support group, including ours! Together, we can provide hope and guidance to others on similar paths. Go Team Dexter!
Your comments and questions are always welcome below.
Join our vibrant Cavalier King Charles Spaniel community on Facebook, support our dedication to pet wellness on Patreon, and stay updated with our weekly newsletter for invaluable tips and insights into raising happy, healthy pets. Together, let’s make a difference in our dogs’ lives!
Google Ad Below [...]Read more...
June 26, 2024Cavalier King Charles Spaniel Enrichment Ideas
Ultimate Guide to Canine Enrichment for Cavalier King Charles Spaniels
If you are reading this blog post on ways to keep your Cavalier King Charles Spaniel entertained, you have made me a very happy lady. Mental stimulation for your Cavalier is so important, and sometimes a very overlooked part of a good positive dog training program. I’ve always said, dog training isn’t just about teaching your Cavalier to do something or not do something. Rather, there is a synergy between training your Cavalier and everything else including canine enrichment. I think bonding with your Cavalier King Charles Spaniel is the best medicine for both you and your pup. So much so, I started a Cavalier King Charles Spaniel Facebook group, with a big emphasis on enrichment ideas for Cavaliers. And the photos you are about to see on this Cavalier blog are all from members of our wonderful community! Now, let’s dive into canine enrichment and why it’s so important.
What is Canine Enrichment?
Canine enrichment is about making your dog’s life better by giving them fun activities that keep their mind and body active. I think about canine enrichment as life experiences and engaging our Cavaliers in a variety of fun and interactive activities. It’s more than just a food puzzle toy, although that’s a great introduction to enrichment for your Cavalier.
Enrichment can be interactive play, positive dog training sessions, sensory games, physical activities, food enrichment, and outdoor adventures. The goal is to keep your Cavalier happy, healthy, and mentally sharp. When you do this, it helps prevent boredom, boosts your dog’s mental skills, and strengthens your bond, which also leads to better listening and obedience.
Subscribe to @CavalierTipsandFun for more!
Beyond Food: Enrichment Through Interaction
Many people associate canine enrichment primarily with food-related activities, like filling food toys or using interactive frozen treats. While these activities are great, and I use them daily with Dexter, they are just one piece of the enrichment puzzle. When I think of canine enrichment, I think of activities that involve direct interaction with Dexter. It’s about more than just keeping him occupied with food toys—it’s about creating a connection with him, something we do together.
Incorporating various types of environmental enrichment can greatly benefit your Cavalier King Charles Spaniel, both mentally and physically. Enrichment keeps those unwanted behaviors at bay by preventing boredom. It encourages social interaction, making for a happier and more engaged dog.
Positive Training for Your Cavalier
Training is a wonderful way to enrich your Cavalier’s life. Whether you’re teaching basic obedience, fun tricks, or advanced behaviors, positive dog training sessions offer cognitive stimulation and deepen your bond. Cavaliers are smart and love to please, which makes them quick and eager learners. Remember, when you’re teaching and training your Cavalier, you want the training to be fun for both your dog and you.
Google Ad Below
Outdoor Adventures
Taking your Cavalier to the park or on a walk can be incredibly gratifying. Consider going on a “sniffy walk,” where your pup gets to explore and investigate their surroundings at their own pace. Allowing them to follow their nose is not only fun but also taps into their natural instincts.
Other fun outdoor adventures can be indoors too! Take your Cavalier to a pet store for some shopping or visit a dog-friendly indoor store. Just make sure to call the establishment first to double-check their pet policies. Those training sessions you’ve been working on will ensure your indoor fun is a positive experience and one you can feel proud of.
Fun and Beneficial Canine Fitness Activities
Incorporating canine fitness activities can be both fun and vital for your Cavalier’s health. Stretching, sits to downs to stands, using wobble boards, or even walking over cavaletti poles are a few examples. These activities help keep your Cavalier in good physical shape and engaged. Other fitness ideas include walking on slight outdoor hills, placing two paws on a curb, jumping on a sturdy boulder, and walking across a fallen tree trunk. Always prioritize safety during these exercises.
Sensory Enrichment for Your Cavalier
Sensory enrichment is another great way for keeping your Cavalier King Charles Spaniel active and entertained. This type of enrichment is all about stimulating their senses, sight, smell, hearing, touch, and even taste. Obviously, there is some overlap between enrichment “categories.”
Consider incorporating toys that make different sounds or have different textures to engage their hearing and touch senses. You can even make a scent garden in your yard with dog-friendly plants and herbs. Or, grab some outdoor things such as pine cones, grass, and flowers and place them in scent boxes for your Cavalier to smell or find. Plus, activities such as scent work, where your dog uses their sense of smell to find hidden treats or toys, can provide a great mental and physical workout..
By giving your Cavalier a variety of sensory experiences, you satisfy their natural curiosity and make them happier overall. Giving your Cavalier sensory activities like scent work or creating a scent garden not only keeps them entertained but also deepens your connection as you explore together.
Bonding Activities
Simple activities like grooming, talking to your dog, or giving them a gentle massage are also forms of enrichment. By connecting and touching your dog, you not only are able to do a lump-and-bump check, but you are laying the foundation of trust. Shared Zen moments like listening to music together or just lounging on the couch, can also be incredibly soothing for both you and your dog. Don’t forget snuggle time! Most Cavaliers love to cuddle, and those quiet, close moments can deepen your relationship even more. Did you hear that, Dexter? By incorporating these simple yet meaningful activities into your life, you’ll create a stronger relationship with your dog.
Food Games and Interactive Toys: Enhancing Mealtime for Your Cavalier
Food games like lick mats, interactive food toys, and snuffle mats are a great way to feed your Cavalier. Instead of wasting those valuable calories by tossing them in a bowl, using enrichment toys offers a fantastic activity. Don’t use extras in those food toys; use your Cavalier’s daily food or food calories.
For Cavaliers who are fed fresh food, such as a raw or fresh diet, lick-type toys like lick mats are perfect. These toys allow your Cavalier to eat their food while licking and enjoying their mealtime. Spreading the food out encourages more time eating and offers an easy enrichment activity. It also mimics natural foraging behavior.
Snuffle Mat DIY
If your Cavalier is fed dry kibble or dehydrated food, treat dispensing toys or snuffle mats are excellent choices. These toys make mealtime interactive by challenging your Cavalier to work for their food. They may knock around a toy that dispenses their meal or snuffle around a mat for their nibbles. In order to keep your Cavalier’s calories in check, you can reduce a small portion of their dry food and use fresh foods or toppers or freeze-dried 100 percent meat in these toys to add variety and excitement.
Incorporating food games and interactive toys into your Cavalier’s routine makes mealtime more enjoyable and provides an easy and daily mental enrichment activity. But, don’t just go with one treat puzzle toy. The more variety, the better.
Enriching Your Cavalier’s Life with Every Adventure
Canine enrichment is all about creating a variety of positive and fun experiences that enhance your Cavalier King Charles Spaniel’s life. Food toys are great–it’s the interactive, engaging activities that truly enhance their daily experiences.
By focusing on a variety of enrichment activities, you’ll ensure your Cavalier King Charles Spaniel is happy, content, and well-rounded.
I host a private Facebook group for Cavalier King Charles Spaniels, and we have a big focus on canine enrichment ideas and challenges to keep your Cavalier engaged and thriving!
I’d love to hear about your own enrichment ideas and experiences with your Cavalier! Share your tips and stories in the comments below and let’s keep the conversation going.
Join our vibrant Cavalier King Charles Spaniel community on Facebook, support our dedication to pet wellness on Patreon, and stay updated with our weekly newsletter for invaluable tips and insights into raising happy, healthy pets. Together, let’s make a difference in our dogs’ lives!
Google Ad Below [...]Read more...
July 24, 2024What Kind of Chew Toys and Bones are Safe for Cavalier King Charles Spaniels?
Most Cavalier King Charles Spaniels love to chew! Chewing is a natural and normal dog behavior that helps fight boredom and can even help keep your Cavalier’s teeth pearly white. But remember, brushing your Cavalier’s teeth daily is still ideal. Puppies and adolescent Cavaliers tend to have a high drive for chewing things. Sometimes, whatever they can sink those teeth into. Hopefully, you are working with a qualified dog trainer to ensure your Cavalier is learning to chew on the right items instead of your furniture, or, even worse, electrical cords or something else that can harm your Cavalier puppy.
So, what makes a chew toy or bone safe for your Cavalier King Charles Spaniel? Over the years, my opinion on this has evolved. I once opted for the harder, the better. But, now, I’m on the other side of the fence, choosing softer items. Hard and tough dog bones can chip teeth and even splinter, which can be very dangerous. Even my sweet, Dexter chipped his tooth on a hard bone….his last hard bone.
I personally do not use or recommend hard bones, antlers, hooves, plastic or nylon bones, rawhides, chews with lots of ingredients, wood bones, or weight-bearing bones. But, I will always say, this is my personal opinion, and they are your Cavaliers. You can do whatever you feel comfortable doing for them, and you will not be judged by me, nor should you be judged by your peers.
Please be aware that not every chew toy or bone will be suitable for every Cavalier. I strongly recommend active supervision when your Cavalier chews, particularly if it’s a new toy or bone or if the chew item is edible. The right size of a bone or toy is also important. You want to make sure the toy or bone is not so small that your Cavalier can place the entire item in their mouth and risk choking. This includes when the chew gets smaller. I tend to toss the end out before Dexter swallows it, with the exception of a chew that is crunchy. Finding the right chew for your Cavalier is sort of like “The Princess and the Pea.” So, let’s jump into my recommendations for safe and healthy chew bones for your Cavalier King Charles Spaniel.
Dehydrated or Freeze-Dried Fish Skins: With a good dehydrated or freeze-dried fish skin dog treat, the treat will be 100 percent fish skin with no artificial colors, preservatives, or flavors. With this list and anything I recommend, the first stop should be to read the actual ingredient panel. What’s inside. Everything. It’s also important to check out the packaging and carefully read the ingredient list and where the fish was caught and processed. Fish skins are great treats for your Cavalier, full of omega-3 fatty acids, typically low in fat, and fully edible. Most dogs love the taste and eagerly chew away. Some fish skins are crunchy, while others are chewy. Chewy ones last longer but need close supervision to make sure your Cavalier chews them up vs. swallowing a large piece. Shop now.
Bully Sticks & Pizzles: Made from the manly part of a bull, many dogs love chewing on these. What I like is that they typically just start to get soft and disappear; I haven’t seen any pieces break off. However, I have seen a stick peel every once in a while, like string cheese. You can also purchase bully stick holders to help hold the stick, which adds a second layer of safety, helping to prevent your dog from swallowing the end. I personally toss that piece into the garbage. Again, sourcing and how they are manufactured is key. Natural does not correlate to not using irradiation (radiation). I contacted my fair share of bully stick brands and asked if they used irradiation, so, make sure you do your homework. Tip: get odor-free or low-odor versions. These can stink like crazy! Shop now.
Raw Bones: Raw bones are another option for your Cavalier to chew on, especially if they are already on a raw diet or natural diet. Because the bones are not cooked, they are soft and unlikely to splinter. Cooked bones easily splinter and are very hard on teeth. The size will depend on the size of the bone and your Cavalier. A few options to consider include necks, wings, feet and tails. Once again, supervise and watch for choking or swallowing. Necks did not work for Dexter, as he thought he should just suck the whole thing down. Chewing Tips: Don’t clean the bones; feed them with some meat on them, as they come. Let your Cavalier pull on the meat and chew and lick the bone. Allow them to have them for an hour, then throw them away. It’s when they sit around the house, get buried, or get dried out that you get bacteria and splintering. They will last in the fridge for three days before feeding. They can also be frozen and thawed. Feed outside or on a towel, and make sure your Cavalier is wearing their snood!. Avoid weight-bearing bones, as dogs can chip or fracture their teeth due to how hard they are. Show now.
Dehydrated Duck/Chicken/Rabbit Feet/Ears: Duck, chicken, and rabbit feet or ears are excellent, crunchy, edible chews for Cavalier King Charles Spaniels. Dehydrated or freeze-dried. Both offer good chewing options. Chicken and duck feet are rich in chondroitin, glucosamine, and collagen, which support joint health, reducing the risk of brittle bones, improving mobility, and maintaining healthy teeth and gums. Rabbit ears and feet are particularly appealing as they are low in fat, high in protein, and help clean your dog’s teeth while reducing plaque buildup. Additionally, the fur on rabbit ears can serve as a natural dewormer. These natural chews are both nutritious and enjoyable, but always supervise your Cavalier to ensure safe chewing. Shop now.
Tripe Sticks: Tripe sticks are a fantastic chew option for Cavalier King Charles Spaniels. Typically made from the stomach lining of cattle, lamb, or goat, these chews are naturally rich in digestive enzymes and nutrients that support gut health. Tripe sticks provide a satisfying, chewy texture that most Cavaliers love, while also helping to clean their teeth and gums. They are full of nutrients that can be a great addition to your dog’s chew rotation. Shop now.
Beef Tails: Beef tails are another excellent choice for your Cavalier. They are durable and provide a long-lasting chewing experience, which helps keep your Cavalier engaged and entertained. Beef tails are also high in protein and can help naturally clean your Cavalier’s teeth. The natural toughness of beef tails makes them a good option for aggressive chewers, but always make sure to choose the appropriate size to prevent any choking hazards. Shop now.
Tendons: Tendons are a great chew for Cavaliers because they are tough yet somewhat flexible, providing a satisfying chew without being too hard on their teeth. They are also rich in collagen, which is beneficial for joint health. Tendons help keep your Cavalier’s teeth clean and their gums healthy. Most Cavaliers find the chewy texture very satisfying. Shop now.
Yak Chews: Yak chews are a fantastic option for Cavalier King Charles Spaniels, but I only recommend them when microwaved to make them poofy. Microwaving them creates a crunchy, airy texture that Cavaliers love, making them a safe and enjoyable option. They are rich in protein and calcium, supporting your dog’s overall health. Made from a mixture of yak and cow milk, these chews are rich in protein and calcium, supporting your dog’s overall health. Again, double check the ingredient label; not all are created equal.
Subscribe to @RaisingYourPetsNaturally’s YouTube channel for more!
Fillable Chew Toys: I am a fan of filling various food toys such as West Paw Tux and Toppl with healthy snacks. The key to getting your Cavalier to chew on a food toy is to stuff it! If your Cavalier is eating the toy instead of the inside food, I do not recommend it. Shop now.
Ingredients matter! If you’re considering chew bones made from various ingredients, it’s crucial to flip over the package and dive deep into the ingredient list. Not all chews are created equal, and some can contain nasty or even toxic substances that could harm your dog. Look for natural, wholesome ingredients and avoid artificial colors, flavors, and preservatives. A little extra time spent reading labels can make a big difference in keeping your Cavalier King Charles Spaniel safe and healthy.
So, there you have it. That is the current list of some healthy and natural chew toys, bones I feel comfortable providing Dexter and recommending to my dog training clients. Always remember to supervise your Cavalier when they are chewing and to choose the right size and type of chew for their needs.
Which of these chews does your Cavalier King Charles Spaniel love the most? Share your favorite chew toys or treats in the comments below!
A big thank you to all the members in our Cavalier Facebook group for your wonderful photos!
Google Ad Below
Join our vibrant Cavalier King Charles Spaniel community on Facebook, support our dedication to pet wellness on Patreon, and stay updated with our weekly newsletter for invaluable tips and insights into raising happy, healthy pets. Together, let’s make a difference in our dogs’ lives!
🐶💙Support our passion for pet wellness and unlock exclusive content, perks and early access by exploring our Patreon tiers.
Sign up for our weekly newsletter!
Join us on Facebook!
[...]Read more...
January 23, 2025Supporting Your Senior Cavalier King Charles Spaniel: The Ultimate Guide to Aging Cavaliers
After 15 amazing years with my Cavalier, Dexter it was his time to go to the rainbow bridge. It’s never an easy decision to make and since then, I have been thinking back on our life together. Over the course of his life, I wrote a lot about Dexter on my first blog, Raising Your Pets Naturally. Now, with Stewart, my 7-month-old rescue Cavalier King Charles Spaniel puppy, I’m starting fresh, but with all that I’ve learned from Dexter’s senior years. I thought this would be a good time to explore when a Cavalier King Charles Spaniel is considered a senior, their lifespan, common health concerns, and how we can support our Cavaliers through every stage of life.
At What Age Is a Cavalier King Charles Spaniel Considered a Senior?
If you’re wondering, “When does a Cavalier reach old age?” The answer varies depending on factors like genetics and health. Typically, small breed dogs like Cavaliers are considered seniors between 7 and 10 years old. While this is a general guideline, you may notice your dog showing signs of aging earlier or later.
Some indicators of senior status include:
Decreased Interest in Play: They may be less enthusiastic about toys or games they used to enjoy.
Weight Changes: Unexplained weight gain or loss can be a sign of aging or underlying health issues.
Changes in Vision or Hearing: Difficulty seeing or responding to cues may suggest declining eyesight or hearing.
Increased Time Spent Resting: Senior dogs often nap more during the day and may tire easily after exercise.
Changes in Appetite: They may eat less or show more picky eating habits.
Difficulty Climbing Stairs or Jumping: You might notice hesitancy or struggle with previously easy physical activities.
Behavioral Changes: Increased anxiety, clinginess, or even irritability may indicate aging.
Frequent Bathroom Breaks: Aging can bring bladder control issues or an increased need to urinate.
Dull or Thinning Coat: Their fur might lose its luster or feel thinner in certain areas.
Dental Issues: Bad breath, difficulty chewing, or loss of teeth can become more prominent.
Reduced Tolerance for Cold or Heat: Seniors may seek out warmth or avoid strenuous activity in hot weather.
Increased Vocalization: They may bark or whine more often, potentially due to discomfort, anxiety, or confusion.
Cognitive Changes: Signs of canine cognitive dysfunction (CCD) include disorientation, restlessness, or forgetting familiar routines.
Slower movement or stiffness in the morning: Your Cavalier may take a little longer to get going in the mornings, which can be a sign of joint stiffness or early arthritis.
Graying fur, often around the muzzle: Just like humans, dogs may develop gray hairs as they age, particularly around their face.
But don’t worry, aging doesn’t mean your Cavalier is slowing down in spirit! With the right care and attention, they can still enjoy life to the fullest.
What Is the Life Expectancy of a Cavalier?
You may have heard the question, “How long do Cavaliers live?” The average lifespan of a Cavalier King Charles Spaniel is approximately 10.45 years. This is based on a 2022 UK study of veterinary data. However, some studies suggest a slightly longer lifespan, with a 2024 UK study indicating an average of 11.8 years for the breed. The typical lifespan of a Cavalier King Charles Spaniel is around 9-14 years. That said, some Cavaliers, like Dexter, surpass this average with proper care, while others may face challenges earlier due to health conditions.
Common Health Issues in Cavaliers
Cavaliers are an incredibly loving and joyful breed, but they do have a predisposition to certain health issues. Knowing what to watch for and being proactive in their care can help them live a happy and long life.
Mitral Valve Disease (MVD): Nearly every Cavalier King Charles Spaniel owner will face mitral valve disease at some point if their dog lives long enough. This heart condition affects the valve’s ability to close properly, leading to a heart murmur and, eventually, heart failure if untreated. Yearly heart check-ups with a cardiologist can help monitor and manage this condition.
Chiari-like Malformation (CM): Because of the breed’s unique head shape, it’s estimated that 95 to 99% of Cavaliers will develop a condition called Chiari-like malformation (CM). This happens when the skull is a bit too small for the brain, causing part of the brain to push into the spinal canal. CM can result in pain, weakness, or in severe cases, even paralysis. While there’s no cure, symptoms can often be managed with medications and regular vet check-ups, helping your dog feel more comfortable.
Hip Dysplasia and Patella Luxation: While less common in Cavaliers compared to larger breeds, these conditions can cause joint pain and mobility issues. Patella luxation, which is a dislocation of the kneecap, is more common in Cavaliers and can lead to lameness and discomfort. Keeping your Cavalier at a healthy weight is key to reducing stress on their joints and managing these conditions.
Eye and Ear Problems: Cavaliers are prone to progressive retinal atrophy (PRA), cataracts, and ear infections. Regular grooming and vet visits help catch these issues early.
Intervertebral Disc Disease (IVDD): IVDD is a condition where the discs in your dog’s spine become damaged or degenerate, causing pain, weakness, or even paralysis in severe cases. Cavaliers are particularly vulnerable to this, especially as they age. Be on the lookout for signs of discomfort, difficulty moving, or dragging their back legs.
Myoclonus: Myoclonus refers to muscle twitches or jerks that can occur in Cavalier seniors, especially around the head or neck area. While it’s usually not painful, it’s important to consult with a vet to rule out underlying issues such as neurological problems.
Medium-Chain Acyl-CoA Dehydrogenase (MCAD) Deficiency: This genetic condition affects Cavaliers’ ability to properly metabolize certain fats, which can lead to serious health problems, including low blood sugar, lethargy, and, in severe cases, sudden death. The great thing is that there’s a quick and easy at-home swab test available to check if your Cavalier has MCAD. It’s a simple step that can give you peace of mind and help catch this condition early. It’s a proactive way to care for your Cavalier’s long-term health.
Subscribe to @CavalierTipsandFun for more!
Supporting Your Cavalier Through All Life Stages
Caring for a senior Cavalier means making thoughtful changes to their routine. As our dogs get older, their needs shift in different ways. They may slow down, develop new health concerns, or simply need more comfort. These changes are completely normal, and it’s up to us to help them adjust so they can continue to feel their best. With a little extra care and attention, we can make sure they stay happy, healthy, and comfortable as they age. Whether it’s modifying their diet, adjusting their exercise, or making small changes to your home, these little changes go a long way in supporting their well-being. After all, they’ve given us so many wonderful years of love and companionship, and now it’s our turn to return the favor.
Nutrition for Senior Cavaliers
As your Cavalier enters their senior years, their nutritional needs often shift to support their changing bodies. A balanced diet made with fresh, high-quality ingredients like Omega-3s, antioxidants, glucosamine, and chondroitin can help maintain joint health, cognitive function, and overall vitality. Glucosamine and chondroitin play an essential role in supporting cartilage and joint health and can be included in their diet through natural sources like bone broth, chicken feet, or beef trachea, or through supplements if needed. Adding these fresh foods as part of their meals or even as toppers can provide a natural boost that processed options often lack. Every dog is unique, so working with your vet or a canine nutritionist is key to crafting a plan that meets your Cavalier’s specific needs.
When Dexter was diagnosed with kidney issues in his senior years, I found that his diet needed some adjustments. He had been raw-fed for most of his life, but with the help of his veterinarian, I transitioned him to a customized, home-cooked diet to better support his health. Bones, which are a staple in raw feeding, are high in phosphorus, a mineral I needed to limit. To make up for the lack of bone calcium, I switched to eggshell calcium, which is lower in phosphorus and just as effective.
I also began boiling his meat and discarding the cooking water, which helped reduce the phosphorus content even further. I carefully selected foods that were naturally lower in phosphorus, like certain vegetables and proteins. Dexter was also starting to lose weight, so I added carbs like rice and sweet potatoes to help him maintain his energy and body condition.
These changes made a big difference in his quality of life. While home-cooking may not be for everyone, it’s worth exploring alternatives to prescription diets if your Cavalier develops a medical condition. A good veterinarian or certified dog nutritionist can guide you in creating a plan that meets your dog’s needs without compromising on fresh, wholesome ingredients.
💡 Pro tip: Every Cavalier is unique, and what works for one dog may not work for another. Always partner with your vet or a canine nutritionist to find the best approach for your senior Cavalier. Giving them a fresh diet tailored to their needs is one of the best ways to show your love and care during their golden years.
Exercise and Mental Enrichment
Gentle exercise is important for keeping your senior Cavalier feeling their best, but it’s all about adjusting to their abilities. When Dexter reached his senior years, mosey walks became our go-to. He loved taking his time, sniffing every blade of grass, and enjoying the world at his own pace. When he got tired, I’d pop him into his stroller so we could continue our adventure without overdoing it. That stroller wasn’t just for outdoor strolls either, it was perfect for indoor store adventures, allowing him to stay engaged and part of the action while giving his body the rest it needed.
Mental enrichment was just as important as physical exercise. One of Dexter’s favorite activities was a “find it” game with cardboard boxes. I’d hide a treat in a box, spread them around, and watch his excitement as he used his nose to uncover the prize. It was the perfect mix of mental stimulation and gentle movement. For senior Cavaliers, simple adjustments like these can make a huge difference. Whether it’s a slow walk, a stroller ride, or an engaging puzzle, finding activities that fit their needs helps them stay vibrant and connected to the world around them.
Don’t forget to subscribe to @CavalierTipsandFun for more!
Natural Therapies for Senior Cavaliers
As Cavaliers age, their bodies may need extra support to stay comfortable and mobile. Therapies like at-home laser treatments, physical therapy, and acupuncture made a big difference for Dexter in his senior years. Actually, Dexter had these treatments the majority of his life due to his Chiari malformation. These options can reduce pain, improve mobility, and help manage chronic conditions like arthritis.
Dexter had regular physical therapy visits, where he worked with a canine rehabilitation specialist to keep his joints moving and his muscles strong. I also had simple at-home exercises to follow up with between visits, ensuring he stayed as active as possible without overdoing it. Using a laser therapy device at home helped target areas of stiffness or soreness, and his PEMF (Pulsed Electromagnetic Field) bed became one of his favorite spots to rest. PEMF therapy didn’t just support his comfort but also promoted better circulation and reduced inflammation.
Order a laser for your Cavalier today!
Acupuncture was another natural treatment that worked well for Dexter, offering gentle relief from discomfort and improving his overall quality of life. These treatments, along with his regular routine, were all part of ensuring he was comfortable and able to enjoy his senior years to the fullest.
If you’re considering these therapies for your Cavalier, talk with your Cavalier’s holistic vet or a canine rehabilitation specialist. They can guide you toward the best options for your Cavalier’s individual needs and help create a plan to support their comfort and mobility.
Veterinary Care and Preventative Check-Ups
Regular vet visits are essential, especially as your Cavalier gets older. I recommend scheduling check-ups at least once a year, but if your dog is on medications or managing a condition, like Dexter was, labs every 4 months can give you a better picture of their health. Semi-annual check-ups are also a good idea to catch early signs of issues like MVD, joint problems, or anything else that may need attention. Don’t hesitate to bring up any subtle changes you’ve noticed, whether it’s weight loss, fatigue, or coughing. Early intervention is key, and your vet can provide valuable guidance to help you manage your Cavalier’s health, ensuring they stay happy and comfortable as they age.
Cardiologist Visits
I highly recommend that every Cavalier sees a cardiologist at least once a year. Cardiologists specialize in heart health and truly understand the ins and outs of heart disease, including conditions like MVD, which Cavaliers are prone to. Even if your dog hasn’t been diagnosed with anything serious yet, a cardiologist can spot early signs of issues that might not be apparent to you or your regular vet. If your Cavalier is diagnosed with MVD, your cardiologist may recommend more frequent visits to monitor the progression of the disease and adjust their treatment plan as needed. Having a heart specialist on your team gives you peace of mind and ensures you’re taking proactive steps to care for your dog’s heart health.
Making Your Home Senior-Friendly
As your Cavalier enters their senior years, small changes around the house can make a world of difference in how they move and rest. Senior dogs often experience joint stiffness, and their mobility may not be what it once was, so providing a comfortable and safe environment helps them feel at ease. These adjustments don’t have to be drastic, but they can really support your dog’s needs as they age.
Ramps or Steps: It’s always a good idea to have ramps or steps in place, even if your Cavalier is still young. Jumping down from furniture can put strain on their joints and neck, leading to potential issues down the road. Ramps or steps make it easier for them to get on and off the couch or into the car, preventing unnecessary stress on their bodies. These additions are a simple way to protect your Cavalier from injury and support their mobility throughout all stages of life, ensuring they can continue to join in on the fun without risk.
Orthopedic Beds: Comfort is key when it comes to senior Cavaliers. Cushioned orthopedic beds provide much-needed support for aging joints and pressure points. Dexter was a fan of cooling mats all year, so I made sure to place them throughout the house, including on his beds, to keep him cool. But I always left at least one bed without a cooling mat, in case he wanted to curl up and stay cozy. The goal is to ensure they have a comfortable place to rest, with options that suit their changing needs.
Non-Slip Surfaces: Slippery floors can be a senior dog’s worst enemy. To prevent falls, I recommend adding rugs or carpets to high-traffic areas, especially in places like the kitchen or hallway. You can also try ToeGrips(use promo code: DEXTER for 10% Off Your First Order), which help with traction, so your Cavalier can walk confidently. Making sure they have a stable environment to navigate helps keep them safe, especially when they’re getting around slower than they used to.
How Long Do Cavaliers Live? Cherish Every Moment
If there’s one thing Dexter taught me, it’s to appreciate the little moments, whether it was a slow morning walk, the rare occasion when he’d want to be close and rest in the nook of my legs, or simply watching him nap and snore in the sunshine. Dexter wasn’t much of a cuddler, but when he wanted to be near me, I made sure to savor those times. Our Cavaliers may not live as long as we’d like, but the joy they bring into our lives is something we’ll never forget.
When Stewart reaches his senior years, I know I’ll be ready to give him the care and love he deserves. For now, I’m soaking up every playful, puppy-filled moment.
Google Ad Below [...]Read more...
April 28, 2024Are Cavalier King Charles Spaniels Good for Therapy Dog Work?
Today, I want to chat about a topic that is close to my heart: therapy dogs! Have you ever wondered if your Cavalier King Charles Spaniel would make a good therapy dog? It’s a common question and one that has a few caveats. First, it’s not all about the dog! I know, I know, it’s always all about Dexter, but with visiting therapy dogs, it’s about teamwork.
But what is a visiting therapy dog team, and what do they do? A therapy pet team is a person and their pet (sometimes cats, bunnies, etc.) who share their companionship and comfort with those in need, visiting places like hospitals, schools, and nursing homes. These teams engage in either Animal-Assisted Activities (AAA) or Animal-Assisted Therapy (AAT). AAA therapy dog teams engage in sessions without the presence of a medical professional or specific treatment goals, aiming simply to bring joy and comfort. Whereas AAT therapy dog teams work with healthcare providers in goal-oriented sessions aimed at addressing specific issues, with progress carefully measured and tracked throughout the process.
Being a good therapy dog team isn’t just about your Cavalier; it’s also about you. Both you and your CKCS are visiting as a team. You both must have the skills and knowledge required to visit people in a wide range of settings.
Let’s discuss what humans should be bringing to a Cavalier therapy dog team. As a therapy dog handler, it’s important to be comfortable when interacting with both people and your dog. You’ll need to be able to guide your Cavalier through different situations, encouraging them and keeping them safe and happy. Understanding your dog is key to becoming a therapy dog handler. You’ve got to be able to recognize the tiniest changes in behavior and body language, and quickly respond. And at the same time, you will be multitasking by staying engaged with individuals. It’s a balancing act, for sure, especially as you start out your journey as a therapy dog team.
Now, what personality should your Cavalier King Charles Spaniel have in order to make a good therapy dog? When it comes to a well-suited therapy dog, you can look at a few key traits. A good therapy dog should be reliable, predictable, and able to follow your cues with ease. That’s not to say they have to be robots and never get flustered, but as a general rule, you want a dog that is solid in their temperament. Your dog should be friendly with strangers, as your visits will be with strangers. At the same time, they should be poised, not jump on people, and be able to walk nicely on a leash around distractions, including food. It’s not just about loving new people; it’s also about having manners in new and unfamiliar environments.
Getting Started Training Your Cavalier to Become a Visiting Therapy Dog
It’s important that your Cavalier have basic obedience and manners. Walking on a loose leash in crowded places, around dogs, and on slick floors is a must. Leaving food or dropped pills on the ground is incredibly important for your dog’s safety. If your Cavalier knows tricks, that can be a great icebreaker and is also helpful when someone wants to look at your dog but not pet them. Dexter and I were a visiting therapy dog team for many years, and tricks and activities were by far his favorite visits! If your dog needs a refresher, enroll in a positive dog training class.
Subscribe to our @CavalierTipsandFun YouTube channel for more!
Google Ad Below
After your Cavalier has mastered his basic obedience skills in a variety of environments, look for a therapy dog training prep class. This may be a weekend class or one that spans 4–8 weeks. When I taught my therapy dog prep class, each week we covered a new topic to prepare the handlers and dogs for the actual work involved and the test. My students by far enjoyed skit night, where my volunteers and I role-played different scenarios, the teams interacted, and we discussed what was good and how they could improve in that situation. It was a hoot and very eye-opening for the upcoming teams.
When you and your Cavalier are ready to take your therapy dog evaluation, you will need to find an evaluator to assess whether you are ready for therapy work. But there is more than one therapy dog organization out there. Choosing the right organization is crucial. Some facilities have specific requirements, like only accepting teams evaluated by certain organizations. So, if you have your sights set on a specific organization, reach out to them first. If your dog is on a raw food diet or you provide your dog with titers vs. yearly vaccinations, not all therapy dog organizations accept that, but some do.
Speaking of organizations, there are plenty out there, each with its own unique criteria. Some of the most common ones include Alliance of Therapy Dogs, Pet Partners, Love on a Leash, and Therapy Dogs International. Be sure to check out their specific requirements before making your decision.
Subscribe to @DextertheDogandFriends for kid-friendly content!
During the evaluation, the evaluator will test your skills to ensure you’re ready to handle various situations with confidence. Once you’ve got the green light from your evaluator, send in your paperwork and fees. While you are waiting for your official badge, it’s a good time to start reaching out to facilities you’re interested in visiting. It’s best to meet with the director, take a tour, and get a feel for the environment without your dog. When you are ready to visit with your Cavalier, keep those initial visits short and sweet. It’s all about easing them into the new surroundings and ensuring they feel comfortable and confident in their role as a therapy dog.
And remember, if you don’t think therapy work is in the cards for your Cavalier, that’s perfectly fine. There are plenty of other enjoyable activities you and your Cavalier can explore together. But if therapy work is the journey you’ve chosen, then I wish you both the best of luck on this rewarding adventure.
Your comments and questions are always welcome below.
Join our vibrant Cavalier King Charles Spaniel community on Facebook, support our dedication to pet wellness on Patreon, and stay updated with our weekly newsletter for invaluable tips and insights into raising happy, healthy pets. Together, let’s make a difference in our dogs’ lives!
Google Ad Below [...]Read more...
July 10, 2024Choosing a Cavalier King Charles Spaniel Breeder
While I understand the “adopt don’t shop” idea, there are valid reasons to purchase a purebred Cavalier King Charles Spaniel from a responsible Cavalier breeder. I’ve received numerous requests on how to find a good Cavalier King Charles Spaniel puppy breeder, so let’s dive into my personal thoughts and considerations.
Educate Yourself on the Cavalier King Charles Spaniel Breed
First things first, it’s crucial to understand the breed you’re interested in. Cavaliers are charming, affectionate, and beautiful, but they also have specific needs and characteristics. Learning about the typical Cavalier personality and care can help you in deciding if a Cavalier is the right breed for your family.
Dive into the Cavalier King Charles Spaniel Breed Information
The internet has a ton of information about Cavalier King Charles Spaniels. Not all good, so take everything with a grain of salt. I would suggest looking at Cavalier King Charles Spaniel national breed clubs and Cavalier rescues. They tend to have a lot of very helpful information. Spend time reading about Cavaliers to understand their grooming care, behavior traits, size, and medical concerns.
Cavalier King Charles Spaniel Temperament and Personality: Cavaliers are known for their friendly and affectionate nature. They thrive on companionship and are often described as “lap dogs” or “love sponges” because they love to snuggle. But, they aren’t all snuggle bugs, and it’s important to note that they are spaniels, which stem from hunting genes, so they can be very active little dogs. Interestingly, Dexter is now almost fifteen, and, over the years, I have met a lot of Cavalier families who downsized from golden retrievers, I was one of them. I think because they have that same personality of fun and eagerness to be part of the family activities.
When taught properly, they are often good with children and other dogs and adapt well to a variety of living environments. I do say when taught properly, as you can’t assume you can toss any dog into a situation and they will handle it as we had hoped. As a side note, please check out my YouTube channel, Dexter the Dog and Friends, to learn more about raising kids and dogs together.
Dexter’s school assembly!
Cavalier King Charles Spaniel Maintenance and Grooming: Cavaliers require regular grooming due to their silky and long coats. This includes brushing several times a week to prevent mats and tangles. Silky? Well, some Cavaliers have a much thicker coat than others. Take my Dexter, for example. He has very long fur, and it’s silky but also super thick. Daily brushing is even better if you can swing it. It will really help to prevent mats in the first place.
Regular baths are important too. If you are using a truly natural dog shampoo (I use 4-Legger) that does not have any harmful ingredients, you can bathe as needed. When Dexter was a visiting therapy dog, he had to have a scrub-a-dub-dub before his visits, so that was weekly or every two weeks for us. But now, he gets a bath every three to four weeks. Their nails should also be trimmed regularly, and their teeth brushed daily to maintain good dental health.
Grooming Tips. Subscribe to my @RaisingYourPetsNaturally YouTube channel for more.
Trimming Your Cavalier King Charles Spaniel: Talk about a controversy! I am always pro it’s your dog; do what is best for them and you. Dexter has Chiari malformation (more on that below) and because of that, grooming is uncomfortable. Therefore, I have always kept him in a puppy cut. I lighten that thick fur, shorten him up, trim his ears, and keep his slippers short. Slippers, BTW, are the fur around their feet, or Grinch feet. If you want to keep their Grinch feet full, it is important to still trim their foot pads to prevent slipping.
Cavalier King Charles Spaniel Medical Conditions: This is where our beloved breed suffers the most. Cavaliers are prone to several hereditary conditions. It’s essential to be aware of these and ensure your breeder is proactive in health testing because that’s the only way to help our Cavaliers out of their medical mess. Key health concerns include mitral valve disease (MVD), hip dysplasia, Chiari malformation (CM) and syringomyelia (SM), and patellar luxation. Reputable breeders will conduct specific screenings to minimize the risk of these conditions in their puppies.
Understanding Health Testing for Cavaliers
For Cavaliers, it’s crucial that both the breeding dogs and their parents are health tested for hereditary diseases. It’s not just the breeding pair, but the grandparents too! The grandparents have a longer history, testing and health records. A highly regarded breeding Cavalier should be over 2.5 years old, with parents that are MVD heart clear and MRI scanned clear of CM/SM. A reputable breeder will eagerly provide copies of health certificates of each parent and grandparents or links to tests. If not, be sure to ask. If they are hesitant to share, I would be hesitant to move forward.
Mitral Valve Disease (MVD): Every breeding Cavalier King Charles Spaniel should have an annual heart exam by a board-certified veterinary cardiologist. The parents of your prospective puppy should have heart clearances from a cardiologist and be at least 2.5 years old at the time of breeding. All four grandparents should be over the age of 5 and heart clear.
Syringomyelia (SM) and Chiari Malformation (CM): Both parents should have MRI scans showing them clear of CM/SM after reaching 2 years of age. It’s even better if the grandparents have also undergone MRI scans and are clear of CM/SM.
Hips: OFA requires that a Cavalier be a minimum of 2 years old for hips to be certified. It’s recommended for grandparents to have certified hips as well.
Patellas: Testing should be done annually to ensure healthy knees and to prevent luxation in both parents.
Medium-Chain Acyl-CoA Dehydrogenase (MCAD): MCAD is a metabolic disorder that affects how Cavalier King Charles Spaniels process certain fats for energy. It’s caused by a genetic mutation that can lead to metabolic imbalances. DNA testing is essential to identify Cavaliers carrying the mutation and prevent passing it on to their offspring. This is a newer (Summer 2023) DNA test.
Episodic Falling Syndrome (EFS): Is a hereditary neurological disorder affecting Cavaliers. Breeders should ensure all Cavalier breeding dogs undergo DNA testing for EFS before mating.
Dry Eye Curly Coat Syndrome: An inherited disease that affects the eyes, skin, and feet of Cavalier. It can be detected through a DNA test.
Dry Eye: Testing for dry eye in Cavalier King Charles Spaniels involves a DNA health test to identify the presence of the genetic mutation associated with dry eye, curly coat syndrome. Testing ensures early detection and appropriate management of this hereditary condition in breeding dogs.
Don’t forget to subscribe to our @CavalierTipsandFun YouTube channel for more!
The Importance of Puppy Socialization
Puppies develop both physically and mentally right out of the gate, and even during pregnancy! A stressed mom can produce stressed, unhealthy puppies. A responsible breeder not only ensures a Cavalier puppy is medically healthy, but behaviorally as well. Breeders should prioritize the physical and mental well-being of Cavalier puppies by starting basic socialization at home. This includes introducing puppies to children, adults, outdoor environments, handling and grooming, and exposing them to different textures and obstacles.
Finding a Good Cavalier King Charles Spaniel Breeder
Many national breed clubs provide breeder lists, which are a great starting point. Look within a specific mile radius you are willing to drive to meet the breeder and puppies. Breeder websites should have detailed information on health testing and puppy socialization.
When you find a few breeders who look good on paper, contact them via email or phone. Discuss your goals and hopes for your new family member. You are looking for a connection with a breeder just like you are looking for a connection with your puppy.
Visiting the Breeder and Their Cavaliers
I recommend setting up a date and time to meet the breeder in their home and visit with their Cavaliers. Seeing the living situation and behavior of their dogs in person is a great indicator of how the puppies will turn out. Look for happy breeding dogs that are part of the family. Some breeders may be hesitant about home visits, but it’s essential for you to feel comfortable with the environment where your puppy is being raised.
Picking out Dexter! FYI he was 5 weeks here, I would bring him home at 12 weeks.
Choosing Your Cavalier Puppy
This could be an entire article on its own, but here are a few highlights to get you started. TAKE YOUR TIME! This is not a time to make a quick decision or an impulse buy. You are choosing your next family member, a living creature with strong emotions that will hopefully be with you for the next ten to twenty years.
Before meeting the puppies, have an idea about what you want to do with your Cavalier puppy and future dog. Are you looking for a canine athlete? Or maybe a therapy dog to visit children or the elderly? The personality traits of those two puppies can be quite different, so knowing your goals will help in choosing the best Cavalier King Charles Spaniel puppy for you, your family, and your goals.
Bringing Your New Cavalier Puppy Home
Picking up a new Cavalier puppy typically happens when the pup is between 12-15 weeks of age. Prepare your car for your new puppy before arriving at the breeder’s home. Items to have on hand include a travel crate, puppy blankets, healthy treats, water and bowl, and a leash and harness. If your journey includes an overnight stay, pack items for a dog friendly hotel stay.
Air Travel Considerations
I personally would never fly any of my pets in cargo, nor would I have my puppy shipped to me. Meeting the breeder, dogs, and puppies is essential. If you plan on a plane ride home, check with the airlines on what they will need before your departure.
Maintaining Contact with Your Breeder
When breeders are committed to the breed’s well-being, they may ask you to provide specific health tests on your puppy throughout its life. This means the breeder is looking to see how the puppies develop, and if there are any medical concerns over their life, they may not breed that pair again. In my book, this speaks volumes about what a responsible breeder really is.
Now that you have a healthy and behaviorally sound Cavalier puppy, it’s your job to start socialization and training. You and your puppy are ready for a lifetime of fun and joy.
I hope this updated article helps your readers in their quest to find a reputable Cavalier King Charles Spaniel breeder. Good luck at finding your BFF!
Google Ad Below
Join our vibrant Cavalier King Charles Spaniel community on Facebook, support our dedication to pet wellness on Patreon, and stay updated with our weekly newsletter for invaluable tips and insights into raising happy, healthy pets. Together, let’s make a difference in our dogs’ lives!
🐶💙Support our passion for pet wellness and unlock exclusive content, perks and early access by exploring our Patreon tiers.
Sign up for our weekly newsletter!
Join us on Facebook!
[...]Read more...
November 12, 2024Best Treats for a Cavalier King Charles Spaniel
If you’ve found this Cavalier blog by searching for “best treats for Cavalier King Charles Spaniels,” you’re probably wondering what makes a healthy dog treat for this special breed. Whether you’re looking for the best dog-training treats for your Cavalier or just healthy dog treats, it’s essential to choose options that benefit your Cavalier King Charles Spaniel’s health and waistline. Here’s what I consider when picking out healthy treats for Dexter.
Check the Ingredients in Your Cavalier’s Treats
The very first thing I do when choosing treats for Dexter is check the ingredients list. Don’t just rely on the fancy pictures on the front of the bag; the ingredient panel tells you what your Cavalier is actually eating. Even if a treat claims to be “chicken-flavored,” that doesn’t always mean it contains real chicken. Always look for whole, natural ingredients like real meat, vegetables, and fruits.
What to Avoid in Your Cavalier King Charles Spaniel’s Treats
Artificial Flavors: If you see “flavor” in the ingredient list, it’s likely a synthetic that’s meant to mimic real food. Real food ingredients are always better for your Cavalier’s health.
Added Salt: Too much salt can be harmful, especially for dogs with heart issues, like Cavaliers. Stick to treats with no added salt, as too much sodium can lead to health problems.
Preservatives: Treats should be free of artificial preservatives like potassium sorbate, sodium benzoates, BHA and BHT. These chemicals are commonly found in cheaper treats and can be harmful in the long run.
By-Products or Mystery Meat: Avoid any treats that list “meat by-products” or vague “animal fat.” We want to know exactly what’s going into our dog’s body.
Sugar or Sweeteners: Skip the sugary treats! Cavalier King Charles Spaniels can easily gain weight, and too many sugar-filled treats can contribute to obesity, which affects their health.
Grains: Many dogs, including Cavaliers, can be sensitive to corn, wheat, and soy. Grains also pack in a lot of calories. Stick to treats with grain-free ingredients.
Healthy Treats for Cavalier King Charles Spaniels
So, what should you be looking for instead? The best treats for Cavalier King Charles Spaniels are made from whole, natural ingredients. I always opt for treats made with high-quality meats, like rabbit, chicken, beef, or duck, and ingredients that support overall health.
When choosing healthy dog treats, I think about each ingredient and how it affects my dog’s health and diet. I prefer foods that can contribute to Dexter’s overall nutrition, not add-ons. If I think the treat’s ingredients are more like a candy bar, I’ll skip it.
Best Training Treats for Cavaliers
When I’m training Dexter, I want treats that are both nutritious and irresistible. Training treats should be small, easy to chew, and made from single-source protein. Some of my favorites include freeze-dried meat or dehydrated meat. These treats are not only high-value (meaning they’ll grab your Cavalier’s attention), but they’re also healthy and easy to use in training sessions.
I also may grab freeze dried dog food that consists of healthy ingredients and no fillers. They tend to be bite-sized, and I can easily cut down on some of Dexter’s fresh food for the day and replace it with the freeze-dried dog food. No extra calories needed, and he doesn’t lose any of his daily nutritional needs.
Treats for Occasional Snacking
When it’s time for a snack, I’m okay with a treat that’s a bit more substantial, like grain-free biscuits made with sweet potato or pumpkin. These treats are great for occasional use, but they do tend to be higher in calories and more ingredients. I like to keep Dexter’s treats simple and sweet.
My Top Picks for Cavalier King Charles Spaniel Treats
Dehydrated Meat: A simple, natural treat that’s great for training or as an occasional snack. Dehydrating your Cavalier’s meat treats at home is simple and can be done using a dehydrator or your oven. To start, slice the meat (like chicken, beef, or turkey) into thin, even strips, removing any fat. If using a dehydrator, set it to around 160°F and arrange the meat strips on the trays, ensuring they don’t overlap. Dehydrate for 6-12 hours, checking for proper dryness—meat should be firm and break easily. If using an oven, place the meat on a baking rack, set the oven to the lowest possible temperature, and prop the door open slightly to allow moisture to escape. Store a few treats in your Cavalier’s treat jar and the rest in the freezer to stay fresh.
Dehydrated Fruits and Veggies: Dehydrated fruits and vegetables are a great low-calorie treat for Cavalier King Charles Spaniels, providing a crunchy, natural snack without added preservatives or artificial ingredients.
Can Cavaliers have carrots? For me, this is a yes and no. Yes, carrots are perfectly healthy and nutritious for your Cavalier. I know a lot of people recommend feeding large carrots to dogs as a chew, but I do think that may pose a choking risk. You must ensure your Cavalier is safely chewing the carrot and not swallowing big chunks. The same goes for baby carrots. For me, I prefer to feed Dexter carrots as little bits. But, I am definitely a proud helicopter mom. Make sure you read the article on healthy chews for your Cavalier King Charles Spaniel if you are wanting safe-and-natural chews.
Freeze-Dried Healthy Dog Food: Freeze-dried dog food can be an easy swap from their regular diet, making it a convenient and healthy treat option for Cavalier King Charles Spaniels. Plus it’s a great treat for picky eaters.
Freeze-Dried Meat Treats (Single Ingredient): Freeze-dried meat treats are a high-protein, single-ingredient snack for Cavaliers, providing a nutritious option.
Healthy DIY Recipes for Cavaliers. Don’t forget to subscribe to @CavalierTipsandFun for more!
Final Thoughts on Choosing the Best Treat for a Cavalier King Charles Spaniel
When choosing the best treats for your Cavalier King Charles Spaniel, always prioritize natural, healthy ingredients. Look for treats that are high-quality, free of unnecessary fillers, and made with proteins you recognize. And remember, even the healthiest treats should be given in moderation.
What treats does your Cavalier love?
Join our vibrant Cavalier King Charles Spaniel community on Facebook, support our dedication to pet wellness on Patreon, and stay updated with our weekly newsletter for invaluable tips and insights into raising happy, healthy pets. Together, let’s make a difference in our dogs’ lives!
Google Ad Below [...]Read more...
August 20, 2024Why Does My Cavalier King Charles Spaniel Eat Everything?
As a devoted Cavalier King Charles Spaniel family, you may be wondering why your Cavalier seems to eat everything in sight. Leaves, rocks, plants, grass, paper, cardboard, whatever they seem to be able to get their mouth around is fair game. This can be concerning, as it should be. If your Cavalier eats something he shouldn’t, there’s a risk of poisoning or choking. This could be caused by pica, not enough food, other health-related issues, or boredom. Let’s dive in and see if, together, we can figure out why your Cavalier King Charles Spaniel eats non-food items.
What is Pica?
Pica is a condition where dogs eat non-food items. For Cavaliers, this could include chewing on blankets, rocks, dirt or other random items. While it might seem quirky, pica can be a sign of underlying issues. Understanding the root causes can help you address the problem and ensure your Cavalier receives the best care.
The Behavior Behind Pica
Cavaliers, like all dogs, need mental and physical stimulation. Without enough engagement and enrichment, they might resort to chewing on inappropriate items. A 2019 study published in The Journal of Veterinary Medical Science discovered pica is a common behavioral issue. After surveying 2,000 cases, researchers found dogs that lacked regular enrichment, whether due to being crated for too long, being bored, or just not enough physical exercise were more likely to display pica tendencies.
Behavior Issues That Might Be Causing Your Cavalier’s Pica
Boredom and Lack of Stimulation: Cavaliers are playful and intelligent dogs that thrive on activity. If they aren’t entertained, they might turn to chewing on anything they can find. Toys and interactive games are crucial in keeping them busy and satisfied.
Stress and Anxiety: A Cavalier’s anxiety or stress is a major concern when it comes to pica. A change in routine, new family members, or other stressors can cause your Cavalier to engage in pica as a coping response. Providing a safe and secure environment along with calming activities can help reduce anxiety. If you feel your Cavalier has anxiety, it’s important to address that anxiety with a professional.
Attention-Seeking: Sometimes, Cavaliers might eat non-food items to get your attention. I always say, if a dog is asking for attention, they probably aren’t getting the attention they need. Bump up your Cavalier’s training, games, and outings.
Medical Reasons for Pica
While pica can often be a sign of boredom, medical issues can contribute to pica in dogs. This is why it’s always important to speak with your Cavalier’s holistic veterinarian. Here are some common medical issues for pica in dogs.
Nutritional Deficiencies: If your Cavalier’s diet is lacking in essential nutrients, they might chew on non-food items to make up for it. Ensure that their diet is balanced and rich in the nutrients they need.
Gastrointestinal Issues: Sometimes, dogs might eat non-food items to soothe an upset stomach. If your Cavalier seems to be eating odd items frequently, it’s worth checking with your vet to rule out any digestive issues.
Some diagnostic methods your vet might suggest include:
Biopsies: Taking tissue samples from the digestive tract to check for disease.
Therapeutic Trials: Trying a medication or diet change to see if the pica improves.
Blood Work: Checking folate and cobalamin levels, and performing a TLI (Trypsin-Like Immunoreactivity) test to assess pancreatic function.
X-rays: Ruling out gastrointestinal obstructions and other potential causes.
How to Stop Pica in Your Cavalier King Charles Spaniel
The good news is that pica can often be managed with positive training and enrichment techniques. If it’s medical, following your dog’s vet’s protocol will be essential.
Provide Engaging Toys and Enrichment Activities: Offer a variety of toys that challenge your Cavalier’s mind and body, such as puzzle toys, chew toys, and interactive games. Incorporate activities like nose work games, agility courses, or scent trails to provide mental stimulation and prevent them from seeking out inappropriate items. Check out our Cavalier enrichment ideas!
Address Anxiety with a Professional: If anxiety might be contributing to your Cavalier’s pica, consult with a dog behavior consultant. They can help identify the root causes of your dog’s anxiety and develop a tailored plan to address it.
Use Positive Reinforcement: Reward good behavior with praise and treats. When your Cavalier interacts with their toys or engages in positive activities, reinforce this behavior to guide them toward what’s encouraged.
Monitor and Redirect: Keep an eye on your Cavalier’s actions and gently redirect them if they start chewing on non-food items. Providing appropriate toys and praising them when they use them can help steer them away from unwanted behaviors.
Leash Management and OutFox Field Guard: Use a leash to manage your Cavalier and prevent them from accessing non-food items so they can’t sneak off. Consider using an OutFox Field Guard, a type of protective mesh that covers their face that can prevent dogs from eating things they shouldn’t. Unlike a muzzle, which restricts a dog’s ability to open their mouth entirely, a OutFox protects against ingestion while allowing normal breathing and drinking.
Understanding and addressing pica in your Cavalier King Charles Spaniel involves a combination of detective work, positive training, proper enrichment, and, if necessary, medical evaluation. By keeping your Cavalier mentally and physically stimulated, providing a balanced diet, and offering plenty of attention and love, you can help them steer clear of inappropriate chewing and enjoy a happy, healthy life.
Have you noticed any specific triggers for your Cavalier’s pica? Share your experiences and tips in the comments below!
Google Ad Below
Join our vibrant Cavalier King Charles Spaniel community on Facebook, support our dedication to pet wellness on Patreon, and stay updated with our weekly newsletter for invaluable tips and insights into raising happy, healthy pets. Together, let’s make a difference in our dogs’ lives!
🐶💙Support our passion for pet wellness and unlock exclusive content, perks and early access by exploring our Patreon tiers.
Sign up for our weekly newsletter!
Join us on Facebook!
[...]Read more...
March 5, 2025Preparing Your Cavalier King Charles Spaniel for Air Travel
Through Dexter’s 15 years of life, we had countless adventures together, but every single one was by car. At nearly 30 pounds, flying in the cabin wasn’t an option for him, and I would never consider putting a dog in cargo. Now, with Stewart, I have the opportunity to travel by plane since he will be between 16 and 18 pounds as an adult, which is small enough to fit in an airline-approved travel crate under the seat.
I have to admit, I’m a little nervous. It’s been almost 30 years since I last flew, and my experience wasn’t great. But I’m determined to make this a smooth process for both Stewart and myself. In September, we’ll be flying from Detroit to Portland, Maine, and I want to make sure Stewart is as comfortable and confident as possible for his first airplane trip.
Preparing Stewart, My Cavalier King Charles Spaniel for Air Travel
Since Stewart has never flown before, I’m taking a step-by-step approach to help him get used to every part of the travel experience. This isn’t just about the flight itself; it’s about everything leading up to it, from riding in his crate in the car to being in a busy airport environment.
Teaching a Cavalier to Enjoy a Travel Crate
One of the biggest adjustments for a Cavalier is spending time in a small, enclosed space. Since Stewart isn’t crate trained and has some separation anxiety, I’m taking extra care to make his travel crate a safe and positive space. An airline-approved travel crate is a much tighter fit, so here’s how I’ve been getting him used to it:
Introducing the Crate Indoors – I started with short training sessions, luring Stewart into the travel crate with treats and rewarding him for stepping inside. Since it’s a tight fit, I guided him to turn around and reinforced him for doing so. Once he was comfortable moving inside, I worked on having him stay in the crate for a few seconds before rewarding and letting him out, gradually increasing the duration.
Crate Inside a Crate – To help him transition smoothly to riding in the travel crate, I placed it inside his larger crate in the van. Since he was already used to the big crate, this made it feel more familiar. For the first couple of weeks, I left the travel crate unzipped, but zipped up the larger crate.
Zipping Up While Driving – Once he was comfortable, I started zipping up the travel crate while still inside the larger crate. This allowed him to experience confinement in a secure way without making a sudden change.
Removing the Larger Crate – The next step will be taking the travel crate out of the big crate so that he’s riding in just the small one. By gradually adjusting him to this setup, he won’t even notice the change!
Socialization and Confidence Building
Beyond the crate, I want to make sure Stewart is confident in all the different environments he’ll encounter on our trip.
Walking Politely on a Leash – Stewart will need to walk calmly on a leash through the airport. We’ve been practicing polite walking in various places with different surfaces and distractions. I will continue this training with busy locations as we progress through his training.
Exposure to Crowds and Noises – Airports are full of noises; baggage carts, intercom announcements, rolling suitcases. I’m taking Stewart to different places where he can experience a variety of sounds and people in a controlled way.
Getting Used to Security Procedures – At TSA checkpoints, I’ll need to take Stewart out of his crate and carry him through security. To prepare, I’ll work on calmly lifting him out of his crate and holding him in busier environments, helping him get comfortable with the experience before our trip.
Preparing for Time in the Airport
Most airports have designated pet relief areas, but access to them depends on the layout of the airport and TSA procedures. Some airports have relief areas before security, while others have them post-security. Since Stewart will be crated during the drive and throughout check-in and security, I’ll plan ahead to find out if there’s an opportunity for a potty break before we go through security. If not, I’ll make sure he’s had plenty of time to potty before we leave for the airport.
Practicing Extended Crate Time – I’ve been gradually increasing the amount of time Stewart spends zipped up in his crate, so he’s comfortable being inside for longer periods.
Planned Potty Breaks – Since dogs can’t relieve themselves once past security, I’ll make sure to take Stewart to the airport’s designated pet relief area before heading to the gate. This is also why I teach my dogs how to potty on cue; it makes it easier to ensure they go when needed, especially in situations like this where time and access are limited.
The Flight Itself
The actual flight is the final step in our preparation. Since Stewart will be in his crate under the seat for the duration of the flight, I want to make sure he’s as comfortable as possible.
Calm, Positive Associations – I’m making sure that his crate time is always associated with good things; treats, chew items, and a cozy space.
Chews and Enrichment for the Flight –I’ll bring along a few safe chews and likely my slippers to provide comfort for Stewart during the flight.
Staying Calm Myself – Dogs pick up on our emotions, so I’ll be focusing on staying relaxed and making this feel like just another routine adventure for Stewart.
Final Thoughts
Traveling with a Cavalier King Charles Spaniel on a plane takes preparation, but with gradual exposure and a positive approach, it can be a smooth experience. My goal is to make sure Stewart feels safe, confident, and comfortable every step of the way. While I’m still a bit nervous about my first flight in 30 years, I know that by preparing Stewart properly, we’ll both be ready for our adventure to Maine.
A big thank you to all of our Cavalier friends who sent us their travel photos! Don’t forget to follow them on social media.
Have you traveled with your Cavalier on a plane? I’d love to hear about your experiences in the comments!
Google Ad Below [...]Read more...
October 30, 2024How to Bathe a Cavalier King Charles Spaniel Puppy
If you are wondering how to bathe a Cavalier King Charles Spaniel puppy at home, I have you covered. As a Cavalier mom and positive dog trainer, I’m ready to help you make bathing your Cavalier puppy not only effective but enjoyable and stress-free for your new Cavalier King Charles Spaniel puppy.
Dexter, who is now fifteen, has had his fair share of dog baths. But, today, I’m going to share how I gave Willow her first bath at home. With the right setup, some tasty treats, taking it slow, and a cozy towel, you can create a zen atmosphere for your Cavalier’s bathtime. So here’s a step-by-step guide to giving your Cavalier King Charles Spaniel puppy their first bath.
Set Up Your Puppy’s Bath Space for Safety and Comfort
First, you want to ensure your puppy’s bathtub or sink is safe and secure. You don’t want your puppy slipping on the surface of a wet tub or sink. First things first-secure the bathtub or sink so your puppy won’t slip. A good rubber mat keeps your Cavalier from slipping, and this alone will help your puppy feel safer in the tub. If your Cavalier is small, like Willow, you can easily bathe them in the sink. But, if they are larger, like Dexter, a tub is a must, or a portable dog bathtub can also work well. I haven’t used one, but I’ve heard from other Cavalier families they are great!
Warm Towel Tip: Before starting your puppy’s bathtime, place a few towels in the dryer. Then, just before you head to the bath, grab the warm towels. Then, after bathtime, your puppy can be wrapped in a warm-and-cozy towel. If you air dry your Cavalier puppy, then add some puppy blankets too, so they can cozy up in the pile of warm blankets.
How to Choose a Puppy Shampoo That is Safe
When choosing a safe puppy shampoo, the first stop is the back of the shampoo bottle to read the entire ingredient panel. Yup, you want to read each ingredient and make sure those ingredients are safe and natural. You may be surprised at the garbage that you find in some puppy shampoos.
Full disclosure, I’ve been working with the 4-Legger brand since 2016 and, in my opinion, they are the best out there. For puppies, I like their hypoallergenic SOOTHE formula. This isn’t a puppy shampoo review, but I do want to share their ingredient panel, so you can get a better idea on what a good puppy shampoo looks like.
4-Legger SOOTHE Ingredients: Organic Aloe Juice, Organic Saponified Oils (Coconut, Shea Butter, Olive, Sunflower, and Jojoba), Organic Vegetable Glycerin, Organic Rosemary Extract Order today with promo code RaiseNaturally20 for 20% off your first order.
Keep Your Cavalier’s Inner Ears Dry
Protecting those little ears is important. You can place a cotton ball gently in each ear to prevent water from sneaking in, but remember to remove them after! Or, you can simply gently press their ear to their head as you use a warm washcloth.
Be Generous with the Tasty Treats or Lick Mats
Treats are key to conditioning your puppy that bathtime is good. Bath=Treats or Bath=Lick Mat Time Giving treats throughout the bath not only keeps it positive but also helps distract them from what is going on. Talk to your Cavalier puppy through the experience. Let your puppy know how much you love them and that this is a safe experience.
If you’re looking for more gentle routines and everyday training ideas like this, my Manners, Life Skills & Foundation Training Course walks you through simple, trust-based lessons you can use at home. It’s all about helping you and your dog feel confident and connected.
Watch Willow’s First Bath and don’t forget to subscribe to @CavalierTipsandFun for more!
Introduce Your Puppy to the Bath Gently
When it’s go-time, place your puppy gently in the sink or tub. Willow was a little unsure at first, so I kept things calm and encouraging. We went slowly, allowing her to get comfortable, and rewarded her bravery with treats. You can always do this in steps over a few days if your puppy is nervous. Teaching your Cavalier puppy to enjoy a bath is going to be so important since this is a breed that can benefit from baths to keep their luxurious coat beautiful. The benefit of puppy bathing is that the process can be much shorter than when your Cavalier has a full coat.
Start the Water Slowly
Once your puppy seems a bit settled, turn on the water. Using a shower sprayer is ideal because it’s easier to manipulate around your Cavalier and get the belly and bum area easier. Always check the temperature; you want it warm, but never hot. If your pup gets nervous, reassure them with gentle touches, talk to them, and provide healthy and tasty treats. We want bathtime to be a good thing, not something to avoid.
Wet Your Puppy and Lather Up
Begin with their back, avoiding their face for now. Once they’re damp, add a little shampoo and lather gently. Go slow and talk to your pup throughout to keep them reassured. Make sure to reach all those little spots like under the belly, armpits, and legs.
When it comes to cleaning your Cavalier’s face, be careful and gentle. Grab a soft washcloth, soak it in warm water, and wring out any excess. Gently wipe around your puppy’s face, especially near the eyes and mouth, to keep things clean without needing shampoo. Cavaliers can be sensitive around their eyes, so keep it soothing and slow, making it a comfortable moment for them. If there’s any tear staining, gently focus on those areas but avoid scrubbing.
Rinse Thoroughly
It’s so important to rinse really well to avoid any leftover shampoo that could irritate their skin. Keep the water warm and gently go over each area until you’re sure they’re squeaky clean.
How to Dry a Cavalier After a Bath
Gently squeeze out as much water as possible from their coat while they’re still in the tub, especially from their ears, legs, and belly. Be careful not to pinch their skin. Then grab a warm towel and start rubbing them down right in the tub. Begin with their back and then work down to their legs, belly, and especially those floppy ears! The towel rubdown helps absorb extra moisture and keeps your puppy from dripping everywhere.
Pro tip: When it looks like your puppy is going to shake their head, try covering their ears lightly with a towel. It can help prevent ear issues and keeps the shake-off water spray to a minimum!
Should You Blow-Dry Your Cavalier King Charles Spaniel Puppy?
For a little more drying, a low heat or cool setting on a blow dryer works great. Keep the dryer moving and avoid getting too close to their skin. And, of course, more treats and sweet talk make this part easier too! I would highly recommend desensitizing your puppy to the hair drier first. You can learn how in the video below. If you are going to allow your Cavalier to air-dry, I would suggest using a dog drying jacket and warm , snuggly blanket.
Learn how to teach your Cavalier to love drying and subscribe to our other YouTube channel @RaisingYourPetsNaturally
And there you have it—bathing your Cavalier King Charles Spaniel puppy at home for the first time! If you’re wondering, when should I bathe my puppy for the first time, or how often should I bathe my puppy, it’s usually safe to start around eight to twelve weeks, assuming you are using a truly safe puppy shampoo. With these tips and a positive approach, you’ll help set up your Cavalier King Charles Spaniel puppy for a lifetime of happy bath times.
What part of your puppy’s first bath are you most nervous about? Let me know in the comments. I’d love to help make it a fun experience for both of you!
Google Ad Below [...]Read more...
October 1, 2024MCAD deficiency in Cavalier King Charles Spaniels
Last year, on my Raising Your Pets Naturally blog, I shared information about a relatively new health condition found in Cavalier King Charles Spaniels: Medium-Chain Acyl-CoA Dehydrogenase (MCAD) deficiency. As many Cavalier families know, this breed is already prone to several health issues, and adding another one to the list is upsetting.
MCAD deficiency is a genetic condition that impacts how the body breaks down certain fats for energy. Recent research has found some Cavaliers who have symptoms such as seizures, lethargy, and other health issues may have MCAD.
The initial study that brought this to the general public’s attention focused on a three-year-old male Cavalier who was experiencing seizures and unusual tiredness. After examining his blood and urine, researchers discovered elevated medium-chain fatty acids, pointing to MCAD deficiency. They then sequenced the dog’s genome and identified a specific change in the ACADM gene, which is associated with this condition.
When the researchers tested this genetic variant in 162 Cavaliers, they found that about 23.5 percent of the dogs carried the mutation. This discovery is important because it suggests that MCAD deficiency might be the reason behind the seizures and other symptoms we sometimes see in Cavaliers.
Here are some symptoms to watch for:
Seizures: Seizures or convulsions can be a key indicator of potential MCAD deficiency.
Lethargy: Unexplained and prolonged tiredness could be a sign of an underlying issue like MCAD deficiency.
Intermittent Health Issues: These episodes might include vomiting, decreased energy, or more severe symptoms like seizures.
Unsteady Gait: Difficulty walking or balance issues could occur during episodes.
Loss of Appetite: A sudden loss of interest in food might indicate a problem.
Low Blood Sugar (Hypoglycemia): This can lead to weakness, shakiness, disorientation, and seizures.
Abnormal Behavior: Changes in behavior, such as irritability or confusion, might be linked to a metabolic disorder.
Respiratory Distress: In severe cases, dogs might experience difficulty breathing during an episode.
Frequent Infections: Some dogs with MCAD deficiency may be more prone to infections.
Neurological Symptoms: Symptoms like circling, head pressing, or lack of coordination could be signs of this condition.
I know, right? A lot of these symptoms are also symptoms of other Cavalier King Charles Spaniel medical issues. While these symptoms can be caused by various factors, it’s important to consider MCAD deficiency, especially if your Cavalier is showing multiple signs.
Consider Getting Your Cavalier Tested for MCAD Deficiency
If you’re concerned about MCAD deficiency and its impact on your Cavalier King Charles Spaniel, getting your dog tested is a straightforward step you can take. The test involves a simple at-home swab, which you can easily order and perform yourself. This can provide valuable insights into whether your Cavalier carries the gene associated with MCAD deficiency.
For those thinking about adding a new Cavalier puppy to their family, it’s encouraging to know that many responsible breeders are proactively testing their breeding pairs and even the grandparents. This testing helps ensure that future puppies are less likely to inherit MCAD deficiency, contributing to healthier generations of Cavaliers.
Testing is a proactive measure that can help you make informed decisions about your dog’s health and well-being. If you’re interested in testing, talk to your veterinarian or reach out to a reputable lab for more information on how to get started.
For Cavaliers at risk of MCAD deficiency, diet plays a crucial role. Since these dogs might struggle to break down medium-chain fatty acids (MCFAs), it’s recommended to be mindful of their diet:
Limit MCTs: Foods high in MCTs, like coconut oil, palm oil, and milk products, including yogurt might need to be limited in dogs with this genetic variant.
Watch High-Fat Diets: A balanced diet, without excessive fats, is key for Cavaliers with potential MCAD deficiency.
Cavaliers that haven’t been tested for MCAD deficiency should avoid foods high in MCTs. Without knowing their genetic status, it’s best to be cautious to prevent potential health issues like seizures or other symptoms associated with the condition. If your Cavalier has had a diet rich in MCTs for a few years without any of the symptoms listed above, you may consider continuing to feed. However, the test is pretty easy and inexpensive, so it might be just easier and safer to test to know for sure.
The research on MCAD deficiency in Cavaliers is ongoing, and it’s vital for more Cavaliers to be tested. A simple swab test can determine whether your Cavalier carries the gene associated with MCAD. This testing is important not just for your Cavalier’s care, but also for responsible breeding practices to reduce the prevalence of this mutation in future generations. If you test, please contact your Cavalier’s breeder with the results.
Testing for MCADD
Canine Genetic Testing
GenSol Animal Diagnostics
Laboklin
As of June, 2024, the latest stats from a Facebook group dedicated to MCAD deficiency in Cavaliers show the following:
Genetically Affected: 49 dogs (9.78%)
Clinically Affected: 6 dogs (1.2%)
Carriers: 238 dogs (47.5%)
Clear: 214 dogs (42.7%)
These numbers highlight the importance of testing and awareness within our Cavalier community. By staying informed and proactive, we can continue to support the health and well-being of our Cavaliers.
Managing MCAD Deficiency: Diet and Care Tips
If your Cavalier King Charles Spaniel has been diagnosed with MCAD deficiency, managing their condition effectively involves careful attention to their diet and feeding schedule. I would suggest a good heart to heart with your dog’s holistic veterinarian. If your Cavalier does have MCAD deficiency you will need to avoid a high-fat diet and avoid foods high in medium-chain triglycerides (MCTs). Don’t forget to read those ingredient panels on all the foods, treats, and chews you feed your Cavalier.
Although MCAD deficiency is serious in Cavaliers, a good food protocol can help ensure your Cavalier still leads a full and enriched life.
Google Ad Below [...]Read more...
September 18, 2024How to Celebrate a Senior Dog’s Birthday and Healthy Dog Cake Recipe
It’s hard to believe that Dexter, my best friend and constant companion, is turning fifteen! I’m over the moon that I am able to celebrate this milestone with him. He may be slowing down a bit, but his spirit and spunk remains as bright as ever. As Dexter has aged, we may have tweaked what we can do, but one thing has stayed the same: we live each day to the fullest, cherishing every moment.
Over the past couple of years, I’ve seen subtle changes in Dexter’s energy and behavior. He doesn’t have the boundless energy of his younger days, and he’s been going through some senior dog anxiety. We’ve learned to adjust our activities together, and I’ve been working on helping him feel more secure as his cognition changes. Our daily enrichment now includes slow, sniffy walks, leisurely poke arounds through the neighborhood followed by a stroll, and indoor adventures. He still enjoys simple training sessions, which keep his mind sharp, and I continue his canine fitness exercises to maintain his mobility and strength.
Earlier this year, Dexter went down in his back end after a reaction to medication. It was a scary time, and I wasn’t sure what his recovery would look like. I was actually wondering if his time was coming to an end. But after three to four months of dedicated rehab, I’m thrilled to share that he’s made a full recovery! Dexter’s resilience has always inspired me, and this experience only deepened my love for him. His ability to bounce back, even at fourteen, is a testament to his incredible spirit.
With Dexter by my side, I’ve been inspired to dive into new creative projects. Over the past year, we launched this blog dedicated to Cavalier King Charles Spaniels. This is actually our second blog! Check out our first blog, Raising Your Pets Naturally. I’ve also created a children’s coloring book, Dexter’s Adventures, bringing his playful and inspiring spirit to life for a younger audience. Which makes this his 3rd children’s book! Everything I do is shaped by Dexter, and I’m so lucky for the joy and inspiration he brings.
Our mantra has always been to live each day to the fullest, and as Dexter turns fifteen, this really hits home. Every day is a gift, and I’m beyond thrilled to have Dexter with me on this journey. Together, we continue to embrace life, even as we both slow down, finding joy in the simple moments we share.
Celebrating Dexter’s birthday is more than just a tradition, it’s a reminder of the love, laughter, and resilience we’ve shared throughout his life. During Dexter’s birthday celebrations, we always make sure to support Cavalier Rescue USA, a cause that’s close to our hearts. If you’re able to donate or volunteer your time, please consider checking them out, and be sure to tell them Dexter sent you!
Here’s to Dexter, my silly monkey, stink pot, my muse, and the one who makes every day brighter with his love.
Don’t forget to subscribe to our @CavalierTipsandFun YouTube channel for more!
Print
Pin
Dog-Friendly Strawberry Birthday Cake
Here's Dexter's 15th birthday cake recipe and photos! To make his special day even more memorable, I whipped up a dog-friendly birthday cake that’s not only tasty but also healthy. This homemade dog birthday cake is packed with ingredients Dexter loves. Whether you're planning a dog birthday celebration or looking for a healthy dog birthday cake recipe, this one is sure to be a hit with your pup.
Course cake Keyword dog friendly cake, dog birthday cake,
Prep Time 1 day day Cook Time 50 minutes minutes
Servings 12 Dogs
Author Tonya Wilhelm
IngredientsOptional Blue Spirulina Gummy Paw Print Decoration6 tbsp Beef Gelatin2 tsp Blue Spirulina2 cups Boiling WaterStrawberry Dog Friendly Cake4 cups Quinoa Flour6 Eggs16 oz Strawberries Stems Removed1/4 cup Olive OilOptional Dog Frosting8 oz Cream Cheese check the ingredients to ensure it’s dog-friendly10 oz Butternut Squash Cooked
InstructionsBlue Spirulina Gummy Paw Print DecorationIn a large mixing cup, combine the gelatin and blue spirulina.Quickly stir in the boiling water until fully dissolved.Pour the mixture into the paw print cutouts in the paw-shaped cake pan. Pour any extra in other fun silicone molds.Refrigerate until set then gently remove the paw gelatin shapes.Place the paw shapes on a cookie sheet and return to the refrigerator while preparing the cake.Dog-Friendly Strawberry CakePreheat the oven to 350°F.Purée the strawberries in a blender until smooth.In a large mixing bowl, combine the quinoa flour, eggs, olive oil, and strawberry purée.Generously grease the paw print cake pan with olive oil.Pour the cake batter into the pan and bake for approximately 50 minutes, or until set.Allow the cake to cool for 15 minutes, then carefully remove it from the pan and place it on a cooling rack to cool completely.Optional Dog FrostingPurée the cooked butternut squash in a blender.Add the cream cheese to the purée and blend until smooth and well combined.Once the cake is completely cool, frost the cake with the butternut squash and cream cheese mixture.Top with the blue spirulina gummy paw print decorations for a fun and colorful touch!
Join our vibrant Cavalier King Charles Spaniel community on Facebook, support our dedication to pet wellness on Patreon, and stay updated with our weekly newsletter for invaluable tips and insights into raising happy, healthy pets. Together, let’s make a difference in our dogs’ lives!
Google Ad Below [...]Read more...
January 8, 2025How to Stop Your Cavalier King Charles Spaniel From Licking Everything
Have you ever wondered why your Cavalier King Charles Spaniel licks you or how to curb excessive licking? If so, you’re not alone. Many Cavalier parents find themselves trying to stop their Cavalier from licking so much. Let’s take a closer look at why Cavaliers lick and what you can do if it becomes too much. Cavaliers lick for various reasons, and understanding the “why” is key to changing and managing the behavior.
Cavaliers May Lick You Because You Taste Great!
One common reason is that you simply taste good. Your Cavalier might be drawn to the salt on your skin, or maybe you’ve just eaten, and they’re picking up on lingering food scents. Even coming inside after an active day outdoors can make you extra appealing to their sensitive noses. Hormones and pheromones also play a role. For example, if you’re feeling stressed or it’s that time of the month, your Cavalier might be more inclined to lick because they’re sensing these subtle changes. Not to mention when we put hand lotion on, oh, yummy!
Cavaliers Lick During Greeting Behaviors
Another reason dogs lick is as part of their greeting ritual. When you come home, they’re excited to see you and may lick as a way of saying, “Hello! I’m so happy you’re here!” It’s a natural expression of affection and enthusiasm. This behavior is especially common in Cavalier King Charles Spaniels, a breed known for their loving and people-oriented nature. Cavaliers thrive on connection and love being close to their families, so licking during greetings is often their way of reinforcing that bond.
Greeting-related licking can also be a way for your dog to gather information about where you’ve been. Dogs rely heavily on their sense of smell and taste to explore their environment, and licking is part of how they “read” the world. If you’ve been around other dogs, eaten something particularly tasty, or even just had a long day out, your Cavalier’s greeting might include licking to learn more about your adventures.
Check out the video. Don’t forget to subscribe to our @RaisingYourPetsNaturally YouTube channel.
Your Cavalier May Be Licking Because He’s Stressed
However, not all licking is tied to happy moments. Sometimes, licking can indicate stress or anxiety. This type of licking is known as a submissive or appeasement gesture. Essentially, your dog is trying to communicate that they mean no harm. You might notice this behavior around guests or strangers, where your dog licks excessively as a way to navigate the interaction. In some cases, they may even start licking their paws or nearby objects if they’re feeling particularly anxious.
How To Stop Your Cavalier King Charles Spaniel From Licking So Much
If your Cavalier’s licking becomes excessive, there are steps you can take to manage it. For instance, if your dog is licking because you taste good or they’re excited to see you, allow a quick lick and then gently redirect them. You can offer a chew toy or a bone to give them something else to focus on. This simple redirection helps channel their energy into a more appropriate activity while still acknowledging their excitement.
When licking is tied to stress, it’s especially important to avoid punishing your Cavalier. Punishment can actually make the behavior worse, as your dog may lick even more in an attempt to appease you. Instead, remain calm and redirect their attention to another behavior, such as sitting or playing with a toy. Addressing the root cause of your Cavalier’s stress and anxiety is key. Building their confidence through positive dog training can make a big difference. As your dog becomes more comfortable in stressful situations, the need for licking as a coping mechanism will naturally decrease.
In some cases, excessive licking may require professional help. If your dog’s licking seems compulsive or tied to high levels of stress, start by consulting your holistic veterinarian. They can check for any medical issues and look at your dog’s behavior history. From there, a dog behavior specialist can help you create a customized dog behavior modification plan to address your Cavalier’s needs, making life easier and more enjoyable for everyone.
If your Cavalier King Charles Spaniel’s licking is becoming a challenge, know that you’re not alone, and there are positive steps you can take to address it. With a little patience and the right approach, you can better understand why your Cavalier licks and guide them toward healthier ways of expressing themselves. If you’re feeling stuck or need personalized guidance, I offer one-on-one phone and Skype sessions to help you and your Cavalier navigate challenges like excessive licking. Together, we can create a plan that works for your unique pup and helps strengthen your bond.
Do you have a licker on your hands?
Google Ad Below [...]Read more...
September 3, 2024The Importance of Enrichment for Senior Cavalier King Charles Spaniels
Oh, Dexter. My senior Cavalier King Charles Spaniel, will be fifteen on October 6, 2024! I’m over the moon happy that he has led a long, happy life. He was diagnosed with Chiari malformation and syringomyelia in 2012, and I didn’t think he would have a very long life. Eventually, his MVD diagnosis also rolled in. But, despite his medical conditions, he has been thriving. He’s not just alive, he’s kicking!
I’m not going to lie. He started showing his age and some cognitive decline a few years ago. I have written about his life on my first blog, Raising Your Pets Naturally, so make sure you head over there for even more about Dexter’s life and care. But today, I wanted to discuss some of the things I have done to help keep Dexter as sharp as possible and try to keep canine cognitive dysfunction syndrome (CCDS) at bay. Through my experiences and research, I’ve seen how diet, positive training, and environmental enrichment can make a significant difference in maintaining his quality of life. So, let’s jump in.
What is Canine Cognitive Dysfunction Syndrome
Canine cognitive dysfunction syndrome (CCDS), is similar to dementia in humans and affects many senior dogs. Symptoms can be different from dog to dog, but some common behaviors include: disorientation, disrupted sleep patterns, decreased activity levels, and changed interactions with their environment and people. Research, including a study from the Journal of Veterinary Behavior (2016), shows that cognitive decline in dogs can significantly impact their quality of life. But early intervention and supportive care can improve CCDS symptoms and a dog’s quality of life.
The Importance of Canine Enrichment for Senior Cavaliers
Environmental enrichment is important for helping senior Cavaliers with canine cognitive dysfunction syndrome. Canine enrichment is about engaging your Cavalier’s senses, engaging their minds, and keeping them moving. I always think about “living life to the fullest.” I mean, we brought our Cavaliers into our homes so we can enjoy them and do fun things with them. Although they are beautiful, they deserve more than just a life where they lie around all day and do nothing. Just because they are seniors, doesn’t mean this mentality should change, although their activities will need to be adjusted to meet their individual needs. And it’s not just me; there’s research that backs up this theory.
Mental Stimulation: According to a study published in the Journal of Veterinary Internal Medicine (2016), mental stimulation through enrichment activities helps slow cognitive decline in senior dogs. Puzzle toys, interactive games, and scent-based activities keep the brain engaged, potentially delaying the progression of CCDS symptoms.
Reduces Stress: Canine enrichment is a great way to help reduce anxiety and stress in senior Cavaliers dealing with cognitive decline. Engaging activities and sensory stimulation can make a big difference. By adding enrichment routines to their day, you’re helping your dog feel calmer and more secure, which can ease some of the stress and anxiety that often come with cognitive issues.
Behavioral Improvement: Enrichment activities can make a big difference for senior Cavalier King Charles Spaniels who are restless or pacing. By offering mental and physical stimulation, these activities help reduce repetitive behaviors and keep your dog more relaxed.
Enhanced Quality of Life: Enrichment isn’t just about keeping your Cavalier busy. It’s about improving their overall quality of life. Engaging in enjoyable and stimulating activities brings more enjoyment, engagement, and a sense of purpose to their days, making their lives more fulfilling.
Simple Enrichment Ideas to Boost Your Senior Dog’s Quality of Life
Enrichment doesn’t have to be complicated or time-consuming. It’s all about finding simple, enjoyable activities that stimulate your senior Cavalier’s mind and body. Here are some ideas to get you started. And don’t forget to check out our article on Cavalier Enrichment Ideas.
Interactive Toys: Toys that dispense treats or require problem-solving are fantastic for mental stimulation. Depending on your Cavalier, you can use treat-dispensing toys or lick mats. When Dexter was younger, treat dispensing toys and frozen Tux toys were a hit. Now, he enjoys lick mats and snuffle mats. Food toys engage your dog’s sense of smell and taste.
Scent Games: Speaking of scent games, Dexter has always loved using his nose. Try hiding treats around the house or yard and let your Cavalier find them using his nose. Scent games are a natural way to keep your Cavalier active and provide both mental and physical exercise in a way most dogs love.
Positive Dog Training Sessions: Short, positive dog training sessions with simple cues or tricks are highly rewarding. They keep your Cavalier’s brain sharp and help build a stronger bond through shared activities.
Varied Walks or Strolls: Don’t get into a rut of going on the same walk, to the same park, on the same trail. Changing up your walking routes introduces new sights and smells. This variety provides your Cavalier with cognitive stimulation and keeps your walks fresh and interesting.
Comfortable Environment: Make sure your senior Cavalier’s living space is safe and cozy. Look out for any obstacles, and ensure good footing below. Whether you have carpet, carpet runners, grippy socks, ToeGrips or all of the above, traction is incredibly important for senior Cavaliers. They don’t have the same core strength to hold themselves up, and slick floors can be very scary and even cause injury if they slip or splay out.
Canine Fitness and Strength Building: I highly recommend setting up some sessions with a canine rehabilitation professional. Working with Dr. Sam, Dexter’s strength has been so important in his overall health and wellness. And our at home exercises aren’t just a way to keep him fit. They are also another form of enrichment, since he loves doing them! Engage in simple at-home exercises like sit-to-stand and sit-to-down exercises to help maintain your Cavalier’s muscle strength and joint mobility. Gentle range-of-motion exercises can also support your senior dog’s overall physical health and comfort.
Supporting Cognitive Health with Diet and Nutrition
Diet plays a crucial role in managing cognitive decline in senior dogs. According to research published in the Journal of Veterinary Internal Medicine (2019), a diet rich in specific vitamins and nutrients can significantly support cognitive health. Key vitamins such as vitamin E and vitamin C act as antioxidants, protecting brain cells from oxidative stress and easing cognitive issues. B vitamins, including B6, B12, and folic acid, are essential for maintaining healthy brain function. Omega-3 fatty acids, commonly found in fish and fish oil supplements, also play a vital role in improving cognitive function and managing symptoms of cognitive decline. Including these vitamins and nutrients in your dog’s diet, either through high-quality dog food (preferably fresh) or supplements, can help manage cognitive decline and enhance their overall quality of life.
Dexter, is proof of the benefits of a fresh diet. His meals are carefully prepared with high-quality, fresh ingredients and free from unnecessary chemicals. I’m convinced this fresh, balanced diet, rich in essential nutrients, has played a significant role in keeping his mind sharp and supporting his overall well-being.
How Positive Training Supports Cognitive Health in Senior Cavaliers
Positive training and routine play a vital role in supporting a senior dog’s mental sharpness and managing the effects of cognitive decline. As a positive dog trainer, I’ve taught Dexter plenty of fun and useful tricks, not just for good behavior, but also to keep his mind engaged and sharp. Each training session isn’t just about obedience; it’s about giving Dexter the mental stimulation he needs to stay mentally fit as he ages.
Incorporating regular training sessions into your dog’s routine is a great way to improve their cognition and their body. Focus on simple tricks and behaviors that challenge their mind and body without causing stress. I have noticed Dexter’s abilities change over the years, so it is important to change with them. By tailoring positive dog training sessions to your Cavalier’s needs and incorporating enjoyable activities into their day, you can help your Cavalier maintain their mental clarity and overall well-being.
Follow our YouTube channel for more Cavalier enrichment ideas!
Final Thoughts
Incorporating canine enrichment into Dexter’s daily routine has been essential for maintaining his quality of life. It’s not just about keeping him busy; it’s about enhancing his mental, emotional, and physical well-being. Enrichment is just one piece of the puzzle for Dexter’s health. A fresh, balanced diet and consistent, positive training are also vital for supporting his well-being as a senior dog.
Dexter’s vibrant health is a testament to how a combination of mental stimulation, nutritious food, and engaging routines can make a real difference. I encourage all Cavalier families to integrate these practices into their senior dogs’ lives. By focusing on enrichment, diet, and training, you can significantly improve your dog’s overall well-being and help them enjoy their golden years to the fullest.
I host a private Facebook group for Cavalier King Charles Spaniels, and we have a big focus on canine enrichment ideas and challenges to keep your Cavalier engaged and thriving!
How do you incorporate enrichment, diet, or training into your senior dog’s routine? Share your tips and experiences below!
Enrichment Increases Relaxation
https://www.ncbi.nlm.nih.gov/pmc/articles/PMC8772568/
https://www.sciencedirect.com/science/article/pii/S0168159123002691
Join our vibrant Cavalier King Charles Spaniel community on Facebook, support our dedication to pet wellness on Patreon, and stay updated with our weekly newsletter for invaluable tips and insights into raising happy, healthy pets. Together, let’s make a difference in our dogs’ lives!
Google Ad Below [...]Read more...
February 5, 2025How to Teach Cavalier King Charles Spaniel to Ignore Distractions
When I’m out with Stewart, my 7-month-old Cavalier, we get stopped a lot. People see his big, sweet eyes, his cute winter coat and wiggly little body and immediately want to say hello. And if this goes for people with or without their dog.
But here’s the thing, not every outing is a social event, and not every person or dog needs to be greeted.
Dog Socializing vs. Everyday Walks
There’s a time and place for socializing, and there’s a time for simply spending quality time with Stewart on our walks and outings. I make sure Stewart has appropriate and positive, structured experiences meeting new people and dogs in a controlled way. This helps him learn confidence, good manners, and appropriate greetings. But, at the same time, I’m teaching him an equally important skill, ignoring distractions such as people and dogs and walking politely with me.
If every walk turns into a meet-and-greet, dogs start to expect it. They pull toward every person or dog, they get frustrated when they don’t get to say hello. That can lead to barking, lunging, or general overexcitement, making walks stressful instead of enjoyable.
Why It’s Important to Teach Your Dog to Ignore Other Dogs and People
Not Every Dog Wants to Say Hello
Some dogs are nervous, in training, or simply not interested. Teaching Stewart to walk past other dogs calmly means he won’t invade another dog’s space or make an already anxious dog uncomfortable.
People Aren’t Always Dog People
Shocking, I know! But not everyone wants a happy little Cavalier bouncing up to them. Some people are afraid of dogs, allergic, or just in a hurry. Stewart is learning to walk past without expecting attention makes life easier for everyone.
Impulse Control is a Life Skill
Dogs who can stay focused, even when exciting things are happening around them, are safer and more enjoyable to live with. If Stewart learns that he doesn’t always get what he wants the moment he wants it, he’ll be better at handling frustration in other areas of life too.
Not Every Walk is About Socializing
Sometimes, I just want to enjoy a peaceful walk with Stewart. He doesn’t need to greet everyone to have a fulfilling experience, sometimes sniffing, walking together, and taking in the world is enough.
Better Walks in Busy Places
By teaching Stewart to walk with me instead of focusing on every dog or person, our walks are smoother and more enjoyable. Crowded sidewalks, busy parks, or narrow trails are much easier to navigate when he stays by my side rather than pulling toward distractions.
Prepping for Travel & Public Outings
I plan on traveling with Stewart, airports, dog-friendly boats, outdoor dining, places where he’ll need to stay close and focused on me. Teaching him now that he doesn’t always get to greet everyone will make these experiences stress-free and enjoyable for both of us.
Don’t forget to subscribe to @CavalierTipsandFun for more videos!
How I’m Teaching Stewart to Walk Past Distractions
Reward Calm Choices
When Stewart notices a dog or person, I reward him. I’m teaching him they=treats. Eventually, he will start to make that connection, see the distraction and look at me for the reward. This is what I’m going for. Over time, he’ll learn that staying focused on me, and it’ll be a non-event for him, he’ll simply walk past without even thinking about stopping to greet.
Use Distance
If Stewart’s too excited or distracted, I create more space between us and the distraction to help him refocus. As he gets better at ignoring, I’ll gradually close that gap, making it easier for him to pass by calmly.
Give Him a Job
I use cues like his name game, watch me, paws up, touch to keep his attention. Engaging his brain with productive tasks means he’s less likely to pull toward distractions.
Set Clear Expectations
I make sure Stewart knows that pulling towards people or dogs does not work. If he starts to pull, I either toss in his name game, stop and wait for him to renege, or add more distance. It truly depends on the situation. I do want him to be successful.
Handling Approaching People
When someone is steadily approaching your Cavalier, how you handle it depends on your goal at that moment. As a positive dog trainer, sometimes I want to explain and educate. If so, then I’ll squat down with Stewart, reward him for staying focused on me, and let the person know we’re training and practicing ignoring distractions. If I choose to say hello, I tell Stewart, “Let’s say hi,” and calmly approach. But sometimes, I just want to keep moving, so I give a quick, upbeat “We’re not saying hello, thank you!” and continue walking, keeping Stewart focused on me. It’s all about setting the tone for the interaction while making sure my dog stays engaged and confident.
Finding the Balance
There’s a time and place for socializing, and there’s also a time to focus on the walk itself. If you do want to stop and say hi, try to stop about 10 feet away from the other person or dog and ask first if it’s okay. Keep in mind that others might be training their dogs or dealing with their own challenges during the walk, so giving them some space is always a good idea. Being considerate makes the experience better for everyone, whether it’s a quick greeting or just calmly walking by each other. I then give Stewart the cue, “Let’s say hi,” so he knows he has permission to greet.
There’s nothing wrong with letting your dog greet others when it’s appropriate, but it’s just as important for them to learn that not every outing is a social event. Teaching Stewart when it’s time to engage and when it’s time to focus on me makes him a better walker and ensures our walks stay enjoyable.
When you’re walking your Cavalier King Charles Spaniel, how do you decide when it’s time to socialize and when it’s time to focus on the walk?
Google Ad Below [...]Read more...
April 21, 2024Tips for traveling with your Cavalier King Charles Spaniel. Dog-friendly vacation ideas.
Follow @CavalierTipsandFun for more videos.
Don’t forget to subscribe to @RaisingYourPetsNaturally for more!
Your comments and questions are always welcome below.
Join our vibrant Cavalier King Charles Spaniel community on Facebook, support our dedication to pet wellness on Patreon, and stay updated with our weekly newsletter for invaluable tips and insights into raising happy, healthy pets. Together, let’s make a difference in our dogs’ lives!
[...]Read more...
October 15, 2024Cavalier King Charles Spaniel Travel Tips
As a Cavalier mom and positive dog trainer, I know how important it is to help our Cavaliers feel comfortable and safe during car rides. Whether you’re planning a quick trip to the park or a longer dog-friendly road trip, making sure your Cavalier King Charles Spaniel enjoys the car ride is key to a stress-free trip for both you and your dog.
When Dexter and I hit the road, I never have to worry about how he’ll handle the ride. He’s a fantastic travel companion because I spent time training him to feel confident and at ease in the car. Today, I want to share my top tips on how you can prepare your Cavalier for car travel and road trips and turn them into a relaxed, happy traveler too.
1. Start with Short and Positive Rides
Just like with any new experience, easing your Cavalier into car rides instead of popping them into the car for a twelve-hour road trip is super important. Begin by taking short trips to fun, dog-friendly places like the local park or pet store. Keep the first few rides short and sweet, no more than ten-to-fifteen minutes. The goal is to associate the car with positive and fun destinations. A trip to the vet does not count as a fun visit for most dogs.
2. Create a Safe Space in the Car
Safety should always be a priority when traveling with your Cavalier. A secure dog car seat or crash-tested harness designed for small breeds like Cavaliers is a must. I personally recommend looking into the Center for Pet Safety’s approved products, as they conduct independent crash testing for dog travel gear. If a brand states they are crash tested, make sure to watch their crash tested video.
Dexter typically travels in a small crate. Because of his Chiari Malformation and syringomyelia and large size, travel harnesses aren’t the most comfortable for him. However, when we travel in the small car, a crash-tested and passed (yes, make sure they have passed the test) is our go-to. The key is to find a comfortable yet safe setup so your Cavalier feels relaxed without compromising their security.
3. Pack Familiar Comfort Items
Make your Cavalier feel more at home by packing some familiar items for the ride. When Dexter was a puppy, he would cozy up with his baby blanket and soft toy. Now, he has a therapeutic mat inside his crate. He likes to stay cool, so I also have a fan pointing at him. These little comforts can help reduce anxiety and make the ride smoother for dogs who may initially feel unsure about the car.
If your Cavalier is a bit anxious, place something with your scent, like a worn T-shirt next to your Cavalier. Your presence, even in the form of scent, can be calming for your Cavalier, especially if they’re a bit nervous during the first few rides.
4. Plan for Frequent Breaks
When traveling for more than an hour, make sure to schedule frequent potty and stretch breaks. Cavaliers are active little dogs, and, like all of us, they need to stretch their legs and take in their surroundings. I like to plan stops at dog-friendly rest areas or parks where Dexter can explore, do his business, and get a little energy out before continuing the journey.
Remember, each break is an opportunity for positive training. Use it as a chance to reward your dog for good behavior during the ride, and they’ll look forward to the next part of the trip.
5. Help Your Cavalier Relax with Calming Music
One of my favorite dog travel hacks is playing calming music designed for dogs during long car rides. I’ve been a fan of the iCalmDog portable speaker, which plays clinically-tested music that helps keep dogs calm and relaxed. Just be careful not to fall asleep at the wheel yourself!
Check out our all Cavalier calming playlist on YouTube!
6. Monitor Your Cavalier’s Well-Being
Keep an eye on your Cavalier’s behavior throughout the trip. Some Cavaliers may experience motion sickness, especially on longer rides. If your dog starts to drool excessively, whine, or seem uncomfortable, it might be time for a break. You can try natural remedies like ginger treats (with your vet’s approval) or consult your vet for other options.
If your Cavalier seems overly tired or stressed, don’t be afraid to cut the trip short. The goal is for travel to be a positive experience, and pushing them too far can have the opposite effect.
By starting with short, positive experiences and keeping their safety and comfort in mind, you can help your Cavalier King Charles Spaniel become a happy traveler. Dexter loves our road trips, and I’m sure your Cavalier will too!
Do you have any favorite travel tips for Cavaliers? Drop them in the comments!
Follow us on YouTube For fun dog-friendly travel adventures!
Google Ad Below [...]Read more...
December 25, 2024Winter Tips for a Cavalier King Charles Spaniel
Brrrr, it’s cold out there! Winter in Ohio can be tough, and today, it’s a chilly 15 degrees. Thankfully, Stewart and I are bundled up inside, but it’s the perfect time to share some essential winter safety tips for your Cavalier King Charles Spaniel. Whether you’re venturing outdoors or staying warm indoors, these precautions and activities will help keep your pup safe, healthy, and happy all winter long.
Safety First: Protecting Your Cavalier in Winter
Limit Outdoor Time
Our Cavaliers are family members, and they thrive indoors with us. While Stewart loves his outdoor potty breaks and a quick sniff around the yard, I always limit his time outside when temperatures dip. Frostbite and hypothermia are real risks for dogs, especially small breeds like Cavaliers. Keep outings short, and always monitor your pup for signs of discomfort.
Protect Those Paws
A dog’s paw pads aren’t built to handle extreme cold or icy surfaces. For quick potty breaks, toddler socks can be a lifesaver; they’re easy to put on and don’t need to be perfect since they’re just for a short trip. Shoot for dark colors, so that if one falls off, it’s easier to find in the snow. For longer walks or outdoor play, dog boots like Saltsox are fantastic options. If your Cavalier goes outside barefoot, be sure to clean their paws thoroughly with a warm washcloth or natural pet wipes to remove ice, salt, and chemicals that could irritate their skin. I make up a bowl of water with a splash of 4-Legger shampoo and a washcloth to clean paws. I make a new batch each day. (Order 4-Legger today with promo code RaiseNaturally20 for 20% off your first order.)
Scoop the Potty Area
I always scoop a clean, clear area in the yard for potty breaks. Cavaliers, like most dogs, prefer a neat spot for their business. A wide, shoveled path ensures your Cavalier can move around comfortably without getting buried in snow.
Coats and Sweaters for Your Cavalier
Dog coats and sweaters are a must for Cavaliers. Look for a jacket that provides full range of motion and covers your pup’s back and belly. Indoors, a cozy sweater can keep your Cavalier comfortable. If you notice your Cavalier sleeping in a tight ball, or even shivering, a dog sweater is a great idea. Stewart’s favorite sweaters are custom-made by MeekByDesign, but there are plenty of great options online or in pet stores.
Should a Cavalier Wear a Hat in the Winter?
Cavaliers’ long, luxurious ears attract snow and ice like a magnet! A lightweight dog hat or snood can protect your Cavalier’s ears during snowy adventures. Afterward, be sure to dry their ears gently with a soft towel.
Staying Warm and Cozy Indoors
When your Cavalier comes inside from the snow or cold, use a super-absorbent microfiber towel to dry him off thoroughly. For an extra touch of luxury, I like to pop a favorite blanket in the dryer so my dog can snuggle up with something warm. These little comforts make a big difference on chilly days!
Indoors, I keep Stewart active and engaged with puzzle toys, hide-and-seek games, and short training sessions. A mentally stimulated pup is a happy pup, even when it’s too cold for a long walk.
Winter Nutrition for Cavaliers
Did you know that certain foods can help your Cavalier King Charles Spaniel stay warm during the chilly months? According to Traditional Chinese Medicine (TCM), foods have energetic properties that can influence the body’s temperature and overall balance.
In the winter, it’s beneficial to incorporate “warming” proteins into your dog’s diet. Proteins like chicken, lamb, venison, and even goat are considered warming and can help offset the cold temperatures. These proteins are especially good for dogs who seem more sensitive to the cold or have lower energy during the winter.
You can also include warming spices and herbs like ginger or turmeric in small, dog-safe amounts to add a cozy touch to their meals. These not only are warming, but also support joint health during cold weather.
If you’re new to adjusting your dog’s diet seasonally, start slow by adding one or two warming ingredients to their current meals. Always consult with your vet or a canine nutrition expert to ensure your Cavalier’s diet remains balanced and meets their individual needs.
Embrace the Season
Stewart may be new to my home, but we’re already making the most of winter together. From brisk walks in his cozy new jacket to snuggling under a warm blanket on chilly evenings, these little moments remind me of the special bond we share. No matter the season, Cavaliers have a way of bringing warmth and joy to our lives.
How do you keep your Cavalier comfortable and happy during the winter months? Share your tips below, I’d love to hear them!
Google Ad Below [...]Read more...
March 30, 2025Health Benefits of Omega-3s for Cavaliers
Omega-3 fatty acids are one of the most important nutrients for Cavaliers, yet they’re often overlooked or misunderstood. These essential fats support heart health, brain function, joint mobility, skin condition, and even immune function. But not all omega-3 sources are created equal. Fresh fish, supplements, and plant-based options vary in effectiveness, and factors like oxidation and sourcing impact their quality. In this guide, I’ll break down the best omega-3 sources, how to choose high-quality options, and what to avoid to ensure your Cavalier King Charles Spaniel gets the maximum health benefits from their Omega-3s.
Skin and Coat Health
Omega-3s help maintain a healthy skin, reducing dryness, flakiness, and itchiness. They also improve coat condition, making your Cavalier’s fur shinier and softer. Cavaliers, like many other breeds, can be prone to allergies and skin sensitivities, and omega-3s can help manage these issues by reducing inflammation in the skin.
Joint Health and Mobility
As Cavaliers age, they can develop arthritis and joint stiffness. Omega-3s have been shown to reduce inflammation in the joints, helping to alleviate pain and improve mobility. Dogs receiving sufficient omega-3s often experience less stiffness and better flexibility, which is particularly important for senior Cavalier King Charles Spaniels.
Brain and Cognitive Function
DHA is a crucial component of brain cell membranes and plays a significant role in cognitive function. In Cavalier puppies, it supports brain development and learning. In senior Cavaliers, it helps prevent cognitive decline and supports memory and problem-solving skills. Studies have shown that dogs supplemented with DHA perform better on cognitive tests than those that do not receive adequate amounts.
Heart Health
Omega-3 fatty acids are essential for supporting cardiovascular function by helping regulate heart rhythm, reduce blood pressure, and improve circulation. For Cavaliers, who are especially prone to mitral valve disease (MVD), a common heart condition in the breed, omega-3s are even more important. Given their susceptibility to MVD, ensuring your Cavalier’s diet is rich in omega-3s can play a crucial role in supporting their heart health and may help slow the progression of the disease.
Immune System Support and Inflammation Control
Chronic inflammation is a factor in many health issues, including autoimmune conditions, allergies, and even cancer. For Cavaliers, who are prone to conditions like Chiari malformation, managing inflammation is especially critical. Omega 3s play an important role in regulating the body’s inflammatory response, helping to balance the immune system and reduce excessive inflammation. By incorporating omega 3s into your Cavalier’s diet, you can help protect against the inflammation that worsens conditions like Chiari malformation and support overall immune health.
Best Omega-3 Sources for Cavaliers
The best omega-3 sources for dogs are those that provide EPA (eicosapentaenoic acid) and DHA (docosahexaenoic acid) in their most bioavailable forms. These two types of omega-3s are the most beneficial for dogs, as they are directly used by the body to support a variety of vital functions, from heart health to joint mobility. The most bioavailable forms of these omega-3s are typically found in marine-based sources, such as oily fish. Fish like salmon, sardines, mackerel, and anchovies are excellent options because they contain high levels of both EPA and DHA, making them ideal for supporting your Cavalier’s health. These fish provide omega-3s in a form that’s easy for the body to absorb, ensuring that your dog gets the maximum benefits.
In addition to fish, fish oil supplements can also be a great source of omega-3s. However, it’s important to choose high-quality, purified fish oils that are free of contaminants like mercury. If your Cavalier is sensitive to fish or you prefer plant-based sources, algae oil is another excellent option, as it provides DHA without the fishy aftertaste or concerns about ocean contaminants. While flaxseed and chia seeds offer plant-based omega-3s, they contain ALA (alpha-linolenic acid), which the body must convert into EPA and DHA, an inefficient process for dogs. This means that marine-based omega-3s are typically the best option for achieving optimal health benefits. By rotating between these high-quality sources, you can help ensure your Cavalier is getting the most effective omega-3s for their needs.
Watch our fresh fish DIY and don’t forget to subscribe to @CavalierTipsandFun for more!
Fresh Fish (Whole Food Source of EPA and DHA)
Feeding fresh, oily fish is one of the most natural ways to provide omega-3s. However, choosing the right type of fish is essential due to concerns about mercury levels, sustainability, and proper sourcing.
Some of the best options for Cavaliers include:
Sardines: Small, low-mercury fish that are naturally high in omega-3s. They are one of the safest whole-food sources.
Anchovies: Similar to sardines, anchovies are rich in DHA and EPA while having minimal contamination risks.
Herring: Often used in high-quality pet foods, herring is another small, oily fish packed with omega-3s.
Atlantic Mackerel: This species is safe, but avoid king mackerel, which is high in mercury.
Wild-Caught Salmon: A great source of omega-3s, but farmed salmon may contain higher levels of contaminants.
When feeding fresh fish, it’s important to either lightly cook the fish or feed it raw if it’s safely sourced. Cooking fish too much can break down some of the omega-3s, while raw fish (from a trusted, safe source) can provide the most nutrients. However, if you choose to feed raw fish, it should be frozen for a week first to reduce the risk of parasites, which can be a concern with certain types of fish.
It’s essential to avoid fish that have been prepared with added salt, spices, or sauces. These seasonings can be harmful to dogs. Also, always avoid feeding cooked bones, as they can splinter and cause serious internal injuries.
Fish Oil Supplements
Many pet parents turn to fish oil supplements to provide omega-3s, but not all fish oil supplements are the same. Choosing the right one for your Cavalier is important to ensure you’re giving them the best quality and the most effective nutrients.
How to Choose a High-Quality Fish Oil
When selecting a fish oil supplement, look for species-specific labeling. Instead of settling for generic “fish oil,” opt for oils like sardine oil, anchovy oil, or krill oil. This ensures transparency in sourcing and gives you a better idea of where the oil is coming from.
When choosing a fish oil supplement, it’s important to look at the levels of EPA and DHA, the two types of omega-3 fatty acids that provide the most health benefits for your dog. The label on the bottle should specify the amount of EPA and DHA in each serving, not just the total amount of fish oil.
For example, a bottle might say it contains 1,000 mg of fish oil per serving. But if the label doesn’t show how much of that is EPA and DHA, it’s hard to know how much of the oil is actually providing the beneficial omega-3s your dog needs.
Some fish oils may have more EPA, which is great for joint and heart health, while others may have more DHA, which supports brain function and reduces inflammation. Knowing exactly how much of each omega-3 is in the oil allows you to be more confident that you’re giving your Cavalier the right amount for their specific health needs. This way, you can make sure you’re getting the full benefits of the omega-3s in the supplement.
Also, choose products that are third-party tested. Reputable brands will test their oils for harmful contaminants like heavy metals, PCBs, and oxidation levels. This helps ensure the oil is safe for your dog and that it hasn’t been compromised during production.
Liquid vs. Capsules
Fish oil comes in two common forms: liquid and capsules. Liquid fish oil (often found in pump bottles) is convenient because it’s easy to dose, but it’s more prone to oxidation once opened. Oxidation occurs when the oil is exposed to light, heat, or air, so it must be stored in the refrigerator and used quickly to maintain its freshness.
On the other hand, capsules are more stable since the oil is protected from air exposure, which reduces the risk of oxidation. However, they can be harder to dose accurately, especially for small dogs.
Oxidation Risks
One of the biggest concerns with fish oil is oxidation. Omega-3s are very sensitive to light, heat, and oxygen, and when the oil oxidizes, it can lose its effectiveness and even become harmful. Signs of rancid fish oil include a strong fishy smell or an unusual taste.
To minimize the risk of oxidation, here are a few tips:
Choose dark glass bottles instead of clear plastic, as glass helps protect the oil from light exposure.
Store the fish oil in the refrigerator after opening to keep it fresh.
Use the oil within 30 to 60 days of opening to ensure you’re getting the best quality.
By taking these steps to choose a high-quality fish oil and storing it properly, you can help ensure your Cavalier gets the full benefits of omega-3s for their heart, joints, and overall health.
Green-Lipped Mussels: A Powerhouse for Joint Support
Green-lipped mussels (Perna canaliculus), native to New Zealand, are one of the most beneficial natural sources of omega-3s for dogs. Unlike traditional fish-based omega-3 supplements that provide primarily EPA and DHA, green-lipped mussels contain a unique omega-3 fatty acid called ETA (Eicosatetraenoic Acid). ETA has been found to have additional anti-inflammatory properties, making it especially helpful for dogs suffering from joint issues like arthritis.
The anti-inflammatory effects of ETA, along with the presence of glucosamine and chondroitin, make green-lipped mussels an excellent option for promoting joint health. These compounds work together to support cartilage repair, reduce inflammation, and enhance mobility in dogs experiencing joint stiffness or discomfort. This combination is particularly beneficial for dog breeds, like Cavaliers, that are prone to developing joint issues as they age.
Comparing Omega-3 Content in Green-Lipped Mussels vs. Fish
In terms of EPA and DHA content, green-lipped mussels may not provide as high a concentration per serving as fatty fish, but their ETA provides an extra layer of anti-inflammatory benefits. This makes green-lipped mussels an excellent addition to a dog’s diet, particularly for those with joint concerns.
How to Feed Green-Lipped Mussels to Your Dog
Green-lipped mussels are often available as freeze-dried powder or in chewable treat forms. Both forms make it easy to incorporate them into your dog’s daily routine, but the powder can be sprinkled over food or mixed into homemade dog meals for ease of use.
As with any supplement, it’s important to start with a small amount to monitor how your dog responds, especially if they are new to green-lipped mussels or have a sensitive digestive system. For the dosing of green-lipped mussels, it’s always best to refer to the product-specific guidelines since the concentration can vary depending on the form (freeze-dried powder, chewables, etc.) and brand. However, a general recommendation often seen in supplements for dogs is:
Start with 1/4 teaspoon per 10 pounds of body weight per day for powder form. This can be adjusted based on the dog’s response and their specific needs.
Plant-Based Omega-3s: Less Effective for Dogs, but Still Valuable
When it comes to omega-3 fatty acids, plant-based options are less efficient for dogs compared to animal sources like fish, as they primarily contain ALA (alpha-linolenic acid). While ALA is an essential omega-3 fatty acid for humans, dogs face challenges in converting ALA to the more bioavailable forms, EPA (eicosapentaenoic acid) and DHA (docosahexaenoic acid), which are the forms most beneficial for their health. This makes plant-based omega-3s less effective for dogs in supporting the same health benefits as those derived from marine sources.
Why ALA Is Less Effective for Dogs
Dogs have a relatively inefficient ability to convert ALA into EPA and DHA. The process of conversion requires specific enzymes, which dogs do not produce in large enough quantities to convert sufficient ALA into the needed forms of omega-3s. As a result, while plant-based omega-3s can still offer some benefits, they are not as effective at delivering the omega-3s that support joint health, cognitive function, and heart health in the same way that fish-derived omega-3s do.
Nevertheless, plant-based sources of omega-3s are still valuable as part of a balanced diet. They can provide supplemental omega-3s and contribute to overall health but should not be relied on as the primary omega-3 source for dogs.
Common Plant-Based Omega-3 Sources
Flaxseeds: Flaxseeds are one of the most popular plant-based sources of ALA omega-3s. They can be ground and added to your dog’s food. However, the conversion rate of ALA to EPA and DHA is low in dogs, so while flaxseeds may offer some benefits, they should not be relied on exclusively for omega-3 needs.
Chia Seeds: Like flaxseeds, chia seeds are rich in ALA. These tiny seeds are highly nutritious and can be added to a dog’s meals. They can absorb water and form a gel, which can be helpful for digestive health. While chia seeds may offer some benefit, they should be seen as supplementary, not primary, sources of omega-3s for dogs.
Hemp Seeds: Hemp seeds contain ALA as well, along with a well-balanced ratio of omega-3 and omega-6 fatty acids. While these can contribute to overall fatty acid intake in dogs, their conversion to EPA and DHA is also limited. Hemp oil, a more concentrated form, may be more effective but still not as efficient as fish oil or algae oil in providing the omega-3s dogs need for optimal health.
Algae Oil: The Better Plant-Based Alternative
While plant-based sources like flaxseeds and chia seeds are valuable in certain aspects, algae oil is usually a better plant-based option for dogs. Algae oil is derived from marine algae, which naturally produce DHA (and sometimes EPA) without requiring the conversion process. Unlike other plant-based sources that contain ALA, algae oil provides a direct source of DHA, the omega-3 that plays a critical role in brain function, heart health, and reducing inflammation.
Algae oil is especially beneficial for pet parents who prefer to avoid fish-based products for ethical, environmental, or allergy reasons. It provides the same essential omega-3 fatty acids found in fish oil, but without the potential risks associated with mercury contamination or fish-based allergens. This makes algae oil a great plant-based alternative for ensuring your dog receives the health benefits of omega-3s.
Algae oil supplements are available in capsules or liquid form and can be incorporated into your dog’s diet just like fish oil. The recommended dosage varies by brand, so it’s important to follow the manufacturer’s guidelines and consult your vet to ensure the right amount for your dog.
While algae oil is a great alternative to fish oil, there are a few differences to consider. One of the main differences is that fish oil generally contains more EPA, an omega-3 that is particularly helpful for reducing inflammation and supporting joint health, while algal oil tends to have more DHA, which is important for brain and eye health. Because of this, if your dog needs more EPA for inflammation or joint issues, fish oil might be a better choice. Additionally, algae oil can be more expensive than fish oil, and it may not be as widely available in stores. Another thing to note is that fish oil is often more bioavailable, meaning it’s easier for dogs to absorb and benefit from. That said, algae oil is still a very good option, especially if you’re looking for a more sustainable, vegetarian, or fish-free supplement. It’s always a good idea to talk to your vet about which type of omega-3 is best for your dog’s specific health needs.
How Much Omega-3 Does Your Cavalier Need?
For general health, the recommended omega-3 dosage, specifically EPA and DHA, is typically between 20 to 55 mg per pound of body weight per day. If your Cavalier has specific health issues, like arthritis or inflammation, the dosage may increase to 50 to 100 mg per pound. If your dog is lacking omega-3s, you might notice signs like dry skin, excessive shedding, joint stiffness, or a dull coat. To ensure you’re giving the right amount, it’s important to consult your vet, who can recommend the proper dosage based on your dog’s size and health concerns.
Final Thoughts
Omega 3s are essential for your Cavalier’s overall health, supporting heart, brain, joint and skin function. By incorporating a variety of high quality omega 3 sources such as fish, green lipped mussels and supplements, you can ensure your Cavalier King Charles Spaniel receives a well rounded intake of these beneficial fatty acids.
Quality matters, so focus on bioavailable forms of EPA and DHA, and always rotate the sources you use to prevent imbalances. Whether you opt for fresh fish, fish oil or green lipped mussels, it’s crucial to store and handle these sources properly to avoid oxidation.
Before making any changes, check with your veterinarian to tailor an omega 3 plan that best suits your Cavalier’s individual health needs. Consistently including omega 3s in their diet will support long term health and vitality, helping your dog thrive at every stage of life.
Do you feed your Cavalier fresh fish?
Google Ad Below [...]Read more...
April 17, 2025Gentle, Safe, and Effective for Our Sensitive Cavaliers
Fleas and ticks. Just hearing those words makes me itch. But as a natural Cavalier Mom, I’ve always been cautious about what I put on or in my dogs, especially with delicate and sensitive breeds like Cavalier King Charles Spaniels. These little sweet hearts often have sensitive skin, luxurious coats, and sometimes underlying conditions like Chiari malformation or syringomyelia, which can make them more vulnerable to adverse reactions.
I’ve been on this natural journey for years, first with Dexter and now with Stewart. Along the way, I’ve learned that staying chemical-free when it comes to flea and tick care is absolutely possible, it just takes a little planning and a lot of label reading.
This is the natural flea and tick routine I’ve found works best for my Cavaliers.
Why I Choose a Natural Approach for My Cavalier King Charles Spaniels
Conventional flea and tick treatments may offer quick results, but they also come with serious risks. Side effects can range from skin irritation, itching, and digestive upset to more concerning issues like tremors, seizures, and in some cases even organ damage. These are not small concerns.
For a breed like the Cavalier King Charles Spaniel, those risks are even more concerning. Cavaliers are already prone to neurological conditions like Chiari malformation, seizures, tremors, and episodic falling syndrome. I’m especially cautious about using anything that lists seizures or neurological side effects as possible outcomes. It just doesn’t make sense to use a treatment that could trigger the very issues this breed is already vulnerable to.
Choosing a natural approach isn’t about trying to be perfect. For me, it’s about reducing chemical exposure wherever I can and building a thoughtful, layered prevention plan that supports overall health instead of relying on a single product to do it all.
My Natural Flea and Tick Prevention Plan for My Cavalier King Charles Spaniel
1. Regular Grooming and Bathing-I bathe Stewart every three to four weeks using a safe, gentle dog shampoo made without synthetic preservatives, artificial fragrances, or harsh surfactants. I’ve been using 4-Legger’s USDA-certified organic formulas for years because I trust their ingredient panel and transparency. They have a variety of formulas that help deter ticks and fleas.
Bathing regularly doesn’t just clean your Cavalier. It helps interrupt the flea life cycle. A good soak and lather can wash away flea eggs, dirt, and debris that might attract pests. When I use a shampoo that includes properly diluted essential oils known to repel fleas and ticks, it gives Stewart an extra layer of protection even after his bath is done.
2. Natural Tick and Flea Sprays for Daily Protection-Before every walk, I spray Stewart with a natural flea and tick repellent. I pay close attention to his legs, chest, tail, and belly, basically anywhere that might brush up against grass, shrubs, or wooded areas. These sprays are one of our most important layers of protection, and I use them daily during warm weather or anytime we’re heading into a high-risk area.
Over the years, I’ve rotated between trusted store-bought options and homemade recipes using properly diluted dog-safe essential oils. I always avoid sprays with synthetic preservatives or ingredients that could irritate a dog’s skin.
When I make my own, I tailor the recipe to the season, the environment, and even the behavior of my dog. Dexter, for example, used to try to catch bees, so I avoided blends with oils like rose geranium that might attract them. The key with any natural tick and flea spray is to apply it each time your Cavalier goes outside. These blends are not designed to last for hours at a time, and a quick re-spritz before each outing is what really makes the difference. I keep a bottle near the door so it becomes part of our daily walking routine.
DIY Natural Flea and Tick Spray for Dogs
This is one of my favorite natural sprays to help keep fleas and ticks at bay, without resorting to harsh chemical treatments. It’s simple to make, and you can use it on both your dog and yourself before heading outside.
What You’ll Need:
3 ounces distilled water
1/4 ounce vodka or grain alcohol (helps disperse oils evenly)
1/4 teaspoon vegetable glycerin (moisturizing and helps blend)
Essential Oils:
4 drops Cedarwood– repels fleas and ticks while being gentle on skin
4 drops Geranium– especially helpful against ticks
3 drops Lavender– calming and gently repels insects
1 drop Citronella– useful for deterring mosquitoes, fleas, and ticks
1 drop Peppermint– offers cooling relief and additional repellent support
How to Make It: Add all the ingredients to a 4-ounce (or larger) amber or cobalt blue glass spray bottle. Shake gently to combine.
How to Use It: Before walks or time outside, shake well and lightly mist your dog’s legs, belly, tail, and along the back. Always avoid spraying near the face and eyes. For areas like the ears, chest, or neck, spray a small amount into your hands first, then gently rub it into your dog’s fur. This helps you apply it more precisely and makes sure it reaches the coat and skin. Always apply when your dog is dry for best results.
Storage Tip: Store your spray in a cool, dark place and an amber or cobalt glass bottle helps protect the essential oils from light exposure, which can cause them to break down over time. Shake before each use to keep the oils properly dispersed.
Simple DIY Natural Flea and Tick Spray for Dogs
When I first started making Dexter’s flea and tick sprays, I kept things really simple. I used just distilled water and a few carefully chosen essential oils. Using just distilled water and essential oils is a great option if you plan to make small batches and use them up fairly quickly. It is easy, gentle, and perfect for Cavalier parents who want something simple. You will still need to shake the bottle well before each use, just like with any natural spray.
If you want your spray to blend a little more evenly and stay fresher a little longer, using the above recipe with the grain alcohol and vegetable glycerin can help. Alcohol acts as a natural preservative and helps the oils disperse a little better through the water. Glycerin can also add some moisture to the coat and skin.
Both options are good, it really depends on what fits best with your dog’s needs and your routine. If you are going through the spray quickly, distilled water and oils work just fine. If you want a little more staying power and an extra moisturizing boost, the version with alcohol and glycerin might be a better fit.
You can also check out four of Dexter’s natural flea and tick spray recipes on my Raising Your Pets Naturally blog.
Watch now and don’t forget to subscribe to @RaisingYourPetsNaturally YouTube for more!
Why Different Natural Tick and Flea Sprays Work for Different Dogs
One thing I learned through experience and from chatting with other natural pet parents is that not every spray works the same way for every dog. Some ticks are more common in certain regions and are repelled by specific essential oils. That’s why I rotate between formulas and stay flexible with what I use. If something stops working, I adjust. It’s not failure, it’s just part of the process.
3. Apple Cider Vinegar for Flea and Tick Support-Raw, unfiltered apple cider vinegar (ACV) is another natural tool I like to keep on hand as part of a layered approach to flea and tick prevention. While it won’t kill fleas or ticks, it can help make your dog less appealing to them.
You can make a simple spray by mixing equal parts raw ACV and distilled water in a spray bottle and lightly misting your dog’s legs and belly. Just be sure to avoid the face, and only use it on healthy, unbroken skin. If your dog has any skin sensitivities or open spots, it’s best to skip ACV topically.
You can also add a small amount of ACV to your Cavalier’s food or water. Not all dogs tolerate vinegar well, especially those with sensitive stomachs or urinary issues. It’s also important if you add it to your Cavalier’s water, they also have non-altered fresh water available.
4. Amber Collars for Natural Flea and Tick Repellent Repellant-Another layer is a raw Baltic amber collar. These collars are made from unpolished amber resin that naturally releases aromatic compounds when warmed by your dog’s body. These compounds can help repel ticks and fleas without adding any scent or chemicals to your dog’s skin.
While I wouldn’t rely on them as the only form of protection, I absolutely feel they can help in the overall care to keep our Cavaliers tick and flea free naturally. They’re lightweight, chemical-free, and easy to clip on. With Cavaliers, just make sure the collar sits comfortably behind their ears and doesn’t tangle with their feathering. If your Cavalier has Chiari malformation, this may not be an option if they can’t wear a collar comfortably.
5. Ultrasonic Tick Tags-Another tool to add to your flea and tick routine is an ultrasonic tick tag. There are various brands that make these small devices that clip onto your dog’s collar or harness. They emit a high-frequency pulse that humans and dogs can’t hear, but it’s designed to interfere with a tick or flea’s ability to orient themselves toward your dog.
These tags are scent-free and totally safe for sensitive dogs like Cavaliers. This type of tag is helpful during hikes, trail walks, or visits to areas known for higher tick populations. It’s a simple, noninvasive step that adds an extra layer of protection.
6. Diatomaceous Earth for Natural Flea and Tick Prevention-Food-grade diatomaceous earth is another natural tool I use as part of our flea and tick routine. It’s a fine powder made from fossilized algae that works by drying out the exoskeletons of pests like fleas and ticks. I don’t use it as a primary prevention method, but it’s a helpful layer, especially after we’ve been somewhere with higher pest exposure.
To apply, I lightly sprinkle a small amount down Stewart’s back and gently brush it into his coat, avoiding his eyes, nose, and mouth. It’s best used when your dog is dry and in a well-ventilated area. You can also use it on bedding or around baseboards during flea season as part of a regular cleaning routine.
Watch how I apply it and don’t forget to subscribe to @CavalierTipsandFun YouTube channel for more!
7. Using Garlic to Support Immune Health and Repel Fleas Naturally-Garlic might be controversial in some circles, but when used responsibly, it’s one of my go-to immune support tools. Garlic often gets a bad reputation because in 2000, they did a study on four dogs and gave them an extreme amount of garlic ( about 25 cloves a day for a 25-pound dog), and they had a bad reaction. That’s not even close to how we’d use garlic in a natural, supportive way. You can read the study here.
I started using fresh garlic years ago with Dexter, and it’s something I continue with Stewart now that he’s old enough for it. Garlic supports the immune system and helps repel fleas and ticks from the inside out. I only use fresh, organic garlic, peeled and minced about ten minutes before mealtime to allow the allicin to activate. Then I mix it into Stewart’s food. I never exceed the recommended amount and only feed garlic for up to three days in a row, followed by five to seven days off.
I never use garlic with puppies, pregnant or nursing dogs, dogs with anemia, or those with upcoming surgeries. It’s not a fit for every dog, so I always recommend checking with a holistic vet first.
Garlic Dose For Dogs: The approximate dose of fresh, organic garlic is 1/8 teaspoon for a 5 pound dog, 1/4 teaspoon for dogs between 6 and 10 pounds, 1/2 teaspoon for 11 to 15 pounds, 3/4 teaspoon for 16 to 20 pounds, and 1 teaspoon for dogs between 21 and 30 pounds. Dogs between 31 and 50 pounds can have 1 1/2 teaspoons, and those over 51 pounds can have up to 2 teaspoons.
8. Spotting and Removing Ticks and Fleas from Your Cavalier King Charles Spaniel-No matter how many prevention tools we use, I always do a hands-on check after walks or outings, especially during peak tick season. I check Stewart’s paws, armpits, ears, groin area, and the base of his tail. These are the spots where ticks love to latch on.
If I do find a tick, I remove it immediately with a tick remover or fine-point tweezers, making sure to grab close to the skin and pull straight out. Afterward, I place it in a bottle with alcohol and wash my hands. I’ve found this routine not only gives me peace of mind but also helps me stay in tune with any changes in Stewart’s skin or coat.
A Quick Note About Dexter’s Experience
As Dexter was in his late senior years and his neurological condition progressed, I started to notice the occasional flea here and there, more than we had seen in the past. His immune system wasn’t as strong, and that likely made him more vulnerable to pests. This isn’t uncommon in aging dogs or those with health challenges. Their bodies just don’t have the same defenses they once did.
I made it a daily routine to sit with Dexter and go over him carefully with a flea comb and a small jar of alcohol to catch any runners before they could become a real problem. I also stayed on top of sweeping and washing his bedding regularly. Thankfully, it never got out of control, just a flea here and there, but it reminded me how important it is to stay consistent.
It also reinforced why I’ve always chosen to avoid harsh flea treatments. With Dexter’s compromised system, exposing him to chemicals could have caused even more serious issues. Supporting his health naturally, with gentle and consistent care, was always the safest choice for him.
Final Thoughts on Natural Flea and Tick Care for Cavaliers
If you’re just starting your natural flea and tick care journey, start small. You don’t have to change everything at once. Pick one new step, try it, and see how it fits your dog’s life. Read labels. Ask questions. And most of all, give yourself grace as you navigate what feels right for you and your Cavalier.
Cavaliers are worth the extra effort, and with how sensitive they can be, choosing gentle, natural care just feels like the right thing to do.
Google Ad Below [...]Read more...
November 27, 2024Does your Cavalier King Charles Spaniel bark for attention? Maybe your Cavalier tosses a toy onto your lap, begging for a game of fetch. Or perhaps your Cavalier King Charles Spaniel barks incessantly to go outside and chase every squirrel in the neighborhood. These are classic examples of attention-seeking behavior and, while they may be funny at times, they can also become exhausting.
In this Cavalier blog, I’ll guide you through training your Cavalier to ask for attention politely or, even better, stop demanding attention altogether. But first, let me be clear. I am all about spending quality time with our dogs. Cavaliers thrive on love, play, and companionship, and I encourage plenty of bonding time. However, constant barking or pushy behaviors for attention are not things I would encourage in a dog. With positive dog training methods, good timing, and a proactive approach, we can change this demanding behavior.
Why Does My Cavalier Bark at Me for Attention?
Cavaliers are a playful breed and incredibly intelligent. They are quick learners and can learn behaviors we don’t even know we are teaching them, like barking for attention. Some Cavaliers may learn to bark for attention, paw, nudge, or give you the “look” for that snack. If they have done one or all of these things, and you gave them what they wanted, they’ve already made the connection: This behavior gets me what I want. For example, if barking speeds up dinner prep or prompts you to throw the ball, your Cavalier has been “trained” by their success.
But, don’t worry. You can change these demanding behaviors to better habits. So, let’s get started at teaching your Cavalier to be calm and quiet for the things they want.
Steps to Stop or at Least Curb Attention-Seeking Behaviors
Increase Quality Time: Cavaliers are highly social and crave interaction. You know that. That’s why they are your breed of choice, right? If your pup is constantly asking for attention, they may feel their current playtime or bonding time isn’t enough. Start by increasing their daily activities by about 50 percent. For example, if you play games with your Cavalier five times a day, bump it up to seven or eight short sessions. The same goes for walks, training, or cuddle sessions. Increase the duration or quantity of their interactive activities. And I do mean interactive vs. just placing a food toy on the floor. Those are all fine and well, but, in most cases, your Cavalier is craving your time. Read more about canine enrichment.
Get Ahead of the Demands: Observe when your Cavalier typically starts seeking attention. If they usually bark for play at 11 a.m., initiate a play session at 10:45 instead. By starting the activity before they ask, you’re rewarding their good and polite behavior rather than their pushiness.
Ignore Pushy Behaviors: This is key. When your Cavalier barks, paws, or demands attention in any way, practice the “invisible dog” technique. Avoid eye contact, verbal responses, or movement. Turn away, walk out of the room, or stay still. Once your Cavalier is quiet, calmly reengage and reward them for being polite. But, this only works if you do #1 and increase that quality time together. If you don’t do that, ignoring won’t work because their needs are not being met.
Pro Tip: Be prepared for an “extinction burst.” Your Cavalier may escalate their behavior temporarily, barking louder or pawing more persistently because the old tactics aren’t working. They are getting frustrated. Stay patient and consistent.
Reward Calm and Quiet: Every time your Cavalier is calm and quiet, offer attention, praise, or even a small treat. Reinforcing this behavior teaches them that being polite is the best way to get what they want. This is also the perfect time to initiate a game or play session with your Cavalier.
Teaching self control is a great way to help curb barking.
Patience Is Key
Changing established habits takes time, so be patient with your Cavalier and yourself. Remember, they’re simply trying to communicate their needs the only way they know how. With consistent positive dog training and a little extra quality time, you’ll soon have a polite pup who doesn’t feel the need to ask for attention because you are providing them all the attention they need and desire.
Real-Life Example: Dexter’s “Talking”
Even my sweet Dexter isn’t perfect. He’s been known to “talk” or snort to get his way, and sometimes it works because I’m not perfect, either. Not to mention, there are two other family members who have been known to reward his ask. And, when it’s rewarded, it persists. If I wanted to fully address this behavior, I’d need to follow the steps above consistently and MAKE SURE the other two members of the family do as well. But, in our home, a little talking is something we tolerate because it doesn’t bother us.
That’s the beauty of training: you get to decide what behaviors matter to you. If something doesn’t bother you, there’s no need to change it, as long as it’s not something that should be addressed like anxiety. Just remember that if you allow certain behaviors, it’s important not to complain about them later.
Check out my playlist on barking!
What You Can Do Next
Now that you have the tools to manage your Cavalier’s attention-seeking behavior, it’s time to put them into action. Start by increasing quality time with your dog, introducing play sessions before they ask for attention, and practicing the “invisible dog” technique when pushy behaviors pop up. Remember, consistency is key, and patience will help you both succeed. With time, you’ll see your Cavalier becoming more polite and less demanding, leading to a stronger bond and fewer unwanted behaviors.
What’s your dog’s favorite way to spend quality time with you?
Join our vibrant Cavalier King Charles Spaniel community on Facebook, support our dedication to pet wellness on Patreon, and stay updated with our weekly newsletter for invaluable tips and insights into raising happy, healthy pets. Together, let’s make a difference in our dogs’ lives!
Google Ad Below [...]Read more...
March 19, 2025How to Teach Your Cavalier King Charles Spaniel to “Leave It” | Positive Training for Cavaliers
Teaching your Cavalier King Charles Spaniel to “leave it” or ignore something on your cue can be lifesaving. Imagine dropping a pill in front of your Cavalier or going for a walk and passing garbage in the street. If your Cavalier King Charles Spaniel has a reliable “leave it” cue, you can easily ask him to leave it as you pick up the pill or walk past the garbage.
When I start the “leave it” training, what I want my dog to learn is that “leave it” doesn’t mean he doesn’t get something, but that I have something better. This helps to build a more reliable behavior, especially off-leash. If you only teach your dog that “leave it” means he doesn’t get something, he might just try to grab the item faster or run off with it. That’s not what we want!
As with all dog training, remember that you need to regularly practice these lessons. Training your Cavalier is not just about doing it once and then only when you need it. Reliable dog training takes time, patience, and consistency. Cavalier King Charles Spaniels, in particular, can be a bit food-driven, so keeping them engaged and excited about the reward is key.
So, be patient, consistent, and most importantly, have fun with your Cavalier while training!
Teaching Your Cavalier to Leave It Level 1
Start with a small, low-value dog treat in your closed hand, and place it about 12 inches to the side of your Cavalier’s face. Make sure your hand is at the right height, not too close to his face, but not too far away either. Let your dog see it there, and wait him out. As soon as he moves his face away or ignores the treat, say, “YES!” and reward him with an amazing treat from your other hand. Not going for the treat is a win, too! So, if you present the leave it treat hand and he doesn’t go for it, “YES!” and treat. Repeat this a few times.
When your Cavalier starts ignoring your treat hand altogether, move to Level 2.
Don’t forget to subscribe to our @CavalierTipsandFun for more!
Teaching a Dog to Leave It Level 2
Start like Level 1, but before you drop your hand, say your “leave it” cue once. Wait him out; as soon as he moves his face away or ignores the treat, say, “YES!” and treat from your other hand. Repeat. When he stops going for your hand after hearing the “leave it” cue, move to Level 3.
Training Your Cavalier to Leave It Level 3
Say your “leave it” cue and drop your hand with the low-value treat to your dog’s side, but leave your hand OPEN. If he goes for the treat, quickly close your hand. When he moves his face away, praise and reward him with a treat from your other hand. Repeat. When your Cavalier is reliably ignoring the treat in your open hand, move to Level 4.
Teaching Your Cavalier to Ignore Items Level 4
At this stage, it’s time to change things up a bit. Up until now, you’ve been using low-value, boring dog treats for the “leave it” item. Once your dog is starting to get the hang of it, it’s time to up the ante. Use tastier treats or toys as the “leave it” item, but remember, his reward needs to be even better.
You can try:
Tastier treats or food
Paper products, tissue, or paper towels
Toys
Subscribe to @RaisingYourPetsNaturally for more!
Here’s how to set it up when using a toy:
Pick a Toy: Choose a toy that your Cavalier likes but isn’t so high-value that your Cavalier would immediately grab it without hesitation. Start with something mildly exciting like a squeaky ball, fleece tuggy toy, or stuffed animal that your dog enjoys.
Set Up the Training Area: Find a quiet spot where you can focus and your dog isn’t too distracted by other things. Make sure it’s a place where you can manage your dog’s movement and reactions.
Start the Cue: Hold the toy in your hand and get your dog’s attention. Don’t get too silly. You just want him to know it’s there, with a bit of excitement.
Use the “Leave It” Cue: Once you’ve gotten his attention, say the “leave it” cue calmly. Hold the toy in front of your dog just out of reach, but don’t place it on the ground yet.
Wait for the Response: Your dog may try to lunge for the toy or show interest in it. The goal here is for him to move away or ignore it, not to grab it. If he goes for it, just swipe the toy up to your chest and ignore him and wait for him to ignore it. Then repeat the process of lowering your hand with the toy. As soon as your dog turns his head or steps away from the toy, immediately say “YES!” and give him a better reward (a tastier treat or something that’s even more valuable than the toy).
Repeat and Increase Difficulty: Repeat the exercise several times, and gradually increase the difficulty. Once your Cavalier reliably ignores the toy when it’s held in your hand, move on to placing the toy on the ground. To set this up, place the toy behind you, out of reach. This way, you can gently body block your dog if he tries to move toward it. When he turns away or ignores the toy, immediately reward him with a better treat or better toy.
Body Blocking: Body blocking involves using your own body to gently guide your dog away from a distraction, like a toy, by positioning yourself between your dog and the item. It’s important to note that body blocking is not about kneeing or being rough with your Cavalier. It’s a gentle, calm way to redirect their attention. However, some dogs may find body blocking intimidating or scary, so if your Cavalier shows signs of stress, it’s best to avoid this method and use alternative techniques for redirection.
Build Duration: As your Cavalier gets more comfortable with the “leave it” cue around toys, try holding the cue for a longer period of time. For example, you can wait for him to sit or stay before rewarding him. This increases his patience and focus during the exercise.
Training Your Cavalier to Leave Something Level 5
Place a low-value treat under your cupped hand, with your dog in front of you. Say your “leave it” cue, and wait for your Cavalier to ignore the treat. If he looks away or shows interest but doesn’t try to grab it, immediately reward him from your other hand with a better treat.
As he gets the hang of this, start showing the “leave it” treat under your cupped hand. If your dog ignores the treat, reward him from your other hand. If he tries to go for the treat, simply cup your hand over the treat again. Repeat this process, gradually raising the criteria by making the treat more tempting and testing his ability to resist.
Teaching Your Cavalier to Leave It Level 6 and Beyond
Now it’s time to make things more challenging. Increase the difficulty by adding distractions, different environments, or a variety of leave-it items. Always be mindful of your Cavalier’s current ability level, and don’t rush the process. If you find your Cavalier is struggling or making mistakes, step back and simplify the task again. You want to build confidence and reliability.
Reminders:
Never allow your Cavalier to get the “leave it” item. If you want your Cavalier to have it, you pick it up and give it to him. The goal is to teach him that ignoring the item leads to something better, not just an empty reward.
If your Cavalier is having trouble with the exercise, step back to easier levels or increase the value of the reward to keep him motivated and engaged. You can also try lowering the difficulty by using a less tempting “leave it” item to help him succeed.
The goal isn’t just for your Cavalier to avoid the item once, but to understand that when you say “leave it,” he has the chance to earn something even better. The more your dog experiences this rewarding outcome, the more reliable the behavior will become.
Pro Tips:
Keep training sessions short, positive, and fun! Don’t let the “leave it” item overwhelm or frustrate your Cavalier. If he’s struggling, simplify the task and increase the reward to keep him interested and motivated.
How Often Should You Practice the Leave It Behavior with Your Cavalier?
It is important to regularly practice “leave it” throughout the day, not just during formal training sessions. You can incorporate it during walks, around the house, or when playing. As you add distractions, make sure to reward your Cavalier for staying focused on you, especially when there are high value items around. Cavaliers are generally quick learners, but they can also get bored easily, so keep your training sessions positive and fun. Consistency and patience will pay off in the long run.
Pro Tip: Practice, practice, practice with various setups. You want your Cavalier to respond reliably to the “leave it” cue in real life situations, whether it is a dropped item, an enticing smell, or something on the floor. By practicing regularly, you ensure they will leave it without hesitation. I still reward those real life “leave its” to keep the behavior strong and consistent!
Conclusion
Practicing “leave it” regularly and in different situations helps ensure your Cavalier responds reliably when it matters most. Keep training sessions fun and rewarding, and don’t forget to reinforce real-life successes. Teaching a solid fetch and “drop it” will also complement “leave it,” giving your Cavalier even more useful skills. With consistency and patience, your Cavalier will continue to improve and make great choices in everyday life.
How is your leave it training going? I’d love to hear about it in the comments!
Google Ad Below [...]Read more...
April 29, 2025Your Cavalier King Charles Spaniel’s Teenage Phase
When you bring home a Cavalier King Charles Spaniel puppy, you are prepared for puppy breath, floppy ears, and all the adorable moments that melt your heart. What nobody talks about enough is what happens when that sweet ball of fluff hits adolescence.
Right now, Stewart, my Cavalier, is about 10 and a half months old and is in full-blown teenager mode. I can tell you firsthand that adolescence is real. Stewart has energy for days, wild bursts of zoomies, and a mischievous sparkle in his eyes that keeps me on my toes. My mom, who adores him, often comments, “He is always getting into trouble!” (Of course, to me, it is not real trouble. It is boredom, enthusiasm, and a young dog who is eager to interact and explore.)
She often compares him to my late Cavalier, Dexter, who lived to be 15 years old. In her memory, Dexter was the perfect, calm little gentleman. And he was, but only after years of growing up. It is easy to forget that Dexter had his own crazy adolescent phase, too. I still remember the day I found myself saying, “You are going to eat, you are going to potty, and you are going to bed!” Sometimes, when puppies get extra wild, it is not even about training. They are simply overtired and need help settling down. Just like toddlers, sometimes they push through their exhaustion and get even more wired.
If you are going through the teenage years with your Cavalier right now, you are not alone. And no, you did not do anything wrong. Adolescence is a natural stage in a dog’s development. In Cavaliers, it usually starts when those puppy teeth begin falling out (around four to six months old) and can last until about eighteen months, give or take depending on the dog.
During this phase, your Cavalier might:
Forget their basic training
Start jumping up more
Become mouthier and more vocal
Seem to ignore you sometimes
Have random bursts of wild energy (we call them “zoomies”)
Get into things they never bothered with before
Show frustration or impatience more easily
Does that sound familiar?
It is important to remember that your Cavalier’s brain is still developing. Just like human teenagers, they are caught between puppyhood and adulthood. Their impulse control is not fully in place yet. The good news? This phase is temporary. And your patience and guidance right now will shape your Cavalier for the rest of their life.
Here is how I am helping Stewart (and helped Dexter before him) navigate this time:
Stay Consistent with Positive Dog Training: Even if your Cavalier seems to have forgotten what “sit” or “stay” means, keep practicing. Short, daily sessions with positive reinforcement go a long way. Stewart and I do a lot of quick “name games,” sits, hand targets, and polite walking games to keep his brain engaged.
Build in Play and Enrichment: A bored adolescent dog is a mischievous dog. I make sure Stewart has plenty of fun activities like sniffy walks, find-it games, fetch sessions, and interactive toys. Play is not just fun, it is a training tool. A dog that plays with you is a dog that trusts you.
Manage the Environment: I always try to be proactive with management first. If I think Stewart might start getting rowdy or restless, I plan ahead. Before I get busy, I will take him for a nice walk, do some training or play a game before I need to settle in. Then, I’ll provide him with something to keep him busy, like a snuffle mat, chew toys or licky mat. That way, he already has something to focus on instead of looking for ways to entertain himself. Managing the environment is not about waiting for problems to pop up. It is about setting your Cavalier up for success before trouble starts.
Provide Enough Rest: After Stewart works on his snuffle mat, chew toy, or licky mat, and has had a little training or a nice walk, he is usually ready to settle. That is when he curls up for a siesta at my feet while I do my work. Remember that story about Dexter? Sometimes the wild behavior we see is not from a lack of exercise. It is from being overtired. Puppies and adolescent Cavaliers still need a lot of sleep throughout the day. Building in scheduled downtime helps them reset and recharge before they get into trouble from being too tired to make good choices.
Focus on Trust and Bonding: During a dog’s adolescence period, it is easy to get caught up in the frustrating moments when your Cavalier is ignoring you, getting too wild, or pushing boundaries. But I always try to remind myself that every interaction with Stewart is an opportunity to build our relationship. Trust and connection are even more important during this teenage stage. Adolescence is a time when Cavaliers are figuring out the world and deciding who and what they can count on. I want Stewart to know that I am always safe, fun, and trustworthy. That way, when things get tricky, like going to the veterinarian or navigating a new place, he will look to me for guidance and reassurance. The stronger the bond we build now, the more confident and connected he will be as an adult.
Keep a Sense of Humor: Adolescent dogs can be frustrating at times, no doubt about it. But it also brings some of the funniest, most joyful memories. Stewart’s goofy antics, the way he proudly carries a pinecone, his dramatic “flops” when he does not get his way, these are the moments I know I will smile about years from now.
If you are raising a Cavalier King Charles Spaniel and feeling overwhelmed by the ups and downs of adolescence, you are not alone. This stage can feel overwhelming on some days, but every patient, playful, and consistent moment you put in now is shaping your Cavalier’s future. All the work you are doing today will help your Cavalier grow into a confident, connected, and loving companion for many years to come.
If you would like more step-by-step help through this stage, I would love for you to join us in our Manners, Life Skills, and Foundation Training course. Inside the course, I walk you through building polite greetings, calm walking, settling skills, and helping your Cavalier stay more focused and connected with you. It is all about giving you the tools to guide your Cavalier through adolescence and beyond with patience, confidence, and fun.
At What Age Do Cavaliers Calm Down?
If you are raising a young Cavalier King Charles Spaniel and wondering when your Cavalier will calm down, it is a common question during the teenage phase. Cavaliers usually start to settle after they move through adolescence, which can last until around eighteen months to two years of age. Some Cavaliers might take a little longer depending on their personality and energy level.
Maturity comes with time, but it also comes with the foundation you build along the way. Positive training, daily routines, enrichment, plenty of rest, and building trust all help your Cavalier develop into a calmer and more confident companion. It is not something that happens overnight, but it does happen.
You have got this! Stay patient, stay positive, and focus on the progress you are making together. It is not about being perfect. It is about showing up, doing the work, and building a strong relationship one day at a time.
What has your Cavalier been doing lately that makes you say, “Yup, we are in the teenage stage”? I would love to hear your stories in the comments!
Google Ad Below [...]Read more...
May 23, 2025What to Do When an Off Leash Dog Approaches or Attacks Your Cavalier
Running into an off leash dog in a public area where leash laws are in place is one of those moments that gets my blood boiling. I’ve heard from too many Cavalier families who have gone through this, and sadly, I know several Cavaliers who were seriously injured. Even a couple that didn’t survive. It’s heartbreaking, it’s preventable, and we need to talk about it.
This post is for those of us doing our best to protect our dogs, especially small, gentle breeds like Cavalier King Charles Spaniels, when others decide the leash rules don’t apply to them. Whether you’re out walking your Cavalier, training, or just enjoying your day, here are real life ways to keep your dog safe and what to do if the worst happens.
Why Letting Your Dog Off Leash Puts Others at Risk
Just because your dog is friendly does not mean they should be off leash in public areas. You never know what someone else’s dog is going through. Some dogs are recovering from surgery or illness and need space. Others are working through fear or reactivity and are not ready for sudden greetings. Some are service dogs who may not be wearing a vest but are doing their job. And many dogs, Cavaliers included, simply do not want strange dogs running up to them.
This is why leash laws exist. They are there to protect everyone. Just because your dog wants to say hi doesn’t mean they should get to.
What to Do When an Off Leash Dog Approaches
There is no perfect solution that works in every situation, especially when an off leash dog charges unexpectedly. But being prepared both mentally and physically can make a real difference. These are practical ideas I have taught, used myself, and seen work in real life. While nothing is guaranteed, having a plan in place can help you stay calm, act quickly, and protect your Cavalier as best you can.
Watch the video demonstrations and don’t forget to subscribe to @RaisingYourPetsNaturally for more tips.
Teach a Sit Stay Behind You
One of the most helpful cues I teach is a sit stay with my dog positioned behind me. I start by practicing in low distraction settings and slowly build it up over time. If a dog approaches, I cue my Cavalier to sit and stay behind me, and I step forward to handle the situation. This helps my dog feel protected and keeps them from reacting or escalating the situation.
Throw Treats at the Approaching Dog
Yes, throw treats right at the dog’s face. It may sound odd, but it works. The goal is to startle the dog and interrupt their focus. Then toss more treats behind them, toward the direction they came from. This often gives you a few seconds to calmly retreat with your Cavalier. I always carry tasty treats for this reason.
Use a Traffic Cop Stance
Turn to face the dog, extend your arm out like a stop sign, and say firmly, “Stop. Go home.” Keep your Cavalier behind you and slowly back away. Some dogs will pause or hesitate if they’re unsure or not aggressive. Keep repeating the phrase and keep your hand out, as you and your Cavalier walk backwards away.
Carry an Air Horn
If your dog is comfortable with noise, an air horn can be a great deterrent. I always condition my dog to hear it at home first and pair it with treats. When needed, a quick blast can interrupt the loose dog’s approach and give you time to move away. It’s one of my go to tools, but only if your dog can handle the sound.
Use an Umbrella as a Visual Block
I train my dogs to be comfortable with umbrellas opening indoors, so they are not startled if I ever need to use one during a walk. If a dog is charging at you, pop open the umbrella toward them. The sudden motion and large shape often causes the dog to pause or back off. If necessary, you can shake it or move it toward the dog as you use a firm, go home, verbal cue.
Carry a Personal Safety Tool
Tools like pepper gel, citronella spray, taser, or even a She’s Birdie alarm can help in urgent moments. Pepper gel has more control than spray, and the alarm can attract attention or startle the other dog. Always practice with these tools and make sure your dog is not afraid of them.
Be Cautious About Picking Up Your Cavalier
It is tempting to scoop up your Cavalier, especially since they are small. But doing so can sometimes make things worse. The approaching dog may jump at you or become more aroused. Only pick up your Cavalier if you feel it will help and if you have a safe place to put them, like a truck bed, behind a fence, or even inside a garbage bin if it means protecting them. Use extreme caution if trying this.
If You’re Walking More Than One Cavalier
This is also one of the reasons I usually prefer walking one dog at a time. It helps me stay more aware, react quickly if something happens, and really connect with the dog I’m with. But I know that’s not always possible, so here’s how to stay prepared when walking more than one.
Walking multiple Cavaliers makes things trickier, especially when a loose dog starts heading your way. It can be harder to control space, stay calm, and manage multiple leashes at once. That’s why I recommend preparing a plan ahead of time if you regularly walk more than one Cavalier.
If possible, practice sit stays with each dog individually first, then gradually build up to group stays. Teach your Cavaliers that standing behind or beside you means safety. If you see a loose dog approaching, calmly guide all your Cavaliers behind you and keep their leashes in one hand while using your other hand to deter the loose dog, whether that’s with a verbal cue, a stop signal, or a safety tool.
This is also where tools like a treat toss or umbrella can really help, because they create distance without needing to physically wrangle multiple Cavaliers. And if things feel too tight, do not hesitate to turn and walk away together. Getting distance is often the safest move when you have more than one dog depending on you.
What to Do If a Dog Attacks Your Cavalier King Charles Spaniel
No one wants to think about this part, and I truly hope you never face it. But if a loose dog attacks your Cavalier, your priority becomes stopping the fight as quickly and safely as possible. This is not about hurting another dog out of anger. It is about protecting your own Cavalier King Charles Spaniel from serious harm or even death.
If you have a tool in hand, such as a stick, an umbrella, or pepper gel, use it to target the attacking dog’s face. Aim for the eyes, nose, or mouth. The goal is to interrupt the attack and create enough of a pause to safely separate the dogs. You may only have a second or two, and you need to respond fast and as hard as you can to protect your Cavalier.
If you are physically trying to break it up without a tool, one method is to grab the attacker’s back legs and swing them away from your dog. This can throw them off balance and give you a chance to create space. Do not reach for collars or faces with your hands. That is the most common way people get bitten during dog fights.
Once the dogs are separated, move your Cavalier to safety right away. If possible, secure the attacking dog so they cannot come back. Then take photos, report the incident, and document everything as soon as you can. Even if your Cavalier seems okay, a vet check is always important. Many bite wounds are deeper than they look.
Helping Your Cavalier Recover Emotionally After an Attack
This is one of the most important parts of the process, and it is often overlooked. A Cavalier who goes through a dog attack may seem fine physically, but emotionally, they can lose trust in the world around them. I have worked with dogs who suddenly freeze on walks, avoid places they once loved, or become uneasy around other dogs even from a distance.
Start by giving your Cavalier time to decompress. Skip your regular walks for a few days and let them rest in the comfort of home. The goal is to help them feel safe again while things settle emotionally and physically. Keep their day simple and supportive.
At home, bring in confidence through simple enrichment. Food puzzles, nose games, and easy trick training can help rebuild a sense of control and engagement. These games in a familiar space can make a big difference.
When you are ready to start walking again, choose quiet places where you are unlikely to run into other dogs. Early mornings, empty parking lots, or quiet nature trails can be good options. Let your Cavalier set the pace. If they want to pause and look around or head back early, that is okay.
Pay attention to the progress. If your Cavalier walks a little farther, seems more confident, or looks at you for guidance, tell them how smart they are. Praise, treat, give a chest scratch. That is how trust returns, little step by little step.
This healing process takes time. That is exactly why I created Supporting Your Sensitive Dog: Gentle Steps Toward Confidence. If your Cavalier is showing signs of fear or hesitation, this course will guide you through gentle, trust based steps to help them feel safe again.
You’re Not Overreacting
Your Cavalier deserves to walk safely. You deserve to walk without fear. And if someone chooses to ignore leash laws, you are completely within your right to protect your Cavalier, using your voice, your body, your training, or any tool you need.
So stay prepared. Be proactive. And most of all, trust your instincts. You’ve got this.
Google Ad Below [...]Read more...
May 14, 2025Kind, Reward-Based Training for Cavalier King Charles Spaniels and All Breeds
When people hear the term positive reinforcement, they sometimes picture a dog who only listens if you have food in your hand. Or they think it means never setting boundaries. I’ve had people say things like, “I don’t want to spoil my dog,” or “I heard that’s just bribing with treats.” But the truth is, positive reinforcement training is science-based, relationship-focused, and one of the most effective ways to help dogs feel confident and understand how to live successfully in our human world.
And it’s not just for Cavaliers. This approach works for every breed, every age, and every behavior challenge.
Let’s break down positive reinforcement dog training in a simple and practical way.
What Positive Reinforcement Dog Training Really Means
Positive reinforcement means adding something your dog enjoys immediately after they do a behavior you want to see again. That reward could be healthy dog treats, a toy, praise, a chance to sniff, or access to something fun. It doesn’t have to be a treat every time, but food is often the easiest and most meaningful place to start. If it’s going to be rewarding for your Cavalier, they decide. I mean, my Mom might think a slice of cherry pie is a good reward, but I don’t even like cherry pie. I’d need a slice of chocolate cake!
This type of training is grounded in how all animals learn, including us. When a behavior is followed by a good outcome, we’re more likely to do it again. Your dog sits, you give them a treat. Your dog walks calmly by your side, you let them go sniff a log. That’s positive reinforcement. You’re not spoiling them. You’re reinforcing behavior you want to see more of, and they get something pleasant in return.
How Dogs Actually Learn
Dogs don’t come into our homes already knowing how to live in them. They don’t know what “sit” means. They don’t know they shouldn’t jump on guests or grab food off the counter. Just like us, they learn by doing, and by figuring out what works.
Dogs learn through repetition. They make connections between what they do and what happens next. If they sit and a treat shows up, they’re more likely to sit again next time. That’s positive reinforcement. We’re showing them that their choices matter and that doing the thing we like leads to something they like.
When we use positive reinforcement, we’re not just trying to get obedience. We’re helping our dogs understand how to live in our world in a way that feels safe and rewarding to them. They’re not learning because they’re afraid of getting it wrong. They’re learning because they feel good getting it right.
And that’s what builds real, long-lasting behavior.
Luring Training Is Teaching—Not Bribing
At the start, we often use a food lure, like holding a treat near your dog’s nose to help them learn how to sit or lie down. We slowly move that treat in a way that encourages the action we want, like guiding their head up and back until their butt hits the ground.
That’s not bribing. It’s teaching. We’re showing them what we’re looking for.
After a few short sessions, we continue practicing the same way. Lure the sit. Reward the sit. Once the dog is starting to understand it, we ask them to follow our empty hand the same way. If they sit, we reward. Now they’re doing the behavior without seeing food first.
Once that’s going smoothly, we add the cue. Say “Sit,” move your empty hand like before, and when their butt hits the ground, reward it.
Over time, we fade the hand movement so that “Sit” becomes all they need to hear. The behavior is now on cue, and your dog learned it in a clear, kind, and effective way.
Dogs Don’t Generalize—They Need Practice in New Places
One of the biggest things people miss is that just because your dog knows how to sit in the living room doesn’t mean they know how to do it in the yard, at the vet’s office, or around a group of children. Dogs need practice in new environments. They need help when distractions are high or when they’re feeling unsure.
That might mean going back to the basics in new places. Using a treat to lure a sit at the park isn’t spoiling your dog. It’s helping them succeed in that moment. You’re helping them learn how to do something they already know, but in a place that’s harder or more distracting.
Why Positive Reinforcement Works for Cavalier King Charles Spaniels and All Breeds of Dogs
Cavaliers are sweet, sensitive, and deeply tuned in to their people. They often respond beautifully to kind guidance and struggle with harsh corrections. A raised voice, leash jerk, or even a stern look can shake their confidence and cause them to shut down.
But this isn’t just about Cavaliers.
Every dog, whether they are a bouncy Labrador, a headstrong terrier, a fearful rescue, or a playful senior, benefits from positive reinforcement dog training. You’re not just teaching skills. You’re building a good relationship. You’re helping your dog feel safe to try new things.
Positive dog training encourages curiosity instead of fear. It helps build lasting behavior in a way that feels good for both you and your dog.
The Risk of Punishment-Based Dog Training
Harsh training methods may seem like they work quickly, but they come with a huge cost. Dogs trained with physical corrections, yelling, or intimidation often show signs of stress, like lip licking, yawning, cowering, or even shutting down completely. They may stop doing the “bad” behavior, but not because they learned something better. They stop because they’re afraid to try.
Studies have shown that punishment-based dog training methods can increase anxiety and reactivity, and even lead to aggressive behavior in some dogs. It doesn’t teach what to do, it just teaches the dog what not to do, without giving them tools to succeed.
I’ve worked with so many families trying to rebuild trust after their dog was trained with punishment. That kind of fallout is hard to undo.
You Don’t Have to Carry Treats Forever
A common concern I hear is, “Will I always need food in my pocket?” The answer is no. As your dog becomes more confident and fluent in a behavior, you’ll reward less often. You’ll also start to mix in other rewards, like praise, sniffy walks, or play.
But here’s the thing, dogs, like us, still appreciate being recognized for a job well done. I still praised Dexter and gave him treats into his senior years. Not because I had to. But because I wanted to reinforce the connection we built over a lifetime of learning together.
You’re not creating a treat-dependent dog. You’re building a dog who trusts that good choices lead to good outcomes.
If you want to teach your dog real life manners in a kind, clear, and effective way, take a look at my Manners, Life Skills, and Foundation Training Course. It’s self paced, easy to follow, and designed to help your dog build everyday skills with confidence. You’ll learn how to prevent common problems before they start, teach polite behavior step by step, and create calm, positive routines that work in daily life. I personally answer questions, give feedback, and support you as you go through the course.
Why Positive Dog Training Works for Behavior Issues Too
Positive reinforcement is not just for basic training or fun dog tricks. It’s also one of the best ways to work through real behavior issues like jumping, barking, reactivity, anxiety, and fear-based behaviors.
A big part of dog behavior modification is emotion. When a dog is barking or lunging, they’re not just being “bad.” They’re usually feeling overwhelmed, scared, frustrated, or unsure. If we only try to stop the behavior without addressing how the dog feels, we’re not really helping them.
Positive reinforcement gives us a way to change those emotions. We teach our dogs that good things happen when they make calm, safe choices. Over time, they start to feel more relaxed in situations that used to be stressful. That change from fear to comfort, from confusion to understanding, is what creates real, lasting change.
Instead of just trying to stop the behavior, we ask, “What is my dog feeling?” Then, “How would I like them to feel instead?” and “What do I want them to do instead?” From there, we adjust the situation so we can meet all those needs and teach the new behavior in a kind, clear way. The more your dog practices that skill in the right setting, the more confident they become. And that’s where things really start to turn around.
What Your Dog Really Needs From You
At the heart of it all, positive reinforcement dog training is about more than treats. It’s about empathy. It’s about understanding how your dog sees the world and helping them learn in a way that clicks.
It’s about setting them up for success and guiding them toward the behaviors you want. Not through fear, but through trust, patience, and connection.
That’s what I want for Stewart. That’s what I wanted for Angel Dexter. And that’s what I want every dog to have, training that feels good, makes sense, and builds a life rooted in partnership, not power.
Keep it positive. Keep it patient. Keep it proactive.
Google Ad Below [...]Read more...
June 5, 2025How to Motivate and Train a Cavalier King Charles Spaniel
If your Cavalier King Charles Spaniel is not motivated to train, you’re not alone. This is something I hear from Cavalier families all the time: “My Cavalier is not food motivated,” or “My Cavalier just doesn’t care about training.” But in most cases, it’s not that your Cavalier doesn’t want to learn, it’s that something is getting in the way.
Here are a few common reasons your Cavalier might not be interested in training right now and what you can do to help them feel more motivated and ready to learn.
Reasons Your Cavalier Might Seem Unmotivated for Training
They are full
If your Cavalier just finished a meal or had a lot of snacks recently, they may not be interested in working for more food. Training with food rewards works best when your Cavalier is a little bit hungry, not stuffed. Try scheduling your training sessions before meals rather than after, or set aside part of their meal to use as training treats throughout the day.
They are tired
Just like us, Cavaliers have times when they are more alert and times when they just want to rest. If your Cavalier had a big play session, a long walk, or an active outing, they may need some quiet time before they are ready to focus again. Cavalier puppies especially need a lot of sleep, so training when they are rested can make a big difference. Try noticing when your Cavalier naturally seems more alert and ready to engage. That is usually the best time to practice a little training together.
They are not feeling well
If your Cavalier seems unusually uninterested in training or even in their favorite treats, that could be a sign they are not feeling well. Even mild health issues like nausea, pain, or dental discomfort can lower motivation. It is not always obvious at first, but changes in training interest can be an early clue that something is off. If this becomes a pattern, or if anything else seems different, reach out to your Cavalier’s holistic vet to rule out anything medical before moving forward with training.
Your Cavalier is overstimulated
Cavaliers take in a lot of information from their surroundings. If you are training your Cavalier in a busy or unfamiliar location, all those sights, sounds, and smells can be overwhelming. When there is too much going on, your Cavalier might not be able to focus or respond the way they usually do. This is especially common for puppies or sensitive Cavaliers who are still learning how to process the world around them.
If that happens, try moving to a quieter spot. You can even take a little break together for a sniffy walk and then go back to something really simple, like The Name Game or Hand Targeting. These familiar cues can help your Cavalier settle and build confidence again.
Your Cavalier is anxious or unsure
When a Cavalier is feeling unsure, whether it is because of a new environment, a stranger nearby, or something they cannot quite figure out, training can start to feel like too much. It is not about being stubborn or ignoring you. They are just trying to process how they feel before they can focus on learning anything new.
If your Cavalier seems nervous or anxious, the best thing you can do is slow things down. Sit with them quietly, speak gently, and let them look around without pressure. Sometimes just being there together is enough. Once they start to relax, you can offer praise and a treat or a “check it out” cue if they seem ready to explore.
The reward is not meaningful enough
When I hear that a Cavalier is not food motivated, the first thing I look at is the reward. Most of the time, it is not that your Cavalier is not food motivated. It is that the treat just does not matter enough to them at that moment. Dry biscuits or lower value treats usually do not get their attention, especially in busy or distracting places.
Start with real food. I usually go straight to meat. That might be small bits of cooked beef, turkey, or lamb. Freeze dried meat or single ingredient dehydrated treats are also great choices. These are often the best treats for Cavaliers because they are soft, tasty, and easy to eat. Just flip the bag over and check the ingredients. You want something simple that says one thing, like chicken breast or turkey. Avoid fillers or extras that do not need to be there.
You can also use freeze dried raw food, broken into tiny pieces. These are real food options and often made mostly from meat, which makes them a great choice for Cavaliers who need something healthy and high value. Many people use them during training and count them toward their Cavalier’s daily calories. It is an easy way to stay consistent with nutrition while still offering something special and rewarding.
I also avoid using liver or organ meats regularly. A little once in a while is fine, but too much liver can lead to vitamin A concerns. Some organ treats can also be too rich and cause diarrhea.
Use the right reward for the right moment
Once you find something that really works for your Cavalier, think about how and when to use it. The most rewarding treats should be saved for the harder training sessions. That might mean practicing outside, focusing around distractions, or trying something brand new. When the reward truly matters to your Cavalier, motivation naturally improves.
If they get their favorite treats for easy things like sitting in the living room, there is not much reason to work harder when training becomes more challenging. Save the cooked beef, freeze dried meat, or other special rewards for those moments when your Cavalier needs a little extra encouragement. Matching the value of the reward to the difficulty of the task helps keep your Cavalier engaged and willing to try.
Explore other forms of motivation
Not every Cavalier is motivated by food alone. Some respond better to toys, praise, or playful interaction. If your Cavalier enjoys toys, try using a favorite squeaky, a soft tug toy, or a quick game of fetch. Some Cavaliers are especially drawn to textures like fleece or rabbit fur, which can make a toy feel more exciting. Whatever it is, keep it put away when you are not training so it stays special and does not lose its value. Other Cavaliers are more motivated by attention and connection. A cheerful voice, a smile, or light praise can sometimes go further than anything you can hold in your hand. At the end of the day, your Cavalier is the one who decides what feels rewarding. It is not about what we think should work. It is about what actually matters to them.
Your Cavalier can learn with the right support
If your Cavalier is not showing interest in training, it does not mean something is broken. It just means they need a little help feeling ready. That might be adjusting the environment, changing up the reward, or simply giving them time to feel more confident.
This is exactly the kind of thing we work on in my Manners, Life Skills and Foundation Training Course. If you are feeling unsure about how to move forward, I will guide you through simple, kind steps to help your Cavalier feel more focused and connected. You will learn how to use rewards that actually matter to your Cavalier, when to train, and how to build everyday habits that stick. It is self-paced, easy to follow, and I am always there if you need support.
Your Cavalier wants to connect with you. With a little support and the right setup, they will start to feel more engaged and eager to participate. You do not need to rush the process. Keep it light, keep it kind, and celebrate the small wins. They all add up.
Google Ad Below [...]Read more...
Google Ad Below
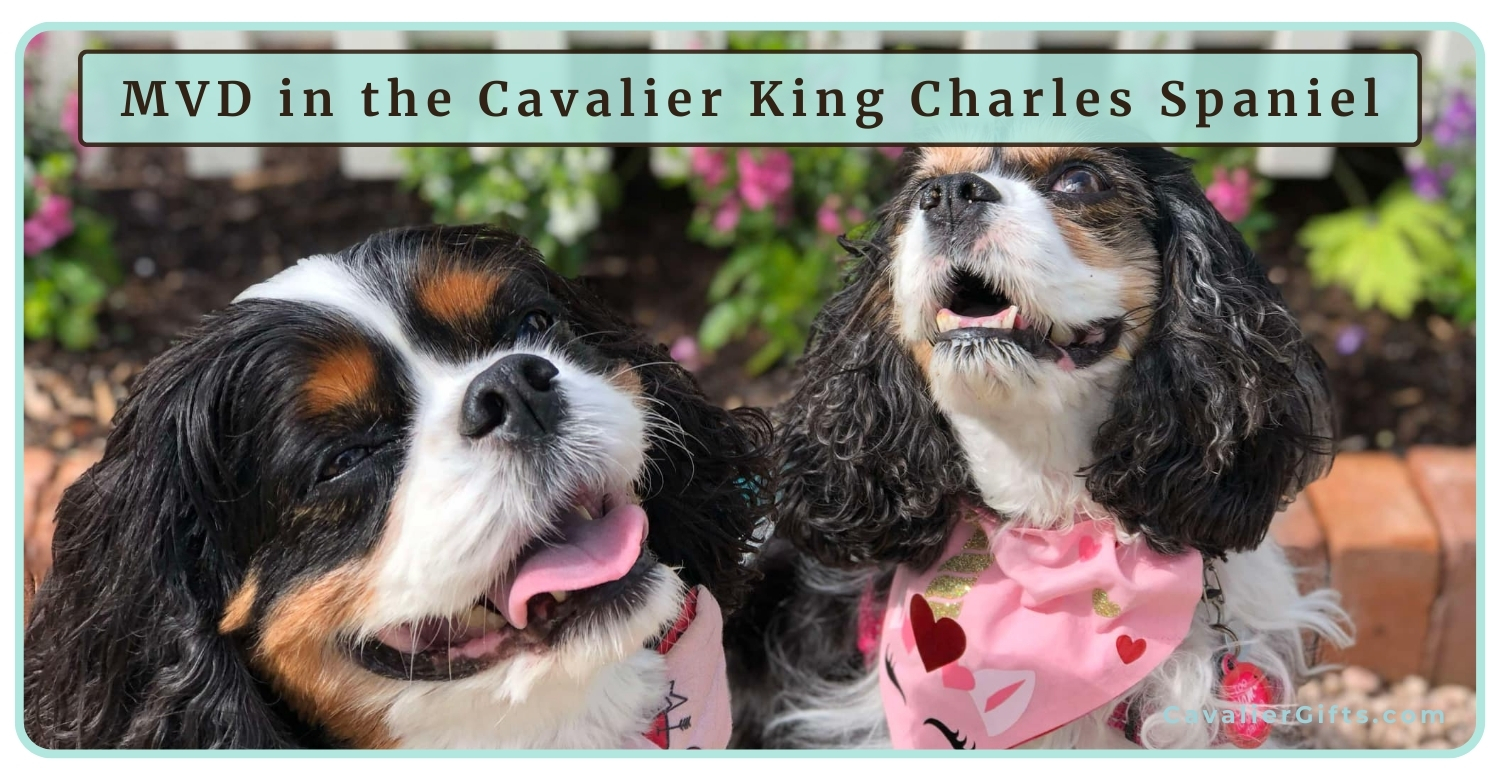
Mitral Valve Disease (MVD) in the Cavalier King Charles Spaniel (Early access for our Patreon community)
Cavalier King Charles Spaniel Heart Disease
Mitral Valve Disease (MVD) is something every Cavalier King Charles Spaniel parent should be familiar with. Sadly, this condition is extremely common in the Cavalier breed, but early awareness and proper management can greatly improve a Cavalier’s quality of life. In this blog, we’ll cover what MVD is, why Cavaliers are at risk, how the disease is staged, and which supplements can help support a healthy heart.
A heartfelt thank you to Lisa Davila, BS in Biomedical Science and Hospital Manager at Aggieland Animal Health Center in College Station, Texas, for helping me put together this article. Lisa has not only dedicated her career to animal health but has also been a loving mom to many Cavalier King Charles Spaniels. Her knowledge and experience are truly invaluable!
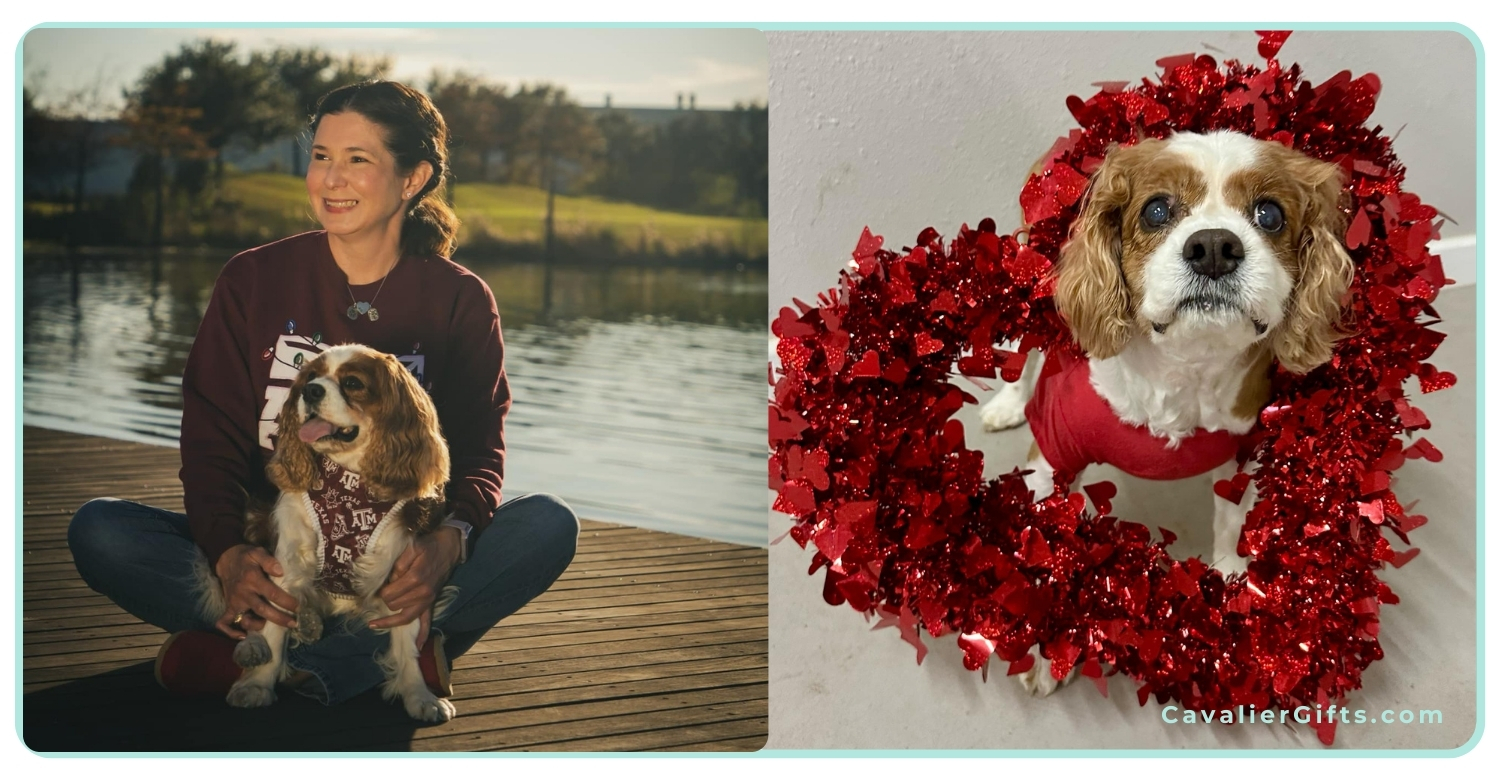
Understanding Mitral Valve Disease (MVD) in Cavaliers
Mitral Valve Disease (MVD) is a degenerative condition that affects the mitral valve of the heart. The mitral valve is responsible for ensuring blood flows properly between the left atrium and left ventricle. Over time, this valve can weaken and leak, allowing blood to flow backward into the atrium. This puts additional strain on the heart, eventually leading to heart enlargement and, in later stages, congestive heart failure (CHF).
MVD is considered a slow-progressing disease, but it varies from dog to dog. Some Cavaliers may live for years with a mild heart murmur, while others may progress more rapidly. Since MVD is so common in the breed, Cavaliers should be closely examined (cardiac auscultation) annually, to determine if they have a murmur. The presence of a murmur is often the first sign that a dog has degenerative valve disease.
Why Are Cavaliers at Risk of MVD?
Cavalier King Charles Spaniels are unfortunately predisposed to MVD. While any breed can develop valve disease, Cavalier King Charles Spaniels are at the greatest risk for developing degenerative mitral valve disease. Studies have shown that over 50% of Cavaliers develop a heart murmur by the age of 5, and by age 10, that number jumps to nearly 100%.Because MVD has a strong genetic component in Cavaliers, responsible breeding practices are essential. Responsible Cavalier King Charles Spaniel breeders ensure their breeding dogs undergo echocardiograms conducted by board-certified cardiologists. When considering a puppy, both parents should have cardiologist-issued heart clearances and be at least 2.5 years old at the time of breeding. Additionally, all four grandparents should be over the age of 5 and heart-clear. However, even with careful breeding, the risk remains high in the breed.
The Stages of MVD
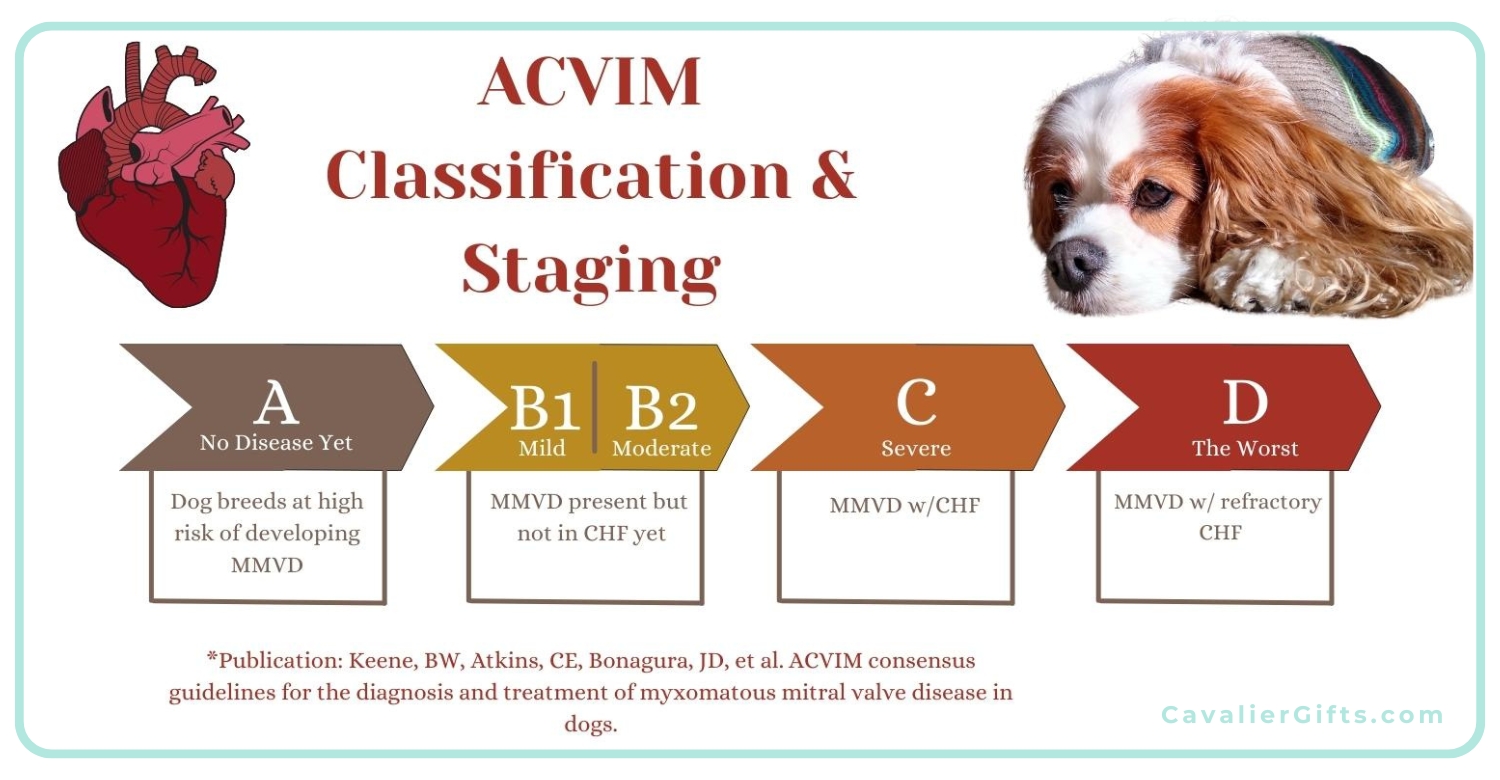
MVD is typically classified into different stages based on its progression. Early detection and monitoring are crucial to managing the disease effectively.
- Stage A – Dogs at risk for MVD but without any current signs (e.g., all Cavaliers are considered Stage A at birth because of their predisposition).
- Stage B1 – A veterinarian detects a heart murmur, but there is no evidence of heart enlargement on X-rays or echocardiograms.
- Stage B2 – A heart murmur is present, and imaging confirms heart enlargement. At this stage, medication such as Vetmedin (pimobendan) is often started to help delay the onset of congestive heart failure.
- Stage C – Congestive heart failure (CHF) is present, meaning the heart can no longer compensate for the disease. Symptoms such as coughing, lethargy, and difficulty breathing may be noticeable. Medications are necessary to help manage the condition.
- Stage D – End-stage CHF, where symptoms become harder to control even with medications.
Once a dog reaches Stage B2, most cardiologists recommend starting treatment to slow disease progression. Regular checkups and echocardiograms help ensure the right treatment plan is in place.
The Truth About Grain-Free Diets and Heart Disease in Cavaliers
With all the discussion surrounding Mitral Valve Disease (MVD) in Cavaliers, you may have come across concerns about grain-free diets and their potential link to heart disease. It’s important to separate the headlines from the facts when it comes to feeding our Cavaliers the best diet for heart health.
The debate about grain-free dog food largely stems from concerns about dilated cardiomyopathy (DCM), a condition where the heart muscle weakens, leading to poor function and potential heart failure. While DCM is a serious disease, the concern over grain-free diets has often been misinterpreted. The issue isn’t necessarily the lack of grains but rather the high levels of starchy carbohydrates like peas, lentils, legumes, and potatoes that are often used as substitutes in processed grain-free kibble.
Cavaliers are already predisposed to MVD, not DCM, which is a different heart condition with different causes. However, diet still plays a critical role in supporting heart health. The best way to provide a heart-healthy diet for your Cavalier is to focus on fresh, whole foods rich in high-quality animal proteins rather than relying on highly processed kibble, whether it contains grains or not. Read more about feeding your Cavalier a fresh diet.

Dr. Karen Becker explains it best: “The problem with grain-free formulas isn’t the lack of grains. At a minimum, it’s the high level of starchy carbohydrates coupled with the extreme high-heat processing methods used to produce these diets.”
Rather than worrying about whether a diet is labeled as “grain-free,” focus on feeding a fresh, balanced diet with high-quality proteins, healthy fats, and low-glycemic vegetables. Rotating proteins and using whole-food ingredients can help ensure your Cavalier gets the nutrients they need to support a healthy heart.
If you’re unsure about your dog’s diet, seek guidance from a veterinarian with a strong background in canine nutrition, not just one who sells prescription diets in the clinic. A certified veterinary food therapist (CVFT) can be a great resource when designing a diet that supports heart health while avoiding unnecessary fillers.
A well-balanced, species-appropriate diet can play a key role in keeping your Cavalier’s heart strong and healthy for years to come.
Heart-Healthy Supplements for Cavaliers with MVD
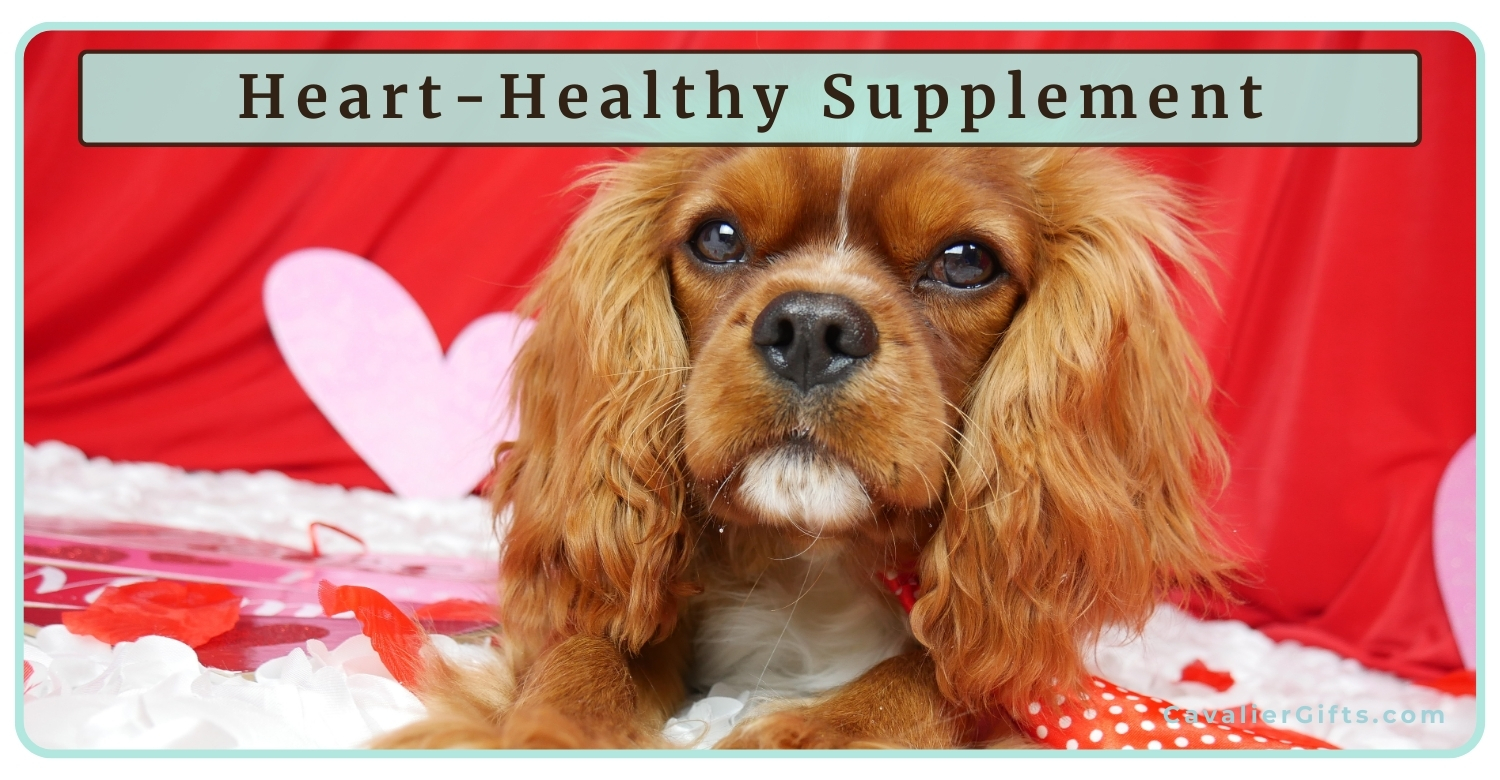
While MVD cannot be cured, a combination of medications, lifestyle management, and supplements can help support heart function and overall well-being. Below are some key supplements that may benefit Cavaliers with or at risk for MVD:
- MCT Oil (Medium-Chain Triglycerides) – Provides an alternative energy source for the heart muscle. One recommended brand is Natural Force Organic MCT Oil (1 tsp daily with food). Before giving your Cavalier coconut oil, please read this article on MCAD in the Cavalier.
- Amino Acids (Lysine, Methionine, L-Carnitine, Taurine) – Help maintain heart muscle contractility and serve as antioxidants.
- Omega-3 Fatty Acids – Reduce inflammation, decrease clot risk, help prevent heart muscle loss, and support healthy blood pressure. Nordic Naturals Omega Pet Liquid is a high-quality option.
- Vitamin E – Acts as both an antioxidant and anti-inflammatory.
- Magnesium – Plays a crucial role in heart muscle contraction and maintaining a healthy heart rhythm.
- Coenzyme Q10 (CoQ10) – A powerful antioxidant that supports heart function. Life Extension 100 mg capsules are a great choice.
Recommended Supplement Blends
If you prefer a multi-ingredient supplement, these options are formulated specifically for heart health:
- Rx Vitamins for Pets Formula CV – Includes amino acids, magnesium, Vitamin E, CoQ10, and hawthorn berry extract (safe unless the dog is on Vetmedin).
- VetriScience Cardio Strength Capsules – Similar to the Rx Vitamins formula but without hawthorn berry extract, making it safe for all MVD stages and medications.
Recap & Common Questions About MVD in Cavaliers
Mitral Valve Disease (MVD) is a serious but manageable heart condition that affects many Cavalier King Charles Spaniels. Early detection, responsible breeding, proper veterinary care, and supportive supplements can all play a role in keeping your Cavalier’s heart as healthy as possible.
What are the early signs of MVD in Cavaliers?
The first noticeable symptom is often a heart murmur, detected during a cardiologist visit. As the disease progresses, signs can include coughing, fatigue, labored breathing, and reduced exercise tolerance.
How long can a Cavalier live with mitral valve disease?
Many Cavaliers live for years after an MVD diagnosis, especially with early detection and proper management. While every dog is different, with the right veterinary care, medications, and supplements, Cavaliers can still enjoy a good quality of life.
What are the final stages of MVD in dogs?
In the later stages, MVD leads to congestive heart failure (CHF). Symptoms include severe coughing, difficulty breathing, lethargy, fainting, and fluid buildup in the lungs or abdomen. At this stage, medication and veterinary support are essential for comfort.
How do you treat MVD in Cavaliers?
Treatment typically includes veterinary-prescribed medications to support heart function and manage symptoms. Additionally, heart-healthy supplements, such as taurine, CoQ10, and omega-3 fatty acids, can provide extra support. Feeding a fresh, species-appropriate diet may also contribute to overall heart health.
Final Thoughts
A heart-healthy fresh diet, proper weight management, and the right combination of supplements can help support your Cavalier’s heart at any stage of MVD, even before a murmur is detected. Early intervention and regular veterinary care are key to helping our beloved Cavaliers live longer, healthier lives.
A big thank you to Lisa for sharing her knowledge on this topic! If you have any questions, feel free to ask, and don’t forget to check out Lisa and Jiminy on Instagram!
|
|
|
|
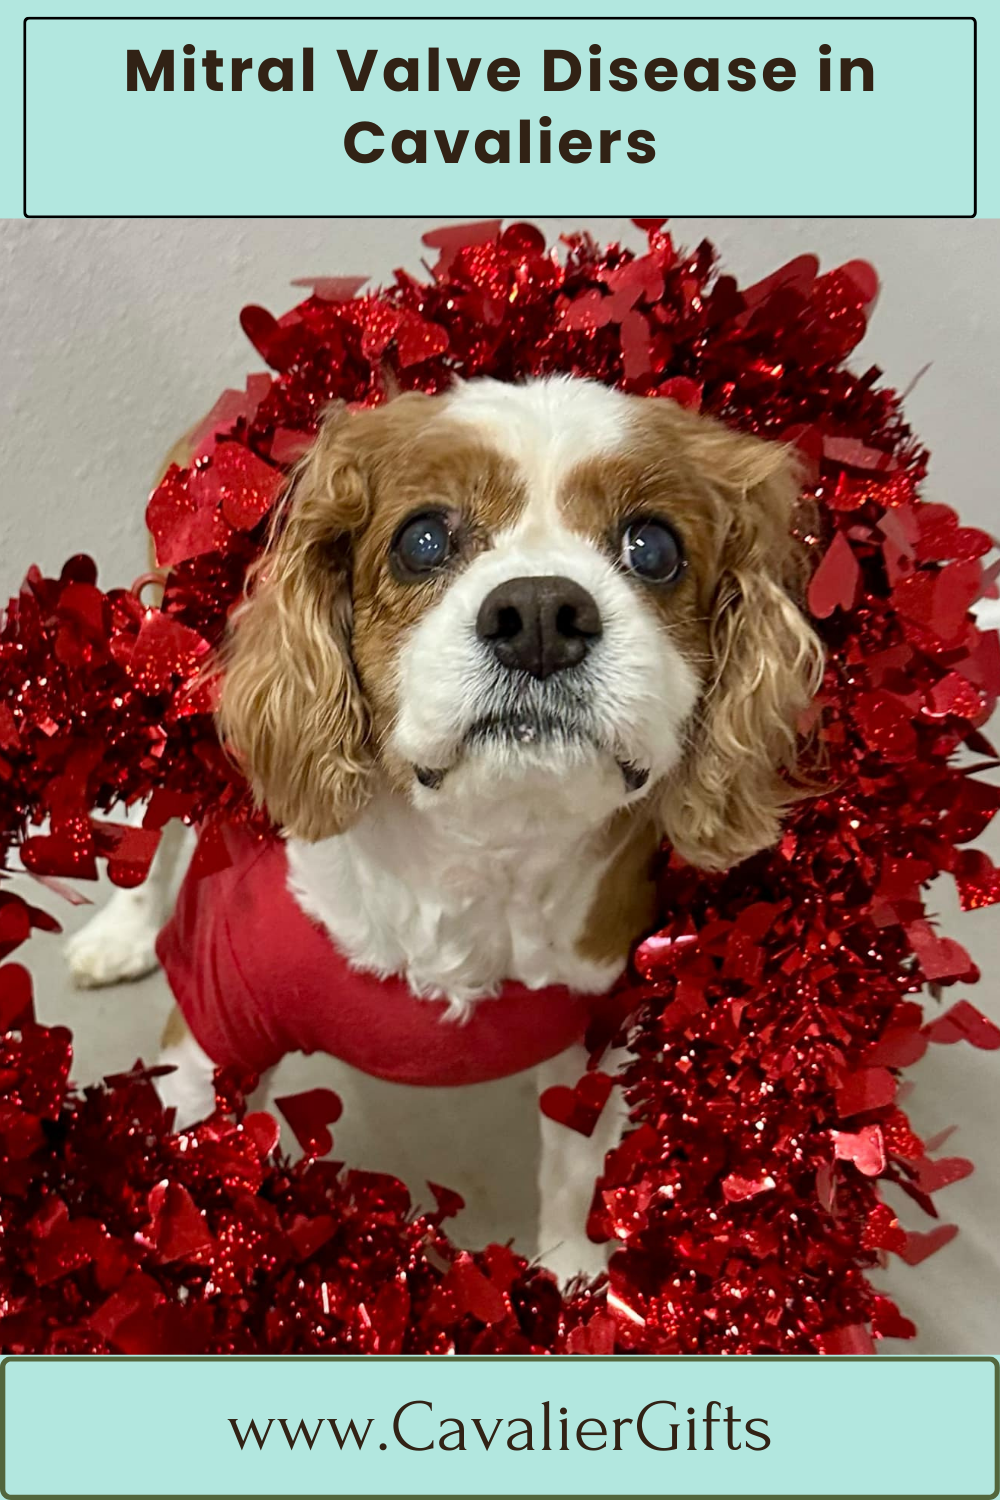
Popular Blogs
February 26, 2025Cavalier King Charles Spaniel Heart Disease
Mitral Valve Disease (MVD) is something every Cavalier King Charles Spaniel parent should be familiar with. Sadly, this condition is extremely common in the Cavalier breed, but early awareness and proper management can greatly improve a Cavalier’s quality of life. In this blog, we’ll cover what MVD is, why Cavaliers are at risk, how the disease is staged, and which supplements can help support a healthy heart.
A heartfelt thank you to Lisa Davila, BS in Biomedical Science and Hospital Manager at Aggieland Animal Health Center in College Station, Texas, for helping me put together this article. Lisa has not only dedicated her career to animal health but has also been a loving mom to many Cavalier King Charles Spaniels. Her knowledge and experience are truly invaluable!
Understanding Mitral Valve Disease (MVD) in Cavaliers
Mitral Valve Disease (MVD) is a degenerative condition that affects the mitral valve of the heart. The mitral valve is responsible for ensuring blood flows properly between the left atrium and left ventricle. Over time, this valve can weaken and leak, allowing blood to flow backward into the atrium. This puts additional strain on the heart, eventually leading to heart enlargement and, in later stages, congestive heart failure (CHF).
MVD is considered a slow-progressing disease, but it varies from dog to dog. Some Cavaliers may live for years with a mild heart murmur, while others may progress more rapidly. Since MVD is so common in the breed, Cavaliers should be closely examined (cardiac auscultation) annually, to determine if they have a murmur. The presence of a murmur is often the first sign that a dog has degenerative valve disease.
Why Are Cavaliers at Risk of MVD?
Cavalier King Charles Spaniels are unfortunately predisposed to MVD. While any breed can develop valve disease, Cavalier King Charles Spaniels are at the greatest risk for developing degenerative mitral valve disease. Studies have shown that over 50% of Cavaliers develop a heart murmur by the age of 5, and by age 10, that number jumps to nearly 100%.Because MVD has a strong genetic component in Cavaliers, responsible breeding practices are essential. Responsible Cavalier King Charles Spaniel breeders ensure their breeding dogs undergo echocardiograms conducted by board-certified cardiologists. When considering a puppy, both parents should have cardiologist-issued heart clearances and be at least 2.5 years old at the time of breeding. Additionally, all four grandparents should be over the age of 5 and heart-clear. However, even with careful breeding, the risk remains high in the breed.
The Stages of MVD
MVD is typically classified into different stages based on its progression. Early detection and monitoring are crucial to managing the disease effectively.
Stage A – Dogs at risk for MVD but without any current signs (e.g., all Cavaliers are considered Stage A at birth because of their predisposition).
Stage B1 – A veterinarian detects a heart murmur, but there is no evidence of heart enlargement on X-rays or echocardiograms.
Stage B2 – A heart murmur is present, and imaging confirms heart enlargement. At this stage, medication such as Vetmedin (pimobendan) is often started to help delay the onset of congestive heart failure.
Stage C – Congestive heart failure (CHF) is present, meaning the heart can no longer compensate for the disease. Symptoms such as coughing, lethargy, and difficulty breathing may be noticeable. Medications are necessary to help manage the condition.
Stage D – End-stage CHF, where symptoms become harder to control even with medications.
Once a dog reaches Stage B2, most cardiologists recommend starting treatment to slow disease progression. Regular checkups and echocardiograms help ensure the right treatment plan is in place.
The Truth About Grain-Free Diets and Heart Disease in Cavaliers
With all the discussion surrounding Mitral Valve Disease (MVD) in Cavaliers, you may have come across concerns about grain-free diets and their potential link to heart disease. It’s important to separate the headlines from the facts when it comes to feeding our Cavaliers the best diet for heart health.
The debate about grain-free dog food largely stems from concerns about dilated cardiomyopathy (DCM), a condition where the heart muscle weakens, leading to poor function and potential heart failure. While DCM is a serious disease, the concern over grain-free diets has often been misinterpreted. The issue isn’t necessarily the lack of grains but rather the high levels of starchy carbohydrates like peas, lentils, legumes, and potatoes that are often used as substitutes in processed grain-free kibble.
Cavaliers are already predisposed to MVD, not DCM, which is a different heart condition with different causes. However, diet still plays a critical role in supporting heart health. The best way to provide a heart-healthy diet for your Cavalier is to focus on fresh, whole foods rich in high-quality animal proteins rather than relying on highly processed kibble, whether it contains grains or not. Read more about feeding your Cavalier a fresh diet.
Dr. Karen Becker explains it best: “The problem with grain-free formulas isn’t the lack of grains. At a minimum, it’s the high level of starchy carbohydrates coupled with the extreme high-heat processing methods used to produce these diets.”
Rather than worrying about whether a diet is labeled as “grain-free,” focus on feeding a fresh, balanced diet with high-quality proteins, healthy fats, and low-glycemic vegetables. Rotating proteins and using whole-food ingredients can help ensure your Cavalier gets the nutrients they need to support a healthy heart.
If you’re unsure about your dog’s diet, seek guidance from a veterinarian with a strong background in canine nutrition, not just one who sells prescription diets in the clinic. A certified veterinary food therapist (CVFT) can be a great resource when designing a diet that supports heart health while avoiding unnecessary fillers.
A well-balanced, species-appropriate diet can play a key role in keeping your Cavalier’s heart strong and healthy for years to come.
Heart-Healthy Supplements for Cavaliers with MVD
While MVD cannot be cured, a combination of medications, lifestyle management, and supplements can help support heart function and overall well-being. Below are some key supplements that may benefit Cavaliers with or at risk for MVD:
MCT Oil (Medium-Chain Triglycerides) – Provides an alternative energy source for the heart muscle. One recommended brand is Natural Force Organic MCT Oil (1 tsp daily with food). Before giving your Cavalier coconut oil, please read this article on MCAD in the Cavalier.
Amino Acids (Lysine, Methionine, L-Carnitine, Taurine) – Help maintain heart muscle contractility and serve as antioxidants.
Omega-3 Fatty Acids – Reduce inflammation, decrease clot risk, help prevent heart muscle loss, and support healthy blood pressure. Nordic Naturals Omega Pet Liquid is a high-quality option.
Vitamin E – Acts as both an antioxidant and anti-inflammatory.
Magnesium – Plays a crucial role in heart muscle contraction and maintaining a healthy heart rhythm.
Coenzyme Q10 (CoQ10) – A powerful antioxidant that supports heart function. Life Extension 100 mg capsules are a great choice.
Recommended Supplement Blends
If you prefer a multi-ingredient supplement, these options are formulated specifically for heart health:
Rx Vitamins for Pets Formula CV – Includes amino acids, magnesium, Vitamin E, CoQ10, and hawthorn berry extract (safe unless the dog is on Vetmedin).
VetriScience Cardio Strength Capsules – Similar to the Rx Vitamins formula but without hawthorn berry extract, making it safe for all MVD stages and medications.
Recap & Common Questions About MVD in Cavaliers
Mitral Valve Disease (MVD) is a serious but manageable heart condition that affects many Cavalier King Charles Spaniels. Early detection, responsible breeding, proper veterinary care, and supportive supplements can all play a role in keeping your Cavalier’s heart as healthy as possible.
What are the early signs of MVD in Cavaliers?
The first noticeable symptom is often a heart murmur, detected during a cardiologist visit. As the disease progresses, signs can include coughing, fatigue, labored breathing, and reduced exercise tolerance.
How long can a Cavalier live with mitral valve disease?
Many Cavaliers live for years after an MVD diagnosis, especially with early detection and proper management. While every dog is different, with the right veterinary care, medications, and supplements, Cavaliers can still enjoy a good quality of life.
What are the final stages of MVD in dogs?
In the later stages, MVD leads to congestive heart failure (CHF). Symptoms include severe coughing, difficulty breathing, lethargy, fainting, and fluid buildup in the lungs or abdomen. At this stage, medication and veterinary support are essential for comfort.
How do you treat MVD in Cavaliers?
Treatment typically includes veterinary-prescribed medications to support heart function and manage symptoms. Additionally, heart-healthy supplements, such as taurine, CoQ10, and omega-3 fatty acids, can provide extra support. Feeding a fresh, species-appropriate diet may also contribute to overall heart health.
Final Thoughts
A heart-healthy fresh diet, proper weight management, and the right combination of supplements can help support your Cavalier’s heart at any stage of MVD, even before a murmur is detected. Early intervention and regular veterinary care are key to helping our beloved Cavaliers live longer, healthier lives.
A big thank you to Lisa for sharing her knowledge on this topic! If you have any questions, feel free to ask, and don’t forget to check out Lisa and Jiminy on Instagram!
Google Ad Below [...]Read more...
April 15, 2024Cavalier King Charles Spaniel Potty Training
Congratulations on welcoming a Cavalier King Charles Spaniel into your life! They’re such charming and affectionate dogs, full of warmth and love. As a fellow Cavalier mom and positive dog trainer, I’m thrilled to share my experience on the best way to potty train a Cavalier puppy. Let’s jump right in to how to successfully housebreak your Cavalier King Charles Spaniel puppy.
I love puppies! And Cavalier puppies are just some of the cutest little things ever! There’s nothing quite like their sweet kisses, puppy breath, and zest for life! But it’s not all puppy kisses; we also must potty train our Cavaliers. Nobody likes an untrained dog.
One common question I get from Cavalier followers is how to best potty train their puppy. I’ve seen plenty of discussions about potty accidents in Cavalier King Charles Spaniel groups, and I’m here to share some potty training tips with you.
First things first. Let’s start by being realistic. Contrary to what some may suggest, potty training a puppy in a matter of days is not realistic. It’s important to realize that puppies, just like human babies, need time to learn and gain control over their bladders. So, if you’re expecting your Cavalier to hold it for hours after just a few days of training, you are setting your pup and yourself up for failure.
My own Cavalier, Dexter, wasn’t fully potty trained in a mere five days, and I’m perfectly okay with that. I prioritized consistent management and frequent potty breaks, which ultimately led to just a couple of accidents in the house. The key is to prevent accidents by being proactive, not reactive.
What’s the best way to potty train your Cavalier puppy?
It all comes down to three essential things: supervision, frequent potty breaks, and confinement when you can’t actively watch them. The goal is to reduce the chances of accidents happening indoors.
When it comes to supervision, it’s eyeballs on! This means keeping a watchful eye on your puppy at all times, ensuring that you’re there to rush them outside if it looks like they are about ready to go. You can use things like baby gates, leashes, shut doors, or X-pens so that you can keep your eyes on them at all times.
Subscribe to @CavalierTipsandFun on YouTube!
How Often Should You Take Your Puppy Potty?
As for how often to take your puppy potty, it really depends on their age and activity level. Active puppies may need to go out every 15–30 minutes, while older dogs can typically hold it for longer periods. The key is to stay ahead of the game and take your puppy out whenever you notice a change in their behavior or activity. A change in behavior or activity signals that it’s time for a bathroom break. For example, if your puppy just had a bout of puppy zoomies, out to potty we go. Did your puppy wake up from a nap? Out to potty we go. By not waiting for your puppy to ask to go out or have an accident, you are well on your way to a potty-trained dog.
When it comes to crate training, make sure the crate is just the right size to discourage accidents. The crate should be large enough for your pup to stand and lie down comfortably, but not so large that they can use one corner as a bathroom.
Whether you have a fenced yard or not, leash your puppy. This gives you the opportunity to reward your puppy for going potty outside. You will be right there to praise your puppy, give him a snack, and tell him just how smart he is. It also leads to my next potty training tip: teaching your Cavalier to potty on cue!
Teaching your Cavalier to potty on cue is a must in my book. Imagine being able to take your dog outside just before the rainstorm and ask him to pee and poo, and he does! This useful behavior isn’t just fantastic for potty training your dog; it’s incredibly convenient in daily life. The keys to teaching your Cavalier to eliminate on cue are good management, timing, and your reward. By associating a word for peeing with a separate word for defecating, you can start to teach your puppy to do either when requested.
Subscribe to @CavalierTipsandFun
Teaching Your Cavalier to Potty on Cue
Here’s how to get started:
Begin the training process in the morning, when your pup wakes up. Arm yourself with some delicious treats, leash up your Cavalier, and head outside to his favorite potty spot.
Stay close and pay attention to your puppy. Stay about 6’, so it’s not just a sniffing fest; the goal is to get him to eliminate before a big walk, play, or sniff. Pay close attention to your Cavalier’s body language. Watch for subtle cues like sniffing, circling, or squatting, which indicate he’s about to eliminate. As soon as you see a sign, use your potty cue, such as “Go potty,” and wait patiently. When your pup starts to do his business, praise quietly, and after he’s finished, give him big praise and rewards. You want to make sure you don’t interrupt the potty process by rewarding too soon.
If your dog typically follows up with a poop, repeat the process with your poop cue, like “Go poop-poop,” and reward him once he’s finished.
After your Cavalier has finished his business, it’s time for the next reward: fun! Whether it’s a walk, playtime in the yard, or simply enjoying the fresh air, make sure to give your pup some extra time to enjoy himself before heading back indoors. This helps reinforce the idea that going potty leads to enjoyable activities.
Repeat this routine each time you take your Cavalier outside, even if you’re planning on going for a walk. By always pairing potty time with rewards, you’ll motivate your pup to go more quickly.
As your Cavalier starts to make the connection between potty on cue and familiar surroundings, gradually introduce the cue in different environments, such as the park or during walks. This helps your dog understand the cue in any situation, ensuring they respond reliably wherever you are.
With patience, consistency, and plenty of positive reinforcement, you can teach your Cavalier King Charles Spaniel to potty on cue, making potty training easier.
Bell Training Your Cavalier King Charles Spaniel Puppy
While some love doggie doorbell training or puppy pads, I prefer to focus on methods that teach puppies to potty outside, not inside or on “things.” I find these methods tend to confuse puppies. Potty pads or litter boxes are teaching the puppy to potty on things that happen to be indoors. This could be a potty pad, but it also could end up being your favorite blanket.
As far as bell training goes, I’m not a fan of encouraging demanding behavior in dogs. Teaching them to ring bells to go outside may inadvertently lead to them using this to not only tell us they need to potty, but also that they may want to go outside to chase squirrels.
I believe in keeping potty training simple and straightforward, focusing on reinforcing the desired behavior of outdoor elimination. By keeping things simple and staying consistent, we can focus on potty training without having to rely on pee pads or bells.
In the end, potty training your Cavalier King Charles Spaniel is all about patience, consistency, and a whole lot of love. By following these tips and staying diligent, you’ll set your new puppy up for success.
Your comments and questions are always welcome below.
Join our vibrant Cavalier King Charles Spaniel community on Facebook, support our dedication to pet wellness on Patreon, and stay updated with our weekly newsletter for invaluable tips and insights into raising happy, healthy pets. Together, let’s make a difference in our dogs’ lives!
Google Ad Below [...]Read more...
May 29, 2024Natural Diet for Cavalier King Charles Spaniel
Dexter’s Food Journey with Raw and Homemade Food
Dexter, my Cavalier King Charles Spaniel, was a raw-fed puppy. However, because I wasn’t sure how to do it properly, and I was unaware that there were premade raw foods on the market, I fed him kibble with food toppers. After learning about how to balance a fresh dog food diet, I started to home cook for him when he was around two. Then, when he was about four, I transitioned him to a DIY raw diet. Through this journey with Dexter, I’ve learned about creating a nutritious and tailored diet that meets his unique needs. Now, I’m excited to pass along my tips and thoughts on feeding your Cavalier King Charles Spaniel. Let’s dive in!
Natural diet for Cavalier King Charles Spaniels
If you’re anything like me, you’re always on the lookout for the best pet products, natural dog grooming supplies, and the healthiest dog food brands for your Cavalier. One of the most important aspects of your Cavalier’s well-being is their diet. Dogs are natural carnivores, made to thrive on a diet of fresh meat. This means a species-appropriate diet is key to their health and vitality.
Understanding Species-Appropriate Nutrition
Let’s think about our dogs’ ancestors for a moment. They thrived on a diet of raw meat, bones, and organs. Today, we can recreate this natural diet with a raw food approach, using fresh, high-quality ingredients that focus on what dogs are meant to eat. For your Cavalier King Charles Spaniel, in a nutshell, this means focusing on a diet that’s about 90 percent meat, bone, and organ, with the remaining 10 percent coming from fruits and vegetables. This balance provides the essential nutrients and fiber they need to stay healthy. Personally, I feel if you aren’t able to go raw, this diet can also be cooked. You just would need to provide the calcium from the bones in another form, since dogs cannot eat cooked bones.
Don’t forget to subscribe to @CavalierTipsandFun for more!
The Problem with Processed Dry Kibble
Now, dry kibble. It’s processed at high temperatures, which takes away almost all the moisture and nutrients from the ingredients. Often, kibble is made with low-quality ingredients and fillers that don’t give your dog the nutrients they need. The lack of moisture in kibble can also lead to chronic dehydration, affecting everything from kidney function to skin and coat health. Plus, since kibble is made to last a long time, the ingredients can go rancid quicker than you might think, making it even less nutritious for your pup.
The Importance of Moisture in Your Dog’s Diet
Moisture is a crucial part of your dog’s diet. In the wild, dogs get most of their hydration from the food they eat. Fresh, raw diets naturally provide the moisture that kibble just can’t. This is essential for your dog’s digestion, kidney health, and overall well-being. By feeding them fresh, high-quality meat and vegetables, you’re making sure they stay hydrated naturally, without having to depend solely on drinking water.
Google Ad Below
Finding the Best Diet for Your Cavalier King Charles Spaniel
When it comes to our Cavaliers, there’s no one-size-fits-all solution. Every dog is unique, with their own health needs, behaviors, and lifestyle. Personally, I’m a big advocate for variety. This could be in the form of different proteins, suppliers or even a nice pre-made raw or mix. I steer clear of dry pet food altogether unless I’m using freeze dried food for dog training treats. For me, a balanced DIY raw diet for Dexter is the way to go. It’s fresh, it’s healthy, and I can tailor and tweak it to Dexter’s needs.
Why a Raw Food Diet is Ideal for Most Cavalier King Charles Spaniels
A raw food diet is as close to a natural diet as you can get for your Cavalier. It includes raw meat, bones, and organs, providing essential vitamins and minerals often lost in commercial dog foods. This diet can improve your Cavalier’s skin and coat health, immune system, and help maintain a healthy weight. As I mentioned earlier, I think adding an approximately 10 percent mix of fruits and vegetables is a great way to add a nutritional boost to the bowl. By avoiding the fillers and artificial additives found in many commercial foods, we ensure our dogs get the best nutrition possible.
Homemade Raw or Cooked Food: Personalized Nutrition for Your Cavalier
One of the best ways to ensure your Cavalier King Charles Spaniel is eating the healthiest diet is to make their food at home. This way, you control the quality of the ingredients and can tailor the meals to your dog’s specific needs. Homemade meals are especially beneficial if your Cavalier is a picky eater or has food allergies. Just remember to balance their diet properly to include all necessary nutrients. Whether your dog has allergies, digestion issues, or any other specific needs, you can tweak their diet to meet their needs.
Feeding Your Cavalier a Grain-Free Diet
You might have heard that grain-free foods are bad for Cavaliers because they were thought to have caused Dilated Cardiomyopathy (DCM). In 2019, the FDA released a list of grain-free pet foods that had people swearing that grain-free dog food was bad. But, guess what? It’s really not the case. In fact, in 2022 the FDA announced on their website there wasn’t a solid link between grain-free diets and DCM.
Feeding your dog grain-free can actually be a good choice for your Cavalier. But things get tricky if you are looking at a purchased grain-free alternative, particularly a dry kibble. When you’re reading the ingredient panel of a dog food (yes, read those labels), watch out for ones loaded with peas, lentils, legumes, seeds, and/or potatoes. Even if the front of the bag screams “meat-first,” it might sneak in a bunch of carbs and starches that aren’t ideal. According to experts, such as Dr. Karen Becker, it’s not about cutting out grains—it’s about making sure our pets aren’t eating too many starchy fillers. So, bottom line? Go back to that 90 percent meat recommendation.
Feeding Your Cavalier King Charles Spaniel Puppy
When it comes to feeding your Cavalier King Charles Spaniel puppy, it’s essential to consider their unique nutritional needs as they grow. If you’re not quite sure about the specifics of puppy nutrition, it’s perfectly okay to rely on trusted commercial brands known for their expertise in creating a balanced diet for puppies.
A commercial raw puppy food will include the essential proteins, fats, and calcium your puppy needs to develop strong bones. The key is to ensure whatever you choose is well-rounded and provides all the nutrients your Cavalier puppy requires during the puppy life stage.
Maintaining a Healthy Weight
Keeping your Cavalier at his ideal weight is super important. Maintaining a healthy weight isn’t just about good looks, but their health. Extra weight can contribute to health issues like joint problems and heart disease. The breed standard says they should weigh between thirteen and eighteen pounds. But, Cavaliers can vary a lot in size. Take Dexter, for instance. He’s a bit of a big guy, weighing his ideal weight at a healthy twenty-nine pounds. So, how do you know if your Cavalier is at the right weight? It’s all about getting your hands on your dog. Run your fingers lightly over their ribcage; you should be able to feel their ribs without pressing too hard. If they’re too prominent, they might be on the thin side. But if you can’t feel them at all, or if their waistline has disappeared, they might be carrying a few extra pounds. Just keep an eye on their overall body shape, and remember, every Cavalier is unique!
How Often to Feed Your Cavalier King Charles Spaniel
Consistency is key when it comes to feeding your Cavalier. Establishing a regular feeding schedule helps regulate their metabolism and digestion. Typically, feeding your Cavalier twice a day, in the morning and evening, works well. For puppies, more frequent meals might be necessary to meet their higher energy demands. I actually feed Dexter three times a day, mainly due to the fact that he gets so much food, I prefer to space it out.
Adding Supplements and Vitamins
Even with a well-balanced diet, supplements can play an essential role in your Cavalier’s health. Omega-3 fatty acids can enhance skin and coat health, probiotics can aid digestion, and joint supplements can support mobility. Always consult your Cavalier’s vet before adding new supplements to ensure they’re necessary and safe. When possible, opt for real food supplements vs. synthetic.
Food Allergies in Cavalier King Charles Spaniels
If your Cavalier has allergies, a limited-ingredient fresh diet can be incredibly beneficial. Before jumping brands, I would suggest going through a pet food elimination diet to identify triggers. Once you know what your Cavalier is allergic to, you can create a personalized diet just for him. You can read more about how and why a pet food elimination diet is helpful on my other blog, right here.
Safe Fruits and Vegetables to Feed Your Cavalier
Things like carrots, broccoli, and kale can be great sources of extra nutrients and fiber. And don’t forget the powerhouse of antioxidants fruits like blueberries, strawberries, pomegranates, and apples can provide. For best digestion, blitz them up! Introduce all new foods slowly and keep an eye on what works for your dog.
Transitioning to a Raw Food Diet
Transitioning your Cavalier to a raw food diet should be done gradually to avoid digestive upsets. Start by introducing small amounts of raw food while slowly decreasing their current food. A 75 percent and 25 percent switch usually works well. Over a week or two, increase the raw portion until it completely replaces their old diet.
Choosing the Best Raw Food Brands
Selecting high-quality raw food brands for your Cavalier ensures they get balanced and nutritious meals. Personally, I look for brands that offer meats that are antibiotic and hormone free. Ideally, any fruits and vegetables will be organic. Opt for whole foods vs synthetics when possible. But, it will be a balancing act based on what’s available to you and your budget. As I mentioned earlier, shoot for approximately 90 percent meat, bone, and organ. A few raw brand choices to consider include BJ’s Raw, Raw Paws Pet Food, Raw Wild, We Feed Raw, Primal, Vital Essentials, Smallbatch, Raw Bistro and Steve’s Real Food.
A Healthy Diet Can Improve the Immune System, Skin, and Coat Health
By providing your Cavalier with a balanced raw or homemade diet you’re not just filling their bowl, you’re nurturing their well-being from the inside out. Fresh diets, whether raw or homemade, are rich in unprocessed ingredients, offering a higher concentration of vital nutrients compared to heavily processed kibble. Fresh foods do not have the fillers and additives found in kibble, making them easier for dogs to digest and absorb. Because of this, fresh food promotes better immune function, healthier skin, and a shinier coat, making them the ideal choice for your Cavalier.
By focusing on a fresh, natural diet tailored to your Cavalier King Charles Spaniel’s specific needs, you’re setting them up for a long, healthy, and happy life. Remember, my goal is to offer guidance and support to help you navigate the journey of pet nutrition, without any judgment. Let’s work together to ensure the best possible care for you and your Cavalier!
Your comments and questions are always welcome below.
Join our vibrant Cavalier King Charles Spaniel community on Facebook, support our dedication to pet wellness on Patreon, and stay updated with our weekly newsletter for invaluable tips and insights into raising happy, healthy pets. Together, let’s make a difference in our dogs’ lives!
Google Ad Below [...]Read more...
May 14, 2024Hot Weather Tips for Cavalier King Charles Spaniels
People often think of summer as a good time to get out and about with our Cavaliers. As a dog-friendly travel blogger, I’m often pitched ideas and stories about taking Dexter to X outdoors, even in July or August. But, the reality is, that’s usually just too darn hot for my now 14.5 year-old Cavalier King Charles Spaniel, Dexter.
He’s always run a bit hot, but now, as a senior and with MVD, the summer heat is just not ideal for him. But, it’s not just Dexter. Summer heat can pose health issues such as sunburn and heatstroke. Today, I’m going to jump into some ideas on how to keep your Cavalier King Charles Spaniel cool and active during the summer or warm months.
Cavalier King Charles Spaniels and Heat Stroke
Heatstroke is a serious concern for all dog families, particularly for breeds like the Cavalier King Charles Spaniel, which can be more susceptible due to their flat-faced (brachycephalic) nature. Any dog, any breed, and any age can develop heat stroke, even on cool days! The VetCompassTM conducted a study in 2016 regarding the risk factors for heat-related illness (HRI):
Breeds with the highest incidence of HRI included the Chow Chow, Bulldog, French Bulldog, Dogue de Bordeaux, Greyhound, Cavalier King Charles Spaniel, Pug, and the Golden Retriever.
Dogs at or above the mean adult body weight for their breed/sex showed an increased risk of HRI compared to dogs below the mean body weight.
Dogs over 12 years old had the greatest odds of HRI compared to dogs under 2 years old.
Signs of Heatstroke in a Cavalier
Recognizing the signs of heatstroke and taking preventive measures are crucial to keeping your dog safe. Signs such as excessive panting, drooling, rapid pulse, and restlessness indicate your Cavalier may be overheating. If you notice these symptoms, act quickly by providing cool (not cold) water and applying damp towels to areas with good blood flow, such as the head, armpits, and groin. Then take your Cavalier to the vet to prevent things from getting worse.
How Food Affects Your Cavalier’s Ability to Tolerate Heat
Just like for us, our pet’s food does more than just provide them with calories. Food has a big impact on their overall health, affecting everything from their longevity to their behavior and how they handle hot and cold temperatures. According to traditional Chinese medicine (TCM), everything in life has a balance of energy and heat, represented by Yin and Yang. Yin embodies the cool, and yang is the hot. This includes our pets, food, and environment; they all have specific energetics.
Dexter tends to run a little more yang (hot). Therefore, when I’m creating his meals, I aim to have the foods I provide either be energetically cooling or neutral. I avoid energetically warm or hot foods and proteins. For example, common foods that are warming or hot include goat, lamb, venison, chicken, and pheasant. Whereas, cooling proteins include rabbit, duck, beaver, cold water fish, and muskrat.
Applying this feeding concept to our Cavaliers, we can tailor their diets to help regulate their internal temperature. During the warmer months, opting for cooling foods can help maintain balance and comfort for your Cavalier.
Google Ad Below
Summer Fun for You and Your Cavalier King Charles Spaniel
Despite the summer heat, Dexter and I still enjoy our summer adventures. They just need to be modified according to the weather. The first thing I do is check the weather, so I’m not out and about with Dexter and surprised! Walking or strolling Dexter in the morning is by far cooler than in the evening. I know people suggest evening walks, but, honestly, the heat from the pavement and the atmosphere seem hotter to me than in the morning. Your location may be different.
Try walking on grassy areas instead of pavement. Shady parks beat the noon sun. Breezy days while wading in the water are another fun way to help your Cavalier stay cool. However, if it’s still sunny or warm, cool water on their feet and a breeze are unlikely to cut it.
We do a lot of indoor adventures during the summer months. Pet stores, dog friendly stores and attractions are our go-tos. I also do a lot of indoor training sessions and enrichment activities to help keep Dexter engaged. The bottom line is that I don’t want to risk Dexter’s health. And I can say from experience, it’s not a good feeling. Back in 2018, I’m pretty sure Dexter almost had a heat stroke! We were in Florida in the spring, doing touristy things. I thought I was being careful, bringing Dexter inside the stores, indoor attractions, and a covered train tour, but he really wasn’t doing well. He started showing signs of heatstroke. We rushed him to the hotel and cooled him down. I was lucky. And I’m not sure what I would have done if I wasn’t so lucky.
Hot Weather Tips for a Cavalier King Charles Spaniel
Grooming & Trimming: Regularly groom your Cavalier to remove loose fur and prevent overheating. I do give Dexter a puppy cut by trimming his belly, legs, and tail. I started this because of his CM/SM, but it also helps lighten his load and keeps him cooler.
Travel Comfort: Ensure your Cavalier’s comfort during travel with a well-ventilated crate or car harness, and schedule frequent breaks for water and shade. I also use a cooling mat and fan blowing on Dexter.
Sunscreen: Dog friendly sunscreen on your Cavalier’s nose helps protect him from harmful UV rays.
Cooling Products: Invest in cooling accessories like a cooling vest, bandana, or mat to provide relief from the heat during outdoor adventures.
Avoid the Hottest Part of the Day: Schedule outdoor activities during cooler times, such as early morning or late evening.
Mind the Pavement: Hot asphalt can burn your Cavalier’s paw pads. Stick to grassy or shaded areas for walks.
Hydration: Always have fresh water available, and encourage your Cavalier to drink frequently to stay hydrated. I put bone broth cubes in Dexter’s water bottle to encourage him to drink. If not, he will ignore the water.
Indoor Play or Outings: On exceptionally hot days, opt for indoor activities like interactive games or training sessions to keep your Cavalier entertained while staying cool.
Cooling Foods: Opt for cooling or neutral proteins in your Cavalier’s diet.
Remain vigilant, provide ample shade and hydration, and monitor your Cavalier for signs of overheating. Keep your Cavalier King Charles Spaniel’s well-being in mind, and use these practical tips to make sure you and your Cavalier have a safe and enjoyable summer.
Your comments and questions are always welcome below.
Join our vibrant Cavalier King Charles Spaniel community on Facebook, support our dedication to pet wellness on Patreon, and stay updated with our weekly newsletter for invaluable tips and insights into raising happy, healthy pets. Together, let’s make a difference in our dogs’ lives!
Google Ad Below [...]Read more...
June 8, 2024Treatment options for Chiari malformation and Syringomyelia
My best friend, Dexter the Dog, was diagnosed with Chiari malformation and syringomyelia in 2012, just before his third birthday. This diagnosis hit me hard. Over the past twelve years, I’ve shared a lot about Dexter’s diagnosis, care, and treatments on my Raising Your Pets Naturally blog and YouTube channel.
Since I recently started this blog dedicated to Cavalier King Charles Spaniels, I thought it would be a good time to write an update on Dexter’s care and what I’ve learned. I am also happy to say that at almost fifteen, Dexter is doing amazingly well! I hope you find this article on Chiari malformation and syringomyelia in dogs helpful. Please share this information to help others dealing with this heartbreaking diagnosis learn about the many helpful and natural treatments for dogs with Chiari malformation and syringomyelia.
What is Chiari Malformation (CM) and Syringomyelia (SM)
Chiari malformation commonly affects Cavalier King Charles Spaniels, Chihuahuas, Brussels Griffons, Yorkshire Terriers, Maltese, Pomeranians, Toy Poodles, and Shih Tzus. In dogs with CM, the skull is too small to hold their brain properly. This overcrowding forces parts of the brain, specifically the cerebellum and medulla, out of their normal positions. The cerebellum controls movement and balance, while the medulla is connected to breathing and heart rate.
When these brain parts are pushed out of place, they obstruct the normal flow of cerebrospinal fluid (CSF). Cerebrospinal fluid is in the brain and spinal cord and acts as a natural cushion, protecting the brain. When the flow of CSF is blocked, it can lead to a buildup of pressure and result in serious neurological issues and can form syringomyelia (SM), a condition where fluid-filled cavities form within the spinal cord.
In Cavalier King Charles Spaniels, Chiari malformation is a congenital issue, meaning they are born with it. Dr. Clare Rusbridge established a breeding protocol to help reduce CM/SM in puppies. Following the breeding protocol is crucial for reducing the risk of Chiari malformation (CM) and syringomyelia (SM) in Cavalier King Charles Spaniels. If both parents have CM/SM, puppies are 92 percent likely to be affected, while the risk drops to 77 percent if only one parent is affected. If both parents are clear of CM/SM, there is a 70 percent chance their puppies will be clear, rising to 87 percent if the grandparents are also clear. Potential Cavalier families should seek breeders who perform this testing to ensure healthier puppies. The only way to diagnose Chiari malformation and syringomyelia definitively is through an MRI scan.
Recognizing Chiari malformation is vital for Cavalier King Charles Spaniel families because early detection and treatment can greatly improve the quality of life for dogs with this condition. If you notice symptoms like uncoordinated movements, sensitivity around the head and neck, or any other unusual behaviors, it’s important to consult with your veterinarian as soon as possible.
Symptoms of Chiari Malformation and Syringomyelia in Dogs
Symptoms of CM and SM in Cavalier King Charles Spaniels and other breeds can vary. About a year before Dexter’s diagnosis, he began showing some random and unusual behaviors. And they didn’t happen all the time.
Fixating at dust particles in the sunlight.
Fidgeting and biting at his rear end. His vet initially thought it was anal glands, but they really weren’t that full, and he continued to do it.
Acting strangely around flying insects. Whenever a fly was around, he would get strange and start spinning around and growling at his back end.
Then, he had a downright scary episode, where he just was going crazy over his back end, growling, at it, spinning, and I could not gain his attention. I then decided to hit record the next time it happened. After recording the next episode and consulting Dr. Lynette Cole at The Ohio State University, three veterinary neurologists suspected Chiari malformation and syringomyelia. I then made an appointment at the OSU neurology department for an MRI and spinal tap. CM and SM were confirmed.
Dexter’s episode is below.
Don’t forget to subscribe to our @RaisingYourPetsNaturally YouTube channel for more.
Other common symptoms of CM/SM in Cavalier King Charles Spaniels can include:
Air scratching, especially on walks or when excited.
Head scratching or rubbing.
Air snapping or licking.
Random yelps of pain.
Sensitivity to touch and being picked up.
Hind end weakness.
Head or body wobbles, stumbling, or squinting.
Head pressing.
Seeking darkness or solitude.
Inactivity or depression.
Restlessness.
Google Ad Below
Diagnosing Chiari Malformation and Syringomyelia
The only definitive way to diagnose CM/SM is with an MRI. If a dog shows common symptoms and belongs to a breed prone to this disease, like Cavalier King Charles Spaniels, a vet might start treatment without MRI confirmation. For me, knowing exactly what Dexter had was key. Along with an MRI, Dexter also had a spinal tap to ensure we had all the facts.
Treatment Options for Chiari Malformation and Syringomyelia
Surgery for Chiari Malformation in Cavalier King Charles Spaniels
Surgery is performed with the goal of restoring the natural flow of spinal fluid. This involves decompressing the affected area, removing bone fragments, and sometimes adding a shunt. However, the results can differ greatly from one dog to another. Despite surgical intervention, many dogs still require medication to manage their pain effectively.
Medications for Chiari Malformation in Cavalier King Charles Spaniels
The disease is progressive and varies in severity. Treatment prioritizes comfort and alleviates pain. Dr. Clare Rusbridge provides the gold standard in the medication treatment protocol. It’s essential to monitor organ functions regularly when administering long-term medications.
Natural Treatments for Syringomyelia in Dogs
There are many natural treatments to help support a dog with CM/SM. Here are some that have worked for Dexter:
Acupuncture: Restores the normal flow of energy through specific pathways.
Cold Laser Therapy: Reduces inflammation, relieves pain, repairs tissue damage, and increases blood circulation.
PEMF ( Pulsed Electromagnetic Field) Therapy: Reduces inflammation, relieves pain, promotes tissue and cell repair.
Food Therapy: A diet of home-cooked or raw dog food helps reduce inflammation. Ingredients like sardines, shiitake mushrooms, and green-lipped mussels can help.
Conscious Proprioception Exercises: Dexter wore Dr. Buzby’s ToeGrips to stimulate awareness of his feet. I also regularly work with him on footwork exercises to help him be more aware of his feet.
Canine Hydrotherapy: Water treadmill therapy strengthens Dexter’s body with low joint impact.
Core Strength Exercises: Dexter’s rehabilitation focuses on boosting his core and back end strength, crucial for enhancing balance and stability. Through a variety of exercises using different equipment, we target his abdominal, back, and hind leg muscles, ensuring he can confidently navigate any challenges.
Living with a Cavalier King Charles Spaniel with Chiari Malformation
Living with a dog diagnosed with Chiari Malformation and syringomyelia can be challenging. Dexter’s first year after diagnosis was the most challenging. Trying to figure out what worked best for him, what kinds of activities or weather would trigger breakthrough pain, and how best to manage it. His life changed, but, luckily, with a great team of professionals, I was and am able to provide Dexter with a great quality of life that is still full of adventures and enrichment.
Comfort Measures
To help keep Dexter as comfortable, happy, and pain-free as possible, I’ve incorporated a range of products.
Dog Harness: Avoid collars that can be painful due to the disease’s nature.
Dog Strollers: Great for giving Dexter a break while still being part of adventures.
Cooling Mats and Warming Blankets: Depending on Dexter’s temperature needs. I will say, now Dexter is on a cooling mat almost 100 percent of his downtime. He rarely seeks heat.
Snuggle Jackets: Some dogs find comfort in them, while others might not. In the beginning, Dexter wore one almost all the time. But, I think, after we finally found our groove with his care, they were no longer necessary.
Natural Calming Aids: Calming CDs and natural calming sprays help Dexter on rough days.
Support for Dogs with Chiari Malformation and Syringomyelia
Let’s unite in this journey. Dexter’s courage living with Chiari malformation and syringomyelia serves as a light of hope for us all. You aren’t in this alone. Seek the help of a good veterinarian team, join a support group, including ours! Together, we can provide hope and guidance to others on similar paths. Go Team Dexter!
Your comments and questions are always welcome below.
Join our vibrant Cavalier King Charles Spaniel community on Facebook, support our dedication to pet wellness on Patreon, and stay updated with our weekly newsletter for invaluable tips and insights into raising happy, healthy pets. Together, let’s make a difference in our dogs’ lives!
Google Ad Below [...]Read more...
June 26, 2024Cavalier King Charles Spaniel Enrichment Ideas
Ultimate Guide to Canine Enrichment for Cavalier King Charles Spaniels
If you are reading this blog post on ways to keep your Cavalier King Charles Spaniel entertained, you have made me a very happy lady. Mental stimulation for your Cavalier is so important, and sometimes a very overlooked part of a good positive dog training program. I’ve always said, dog training isn’t just about teaching your Cavalier to do something or not do something. Rather, there is a synergy between training your Cavalier and everything else including canine enrichment. I think bonding with your Cavalier King Charles Spaniel is the best medicine for both you and your pup. So much so, I started a Cavalier King Charles Spaniel Facebook group, with a big emphasis on enrichment ideas for Cavaliers. And the photos you are about to see on this Cavalier blog are all from members of our wonderful community! Now, let’s dive into canine enrichment and why it’s so important.
What is Canine Enrichment?
Canine enrichment is about making your dog’s life better by giving them fun activities that keep their mind and body active. I think about canine enrichment as life experiences and engaging our Cavaliers in a variety of fun and interactive activities. It’s more than just a food puzzle toy, although that’s a great introduction to enrichment for your Cavalier.
Enrichment can be interactive play, positive dog training sessions, sensory games, physical activities, food enrichment, and outdoor adventures. The goal is to keep your Cavalier happy, healthy, and mentally sharp. When you do this, it helps prevent boredom, boosts your dog’s mental skills, and strengthens your bond, which also leads to better listening and obedience.
Subscribe to @CavalierTipsandFun for more!
Beyond Food: Enrichment Through Interaction
Many people associate canine enrichment primarily with food-related activities, like filling food toys or using interactive frozen treats. While these activities are great, and I use them daily with Dexter, they are just one piece of the enrichment puzzle. When I think of canine enrichment, I think of activities that involve direct interaction with Dexter. It’s about more than just keeping him occupied with food toys—it’s about creating a connection with him, something we do together.
Incorporating various types of environmental enrichment can greatly benefit your Cavalier King Charles Spaniel, both mentally and physically. Enrichment keeps those unwanted behaviors at bay by preventing boredom. It encourages social interaction, making for a happier and more engaged dog.
Positive Training for Your Cavalier
Training is a wonderful way to enrich your Cavalier’s life. Whether you’re teaching basic obedience, fun tricks, or advanced behaviors, positive dog training sessions offer cognitive stimulation and deepen your bond. Cavaliers are smart and love to please, which makes them quick and eager learners. Remember, when you’re teaching and training your Cavalier, you want the training to be fun for both your dog and you.
Google Ad Below
Outdoor Adventures
Taking your Cavalier to the park or on a walk can be incredibly gratifying. Consider going on a “sniffy walk,” where your pup gets to explore and investigate their surroundings at their own pace. Allowing them to follow their nose is not only fun but also taps into their natural instincts.
Other fun outdoor adventures can be indoors too! Take your Cavalier to a pet store for some shopping or visit a dog-friendly indoor store. Just make sure to call the establishment first to double-check their pet policies. Those training sessions you’ve been working on will ensure your indoor fun is a positive experience and one you can feel proud of.
Fun and Beneficial Canine Fitness Activities
Incorporating canine fitness activities can be both fun and vital for your Cavalier’s health. Stretching, sits to downs to stands, using wobble boards, or even walking over cavaletti poles are a few examples. These activities help keep your Cavalier in good physical shape and engaged. Other fitness ideas include walking on slight outdoor hills, placing two paws on a curb, jumping on a sturdy boulder, and walking across a fallen tree trunk. Always prioritize safety during these exercises.
Sensory Enrichment for Your Cavalier
Sensory enrichment is another great way for keeping your Cavalier King Charles Spaniel active and entertained. This type of enrichment is all about stimulating their senses, sight, smell, hearing, touch, and even taste. Obviously, there is some overlap between enrichment “categories.”
Consider incorporating toys that make different sounds or have different textures to engage their hearing and touch senses. You can even make a scent garden in your yard with dog-friendly plants and herbs. Or, grab some outdoor things such as pine cones, grass, and flowers and place them in scent boxes for your Cavalier to smell or find. Plus, activities such as scent work, where your dog uses their sense of smell to find hidden treats or toys, can provide a great mental and physical workout..
By giving your Cavalier a variety of sensory experiences, you satisfy their natural curiosity and make them happier overall. Giving your Cavalier sensory activities like scent work or creating a scent garden not only keeps them entertained but also deepens your connection as you explore together.
Bonding Activities
Simple activities like grooming, talking to your dog, or giving them a gentle massage are also forms of enrichment. By connecting and touching your dog, you not only are able to do a lump-and-bump check, but you are laying the foundation of trust. Shared Zen moments like listening to music together or just lounging on the couch, can also be incredibly soothing for both you and your dog. Don’t forget snuggle time! Most Cavaliers love to cuddle, and those quiet, close moments can deepen your relationship even more. Did you hear that, Dexter? By incorporating these simple yet meaningful activities into your life, you’ll create a stronger relationship with your dog.
Food Games and Interactive Toys: Enhancing Mealtime for Your Cavalier
Food games like lick mats, interactive food toys, and snuffle mats are a great way to feed your Cavalier. Instead of wasting those valuable calories by tossing them in a bowl, using enrichment toys offers a fantastic activity. Don’t use extras in those food toys; use your Cavalier’s daily food or food calories.
For Cavaliers who are fed fresh food, such as a raw or fresh diet, lick-type toys like lick mats are perfect. These toys allow your Cavalier to eat their food while licking and enjoying their mealtime. Spreading the food out encourages more time eating and offers an easy enrichment activity. It also mimics natural foraging behavior.
Snuffle Mat DIY
If your Cavalier is fed dry kibble or dehydrated food, treat dispensing toys or snuffle mats are excellent choices. These toys make mealtime interactive by challenging your Cavalier to work for their food. They may knock around a toy that dispenses their meal or snuffle around a mat for their nibbles. In order to keep your Cavalier’s calories in check, you can reduce a small portion of their dry food and use fresh foods or toppers or freeze-dried 100 percent meat in these toys to add variety and excitement.
Incorporating food games and interactive toys into your Cavalier’s routine makes mealtime more enjoyable and provides an easy and daily mental enrichment activity. But, don’t just go with one treat puzzle toy. The more variety, the better.
Enriching Your Cavalier’s Life with Every Adventure
Canine enrichment is all about creating a variety of positive and fun experiences that enhance your Cavalier King Charles Spaniel’s life. Food toys are great–it’s the interactive, engaging activities that truly enhance their daily experiences.
By focusing on a variety of enrichment activities, you’ll ensure your Cavalier King Charles Spaniel is happy, content, and well-rounded.
I host a private Facebook group for Cavalier King Charles Spaniels, and we have a big focus on canine enrichment ideas and challenges to keep your Cavalier engaged and thriving!
I’d love to hear about your own enrichment ideas and experiences with your Cavalier! Share your tips and stories in the comments below and let’s keep the conversation going.
Join our vibrant Cavalier King Charles Spaniel community on Facebook, support our dedication to pet wellness on Patreon, and stay updated with our weekly newsletter for invaluable tips and insights into raising happy, healthy pets. Together, let’s make a difference in our dogs’ lives!
Google Ad Below [...]Read more...
July 24, 2024What Kind of Chew Toys and Bones are Safe for Cavalier King Charles Spaniels?
Most Cavalier King Charles Spaniels love to chew! Chewing is a natural and normal dog behavior that helps fight boredom and can even help keep your Cavalier’s teeth pearly white. But remember, brushing your Cavalier’s teeth daily is still ideal. Puppies and adolescent Cavaliers tend to have a high drive for chewing things. Sometimes, whatever they can sink those teeth into. Hopefully, you are working with a qualified dog trainer to ensure your Cavalier is learning to chew on the right items instead of your furniture, or, even worse, electrical cords or something else that can harm your Cavalier puppy.
So, what makes a chew toy or bone safe for your Cavalier King Charles Spaniel? Over the years, my opinion on this has evolved. I once opted for the harder, the better. But, now, I’m on the other side of the fence, choosing softer items. Hard and tough dog bones can chip teeth and even splinter, which can be very dangerous. Even my sweet, Dexter chipped his tooth on a hard bone….his last hard bone.
I personally do not use or recommend hard bones, antlers, hooves, plastic or nylon bones, rawhides, chews with lots of ingredients, wood bones, or weight-bearing bones. But, I will always say, this is my personal opinion, and they are your Cavaliers. You can do whatever you feel comfortable doing for them, and you will not be judged by me, nor should you be judged by your peers.
Please be aware that not every chew toy or bone will be suitable for every Cavalier. I strongly recommend active supervision when your Cavalier chews, particularly if it’s a new toy or bone or if the chew item is edible. The right size of a bone or toy is also important. You want to make sure the toy or bone is not so small that your Cavalier can place the entire item in their mouth and risk choking. This includes when the chew gets smaller. I tend to toss the end out before Dexter swallows it, with the exception of a chew that is crunchy. Finding the right chew for your Cavalier is sort of like “The Princess and the Pea.” So, let’s jump into my recommendations for safe and healthy chew bones for your Cavalier King Charles Spaniel.
Dehydrated or Freeze-Dried Fish Skins: With a good dehydrated or freeze-dried fish skin dog treat, the treat will be 100 percent fish skin with no artificial colors, preservatives, or flavors. With this list and anything I recommend, the first stop should be to read the actual ingredient panel. What’s inside. Everything. It’s also important to check out the packaging and carefully read the ingredient list and where the fish was caught and processed. Fish skins are great treats for your Cavalier, full of omega-3 fatty acids, typically low in fat, and fully edible. Most dogs love the taste and eagerly chew away. Some fish skins are crunchy, while others are chewy. Chewy ones last longer but need close supervision to make sure your Cavalier chews them up vs. swallowing a large piece. Shop now.
Bully Sticks & Pizzles: Made from the manly part of a bull, many dogs love chewing on these. What I like is that they typically just start to get soft and disappear; I haven’t seen any pieces break off. However, I have seen a stick peel every once in a while, like string cheese. You can also purchase bully stick holders to help hold the stick, which adds a second layer of safety, helping to prevent your dog from swallowing the end. I personally toss that piece into the garbage. Again, sourcing and how they are manufactured is key. Natural does not correlate to not using irradiation (radiation). I contacted my fair share of bully stick brands and asked if they used irradiation, so, make sure you do your homework. Tip: get odor-free or low-odor versions. These can stink like crazy! Shop now.
Raw Bones: Raw bones are another option for your Cavalier to chew on, especially if they are already on a raw diet or natural diet. Because the bones are not cooked, they are soft and unlikely to splinter. Cooked bones easily splinter and are very hard on teeth. The size will depend on the size of the bone and your Cavalier. A few options to consider include necks, wings, feet and tails. Once again, supervise and watch for choking or swallowing. Necks did not work for Dexter, as he thought he should just suck the whole thing down. Chewing Tips: Don’t clean the bones; feed them with some meat on them, as they come. Let your Cavalier pull on the meat and chew and lick the bone. Allow them to have them for an hour, then throw them away. It’s when they sit around the house, get buried, or get dried out that you get bacteria and splintering. They will last in the fridge for three days before feeding. They can also be frozen and thawed. Feed outside or on a towel, and make sure your Cavalier is wearing their snood!. Avoid weight-bearing bones, as dogs can chip or fracture their teeth due to how hard they are. Show now.
Dehydrated Duck/Chicken/Rabbit Feet/Ears: Duck, chicken, and rabbit feet or ears are excellent, crunchy, edible chews for Cavalier King Charles Spaniels. Dehydrated or freeze-dried. Both offer good chewing options. Chicken and duck feet are rich in chondroitin, glucosamine, and collagen, which support joint health, reducing the risk of brittle bones, improving mobility, and maintaining healthy teeth and gums. Rabbit ears and feet are particularly appealing as they are low in fat, high in protein, and help clean your dog’s teeth while reducing plaque buildup. Additionally, the fur on rabbit ears can serve as a natural dewormer. These natural chews are both nutritious and enjoyable, but always supervise your Cavalier to ensure safe chewing. Shop now.
Tripe Sticks: Tripe sticks are a fantastic chew option for Cavalier King Charles Spaniels. Typically made from the stomach lining of cattle, lamb, or goat, these chews are naturally rich in digestive enzymes and nutrients that support gut health. Tripe sticks provide a satisfying, chewy texture that most Cavaliers love, while also helping to clean their teeth and gums. They are full of nutrients that can be a great addition to your dog’s chew rotation. Shop now.
Beef Tails: Beef tails are another excellent choice for your Cavalier. They are durable and provide a long-lasting chewing experience, which helps keep your Cavalier engaged and entertained. Beef tails are also high in protein and can help naturally clean your Cavalier’s teeth. The natural toughness of beef tails makes them a good option for aggressive chewers, but always make sure to choose the appropriate size to prevent any choking hazards. Shop now.
Tendons: Tendons are a great chew for Cavaliers because they are tough yet somewhat flexible, providing a satisfying chew without being too hard on their teeth. They are also rich in collagen, which is beneficial for joint health. Tendons help keep your Cavalier’s teeth clean and their gums healthy. Most Cavaliers find the chewy texture very satisfying. Shop now.
Yak Chews: Yak chews are a fantastic option for Cavalier King Charles Spaniels, but I only recommend them when microwaved to make them poofy. Microwaving them creates a crunchy, airy texture that Cavaliers love, making them a safe and enjoyable option. They are rich in protein and calcium, supporting your dog’s overall health. Made from a mixture of yak and cow milk, these chews are rich in protein and calcium, supporting your dog’s overall health. Again, double check the ingredient label; not all are created equal.
Subscribe to @RaisingYourPetsNaturally’s YouTube channel for more!
Fillable Chew Toys: I am a fan of filling various food toys such as West Paw Tux and Toppl with healthy snacks. The key to getting your Cavalier to chew on a food toy is to stuff it! If your Cavalier is eating the toy instead of the inside food, I do not recommend it. Shop now.
Ingredients matter! If you’re considering chew bones made from various ingredients, it’s crucial to flip over the package and dive deep into the ingredient list. Not all chews are created equal, and some can contain nasty or even toxic substances that could harm your dog. Look for natural, wholesome ingredients and avoid artificial colors, flavors, and preservatives. A little extra time spent reading labels can make a big difference in keeping your Cavalier King Charles Spaniel safe and healthy.
So, there you have it. That is the current list of some healthy and natural chew toys, bones I feel comfortable providing Dexter and recommending to my dog training clients. Always remember to supervise your Cavalier when they are chewing and to choose the right size and type of chew for their needs.
Which of these chews does your Cavalier King Charles Spaniel love the most? Share your favorite chew toys or treats in the comments below!
A big thank you to all the members in our Cavalier Facebook group for your wonderful photos!
Google Ad Below
Join our vibrant Cavalier King Charles Spaniel community on Facebook, support our dedication to pet wellness on Patreon, and stay updated with our weekly newsletter for invaluable tips and insights into raising happy, healthy pets. Together, let’s make a difference in our dogs’ lives!
🐶💙Support our passion for pet wellness and unlock exclusive content, perks and early access by exploring our Patreon tiers.
Sign up for our weekly newsletter!
Join us on Facebook!
[...]Read more...
January 23, 2025Supporting Your Senior Cavalier King Charles Spaniel: The Ultimate Guide to Aging Cavaliers
After 15 amazing years with my Cavalier, Dexter it was his time to go to the rainbow bridge. It’s never an easy decision to make and since then, I have been thinking back on our life together. Over the course of his life, I wrote a lot about Dexter on my first blog, Raising Your Pets Naturally. Now, with Stewart, my 7-month-old rescue Cavalier King Charles Spaniel puppy, I’m starting fresh, but with all that I’ve learned from Dexter’s senior years. I thought this would be a good time to explore when a Cavalier King Charles Spaniel is considered a senior, their lifespan, common health concerns, and how we can support our Cavaliers through every stage of life.
At What Age Is a Cavalier King Charles Spaniel Considered a Senior?
If you’re wondering, “When does a Cavalier reach old age?” The answer varies depending on factors like genetics and health. Typically, small breed dogs like Cavaliers are considered seniors between 7 and 10 years old. While this is a general guideline, you may notice your dog showing signs of aging earlier or later.
Some indicators of senior status include:
Decreased Interest in Play: They may be less enthusiastic about toys or games they used to enjoy.
Weight Changes: Unexplained weight gain or loss can be a sign of aging or underlying health issues.
Changes in Vision or Hearing: Difficulty seeing or responding to cues may suggest declining eyesight or hearing.
Increased Time Spent Resting: Senior dogs often nap more during the day and may tire easily after exercise.
Changes in Appetite: They may eat less or show more picky eating habits.
Difficulty Climbing Stairs or Jumping: You might notice hesitancy or struggle with previously easy physical activities.
Behavioral Changes: Increased anxiety, clinginess, or even irritability may indicate aging.
Frequent Bathroom Breaks: Aging can bring bladder control issues or an increased need to urinate.
Dull or Thinning Coat: Their fur might lose its luster or feel thinner in certain areas.
Dental Issues: Bad breath, difficulty chewing, or loss of teeth can become more prominent.
Reduced Tolerance for Cold or Heat: Seniors may seek out warmth or avoid strenuous activity in hot weather.
Increased Vocalization: They may bark or whine more often, potentially due to discomfort, anxiety, or confusion.
Cognitive Changes: Signs of canine cognitive dysfunction (CCD) include disorientation, restlessness, or forgetting familiar routines.
Slower movement or stiffness in the morning: Your Cavalier may take a little longer to get going in the mornings, which can be a sign of joint stiffness or early arthritis.
Graying fur, often around the muzzle: Just like humans, dogs may develop gray hairs as they age, particularly around their face.
But don’t worry, aging doesn’t mean your Cavalier is slowing down in spirit! With the right care and attention, they can still enjoy life to the fullest.
What Is the Life Expectancy of a Cavalier?
You may have heard the question, “How long do Cavaliers live?” The average lifespan of a Cavalier King Charles Spaniel is approximately 10.45 years. This is based on a 2022 UK study of veterinary data. However, some studies suggest a slightly longer lifespan, with a 2024 UK study indicating an average of 11.8 years for the breed. The typical lifespan of a Cavalier King Charles Spaniel is around 9-14 years. That said, some Cavaliers, like Dexter, surpass this average with proper care, while others may face challenges earlier due to health conditions.
Common Health Issues in Cavaliers
Cavaliers are an incredibly loving and joyful breed, but they do have a predisposition to certain health issues. Knowing what to watch for and being proactive in their care can help them live a happy and long life.
Mitral Valve Disease (MVD): Nearly every Cavalier King Charles Spaniel owner will face mitral valve disease at some point if their dog lives long enough. This heart condition affects the valve’s ability to close properly, leading to a heart murmur and, eventually, heart failure if untreated. Yearly heart check-ups with a cardiologist can help monitor and manage this condition.
Chiari-like Malformation (CM): Because of the breed’s unique head shape, it’s estimated that 95 to 99% of Cavaliers will develop a condition called Chiari-like malformation (CM). This happens when the skull is a bit too small for the brain, causing part of the brain to push into the spinal canal. CM can result in pain, weakness, or in severe cases, even paralysis. While there’s no cure, symptoms can often be managed with medications and regular vet check-ups, helping your dog feel more comfortable.
Hip Dysplasia and Patella Luxation: While less common in Cavaliers compared to larger breeds, these conditions can cause joint pain and mobility issues. Patella luxation, which is a dislocation of the kneecap, is more common in Cavaliers and can lead to lameness and discomfort. Keeping your Cavalier at a healthy weight is key to reducing stress on their joints and managing these conditions.
Eye and Ear Problems: Cavaliers are prone to progressive retinal atrophy (PRA), cataracts, and ear infections. Regular grooming and vet visits help catch these issues early.
Intervertebral Disc Disease (IVDD): IVDD is a condition where the discs in your dog’s spine become damaged or degenerate, causing pain, weakness, or even paralysis in severe cases. Cavaliers are particularly vulnerable to this, especially as they age. Be on the lookout for signs of discomfort, difficulty moving, or dragging their back legs.
Myoclonus: Myoclonus refers to muscle twitches or jerks that can occur in Cavalier seniors, especially around the head or neck area. While it’s usually not painful, it’s important to consult with a vet to rule out underlying issues such as neurological problems.
Medium-Chain Acyl-CoA Dehydrogenase (MCAD) Deficiency: This genetic condition affects Cavaliers’ ability to properly metabolize certain fats, which can lead to serious health problems, including low blood sugar, lethargy, and, in severe cases, sudden death. The great thing is that there’s a quick and easy at-home swab test available to check if your Cavalier has MCAD. It’s a simple step that can give you peace of mind and help catch this condition early. It’s a proactive way to care for your Cavalier’s long-term health.
Subscribe to @CavalierTipsandFun for more!
Supporting Your Cavalier Through All Life Stages
Caring for a senior Cavalier means making thoughtful changes to their routine. As our dogs get older, their needs shift in different ways. They may slow down, develop new health concerns, or simply need more comfort. These changes are completely normal, and it’s up to us to help them adjust so they can continue to feel their best. With a little extra care and attention, we can make sure they stay happy, healthy, and comfortable as they age. Whether it’s modifying their diet, adjusting their exercise, or making small changes to your home, these little changes go a long way in supporting their well-being. After all, they’ve given us so many wonderful years of love and companionship, and now it’s our turn to return the favor.
Nutrition for Senior Cavaliers
As your Cavalier enters their senior years, their nutritional needs often shift to support their changing bodies. A balanced diet made with fresh, high-quality ingredients like Omega-3s, antioxidants, glucosamine, and chondroitin can help maintain joint health, cognitive function, and overall vitality. Glucosamine and chondroitin play an essential role in supporting cartilage and joint health and can be included in their diet through natural sources like bone broth, chicken feet, or beef trachea, or through supplements if needed. Adding these fresh foods as part of their meals or even as toppers can provide a natural boost that processed options often lack. Every dog is unique, so working with your vet or a canine nutritionist is key to crafting a plan that meets your Cavalier’s specific needs.
When Dexter was diagnosed with kidney issues in his senior years, I found that his diet needed some adjustments. He had been raw-fed for most of his life, but with the help of his veterinarian, I transitioned him to a customized, home-cooked diet to better support his health. Bones, which are a staple in raw feeding, are high in phosphorus, a mineral I needed to limit. To make up for the lack of bone calcium, I switched to eggshell calcium, which is lower in phosphorus and just as effective.
I also began boiling his meat and discarding the cooking water, which helped reduce the phosphorus content even further. I carefully selected foods that were naturally lower in phosphorus, like certain vegetables and proteins. Dexter was also starting to lose weight, so I added carbs like rice and sweet potatoes to help him maintain his energy and body condition.
These changes made a big difference in his quality of life. While home-cooking may not be for everyone, it’s worth exploring alternatives to prescription diets if your Cavalier develops a medical condition. A good veterinarian or certified dog nutritionist can guide you in creating a plan that meets your dog’s needs without compromising on fresh, wholesome ingredients.
💡 Pro tip: Every Cavalier is unique, and what works for one dog may not work for another. Always partner with your vet or a canine nutritionist to find the best approach for your senior Cavalier. Giving them a fresh diet tailored to their needs is one of the best ways to show your love and care during their golden years.
Exercise and Mental Enrichment
Gentle exercise is important for keeping your senior Cavalier feeling their best, but it’s all about adjusting to their abilities. When Dexter reached his senior years, mosey walks became our go-to. He loved taking his time, sniffing every blade of grass, and enjoying the world at his own pace. When he got tired, I’d pop him into his stroller so we could continue our adventure without overdoing it. That stroller wasn’t just for outdoor strolls either, it was perfect for indoor store adventures, allowing him to stay engaged and part of the action while giving his body the rest it needed.
Mental enrichment was just as important as physical exercise. One of Dexter’s favorite activities was a “find it” game with cardboard boxes. I’d hide a treat in a box, spread them around, and watch his excitement as he used his nose to uncover the prize. It was the perfect mix of mental stimulation and gentle movement. For senior Cavaliers, simple adjustments like these can make a huge difference. Whether it’s a slow walk, a stroller ride, or an engaging puzzle, finding activities that fit their needs helps them stay vibrant and connected to the world around them.
Don’t forget to subscribe to @CavalierTipsandFun for more!
Natural Therapies for Senior Cavaliers
As Cavaliers age, their bodies may need extra support to stay comfortable and mobile. Therapies like at-home laser treatments, physical therapy, and acupuncture made a big difference for Dexter in his senior years. Actually, Dexter had these treatments the majority of his life due to his Chiari malformation. These options can reduce pain, improve mobility, and help manage chronic conditions like arthritis.
Dexter had regular physical therapy visits, where he worked with a canine rehabilitation specialist to keep his joints moving and his muscles strong. I also had simple at-home exercises to follow up with between visits, ensuring he stayed as active as possible without overdoing it. Using a laser therapy device at home helped target areas of stiffness or soreness, and his PEMF (Pulsed Electromagnetic Field) bed became one of his favorite spots to rest. PEMF therapy didn’t just support his comfort but also promoted better circulation and reduced inflammation.
Order a laser for your Cavalier today!
Acupuncture was another natural treatment that worked well for Dexter, offering gentle relief from discomfort and improving his overall quality of life. These treatments, along with his regular routine, were all part of ensuring he was comfortable and able to enjoy his senior years to the fullest.
If you’re considering these therapies for your Cavalier, talk with your Cavalier’s holistic vet or a canine rehabilitation specialist. They can guide you toward the best options for your Cavalier’s individual needs and help create a plan to support their comfort and mobility.
Veterinary Care and Preventative Check-Ups
Regular vet visits are essential, especially as your Cavalier gets older. I recommend scheduling check-ups at least once a year, but if your dog is on medications or managing a condition, like Dexter was, labs every 4 months can give you a better picture of their health. Semi-annual check-ups are also a good idea to catch early signs of issues like MVD, joint problems, or anything else that may need attention. Don’t hesitate to bring up any subtle changes you’ve noticed, whether it’s weight loss, fatigue, or coughing. Early intervention is key, and your vet can provide valuable guidance to help you manage your Cavalier’s health, ensuring they stay happy and comfortable as they age.
Cardiologist Visits
I highly recommend that every Cavalier sees a cardiologist at least once a year. Cardiologists specialize in heart health and truly understand the ins and outs of heart disease, including conditions like MVD, which Cavaliers are prone to. Even if your dog hasn’t been diagnosed with anything serious yet, a cardiologist can spot early signs of issues that might not be apparent to you or your regular vet. If your Cavalier is diagnosed with MVD, your cardiologist may recommend more frequent visits to monitor the progression of the disease and adjust their treatment plan as needed. Having a heart specialist on your team gives you peace of mind and ensures you’re taking proactive steps to care for your dog’s heart health.
Making Your Home Senior-Friendly
As your Cavalier enters their senior years, small changes around the house can make a world of difference in how they move and rest. Senior dogs often experience joint stiffness, and their mobility may not be what it once was, so providing a comfortable and safe environment helps them feel at ease. These adjustments don’t have to be drastic, but they can really support your dog’s needs as they age.
Ramps or Steps: It’s always a good idea to have ramps or steps in place, even if your Cavalier is still young. Jumping down from furniture can put strain on their joints and neck, leading to potential issues down the road. Ramps or steps make it easier for them to get on and off the couch or into the car, preventing unnecessary stress on their bodies. These additions are a simple way to protect your Cavalier from injury and support their mobility throughout all stages of life, ensuring they can continue to join in on the fun without risk.
Orthopedic Beds: Comfort is key when it comes to senior Cavaliers. Cushioned orthopedic beds provide much-needed support for aging joints and pressure points. Dexter was a fan of cooling mats all year, so I made sure to place them throughout the house, including on his beds, to keep him cool. But I always left at least one bed without a cooling mat, in case he wanted to curl up and stay cozy. The goal is to ensure they have a comfortable place to rest, with options that suit their changing needs.
Non-Slip Surfaces: Slippery floors can be a senior dog’s worst enemy. To prevent falls, I recommend adding rugs or carpets to high-traffic areas, especially in places like the kitchen or hallway. You can also try ToeGrips(use promo code: DEXTER for 10% Off Your First Order), which help with traction, so your Cavalier can walk confidently. Making sure they have a stable environment to navigate helps keep them safe, especially when they’re getting around slower than they used to.
How Long Do Cavaliers Live? Cherish Every Moment
If there’s one thing Dexter taught me, it’s to appreciate the little moments, whether it was a slow morning walk, the rare occasion when he’d want to be close and rest in the nook of my legs, or simply watching him nap and snore in the sunshine. Dexter wasn’t much of a cuddler, but when he wanted to be near me, I made sure to savor those times. Our Cavaliers may not live as long as we’d like, but the joy they bring into our lives is something we’ll never forget.
When Stewart reaches his senior years, I know I’ll be ready to give him the care and love he deserves. For now, I’m soaking up every playful, puppy-filled moment.
Google Ad Below [...]Read more...
April 28, 2024Are Cavalier King Charles Spaniels Good for Therapy Dog Work?
Today, I want to chat about a topic that is close to my heart: therapy dogs! Have you ever wondered if your Cavalier King Charles Spaniel would make a good therapy dog? It’s a common question and one that has a few caveats. First, it’s not all about the dog! I know, I know, it’s always all about Dexter, but with visiting therapy dogs, it’s about teamwork.
But what is a visiting therapy dog team, and what do they do? A therapy pet team is a person and their pet (sometimes cats, bunnies, etc.) who share their companionship and comfort with those in need, visiting places like hospitals, schools, and nursing homes. These teams engage in either Animal-Assisted Activities (AAA) or Animal-Assisted Therapy (AAT). AAA therapy dog teams engage in sessions without the presence of a medical professional or specific treatment goals, aiming simply to bring joy and comfort. Whereas AAT therapy dog teams work with healthcare providers in goal-oriented sessions aimed at addressing specific issues, with progress carefully measured and tracked throughout the process.
Being a good therapy dog team isn’t just about your Cavalier; it’s also about you. Both you and your CKCS are visiting as a team. You both must have the skills and knowledge required to visit people in a wide range of settings.
Let’s discuss what humans should be bringing to a Cavalier therapy dog team. As a therapy dog handler, it’s important to be comfortable when interacting with both people and your dog. You’ll need to be able to guide your Cavalier through different situations, encouraging them and keeping them safe and happy. Understanding your dog is key to becoming a therapy dog handler. You’ve got to be able to recognize the tiniest changes in behavior and body language, and quickly respond. And at the same time, you will be multitasking by staying engaged with individuals. It’s a balancing act, for sure, especially as you start out your journey as a therapy dog team.
Now, what personality should your Cavalier King Charles Spaniel have in order to make a good therapy dog? When it comes to a well-suited therapy dog, you can look at a few key traits. A good therapy dog should be reliable, predictable, and able to follow your cues with ease. That’s not to say they have to be robots and never get flustered, but as a general rule, you want a dog that is solid in their temperament. Your dog should be friendly with strangers, as your visits will be with strangers. At the same time, they should be poised, not jump on people, and be able to walk nicely on a leash around distractions, including food. It’s not just about loving new people; it’s also about having manners in new and unfamiliar environments.
Getting Started Training Your Cavalier to Become a Visiting Therapy Dog
It’s important that your Cavalier have basic obedience and manners. Walking on a loose leash in crowded places, around dogs, and on slick floors is a must. Leaving food or dropped pills on the ground is incredibly important for your dog’s safety. If your Cavalier knows tricks, that can be a great icebreaker and is also helpful when someone wants to look at your dog but not pet them. Dexter and I were a visiting therapy dog team for many years, and tricks and activities were by far his favorite visits! If your dog needs a refresher, enroll in a positive dog training class.
Subscribe to our @CavalierTipsandFun YouTube channel for more!
Google Ad Below
After your Cavalier has mastered his basic obedience skills in a variety of environments, look for a therapy dog training prep class. This may be a weekend class or one that spans 4–8 weeks. When I taught my therapy dog prep class, each week we covered a new topic to prepare the handlers and dogs for the actual work involved and the test. My students by far enjoyed skit night, where my volunteers and I role-played different scenarios, the teams interacted, and we discussed what was good and how they could improve in that situation. It was a hoot and very eye-opening for the upcoming teams.
When you and your Cavalier are ready to take your therapy dog evaluation, you will need to find an evaluator to assess whether you are ready for therapy work. But there is more than one therapy dog organization out there. Choosing the right organization is crucial. Some facilities have specific requirements, like only accepting teams evaluated by certain organizations. So, if you have your sights set on a specific organization, reach out to them first. If your dog is on a raw food diet or you provide your dog with titers vs. yearly vaccinations, not all therapy dog organizations accept that, but some do.
Speaking of organizations, there are plenty out there, each with its own unique criteria. Some of the most common ones include Alliance of Therapy Dogs, Pet Partners, Love on a Leash, and Therapy Dogs International. Be sure to check out their specific requirements before making your decision.
Subscribe to @DextertheDogandFriends for kid-friendly content!
During the evaluation, the evaluator will test your skills to ensure you’re ready to handle various situations with confidence. Once you’ve got the green light from your evaluator, send in your paperwork and fees. While you are waiting for your official badge, it’s a good time to start reaching out to facilities you’re interested in visiting. It’s best to meet with the director, take a tour, and get a feel for the environment without your dog. When you are ready to visit with your Cavalier, keep those initial visits short and sweet. It’s all about easing them into the new surroundings and ensuring they feel comfortable and confident in their role as a therapy dog.
And remember, if you don’t think therapy work is in the cards for your Cavalier, that’s perfectly fine. There are plenty of other enjoyable activities you and your Cavalier can explore together. But if therapy work is the journey you’ve chosen, then I wish you both the best of luck on this rewarding adventure.
Your comments and questions are always welcome below.
Join our vibrant Cavalier King Charles Spaniel community on Facebook, support our dedication to pet wellness on Patreon, and stay updated with our weekly newsletter for invaluable tips and insights into raising happy, healthy pets. Together, let’s make a difference in our dogs’ lives!
Google Ad Below [...]Read more...
July 10, 2024Choosing a Cavalier King Charles Spaniel Breeder
While I understand the “adopt don’t shop” idea, there are valid reasons to purchase a purebred Cavalier King Charles Spaniel from a responsible Cavalier breeder. I’ve received numerous requests on how to find a good Cavalier King Charles Spaniel puppy breeder, so let’s dive into my personal thoughts and considerations.
Educate Yourself on the Cavalier King Charles Spaniel Breed
First things first, it’s crucial to understand the breed you’re interested in. Cavaliers are charming, affectionate, and beautiful, but they also have specific needs and characteristics. Learning about the typical Cavalier personality and care can help you in deciding if a Cavalier is the right breed for your family.
Dive into the Cavalier King Charles Spaniel Breed Information
The internet has a ton of information about Cavalier King Charles Spaniels. Not all good, so take everything with a grain of salt. I would suggest looking at Cavalier King Charles Spaniel national breed clubs and Cavalier rescues. They tend to have a lot of very helpful information. Spend time reading about Cavaliers to understand their grooming care, behavior traits, size, and medical concerns.
Cavalier King Charles Spaniel Temperament and Personality: Cavaliers are known for their friendly and affectionate nature. They thrive on companionship and are often described as “lap dogs” or “love sponges” because they love to snuggle. But, they aren’t all snuggle bugs, and it’s important to note that they are spaniels, which stem from hunting genes, so they can be very active little dogs. Interestingly, Dexter is now almost fifteen, and, over the years, I have met a lot of Cavalier families who downsized from golden retrievers, I was one of them. I think because they have that same personality of fun and eagerness to be part of the family activities.
When taught properly, they are often good with children and other dogs and adapt well to a variety of living environments. I do say when taught properly, as you can’t assume you can toss any dog into a situation and they will handle it as we had hoped. As a side note, please check out my YouTube channel, Dexter the Dog and Friends, to learn more about raising kids and dogs together.
Dexter’s school assembly!
Cavalier King Charles Spaniel Maintenance and Grooming: Cavaliers require regular grooming due to their silky and long coats. This includes brushing several times a week to prevent mats and tangles. Silky? Well, some Cavaliers have a much thicker coat than others. Take my Dexter, for example. He has very long fur, and it’s silky but also super thick. Daily brushing is even better if you can swing it. It will really help to prevent mats in the first place.
Regular baths are important too. If you are using a truly natural dog shampoo (I use 4-Legger) that does not have any harmful ingredients, you can bathe as needed. When Dexter was a visiting therapy dog, he had to have a scrub-a-dub-dub before his visits, so that was weekly or every two weeks for us. But now, he gets a bath every three to four weeks. Their nails should also be trimmed regularly, and their teeth brushed daily to maintain good dental health.
Grooming Tips. Subscribe to my @RaisingYourPetsNaturally YouTube channel for more.
Trimming Your Cavalier King Charles Spaniel: Talk about a controversy! I am always pro it’s your dog; do what is best for them and you. Dexter has Chiari malformation (more on that below) and because of that, grooming is uncomfortable. Therefore, I have always kept him in a puppy cut. I lighten that thick fur, shorten him up, trim his ears, and keep his slippers short. Slippers, BTW, are the fur around their feet, or Grinch feet. If you want to keep their Grinch feet full, it is important to still trim their foot pads to prevent slipping.
Cavalier King Charles Spaniel Medical Conditions: This is where our beloved breed suffers the most. Cavaliers are prone to several hereditary conditions. It’s essential to be aware of these and ensure your breeder is proactive in health testing because that’s the only way to help our Cavaliers out of their medical mess. Key health concerns include mitral valve disease (MVD), hip dysplasia, Chiari malformation (CM) and syringomyelia (SM), and patellar luxation. Reputable breeders will conduct specific screenings to minimize the risk of these conditions in their puppies.
Understanding Health Testing for Cavaliers
For Cavaliers, it’s crucial that both the breeding dogs and their parents are health tested for hereditary diseases. It’s not just the breeding pair, but the grandparents too! The grandparents have a longer history, testing and health records. A highly regarded breeding Cavalier should be over 2.5 years old, with parents that are MVD heart clear and MRI scanned clear of CM/SM. A reputable breeder will eagerly provide copies of health certificates of each parent and grandparents or links to tests. If not, be sure to ask. If they are hesitant to share, I would be hesitant to move forward.
Mitral Valve Disease (MVD): Every breeding Cavalier King Charles Spaniel should have an annual heart exam by a board-certified veterinary cardiologist. The parents of your prospective puppy should have heart clearances from a cardiologist and be at least 2.5 years old at the time of breeding. All four grandparents should be over the age of 5 and heart clear.
Syringomyelia (SM) and Chiari Malformation (CM): Both parents should have MRI scans showing them clear of CM/SM after reaching 2 years of age. It’s even better if the grandparents have also undergone MRI scans and are clear of CM/SM.
Hips: OFA requires that a Cavalier be a minimum of 2 years old for hips to be certified. It’s recommended for grandparents to have certified hips as well.
Patellas: Testing should be done annually to ensure healthy knees and to prevent luxation in both parents.
Medium-Chain Acyl-CoA Dehydrogenase (MCAD): MCAD is a metabolic disorder that affects how Cavalier King Charles Spaniels process certain fats for energy. It’s caused by a genetic mutation that can lead to metabolic imbalances. DNA testing is essential to identify Cavaliers carrying the mutation and prevent passing it on to their offspring. This is a newer (Summer 2023) DNA test.
Episodic Falling Syndrome (EFS): Is a hereditary neurological disorder affecting Cavaliers. Breeders should ensure all Cavalier breeding dogs undergo DNA testing for EFS before mating.
Dry Eye Curly Coat Syndrome: An inherited disease that affects the eyes, skin, and feet of Cavalier. It can be detected through a DNA test.
Dry Eye: Testing for dry eye in Cavalier King Charles Spaniels involves a DNA health test to identify the presence of the genetic mutation associated with dry eye, curly coat syndrome. Testing ensures early detection and appropriate management of this hereditary condition in breeding dogs.
Don’t forget to subscribe to our @CavalierTipsandFun YouTube channel for more!
The Importance of Puppy Socialization
Puppies develop both physically and mentally right out of the gate, and even during pregnancy! A stressed mom can produce stressed, unhealthy puppies. A responsible breeder not only ensures a Cavalier puppy is medically healthy, but behaviorally as well. Breeders should prioritize the physical and mental well-being of Cavalier puppies by starting basic socialization at home. This includes introducing puppies to children, adults, outdoor environments, handling and grooming, and exposing them to different textures and obstacles.
Finding a Good Cavalier King Charles Spaniel Breeder
Many national breed clubs provide breeder lists, which are a great starting point. Look within a specific mile radius you are willing to drive to meet the breeder and puppies. Breeder websites should have detailed information on health testing and puppy socialization.
When you find a few breeders who look good on paper, contact them via email or phone. Discuss your goals and hopes for your new family member. You are looking for a connection with a breeder just like you are looking for a connection with your puppy.
Visiting the Breeder and Their Cavaliers
I recommend setting up a date and time to meet the breeder in their home and visit with their Cavaliers. Seeing the living situation and behavior of their dogs in person is a great indicator of how the puppies will turn out. Look for happy breeding dogs that are part of the family. Some breeders may be hesitant about home visits, but it’s essential for you to feel comfortable with the environment where your puppy is being raised.
Picking out Dexter! FYI he was 5 weeks here, I would bring him home at 12 weeks.
Choosing Your Cavalier Puppy
This could be an entire article on its own, but here are a few highlights to get you started. TAKE YOUR TIME! This is not a time to make a quick decision or an impulse buy. You are choosing your next family member, a living creature with strong emotions that will hopefully be with you for the next ten to twenty years.
Before meeting the puppies, have an idea about what you want to do with your Cavalier puppy and future dog. Are you looking for a canine athlete? Or maybe a therapy dog to visit children or the elderly? The personality traits of those two puppies can be quite different, so knowing your goals will help in choosing the best Cavalier King Charles Spaniel puppy for you, your family, and your goals.
Bringing Your New Cavalier Puppy Home
Picking up a new Cavalier puppy typically happens when the pup is between 12-15 weeks of age. Prepare your car for your new puppy before arriving at the breeder’s home. Items to have on hand include a travel crate, puppy blankets, healthy treats, water and bowl, and a leash and harness. If your journey includes an overnight stay, pack items for a dog friendly hotel stay.
Air Travel Considerations
I personally would never fly any of my pets in cargo, nor would I have my puppy shipped to me. Meeting the breeder, dogs, and puppies is essential. If you plan on a plane ride home, check with the airlines on what they will need before your departure.
Maintaining Contact with Your Breeder
When breeders are committed to the breed’s well-being, they may ask you to provide specific health tests on your puppy throughout its life. This means the breeder is looking to see how the puppies develop, and if there are any medical concerns over their life, they may not breed that pair again. In my book, this speaks volumes about what a responsible breeder really is.
Now that you have a healthy and behaviorally sound Cavalier puppy, it’s your job to start socialization and training. You and your puppy are ready for a lifetime of fun and joy.
I hope this updated article helps your readers in their quest to find a reputable Cavalier King Charles Spaniel breeder. Good luck at finding your BFF!
Google Ad Below
Join our vibrant Cavalier King Charles Spaniel community on Facebook, support our dedication to pet wellness on Patreon, and stay updated with our weekly newsletter for invaluable tips and insights into raising happy, healthy pets. Together, let’s make a difference in our dogs’ lives!
🐶💙Support our passion for pet wellness and unlock exclusive content, perks and early access by exploring our Patreon tiers.
Sign up for our weekly newsletter!
Join us on Facebook!
[...]Read more...
November 12, 2024Best Treats for a Cavalier King Charles Spaniel
If you’ve found this Cavalier blog by searching for “best treats for Cavalier King Charles Spaniels,” you’re probably wondering what makes a healthy dog treat for this special breed. Whether you’re looking for the best dog-training treats for your Cavalier or just healthy dog treats, it’s essential to choose options that benefit your Cavalier King Charles Spaniel’s health and waistline. Here’s what I consider when picking out healthy treats for Dexter.
Check the Ingredients in Your Cavalier’s Treats
The very first thing I do when choosing treats for Dexter is check the ingredients list. Don’t just rely on the fancy pictures on the front of the bag; the ingredient panel tells you what your Cavalier is actually eating. Even if a treat claims to be “chicken-flavored,” that doesn’t always mean it contains real chicken. Always look for whole, natural ingredients like real meat, vegetables, and fruits.
What to Avoid in Your Cavalier King Charles Spaniel’s Treats
Artificial Flavors: If you see “flavor” in the ingredient list, it’s likely a synthetic that’s meant to mimic real food. Real food ingredients are always better for your Cavalier’s health.
Added Salt: Too much salt can be harmful, especially for dogs with heart issues, like Cavaliers. Stick to treats with no added salt, as too much sodium can lead to health problems.
Preservatives: Treats should be free of artificial preservatives like potassium sorbate, sodium benzoates, BHA and BHT. These chemicals are commonly found in cheaper treats and can be harmful in the long run.
By-Products or Mystery Meat: Avoid any treats that list “meat by-products” or vague “animal fat.” We want to know exactly what’s going into our dog’s body.
Sugar or Sweeteners: Skip the sugary treats! Cavalier King Charles Spaniels can easily gain weight, and too many sugar-filled treats can contribute to obesity, which affects their health.
Grains: Many dogs, including Cavaliers, can be sensitive to corn, wheat, and soy. Grains also pack in a lot of calories. Stick to treats with grain-free ingredients.
Healthy Treats for Cavalier King Charles Spaniels
So, what should you be looking for instead? The best treats for Cavalier King Charles Spaniels are made from whole, natural ingredients. I always opt for treats made with high-quality meats, like rabbit, chicken, beef, or duck, and ingredients that support overall health.
When choosing healthy dog treats, I think about each ingredient and how it affects my dog’s health and diet. I prefer foods that can contribute to Dexter’s overall nutrition, not add-ons. If I think the treat’s ingredients are more like a candy bar, I’ll skip it.
Best Training Treats for Cavaliers
When I’m training Dexter, I want treats that are both nutritious and irresistible. Training treats should be small, easy to chew, and made from single-source protein. Some of my favorites include freeze-dried meat or dehydrated meat. These treats are not only high-value (meaning they’ll grab your Cavalier’s attention), but they’re also healthy and easy to use in training sessions.
I also may grab freeze dried dog food that consists of healthy ingredients and no fillers. They tend to be bite-sized, and I can easily cut down on some of Dexter’s fresh food for the day and replace it with the freeze-dried dog food. No extra calories needed, and he doesn’t lose any of his daily nutritional needs.
Treats for Occasional Snacking
When it’s time for a snack, I’m okay with a treat that’s a bit more substantial, like grain-free biscuits made with sweet potato or pumpkin. These treats are great for occasional use, but they do tend to be higher in calories and more ingredients. I like to keep Dexter’s treats simple and sweet.
My Top Picks for Cavalier King Charles Spaniel Treats
Dehydrated Meat: A simple, natural treat that’s great for training or as an occasional snack. Dehydrating your Cavalier’s meat treats at home is simple and can be done using a dehydrator or your oven. To start, slice the meat (like chicken, beef, or turkey) into thin, even strips, removing any fat. If using a dehydrator, set it to around 160°F and arrange the meat strips on the trays, ensuring they don’t overlap. Dehydrate for 6-12 hours, checking for proper dryness—meat should be firm and break easily. If using an oven, place the meat on a baking rack, set the oven to the lowest possible temperature, and prop the door open slightly to allow moisture to escape. Store a few treats in your Cavalier’s treat jar and the rest in the freezer to stay fresh.
Dehydrated Fruits and Veggies: Dehydrated fruits and vegetables are a great low-calorie treat for Cavalier King Charles Spaniels, providing a crunchy, natural snack without added preservatives or artificial ingredients.
Can Cavaliers have carrots? For me, this is a yes and no. Yes, carrots are perfectly healthy and nutritious for your Cavalier. I know a lot of people recommend feeding large carrots to dogs as a chew, but I do think that may pose a choking risk. You must ensure your Cavalier is safely chewing the carrot and not swallowing big chunks. The same goes for baby carrots. For me, I prefer to feed Dexter carrots as little bits. But, I am definitely a proud helicopter mom. Make sure you read the article on healthy chews for your Cavalier King Charles Spaniel if you are wanting safe-and-natural chews.
Freeze-Dried Healthy Dog Food: Freeze-dried dog food can be an easy swap from their regular diet, making it a convenient and healthy treat option for Cavalier King Charles Spaniels. Plus it’s a great treat for picky eaters.
Freeze-Dried Meat Treats (Single Ingredient): Freeze-dried meat treats are a high-protein, single-ingredient snack for Cavaliers, providing a nutritious option.
Healthy DIY Recipes for Cavaliers. Don’t forget to subscribe to @CavalierTipsandFun for more!
Final Thoughts on Choosing the Best Treat for a Cavalier King Charles Spaniel
When choosing the best treats for your Cavalier King Charles Spaniel, always prioritize natural, healthy ingredients. Look for treats that are high-quality, free of unnecessary fillers, and made with proteins you recognize. And remember, even the healthiest treats should be given in moderation.
What treats does your Cavalier love?
Join our vibrant Cavalier King Charles Spaniel community on Facebook, support our dedication to pet wellness on Patreon, and stay updated with our weekly newsletter for invaluable tips and insights into raising happy, healthy pets. Together, let’s make a difference in our dogs’ lives!
Google Ad Below [...]Read more...
August 20, 2024Why Does My Cavalier King Charles Spaniel Eat Everything?
As a devoted Cavalier King Charles Spaniel family, you may be wondering why your Cavalier seems to eat everything in sight. Leaves, rocks, plants, grass, paper, cardboard, whatever they seem to be able to get their mouth around is fair game. This can be concerning, as it should be. If your Cavalier eats something he shouldn’t, there’s a risk of poisoning or choking. This could be caused by pica, not enough food, other health-related issues, or boredom. Let’s dive in and see if, together, we can figure out why your Cavalier King Charles Spaniel eats non-food items.
What is Pica?
Pica is a condition where dogs eat non-food items. For Cavaliers, this could include chewing on blankets, rocks, dirt or other random items. While it might seem quirky, pica can be a sign of underlying issues. Understanding the root causes can help you address the problem and ensure your Cavalier receives the best care.
The Behavior Behind Pica
Cavaliers, like all dogs, need mental and physical stimulation. Without enough engagement and enrichment, they might resort to chewing on inappropriate items. A 2019 study published in The Journal of Veterinary Medical Science discovered pica is a common behavioral issue. After surveying 2,000 cases, researchers found dogs that lacked regular enrichment, whether due to being crated for too long, being bored, or just not enough physical exercise were more likely to display pica tendencies.
Behavior Issues That Might Be Causing Your Cavalier’s Pica
Boredom and Lack of Stimulation: Cavaliers are playful and intelligent dogs that thrive on activity. If they aren’t entertained, they might turn to chewing on anything they can find. Toys and interactive games are crucial in keeping them busy and satisfied.
Stress and Anxiety: A Cavalier’s anxiety or stress is a major concern when it comes to pica. A change in routine, new family members, or other stressors can cause your Cavalier to engage in pica as a coping response. Providing a safe and secure environment along with calming activities can help reduce anxiety. If you feel your Cavalier has anxiety, it’s important to address that anxiety with a professional.
Attention-Seeking: Sometimes, Cavaliers might eat non-food items to get your attention. I always say, if a dog is asking for attention, they probably aren’t getting the attention they need. Bump up your Cavalier’s training, games, and outings.
Medical Reasons for Pica
While pica can often be a sign of boredom, medical issues can contribute to pica in dogs. This is why it’s always important to speak with your Cavalier’s holistic veterinarian. Here are some common medical issues for pica in dogs.
Nutritional Deficiencies: If your Cavalier’s diet is lacking in essential nutrients, they might chew on non-food items to make up for it. Ensure that their diet is balanced and rich in the nutrients they need.
Gastrointestinal Issues: Sometimes, dogs might eat non-food items to soothe an upset stomach. If your Cavalier seems to be eating odd items frequently, it’s worth checking with your vet to rule out any digestive issues.
Some diagnostic methods your vet might suggest include:
Biopsies: Taking tissue samples from the digestive tract to check for disease.
Therapeutic Trials: Trying a medication or diet change to see if the pica improves.
Blood Work: Checking folate and cobalamin levels, and performing a TLI (Trypsin-Like Immunoreactivity) test to assess pancreatic function.
X-rays: Ruling out gastrointestinal obstructions and other potential causes.
How to Stop Pica in Your Cavalier King Charles Spaniel
The good news is that pica can often be managed with positive training and enrichment techniques. If it’s medical, following your dog’s vet’s protocol will be essential.
Provide Engaging Toys and Enrichment Activities: Offer a variety of toys that challenge your Cavalier’s mind and body, such as puzzle toys, chew toys, and interactive games. Incorporate activities like nose work games, agility courses, or scent trails to provide mental stimulation and prevent them from seeking out inappropriate items. Check out our Cavalier enrichment ideas!
Address Anxiety with a Professional: If anxiety might be contributing to your Cavalier’s pica, consult with a dog behavior consultant. They can help identify the root causes of your dog’s anxiety and develop a tailored plan to address it.
Use Positive Reinforcement: Reward good behavior with praise and treats. When your Cavalier interacts with their toys or engages in positive activities, reinforce this behavior to guide them toward what’s encouraged.
Monitor and Redirect: Keep an eye on your Cavalier’s actions and gently redirect them if they start chewing on non-food items. Providing appropriate toys and praising them when they use them can help steer them away from unwanted behaviors.
Leash Management and OutFox Field Guard: Use a leash to manage your Cavalier and prevent them from accessing non-food items so they can’t sneak off. Consider using an OutFox Field Guard, a type of protective mesh that covers their face that can prevent dogs from eating things they shouldn’t. Unlike a muzzle, which restricts a dog’s ability to open their mouth entirely, a OutFox protects against ingestion while allowing normal breathing and drinking.
Understanding and addressing pica in your Cavalier King Charles Spaniel involves a combination of detective work, positive training, proper enrichment, and, if necessary, medical evaluation. By keeping your Cavalier mentally and physically stimulated, providing a balanced diet, and offering plenty of attention and love, you can help them steer clear of inappropriate chewing and enjoy a happy, healthy life.
Have you noticed any specific triggers for your Cavalier’s pica? Share your experiences and tips in the comments below!
Google Ad Below
Join our vibrant Cavalier King Charles Spaniel community on Facebook, support our dedication to pet wellness on Patreon, and stay updated with our weekly newsletter for invaluable tips and insights into raising happy, healthy pets. Together, let’s make a difference in our dogs’ lives!
🐶💙Support our passion for pet wellness and unlock exclusive content, perks and early access by exploring our Patreon tiers.
Sign up for our weekly newsletter!
Join us on Facebook!
[...]Read more...
March 5, 2025Preparing Your Cavalier King Charles Spaniel for Air Travel
Through Dexter’s 15 years of life, we had countless adventures together, but every single one was by car. At nearly 30 pounds, flying in the cabin wasn’t an option for him, and I would never consider putting a dog in cargo. Now, with Stewart, I have the opportunity to travel by plane since he will be between 16 and 18 pounds as an adult, which is small enough to fit in an airline-approved travel crate under the seat.
I have to admit, I’m a little nervous. It’s been almost 30 years since I last flew, and my experience wasn’t great. But I’m determined to make this a smooth process for both Stewart and myself. In September, we’ll be flying from Detroit to Portland, Maine, and I want to make sure Stewart is as comfortable and confident as possible for his first airplane trip.
Preparing Stewart, My Cavalier King Charles Spaniel for Air Travel
Since Stewart has never flown before, I’m taking a step-by-step approach to help him get used to every part of the travel experience. This isn’t just about the flight itself; it’s about everything leading up to it, from riding in his crate in the car to being in a busy airport environment.
Teaching a Cavalier to Enjoy a Travel Crate
One of the biggest adjustments for a Cavalier is spending time in a small, enclosed space. Since Stewart isn’t crate trained and has some separation anxiety, I’m taking extra care to make his travel crate a safe and positive space. An airline-approved travel crate is a much tighter fit, so here’s how I’ve been getting him used to it:
Introducing the Crate Indoors – I started with short training sessions, luring Stewart into the travel crate with treats and rewarding him for stepping inside. Since it’s a tight fit, I guided him to turn around and reinforced him for doing so. Once he was comfortable moving inside, I worked on having him stay in the crate for a few seconds before rewarding and letting him out, gradually increasing the duration.
Crate Inside a Crate – To help him transition smoothly to riding in the travel crate, I placed it inside his larger crate in the van. Since he was already used to the big crate, this made it feel more familiar. For the first couple of weeks, I left the travel crate unzipped, but zipped up the larger crate.
Zipping Up While Driving – Once he was comfortable, I started zipping up the travel crate while still inside the larger crate. This allowed him to experience confinement in a secure way without making a sudden change.
Removing the Larger Crate – The next step will be taking the travel crate out of the big crate so that he’s riding in just the small one. By gradually adjusting him to this setup, he won’t even notice the change!
Socialization and Confidence Building
Beyond the crate, I want to make sure Stewart is confident in all the different environments he’ll encounter on our trip.
Walking Politely on a Leash – Stewart will need to walk calmly on a leash through the airport. We’ve been practicing polite walking in various places with different surfaces and distractions. I will continue this training with busy locations as we progress through his training.
Exposure to Crowds and Noises – Airports are full of noises; baggage carts, intercom announcements, rolling suitcases. I’m taking Stewart to different places where he can experience a variety of sounds and people in a controlled way.
Getting Used to Security Procedures – At TSA checkpoints, I’ll need to take Stewart out of his crate and carry him through security. To prepare, I’ll work on calmly lifting him out of his crate and holding him in busier environments, helping him get comfortable with the experience before our trip.
Preparing for Time in the Airport
Most airports have designated pet relief areas, but access to them depends on the layout of the airport and TSA procedures. Some airports have relief areas before security, while others have them post-security. Since Stewart will be crated during the drive and throughout check-in and security, I’ll plan ahead to find out if there’s an opportunity for a potty break before we go through security. If not, I’ll make sure he’s had plenty of time to potty before we leave for the airport.
Practicing Extended Crate Time – I’ve been gradually increasing the amount of time Stewart spends zipped up in his crate, so he’s comfortable being inside for longer periods.
Planned Potty Breaks – Since dogs can’t relieve themselves once past security, I’ll make sure to take Stewart to the airport’s designated pet relief area before heading to the gate. This is also why I teach my dogs how to potty on cue; it makes it easier to ensure they go when needed, especially in situations like this where time and access are limited.
The Flight Itself
The actual flight is the final step in our preparation. Since Stewart will be in his crate under the seat for the duration of the flight, I want to make sure he’s as comfortable as possible.
Calm, Positive Associations – I’m making sure that his crate time is always associated with good things; treats, chew items, and a cozy space.
Chews and Enrichment for the Flight –I’ll bring along a few safe chews and likely my slippers to provide comfort for Stewart during the flight.
Staying Calm Myself – Dogs pick up on our emotions, so I’ll be focusing on staying relaxed and making this feel like just another routine adventure for Stewart.
Final Thoughts
Traveling with a Cavalier King Charles Spaniel on a plane takes preparation, but with gradual exposure and a positive approach, it can be a smooth experience. My goal is to make sure Stewart feels safe, confident, and comfortable every step of the way. While I’m still a bit nervous about my first flight in 30 years, I know that by preparing Stewart properly, we’ll both be ready for our adventure to Maine.
A big thank you to all of our Cavalier friends who sent us their travel photos! Don’t forget to follow them on social media.
Have you traveled with your Cavalier on a plane? I’d love to hear about your experiences in the comments!
Google Ad Below [...]Read more...
October 30, 2024How to Bathe a Cavalier King Charles Spaniel Puppy
If you are wondering how to bathe a Cavalier King Charles Spaniel puppy at home, I have you covered. As a Cavalier mom and positive dog trainer, I’m ready to help you make bathing your Cavalier puppy not only effective but enjoyable and stress-free for your new Cavalier King Charles Spaniel puppy.
Dexter, who is now fifteen, has had his fair share of dog baths. But, today, I’m going to share how I gave Willow her first bath at home. With the right setup, some tasty treats, taking it slow, and a cozy towel, you can create a zen atmosphere for your Cavalier’s bathtime. So here’s a step-by-step guide to giving your Cavalier King Charles Spaniel puppy their first bath.
Set Up Your Puppy’s Bath Space for Safety and Comfort
First, you want to ensure your puppy’s bathtub or sink is safe and secure. You don’t want your puppy slipping on the surface of a wet tub or sink. First things first-secure the bathtub or sink so your puppy won’t slip. A good rubber mat keeps your Cavalier from slipping, and this alone will help your puppy feel safer in the tub. If your Cavalier is small, like Willow, you can easily bathe them in the sink. But, if they are larger, like Dexter, a tub is a must, or a portable dog bathtub can also work well. I haven’t used one, but I’ve heard from other Cavalier families they are great!
Warm Towel Tip: Before starting your puppy’s bathtime, place a few towels in the dryer. Then, just before you head to the bath, grab the warm towels. Then, after bathtime, your puppy can be wrapped in a warm-and-cozy towel. If you air dry your Cavalier puppy, then add some puppy blankets too, so they can cozy up in the pile of warm blankets.
How to Choose a Puppy Shampoo That is Safe
When choosing a safe puppy shampoo, the first stop is the back of the shampoo bottle to read the entire ingredient panel. Yup, you want to read each ingredient and make sure those ingredients are safe and natural. You may be surprised at the garbage that you find in some puppy shampoos.
Full disclosure, I’ve been working with the 4-Legger brand since 2016 and, in my opinion, they are the best out there. For puppies, I like their hypoallergenic SOOTHE formula. This isn’t a puppy shampoo review, but I do want to share their ingredient panel, so you can get a better idea on what a good puppy shampoo looks like.
4-Legger SOOTHE Ingredients: Organic Aloe Juice, Organic Saponified Oils (Coconut, Shea Butter, Olive, Sunflower, and Jojoba), Organic Vegetable Glycerin, Organic Rosemary Extract Order today with promo code RaiseNaturally20 for 20% off your first order.
Keep Your Cavalier’s Inner Ears Dry
Protecting those little ears is important. You can place a cotton ball gently in each ear to prevent water from sneaking in, but remember to remove them after! Or, you can simply gently press their ear to their head as you use a warm washcloth.
Be Generous with the Tasty Treats or Lick Mats
Treats are key to conditioning your puppy that bathtime is good. Bath=Treats or Bath=Lick Mat Time Giving treats throughout the bath not only keeps it positive but also helps distract them from what is going on. Talk to your Cavalier puppy through the experience. Let your puppy know how much you love them and that this is a safe experience.
If you’re looking for more gentle routines and everyday training ideas like this, my Manners, Life Skills & Foundation Training Course walks you through simple, trust-based lessons you can use at home. It’s all about helping you and your dog feel confident and connected.
Watch Willow’s First Bath and don’t forget to subscribe to @CavalierTipsandFun for more!
Introduce Your Puppy to the Bath Gently
When it’s go-time, place your puppy gently in the sink or tub. Willow was a little unsure at first, so I kept things calm and encouraging. We went slowly, allowing her to get comfortable, and rewarded her bravery with treats. You can always do this in steps over a few days if your puppy is nervous. Teaching your Cavalier puppy to enjoy a bath is going to be so important since this is a breed that can benefit from baths to keep their luxurious coat beautiful. The benefit of puppy bathing is that the process can be much shorter than when your Cavalier has a full coat.
Start the Water Slowly
Once your puppy seems a bit settled, turn on the water. Using a shower sprayer is ideal because it’s easier to manipulate around your Cavalier and get the belly and bum area easier. Always check the temperature; you want it warm, but never hot. If your pup gets nervous, reassure them with gentle touches, talk to them, and provide healthy and tasty treats. We want bathtime to be a good thing, not something to avoid.
Wet Your Puppy and Lather Up
Begin with their back, avoiding their face for now. Once they’re damp, add a little shampoo and lather gently. Go slow and talk to your pup throughout to keep them reassured. Make sure to reach all those little spots like under the belly, armpits, and legs.
When it comes to cleaning your Cavalier’s face, be careful and gentle. Grab a soft washcloth, soak it in warm water, and wring out any excess. Gently wipe around your puppy’s face, especially near the eyes and mouth, to keep things clean without needing shampoo. Cavaliers can be sensitive around their eyes, so keep it soothing and slow, making it a comfortable moment for them. If there’s any tear staining, gently focus on those areas but avoid scrubbing.
Rinse Thoroughly
It’s so important to rinse really well to avoid any leftover shampoo that could irritate their skin. Keep the water warm and gently go over each area until you’re sure they’re squeaky clean.
How to Dry a Cavalier After a Bath
Gently squeeze out as much water as possible from their coat while they’re still in the tub, especially from their ears, legs, and belly. Be careful not to pinch their skin. Then grab a warm towel and start rubbing them down right in the tub. Begin with their back and then work down to their legs, belly, and especially those floppy ears! The towel rubdown helps absorb extra moisture and keeps your puppy from dripping everywhere.
Pro tip: When it looks like your puppy is going to shake their head, try covering their ears lightly with a towel. It can help prevent ear issues and keeps the shake-off water spray to a minimum!
Should You Blow-Dry Your Cavalier King Charles Spaniel Puppy?
For a little more drying, a low heat or cool setting on a blow dryer works great. Keep the dryer moving and avoid getting too close to their skin. And, of course, more treats and sweet talk make this part easier too! I would highly recommend desensitizing your puppy to the hair drier first. You can learn how in the video below. If you are going to allow your Cavalier to air-dry, I would suggest using a dog drying jacket and warm , snuggly blanket.
Learn how to teach your Cavalier to love drying and subscribe to our other YouTube channel @RaisingYourPetsNaturally
And there you have it—bathing your Cavalier King Charles Spaniel puppy at home for the first time! If you’re wondering, when should I bathe my puppy for the first time, or how often should I bathe my puppy, it’s usually safe to start around eight to twelve weeks, assuming you are using a truly safe puppy shampoo. With these tips and a positive approach, you’ll help set up your Cavalier King Charles Spaniel puppy for a lifetime of happy bath times.
What part of your puppy’s first bath are you most nervous about? Let me know in the comments. I’d love to help make it a fun experience for both of you!
Google Ad Below [...]Read more...
October 1, 2024MCAD deficiency in Cavalier King Charles Spaniels
Last year, on my Raising Your Pets Naturally blog, I shared information about a relatively new health condition found in Cavalier King Charles Spaniels: Medium-Chain Acyl-CoA Dehydrogenase (MCAD) deficiency. As many Cavalier families know, this breed is already prone to several health issues, and adding another one to the list is upsetting.
MCAD deficiency is a genetic condition that impacts how the body breaks down certain fats for energy. Recent research has found some Cavaliers who have symptoms such as seizures, lethargy, and other health issues may have MCAD.
The initial study that brought this to the general public’s attention focused on a three-year-old male Cavalier who was experiencing seizures and unusual tiredness. After examining his blood and urine, researchers discovered elevated medium-chain fatty acids, pointing to MCAD deficiency. They then sequenced the dog’s genome and identified a specific change in the ACADM gene, which is associated with this condition.
When the researchers tested this genetic variant in 162 Cavaliers, they found that about 23.5 percent of the dogs carried the mutation. This discovery is important because it suggests that MCAD deficiency might be the reason behind the seizures and other symptoms we sometimes see in Cavaliers.
Here are some symptoms to watch for:
Seizures: Seizures or convulsions can be a key indicator of potential MCAD deficiency.
Lethargy: Unexplained and prolonged tiredness could be a sign of an underlying issue like MCAD deficiency.
Intermittent Health Issues: These episodes might include vomiting, decreased energy, or more severe symptoms like seizures.
Unsteady Gait: Difficulty walking or balance issues could occur during episodes.
Loss of Appetite: A sudden loss of interest in food might indicate a problem.
Low Blood Sugar (Hypoglycemia): This can lead to weakness, shakiness, disorientation, and seizures.
Abnormal Behavior: Changes in behavior, such as irritability or confusion, might be linked to a metabolic disorder.
Respiratory Distress: In severe cases, dogs might experience difficulty breathing during an episode.
Frequent Infections: Some dogs with MCAD deficiency may be more prone to infections.
Neurological Symptoms: Symptoms like circling, head pressing, or lack of coordination could be signs of this condition.
I know, right? A lot of these symptoms are also symptoms of other Cavalier King Charles Spaniel medical issues. While these symptoms can be caused by various factors, it’s important to consider MCAD deficiency, especially if your Cavalier is showing multiple signs.
Consider Getting Your Cavalier Tested for MCAD Deficiency
If you’re concerned about MCAD deficiency and its impact on your Cavalier King Charles Spaniel, getting your dog tested is a straightforward step you can take. The test involves a simple at-home swab, which you can easily order and perform yourself. This can provide valuable insights into whether your Cavalier carries the gene associated with MCAD deficiency.
For those thinking about adding a new Cavalier puppy to their family, it’s encouraging to know that many responsible breeders are proactively testing their breeding pairs and even the grandparents. This testing helps ensure that future puppies are less likely to inherit MCAD deficiency, contributing to healthier generations of Cavaliers.
Testing is a proactive measure that can help you make informed decisions about your dog’s health and well-being. If you’re interested in testing, talk to your veterinarian or reach out to a reputable lab for more information on how to get started.
For Cavaliers at risk of MCAD deficiency, diet plays a crucial role. Since these dogs might struggle to break down medium-chain fatty acids (MCFAs), it’s recommended to be mindful of their diet:
Limit MCTs: Foods high in MCTs, like coconut oil, palm oil, and milk products, including yogurt might need to be limited in dogs with this genetic variant.
Watch High-Fat Diets: A balanced diet, without excessive fats, is key for Cavaliers with potential MCAD deficiency.
Cavaliers that haven’t been tested for MCAD deficiency should avoid foods high in MCTs. Without knowing their genetic status, it’s best to be cautious to prevent potential health issues like seizures or other symptoms associated with the condition. If your Cavalier has had a diet rich in MCTs for a few years without any of the symptoms listed above, you may consider continuing to feed. However, the test is pretty easy and inexpensive, so it might be just easier and safer to test to know for sure.
The research on MCAD deficiency in Cavaliers is ongoing, and it’s vital for more Cavaliers to be tested. A simple swab test can determine whether your Cavalier carries the gene associated with MCAD. This testing is important not just for your Cavalier’s care, but also for responsible breeding practices to reduce the prevalence of this mutation in future generations. If you test, please contact your Cavalier’s breeder with the results.
Testing for MCADD
Canine Genetic Testing
GenSol Animal Diagnostics
Laboklin
As of June, 2024, the latest stats from a Facebook group dedicated to MCAD deficiency in Cavaliers show the following:
Genetically Affected: 49 dogs (9.78%)
Clinically Affected: 6 dogs (1.2%)
Carriers: 238 dogs (47.5%)
Clear: 214 dogs (42.7%)
These numbers highlight the importance of testing and awareness within our Cavalier community. By staying informed and proactive, we can continue to support the health and well-being of our Cavaliers.
Managing MCAD Deficiency: Diet and Care Tips
If your Cavalier King Charles Spaniel has been diagnosed with MCAD deficiency, managing their condition effectively involves careful attention to their diet and feeding schedule. I would suggest a good heart to heart with your dog’s holistic veterinarian. If your Cavalier does have MCAD deficiency you will need to avoid a high-fat diet and avoid foods high in medium-chain triglycerides (MCTs). Don’t forget to read those ingredient panels on all the foods, treats, and chews you feed your Cavalier.
Although MCAD deficiency is serious in Cavaliers, a good food protocol can help ensure your Cavalier still leads a full and enriched life.
Google Ad Below [...]Read more...
September 18, 2024How to Celebrate a Senior Dog’s Birthday and Healthy Dog Cake Recipe
It’s hard to believe that Dexter, my best friend and constant companion, is turning fifteen! I’m over the moon that I am able to celebrate this milestone with him. He may be slowing down a bit, but his spirit and spunk remains as bright as ever. As Dexter has aged, we may have tweaked what we can do, but one thing has stayed the same: we live each day to the fullest, cherishing every moment.
Over the past couple of years, I’ve seen subtle changes in Dexter’s energy and behavior. He doesn’t have the boundless energy of his younger days, and he’s been going through some senior dog anxiety. We’ve learned to adjust our activities together, and I’ve been working on helping him feel more secure as his cognition changes. Our daily enrichment now includes slow, sniffy walks, leisurely poke arounds through the neighborhood followed by a stroll, and indoor adventures. He still enjoys simple training sessions, which keep his mind sharp, and I continue his canine fitness exercises to maintain his mobility and strength.
Earlier this year, Dexter went down in his back end after a reaction to medication. It was a scary time, and I wasn’t sure what his recovery would look like. I was actually wondering if his time was coming to an end. But after three to four months of dedicated rehab, I’m thrilled to share that he’s made a full recovery! Dexter’s resilience has always inspired me, and this experience only deepened my love for him. His ability to bounce back, even at fourteen, is a testament to his incredible spirit.
With Dexter by my side, I’ve been inspired to dive into new creative projects. Over the past year, we launched this blog dedicated to Cavalier King Charles Spaniels. This is actually our second blog! Check out our first blog, Raising Your Pets Naturally. I’ve also created a children’s coloring book, Dexter’s Adventures, bringing his playful and inspiring spirit to life for a younger audience. Which makes this his 3rd children’s book! Everything I do is shaped by Dexter, and I’m so lucky for the joy and inspiration he brings.
Our mantra has always been to live each day to the fullest, and as Dexter turns fifteen, this really hits home. Every day is a gift, and I’m beyond thrilled to have Dexter with me on this journey. Together, we continue to embrace life, even as we both slow down, finding joy in the simple moments we share.
Celebrating Dexter’s birthday is more than just a tradition, it’s a reminder of the love, laughter, and resilience we’ve shared throughout his life. During Dexter’s birthday celebrations, we always make sure to support Cavalier Rescue USA, a cause that’s close to our hearts. If you’re able to donate or volunteer your time, please consider checking them out, and be sure to tell them Dexter sent you!
Here’s to Dexter, my silly monkey, stink pot, my muse, and the one who makes every day brighter with his love.
Don’t forget to subscribe to our @CavalierTipsandFun YouTube channel for more!
Print
Pin
Dog-Friendly Strawberry Birthday Cake
Here's Dexter's 15th birthday cake recipe and photos! To make his special day even more memorable, I whipped up a dog-friendly birthday cake that’s not only tasty but also healthy. This homemade dog birthday cake is packed with ingredients Dexter loves. Whether you're planning a dog birthday celebration or looking for a healthy dog birthday cake recipe, this one is sure to be a hit with your pup.
Course cake Keyword dog friendly cake, dog birthday cake,
Prep Time 1 day day Cook Time 50 minutes minutes
Servings 12 Dogs
Author Tonya Wilhelm
IngredientsOptional Blue Spirulina Gummy Paw Print Decoration6 tbsp Beef Gelatin2 tsp Blue Spirulina2 cups Boiling WaterStrawberry Dog Friendly Cake4 cups Quinoa Flour6 Eggs16 oz Strawberries Stems Removed1/4 cup Olive OilOptional Dog Frosting8 oz Cream Cheese check the ingredients to ensure it’s dog-friendly10 oz Butternut Squash Cooked
InstructionsBlue Spirulina Gummy Paw Print DecorationIn a large mixing cup, combine the gelatin and blue spirulina.Quickly stir in the boiling water until fully dissolved.Pour the mixture into the paw print cutouts in the paw-shaped cake pan. Pour any extra in other fun silicone molds.Refrigerate until set then gently remove the paw gelatin shapes.Place the paw shapes on a cookie sheet and return to the refrigerator while preparing the cake.Dog-Friendly Strawberry CakePreheat the oven to 350°F.Purée the strawberries in a blender until smooth.In a large mixing bowl, combine the quinoa flour, eggs, olive oil, and strawberry purée.Generously grease the paw print cake pan with olive oil.Pour the cake batter into the pan and bake for approximately 50 minutes, or until set.Allow the cake to cool for 15 minutes, then carefully remove it from the pan and place it on a cooling rack to cool completely.Optional Dog FrostingPurée the cooked butternut squash in a blender.Add the cream cheese to the purée and blend until smooth and well combined.Once the cake is completely cool, frost the cake with the butternut squash and cream cheese mixture.Top with the blue spirulina gummy paw print decorations for a fun and colorful touch!
Join our vibrant Cavalier King Charles Spaniel community on Facebook, support our dedication to pet wellness on Patreon, and stay updated with our weekly newsletter for invaluable tips and insights into raising happy, healthy pets. Together, let’s make a difference in our dogs’ lives!
Google Ad Below [...]Read more...
January 8, 2025How to Stop Your Cavalier King Charles Spaniel From Licking Everything
Have you ever wondered why your Cavalier King Charles Spaniel licks you or how to curb excessive licking? If so, you’re not alone. Many Cavalier parents find themselves trying to stop their Cavalier from licking so much. Let’s take a closer look at why Cavaliers lick and what you can do if it becomes too much. Cavaliers lick for various reasons, and understanding the “why” is key to changing and managing the behavior.
Cavaliers May Lick You Because You Taste Great!
One common reason is that you simply taste good. Your Cavalier might be drawn to the salt on your skin, or maybe you’ve just eaten, and they’re picking up on lingering food scents. Even coming inside after an active day outdoors can make you extra appealing to their sensitive noses. Hormones and pheromones also play a role. For example, if you’re feeling stressed or it’s that time of the month, your Cavalier might be more inclined to lick because they’re sensing these subtle changes. Not to mention when we put hand lotion on, oh, yummy!
Cavaliers Lick During Greeting Behaviors
Another reason dogs lick is as part of their greeting ritual. When you come home, they’re excited to see you and may lick as a way of saying, “Hello! I’m so happy you’re here!” It’s a natural expression of affection and enthusiasm. This behavior is especially common in Cavalier King Charles Spaniels, a breed known for their loving and people-oriented nature. Cavaliers thrive on connection and love being close to their families, so licking during greetings is often their way of reinforcing that bond.
Greeting-related licking can also be a way for your dog to gather information about where you’ve been. Dogs rely heavily on their sense of smell and taste to explore their environment, and licking is part of how they “read” the world. If you’ve been around other dogs, eaten something particularly tasty, or even just had a long day out, your Cavalier’s greeting might include licking to learn more about your adventures.
Check out the video. Don’t forget to subscribe to our @RaisingYourPetsNaturally YouTube channel.
Your Cavalier May Be Licking Because He’s Stressed
However, not all licking is tied to happy moments. Sometimes, licking can indicate stress or anxiety. This type of licking is known as a submissive or appeasement gesture. Essentially, your dog is trying to communicate that they mean no harm. You might notice this behavior around guests or strangers, where your dog licks excessively as a way to navigate the interaction. In some cases, they may even start licking their paws or nearby objects if they’re feeling particularly anxious.
How To Stop Your Cavalier King Charles Spaniel From Licking So Much
If your Cavalier’s licking becomes excessive, there are steps you can take to manage it. For instance, if your dog is licking because you taste good or they’re excited to see you, allow a quick lick and then gently redirect them. You can offer a chew toy or a bone to give them something else to focus on. This simple redirection helps channel their energy into a more appropriate activity while still acknowledging their excitement.
When licking is tied to stress, it’s especially important to avoid punishing your Cavalier. Punishment can actually make the behavior worse, as your dog may lick even more in an attempt to appease you. Instead, remain calm and redirect their attention to another behavior, such as sitting or playing with a toy. Addressing the root cause of your Cavalier’s stress and anxiety is key. Building their confidence through positive dog training can make a big difference. As your dog becomes more comfortable in stressful situations, the need for licking as a coping mechanism will naturally decrease.
In some cases, excessive licking may require professional help. If your dog’s licking seems compulsive or tied to high levels of stress, start by consulting your holistic veterinarian. They can check for any medical issues and look at your dog’s behavior history. From there, a dog behavior specialist can help you create a customized dog behavior modification plan to address your Cavalier’s needs, making life easier and more enjoyable for everyone.
If your Cavalier King Charles Spaniel’s licking is becoming a challenge, know that you’re not alone, and there are positive steps you can take to address it. With a little patience and the right approach, you can better understand why your Cavalier licks and guide them toward healthier ways of expressing themselves. If you’re feeling stuck or need personalized guidance, I offer one-on-one phone and Skype sessions to help you and your Cavalier navigate challenges like excessive licking. Together, we can create a plan that works for your unique pup and helps strengthen your bond.
Do you have a licker on your hands?
Google Ad Below [...]Read more...
September 3, 2024The Importance of Enrichment for Senior Cavalier King Charles Spaniels
Oh, Dexter. My senior Cavalier King Charles Spaniel, will be fifteen on October 6, 2024! I’m over the moon happy that he has led a long, happy life. He was diagnosed with Chiari malformation and syringomyelia in 2012, and I didn’t think he would have a very long life. Eventually, his MVD diagnosis also rolled in. But, despite his medical conditions, he has been thriving. He’s not just alive, he’s kicking!
I’m not going to lie. He started showing his age and some cognitive decline a few years ago. I have written about his life on my first blog, Raising Your Pets Naturally, so make sure you head over there for even more about Dexter’s life and care. But today, I wanted to discuss some of the things I have done to help keep Dexter as sharp as possible and try to keep canine cognitive dysfunction syndrome (CCDS) at bay. Through my experiences and research, I’ve seen how diet, positive training, and environmental enrichment can make a significant difference in maintaining his quality of life. So, let’s jump in.
What is Canine Cognitive Dysfunction Syndrome
Canine cognitive dysfunction syndrome (CCDS), is similar to dementia in humans and affects many senior dogs. Symptoms can be different from dog to dog, but some common behaviors include: disorientation, disrupted sleep patterns, decreased activity levels, and changed interactions with their environment and people. Research, including a study from the Journal of Veterinary Behavior (2016), shows that cognitive decline in dogs can significantly impact their quality of life. But early intervention and supportive care can improve CCDS symptoms and a dog’s quality of life.
The Importance of Canine Enrichment for Senior Cavaliers
Environmental enrichment is important for helping senior Cavaliers with canine cognitive dysfunction syndrome. Canine enrichment is about engaging your Cavalier’s senses, engaging their minds, and keeping them moving. I always think about “living life to the fullest.” I mean, we brought our Cavaliers into our homes so we can enjoy them and do fun things with them. Although they are beautiful, they deserve more than just a life where they lie around all day and do nothing. Just because they are seniors, doesn’t mean this mentality should change, although their activities will need to be adjusted to meet their individual needs. And it’s not just me; there’s research that backs up this theory.
Mental Stimulation: According to a study published in the Journal of Veterinary Internal Medicine (2016), mental stimulation through enrichment activities helps slow cognitive decline in senior dogs. Puzzle toys, interactive games, and scent-based activities keep the brain engaged, potentially delaying the progression of CCDS symptoms.
Reduces Stress: Canine enrichment is a great way to help reduce anxiety and stress in senior Cavaliers dealing with cognitive decline. Engaging activities and sensory stimulation can make a big difference. By adding enrichment routines to their day, you’re helping your dog feel calmer and more secure, which can ease some of the stress and anxiety that often come with cognitive issues.
Behavioral Improvement: Enrichment activities can make a big difference for senior Cavalier King Charles Spaniels who are restless or pacing. By offering mental and physical stimulation, these activities help reduce repetitive behaviors and keep your dog more relaxed.
Enhanced Quality of Life: Enrichment isn’t just about keeping your Cavalier busy. It’s about improving their overall quality of life. Engaging in enjoyable and stimulating activities brings more enjoyment, engagement, and a sense of purpose to their days, making their lives more fulfilling.
Simple Enrichment Ideas to Boost Your Senior Dog’s Quality of Life
Enrichment doesn’t have to be complicated or time-consuming. It’s all about finding simple, enjoyable activities that stimulate your senior Cavalier’s mind and body. Here are some ideas to get you started. And don’t forget to check out our article on Cavalier Enrichment Ideas.
Interactive Toys: Toys that dispense treats or require problem-solving are fantastic for mental stimulation. Depending on your Cavalier, you can use treat-dispensing toys or lick mats. When Dexter was younger, treat dispensing toys and frozen Tux toys were a hit. Now, he enjoys lick mats and snuffle mats. Food toys engage your dog’s sense of smell and taste.
Scent Games: Speaking of scent games, Dexter has always loved using his nose. Try hiding treats around the house or yard and let your Cavalier find them using his nose. Scent games are a natural way to keep your Cavalier active and provide both mental and physical exercise in a way most dogs love.
Positive Dog Training Sessions: Short, positive dog training sessions with simple cues or tricks are highly rewarding. They keep your Cavalier’s brain sharp and help build a stronger bond through shared activities.
Varied Walks or Strolls: Don’t get into a rut of going on the same walk, to the same park, on the same trail. Changing up your walking routes introduces new sights and smells. This variety provides your Cavalier with cognitive stimulation and keeps your walks fresh and interesting.
Comfortable Environment: Make sure your senior Cavalier’s living space is safe and cozy. Look out for any obstacles, and ensure good footing below. Whether you have carpet, carpet runners, grippy socks, ToeGrips or all of the above, traction is incredibly important for senior Cavaliers. They don’t have the same core strength to hold themselves up, and slick floors can be very scary and even cause injury if they slip or splay out.
Canine Fitness and Strength Building: I highly recommend setting up some sessions with a canine rehabilitation professional. Working with Dr. Sam, Dexter’s strength has been so important in his overall health and wellness. And our at home exercises aren’t just a way to keep him fit. They are also another form of enrichment, since he loves doing them! Engage in simple at-home exercises like sit-to-stand and sit-to-down exercises to help maintain your Cavalier’s muscle strength and joint mobility. Gentle range-of-motion exercises can also support your senior dog’s overall physical health and comfort.
Supporting Cognitive Health with Diet and Nutrition
Diet plays a crucial role in managing cognitive decline in senior dogs. According to research published in the Journal of Veterinary Internal Medicine (2019), a diet rich in specific vitamins and nutrients can significantly support cognitive health. Key vitamins such as vitamin E and vitamin C act as antioxidants, protecting brain cells from oxidative stress and easing cognitive issues. B vitamins, including B6, B12, and folic acid, are essential for maintaining healthy brain function. Omega-3 fatty acids, commonly found in fish and fish oil supplements, also play a vital role in improving cognitive function and managing symptoms of cognitive decline. Including these vitamins and nutrients in your dog’s diet, either through high-quality dog food (preferably fresh) or supplements, can help manage cognitive decline and enhance their overall quality of life.
Dexter, is proof of the benefits of a fresh diet. His meals are carefully prepared with high-quality, fresh ingredients and free from unnecessary chemicals. I’m convinced this fresh, balanced diet, rich in essential nutrients, has played a significant role in keeping his mind sharp and supporting his overall well-being.
How Positive Training Supports Cognitive Health in Senior Cavaliers
Positive training and routine play a vital role in supporting a senior dog’s mental sharpness and managing the effects of cognitive decline. As a positive dog trainer, I’ve taught Dexter plenty of fun and useful tricks, not just for good behavior, but also to keep his mind engaged and sharp. Each training session isn’t just about obedience; it’s about giving Dexter the mental stimulation he needs to stay mentally fit as he ages.
Incorporating regular training sessions into your dog’s routine is a great way to improve their cognition and their body. Focus on simple tricks and behaviors that challenge their mind and body without causing stress. I have noticed Dexter’s abilities change over the years, so it is important to change with them. By tailoring positive dog training sessions to your Cavalier’s needs and incorporating enjoyable activities into their day, you can help your Cavalier maintain their mental clarity and overall well-being.
Follow our YouTube channel for more Cavalier enrichment ideas!
Final Thoughts
Incorporating canine enrichment into Dexter’s daily routine has been essential for maintaining his quality of life. It’s not just about keeping him busy; it’s about enhancing his mental, emotional, and physical well-being. Enrichment is just one piece of the puzzle for Dexter’s health. A fresh, balanced diet and consistent, positive training are also vital for supporting his well-being as a senior dog.
Dexter’s vibrant health is a testament to how a combination of mental stimulation, nutritious food, and engaging routines can make a real difference. I encourage all Cavalier families to integrate these practices into their senior dogs’ lives. By focusing on enrichment, diet, and training, you can significantly improve your dog’s overall well-being and help them enjoy their golden years to the fullest.
I host a private Facebook group for Cavalier King Charles Spaniels, and we have a big focus on canine enrichment ideas and challenges to keep your Cavalier engaged and thriving!
How do you incorporate enrichment, diet, or training into your senior dog’s routine? Share your tips and experiences below!
Enrichment Increases Relaxation
https://www.ncbi.nlm.nih.gov/pmc/articles/PMC8772568/
https://www.sciencedirect.com/science/article/pii/S0168159123002691
Join our vibrant Cavalier King Charles Spaniel community on Facebook, support our dedication to pet wellness on Patreon, and stay updated with our weekly newsletter for invaluable tips and insights into raising happy, healthy pets. Together, let’s make a difference in our dogs’ lives!
Google Ad Below [...]Read more...
February 5, 2025How to Teach Cavalier King Charles Spaniel to Ignore Distractions
When I’m out with Stewart, my 7-month-old Cavalier, we get stopped a lot. People see his big, sweet eyes, his cute winter coat and wiggly little body and immediately want to say hello. And if this goes for people with or without their dog.
But here’s the thing, not every outing is a social event, and not every person or dog needs to be greeted.
Dog Socializing vs. Everyday Walks
There’s a time and place for socializing, and there’s a time for simply spending quality time with Stewart on our walks and outings. I make sure Stewart has appropriate and positive, structured experiences meeting new people and dogs in a controlled way. This helps him learn confidence, good manners, and appropriate greetings. But, at the same time, I’m teaching him an equally important skill, ignoring distractions such as people and dogs and walking politely with me.
If every walk turns into a meet-and-greet, dogs start to expect it. They pull toward every person or dog, they get frustrated when they don’t get to say hello. That can lead to barking, lunging, or general overexcitement, making walks stressful instead of enjoyable.
Why It’s Important to Teach Your Dog to Ignore Other Dogs and People
Not Every Dog Wants to Say Hello
Some dogs are nervous, in training, or simply not interested. Teaching Stewart to walk past other dogs calmly means he won’t invade another dog’s space or make an already anxious dog uncomfortable.
People Aren’t Always Dog People
Shocking, I know! But not everyone wants a happy little Cavalier bouncing up to them. Some people are afraid of dogs, allergic, or just in a hurry. Stewart is learning to walk past without expecting attention makes life easier for everyone.
Impulse Control is a Life Skill
Dogs who can stay focused, even when exciting things are happening around them, are safer and more enjoyable to live with. If Stewart learns that he doesn’t always get what he wants the moment he wants it, he’ll be better at handling frustration in other areas of life too.
Not Every Walk is About Socializing
Sometimes, I just want to enjoy a peaceful walk with Stewart. He doesn’t need to greet everyone to have a fulfilling experience, sometimes sniffing, walking together, and taking in the world is enough.
Better Walks in Busy Places
By teaching Stewart to walk with me instead of focusing on every dog or person, our walks are smoother and more enjoyable. Crowded sidewalks, busy parks, or narrow trails are much easier to navigate when he stays by my side rather than pulling toward distractions.
Prepping for Travel & Public Outings
I plan on traveling with Stewart, airports, dog-friendly boats, outdoor dining, places where he’ll need to stay close and focused on me. Teaching him now that he doesn’t always get to greet everyone will make these experiences stress-free and enjoyable for both of us.
Don’t forget to subscribe to @CavalierTipsandFun for more videos!
How I’m Teaching Stewart to Walk Past Distractions
Reward Calm Choices
When Stewart notices a dog or person, I reward him. I’m teaching him they=treats. Eventually, he will start to make that connection, see the distraction and look at me for the reward. This is what I’m going for. Over time, he’ll learn that staying focused on me, and it’ll be a non-event for him, he’ll simply walk past without even thinking about stopping to greet.
Use Distance
If Stewart’s too excited or distracted, I create more space between us and the distraction to help him refocus. As he gets better at ignoring, I’ll gradually close that gap, making it easier for him to pass by calmly.
Give Him a Job
I use cues like his name game, watch me, paws up, touch to keep his attention. Engaging his brain with productive tasks means he’s less likely to pull toward distractions.
Set Clear Expectations
I make sure Stewart knows that pulling towards people or dogs does not work. If he starts to pull, I either toss in his name game, stop and wait for him to renege, or add more distance. It truly depends on the situation. I do want him to be successful.
Handling Approaching People
When someone is steadily approaching your Cavalier, how you handle it depends on your goal at that moment. As a positive dog trainer, sometimes I want to explain and educate. If so, then I’ll squat down with Stewart, reward him for staying focused on me, and let the person know we’re training and practicing ignoring distractions. If I choose to say hello, I tell Stewart, “Let’s say hi,” and calmly approach. But sometimes, I just want to keep moving, so I give a quick, upbeat “We’re not saying hello, thank you!” and continue walking, keeping Stewart focused on me. It’s all about setting the tone for the interaction while making sure my dog stays engaged and confident.
Finding the Balance
There’s a time and place for socializing, and there’s also a time to focus on the walk itself. If you do want to stop and say hi, try to stop about 10 feet away from the other person or dog and ask first if it’s okay. Keep in mind that others might be training their dogs or dealing with their own challenges during the walk, so giving them some space is always a good idea. Being considerate makes the experience better for everyone, whether it’s a quick greeting or just calmly walking by each other. I then give Stewart the cue, “Let’s say hi,” so he knows he has permission to greet.
There’s nothing wrong with letting your dog greet others when it’s appropriate, but it’s just as important for them to learn that not every outing is a social event. Teaching Stewart when it’s time to engage and when it’s time to focus on me makes him a better walker and ensures our walks stay enjoyable.
When you’re walking your Cavalier King Charles Spaniel, how do you decide when it’s time to socialize and when it’s time to focus on the walk?
Google Ad Below [...]Read more...
April 21, 2024Tips for traveling with your Cavalier King Charles Spaniel. Dog-friendly vacation ideas.
Follow @CavalierTipsandFun for more videos.
Don’t forget to subscribe to @RaisingYourPetsNaturally for more!
Your comments and questions are always welcome below.
Join our vibrant Cavalier King Charles Spaniel community on Facebook, support our dedication to pet wellness on Patreon, and stay updated with our weekly newsletter for invaluable tips and insights into raising happy, healthy pets. Together, let’s make a difference in our dogs’ lives!
[...]Read more...
October 15, 2024Cavalier King Charles Spaniel Travel Tips
As a Cavalier mom and positive dog trainer, I know how important it is to help our Cavaliers feel comfortable and safe during car rides. Whether you’re planning a quick trip to the park or a longer dog-friendly road trip, making sure your Cavalier King Charles Spaniel enjoys the car ride is key to a stress-free trip for both you and your dog.
When Dexter and I hit the road, I never have to worry about how he’ll handle the ride. He’s a fantastic travel companion because I spent time training him to feel confident and at ease in the car. Today, I want to share my top tips on how you can prepare your Cavalier for car travel and road trips and turn them into a relaxed, happy traveler too.
1. Start with Short and Positive Rides
Just like with any new experience, easing your Cavalier into car rides instead of popping them into the car for a twelve-hour road trip is super important. Begin by taking short trips to fun, dog-friendly places like the local park or pet store. Keep the first few rides short and sweet, no more than ten-to-fifteen minutes. The goal is to associate the car with positive and fun destinations. A trip to the vet does not count as a fun visit for most dogs.
2. Create a Safe Space in the Car
Safety should always be a priority when traveling with your Cavalier. A secure dog car seat or crash-tested harness designed for small breeds like Cavaliers is a must. I personally recommend looking into the Center for Pet Safety’s approved products, as they conduct independent crash testing for dog travel gear. If a brand states they are crash tested, make sure to watch their crash tested video.
Dexter typically travels in a small crate. Because of his Chiari Malformation and syringomyelia and large size, travel harnesses aren’t the most comfortable for him. However, when we travel in the small car, a crash-tested and passed (yes, make sure they have passed the test) is our go-to. The key is to find a comfortable yet safe setup so your Cavalier feels relaxed without compromising their security.
3. Pack Familiar Comfort Items
Make your Cavalier feel more at home by packing some familiar items for the ride. When Dexter was a puppy, he would cozy up with his baby blanket and soft toy. Now, he has a therapeutic mat inside his crate. He likes to stay cool, so I also have a fan pointing at him. These little comforts can help reduce anxiety and make the ride smoother for dogs who may initially feel unsure about the car.
If your Cavalier is a bit anxious, place something with your scent, like a worn T-shirt next to your Cavalier. Your presence, even in the form of scent, can be calming for your Cavalier, especially if they’re a bit nervous during the first few rides.
4. Plan for Frequent Breaks
When traveling for more than an hour, make sure to schedule frequent potty and stretch breaks. Cavaliers are active little dogs, and, like all of us, they need to stretch their legs and take in their surroundings. I like to plan stops at dog-friendly rest areas or parks where Dexter can explore, do his business, and get a little energy out before continuing the journey.
Remember, each break is an opportunity for positive training. Use it as a chance to reward your dog for good behavior during the ride, and they’ll look forward to the next part of the trip.
5. Help Your Cavalier Relax with Calming Music
One of my favorite dog travel hacks is playing calming music designed for dogs during long car rides. I’ve been a fan of the iCalmDog portable speaker, which plays clinically-tested music that helps keep dogs calm and relaxed. Just be careful not to fall asleep at the wheel yourself!
Check out our all Cavalier calming playlist on YouTube!
6. Monitor Your Cavalier’s Well-Being
Keep an eye on your Cavalier’s behavior throughout the trip. Some Cavaliers may experience motion sickness, especially on longer rides. If your dog starts to drool excessively, whine, or seem uncomfortable, it might be time for a break. You can try natural remedies like ginger treats (with your vet’s approval) or consult your vet for other options.
If your Cavalier seems overly tired or stressed, don’t be afraid to cut the trip short. The goal is for travel to be a positive experience, and pushing them too far can have the opposite effect.
By starting with short, positive experiences and keeping their safety and comfort in mind, you can help your Cavalier King Charles Spaniel become a happy traveler. Dexter loves our road trips, and I’m sure your Cavalier will too!
Do you have any favorite travel tips for Cavaliers? Drop them in the comments!
Follow us on YouTube For fun dog-friendly travel adventures!
Google Ad Below [...]Read more...
December 25, 2024Winter Tips for a Cavalier King Charles Spaniel
Brrrr, it’s cold out there! Winter in Ohio can be tough, and today, it’s a chilly 15 degrees. Thankfully, Stewart and I are bundled up inside, but it’s the perfect time to share some essential winter safety tips for your Cavalier King Charles Spaniel. Whether you’re venturing outdoors or staying warm indoors, these precautions and activities will help keep your pup safe, healthy, and happy all winter long.
Safety First: Protecting Your Cavalier in Winter
Limit Outdoor Time
Our Cavaliers are family members, and they thrive indoors with us. While Stewart loves his outdoor potty breaks and a quick sniff around the yard, I always limit his time outside when temperatures dip. Frostbite and hypothermia are real risks for dogs, especially small breeds like Cavaliers. Keep outings short, and always monitor your pup for signs of discomfort.
Protect Those Paws
A dog’s paw pads aren’t built to handle extreme cold or icy surfaces. For quick potty breaks, toddler socks can be a lifesaver; they’re easy to put on and don’t need to be perfect since they’re just for a short trip. Shoot for dark colors, so that if one falls off, it’s easier to find in the snow. For longer walks or outdoor play, dog boots like Saltsox are fantastic options. If your Cavalier goes outside barefoot, be sure to clean their paws thoroughly with a warm washcloth or natural pet wipes to remove ice, salt, and chemicals that could irritate their skin. I make up a bowl of water with a splash of 4-Legger shampoo and a washcloth to clean paws. I make a new batch each day. (Order 4-Legger today with promo code RaiseNaturally20 for 20% off your first order.)
Scoop the Potty Area
I always scoop a clean, clear area in the yard for potty breaks. Cavaliers, like most dogs, prefer a neat spot for their business. A wide, shoveled path ensures your Cavalier can move around comfortably without getting buried in snow.
Coats and Sweaters for Your Cavalier
Dog coats and sweaters are a must for Cavaliers. Look for a jacket that provides full range of motion and covers your pup’s back and belly. Indoors, a cozy sweater can keep your Cavalier comfortable. If you notice your Cavalier sleeping in a tight ball, or even shivering, a dog sweater is a great idea. Stewart’s favorite sweaters are custom-made by MeekByDesign, but there are plenty of great options online or in pet stores.
Should a Cavalier Wear a Hat in the Winter?
Cavaliers’ long, luxurious ears attract snow and ice like a magnet! A lightweight dog hat or snood can protect your Cavalier’s ears during snowy adventures. Afterward, be sure to dry their ears gently with a soft towel.
Staying Warm and Cozy Indoors
When your Cavalier comes inside from the snow or cold, use a super-absorbent microfiber towel to dry him off thoroughly. For an extra touch of luxury, I like to pop a favorite blanket in the dryer so my dog can snuggle up with something warm. These little comforts make a big difference on chilly days!
Indoors, I keep Stewart active and engaged with puzzle toys, hide-and-seek games, and short training sessions. A mentally stimulated pup is a happy pup, even when it’s too cold for a long walk.
Winter Nutrition for Cavaliers
Did you know that certain foods can help your Cavalier King Charles Spaniel stay warm during the chilly months? According to Traditional Chinese Medicine (TCM), foods have energetic properties that can influence the body’s temperature and overall balance.
In the winter, it’s beneficial to incorporate “warming” proteins into your dog’s diet. Proteins like chicken, lamb, venison, and even goat are considered warming and can help offset the cold temperatures. These proteins are especially good for dogs who seem more sensitive to the cold or have lower energy during the winter.
You can also include warming spices and herbs like ginger or turmeric in small, dog-safe amounts to add a cozy touch to their meals. These not only are warming, but also support joint health during cold weather.
If you’re new to adjusting your dog’s diet seasonally, start slow by adding one or two warming ingredients to their current meals. Always consult with your vet or a canine nutrition expert to ensure your Cavalier’s diet remains balanced and meets their individual needs.
Embrace the Season
Stewart may be new to my home, but we’re already making the most of winter together. From brisk walks in his cozy new jacket to snuggling under a warm blanket on chilly evenings, these little moments remind me of the special bond we share. No matter the season, Cavaliers have a way of bringing warmth and joy to our lives.
How do you keep your Cavalier comfortable and happy during the winter months? Share your tips below, I’d love to hear them!
Google Ad Below [...]Read more...
March 30, 2025Health Benefits of Omega-3s for Cavaliers
Omega-3 fatty acids are one of the most important nutrients for Cavaliers, yet they’re often overlooked or misunderstood. These essential fats support heart health, brain function, joint mobility, skin condition, and even immune function. But not all omega-3 sources are created equal. Fresh fish, supplements, and plant-based options vary in effectiveness, and factors like oxidation and sourcing impact their quality. In this guide, I’ll break down the best omega-3 sources, how to choose high-quality options, and what to avoid to ensure your Cavalier King Charles Spaniel gets the maximum health benefits from their Omega-3s.
Skin and Coat Health
Omega-3s help maintain a healthy skin, reducing dryness, flakiness, and itchiness. They also improve coat condition, making your Cavalier’s fur shinier and softer. Cavaliers, like many other breeds, can be prone to allergies and skin sensitivities, and omega-3s can help manage these issues by reducing inflammation in the skin.
Joint Health and Mobility
As Cavaliers age, they can develop arthritis and joint stiffness. Omega-3s have been shown to reduce inflammation in the joints, helping to alleviate pain and improve mobility. Dogs receiving sufficient omega-3s often experience less stiffness and better flexibility, which is particularly important for senior Cavalier King Charles Spaniels.
Brain and Cognitive Function
DHA is a crucial component of brain cell membranes and plays a significant role in cognitive function. In Cavalier puppies, it supports brain development and learning. In senior Cavaliers, it helps prevent cognitive decline and supports memory and problem-solving skills. Studies have shown that dogs supplemented with DHA perform better on cognitive tests than those that do not receive adequate amounts.
Heart Health
Omega-3 fatty acids are essential for supporting cardiovascular function by helping regulate heart rhythm, reduce blood pressure, and improve circulation. For Cavaliers, who are especially prone to mitral valve disease (MVD), a common heart condition in the breed, omega-3s are even more important. Given their susceptibility to MVD, ensuring your Cavalier’s diet is rich in omega-3s can play a crucial role in supporting their heart health and may help slow the progression of the disease.
Immune System Support and Inflammation Control
Chronic inflammation is a factor in many health issues, including autoimmune conditions, allergies, and even cancer. For Cavaliers, who are prone to conditions like Chiari malformation, managing inflammation is especially critical. Omega 3s play an important role in regulating the body’s inflammatory response, helping to balance the immune system and reduce excessive inflammation. By incorporating omega 3s into your Cavalier’s diet, you can help protect against the inflammation that worsens conditions like Chiari malformation and support overall immune health.
Best Omega-3 Sources for Cavaliers
The best omega-3 sources for dogs are those that provide EPA (eicosapentaenoic acid) and DHA (docosahexaenoic acid) in their most bioavailable forms. These two types of omega-3s are the most beneficial for dogs, as they are directly used by the body to support a variety of vital functions, from heart health to joint mobility. The most bioavailable forms of these omega-3s are typically found in marine-based sources, such as oily fish. Fish like salmon, sardines, mackerel, and anchovies are excellent options because they contain high levels of both EPA and DHA, making them ideal for supporting your Cavalier’s health. These fish provide omega-3s in a form that’s easy for the body to absorb, ensuring that your dog gets the maximum benefits.
In addition to fish, fish oil supplements can also be a great source of omega-3s. However, it’s important to choose high-quality, purified fish oils that are free of contaminants like mercury. If your Cavalier is sensitive to fish or you prefer plant-based sources, algae oil is another excellent option, as it provides DHA without the fishy aftertaste or concerns about ocean contaminants. While flaxseed and chia seeds offer plant-based omega-3s, they contain ALA (alpha-linolenic acid), which the body must convert into EPA and DHA, an inefficient process for dogs. This means that marine-based omega-3s are typically the best option for achieving optimal health benefits. By rotating between these high-quality sources, you can help ensure your Cavalier is getting the most effective omega-3s for their needs.
Watch our fresh fish DIY and don’t forget to subscribe to @CavalierTipsandFun for more!
Fresh Fish (Whole Food Source of EPA and DHA)
Feeding fresh, oily fish is one of the most natural ways to provide omega-3s. However, choosing the right type of fish is essential due to concerns about mercury levels, sustainability, and proper sourcing.
Some of the best options for Cavaliers include:
Sardines: Small, low-mercury fish that are naturally high in omega-3s. They are one of the safest whole-food sources.
Anchovies: Similar to sardines, anchovies are rich in DHA and EPA while having minimal contamination risks.
Herring: Often used in high-quality pet foods, herring is another small, oily fish packed with omega-3s.
Atlantic Mackerel: This species is safe, but avoid king mackerel, which is high in mercury.
Wild-Caught Salmon: A great source of omega-3s, but farmed salmon may contain higher levels of contaminants.
When feeding fresh fish, it’s important to either lightly cook the fish or feed it raw if it’s safely sourced. Cooking fish too much can break down some of the omega-3s, while raw fish (from a trusted, safe source) can provide the most nutrients. However, if you choose to feed raw fish, it should be frozen for a week first to reduce the risk of parasites, which can be a concern with certain types of fish.
It’s essential to avoid fish that have been prepared with added salt, spices, or sauces. These seasonings can be harmful to dogs. Also, always avoid feeding cooked bones, as they can splinter and cause serious internal injuries.
Fish Oil Supplements
Many pet parents turn to fish oil supplements to provide omega-3s, but not all fish oil supplements are the same. Choosing the right one for your Cavalier is important to ensure you’re giving them the best quality and the most effective nutrients.
How to Choose a High-Quality Fish Oil
When selecting a fish oil supplement, look for species-specific labeling. Instead of settling for generic “fish oil,” opt for oils like sardine oil, anchovy oil, or krill oil. This ensures transparency in sourcing and gives you a better idea of where the oil is coming from.
When choosing a fish oil supplement, it’s important to look at the levels of EPA and DHA, the two types of omega-3 fatty acids that provide the most health benefits for your dog. The label on the bottle should specify the amount of EPA and DHA in each serving, not just the total amount of fish oil.
For example, a bottle might say it contains 1,000 mg of fish oil per serving. But if the label doesn’t show how much of that is EPA and DHA, it’s hard to know how much of the oil is actually providing the beneficial omega-3s your dog needs.
Some fish oils may have more EPA, which is great for joint and heart health, while others may have more DHA, which supports brain function and reduces inflammation. Knowing exactly how much of each omega-3 is in the oil allows you to be more confident that you’re giving your Cavalier the right amount for their specific health needs. This way, you can make sure you’re getting the full benefits of the omega-3s in the supplement.
Also, choose products that are third-party tested. Reputable brands will test their oils for harmful contaminants like heavy metals, PCBs, and oxidation levels. This helps ensure the oil is safe for your dog and that it hasn’t been compromised during production.
Liquid vs. Capsules
Fish oil comes in two common forms: liquid and capsules. Liquid fish oil (often found in pump bottles) is convenient because it’s easy to dose, but it’s more prone to oxidation once opened. Oxidation occurs when the oil is exposed to light, heat, or air, so it must be stored in the refrigerator and used quickly to maintain its freshness.
On the other hand, capsules are more stable since the oil is protected from air exposure, which reduces the risk of oxidation. However, they can be harder to dose accurately, especially for small dogs.
Oxidation Risks
One of the biggest concerns with fish oil is oxidation. Omega-3s are very sensitive to light, heat, and oxygen, and when the oil oxidizes, it can lose its effectiveness and even become harmful. Signs of rancid fish oil include a strong fishy smell or an unusual taste.
To minimize the risk of oxidation, here are a few tips:
Choose dark glass bottles instead of clear plastic, as glass helps protect the oil from light exposure.
Store the fish oil in the refrigerator after opening to keep it fresh.
Use the oil within 30 to 60 days of opening to ensure you’re getting the best quality.
By taking these steps to choose a high-quality fish oil and storing it properly, you can help ensure your Cavalier gets the full benefits of omega-3s for their heart, joints, and overall health.
Green-Lipped Mussels: A Powerhouse for Joint Support
Green-lipped mussels (Perna canaliculus), native to New Zealand, are one of the most beneficial natural sources of omega-3s for dogs. Unlike traditional fish-based omega-3 supplements that provide primarily EPA and DHA, green-lipped mussels contain a unique omega-3 fatty acid called ETA (Eicosatetraenoic Acid). ETA has been found to have additional anti-inflammatory properties, making it especially helpful for dogs suffering from joint issues like arthritis.
The anti-inflammatory effects of ETA, along with the presence of glucosamine and chondroitin, make green-lipped mussels an excellent option for promoting joint health. These compounds work together to support cartilage repair, reduce inflammation, and enhance mobility in dogs experiencing joint stiffness or discomfort. This combination is particularly beneficial for dog breeds, like Cavaliers, that are prone to developing joint issues as they age.
Comparing Omega-3 Content in Green-Lipped Mussels vs. Fish
In terms of EPA and DHA content, green-lipped mussels may not provide as high a concentration per serving as fatty fish, but their ETA provides an extra layer of anti-inflammatory benefits. This makes green-lipped mussels an excellent addition to a dog’s diet, particularly for those with joint concerns.
How to Feed Green-Lipped Mussels to Your Dog
Green-lipped mussels are often available as freeze-dried powder or in chewable treat forms. Both forms make it easy to incorporate them into your dog’s daily routine, but the powder can be sprinkled over food or mixed into homemade dog meals for ease of use.
As with any supplement, it’s important to start with a small amount to monitor how your dog responds, especially if they are new to green-lipped mussels or have a sensitive digestive system. For the dosing of green-lipped mussels, it’s always best to refer to the product-specific guidelines since the concentration can vary depending on the form (freeze-dried powder, chewables, etc.) and brand. However, a general recommendation often seen in supplements for dogs is:
Start with 1/4 teaspoon per 10 pounds of body weight per day for powder form. This can be adjusted based on the dog’s response and their specific needs.
Plant-Based Omega-3s: Less Effective for Dogs, but Still Valuable
When it comes to omega-3 fatty acids, plant-based options are less efficient for dogs compared to animal sources like fish, as they primarily contain ALA (alpha-linolenic acid). While ALA is an essential omega-3 fatty acid for humans, dogs face challenges in converting ALA to the more bioavailable forms, EPA (eicosapentaenoic acid) and DHA (docosahexaenoic acid), which are the forms most beneficial for their health. This makes plant-based omega-3s less effective for dogs in supporting the same health benefits as those derived from marine sources.
Why ALA Is Less Effective for Dogs
Dogs have a relatively inefficient ability to convert ALA into EPA and DHA. The process of conversion requires specific enzymes, which dogs do not produce in large enough quantities to convert sufficient ALA into the needed forms of omega-3s. As a result, while plant-based omega-3s can still offer some benefits, they are not as effective at delivering the omega-3s that support joint health, cognitive function, and heart health in the same way that fish-derived omega-3s do.
Nevertheless, plant-based sources of omega-3s are still valuable as part of a balanced diet. They can provide supplemental omega-3s and contribute to overall health but should not be relied on as the primary omega-3 source for dogs.
Common Plant-Based Omega-3 Sources
Flaxseeds: Flaxseeds are one of the most popular plant-based sources of ALA omega-3s. They can be ground and added to your dog’s food. However, the conversion rate of ALA to EPA and DHA is low in dogs, so while flaxseeds may offer some benefits, they should not be relied on exclusively for omega-3 needs.
Chia Seeds: Like flaxseeds, chia seeds are rich in ALA. These tiny seeds are highly nutritious and can be added to a dog’s meals. They can absorb water and form a gel, which can be helpful for digestive health. While chia seeds may offer some benefit, they should be seen as supplementary, not primary, sources of omega-3s for dogs.
Hemp Seeds: Hemp seeds contain ALA as well, along with a well-balanced ratio of omega-3 and omega-6 fatty acids. While these can contribute to overall fatty acid intake in dogs, their conversion to EPA and DHA is also limited. Hemp oil, a more concentrated form, may be more effective but still not as efficient as fish oil or algae oil in providing the omega-3s dogs need for optimal health.
Algae Oil: The Better Plant-Based Alternative
While plant-based sources like flaxseeds and chia seeds are valuable in certain aspects, algae oil is usually a better plant-based option for dogs. Algae oil is derived from marine algae, which naturally produce DHA (and sometimes EPA) without requiring the conversion process. Unlike other plant-based sources that contain ALA, algae oil provides a direct source of DHA, the omega-3 that plays a critical role in brain function, heart health, and reducing inflammation.
Algae oil is especially beneficial for pet parents who prefer to avoid fish-based products for ethical, environmental, or allergy reasons. It provides the same essential omega-3 fatty acids found in fish oil, but without the potential risks associated with mercury contamination or fish-based allergens. This makes algae oil a great plant-based alternative for ensuring your dog receives the health benefits of omega-3s.
Algae oil supplements are available in capsules or liquid form and can be incorporated into your dog’s diet just like fish oil. The recommended dosage varies by brand, so it’s important to follow the manufacturer’s guidelines and consult your vet to ensure the right amount for your dog.
While algae oil is a great alternative to fish oil, there are a few differences to consider. One of the main differences is that fish oil generally contains more EPA, an omega-3 that is particularly helpful for reducing inflammation and supporting joint health, while algal oil tends to have more DHA, which is important for brain and eye health. Because of this, if your dog needs more EPA for inflammation or joint issues, fish oil might be a better choice. Additionally, algae oil can be more expensive than fish oil, and it may not be as widely available in stores. Another thing to note is that fish oil is often more bioavailable, meaning it’s easier for dogs to absorb and benefit from. That said, algae oil is still a very good option, especially if you’re looking for a more sustainable, vegetarian, or fish-free supplement. It’s always a good idea to talk to your vet about which type of omega-3 is best for your dog’s specific health needs.
How Much Omega-3 Does Your Cavalier Need?
For general health, the recommended omega-3 dosage, specifically EPA and DHA, is typically between 20 to 55 mg per pound of body weight per day. If your Cavalier has specific health issues, like arthritis or inflammation, the dosage may increase to 50 to 100 mg per pound. If your dog is lacking omega-3s, you might notice signs like dry skin, excessive shedding, joint stiffness, or a dull coat. To ensure you’re giving the right amount, it’s important to consult your vet, who can recommend the proper dosage based on your dog’s size and health concerns.
Final Thoughts
Omega 3s are essential for your Cavalier’s overall health, supporting heart, brain, joint and skin function. By incorporating a variety of high quality omega 3 sources such as fish, green lipped mussels and supplements, you can ensure your Cavalier King Charles Spaniel receives a well rounded intake of these beneficial fatty acids.
Quality matters, so focus on bioavailable forms of EPA and DHA, and always rotate the sources you use to prevent imbalances. Whether you opt for fresh fish, fish oil or green lipped mussels, it’s crucial to store and handle these sources properly to avoid oxidation.
Before making any changes, check with your veterinarian to tailor an omega 3 plan that best suits your Cavalier’s individual health needs. Consistently including omega 3s in their diet will support long term health and vitality, helping your dog thrive at every stage of life.
Do you feed your Cavalier fresh fish?
Google Ad Below [...]Read more...
April 17, 2025Gentle, Safe, and Effective for Our Sensitive Cavaliers
Fleas and ticks. Just hearing those words makes me itch. But as a natural Cavalier Mom, I’ve always been cautious about what I put on or in my dogs, especially with delicate and sensitive breeds like Cavalier King Charles Spaniels. These little sweet hearts often have sensitive skin, luxurious coats, and sometimes underlying conditions like Chiari malformation or syringomyelia, which can make them more vulnerable to adverse reactions.
I’ve been on this natural journey for years, first with Dexter and now with Stewart. Along the way, I’ve learned that staying chemical-free when it comes to flea and tick care is absolutely possible, it just takes a little planning and a lot of label reading.
This is the natural flea and tick routine I’ve found works best for my Cavaliers.
Why I Choose a Natural Approach for My Cavalier King Charles Spaniels
Conventional flea and tick treatments may offer quick results, but they also come with serious risks. Side effects can range from skin irritation, itching, and digestive upset to more concerning issues like tremors, seizures, and in some cases even organ damage. These are not small concerns.
For a breed like the Cavalier King Charles Spaniel, those risks are even more concerning. Cavaliers are already prone to neurological conditions like Chiari malformation, seizures, tremors, and episodic falling syndrome. I’m especially cautious about using anything that lists seizures or neurological side effects as possible outcomes. It just doesn’t make sense to use a treatment that could trigger the very issues this breed is already vulnerable to.
Choosing a natural approach isn’t about trying to be perfect. For me, it’s about reducing chemical exposure wherever I can and building a thoughtful, layered prevention plan that supports overall health instead of relying on a single product to do it all.
My Natural Flea and Tick Prevention Plan for My Cavalier King Charles Spaniel
1. Regular Grooming and Bathing-I bathe Stewart every three to four weeks using a safe, gentle dog shampoo made without synthetic preservatives, artificial fragrances, or harsh surfactants. I’ve been using 4-Legger’s USDA-certified organic formulas for years because I trust their ingredient panel and transparency. They have a variety of formulas that help deter ticks and fleas.
Bathing regularly doesn’t just clean your Cavalier. It helps interrupt the flea life cycle. A good soak and lather can wash away flea eggs, dirt, and debris that might attract pests. When I use a shampoo that includes properly diluted essential oils known to repel fleas and ticks, it gives Stewart an extra layer of protection even after his bath is done.
2. Natural Tick and Flea Sprays for Daily Protection-Before every walk, I spray Stewart with a natural flea and tick repellent. I pay close attention to his legs, chest, tail, and belly, basically anywhere that might brush up against grass, shrubs, or wooded areas. These sprays are one of our most important layers of protection, and I use them daily during warm weather or anytime we’re heading into a high-risk area.
Over the years, I’ve rotated between trusted store-bought options and homemade recipes using properly diluted dog-safe essential oils. I always avoid sprays with synthetic preservatives or ingredients that could irritate a dog’s skin.
When I make my own, I tailor the recipe to the season, the environment, and even the behavior of my dog. Dexter, for example, used to try to catch bees, so I avoided blends with oils like rose geranium that might attract them. The key with any natural tick and flea spray is to apply it each time your Cavalier goes outside. These blends are not designed to last for hours at a time, and a quick re-spritz before each outing is what really makes the difference. I keep a bottle near the door so it becomes part of our daily walking routine.
DIY Natural Flea and Tick Spray for Dogs
This is one of my favorite natural sprays to help keep fleas and ticks at bay, without resorting to harsh chemical treatments. It’s simple to make, and you can use it on both your dog and yourself before heading outside.
What You’ll Need:
3 ounces distilled water
1/4 ounce vodka or grain alcohol (helps disperse oils evenly)
1/4 teaspoon vegetable glycerin (moisturizing and helps blend)
Essential Oils:
4 drops Cedarwood– repels fleas and ticks while being gentle on skin
4 drops Geranium– especially helpful against ticks
3 drops Lavender– calming and gently repels insects
1 drop Citronella– useful for deterring mosquitoes, fleas, and ticks
1 drop Peppermint– offers cooling relief and additional repellent support
How to Make It: Add all the ingredients to a 4-ounce (or larger) amber or cobalt blue glass spray bottle. Shake gently to combine.
How to Use It: Before walks or time outside, shake well and lightly mist your dog’s legs, belly, tail, and along the back. Always avoid spraying near the face and eyes. For areas like the ears, chest, or neck, spray a small amount into your hands first, then gently rub it into your dog’s fur. This helps you apply it more precisely and makes sure it reaches the coat and skin. Always apply when your dog is dry for best results.
Storage Tip: Store your spray in a cool, dark place and an amber or cobalt glass bottle helps protect the essential oils from light exposure, which can cause them to break down over time. Shake before each use to keep the oils properly dispersed.
Simple DIY Natural Flea and Tick Spray for Dogs
When I first started making Dexter’s flea and tick sprays, I kept things really simple. I used just distilled water and a few carefully chosen essential oils. Using just distilled water and essential oils is a great option if you plan to make small batches and use them up fairly quickly. It is easy, gentle, and perfect for Cavalier parents who want something simple. You will still need to shake the bottle well before each use, just like with any natural spray.
If you want your spray to blend a little more evenly and stay fresher a little longer, using the above recipe with the grain alcohol and vegetable glycerin can help. Alcohol acts as a natural preservative and helps the oils disperse a little better through the water. Glycerin can also add some moisture to the coat and skin.
Both options are good, it really depends on what fits best with your dog’s needs and your routine. If you are going through the spray quickly, distilled water and oils work just fine. If you want a little more staying power and an extra moisturizing boost, the version with alcohol and glycerin might be a better fit.
You can also check out four of Dexter’s natural flea and tick spray recipes on my Raising Your Pets Naturally blog.
Watch now and don’t forget to subscribe to @RaisingYourPetsNaturally YouTube for more!
Why Different Natural Tick and Flea Sprays Work for Different Dogs
One thing I learned through experience and from chatting with other natural pet parents is that not every spray works the same way for every dog. Some ticks are more common in certain regions and are repelled by specific essential oils. That’s why I rotate between formulas and stay flexible with what I use. If something stops working, I adjust. It’s not failure, it’s just part of the process.
3. Apple Cider Vinegar for Flea and Tick Support-Raw, unfiltered apple cider vinegar (ACV) is another natural tool I like to keep on hand as part of a layered approach to flea and tick prevention. While it won’t kill fleas or ticks, it can help make your dog less appealing to them.
You can make a simple spray by mixing equal parts raw ACV and distilled water in a spray bottle and lightly misting your dog’s legs and belly. Just be sure to avoid the face, and only use it on healthy, unbroken skin. If your dog has any skin sensitivities or open spots, it’s best to skip ACV topically.
You can also add a small amount of ACV to your Cavalier’s food or water. Not all dogs tolerate vinegar well, especially those with sensitive stomachs or urinary issues. It’s also important if you add it to your Cavalier’s water, they also have non-altered fresh water available.
4. Amber Collars for Natural Flea and Tick Repellent Repellant-Another layer is a raw Baltic amber collar. These collars are made from unpolished amber resin that naturally releases aromatic compounds when warmed by your dog’s body. These compounds can help repel ticks and fleas without adding any scent or chemicals to your dog’s skin.
While I wouldn’t rely on them as the only form of protection, I absolutely feel they can help in the overall care to keep our Cavaliers tick and flea free naturally. They’re lightweight, chemical-free, and easy to clip on. With Cavaliers, just make sure the collar sits comfortably behind their ears and doesn’t tangle with their feathering. If your Cavalier has Chiari malformation, this may not be an option if they can’t wear a collar comfortably.
5. Ultrasonic Tick Tags-Another tool to add to your flea and tick routine is an ultrasonic tick tag. There are various brands that make these small devices that clip onto your dog’s collar or harness. They emit a high-frequency pulse that humans and dogs can’t hear, but it’s designed to interfere with a tick or flea’s ability to orient themselves toward your dog.
These tags are scent-free and totally safe for sensitive dogs like Cavaliers. This type of tag is helpful during hikes, trail walks, or visits to areas known for higher tick populations. It’s a simple, noninvasive step that adds an extra layer of protection.
6. Diatomaceous Earth for Natural Flea and Tick Prevention-Food-grade diatomaceous earth is another natural tool I use as part of our flea and tick routine. It’s a fine powder made from fossilized algae that works by drying out the exoskeletons of pests like fleas and ticks. I don’t use it as a primary prevention method, but it’s a helpful layer, especially after we’ve been somewhere with higher pest exposure.
To apply, I lightly sprinkle a small amount down Stewart’s back and gently brush it into his coat, avoiding his eyes, nose, and mouth. It’s best used when your dog is dry and in a well-ventilated area. You can also use it on bedding or around baseboards during flea season as part of a regular cleaning routine.
Watch how I apply it and don’t forget to subscribe to @CavalierTipsandFun YouTube channel for more!
7. Using Garlic to Support Immune Health and Repel Fleas Naturally-Garlic might be controversial in some circles, but when used responsibly, it’s one of my go-to immune support tools. Garlic often gets a bad reputation because in 2000, they did a study on four dogs and gave them an extreme amount of garlic ( about 25 cloves a day for a 25-pound dog), and they had a bad reaction. That’s not even close to how we’d use garlic in a natural, supportive way. You can read the study here.
I started using fresh garlic years ago with Dexter, and it’s something I continue with Stewart now that he’s old enough for it. Garlic supports the immune system and helps repel fleas and ticks from the inside out. I only use fresh, organic garlic, peeled and minced about ten minutes before mealtime to allow the allicin to activate. Then I mix it into Stewart’s food. I never exceed the recommended amount and only feed garlic for up to three days in a row, followed by five to seven days off.
I never use garlic with puppies, pregnant or nursing dogs, dogs with anemia, or those with upcoming surgeries. It’s not a fit for every dog, so I always recommend checking with a holistic vet first.
Garlic Dose For Dogs: The approximate dose of fresh, organic garlic is 1/8 teaspoon for a 5 pound dog, 1/4 teaspoon for dogs between 6 and 10 pounds, 1/2 teaspoon for 11 to 15 pounds, 3/4 teaspoon for 16 to 20 pounds, and 1 teaspoon for dogs between 21 and 30 pounds. Dogs between 31 and 50 pounds can have 1 1/2 teaspoons, and those over 51 pounds can have up to 2 teaspoons.
8. Spotting and Removing Ticks and Fleas from Your Cavalier King Charles Spaniel-No matter how many prevention tools we use, I always do a hands-on check after walks or outings, especially during peak tick season. I check Stewart’s paws, armpits, ears, groin area, and the base of his tail. These are the spots where ticks love to latch on.
If I do find a tick, I remove it immediately with a tick remover or fine-point tweezers, making sure to grab close to the skin and pull straight out. Afterward, I place it in a bottle with alcohol and wash my hands. I’ve found this routine not only gives me peace of mind but also helps me stay in tune with any changes in Stewart’s skin or coat.
A Quick Note About Dexter’s Experience
As Dexter was in his late senior years and his neurological condition progressed, I started to notice the occasional flea here and there, more than we had seen in the past. His immune system wasn’t as strong, and that likely made him more vulnerable to pests. This isn’t uncommon in aging dogs or those with health challenges. Their bodies just don’t have the same defenses they once did.
I made it a daily routine to sit with Dexter and go over him carefully with a flea comb and a small jar of alcohol to catch any runners before they could become a real problem. I also stayed on top of sweeping and washing his bedding regularly. Thankfully, it never got out of control, just a flea here and there, but it reminded me how important it is to stay consistent.
It also reinforced why I’ve always chosen to avoid harsh flea treatments. With Dexter’s compromised system, exposing him to chemicals could have caused even more serious issues. Supporting his health naturally, with gentle and consistent care, was always the safest choice for him.
Final Thoughts on Natural Flea and Tick Care for Cavaliers
If you’re just starting your natural flea and tick care journey, start small. You don’t have to change everything at once. Pick one new step, try it, and see how it fits your dog’s life. Read labels. Ask questions. And most of all, give yourself grace as you navigate what feels right for you and your Cavalier.
Cavaliers are worth the extra effort, and with how sensitive they can be, choosing gentle, natural care just feels like the right thing to do.
Google Ad Below [...]Read more...
November 27, 2024Does your Cavalier King Charles Spaniel bark for attention? Maybe your Cavalier tosses a toy onto your lap, begging for a game of fetch. Or perhaps your Cavalier King Charles Spaniel barks incessantly to go outside and chase every squirrel in the neighborhood. These are classic examples of attention-seeking behavior and, while they may be funny at times, they can also become exhausting.
In this Cavalier blog, I’ll guide you through training your Cavalier to ask for attention politely or, even better, stop demanding attention altogether. But first, let me be clear. I am all about spending quality time with our dogs. Cavaliers thrive on love, play, and companionship, and I encourage plenty of bonding time. However, constant barking or pushy behaviors for attention are not things I would encourage in a dog. With positive dog training methods, good timing, and a proactive approach, we can change this demanding behavior.
Why Does My Cavalier Bark at Me for Attention?
Cavaliers are a playful breed and incredibly intelligent. They are quick learners and can learn behaviors we don’t even know we are teaching them, like barking for attention. Some Cavaliers may learn to bark for attention, paw, nudge, or give you the “look” for that snack. If they have done one or all of these things, and you gave them what they wanted, they’ve already made the connection: This behavior gets me what I want. For example, if barking speeds up dinner prep or prompts you to throw the ball, your Cavalier has been “trained” by their success.
But, don’t worry. You can change these demanding behaviors to better habits. So, let’s get started at teaching your Cavalier to be calm and quiet for the things they want.
Steps to Stop or at Least Curb Attention-Seeking Behaviors
Increase Quality Time: Cavaliers are highly social and crave interaction. You know that. That’s why they are your breed of choice, right? If your pup is constantly asking for attention, they may feel their current playtime or bonding time isn’t enough. Start by increasing their daily activities by about 50 percent. For example, if you play games with your Cavalier five times a day, bump it up to seven or eight short sessions. The same goes for walks, training, or cuddle sessions. Increase the duration or quantity of their interactive activities. And I do mean interactive vs. just placing a food toy on the floor. Those are all fine and well, but, in most cases, your Cavalier is craving your time. Read more about canine enrichment.
Get Ahead of the Demands: Observe when your Cavalier typically starts seeking attention. If they usually bark for play at 11 a.m., initiate a play session at 10:45 instead. By starting the activity before they ask, you’re rewarding their good and polite behavior rather than their pushiness.
Ignore Pushy Behaviors: This is key. When your Cavalier barks, paws, or demands attention in any way, practice the “invisible dog” technique. Avoid eye contact, verbal responses, or movement. Turn away, walk out of the room, or stay still. Once your Cavalier is quiet, calmly reengage and reward them for being polite. But, this only works if you do #1 and increase that quality time together. If you don’t do that, ignoring won’t work because their needs are not being met.
Pro Tip: Be prepared for an “extinction burst.” Your Cavalier may escalate their behavior temporarily, barking louder or pawing more persistently because the old tactics aren’t working. They are getting frustrated. Stay patient and consistent.
Reward Calm and Quiet: Every time your Cavalier is calm and quiet, offer attention, praise, or even a small treat. Reinforcing this behavior teaches them that being polite is the best way to get what they want. This is also the perfect time to initiate a game or play session with your Cavalier.
Teaching self control is a great way to help curb barking.
Patience Is Key
Changing established habits takes time, so be patient with your Cavalier and yourself. Remember, they’re simply trying to communicate their needs the only way they know how. With consistent positive dog training and a little extra quality time, you’ll soon have a polite pup who doesn’t feel the need to ask for attention because you are providing them all the attention they need and desire.
Real-Life Example: Dexter’s “Talking”
Even my sweet Dexter isn’t perfect. He’s been known to “talk” or snort to get his way, and sometimes it works because I’m not perfect, either. Not to mention, there are two other family members who have been known to reward his ask. And, when it’s rewarded, it persists. If I wanted to fully address this behavior, I’d need to follow the steps above consistently and MAKE SURE the other two members of the family do as well. But, in our home, a little talking is something we tolerate because it doesn’t bother us.
That’s the beauty of training: you get to decide what behaviors matter to you. If something doesn’t bother you, there’s no need to change it, as long as it’s not something that should be addressed like anxiety. Just remember that if you allow certain behaviors, it’s important not to complain about them later.
Check out my playlist on barking!
What You Can Do Next
Now that you have the tools to manage your Cavalier’s attention-seeking behavior, it’s time to put them into action. Start by increasing quality time with your dog, introducing play sessions before they ask for attention, and practicing the “invisible dog” technique when pushy behaviors pop up. Remember, consistency is key, and patience will help you both succeed. With time, you’ll see your Cavalier becoming more polite and less demanding, leading to a stronger bond and fewer unwanted behaviors.
What’s your dog’s favorite way to spend quality time with you?
Join our vibrant Cavalier King Charles Spaniel community on Facebook, support our dedication to pet wellness on Patreon, and stay updated with our weekly newsletter for invaluable tips and insights into raising happy, healthy pets. Together, let’s make a difference in our dogs’ lives!
Google Ad Below [...]Read more...
March 19, 2025How to Teach Your Cavalier King Charles Spaniel to “Leave It” | Positive Training for Cavaliers
Teaching your Cavalier King Charles Spaniel to “leave it” or ignore something on your cue can be lifesaving. Imagine dropping a pill in front of your Cavalier or going for a walk and passing garbage in the street. If your Cavalier King Charles Spaniel has a reliable “leave it” cue, you can easily ask him to leave it as you pick up the pill or walk past the garbage.
When I start the “leave it” training, what I want my dog to learn is that “leave it” doesn’t mean he doesn’t get something, but that I have something better. This helps to build a more reliable behavior, especially off-leash. If you only teach your dog that “leave it” means he doesn’t get something, he might just try to grab the item faster or run off with it. That’s not what we want!
As with all dog training, remember that you need to regularly practice these lessons. Training your Cavalier is not just about doing it once and then only when you need it. Reliable dog training takes time, patience, and consistency. Cavalier King Charles Spaniels, in particular, can be a bit food-driven, so keeping them engaged and excited about the reward is key.
So, be patient, consistent, and most importantly, have fun with your Cavalier while training!
Teaching Your Cavalier to Leave It Level 1
Start with a small, low-value dog treat in your closed hand, and place it about 12 inches to the side of your Cavalier’s face. Make sure your hand is at the right height, not too close to his face, but not too far away either. Let your dog see it there, and wait him out. As soon as he moves his face away or ignores the treat, say, “YES!” and reward him with an amazing treat from your other hand. Not going for the treat is a win, too! So, if you present the leave it treat hand and he doesn’t go for it, “YES!” and treat. Repeat this a few times.
When your Cavalier starts ignoring your treat hand altogether, move to Level 2.
Don’t forget to subscribe to our @CavalierTipsandFun for more!
Teaching a Dog to Leave It Level 2
Start like Level 1, but before you drop your hand, say your “leave it” cue once. Wait him out; as soon as he moves his face away or ignores the treat, say, “YES!” and treat from your other hand. Repeat. When he stops going for your hand after hearing the “leave it” cue, move to Level 3.
Training Your Cavalier to Leave It Level 3
Say your “leave it” cue and drop your hand with the low-value treat to your dog’s side, but leave your hand OPEN. If he goes for the treat, quickly close your hand. When he moves his face away, praise and reward him with a treat from your other hand. Repeat. When your Cavalier is reliably ignoring the treat in your open hand, move to Level 4.
Teaching Your Cavalier to Ignore Items Level 4
At this stage, it’s time to change things up a bit. Up until now, you’ve been using low-value, boring dog treats for the “leave it” item. Once your dog is starting to get the hang of it, it’s time to up the ante. Use tastier treats or toys as the “leave it” item, but remember, his reward needs to be even better.
You can try:
Tastier treats or food
Paper products, tissue, or paper towels
Toys
Subscribe to @RaisingYourPetsNaturally for more!
Here’s how to set it up when using a toy:
Pick a Toy: Choose a toy that your Cavalier likes but isn’t so high-value that your Cavalier would immediately grab it without hesitation. Start with something mildly exciting like a squeaky ball, fleece tuggy toy, or stuffed animal that your dog enjoys.
Set Up the Training Area: Find a quiet spot where you can focus and your dog isn’t too distracted by other things. Make sure it’s a place where you can manage your dog’s movement and reactions.
Start the Cue: Hold the toy in your hand and get your dog’s attention. Don’t get too silly. You just want him to know it’s there, with a bit of excitement.
Use the “Leave It” Cue: Once you’ve gotten his attention, say the “leave it” cue calmly. Hold the toy in front of your dog just out of reach, but don’t place it on the ground yet.
Wait for the Response: Your dog may try to lunge for the toy or show interest in it. The goal here is for him to move away or ignore it, not to grab it. If he goes for it, just swipe the toy up to your chest and ignore him and wait for him to ignore it. Then repeat the process of lowering your hand with the toy. As soon as your dog turns his head or steps away from the toy, immediately say “YES!” and give him a better reward (a tastier treat or something that’s even more valuable than the toy).
Repeat and Increase Difficulty: Repeat the exercise several times, and gradually increase the difficulty. Once your Cavalier reliably ignores the toy when it’s held in your hand, move on to placing the toy on the ground. To set this up, place the toy behind you, out of reach. This way, you can gently body block your dog if he tries to move toward it. When he turns away or ignores the toy, immediately reward him with a better treat or better toy.
Body Blocking: Body blocking involves using your own body to gently guide your dog away from a distraction, like a toy, by positioning yourself between your dog and the item. It’s important to note that body blocking is not about kneeing or being rough with your Cavalier. It’s a gentle, calm way to redirect their attention. However, some dogs may find body blocking intimidating or scary, so if your Cavalier shows signs of stress, it’s best to avoid this method and use alternative techniques for redirection.
Build Duration: As your Cavalier gets more comfortable with the “leave it” cue around toys, try holding the cue for a longer period of time. For example, you can wait for him to sit or stay before rewarding him. This increases his patience and focus during the exercise.
Training Your Cavalier to Leave Something Level 5
Place a low-value treat under your cupped hand, with your dog in front of you. Say your “leave it” cue, and wait for your Cavalier to ignore the treat. If he looks away or shows interest but doesn’t try to grab it, immediately reward him from your other hand with a better treat.
As he gets the hang of this, start showing the “leave it” treat under your cupped hand. If your dog ignores the treat, reward him from your other hand. If he tries to go for the treat, simply cup your hand over the treat again. Repeat this process, gradually raising the criteria by making the treat more tempting and testing his ability to resist.
Teaching Your Cavalier to Leave It Level 6 and Beyond
Now it’s time to make things more challenging. Increase the difficulty by adding distractions, different environments, or a variety of leave-it items. Always be mindful of your Cavalier’s current ability level, and don’t rush the process. If you find your Cavalier is struggling or making mistakes, step back and simplify the task again. You want to build confidence and reliability.
Reminders:
Never allow your Cavalier to get the “leave it” item. If you want your Cavalier to have it, you pick it up and give it to him. The goal is to teach him that ignoring the item leads to something better, not just an empty reward.
If your Cavalier is having trouble with the exercise, step back to easier levels or increase the value of the reward to keep him motivated and engaged. You can also try lowering the difficulty by using a less tempting “leave it” item to help him succeed.
The goal isn’t just for your Cavalier to avoid the item once, but to understand that when you say “leave it,” he has the chance to earn something even better. The more your dog experiences this rewarding outcome, the more reliable the behavior will become.
Pro Tips:
Keep training sessions short, positive, and fun! Don’t let the “leave it” item overwhelm or frustrate your Cavalier. If he’s struggling, simplify the task and increase the reward to keep him interested and motivated.
How Often Should You Practice the Leave It Behavior with Your Cavalier?
It is important to regularly practice “leave it” throughout the day, not just during formal training sessions. You can incorporate it during walks, around the house, or when playing. As you add distractions, make sure to reward your Cavalier for staying focused on you, especially when there are high value items around. Cavaliers are generally quick learners, but they can also get bored easily, so keep your training sessions positive and fun. Consistency and patience will pay off in the long run.
Pro Tip: Practice, practice, practice with various setups. You want your Cavalier to respond reliably to the “leave it” cue in real life situations, whether it is a dropped item, an enticing smell, or something on the floor. By practicing regularly, you ensure they will leave it without hesitation. I still reward those real life “leave its” to keep the behavior strong and consistent!
Conclusion
Practicing “leave it” regularly and in different situations helps ensure your Cavalier responds reliably when it matters most. Keep training sessions fun and rewarding, and don’t forget to reinforce real-life successes. Teaching a solid fetch and “drop it” will also complement “leave it,” giving your Cavalier even more useful skills. With consistency and patience, your Cavalier will continue to improve and make great choices in everyday life.
How is your leave it training going? I’d love to hear about it in the comments!
Google Ad Below [...]Read more...
April 29, 2025Your Cavalier King Charles Spaniel’s Teenage Phase
When you bring home a Cavalier King Charles Spaniel puppy, you are prepared for puppy breath, floppy ears, and all the adorable moments that melt your heart. What nobody talks about enough is what happens when that sweet ball of fluff hits adolescence.
Right now, Stewart, my Cavalier, is about 10 and a half months old and is in full-blown teenager mode. I can tell you firsthand that adolescence is real. Stewart has energy for days, wild bursts of zoomies, and a mischievous sparkle in his eyes that keeps me on my toes. My mom, who adores him, often comments, “He is always getting into trouble!” (Of course, to me, it is not real trouble. It is boredom, enthusiasm, and a young dog who is eager to interact and explore.)
She often compares him to my late Cavalier, Dexter, who lived to be 15 years old. In her memory, Dexter was the perfect, calm little gentleman. And he was, but only after years of growing up. It is easy to forget that Dexter had his own crazy adolescent phase, too. I still remember the day I found myself saying, “You are going to eat, you are going to potty, and you are going to bed!” Sometimes, when puppies get extra wild, it is not even about training. They are simply overtired and need help settling down. Just like toddlers, sometimes they push through their exhaustion and get even more wired.
If you are going through the teenage years with your Cavalier right now, you are not alone. And no, you did not do anything wrong. Adolescence is a natural stage in a dog’s development. In Cavaliers, it usually starts when those puppy teeth begin falling out (around four to six months old) and can last until about eighteen months, give or take depending on the dog.
During this phase, your Cavalier might:
Forget their basic training
Start jumping up more
Become mouthier and more vocal
Seem to ignore you sometimes
Have random bursts of wild energy (we call them “zoomies”)
Get into things they never bothered with before
Show frustration or impatience more easily
Does that sound familiar?
It is important to remember that your Cavalier’s brain is still developing. Just like human teenagers, they are caught between puppyhood and adulthood. Their impulse control is not fully in place yet. The good news? This phase is temporary. And your patience and guidance right now will shape your Cavalier for the rest of their life.
Here is how I am helping Stewart (and helped Dexter before him) navigate this time:
Stay Consistent with Positive Dog Training: Even if your Cavalier seems to have forgotten what “sit” or “stay” means, keep practicing. Short, daily sessions with positive reinforcement go a long way. Stewart and I do a lot of quick “name games,” sits, hand targets, and polite walking games to keep his brain engaged.
Build in Play and Enrichment: A bored adolescent dog is a mischievous dog. I make sure Stewart has plenty of fun activities like sniffy walks, find-it games, fetch sessions, and interactive toys. Play is not just fun, it is a training tool. A dog that plays with you is a dog that trusts you.
Manage the Environment: I always try to be proactive with management first. If I think Stewart might start getting rowdy or restless, I plan ahead. Before I get busy, I will take him for a nice walk, do some training or play a game before I need to settle in. Then, I’ll provide him with something to keep him busy, like a snuffle mat, chew toys or licky mat. That way, he already has something to focus on instead of looking for ways to entertain himself. Managing the environment is not about waiting for problems to pop up. It is about setting your Cavalier up for success before trouble starts.
Provide Enough Rest: After Stewart works on his snuffle mat, chew toy, or licky mat, and has had a little training or a nice walk, he is usually ready to settle. That is when he curls up for a siesta at my feet while I do my work. Remember that story about Dexter? Sometimes the wild behavior we see is not from a lack of exercise. It is from being overtired. Puppies and adolescent Cavaliers still need a lot of sleep throughout the day. Building in scheduled downtime helps them reset and recharge before they get into trouble from being too tired to make good choices.
Focus on Trust and Bonding: During a dog’s adolescence period, it is easy to get caught up in the frustrating moments when your Cavalier is ignoring you, getting too wild, or pushing boundaries. But I always try to remind myself that every interaction with Stewart is an opportunity to build our relationship. Trust and connection are even more important during this teenage stage. Adolescence is a time when Cavaliers are figuring out the world and deciding who and what they can count on. I want Stewart to know that I am always safe, fun, and trustworthy. That way, when things get tricky, like going to the veterinarian or navigating a new place, he will look to me for guidance and reassurance. The stronger the bond we build now, the more confident and connected he will be as an adult.
Keep a Sense of Humor: Adolescent dogs can be frustrating at times, no doubt about it. But it also brings some of the funniest, most joyful memories. Stewart’s goofy antics, the way he proudly carries a pinecone, his dramatic “flops” when he does not get his way, these are the moments I know I will smile about years from now.
If you are raising a Cavalier King Charles Spaniel and feeling overwhelmed by the ups and downs of adolescence, you are not alone. This stage can feel overwhelming on some days, but every patient, playful, and consistent moment you put in now is shaping your Cavalier’s future. All the work you are doing today will help your Cavalier grow into a confident, connected, and loving companion for many years to come.
If you would like more step-by-step help through this stage, I would love for you to join us in our Manners, Life Skills, and Foundation Training course. Inside the course, I walk you through building polite greetings, calm walking, settling skills, and helping your Cavalier stay more focused and connected with you. It is all about giving you the tools to guide your Cavalier through adolescence and beyond with patience, confidence, and fun.
At What Age Do Cavaliers Calm Down?
If you are raising a young Cavalier King Charles Spaniel and wondering when your Cavalier will calm down, it is a common question during the teenage phase. Cavaliers usually start to settle after they move through adolescence, which can last until around eighteen months to two years of age. Some Cavaliers might take a little longer depending on their personality and energy level.
Maturity comes with time, but it also comes with the foundation you build along the way. Positive training, daily routines, enrichment, plenty of rest, and building trust all help your Cavalier develop into a calmer and more confident companion. It is not something that happens overnight, but it does happen.
You have got this! Stay patient, stay positive, and focus on the progress you are making together. It is not about being perfect. It is about showing up, doing the work, and building a strong relationship one day at a time.
What has your Cavalier been doing lately that makes you say, “Yup, we are in the teenage stage”? I would love to hear your stories in the comments!
Google Ad Below [...]Read more...
May 23, 2025What to Do When an Off Leash Dog Approaches or Attacks Your Cavalier
Running into an off leash dog in a public area where leash laws are in place is one of those moments that gets my blood boiling. I’ve heard from too many Cavalier families who have gone through this, and sadly, I know several Cavaliers who were seriously injured. Even a couple that didn’t survive. It’s heartbreaking, it’s preventable, and we need to talk about it.
This post is for those of us doing our best to protect our dogs, especially small, gentle breeds like Cavalier King Charles Spaniels, when others decide the leash rules don’t apply to them. Whether you’re out walking your Cavalier, training, or just enjoying your day, here are real life ways to keep your dog safe and what to do if the worst happens.
Why Letting Your Dog Off Leash Puts Others at Risk
Just because your dog is friendly does not mean they should be off leash in public areas. You never know what someone else’s dog is going through. Some dogs are recovering from surgery or illness and need space. Others are working through fear or reactivity and are not ready for sudden greetings. Some are service dogs who may not be wearing a vest but are doing their job. And many dogs, Cavaliers included, simply do not want strange dogs running up to them.
This is why leash laws exist. They are there to protect everyone. Just because your dog wants to say hi doesn’t mean they should get to.
What to Do When an Off Leash Dog Approaches
There is no perfect solution that works in every situation, especially when an off leash dog charges unexpectedly. But being prepared both mentally and physically can make a real difference. These are practical ideas I have taught, used myself, and seen work in real life. While nothing is guaranteed, having a plan in place can help you stay calm, act quickly, and protect your Cavalier as best you can.
Watch the video demonstrations and don’t forget to subscribe to @RaisingYourPetsNaturally for more tips.
Teach a Sit Stay Behind You
One of the most helpful cues I teach is a sit stay with my dog positioned behind me. I start by practicing in low distraction settings and slowly build it up over time. If a dog approaches, I cue my Cavalier to sit and stay behind me, and I step forward to handle the situation. This helps my dog feel protected and keeps them from reacting or escalating the situation.
Throw Treats at the Approaching Dog
Yes, throw treats right at the dog’s face. It may sound odd, but it works. The goal is to startle the dog and interrupt their focus. Then toss more treats behind them, toward the direction they came from. This often gives you a few seconds to calmly retreat with your Cavalier. I always carry tasty treats for this reason.
Use a Traffic Cop Stance
Turn to face the dog, extend your arm out like a stop sign, and say firmly, “Stop. Go home.” Keep your Cavalier behind you and slowly back away. Some dogs will pause or hesitate if they’re unsure or not aggressive. Keep repeating the phrase and keep your hand out, as you and your Cavalier walk backwards away.
Carry an Air Horn
If your dog is comfortable with noise, an air horn can be a great deterrent. I always condition my dog to hear it at home first and pair it with treats. When needed, a quick blast can interrupt the loose dog’s approach and give you time to move away. It’s one of my go to tools, but only if your dog can handle the sound.
Use an Umbrella as a Visual Block
I train my dogs to be comfortable with umbrellas opening indoors, so they are not startled if I ever need to use one during a walk. If a dog is charging at you, pop open the umbrella toward them. The sudden motion and large shape often causes the dog to pause or back off. If necessary, you can shake it or move it toward the dog as you use a firm, go home, verbal cue.
Carry a Personal Safety Tool
Tools like pepper gel, citronella spray, taser, or even a She’s Birdie alarm can help in urgent moments. Pepper gel has more control than spray, and the alarm can attract attention or startle the other dog. Always practice with these tools and make sure your dog is not afraid of them.
Be Cautious About Picking Up Your Cavalier
It is tempting to scoop up your Cavalier, especially since they are small. But doing so can sometimes make things worse. The approaching dog may jump at you or become more aroused. Only pick up your Cavalier if you feel it will help and if you have a safe place to put them, like a truck bed, behind a fence, or even inside a garbage bin if it means protecting them. Use extreme caution if trying this.
If You’re Walking More Than One Cavalier
This is also one of the reasons I usually prefer walking one dog at a time. It helps me stay more aware, react quickly if something happens, and really connect with the dog I’m with. But I know that’s not always possible, so here’s how to stay prepared when walking more than one.
Walking multiple Cavaliers makes things trickier, especially when a loose dog starts heading your way. It can be harder to control space, stay calm, and manage multiple leashes at once. That’s why I recommend preparing a plan ahead of time if you regularly walk more than one Cavalier.
If possible, practice sit stays with each dog individually first, then gradually build up to group stays. Teach your Cavaliers that standing behind or beside you means safety. If you see a loose dog approaching, calmly guide all your Cavaliers behind you and keep their leashes in one hand while using your other hand to deter the loose dog, whether that’s with a verbal cue, a stop signal, or a safety tool.
This is also where tools like a treat toss or umbrella can really help, because they create distance without needing to physically wrangle multiple Cavaliers. And if things feel too tight, do not hesitate to turn and walk away together. Getting distance is often the safest move when you have more than one dog depending on you.
What to Do If a Dog Attacks Your Cavalier King Charles Spaniel
No one wants to think about this part, and I truly hope you never face it. But if a loose dog attacks your Cavalier, your priority becomes stopping the fight as quickly and safely as possible. This is not about hurting another dog out of anger. It is about protecting your own Cavalier King Charles Spaniel from serious harm or even death.
If you have a tool in hand, such as a stick, an umbrella, or pepper gel, use it to target the attacking dog’s face. Aim for the eyes, nose, or mouth. The goal is to interrupt the attack and create enough of a pause to safely separate the dogs. You may only have a second or two, and you need to respond fast and as hard as you can to protect your Cavalier.
If you are physically trying to break it up without a tool, one method is to grab the attacker’s back legs and swing them away from your dog. This can throw them off balance and give you a chance to create space. Do not reach for collars or faces with your hands. That is the most common way people get bitten during dog fights.
Once the dogs are separated, move your Cavalier to safety right away. If possible, secure the attacking dog so they cannot come back. Then take photos, report the incident, and document everything as soon as you can. Even if your Cavalier seems okay, a vet check is always important. Many bite wounds are deeper than they look.
Helping Your Cavalier Recover Emotionally After an Attack
This is one of the most important parts of the process, and it is often overlooked. A Cavalier who goes through a dog attack may seem fine physically, but emotionally, they can lose trust in the world around them. I have worked with dogs who suddenly freeze on walks, avoid places they once loved, or become uneasy around other dogs even from a distance.
Start by giving your Cavalier time to decompress. Skip your regular walks for a few days and let them rest in the comfort of home. The goal is to help them feel safe again while things settle emotionally and physically. Keep their day simple and supportive.
At home, bring in confidence through simple enrichment. Food puzzles, nose games, and easy trick training can help rebuild a sense of control and engagement. These games in a familiar space can make a big difference.
When you are ready to start walking again, choose quiet places where you are unlikely to run into other dogs. Early mornings, empty parking lots, or quiet nature trails can be good options. Let your Cavalier set the pace. If they want to pause and look around or head back early, that is okay.
Pay attention to the progress. If your Cavalier walks a little farther, seems more confident, or looks at you for guidance, tell them how smart they are. Praise, treat, give a chest scratch. That is how trust returns, little step by little step.
This healing process takes time. That is exactly why I created Supporting Your Sensitive Dog: Gentle Steps Toward Confidence. If your Cavalier is showing signs of fear or hesitation, this course will guide you through gentle, trust based steps to help them feel safe again.
You’re Not Overreacting
Your Cavalier deserves to walk safely. You deserve to walk without fear. And if someone chooses to ignore leash laws, you are completely within your right to protect your Cavalier, using your voice, your body, your training, or any tool you need.
So stay prepared. Be proactive. And most of all, trust your instincts. You’ve got this.
Google Ad Below [...]Read more...
May 14, 2025Kind, Reward-Based Training for Cavalier King Charles Spaniels and All Breeds
When people hear the term positive reinforcement, they sometimes picture a dog who only listens if you have food in your hand. Or they think it means never setting boundaries. I’ve had people say things like, “I don’t want to spoil my dog,” or “I heard that’s just bribing with treats.” But the truth is, positive reinforcement training is science-based, relationship-focused, and one of the most effective ways to help dogs feel confident and understand how to live successfully in our human world.
And it’s not just for Cavaliers. This approach works for every breed, every age, and every behavior challenge.
Let’s break down positive reinforcement dog training in a simple and practical way.
What Positive Reinforcement Dog Training Really Means
Positive reinforcement means adding something your dog enjoys immediately after they do a behavior you want to see again. That reward could be healthy dog treats, a toy, praise, a chance to sniff, or access to something fun. It doesn’t have to be a treat every time, but food is often the easiest and most meaningful place to start. If it’s going to be rewarding for your Cavalier, they decide. I mean, my Mom might think a slice of cherry pie is a good reward, but I don’t even like cherry pie. I’d need a slice of chocolate cake!
This type of training is grounded in how all animals learn, including us. When a behavior is followed by a good outcome, we’re more likely to do it again. Your dog sits, you give them a treat. Your dog walks calmly by your side, you let them go sniff a log. That’s positive reinforcement. You’re not spoiling them. You’re reinforcing behavior you want to see more of, and they get something pleasant in return.
How Dogs Actually Learn
Dogs don’t come into our homes already knowing how to live in them. They don’t know what “sit” means. They don’t know they shouldn’t jump on guests or grab food off the counter. Just like us, they learn by doing, and by figuring out what works.
Dogs learn through repetition. They make connections between what they do and what happens next. If they sit and a treat shows up, they’re more likely to sit again next time. That’s positive reinforcement. We’re showing them that their choices matter and that doing the thing we like leads to something they like.
When we use positive reinforcement, we’re not just trying to get obedience. We’re helping our dogs understand how to live in our world in a way that feels safe and rewarding to them. They’re not learning because they’re afraid of getting it wrong. They’re learning because they feel good getting it right.
And that’s what builds real, long-lasting behavior.
Luring Training Is Teaching—Not Bribing
At the start, we often use a food lure, like holding a treat near your dog’s nose to help them learn how to sit or lie down. We slowly move that treat in a way that encourages the action we want, like guiding their head up and back until their butt hits the ground.
That’s not bribing. It’s teaching. We’re showing them what we’re looking for.
After a few short sessions, we continue practicing the same way. Lure the sit. Reward the sit. Once the dog is starting to understand it, we ask them to follow our empty hand the same way. If they sit, we reward. Now they’re doing the behavior without seeing food first.
Once that’s going smoothly, we add the cue. Say “Sit,” move your empty hand like before, and when their butt hits the ground, reward it.
Over time, we fade the hand movement so that “Sit” becomes all they need to hear. The behavior is now on cue, and your dog learned it in a clear, kind, and effective way.
Dogs Don’t Generalize—They Need Practice in New Places
One of the biggest things people miss is that just because your dog knows how to sit in the living room doesn’t mean they know how to do it in the yard, at the vet’s office, or around a group of children. Dogs need practice in new environments. They need help when distractions are high or when they’re feeling unsure.
That might mean going back to the basics in new places. Using a treat to lure a sit at the park isn’t spoiling your dog. It’s helping them succeed in that moment. You’re helping them learn how to do something they already know, but in a place that’s harder or more distracting.
Why Positive Reinforcement Works for Cavalier King Charles Spaniels and All Breeds of Dogs
Cavaliers are sweet, sensitive, and deeply tuned in to their people. They often respond beautifully to kind guidance and struggle with harsh corrections. A raised voice, leash jerk, or even a stern look can shake their confidence and cause them to shut down.
But this isn’t just about Cavaliers.
Every dog, whether they are a bouncy Labrador, a headstrong terrier, a fearful rescue, or a playful senior, benefits from positive reinforcement dog training. You’re not just teaching skills. You’re building a good relationship. You’re helping your dog feel safe to try new things.
Positive dog training encourages curiosity instead of fear. It helps build lasting behavior in a way that feels good for both you and your dog.
The Risk of Punishment-Based Dog Training
Harsh training methods may seem like they work quickly, but they come with a huge cost. Dogs trained with physical corrections, yelling, or intimidation often show signs of stress, like lip licking, yawning, cowering, or even shutting down completely. They may stop doing the “bad” behavior, but not because they learned something better. They stop because they’re afraid to try.
Studies have shown that punishment-based dog training methods can increase anxiety and reactivity, and even lead to aggressive behavior in some dogs. It doesn’t teach what to do, it just teaches the dog what not to do, without giving them tools to succeed.
I’ve worked with so many families trying to rebuild trust after their dog was trained with punishment. That kind of fallout is hard to undo.
You Don’t Have to Carry Treats Forever
A common concern I hear is, “Will I always need food in my pocket?” The answer is no. As your dog becomes more confident and fluent in a behavior, you’ll reward less often. You’ll also start to mix in other rewards, like praise, sniffy walks, or play.
But here’s the thing, dogs, like us, still appreciate being recognized for a job well done. I still praised Dexter and gave him treats into his senior years. Not because I had to. But because I wanted to reinforce the connection we built over a lifetime of learning together.
You’re not creating a treat-dependent dog. You’re building a dog who trusts that good choices lead to good outcomes.
If you want to teach your dog real life manners in a kind, clear, and effective way, take a look at my Manners, Life Skills, and Foundation Training Course. It’s self paced, easy to follow, and designed to help your dog build everyday skills with confidence. You’ll learn how to prevent common problems before they start, teach polite behavior step by step, and create calm, positive routines that work in daily life. I personally answer questions, give feedback, and support you as you go through the course.
Why Positive Dog Training Works for Behavior Issues Too
Positive reinforcement is not just for basic training or fun dog tricks. It’s also one of the best ways to work through real behavior issues like jumping, barking, reactivity, anxiety, and fear-based behaviors.
A big part of dog behavior modification is emotion. When a dog is barking or lunging, they’re not just being “bad.” They’re usually feeling overwhelmed, scared, frustrated, or unsure. If we only try to stop the behavior without addressing how the dog feels, we’re not really helping them.
Positive reinforcement gives us a way to change those emotions. We teach our dogs that good things happen when they make calm, safe choices. Over time, they start to feel more relaxed in situations that used to be stressful. That change from fear to comfort, from confusion to understanding, is what creates real, lasting change.
Instead of just trying to stop the behavior, we ask, “What is my dog feeling?” Then, “How would I like them to feel instead?” and “What do I want them to do instead?” From there, we adjust the situation so we can meet all those needs and teach the new behavior in a kind, clear way. The more your dog practices that skill in the right setting, the more confident they become. And that’s where things really start to turn around.
What Your Dog Really Needs From You
At the heart of it all, positive reinforcement dog training is about more than treats. It’s about empathy. It’s about understanding how your dog sees the world and helping them learn in a way that clicks.
It’s about setting them up for success and guiding them toward the behaviors you want. Not through fear, but through trust, patience, and connection.
That’s what I want for Stewart. That’s what I wanted for Angel Dexter. And that’s what I want every dog to have, training that feels good, makes sense, and builds a life rooted in partnership, not power.
Keep it positive. Keep it patient. Keep it proactive.
Google Ad Below [...]Read more...
June 5, 2025How to Motivate and Train a Cavalier King Charles Spaniel
If your Cavalier King Charles Spaniel is not motivated to train, you’re not alone. This is something I hear from Cavalier families all the time: “My Cavalier is not food motivated,” or “My Cavalier just doesn’t care about training.” But in most cases, it’s not that your Cavalier doesn’t want to learn, it’s that something is getting in the way.
Here are a few common reasons your Cavalier might not be interested in training right now and what you can do to help them feel more motivated and ready to learn.
Reasons Your Cavalier Might Seem Unmotivated for Training
They are full
If your Cavalier just finished a meal or had a lot of snacks recently, they may not be interested in working for more food. Training with food rewards works best when your Cavalier is a little bit hungry, not stuffed. Try scheduling your training sessions before meals rather than after, or set aside part of their meal to use as training treats throughout the day.
They are tired
Just like us, Cavaliers have times when they are more alert and times when they just want to rest. If your Cavalier had a big play session, a long walk, or an active outing, they may need some quiet time before they are ready to focus again. Cavalier puppies especially need a lot of sleep, so training when they are rested can make a big difference. Try noticing when your Cavalier naturally seems more alert and ready to engage. That is usually the best time to practice a little training together.
They are not feeling well
If your Cavalier seems unusually uninterested in training or even in their favorite treats, that could be a sign they are not feeling well. Even mild health issues like nausea, pain, or dental discomfort can lower motivation. It is not always obvious at first, but changes in training interest can be an early clue that something is off. If this becomes a pattern, or if anything else seems different, reach out to your Cavalier’s holistic vet to rule out anything medical before moving forward with training.
Your Cavalier is overstimulated
Cavaliers take in a lot of information from their surroundings. If you are training your Cavalier in a busy or unfamiliar location, all those sights, sounds, and smells can be overwhelming. When there is too much going on, your Cavalier might not be able to focus or respond the way they usually do. This is especially common for puppies or sensitive Cavaliers who are still learning how to process the world around them.
If that happens, try moving to a quieter spot. You can even take a little break together for a sniffy walk and then go back to something really simple, like The Name Game or Hand Targeting. These familiar cues can help your Cavalier settle and build confidence again.
Your Cavalier is anxious or unsure
When a Cavalier is feeling unsure, whether it is because of a new environment, a stranger nearby, or something they cannot quite figure out, training can start to feel like too much. It is not about being stubborn or ignoring you. They are just trying to process how they feel before they can focus on learning anything new.
If your Cavalier seems nervous or anxious, the best thing you can do is slow things down. Sit with them quietly, speak gently, and let them look around without pressure. Sometimes just being there together is enough. Once they start to relax, you can offer praise and a treat or a “check it out” cue if they seem ready to explore.
The reward is not meaningful enough
When I hear that a Cavalier is not food motivated, the first thing I look at is the reward. Most of the time, it is not that your Cavalier is not food motivated. It is that the treat just does not matter enough to them at that moment. Dry biscuits or lower value treats usually do not get their attention, especially in busy or distracting places.
Start with real food. I usually go straight to meat. That might be small bits of cooked beef, turkey, or lamb. Freeze dried meat or single ingredient dehydrated treats are also great choices. These are often the best treats for Cavaliers because they are soft, tasty, and easy to eat. Just flip the bag over and check the ingredients. You want something simple that says one thing, like chicken breast or turkey. Avoid fillers or extras that do not need to be there.
You can also use freeze dried raw food, broken into tiny pieces. These are real food options and often made mostly from meat, which makes them a great choice for Cavaliers who need something healthy and high value. Many people use them during training and count them toward their Cavalier’s daily calories. It is an easy way to stay consistent with nutrition while still offering something special and rewarding.
I also avoid using liver or organ meats regularly. A little once in a while is fine, but too much liver can lead to vitamin A concerns. Some organ treats can also be too rich and cause diarrhea.
Use the right reward for the right moment
Once you find something that really works for your Cavalier, think about how and when to use it. The most rewarding treats should be saved for the harder training sessions. That might mean practicing outside, focusing around distractions, or trying something brand new. When the reward truly matters to your Cavalier, motivation naturally improves.
If they get their favorite treats for easy things like sitting in the living room, there is not much reason to work harder when training becomes more challenging. Save the cooked beef, freeze dried meat, or other special rewards for those moments when your Cavalier needs a little extra encouragement. Matching the value of the reward to the difficulty of the task helps keep your Cavalier engaged and willing to try.
Explore other forms of motivation
Not every Cavalier is motivated by food alone. Some respond better to toys, praise, or playful interaction. If your Cavalier enjoys toys, try using a favorite squeaky, a soft tug toy, or a quick game of fetch. Some Cavaliers are especially drawn to textures like fleece or rabbit fur, which can make a toy feel more exciting. Whatever it is, keep it put away when you are not training so it stays special and does not lose its value. Other Cavaliers are more motivated by attention and connection. A cheerful voice, a smile, or light praise can sometimes go further than anything you can hold in your hand. At the end of the day, your Cavalier is the one who decides what feels rewarding. It is not about what we think should work. It is about what actually matters to them.
Your Cavalier can learn with the right support
If your Cavalier is not showing interest in training, it does not mean something is broken. It just means they need a little help feeling ready. That might be adjusting the environment, changing up the reward, or simply giving them time to feel more confident.
This is exactly the kind of thing we work on in my Manners, Life Skills and Foundation Training Course. If you are feeling unsure about how to move forward, I will guide you through simple, kind steps to help your Cavalier feel more focused and connected. You will learn how to use rewards that actually matter to your Cavalier, when to train, and how to build everyday habits that stick. It is self-paced, easy to follow, and I am always there if you need support.
Your Cavalier wants to connect with you. With a little support and the right setup, they will start to feel more engaged and eager to participate. You do not need to rush the process. Keep it light, keep it kind, and celebrate the small wins. They all add up.
Google Ad Below [...]Read more...
Google Ad Below